Tired of monotonous work? Want to know the easiest way to add Zendesk Sell lead for new ScheduleOnce booking?
If the answer is “Yes”, then here we are presenting the simplest approach to integrating ScheduleOnce and Zendesk Sell using Pabbly Connect.
Basically, Pabbly Connect is an integration and automation tool that lets you transfer data easily in minutes without requiring any kind of coding.
Why Choose This Method Of Integration?
In contrast with other integration services-
- Pabbly Connect does not charge you for its in-built apps like filters, Iterator, Router, Data transformer, and more
- Create “Unlimited Workflows” and smoothly define multiple tasks for each action
- As compared to other services which offer 750 tasks at $24.99, Pabbly Connect offers 50000 tasks in the starter plan of $29 itself
- Unlike Zapier, there’s no restriction on features. Get access to advanced features even in the basic plan
- Try before you buy! Before spending your money, you can actually signup & try out the working of Pabbly Connect for FREE
Using the tool, you can integrate multiple premium applications without any difficulty.
But let’s first understand the service and need for this integration. ScheduleOnce is a cloud-based scheduling solution that allows organizations of all types to organize and handle online experiences with their clients and prospects. Whereas Zendesk Sell is a sales force automation (SFA) platform that helps sales teams improve efficiency, operations, and pipeline visibility.
By connecting ScheduleOnce with Zendesk Sell using Pabbly Connect, one can easily create a lead from booking. We have also embedded a video, just look at it.
Apart from the video, we have also attached the template for this integration to help you begin your journey instantly. You can just press the “Use Workflow” button available below to get started. Furthermore, visit Marketplace & look for more integrations & apps.

Here in this blog, we will understand how to integrate ScheduleOnce with Zendesk Sell.
Let’s begin the process.
Step 1: Sign up to Pabbly Connect

Start the procedure of connecting ScheduleOnce with Zendesk Sell by visiting the Pabbly Connect website. Next, hit the “Sign-Up Free” button available. You can either use your existing Gmail account or else manually fill in the registration form to signup.
Try Pabbly Connect for FREE
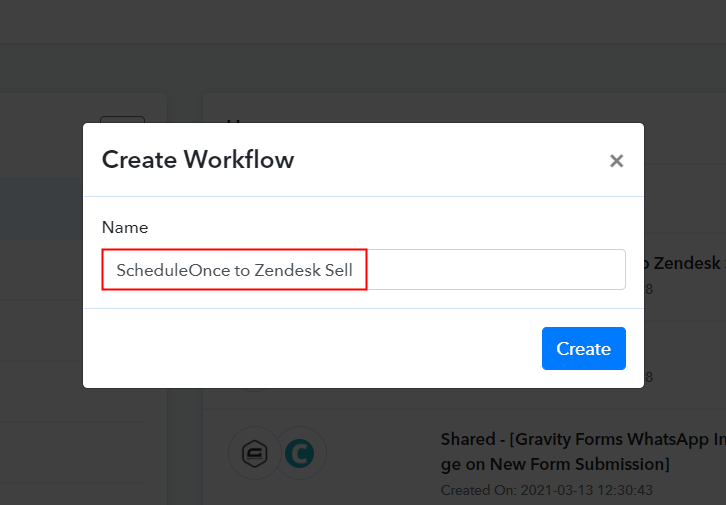
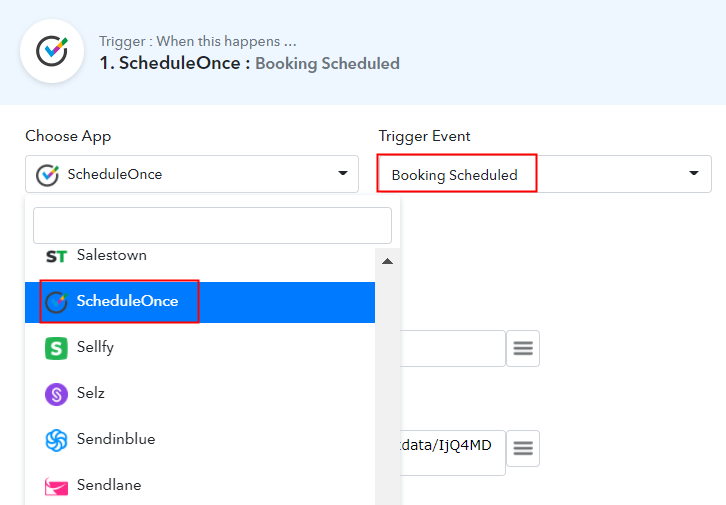
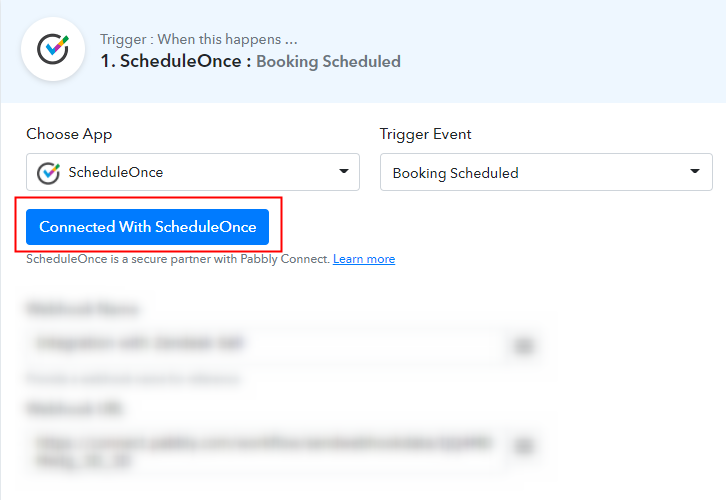
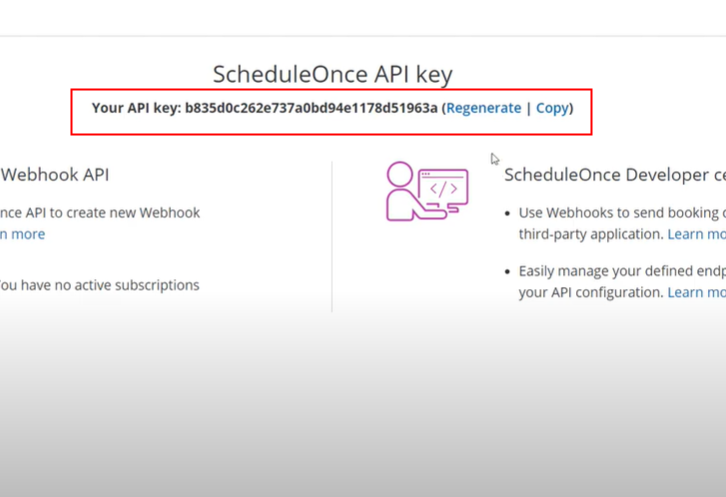
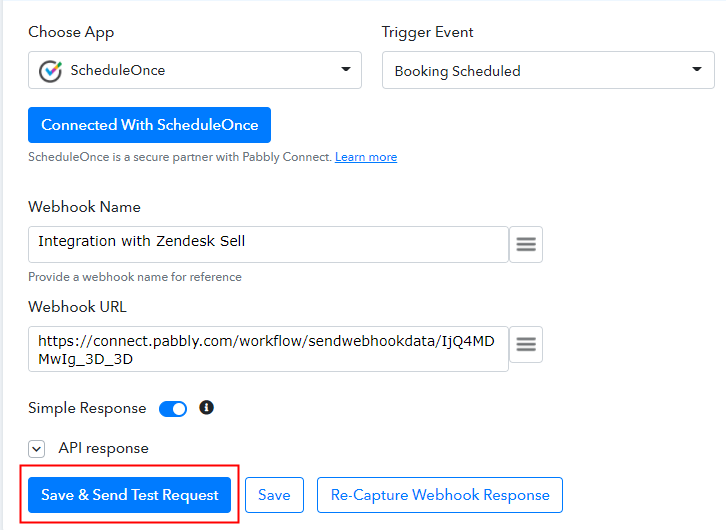
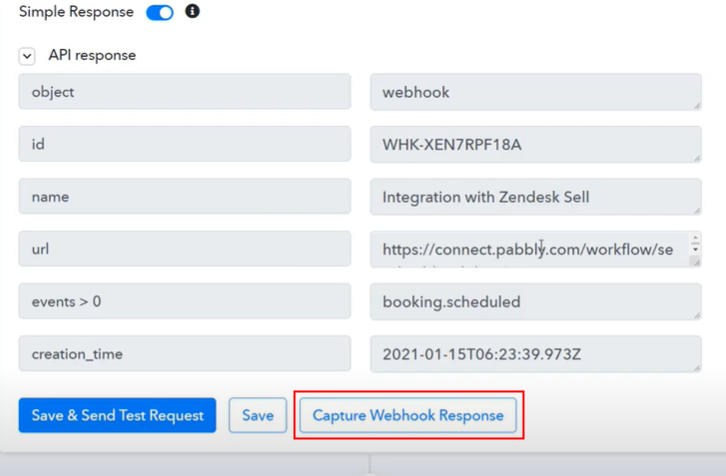
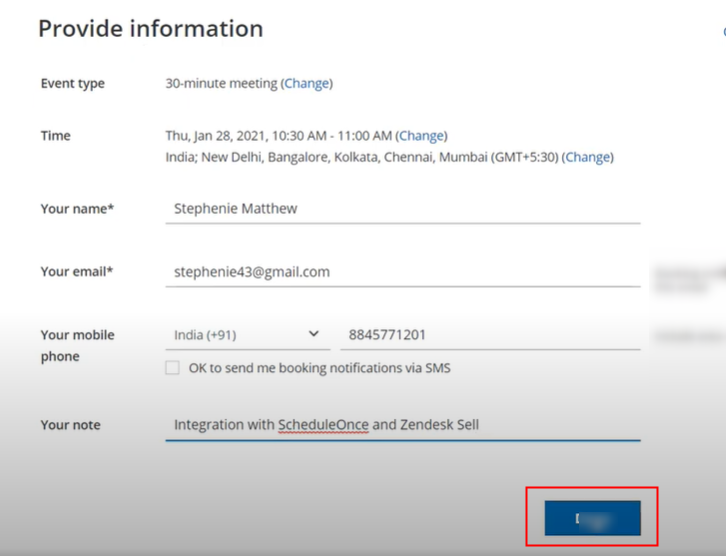
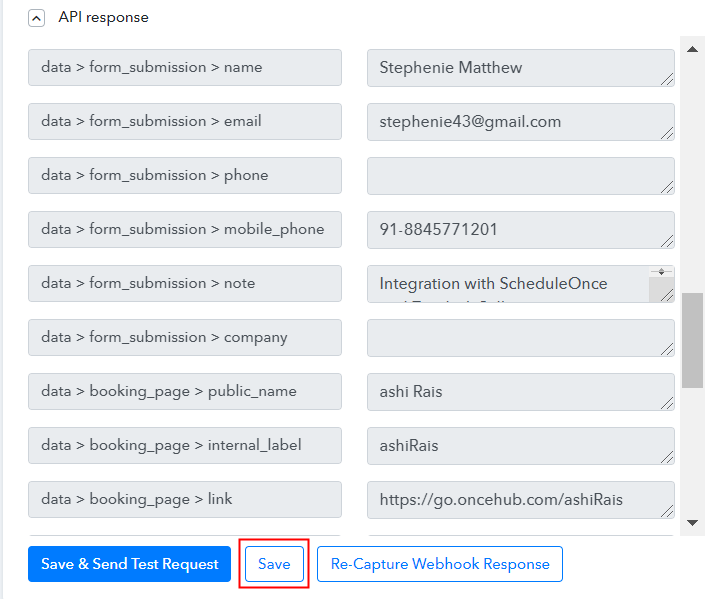
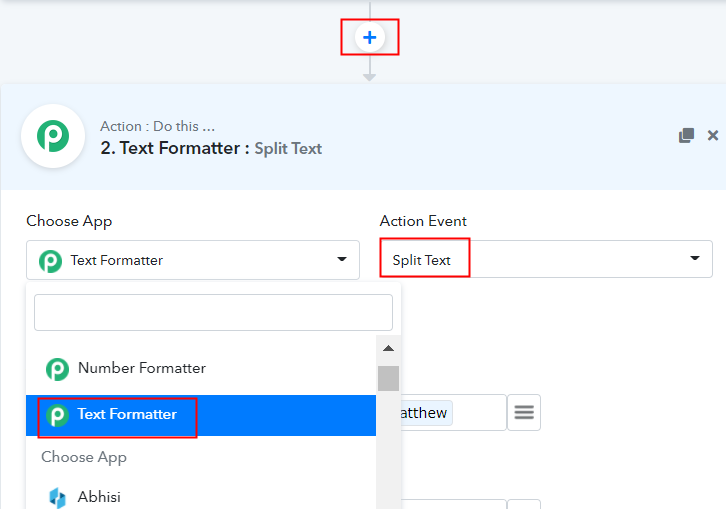
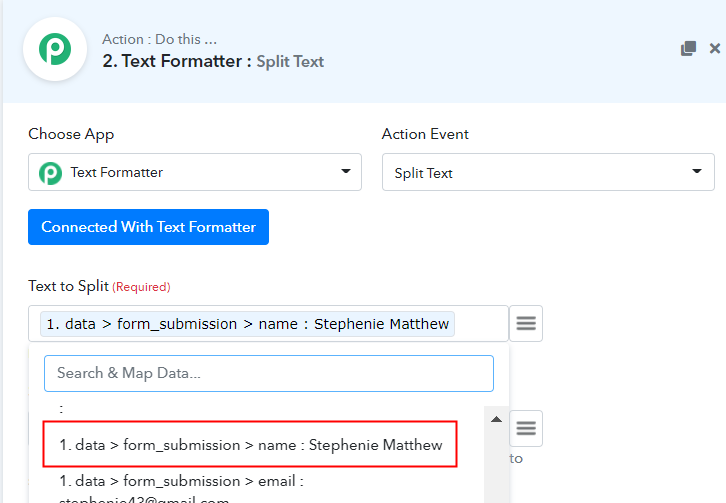
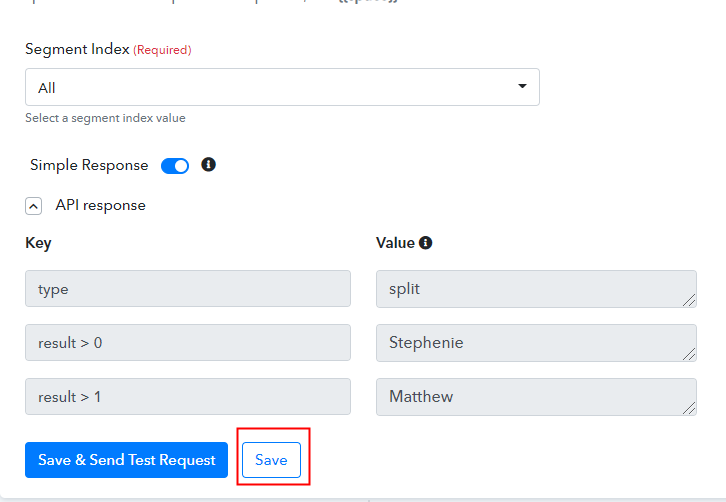
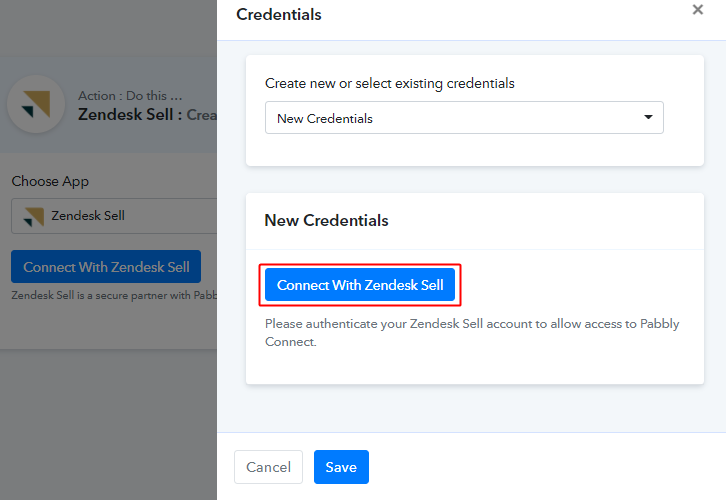
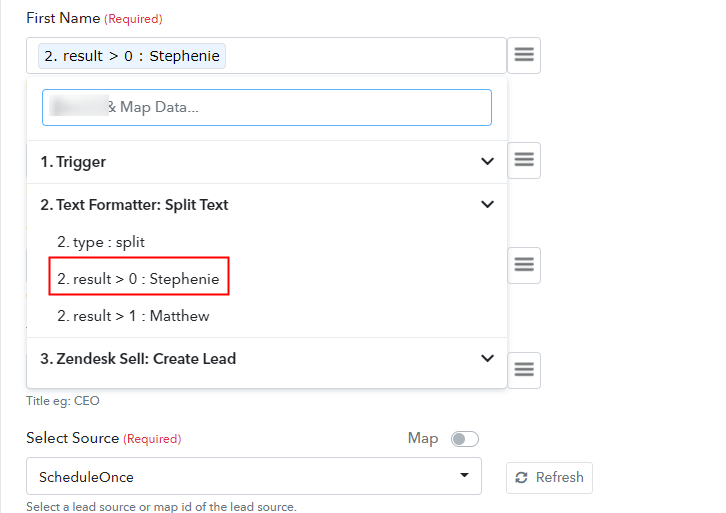
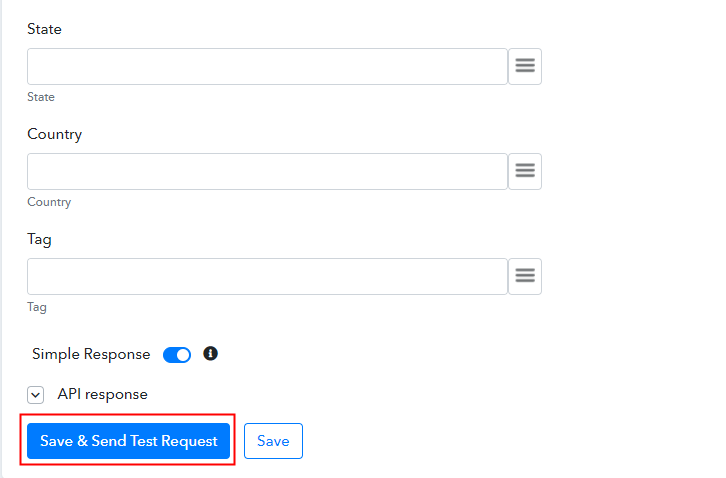
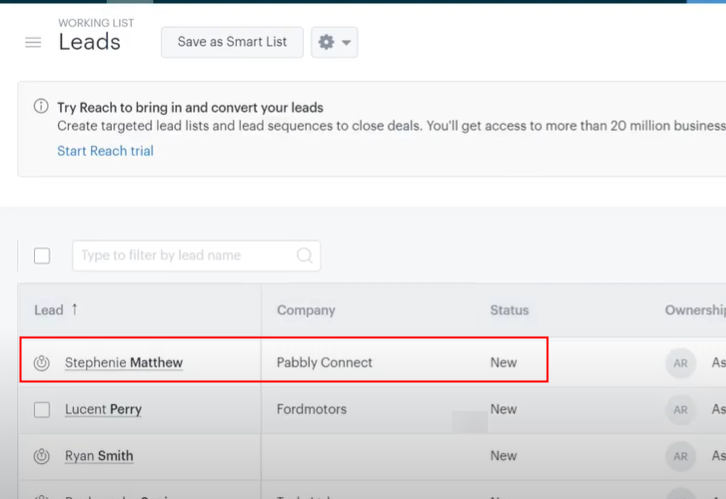
Promptly, press the “Access Now” button of the software “Connect” within the Pabbly applications. Afterwards, start with creating a workflow to create a lead in Zendesk Sell for new ScheduleOnce appointment by pushing the “Create Workflow” button. Now, name the workflow as per the integration or use-case. Here we named it “ScheduleOnce to Zendesk Sell”, you can name it according to your needs. Then, press the “Create” button. Next, to automatically add Zendesk Sell lead for new ScheduleOnce booking, you’ll need to set-up a trigger using Pabbly Connect. The following step is to select “ScheduleOnce” from the dropdown, then choose the method as the “Booking Scheduled” option. After choosing the application click on the ‘Connect With ScheduleOnce’ button for the next step. Now to connect ScheduleOnce with Pabbly Connect, you need to paste the API key, for which you have to log in to your ScheduleOnce account. Next, to get the API key, just click on the anchor text “Integration API” (b) Copy the API Key Now as soon as you click on the link, it will open the tab with the API key. Simply copy it. Next, all you have to do is paste the API key into the Pabbly Connect dashboard. As we have established the connection with ScheduleOnce and Pabbly Connect, now all we have to do is click on “Save & Send Test Request” to see if it is working fine or not. Now to check the integration, we will create a dummy or test booking in ScheduleOnce to see if the Pabbly Connect is capturing data or not. Before creating a test booking, make sure to click on “Capture Webhook Response” (b) Head to Booking Page Just head to your booking page, you can create one according to your need too. Now all you have to do is pick a time and date, and add all the details. After making all the changes, click on the “Done” button. As soon as you click on the “Done” button, the entry will appear on the “Pabbly Connect” dashboard. Next, hit the “Save” option. To make this ScheduleOnce – Zendesk Sell integration work, you have to choose two actions for your trigger. The first action of ‘Text Formatter’ to simplify the data that we got in the trigger event, the second action of ‘Zendesk Sell’ to create a lead. To add the “Text Formatter”, click on the plus (+) button and select ‘Data Transformer’ from the chosen app drop-down and select method as ‘Split Text’ After choosing the application, click on the ‘Connect With Text Formatter’ button. Now, it’s time to map the field data. Simply click on the map button and select the ‘field_data’ which you received through the ScheduleOnce trigger and then hit the ‘Save & Send Test Request’ button. Here, we got the response in the correct format, click on the ‘Save’ button. Now, select the app to integrate here as “Zendesk Sell” & method as “Create Lead”. Conclusively, press the “Connect with Zendesk Sell” button. Next, click on the “Connect with Zendesk Sell” button and authorize your Zendesk Sell account to connect with Pabbly Connect. After connecting with your Zendesk Sell account, map all the fields quickly like the first name, last name, email, etc. Further, hit the “Save & Send Test Request” button to proceed further. Afterwards, you can check the response of your API in the action window. Lastly, hit the “Save” button to save the action API’s response. Ultimately, you can check the lead’s entry in your Zendesk Sell account. So now you know how to add Zendesk Sell lead for new ScheduleOnce booking using Pabbly Connect. To sum up, this was all about “how to add Zendesk Sell lead for new ScheduleOnce booking”. Consequently, after completing the step by step procedure, you will end up auto-creating the Zendesk Sell lead from the newly added ScheduleOnce booking. Meanwhile, you can opt for Pabbly Connect for FREE with all its premium features. Also, comment below your queries and suggestions.Step 2: Access Pabbly Connect

Step 3: Workflow for ScheduleOnce with Zendesk Sell Integration
(a) Start with a New Workflow

(b) Name the Workflow
Step 4: Setting Trigger for ScheduleOnce to Zendesk Sell Integration
(a) Select Application you Want to Integrate
(b) Connect with ScheduleOnce
Step 5: Connecting ScheduleOnce to Pabbly Connect
(a) Click on Integration API
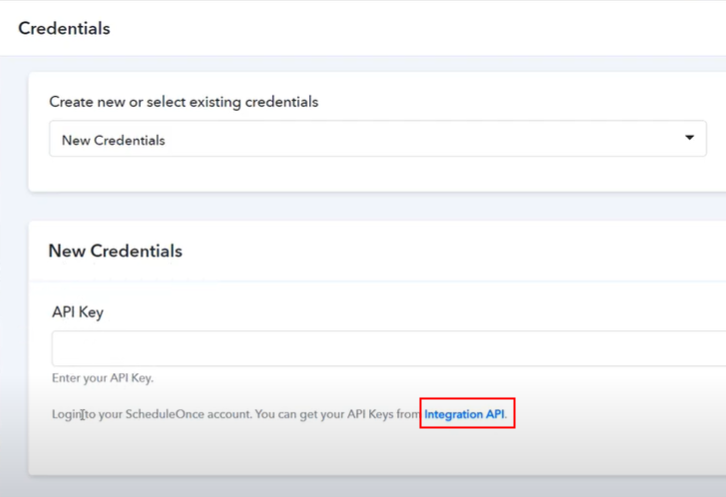
(c) Paste the API Key
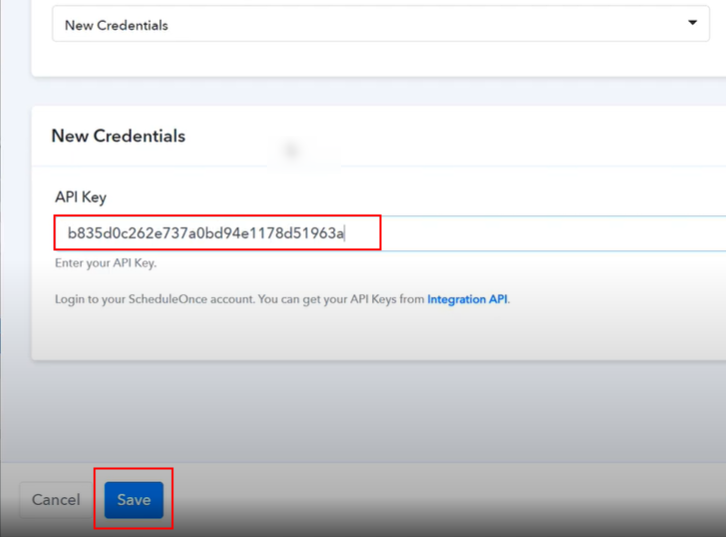
(d) Save & Send Test Request
Step 6: Make a Dummy Booking
(a) Capture Webhook Response
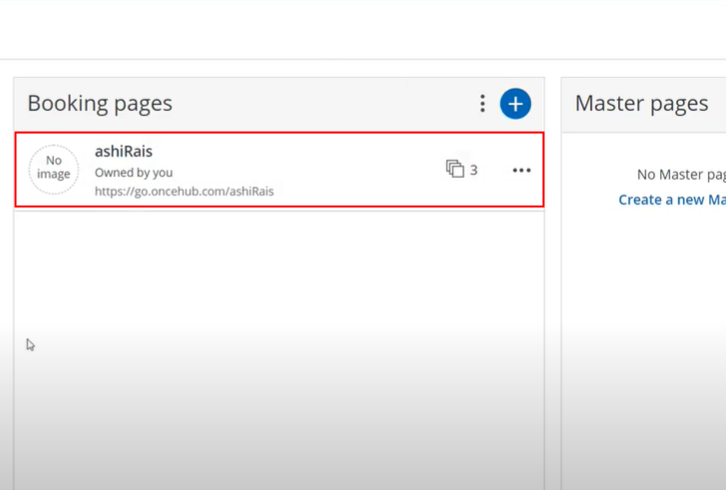
(c) Book an Appointment
Step 7: Test the Response in Pabbly Connect Dashboard
Step 8: Setting Actions for ScheduleOnce to Zendesk Sell Integration
(a) Select Application you Want to Integrate
(b) Click the Connect Button

(c) Map the Fields
(d) Save the API Response
(e) Select Application you want to Integrate
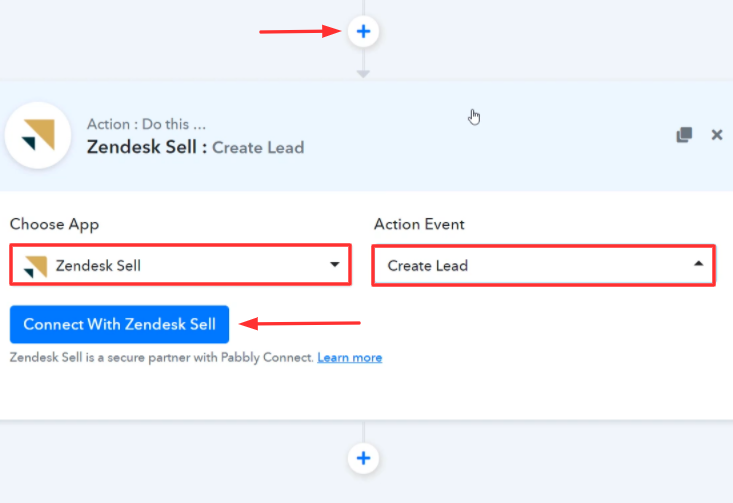
(f) Connecting Zendesk Sell to Pabbly Connect
(g) Map the Fields
(h) Save & Send Test Request
Step 9: Check Response in Zendesk Sell Dashboard
Conclusion –
You May Also Like to Read:


