If you are looking for some way by which you can easily integrate Stripe and Salesforce then this could be the end of your search.
As this blog consist, the step by step procedure to automatically add notes on Salesforce for the newly added Stripe charges. The manual integration of these services could be both time consuming and difficult. But, I’ll be using Pabbly Connect service, so as to reduce the time consumption to a few minutes and that too without any hard-coding.

Let’s learn a little bit about the services, before getting started with the workflow. Stripe is a payment processing software that facilitates accepting payments, managing payouts, invoicing, issuing cards, business spends management, financing etc to its users for the various business types.
And, Salesforce is an online CRM tool that helps business to grow by making strategies to increase profit using the various reports generated.
This way whenever a customer purchases something from Stripe, a note for the respective charge will be added on Salesforce.
Why Choose This Method Of Integration?
In contrast with other integration services-
- Pabbly Connect does not charge you for its in-built apps like filters, Iterator, Router, Data transformer and more
- Create “Unlimited Workflows” and smoothly define multiple tasks for each action
- As compared to other services which offer 750 tasks at $24.99, Pabbly Connect offers 50000 tasks in the starter plan of $29 itself
- Unlike Zapier, there’s no restriction on features. Get access to advanced features even in the basic plan
- Try before you buy! Before spending your money, you can actually signup & try out the working of Pabbly Connect for FREE
Pabbly Connect is an affordable option to connect multiple services for sharing information in real-time. Moreover, it will only take a minute interval to automate your repetitive tasks.
Also, you can use routers, formatters, instant triggers, multi-step calls & premium apps for unlimited workflows premium Pabbly Connect features without any restriction even in the free plan.
Now, without any further ado, let’s follow the step by step procedure to integrate Stripe and Salesforce.
Step 1: Sign up to Pabbly Connect

Initially, visit the Pabbly Connect website & hit the ‘Sign-Up Free‘ button. Next on the registration page that opens subsequently either use your existing Google account or manually fill the registration form to signup.
Step 2: Access Pabbly Connect

After successfully logging in, hit the ‘Access Now’ button of the software ‘Connect’ in the Pabbly application.
Step 3: Workflow for Stripe with Salesforce Integration
(a) Start with a New Workflow

Start with creating a workflow to add a note to Salesforce for every new Stripe charge & to do this push the ‘Create Workflow’ button first.
(b) Name the Workflow
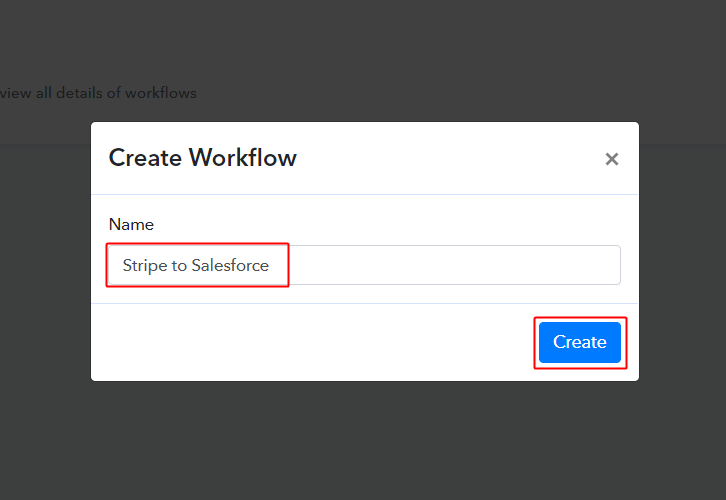
Now, name the workflow as per your need (for instance: Stripe to Salesforce etc) and push the ‘Create’ button available here.
Step 4: Setting Trigger for Stripe to Salesforce Integration
To automatically add Salesforce notes for the newly added Stripe customers, you’ll need to set-up a trigger on the new Stripe customers and its respective action to add a Salesforce note using Pabbly Connect.
(a) Select Application you want to integrate
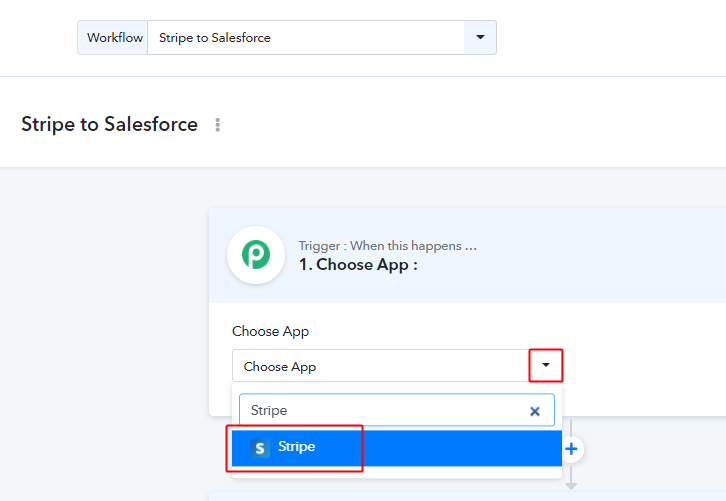
When you click on the create button to generate the workflow, a page containing the trigger window will open next.
Select the ‘Stripe’ app from the ‘Choose App’ field drop-down options.
(b) Select Method & Copy Webhook URL
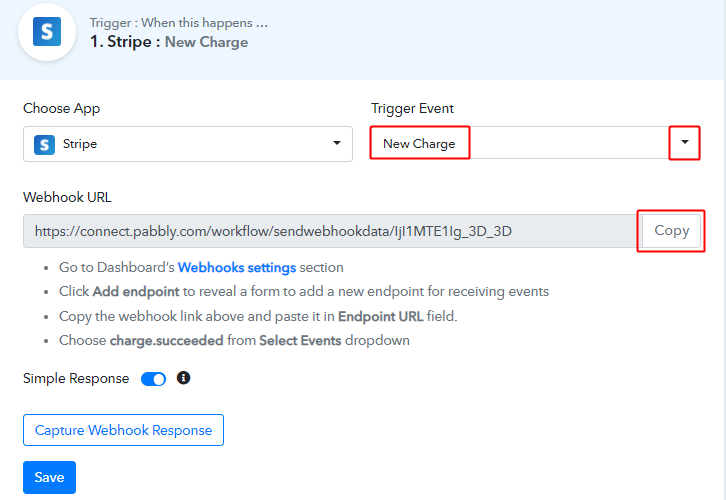
Select the method in here to be ‘New Charge’ & then hit the ‘Copy’ button that is right next to the Webhook URL link.
Step 5: Connecting Stripe to Pabbly Connect
Sign-in your Stripe account & click on the ‘Developers’ option in the verticle menu available.
(a) Go to Your Stripe Account & Add an Endpoint

When you strike the ‘Developers’ option in the left verticle menu, another secondary menu will open up below it . Click on the ‘Webhook’ option from this menu.
Lastly, push the ‘Add endpoint’ button.
(b) Add the Endpoint on Stripe
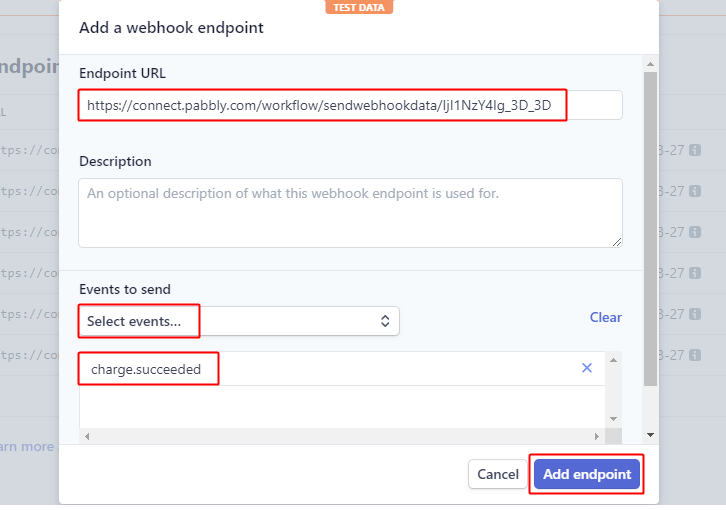
A window will pop up, paste the copied Pabbly Connect trigger Webhook URL here in the ‘Endpoint URL’ field, select the event as ‘customer.succeeded’ & click on ‘Add endpoint’ button.
Step 6: Test the Response in Pabbly Connect Dashboard
We are done setting up the trigger to gather the data of a newly added Stripe charge. So, now let’s just test the trigger by making a test order on Stripe.
(a) Capture Webhook Response
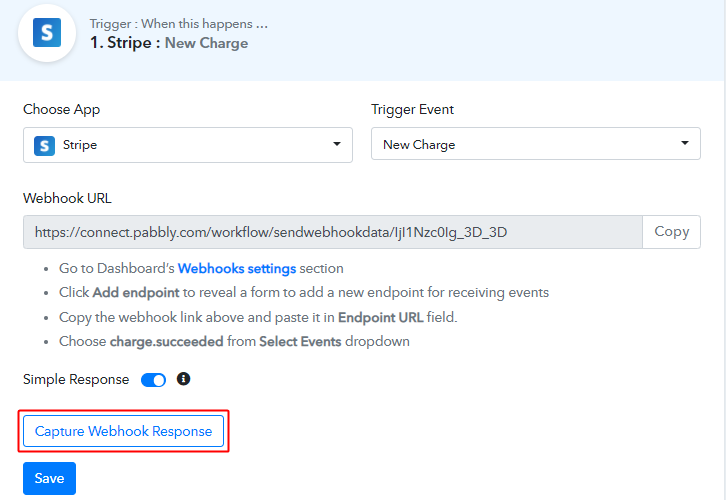
To test a trigger, click on the ‘Capture Webhook Response’ button on the Pabbly Connect trigger window.
(b) Go to Stripe & Add Charge
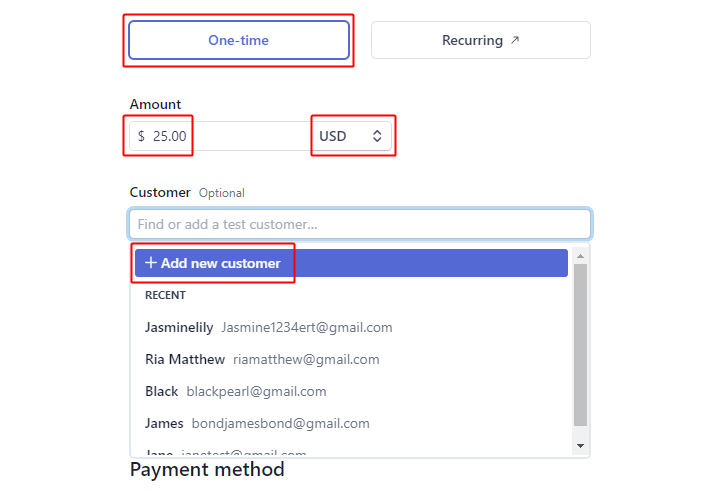
Log in to your Stripe account and make a charge.
First, select the payment type, amount and currency.
Next, hit the ‘+ Add new customer’ button available on the top right.
(c) Add Account Information
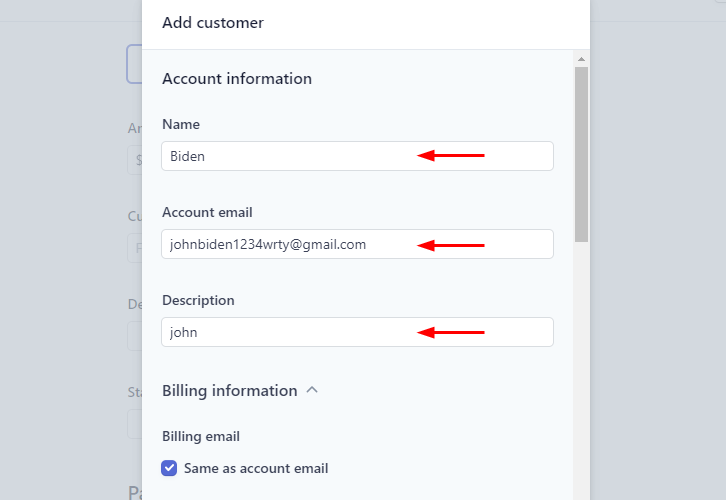
A window will pop up containing fields for customer details. Add all the required customer information in it.
(d) Fill the Billing Details
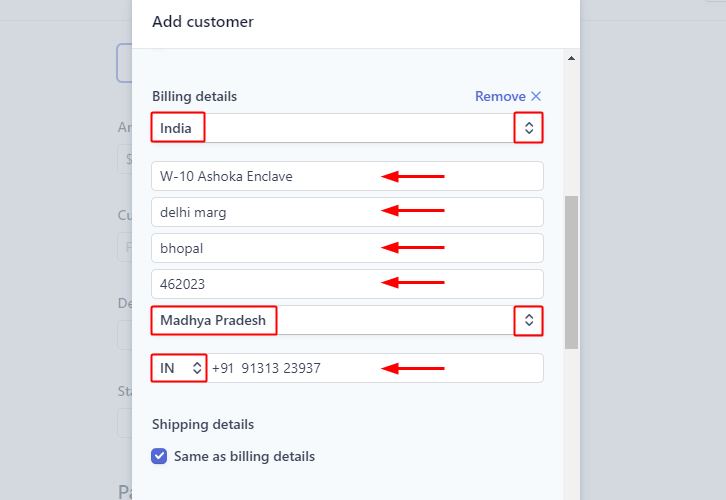
Select the country and fill in the address information. Also, mention the phone number of the customer.
(e) Add Language, Currency & Click on ‘Add Customer’
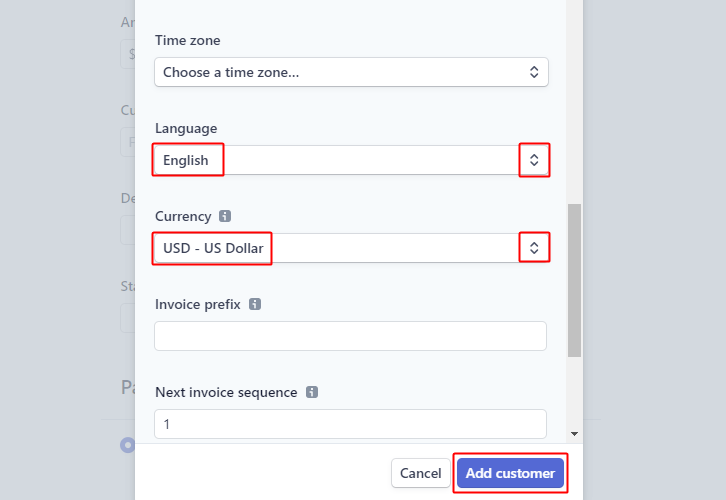
Select the language, currency and then click on ‘Add customer’ button at the bottom right corner.
(f) Click on ‘Submit Payment’
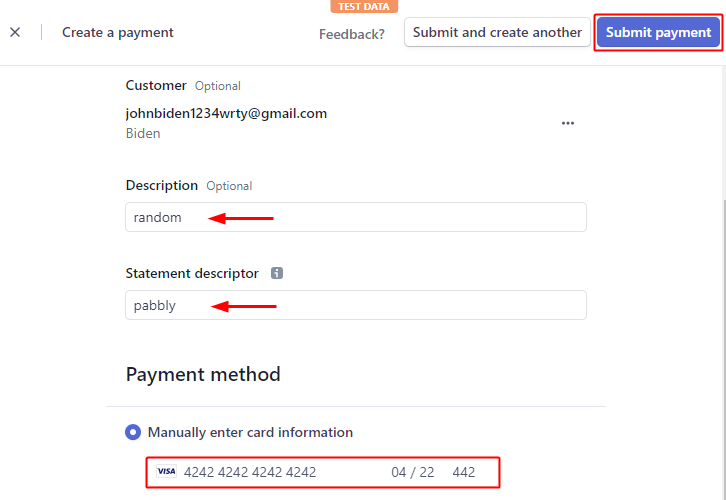
Add description, statement description and card information. Then, hit the ‘Submit payment’ button on the top right.
(g) Check Trigger Response & Save

Check the trigger response, you can check all the customer data in it.
Click on the ‘Save’ button to save the response as well as the trigger settings.
Step 7: Retrieve Stripe Customer Details
Up to this point, we’ve gathered all the necessary data from Stripe in trigger response to tag a Salesforce subscriber. So, let’s proceed to the very last step of setting an action.
(a) Select Application you want to Integrate

First, click the plus button next to your trigger window.
And then select the ‘Stripe’ app to integrate from the ‘Choose App’ field.
Select the method in here as ‘Retrieve a Customer’ and then click the ‘Connect with Stripe’ button.
(b) Go to your Stripe Account & Reveal the API Key
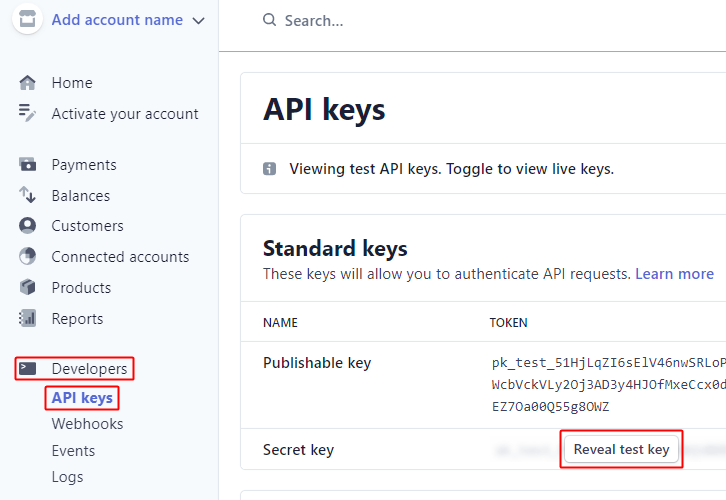
Now, go to your Stripe account and click on the ‘Developers’ option in the left verticle menu.
A secondary menu will open-up below it, click on the API keys option in ti.
Lastly, click on the ‘Reveal test key’ button.
(c) Copy the API Key
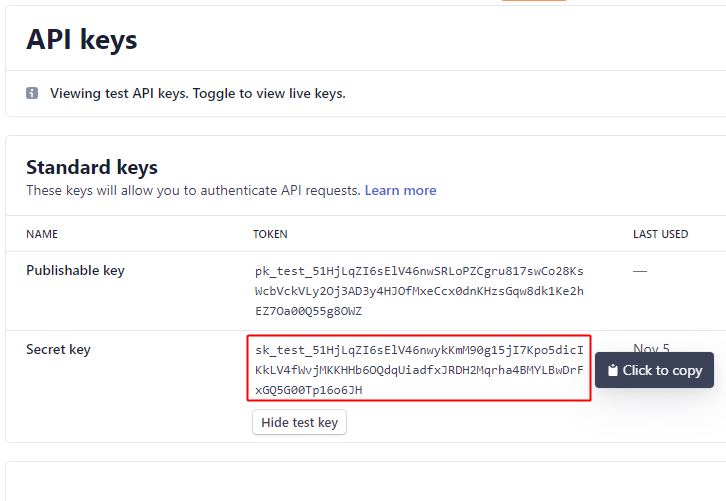
Click on the revealed API key and it will get copied to clipboard.
(d) Paste the Stripe API Key on Pabbly Connect
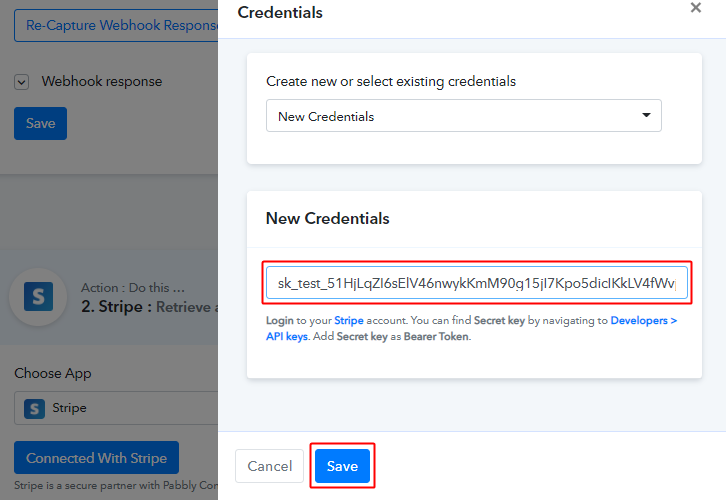
Paste the copied Stripe API key on Pabbly Connect action.
(e) Map Fields & Send Test Request
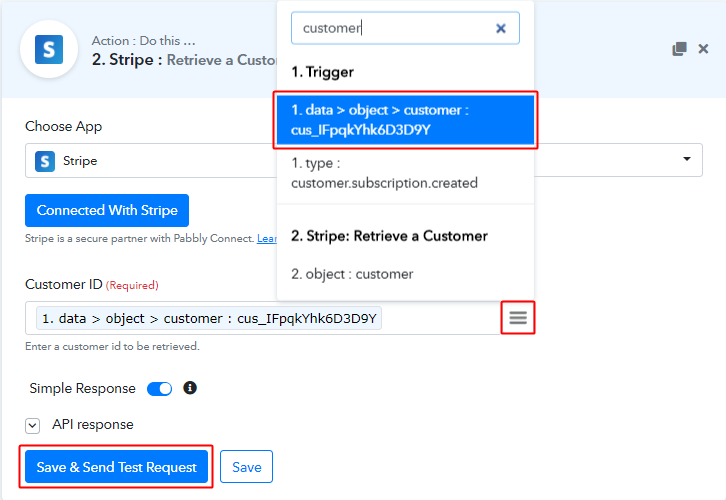
First, map the customer response detail in the ‘Customer ID’ field.
To map a value, place your cursor in the field.
Then, click the menu button (three horizontal lines) next to that particular field.
Click-select the value that you want to map with the respective field.
And then push the ‘Save & Send Test Request’ button.
(f) Check API Response & Save
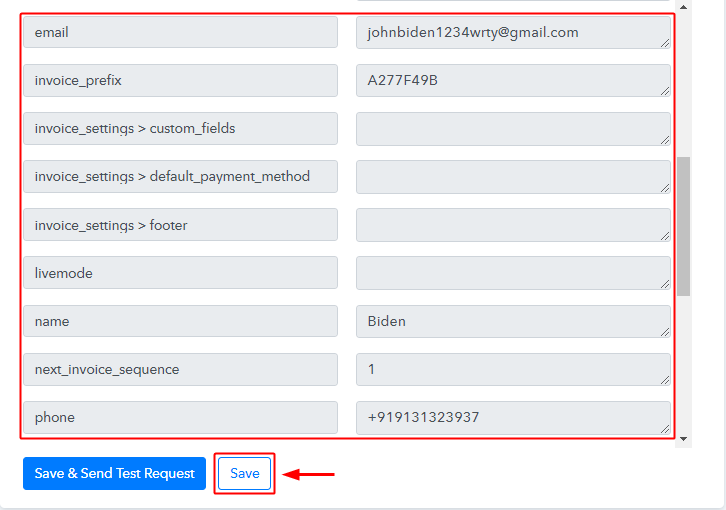
You can check all the customer data will start showing this response.
Save the Stripe API response by pushing the ‘Save’ button next to the response.
Step 8: Trim Amount

As we’ve observed the amount we entered while the test payment is not exactly what we are getting in the response, so we’ll need to format it to use it further.
For this, simply click on the plus button next to your Stripe action window.
And select the ‘API’ option and Action Event as ‘GET’.
(g) Paste the Endpoint URL & Map Amount
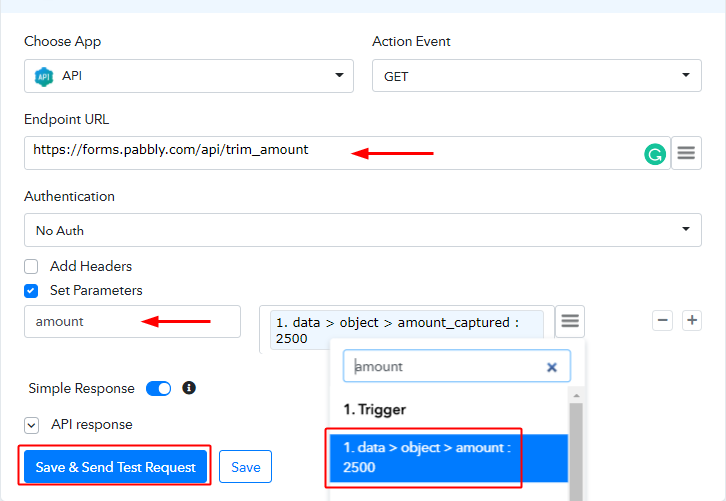
Paste the following URL in the ‘Endpoint URL’ field:
https://forms.pabbly.com/api/trim_amount
Click on ‘Set Parameters’ and mention the field value as ‘amount’.
Next, map the amount from the gathered response and click on ‘Save & Send Test Request’ button.
(i) Check & Save the Trimmed Amount Response

Check the success of your action in the response and push the ‘Save’ button.
Step 9: Setting Action for Stripe to Salesforce Integration
(a) Select Application you want to Integrate
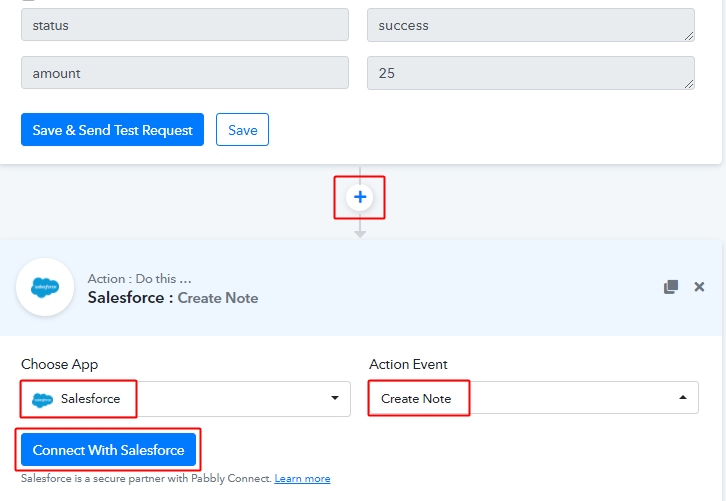
Next. push the plus button next to the Stripe action.
Select the app to integrate as ‘Salesforce’ and method as ‘Create Note’.
Lastly, click on the ‘Connect with Salesforce’ button.
(b) Click on ‘Connect with Salesforce’
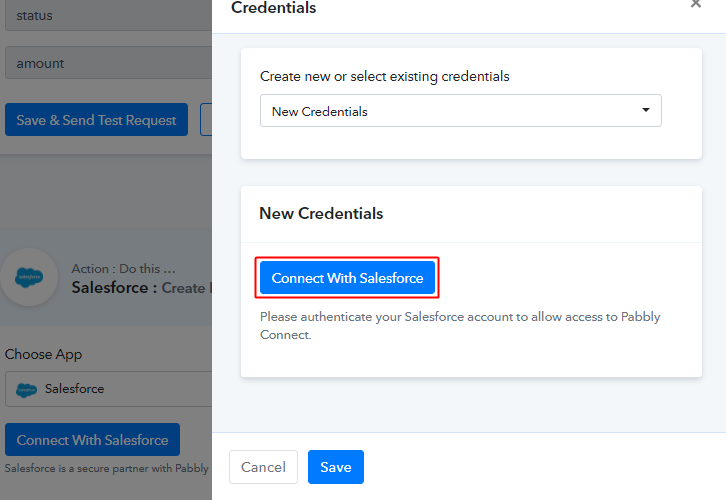
In the next window that slides in from the right, click on ‘Connect with Salesforce’ button.
Allow your Salesforce account to connect with Pabbly Connect.
(d) Select ID & Map Title Field
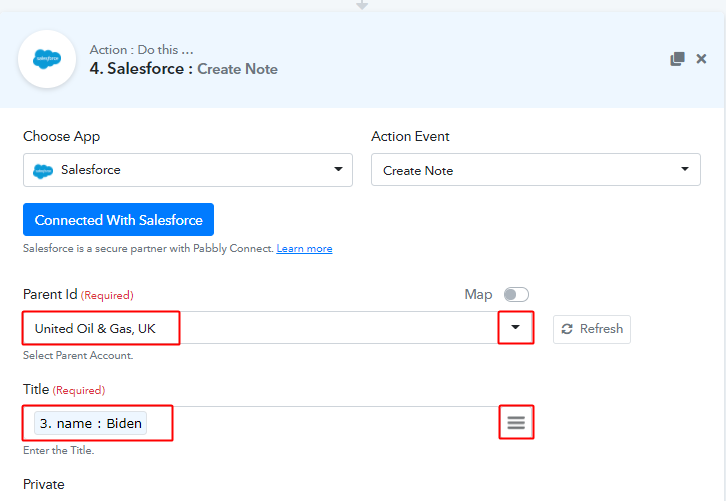
Now, select the Parent ID value & map the ‘Title’.
(e) Map Body Values & Send Test Request

You can draft the body of the note by mapping the values from the response.
Click on ‘Save & Send Test Request’ button.
You can check the response of your API in the action window. If everything is good, the response will show success value as 1. On the other hand, if there is some error then the response will show the error details.Save the action API’s response by hitting the ‘Save’ button at the bottom of the action API’s response.
Step 10: Check Response in Salesforce Dashboard
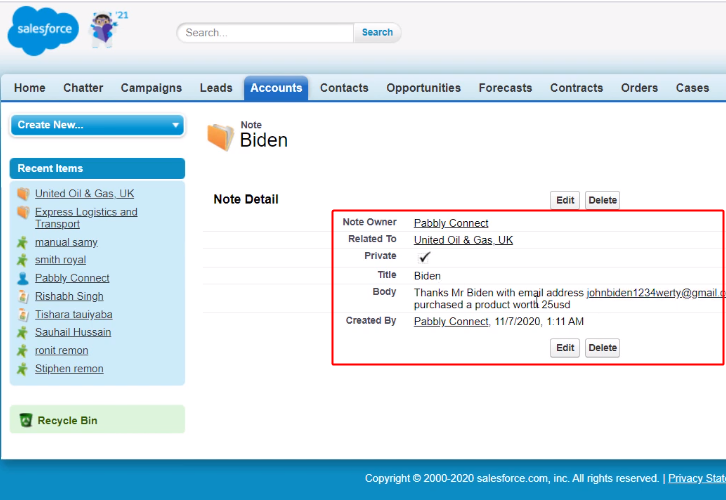
Also, you can check the tagged subscriber on your connected Salesforce account.
Wind-Up
Well, this is all about ‘How to add new Salesforce notes from new Stripe charges’. Consequently, after completing the step by step procedure, you will end up adding a Salesforce note from new Stripe charge automatically.
Go grab, Pabbly Connect for FREE with all its premium features.
Also, do comment your feedback below over this integration.


