Are you in search of a way to add Google Sheets rows from new PayKickstart subscription? If yes, then let us introduce you guys to the amazing tool named Pabbly Connect.
Basically, Pabbly Connect is an integration & automation software that allows you to migrate data from one app to another automatically in real-time.
Sometimes we want to set ourselves free from all the repetitive work, and want someone to handle all the tasks in one go. Therefore, the best automation tool is here to make this wish come true i.e, Pabbly Connect.
But before we jump straight into the integration process, let’s know a little bit about both the software. Hence, PayKickstart is an online shopping cart and affiliate management platform with built-in conversion enhancing features. On the other hand, Google Sheets is a spreadsheet program that allows users to edit, organize, and analyze different types of information along with collaborations, & multiple users access to edit and format files in real-time.
After integrating these applications, whenever there will be any new subscription in your PayKickstart store, the data will get automatically saved in Google Sheets in real-time.
Nevertheless, there is no direct integration possible for these two services yet. Therefore, we are going to use Pabbly Connect to make this integration possible.
With the help of this software, you can effortlessly share data within multiple premium services easily. Moreover, you don’t need to have any coding skills & even a beginner can use it efficiently. Furthermore, this would be just a one-time setup. Later on, the data will automatically be transferred in real-time.
Why Choose This Method Of Integration?
In contrast with other integration services-
- Pabbly Connect does not charge you for its in-built apps like filters, Iterator, Router, Data transformer, and more
- Create “Unlimited Workflows” and smoothly define multiple tasks for each action
- As compared to other services which offer 750 tasks at $24.99, Pabbly Connect offers 50000 tasks in the starter plan of $29 itself
- Unlike Zapier, there’s no restriction on features. Get access to advanced features even in the basic plan
- Try before you buy! Before spending your money, you can actually signup & try out the working of Pabbly Connect for FREE
Thus, without wasting any of your time, let’s get started on how to connect PayKickstart and Google Sheets in real-time. Besides, we’ve attached a template for this integration to assist you better and more efficiently. You can simply hit the ‘Use Workflow’ button below in order to get started. Additionally, you can go to the App Directory & look for more apps/integrations.

So, without taking any more of your time, let’s move according to plan & follow the step by step process to integrate PayKickstart and Google Sheets.
Step 1: Sign up to Pabbly Connect

Start the process to add Google Sheets rows from new PayKickstart subscription by pressing the ‘Sign Up Free’ button on the Pabbly Connect dashboard. Afterward, either fill-up all the details manually or sign up using Gmail credentials.
Try Pabbly Connect for FREE
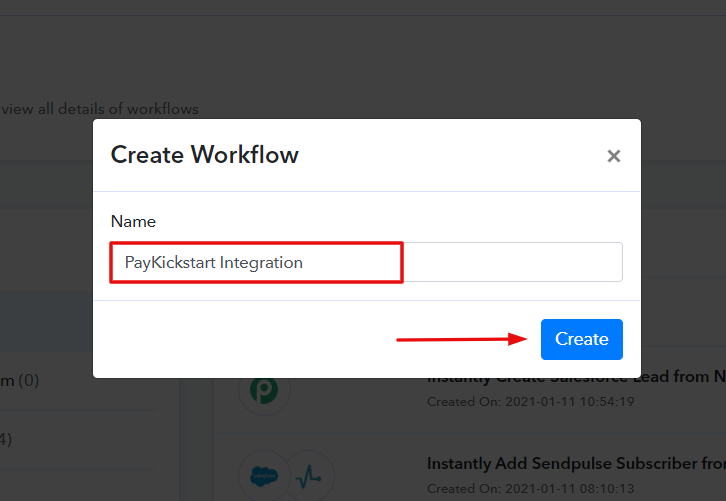
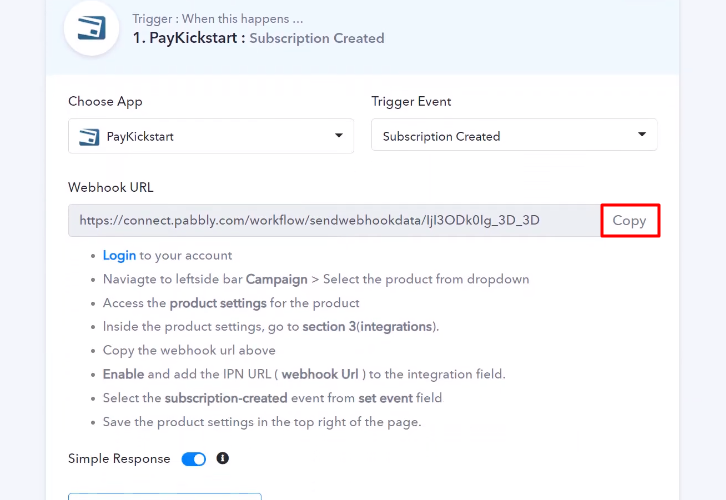
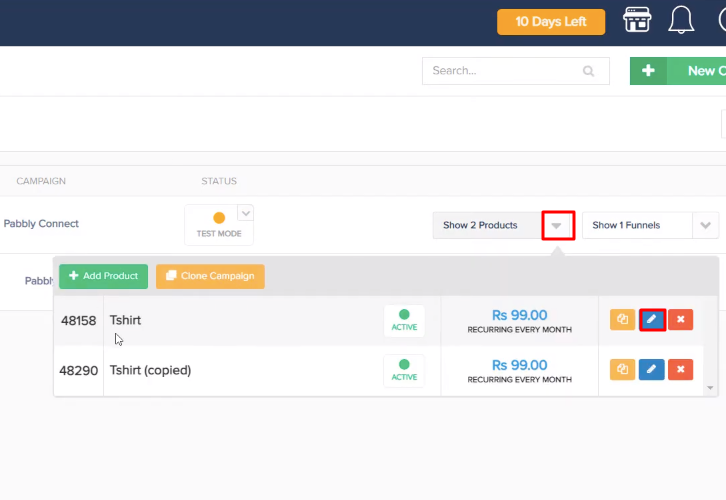
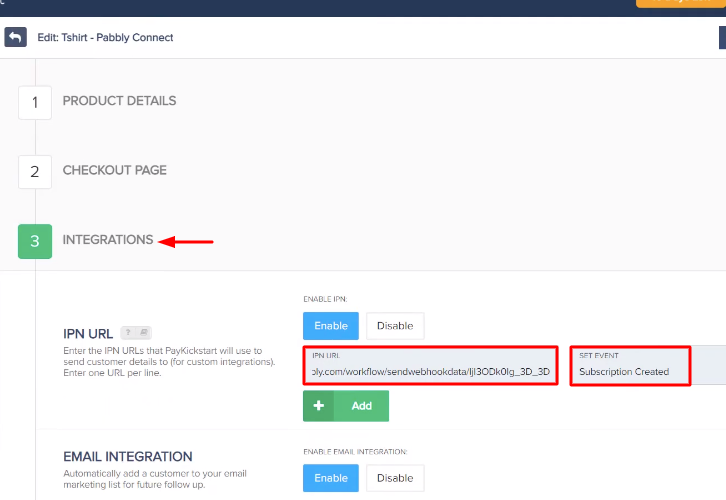
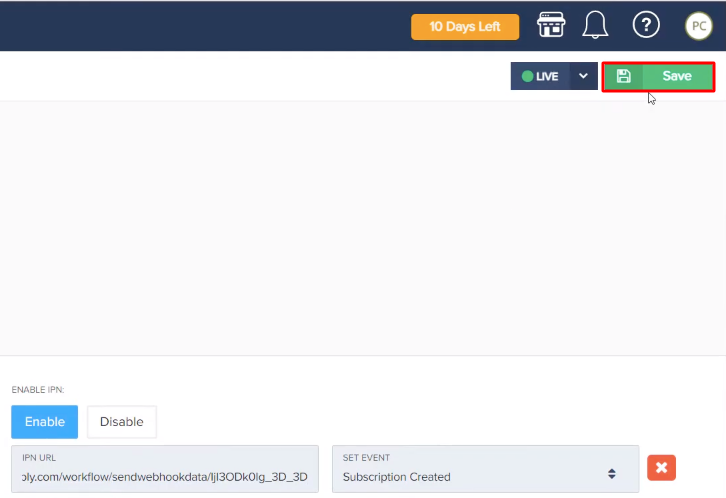
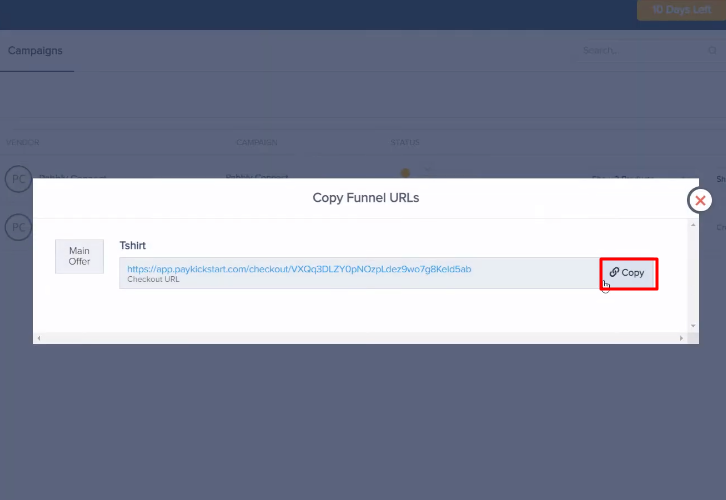
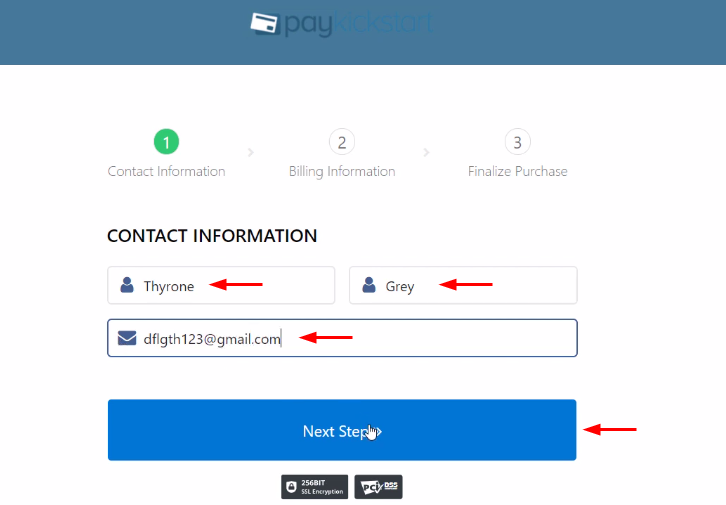
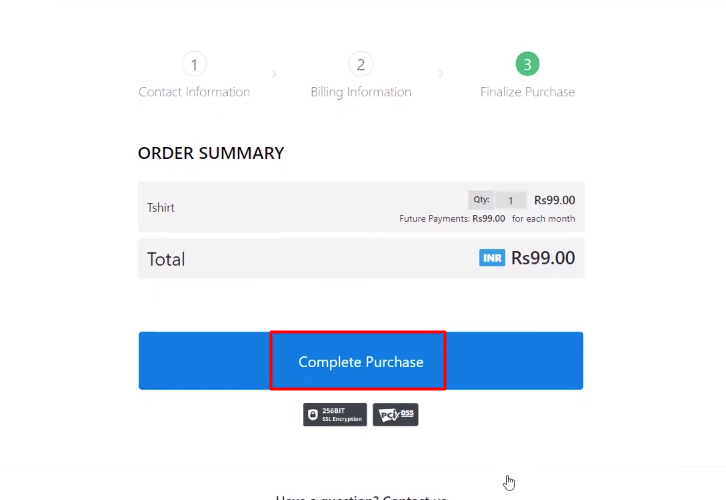
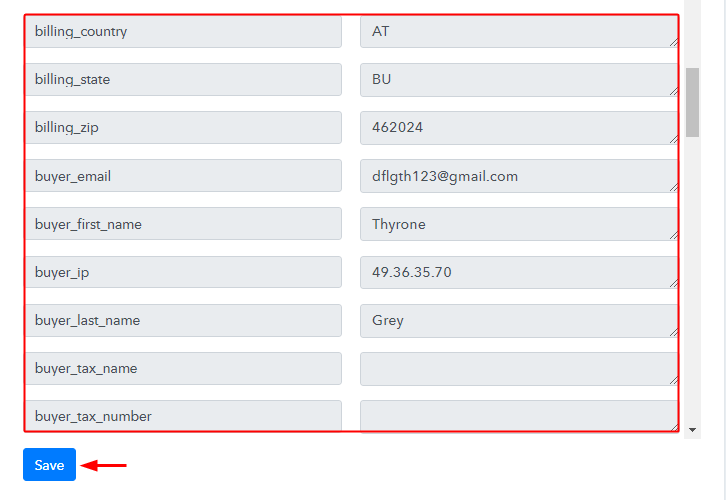
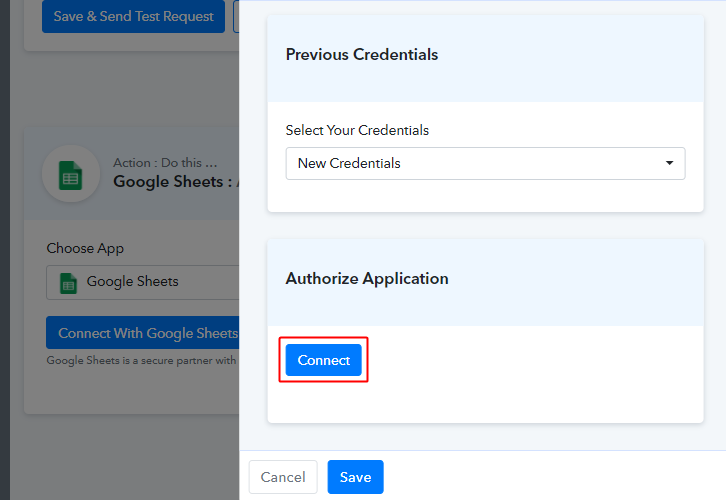
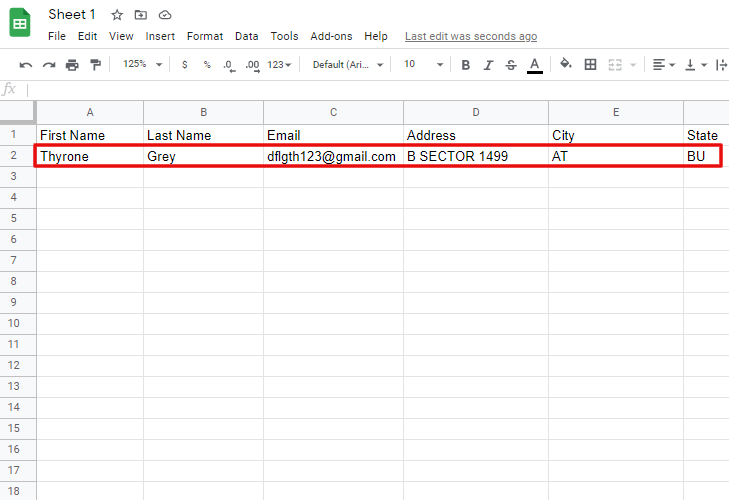
Following that, after logging into the account, hit the ‘Access Now’ button as shown in the above image. Begin with creating a workflow for your project by pressing the ‘Create Workflow’ button. Promptly, you need to name the workflow just like in the above-shown image. I named the workflow ‘PayKickstart to Google Sheets’, you can obviously name the workflow as per your necessities. Once you are done with naming your workflow, now its time to select the application you want to integrate. Pabbly Connect enables you to connect unlimited premium apps, create your free account now. Soon, you have to select the application that you want to integrate. Here, we are choosing ‘PayKickstart’ for integration. In the method section, select ‘Subscription Created’. The subsequent step is to copy the webhook URL which is appearing on the dashboard just like in the above-shown image. Now, in order to connect PayKickstart with Pabbly Connect, you have to paste the copied webhook URL in the software. Hence for that, you need to log in to your PayKickstart account. Next, in order to paste the URL, hit the ‘Campaigns’ option in your PayKickstart dashboard. Once you reach the campaigns page, select any of your listed products then tap on the edit button. Later, scroll down the page and hit the ‘Integrations’. In IPN URL section, paste the copied webhook URL and in event section select ‘Subscription Created’ option. Once you are done making all the changes, simply press the ‘Save’ button to save the changes. Next, in order to check if the integration is capturing data or not, we will make a dummy purchase in PayKickstart. Now, to make a purchase, again we will go to the ‘Campaigns’ section of your PayKickstart dashboard. Hither hit the ‘Funnel’ section of your product & press the link button. Following that, simply copy the given funnel URL & open it in a new tab. Now, add the required customer details such as name & email and then press the ‘Next Step’ button. Promptly, you have to add the billing info such as address, contact number, etc. Then hit the ‘Next Step’ button. Once you are done making all the required changes, simply press the ‘Complete Purchase’ button. Before that, click on the ‘Capture Webhook Response’ in Pabbly Connect to capture the data. Once you hit the ‘Complete Purchase’ in PayKickstart and on the ‘Capture Webhook Response’ in Pabbly Connect, the subscriber info will appear on the Pabbly Connect dashboard. Next, press the ‘Save’ option. Now, to make this PayKickstart-Google Sheets integration work, you have to choose an action for your trigger. Later, hit the “(+)” icon then select “Google Sheets” and in the choose method option, select ” Add New Row”. Next, hit the button named “Connect” to authorize it with Google account. Once you press the “Connected with Google Sheets” button, an authorization window will open up, so that you log in to your Google account. Moving on to the next step, now it’s time to map the required field from the drop-down like for the email field, select the email option, and for the name field select the name option. Once you are done filling in all the details, hit the ‘Send Test Request’ button. Ultimately, once you hit the “Send Test Request”, all the entries will be sent to Google Sheets Rows. Simply tap on the “Save” button to save the entire workflow. Finally, when you check the Google Sheets, the entered details get auto-populated in a sheet. So this was the easiest and fastest method that you could use to integrate PayKickstart to Google Sheets. It’s simple and easy to use and you won’t have to go for any other software after using it. So, what’s stopping you now! Go and catch your deal by signing up for a free account. If you have any suggestions or queries, please drop them down in the comment section, we will get back to you as soon as possible.Step 2: Access Pabbly Connect

Step 3: Workflow for PayKickstart to Google Sheets Integration
(a) Start with a New Workflow

(b) Name the Workflow
Step 4: Setting Trigger for PayKickstart to Google Sheets Integration
(a) Select Application you Want to Integrate

(b) Copy the Webhook URL
Step 5: Connecting PayKickstart to Pabbly Connect
(a) Go to PayKickstart Campaigns
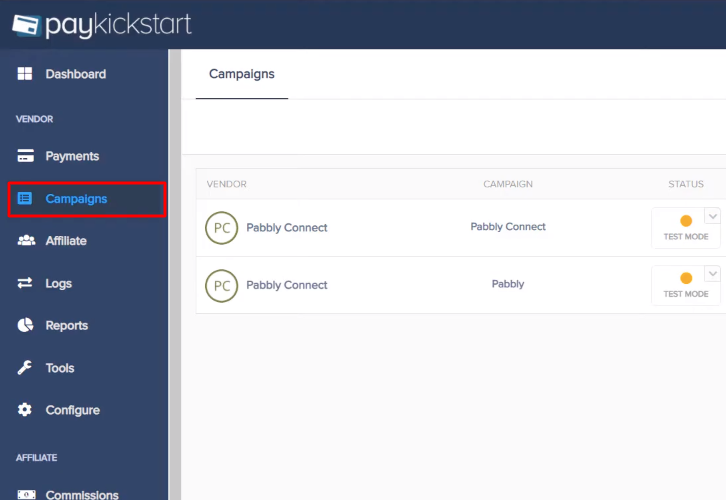
(b) Select Product
(c) Paste the Webhook URL
(d) Save Changes
Step 6: Make a Test Purchase
(a) Click on Campaigns
(b) Select Product
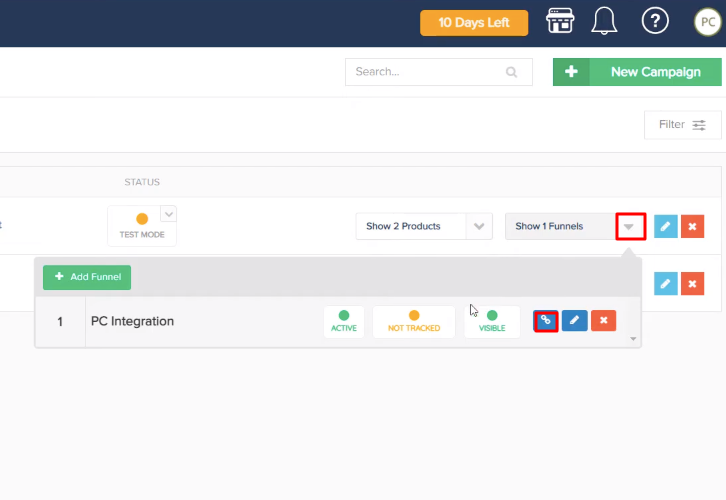
(c) Copy Funnel URL
(d) Add Customer Details
(e) Complete Purchase
Step 7: Test the Response in Pabbly Connect Dashboard
Step 8: Setting Action for PayKickstart to Google Sheets Integration
(a) Select Application you Want to Integrate
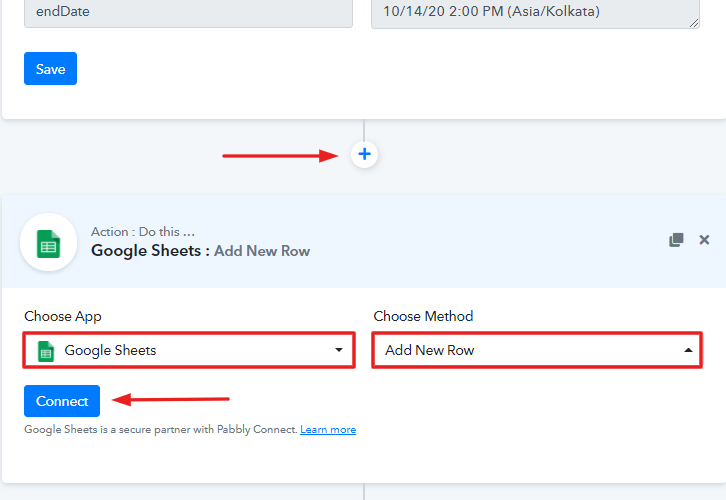
(b) Click the Connect Button
(c) Map Field Data
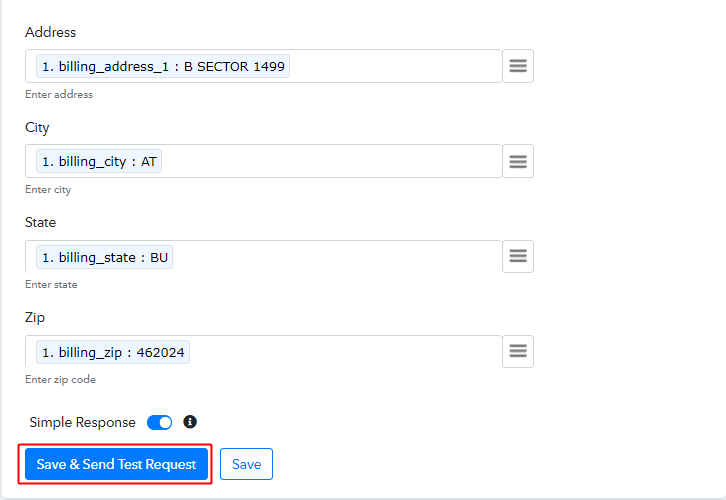
(d) Test the Submission and Save
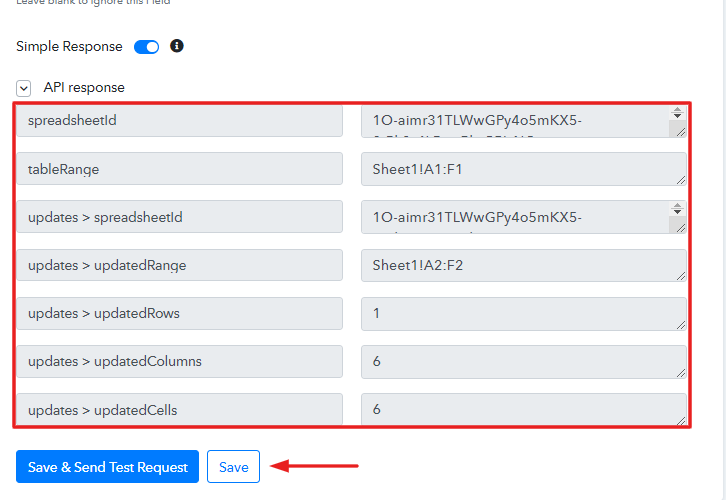
Step 9: Check Response in Google Sheets
Conclusion –
You May Also Like To Read –


