It is important to create RESTful API while working with ExpressJS. If you will create API you will have to go through a number of operations for the client request to be done. For any particular task, we use so many files like HTML, CSS, JAVASCRIPT, IMAGES and so on. To manage these files in directories and to create a proper structure we use Scaffolding.
Scaffolding allows us to create a skeleton for a web application when we work with ExpressJS. We manually create our public directory, add middleware, create separate route files, etc. A scaffolding tool sets up all these things for us so that we can directly get started with building our application. For this, we have a number of modules like Yeoman and Express-generator.
We are going to start Scaffolding using the Express-generator module. For this, we have to install express-generator module.
Firstly, you need to open the folder in your editor where you want to work. I have opened ‘example’ folder in Visual Studio Code because I want to work here, Then open the terminal and install the Express-generator module. For this installation run the following command : –
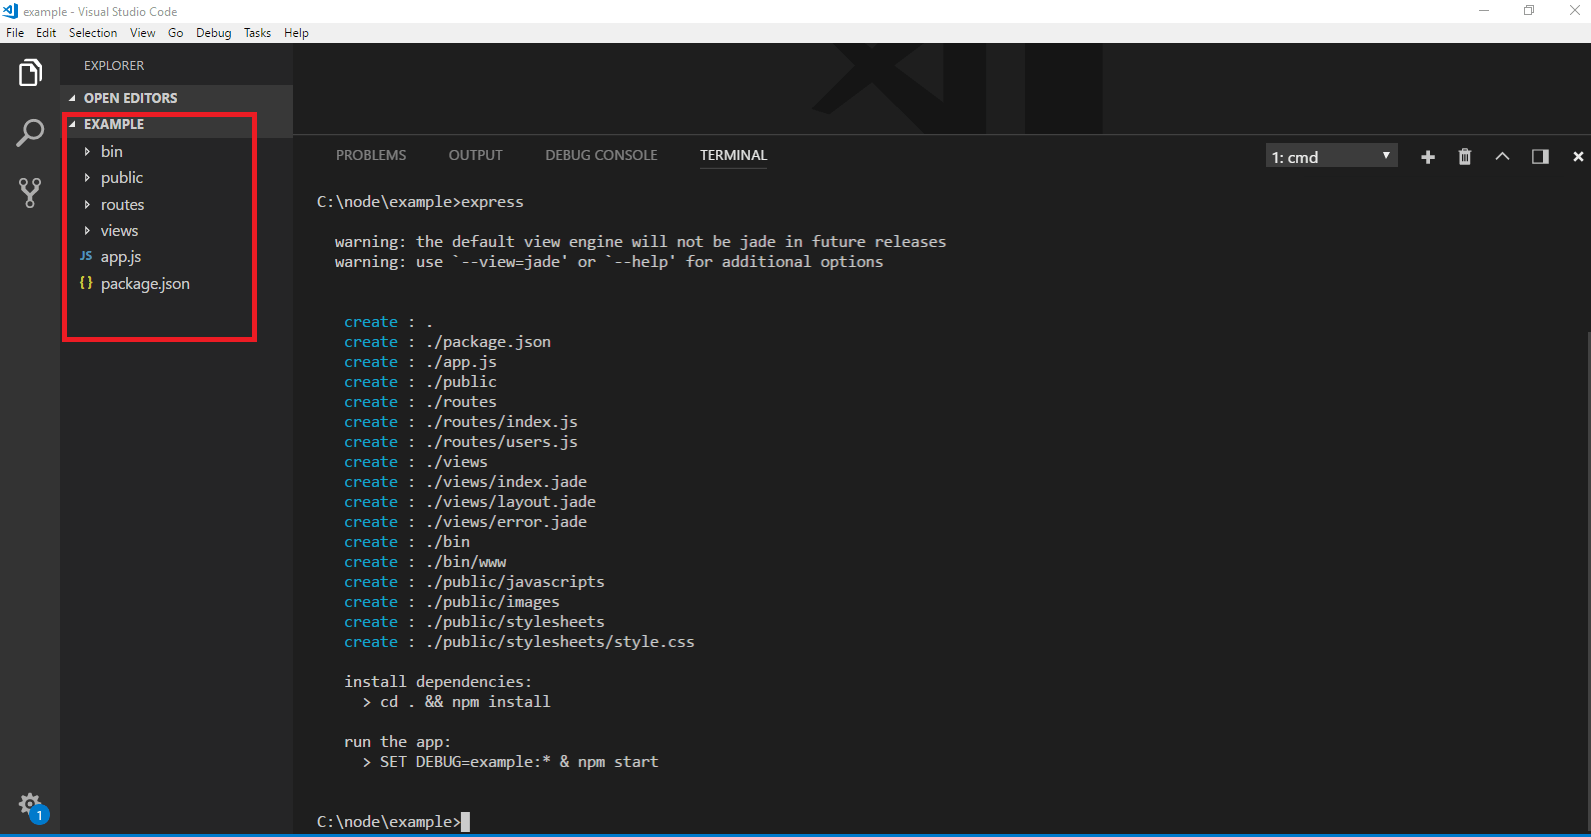
C:\node\example>npm install express-generator -gIf you are planning to use it multiple times run the following command and install the express-generator globally like I did here. The command will take a few seconds. As soon as the express-generator will installed, now you need to run the express command like this and hit enter:-
C:\node\example>expressSo now you can find all the necessary directories and files has been created in your folder.
Every folder has different content inside.
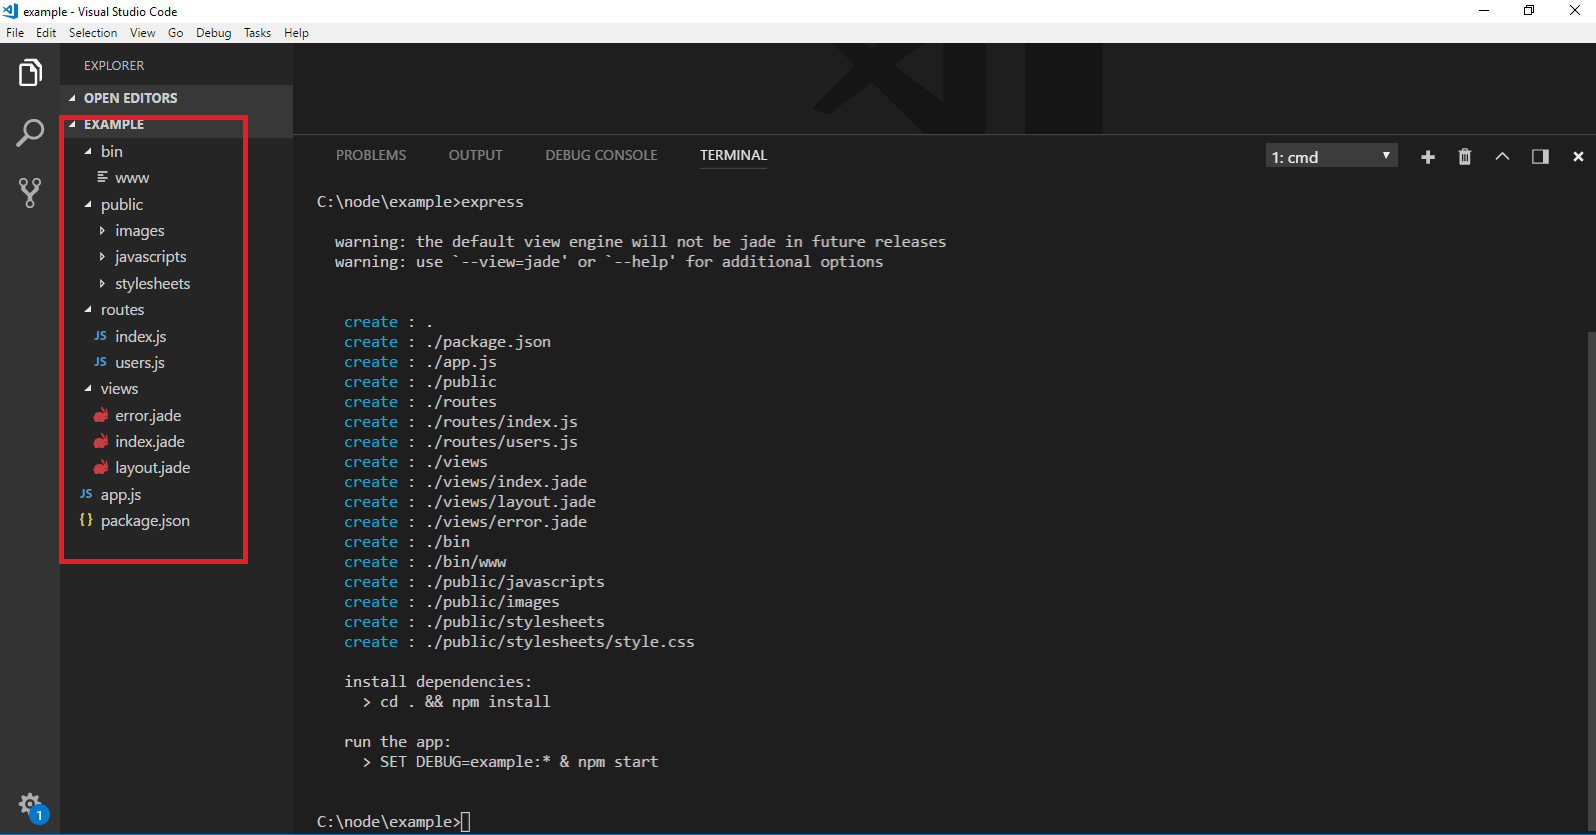
At first, you find a bin folder. There is only one file named ‘www’ inside this folder.
This file actually contains the JavaScript which is necessary to start your server. It handles the port at which the server is running and it creates a server for your app.
In the public folder, you will have three folders they are images, javascripts, and stylesheets. Whichever file you want as a public thing you define them all here.You can put all the images, javascript here which you are going to use throughout your application.
‘Routes’ folder will help you to provide routing things. For example, as we know that we find different kinds of GET request in our application so here we can manage them in a single or different js file.
In the ‘view’ folder you put all your web pages.There are some files with the jade extension in view folder, JADE is a substitution for the HTML file where we don’t need to use tags. This makes our page more compact. The tag in HTML used as a key in JADE. If you are not familiar with jade you can continue with HTML or EJS.
You can see the file ‘app.js’ this is the main file for this application.Here you can see some module are used. All these modules are necessary for a basic app or we can use them according to our need. You will find some middleware also. Middlewares are an intermediate process which will be executed before the actual request got processed. There is some handler for developer environment and production environment.
var express = require('express');
var path = require('path');
var favicon = require('serve-favicon');
var logger = require('morgan');
var cookieParser = require('cookie-parser');
var bodyParser = require('body-parser');

var index = require('./routes/index');
var users = require('./routes/users');

var app = express();

// view engine setup
app.set('views', path.join(__dirname, 'views'));
app.set('view engine', 'jade');

// uncomment after placing your favicon in /public
//app.use(favicon(path.join(__dirname, 'public', 'favicon.ico')));
app.use(logger('dev'));
app.use(bodyParser.json());
app.use(bodyParser.urlencoded({ extended: false }));
app.use(cookieParser());
app.use(express.static(path.join(__dirname, 'public')));

app.use('/', index);
app.use('/users', users);

// catch 404 and forward to error handler
app.use(function(req, res, next) {
 var err = new Error('Not Found');
 err.status = 404;
 next(err);
});

// error handler
app.use(function(err, req, res, next) {
 // set locals, only providing error in development
 res.locals.message = err.message;
 res.locals.error = req.app.get('env') === 'development' ? err : {};

 // render the error page
 res.status(err.status || 500);
 res.render('error');
});

module.exports = app;//exporting app.js as module
In the bin folder, You can see that we have used that app which we just export in the app.js. Apart from that, we have HTTP module to start it as a server by default it will take 3000 as the port number and if you want to change the port number you can change it. You can also find some error handling and event listening thing is done here. So the ‘www’ file is like a startup for my application.
#!/usr/bin/env node

/**
* Module dependencies.
*/

var app = require('../app');
var debug = require('debug')('example:server');
var http = require('http');

/**
* Get port from environment and store in Express.
*/

var port = normalizePort(process.env.PORT || '3000');
app.set('port', port);

/**
* Create HTTP server.
*/

var server = http.createServer(app);

/**
* Listen on provided port, on all network interfaces.
*/

server.listen(port);
server.on('error', onError);
server.on('listening', onListening);

/**
* Normalize a port into a number, string, or false.
*/

function normalizePort(val) {
 var port = parseInt(val, 10);

 if (isNaN(port)) {
   // named pipe
   return val;
 }

 if (port >= 0) {
   // port number
   return port;
 }

 return false;
}

/**
* Event listener for HTTP server "error" event.
*/

function onError(error) {
 if (error.syscall !== 'listen') {
   throw error;
 }

 var bind = typeof port === 'string'
   ? 'Pipe ' + port
   : 'Port ' + port;

 // handle specific listen errors with friendly messages
 switch (error.code) {
   case 'EACCES':
     console.error(bind + ' requires elevated privileges');
     process.exit(1);
     break;
   case 'EADDRINUSE':
     console.error(bind + ' is already in use');
     process.exit(1);
     break;
   default:
     throw error;
 }
}

/**
* Event listener for HTTP server "listening" event.
*/

function onListening() {
 var addr = server.address();
 var bind = typeof addr === 'string'
   ? 'pipe ' + addr
   : 'port ' + addr.port;
 debug('Listening on ' + bind);
}
Now we come to the package.json file. Here You can see all the dependencies are specified here like body-parser, cookie-parser which we have used in our app.js file.
You can also see this “start” : “ node ./bin/www” . here ‘start’ is a command and whenever you will call this start command, internally it will execute node WWW file. So this line makes the www file as a startup thing.
{
 "name": "example",
 "version": "0.0.0",
 "private": true,
 "scripts": {
   "start": "node ./bin/www"
 },
 "dependencies": {
   "body-parser": "~1.18.2",
   "cookie-parser": "~1.4.3",
   "debug": "~2.6.9",
   "express": "~4.15.5",
   "jade": "~1.11.0",
   "morgan": "~1.9.0",
   "serve-favicon": "~2.4.5"
 }
}
So now we need to install all the dependencies. Since all the module name has been specified in the package.json so we don’t need to install each and every module separately rather we just run following command to install all the dependent module which are specified in package.json.
C:\node\example>npm installNow the installation is done so we can start execution.for this use the following command : –
C:\node>npm startYour server will get started now. You can open the browser and can make a request at port 3000 as this is the default port number for us now. The request will open the jade page for us.
All the scaffolding is done now. All the required directories have been created. You can obviously create more directories and can make changes according to your needs but the basic structure is done now.
Get More Knowledge:


