Are you looking for a free and quick way to send Thanks.io postcard from new PayKickstart sale? If yes, then follow the step by step process. As here, we enlighten you with an awesome tool named as Pabbly Connect.
Substantially, Pabbly Connect is an integration and automation tool that let you to transfer data from one app to another automatically in real-time.
Especially, you don’t need to have any coding expertise and even a novice can use it efficiently. Additionally, this will be just a one-time setup and afterwards, the workflow will handle the rest.
Why Choose This Method Of Integration?
In contrast with other integration services-
- Pabbly Connect does not charge you for its in-built apps like filters, Iterator, Router, Data transformer and more
- Create “Unlimited Workflows” and smoothly define multiple tasks for each action
- As compared to other services which offer 750 tasks at $24.99, Pabbly Connect offers 50000 tasks in the starter plan of $29 itself
- Unlike Zapier, there’s no restriction on features. Get access to advanced features even in the basic plan
- Try before you buy! Before spending your money, you can actually sign up & try out the working of Pabbly Connect for FREE
But, before starting the procedure first, let’s know a whit about both the services and the need for the automation. PayKickstart is a billing and affiliate management platform for subscription-based businesses. Whereas, Thanks.io is a cloud-based direct mailing platform that helps you to send automated handwritten postcards and letters.
Since, there is no direct integration between PayKickstart and Thanks.io, that’s why we use Pabbly Connect which allows us to send data from PayKickstart to Thanks.io.
Integration helps you transfer the data between two remote applications automatically with soothing, and you don’t need to enter details manually every time.
After integrating these applications, you can easily send Thanks.io postcard from new PayKickstart sale automatically in real-time. If you want, you can also watch the below video to understand the use of Pabbly Connect.
Moreover, we have attached the template for the same to help you get started easily. You can also click on the ‘Use Workflow’ button below to get started. You can also visit the Marketplace and look for more apps/integrations.

So, fasten your seatbelts as we’re going to disclose how to automatically send Thanks.io postcard from new PayKickstart sale through this step by step integration.
Step 1: Sign up to Pabbly Connect
 Initiate the process of sending Thanks.io postcard from new PayKickstart sale by pressing the “Sign Up Free” button on the Pabbly Connect dashboard. Later on, either fill-up all the details manually or sign up using Gmail credentials.
Step 2: Access Pabbly Connect

Following this, after logging to your account, click the ’Access Now’ button as shown in the image above.
Step 3: Workflow for PayKickstart to Thanks.io Integration
(a) Start with a new Workflow

Launch with creating a workflow for your project by clicking on the ‘Create Workflow’ button.
(b) Name the Workflow
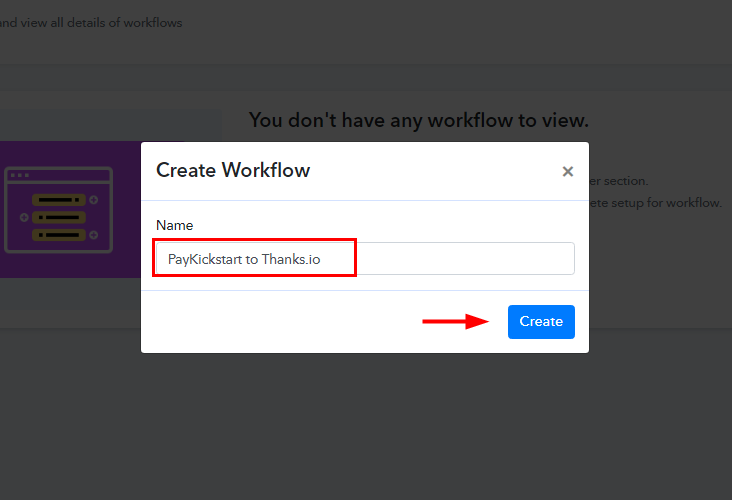
Now, you need to name the workflow according to the use case or integration. As we need to integrate PayKickstart and Thanks.io, so we named the workflow ‘PayKickstart to Thanks.io’. Finally, click on the ‘Create’ button.
Step 4: Setting Trigger for PayKickstart to Thanks.io Integration
As soon as you are done naming the workflow, a trigger window appears where you have to select the application you want to integrate. Pabbly Connect allow you to connect unlimited premium apps, create your free account now.
(a) Select Application you want to integrate
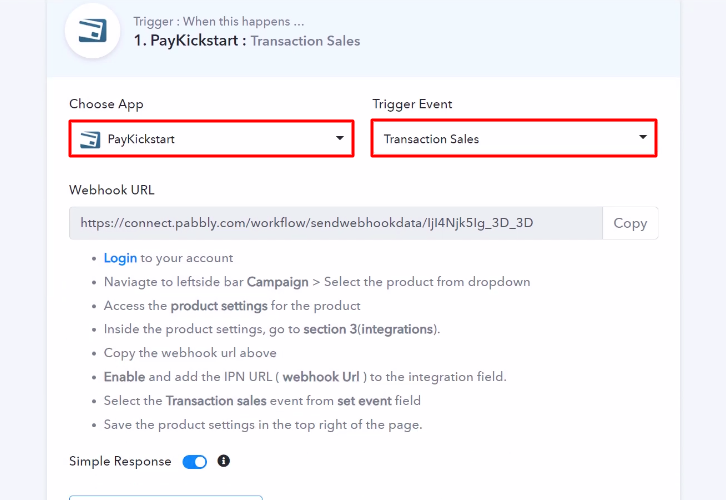
Now, you have to select the application you want to integrate. Here, we are choosing ‘PayKickstart’ in Choose Apps and Trigger Event as ‘Transactional Sales’.
(b) Copy the Webhook URL
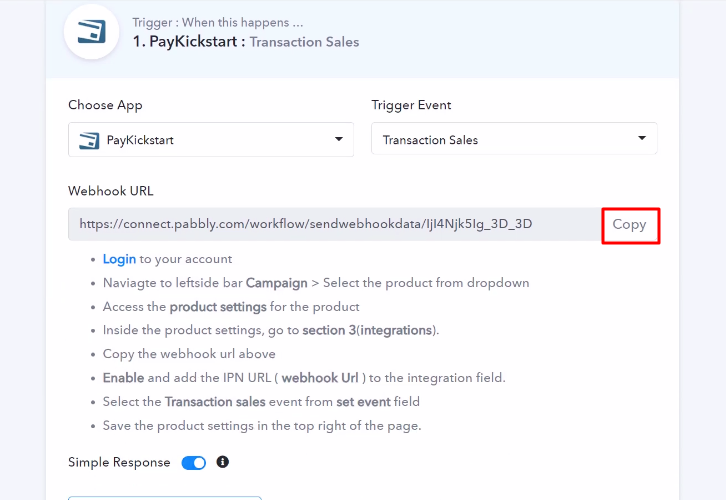
The next step is to copy the Webhook URL which is appearing on the dashboard.
Step 5: Connecting PayKickstart to Pabbly Connect
Promptly, to connect PayKickstart with Pabbly Connect, you have to paste the copied webhook URL in the software, and for that, you need to log in to your PayKickstart account.
(a) Go to PayKickstart Campaigns
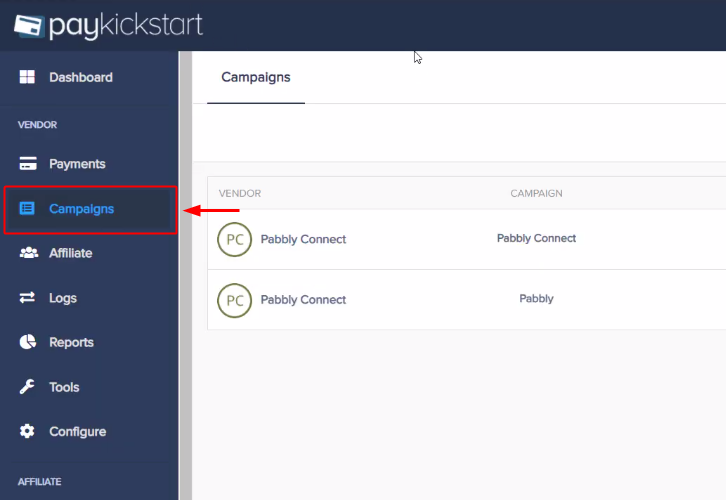
After, login to your PayKickstart account, click on ‘Campaigns’ option in your PayKickstart dashboard.
(b) Select Product
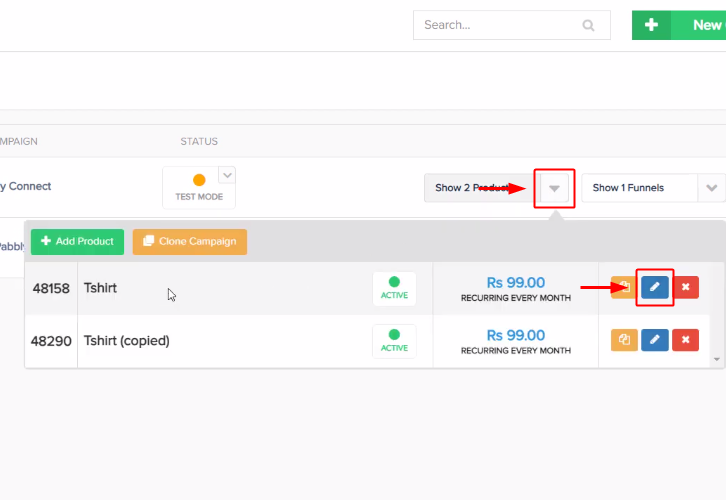
After reaching the campaigns page, You will see that your products are listed there, select any one of them and then click on the pencil icon to edit them.
(c) Click on Integration
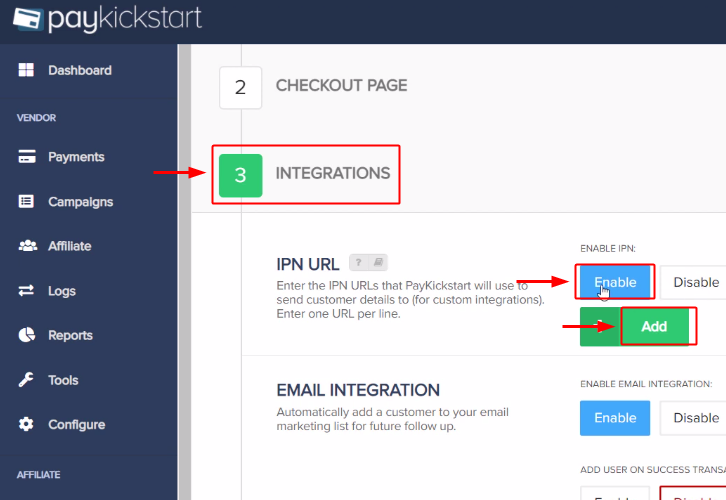
Scroll to the bottom of the page and then click on ‘Integrations’. Now, click on ‘Enable’ in the IPN URL section and then click on the “Add” button.
(d) Paste the Webhook URL
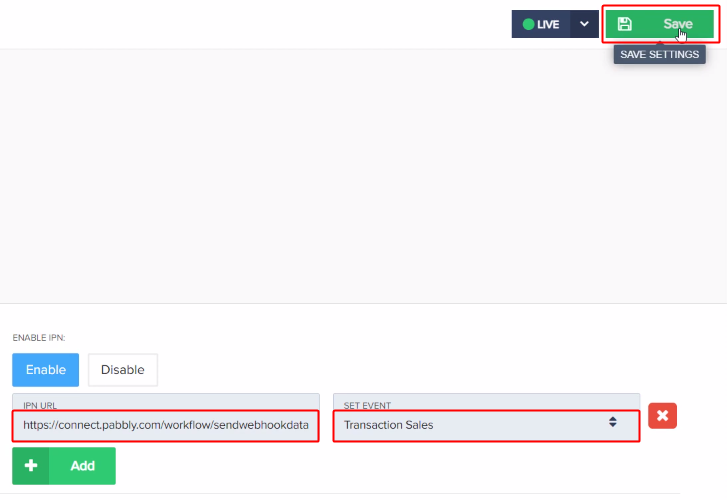
Thereafter, paste the copied Webhook URL in the “IPN URL” field and select the “SET EVENT” as ‘Transactional Sales’. Then, hit the ‘Save’ button which is present at the top right corner of the page.
Step 6: Test the Response in Pabbly Connect Dashboard
Consequently, we are done setting up the triggers for PayKickstart to Thanks.io integration. Now, to test the trigger settings we need to generate a test sale in PayKickstart.
(a) Capture Webhook Response
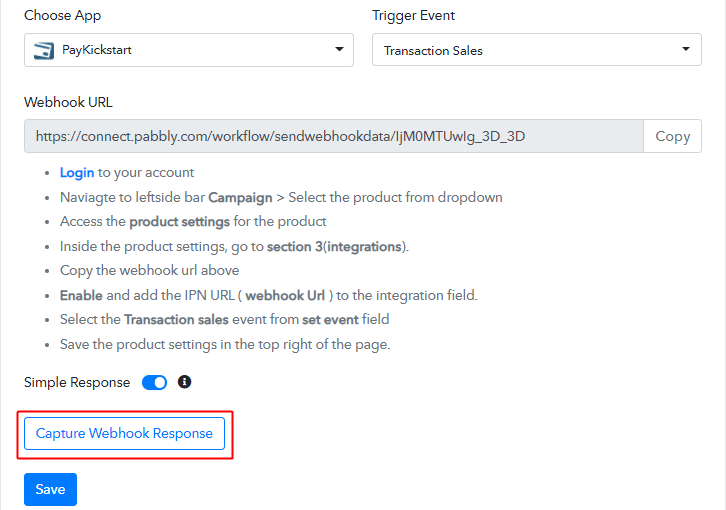
Click on ‘Capture Webhook Response’ button on your Pabbly Connect window to test the trigger settings.
(b) Open your PayKickstart Campaigns
Now, head back to your PayKickstart window and from the left menu click on ‘Campaigns’.
(c) Open any Product Checkout Page
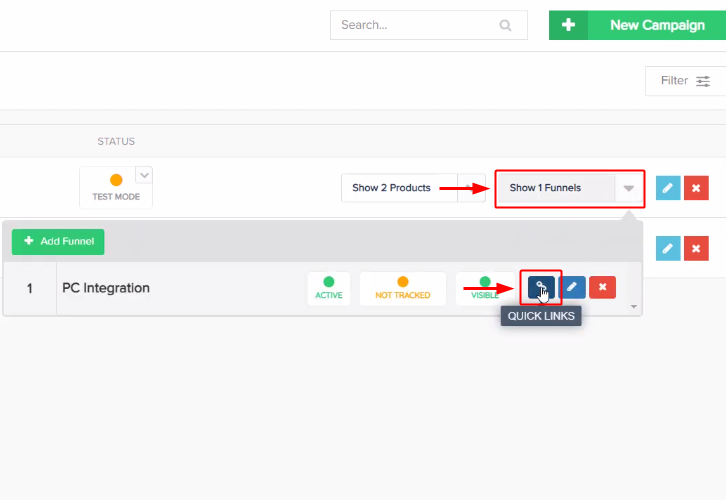
After that, select the same product on which you paste the Webhook URL and then click on Checkout link of that product.
(d) Copy the Checkout Page URL
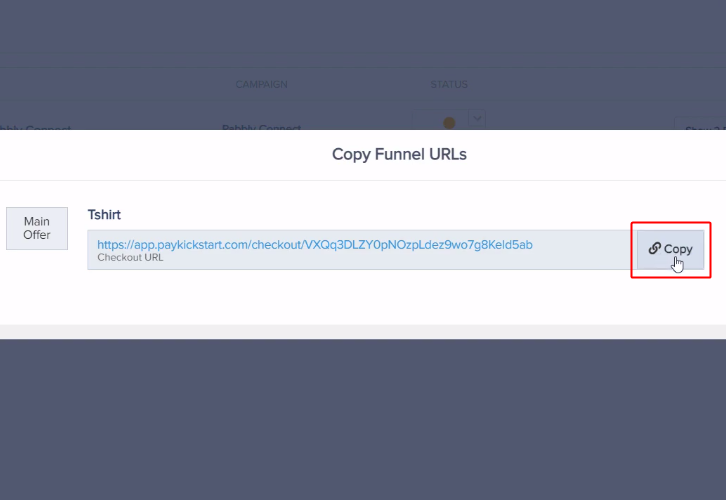
Now, a window will pop-up, copy the Checkout URL and paste it in another tab.
(e) Make a Test Purchase
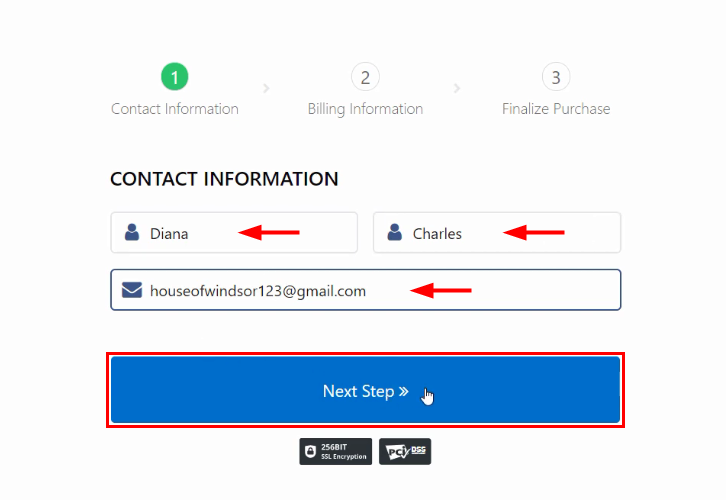
Following this, add all the purchase details to make a test purchase. Begin with adding contact information, after that add billing details and at last wrap up the purchase by clicking on ‘Complete Purchase’.
(f) Complete the Test Purchase
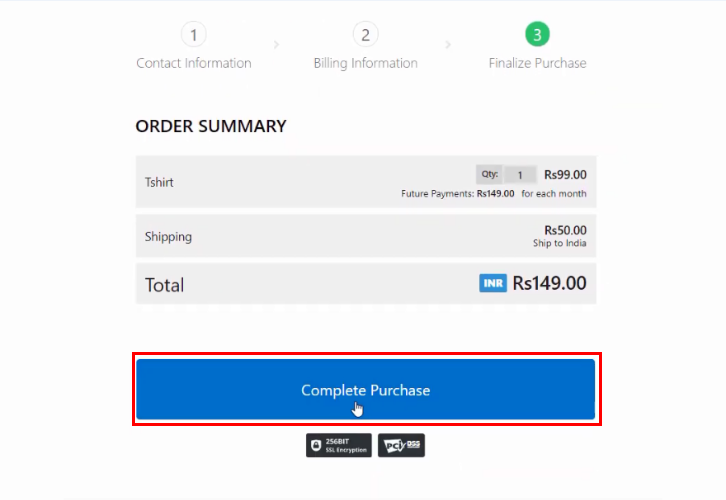
Complete the test purchase by following all the steps required to make a successful payment.
(g) Check and Save Trigger Response

Once you successfully complete the registration, go back to Pabbly Connect window and wait for the response to be captured. After that, click on the ‘Save’ button to save the response.
Step 7: Setting Action for PayKickstart to Thanks.io Integration
Now, as we collected all the needed informations to send postcard through Thanks.io from PayKickstart response. We can now proceed to select an application for action process.
(a) Select Application you want to Integrate
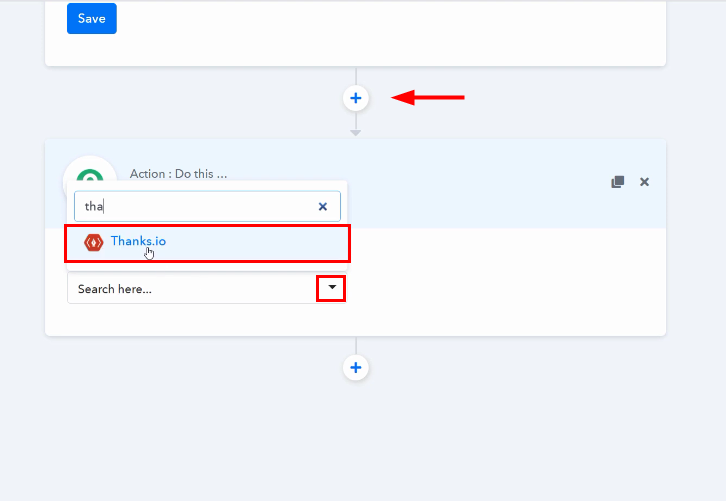
Later on, click on the plus (+) icon and you will see an action window appears. Here, select app to integrate as ‘Thanks.io’.
(b) Select Event and Connect with Thanks.io
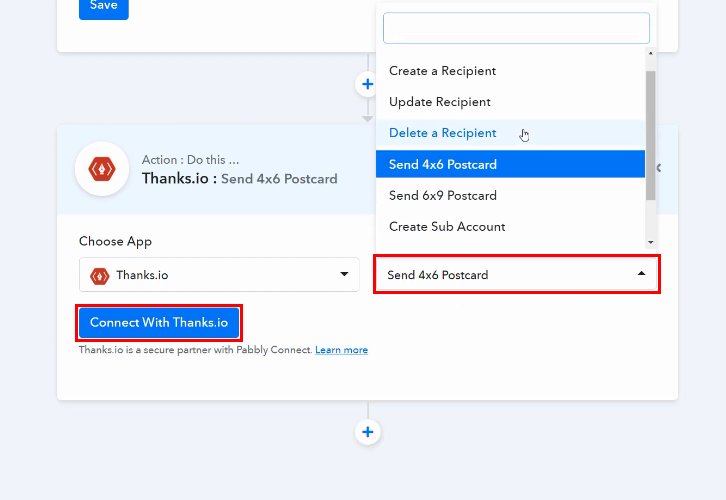
After that, select action event as ‘Send 4×6 Postcard’. And, now click on the Connect with ‘Thanks.io’ button to move further.
Step 8: Connecting Thanks.io to Pabbly Connect
Later on, to connect ‘Thanks.io’ to Pabbly connect you need to paste the ‘Access Token’. For that, you have to log in to your Thanks.io account.
(a) Login to Thanks.io
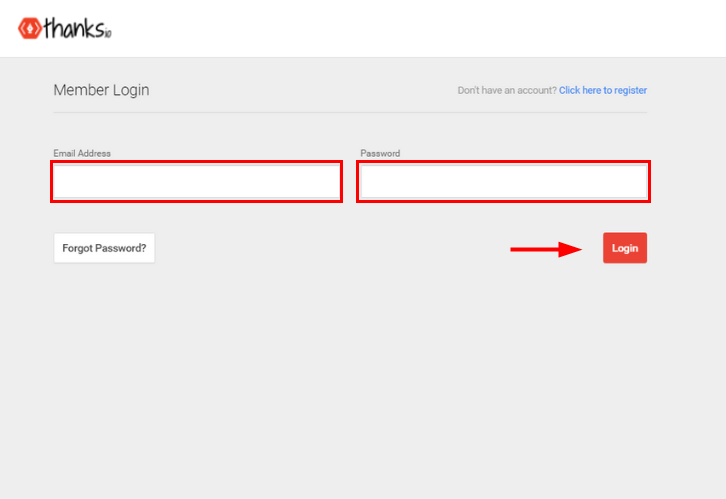
To get the ‘Access Token’, first you have to log in to your ‘Thanks.io’ account.
(b) Click on Gear Icon
![]()
Once you log in to your Thanks.io account. In the dashboard, at the topmost section you will see a gear icon click on it and then click on the ‘API Access’ button.
(c) Add Personal Access Token
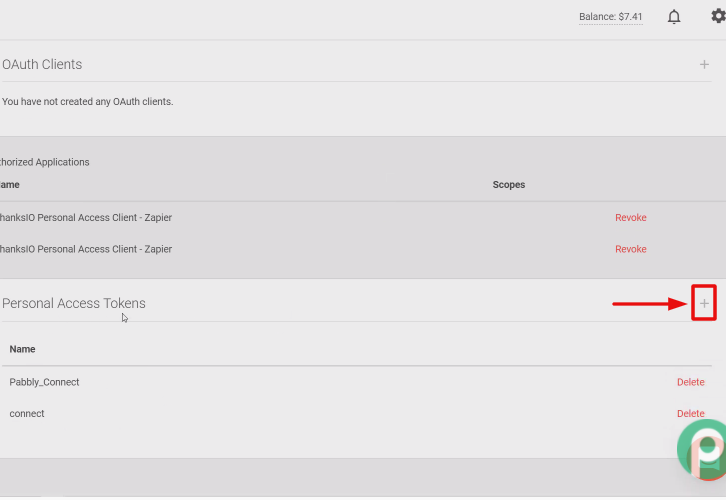
Afterward, you see API Access page. There, create a ‘Personal Access Tokens’ by scrolling down the page.
(d) Create Token

When you click on the plus (+) button, a window appear where you have to give a name to the token and then click on the ‘Create’ button.
(e) Copy the API Token
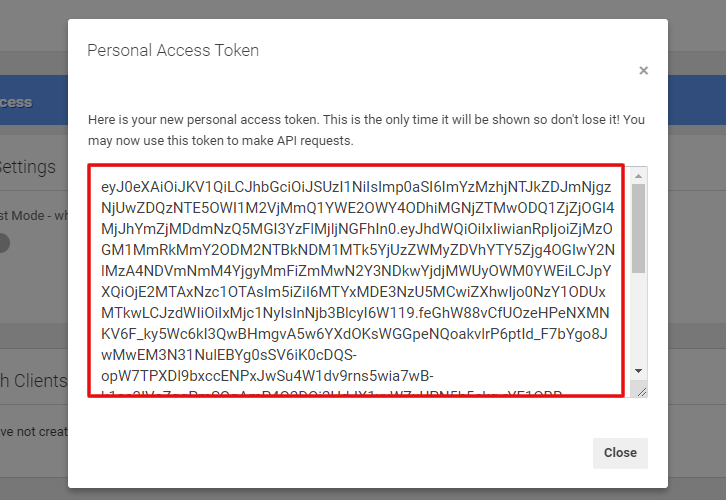
Straightaway, a token will generate, just copy it to make the API request.
(f) Paste the Token
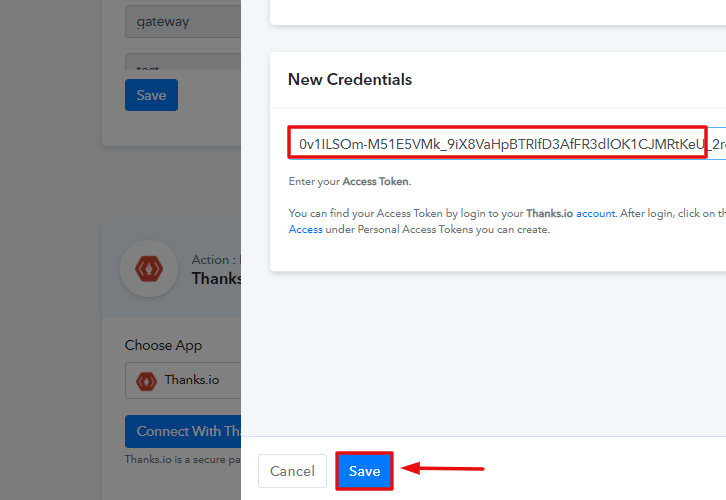
Promptly, go to the Pabbly Connect Dashboard and paste the Token in the specific column. Next, hit the ‘Save’ button.
(g) Map the Fields
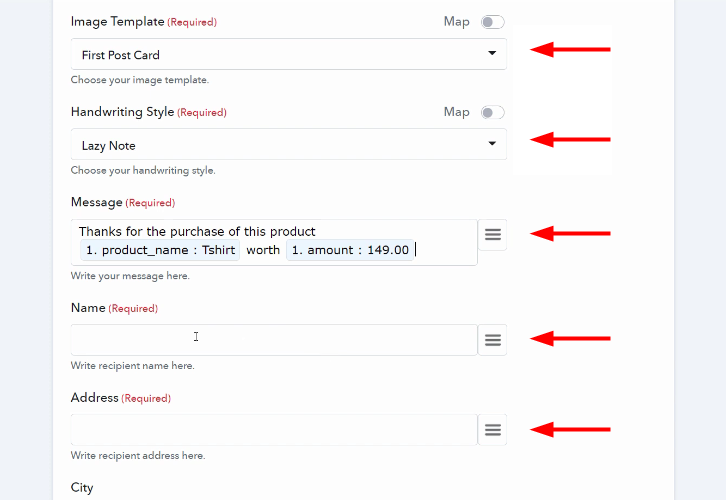
Subsequently, Pabbly Connect will automatically fetch Image Templates from Thanks.io. Now, you have to select the ‘Handwriting Style’, type a suitable message, and then map all details from drop-down like name, address, city, and so on.
(h) Save and Send Test Request
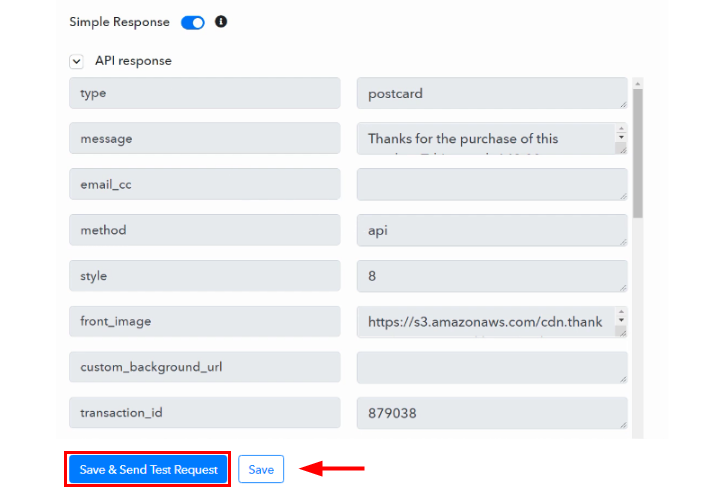
After mapping all the details, click on ‘Save and Send Test Request’ and you will see that the data has been successfully sent to Thanks.io. If there is any error in workflow, the API response will show error.
Now, click on the ‘Save’ button to save overall workflow.
Step 9: Check Response in Thanks.io Dashboard
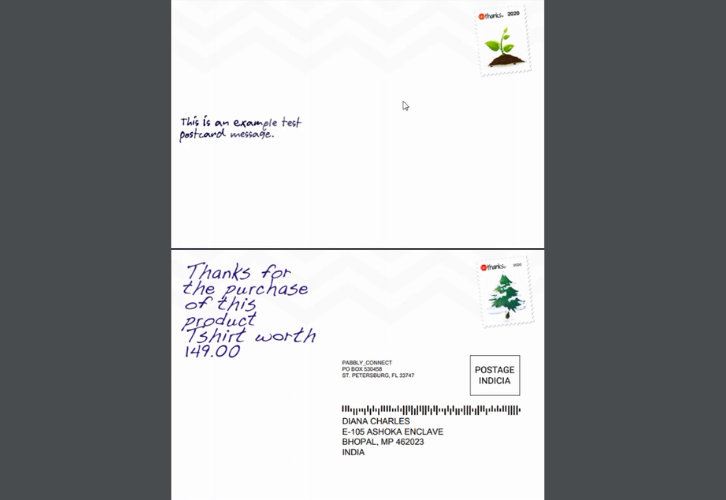
At long last, come to the dashboard of Thanks.io and you will notice that a postcard is updated there. Click on it.
If you want to view it just click on the ‘Preview’ button. It means our automation has successfully accomplished.
Promptly, whenever there is a transaction sales happened in PayKickstart, it will automatically be reflected via postcard through Thanks.io.
Conclusion:
That’s it! Here we completely define “How to Send Thanks.io Postcard from New PayKickstart Sale” using Pabbly Connect. Just follow the step by step procedure and your PayKickstart to Thanks.io integration is all done.
So, what are you waiting for? Go ahead and grab your deal by signing up for a free account.


