Have you ever thought if you could send Slack channel message automatically when Chargebee invoice created? Just imagine if all this could be done automatically then how much free time would you have on your hands for other work.
If you were looking for answers to these questions then this blog is for you as here we are explaining to you how to integrate Chargebee with Slack via Pabbly Connect.

But first, let’s know a tiny bit about both the services that we are going to integrate. Chargebee is a subscription management system that can help you handle all the aspects of the subscription life cycle including recurring billing, invoicing, and trial management for your customers. Whereas, Slack is a proprietary business communication platform that offers many IRC-style features, including persistent chat rooms organized by topic, private groups, and direct messaging.
Therefore, by integrating Chargebee with Slack, you can send Slack channel messages automatically on the creation of new invoices in your Chargebee account. Also, after this integration, you can easily keep all your subscribers in the loop about the latest updates of your services and inform them via Slack messages.
Why Choose This Method Of Integration?
In contrast with other integration services-
- Pabbly Connect does not charge you for its in-built apps like filters, Iterator, Router, Data transformer, and more
- Create “Unlimited Workflows” and smoothly define multiple tasks for each action
- As compared to other services which offer 750 tasks at $24.99, Pabbly Connect offers 50000 tasks in the starter plan of $29 itself
- Unlike Zapier, there’s no restriction on features. Get access to advanced features even in the basic plan
- Try before you buy! Before spending your money, you can actually signup & try out the working of Pabbly Connect for FREE
Pabbly Connect is your answer to all your problems related to automation and integration. Through this software, you can integrate unlimited premium apps, automate all the projects, set unlimited triggers and actions, etc without any coding skills. The amazing part of this software is that you can do all this even with its free plan.
Therefore, without any further delay, let’s get into the blog about how to send Slack channel message when Chargebee invoice created.
Step 1: Sign up to Pabbly Connect

Let’s kick off the process to send Slack channel message when Chargebee invoice created by clicking on the ‘Sign Up Free’ icon on the Pabbly Connect home page. Next, either manually fill-up all the details or sign up using your Gmail account.
Try Pabbly Connect for FREE
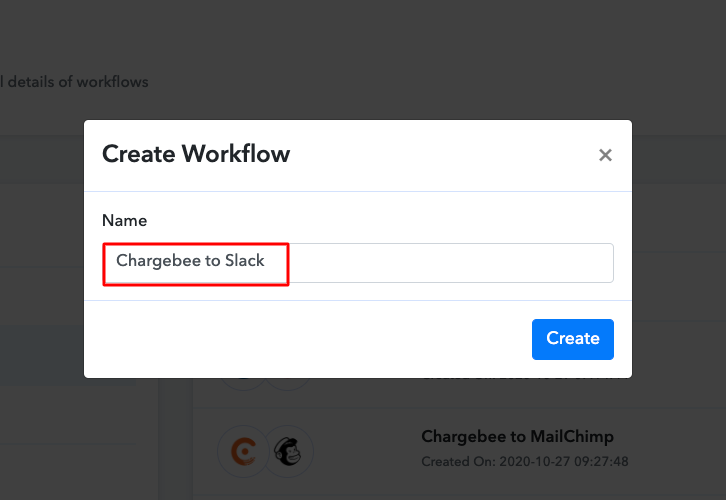
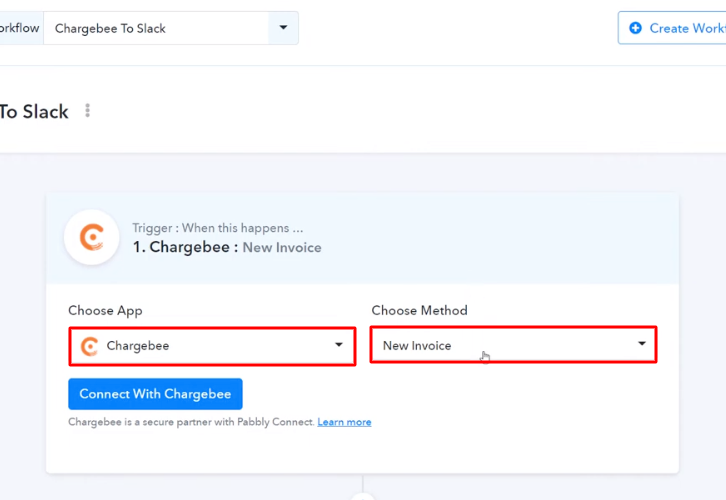
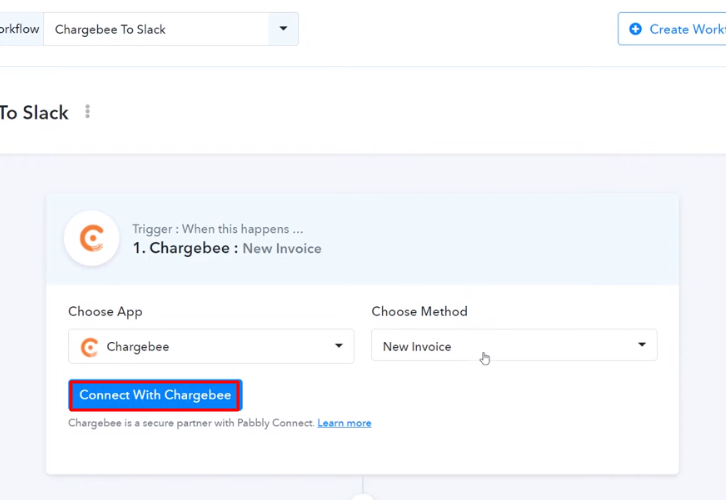
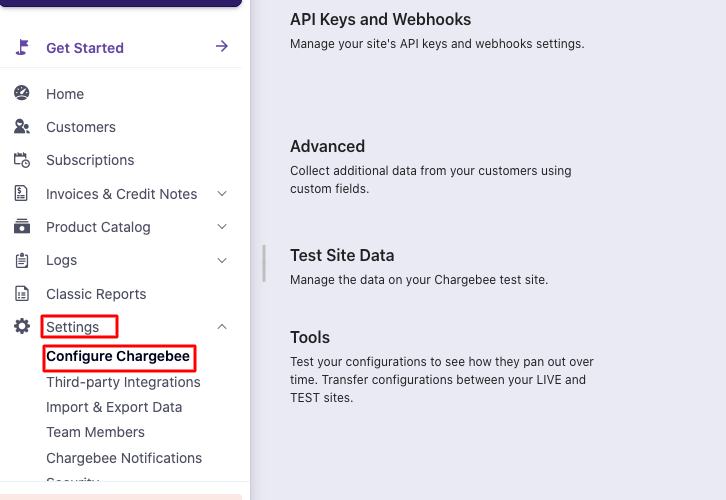
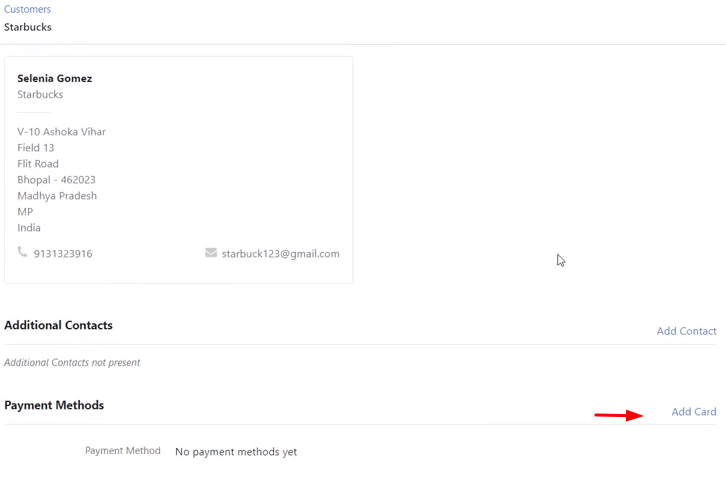
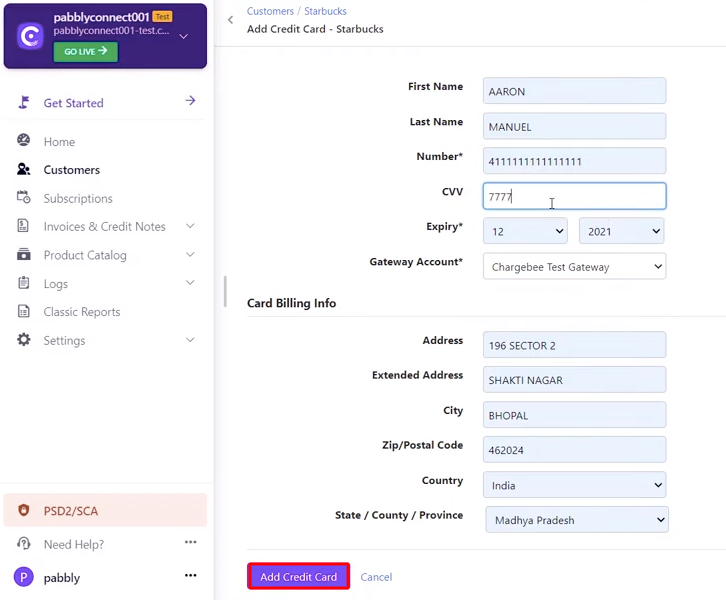
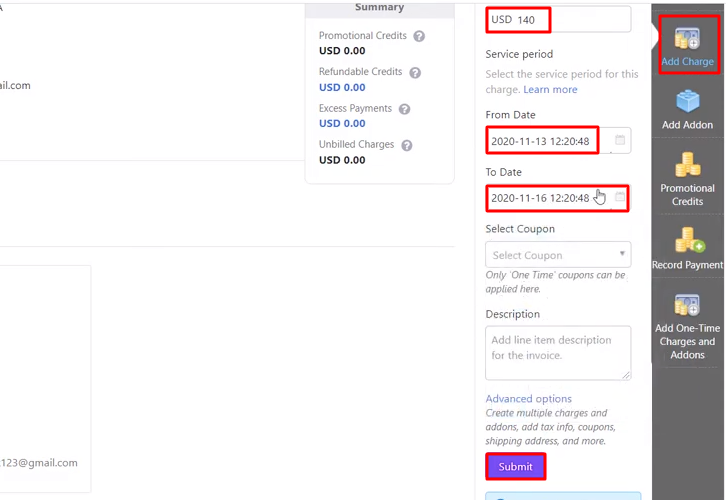
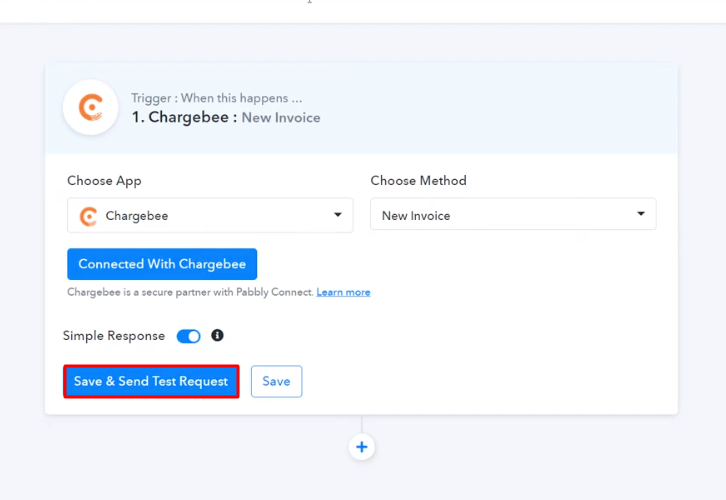
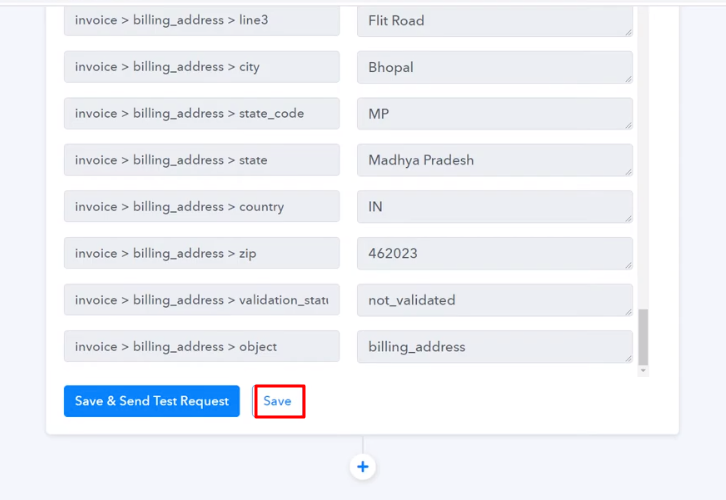
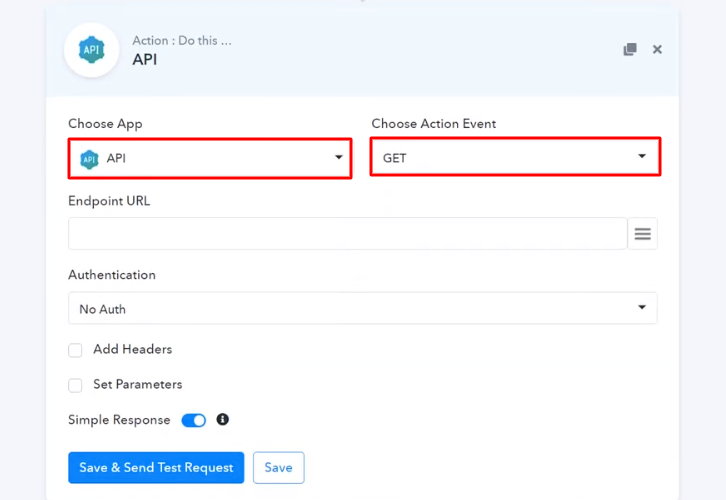
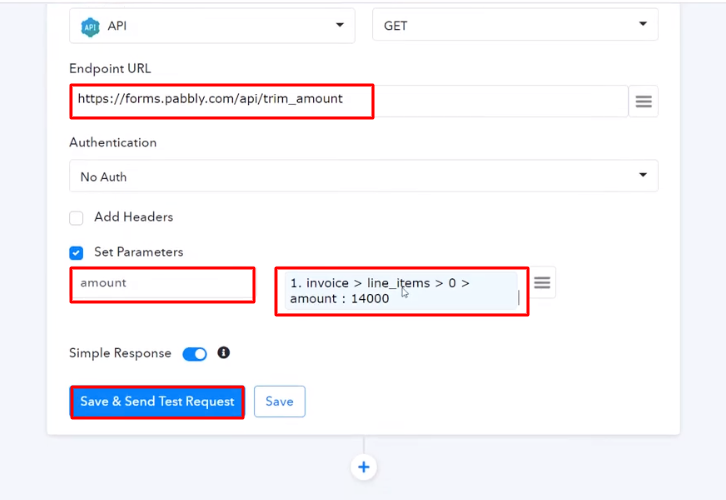
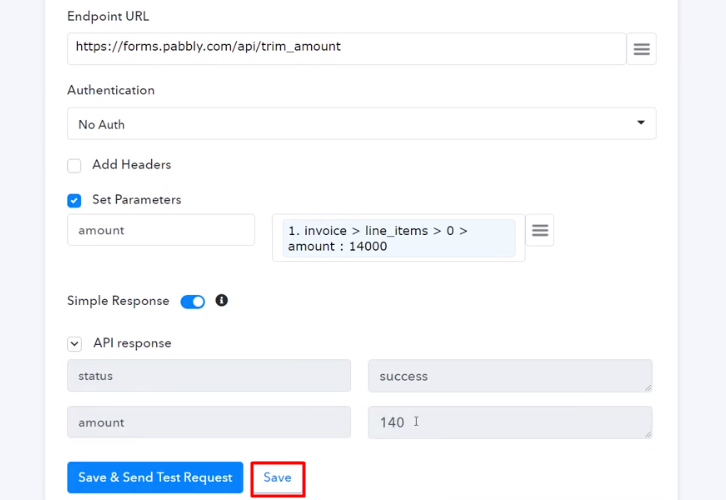
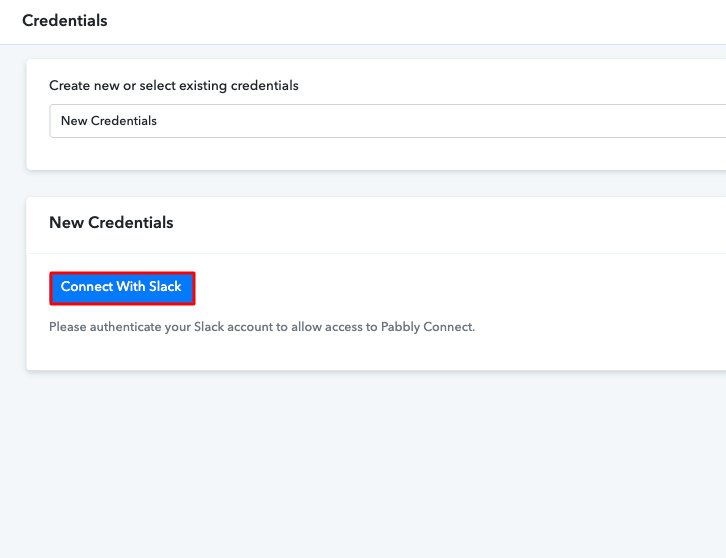
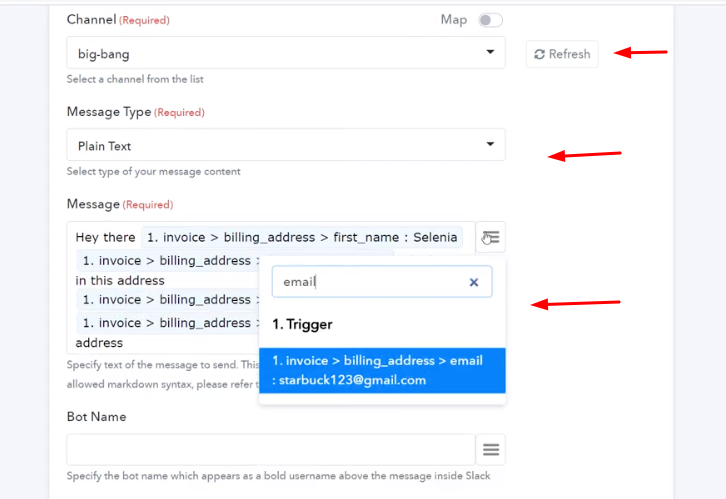
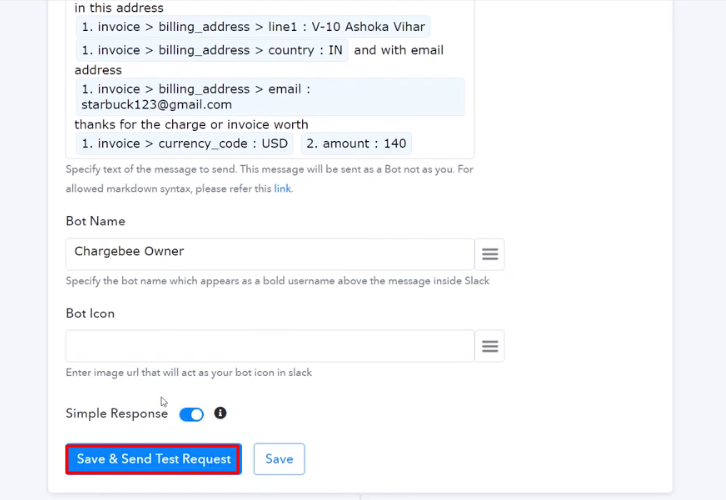
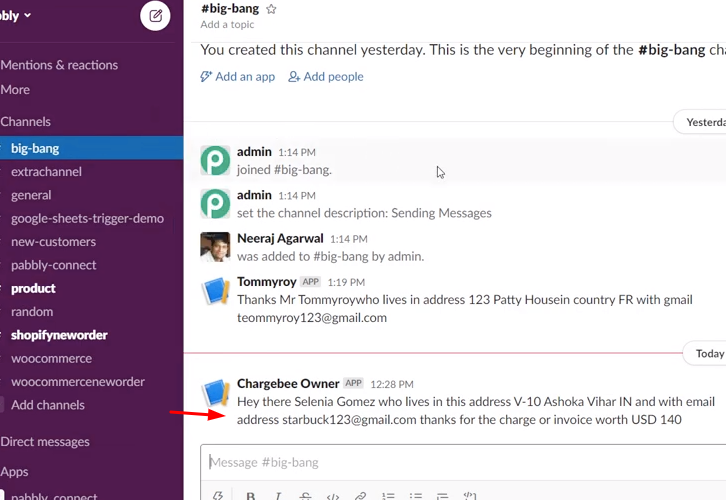
Next, after logging into the account, click on the ‘Access Now’ button of the Connect section in the dashboard. Start with creating a workflow for your project by clicking on the ‘Create Workflow’ button. Now, you need to name the workflow just like in the above-shown image. I named the workflow as ‘Chargebee to Slack’, you can obviously name the workflow as per your requirements. As soon as you are done with naming your workflow, you will have to select the application you want to integrate. Pabbly Connect allows you to integrate unlimited premium applications, create your free account now. Now, you have to select the application that you want to integrate. In this case, we are choosing ‘Chargebee’ for integration. In the method section, select ‘New Invoice’. After selecting the application, now you have to click on the ‘Connect with Chargebee’ button just like in the above-shown image to take further the integration process. To connect Chargebee with Pabbly Connect, you have to add the API key and site name in the software. For that, you have to log in to your Chargebee account. After logging into your Chargebee account, click on the ‘Settings’ option, and then click on ‘Configure Chargebee’. Next, you need to scroll down and click on the ‘API Keys’ option. Now, you have to simply copy the given API key or you can also generate a new API key by clicking on the ‘Add API Key’ button. After copying the API key, now you have to paste it into the Pabbly Connect dashboard. You can find the Chargebee site name from the subdomain of your Chargebee account. Once, you have pasted all the required details, then hit the ‘Save’ button. To check this integration, we have to send a test request and for that, we will create a dummy invoice on Chargebee. To add an invoice, first, you have to click on the ‘Customers’ option in your Chargebee dashboard then select any customer for whom you want to create an invoice. Now, scroll down and click on the ‘Add Card’ option to add card details. In this step, now you have to add all the required details of the card through which you want to make the payment like name, card number, CVV, etc. After adding all the details hit the ‘Add Credit Card’ button. Here, you have to click on the ‘Add Charge’ option given on the side of the screen and then add all the details like amount, service period, description, etc and then click on the ‘Submit button. After adding a new invoice in Chargebee, now we will capture the data by clicking on the ‘Save & Send Test Request’ button in Pabbly Connect. Once you click on the ‘Save & Send Test Request’ in Pabbly Connect, the subscriber info will appear on the Pabbly Connect dashboard. Then, click on the ‘Save’ option. To make this Chargebee-Slack integration work, you have to choose two actions for your trigger. The first action of API to convert the money amount into a proper decimal system and the second action of Slack to send messages. Now in this step, click on the + button below and choose the application that you want to integrate. Here we will choose ‘API’ to integrate and in the method section select ‘GET’. Next, you need to add the ‘https://forms.pabbly.com/api/trim_amount’ URL in the ‘Endpoint URL’ section to trim the amount and click on the ‘Set Parameters’ option to map the amount. After making all the changes, hit the ‘Save & Send Test Request’ button. As we can see that the amount is converted into a proper decimal system. Now, hit the ‘Save’ button to save the API response. Now in this step, click on the + button below and choose the application that you want to integrate. Here we will choose ‘Slack’ to integrate and in the method section select ‘Send Channel Message (without Image)’. After choosing the application click on the ‘Connect with Slack’ button to move forward. To connect Slack to Pabbly Connect, you have to authorize your Slack account. For this, you have to log in to your Slack account. When you click on the ‘Connect’ button, a window will slide in from the right, here you have to again click on the ‘Connect with Slack’ button and then choose the account through which you want to log into your Slack account. After connecting with your Slack account, map all the fields quickly like channel, message, etc. Once you are done adding up all field data click on the ‘Save & Send Test Request’ button. Here, you can see that our integration was successful and the message has been sent from the Slack channel automatically on the creation of a new invoice in Chargebee. Now, whenever there will be any new invoice created in your Chargebee account, the message will be automatically sent from your Slack account. In the end, this was our take on ‘How to Send Slack Channel Message when Chargebee Invoice Created‘. Now that you have understood how Pabbly Connect works and how it can help you in saving a lot of time and effort, you can integrate multiple applications easily. You just have to follow the above mentioned simple procedure and once the integration is done, then Pabbly Connect will do the rest for you. Thus, go ahead and signup for free to enjoy this amazing automation and integration software. For further queries, please drop your comments below. We will get back to you as soon as possible.Step 2: Access Pabbly Connect

Step 3: Workflow for Chargebee with Slack Integration
(a) Start with a New Workflow

(b) Name the Workflow
Step 4: Setting Trigger for Chargebee with Slack Integration
(a) Select Application you Want to Integrate
(b) Click on Connect Button
Step 5: Connecting Chargebee to Pabbly Connect
(a) Click on Chargebee Settings
(b) Click on the API Keys
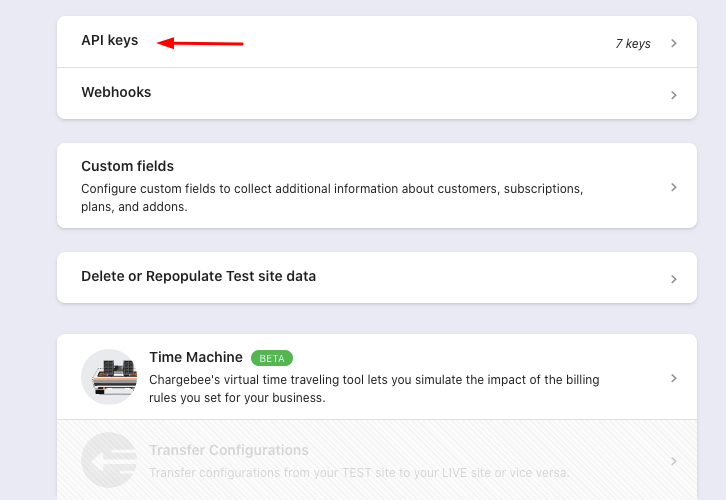
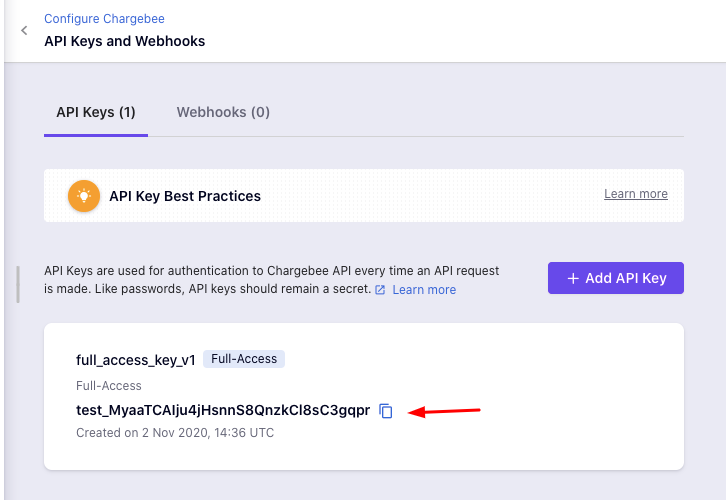
(c) Copy the API Key
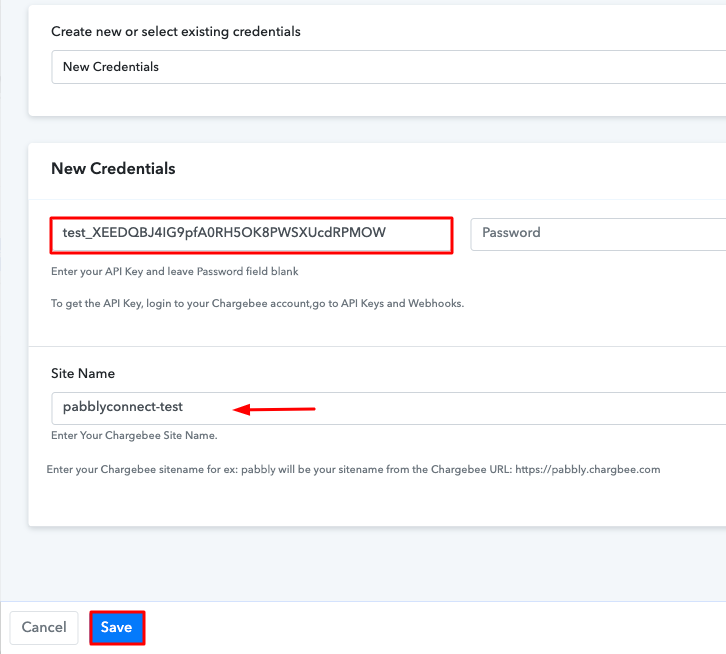
(d) Paste the API Key
Step 6: Create a Sample Invoice
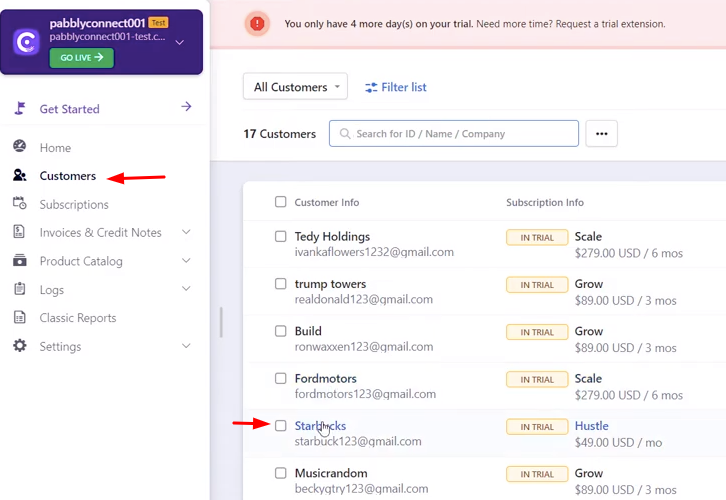
(a) Click on Customers
(b) Click on Add Card
(c) Add Card Details
(d) Add Charge
(e) Send a Test Request
Step 7: Test the Response in Pabbly Connect Dashboard
Step 8: Setting Actions for Chargebee with Slack Integration
(a) Select Application you Want to Integrate
(b) Trim Amount
(c) Save the API Response
(d) Select Application you Want to Integrate
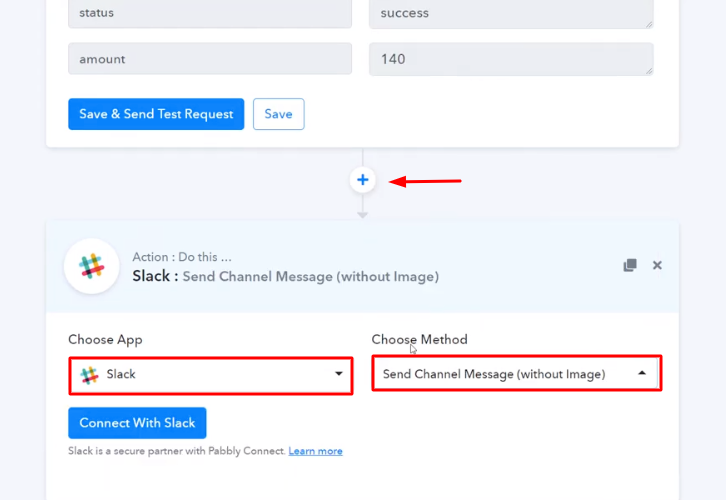
(e) Click the Connect Button
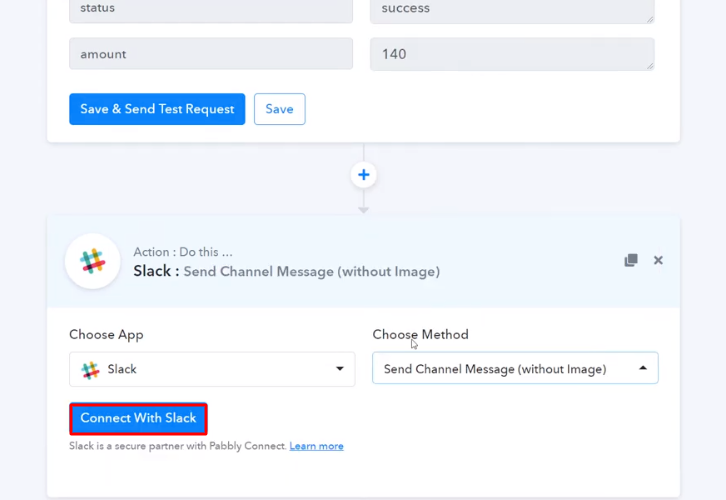
Step 9: Connecting Slack to Pabbly Connect
(a) Authorize Account
(b) Map the Fields
(c) Save and Send Test Request
Step 10: Check Response in Slack Dashboard
Conclusion –
You May Also Like to Read –


