In this blog, we are going to walk you through the step by step procedure to save the newly added Streak Boxes to Google Sheets automatically. As we sometimes need to use the data collected from CRM to a spreadsheet and further use it for multiple marketing as well as engagement purposes.
We’ll be integrating Streak Boxes with Google Sheets using Pabbly Connect to automatically save the customer in spreadsheet rows. Pabbly Connect allows you to connect two or more software to share data between them in real-time.
We’ll set up a trigger on the Streak’s ‘New Box’ event and its respective action for saving the box’s detail on Google Sheets rows.
Besides, Pabbly Connect also allows you to use routers, filters, formatters as well as set up instant triggers to design unlimited workflows. Additionally, it also provides many advanced features like multi-step calls, integration with unlimited premium apps etc. All in all, you can make use of many features to automate your tasks and design excellent workflows.
Why Choose This Method Of Integration?
In contrast with other integration services-
- Pabbly Connect does not charge you for its in-built apps like filters, Iterator, Router, Data transformer and more
- Create “Unlimited Workflows” and smoothly define multiple tasks for each action
- As compared to other services which offer 750 tasks at $24.99, Pabbly Connect proffers 50000 tasks in the starter plan of $29 itself
- Unlike Zapier, there’s no restriction on features. Get access to advanced features even in the basic plan
- Try before you buy! Before spending your money, you can actually signup & try out the working of Pabbly Connect for FREE
It enables you to design as well as automate the workflow to add the recently added boxes on Streak Boxes to Google Sheets rows in just a minute interval. So, save your time and automate your tasks, access all Pabbly Connect features without any restriction even in the free plan.
Now, let’s dig in the step by step procedure to integrate Streak Boxes to Google Sheets and automatically save the newly added contacts within sheets rows.
Step 1: Sign up to Pabbly Connect

Visit the official website of Pabbly Connect & then hit the ‘Sign-Up Free‘ button. Next, on the registration page signup using an existing Google account or manually fill in the form to get into the system.
Step 2: Access Pabbly Connect

After signing up successfully, click the ‘Access Now’ button of the software ‘Connect’ Pabbly application.
Step 3: Workflow for Streak Boxes with Google Sheets Integration
(a) Start with a New Workflow

Start with creating a workflow to save new Streak Boxes contacts to Google Sheets as rows and to do this strike the ‘Create New Workflow’ button.
(b) Name the Workflow
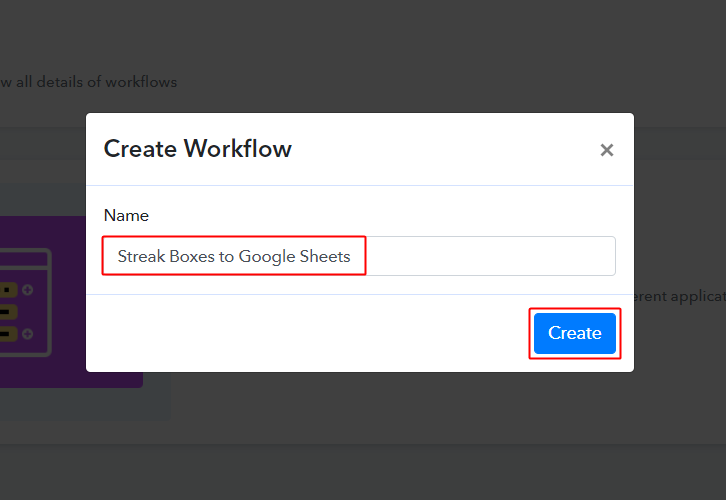
Now, name the workflow as per your need (for instance: Streak Boxes to Google Sheets etc) and push the ‘Save’ button.
Step 4: Setting Trigger for Streak Boxes – Google Sheets Integration
To automatically add new Streak Boxes contacts to Google Sheets as rows whenever a new contact is added, you’ll need to set-up a trigger on ‘New Boxes’ event and its respective action to add the customer details in your Google Sheets as rows.
(a) Select Application you want to integrate
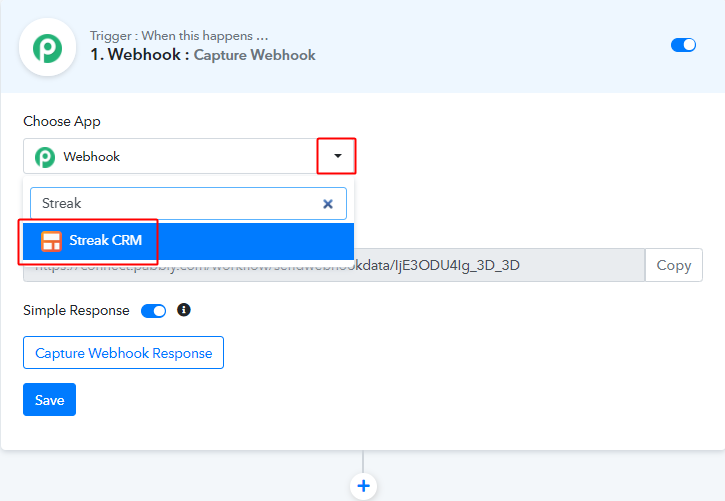
When you hit the save button to create a workflow, a trigger window will open next.
You’ll need to select the ‘Streak CRM’ option from the ‘Choose App’ field drop-down options.
(b) Connect with Streak CRM
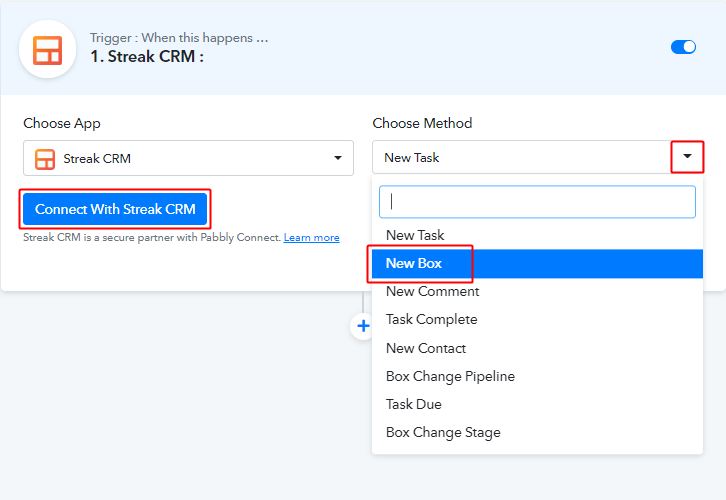
Select the method in here to be ‘New Box’ & copy the ‘Webhook URL’ by clicking the ‘Copy’ button on this page.
Up to this point, we are half-way done with the Streak to Google Sheets integration’s trigger. And now, the system is asking for an API key, we’ll need to paste the Streak API key.
Step 5: Connecting Streak Boxes to Pabbly Connect
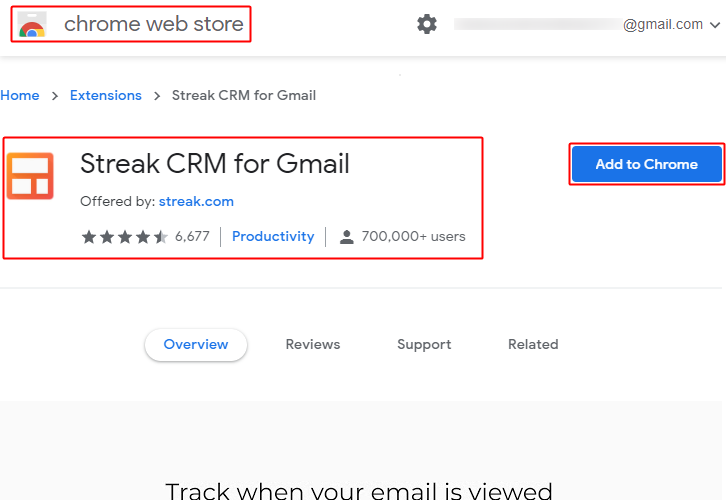
To connect your Streak account and Pabbly Connect. First, install the Streak chrome extension and then sign-in into your Gmail account.
(a) Add Streak Chrome Extension
Install the Streak chrome extention and then sign-in your Gmail account.
Complete the integration by allowing Streak to connect with your Gmail.
(b) Go to Streak Integrations
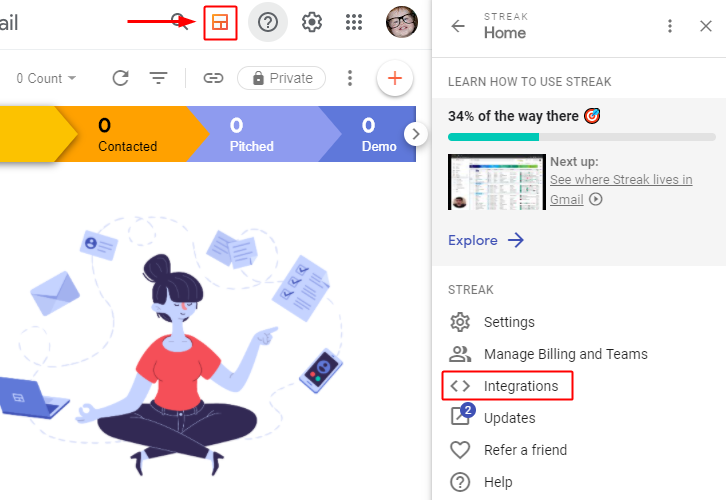
Click on the ‘Streak Icon’ present on your Gmail and then select the ‘Integration’ option from the menu that opens on the right.
(c) Get the API Key

Now, tick the ‘Get API Key’ button, present in the Steak API head.
(d) Copy the API Key
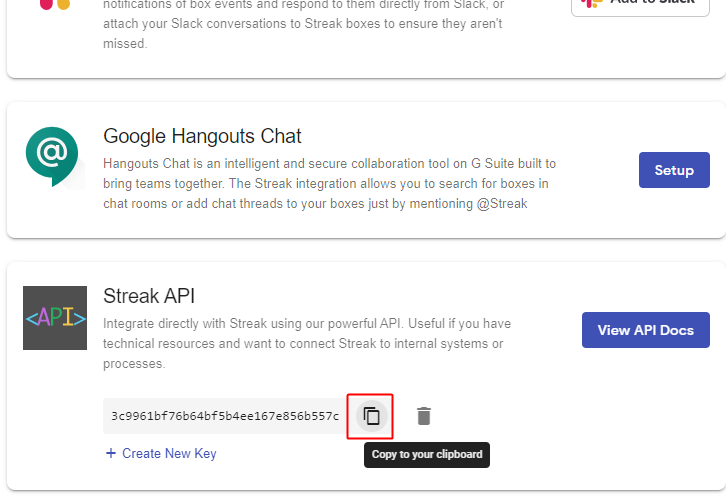
The same field will start showing the Streak API Key for your account. Simply, click the copy icon button to copy the API Key.
(e) Paste API Key
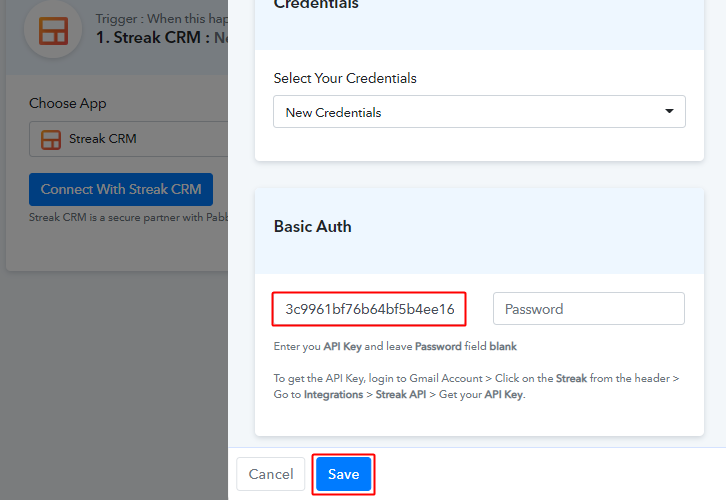
Now, paste the copied API key from Streak to Pabbly Connect trigger and then hit the ‘Save’ button.
(f) Select Pipeline and Send Test Request
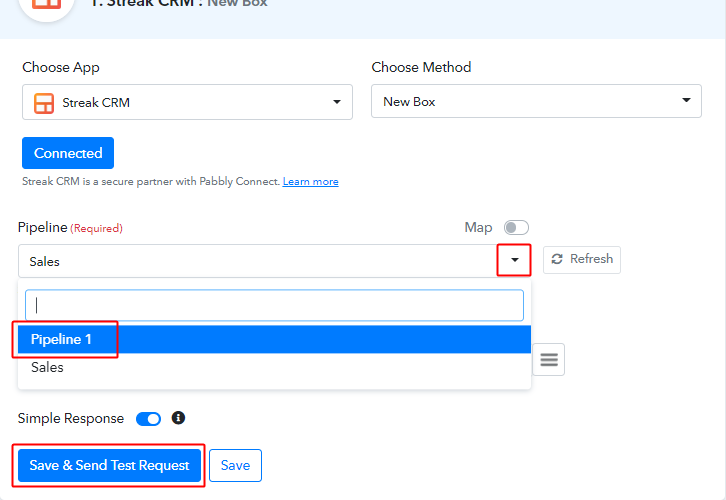
Select the Pipeline that you created for the purpose and hit ‘Save& Send TestRequest’ button.
(g) Check the Trigger Connection Response

Check the connection API response.
Step 6: Test the Trigger Response in Pabbly Connect Dashboard
As we can see, we are done setting up the trigger to save new Streak Boxesto Google Sheets as rows. So now, let’s just test the trigger by making a test booking on Streak trigger set-up.
(a) Capture Webhook Response
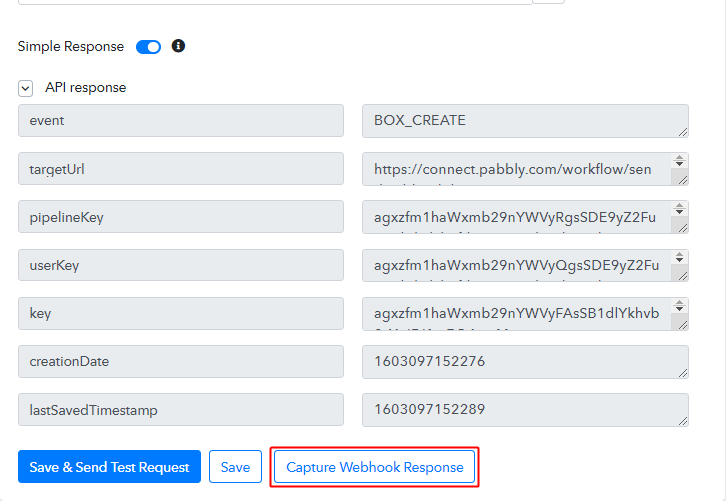
To test the trigger, first, hit the ‘Capture Webhook Response’ button on the Pabbly Connect trigger window.
(b) Go to the Selected Pipeline & Click Add Box
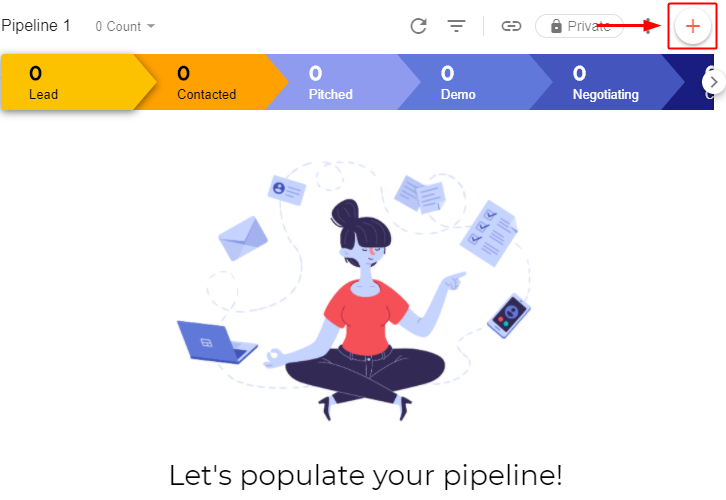
Now, go to your selected pipeline that you just connected here with the trigger. And click the plus ‘+’ button there.
(c) Name and Add Box
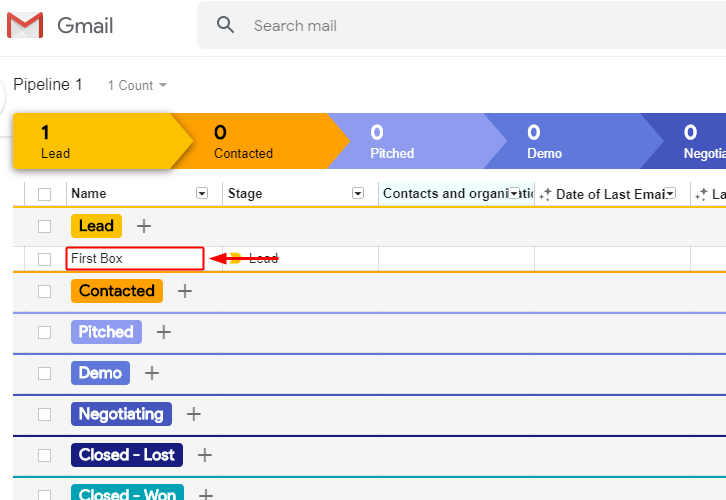
Name and add a box in the selected pipeline.
(d) Check the Trigger API Response
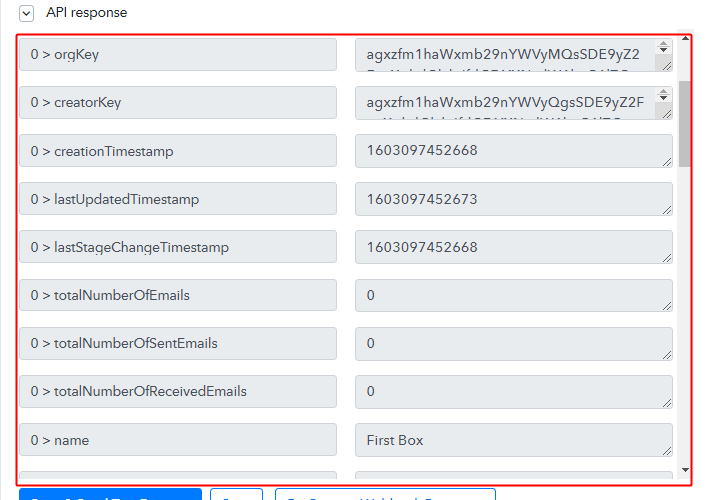
Check the captured trigger response in the Pabbly Connect trigger window. You can see all the data fed in the created box details in the trigger response.
Step 7: Setting Action for Streak – Google Sheets Integration
As we can see the response that we got of the Streak trigger contain the newly added box details. Now, we will simply forward this captures data to Google Sheet rows.
(a) Create Google Sheets
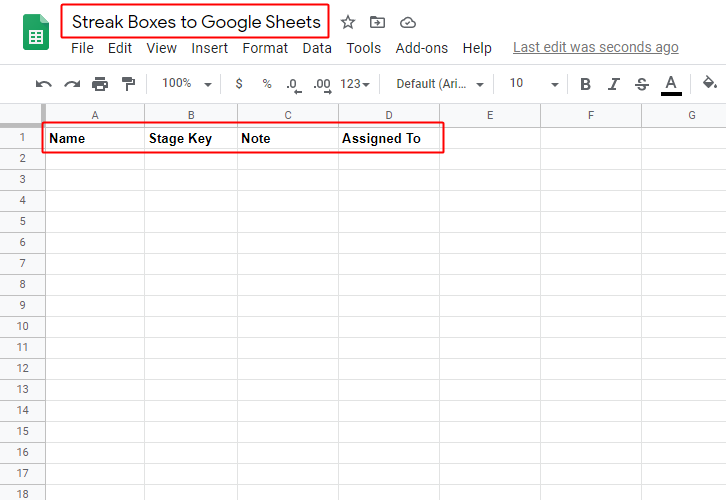
To save the recently added box within a Google Sheet first, create a spreadsheet within your Google Account.
And also name the columns.
(b) Select Application You Want to Integrate
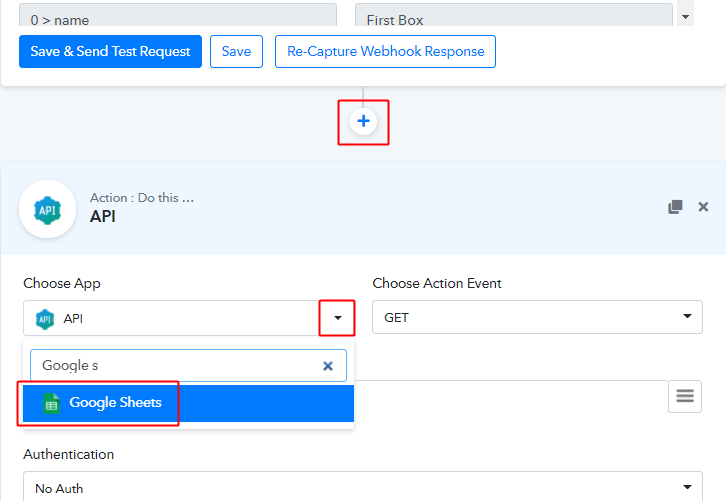
Click the plus button next to your Streak trigger window.
And in the action window that opens next, choose the ‘Google Sheets’ app from the ‘Choose App’ field’s drop-down menu.
(b) Connect with Google Sheets
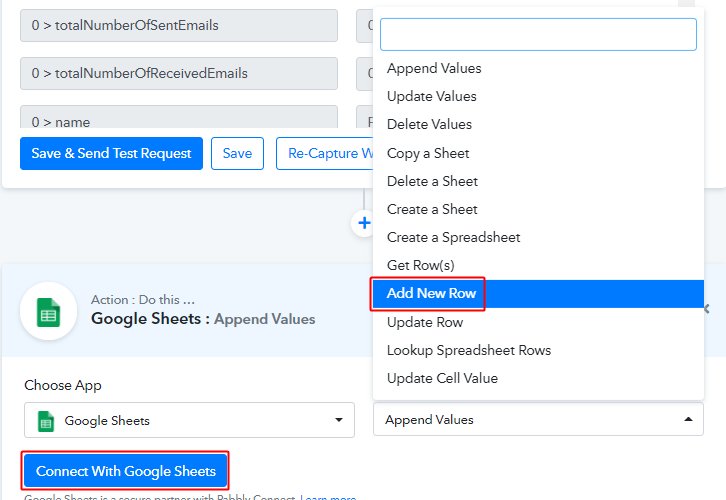
Select the method in here as ‘Add New Row’ and then click the ‘Connect with Google Sheets’ button.
(c) Authorize Google Account
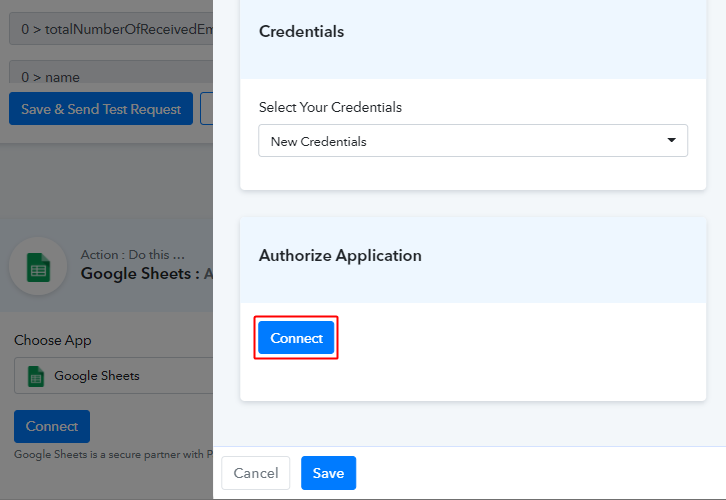
In the next window that slides in from the right click on the ‘Connect’ button. And then complete the authorization by allowing the connection between your Google account and Pabbly Connect.
(d) Choose the Spreadsheet & Sheet
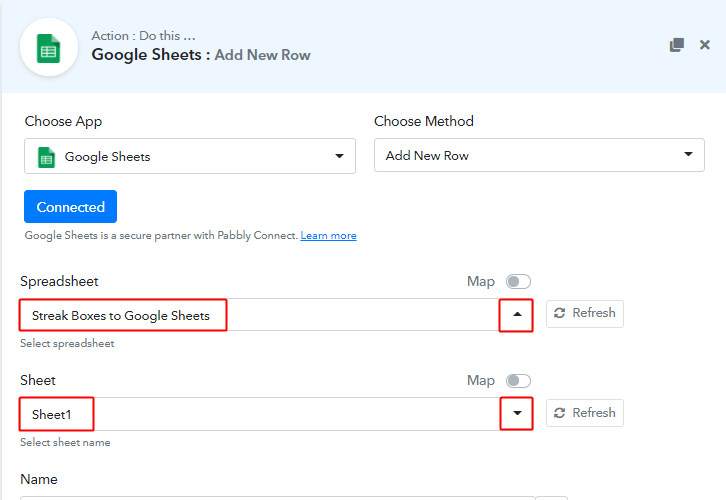
Pick the sheet that you’ve created for this purpose as well as the sheet within for the exact location.
(e) Map Values
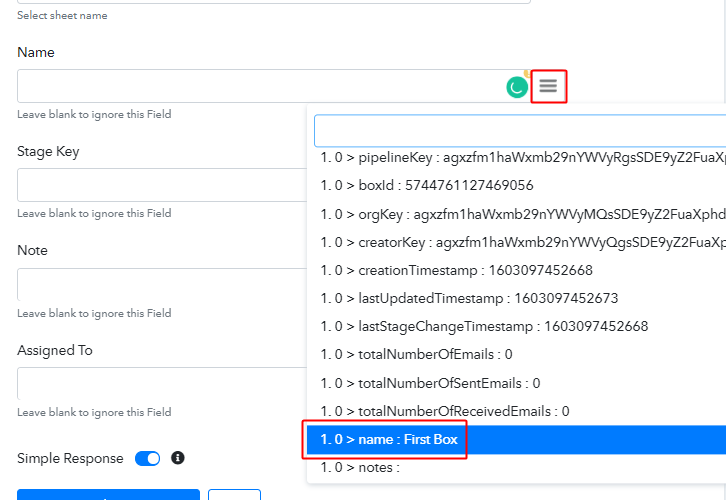
Next, you’ll need to map the trigger API response values that you got from Streak with the Google Sheets columns.
(f) Save & Send Test Request
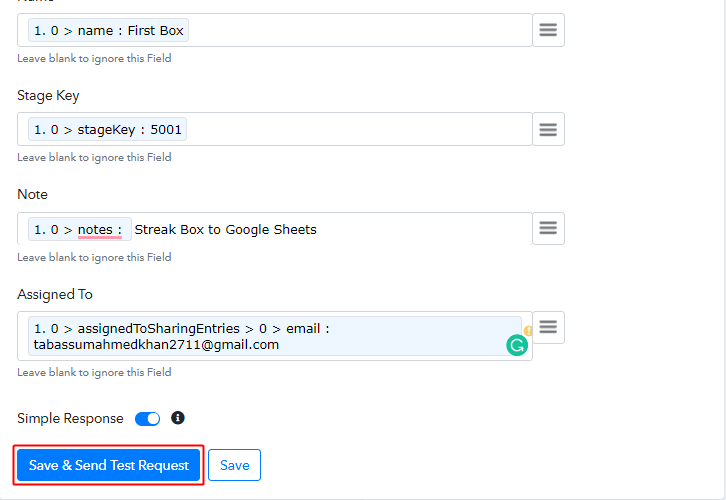
After mapping all the necessary fields, click on the ‘Save & Send Test Request’ button.
Step 8: Check the Action’s Response
(a) Check the Action API’s Response
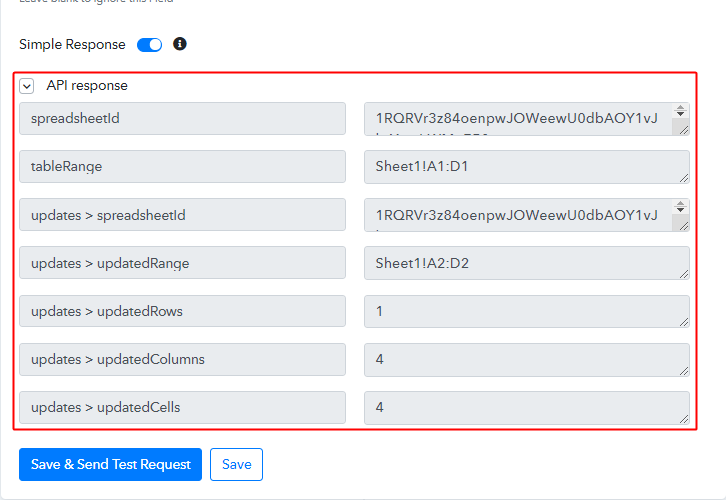
You can check the response of your API in the action window.
(b) Check the Contact Entry in Google Sheets

Also, you can check the entry of a new done in your connected Google Sheets account.
Step 9: Save the Workflow
(a) Save the Action API’s Response
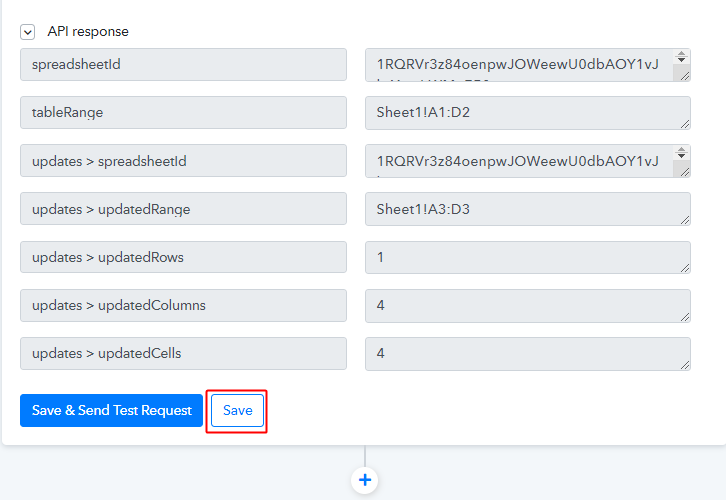
Save the action API’s response by hitting the ‘Save’ button at the bottom of the action API’s response.
(b) Save the Workflow
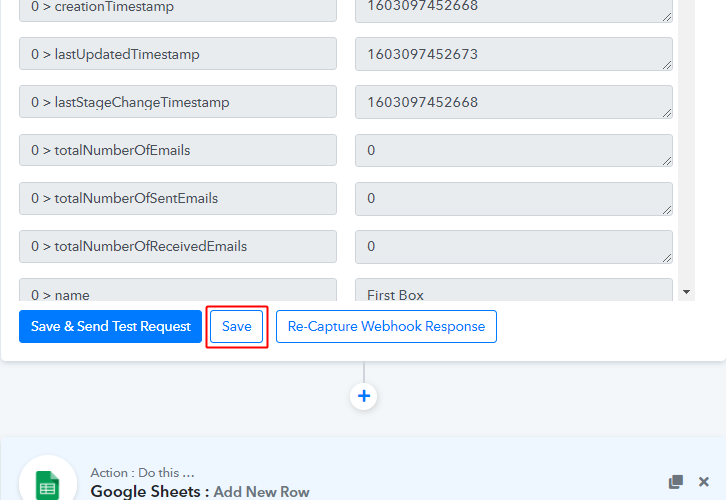
As we can see the workflow is working perfectly. So, simply save the webhook by clicking the save button in the trigger window.
Wind-Up
Well, this is all about ‘How to save new Streak Boxes to Google Sheets’. Consequently, after completing the step by step procedure, you will end up saving the Streak box details on Google Sheets. More importantly, this process is very simple & you don’t need any coding knowledge to follow the steps.
You can try Pabbly Connect for FREE.
For further questions, comment below.


