Tired of searching for a way to create Salesforce Lead from new BigCommerce order automatically? If yes! Then here I’m going to give you a step-by-step guide on how to automate the tasks using Pabbly Connect.
Well, as we already know that there is no direct integration possible between these two services. Therefore, we’ll be using a third-party software i.e, Pabbly Connect to integrate BigCommerce to Salesforce in real-time.
So basically, Pabbly Connect is an integration & automation service which enables you to share data between multiple applications.
Furthermore, this would be just a single-time setup & after this, the workflow will take care of the rest. Besides, you don’t have to be a developer for that, even a newbie can use it efficiently.
Why Choose This Method Of Integration?
In contrast with other integration services-
- Pabbly Connect does not charge you for its in-built apps like filters, Iterator, Router, Data transformer, and more
- Create “Unlimited Workflows” and smoothly define multiple tasks for each action
- As compared to other services which offer 750 tasks at $24.99, Pabbly Connect offers 50000 tasks in the starter plan of $29 itself
- Unlike Zapier, there’s no restriction on features. Get access to advanced features even in the basic plan
- Try before you buy! Before spending your money, you can actually signup & try out the working of Pabbly Connect for FREE
Before we begin the procedure, let’s learn a bit about the services. BigCommerce is considered an open SaaS platform provider and a growing headless commerce provider based on the low total cost of ownership and highly flexible APIs.
Whereas, Salesforce is a cloud-based software company that provides CRM service and also a complementary suite of enterprise applications focused on customer service, marketing automation, analytics, etc.
Nonetheless, once you’re done setting up this workflow. Your customers will get automatically listed in Salesforce as lead, whenever there is a new order placed on BigCommerce. Plus, we’ve embedded a video tutorial for this integration. So, have a look at it by yourself –
Moreover, we have also embedded the template for this integration to help you begin your journey instantly. You can just click on the image available below to get started. Furthermore, visit Marketplace & look for more integrations & apps.

Hence, let’s begin the BigCommerce and Salesforce integration using Pabbly Connect in real-time.
Step 1: Sign up to Pabbly Connect

We will start the process to create Salesforce lead from new BigCommerce order by clicking on the ‘Sign Up Free’ icon on the Pabbly Connect home page. Next, either manually fill-up all the details or sign up using your Gmail account.
Try Pabbly Connect for FREE
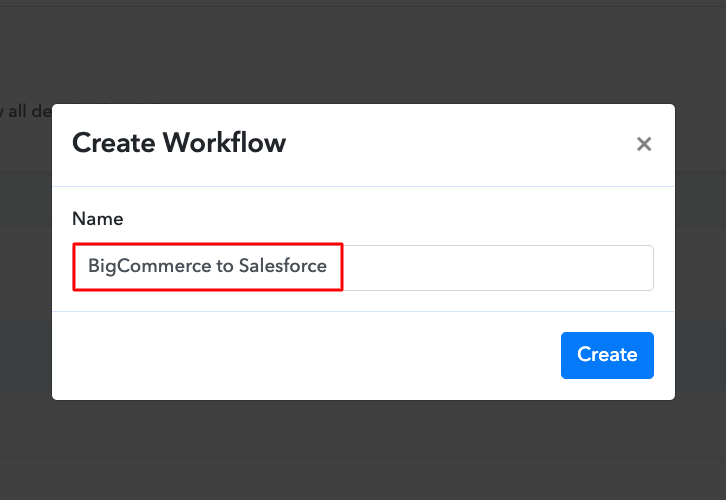
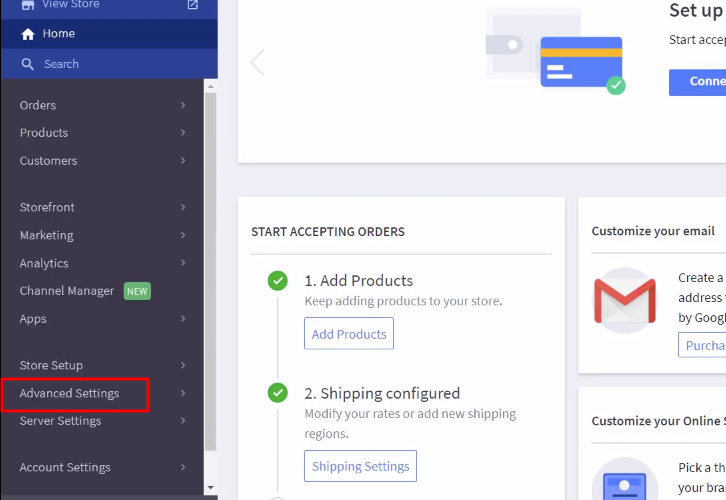
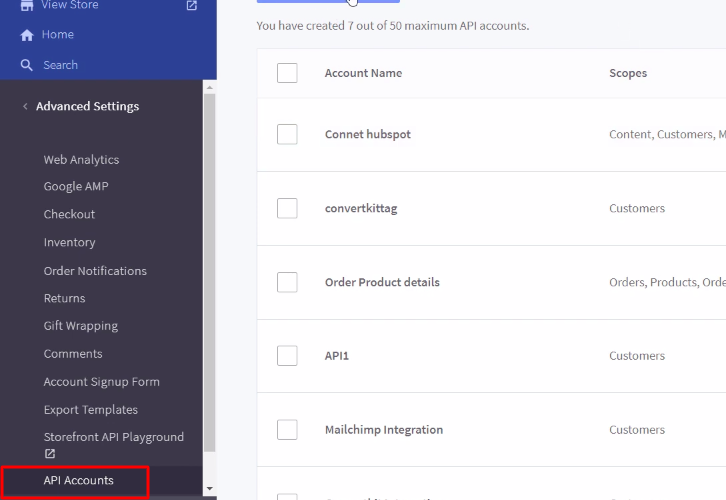
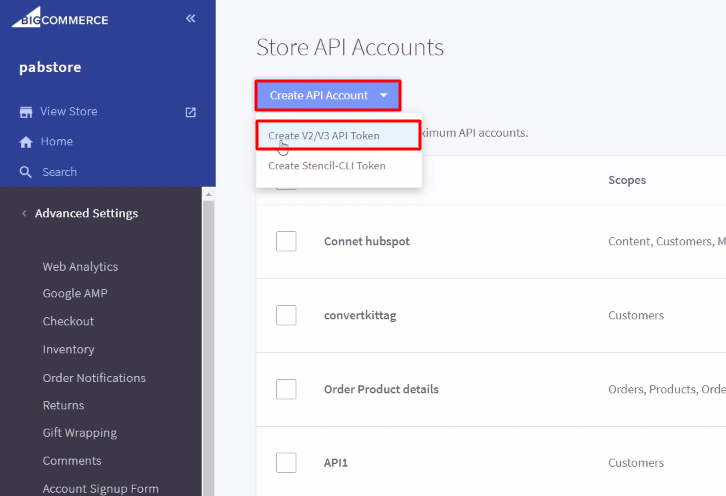
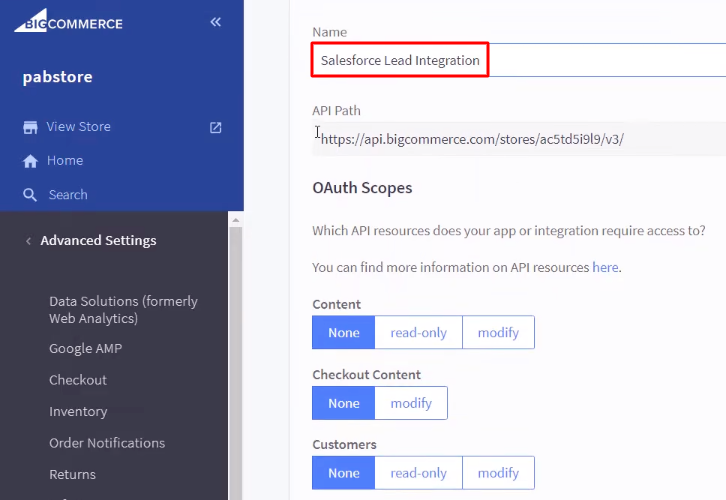
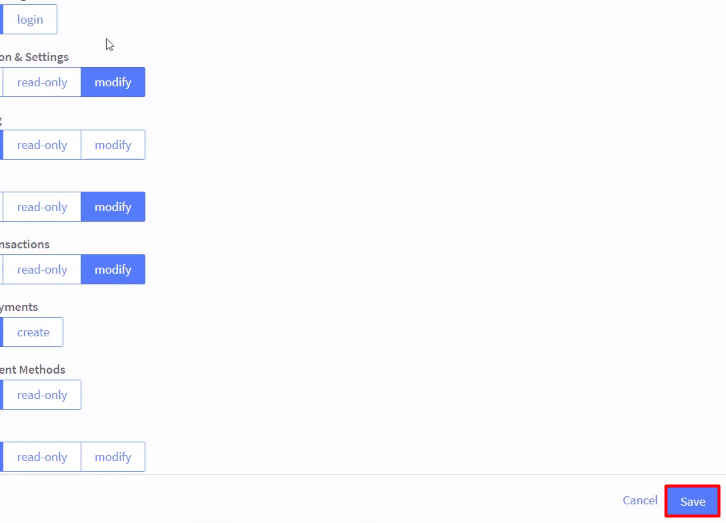
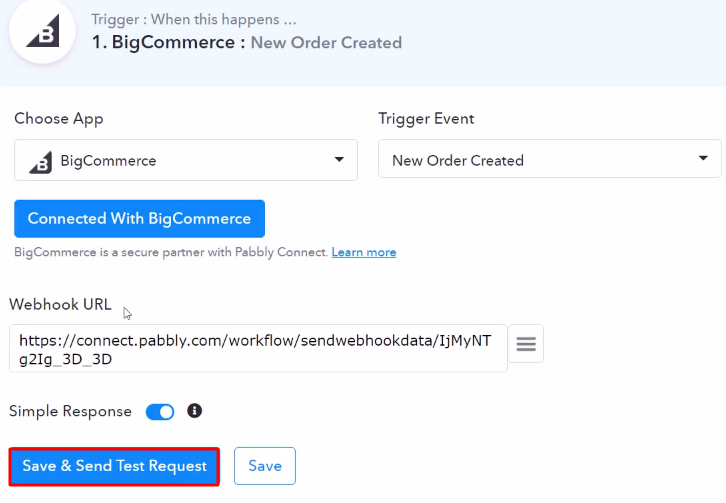
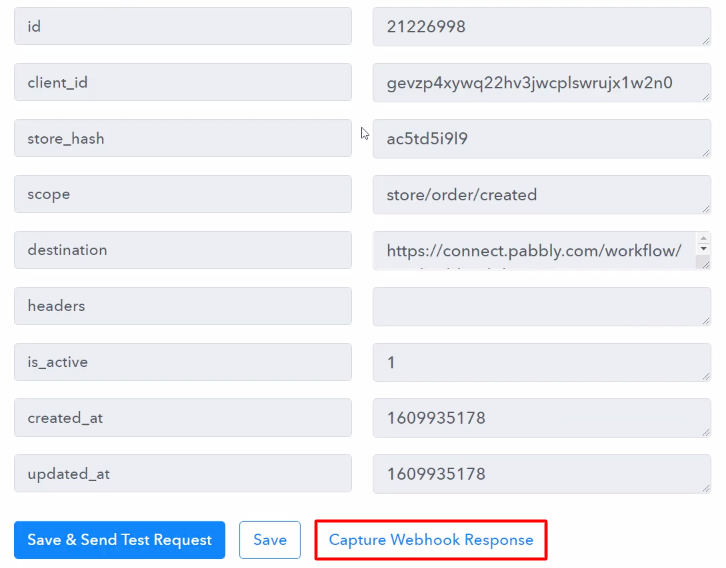
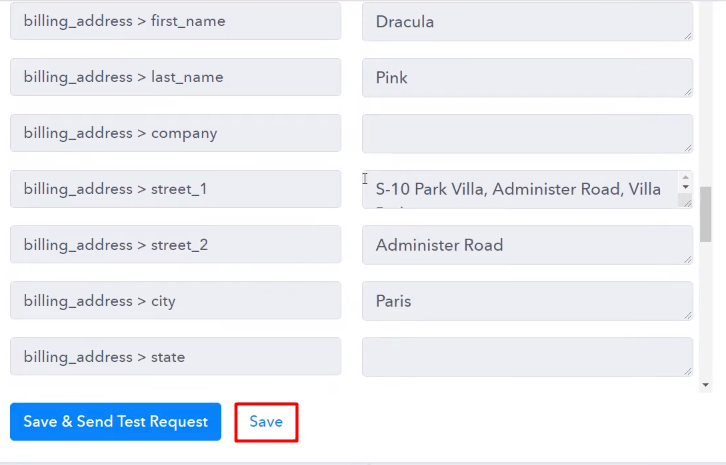
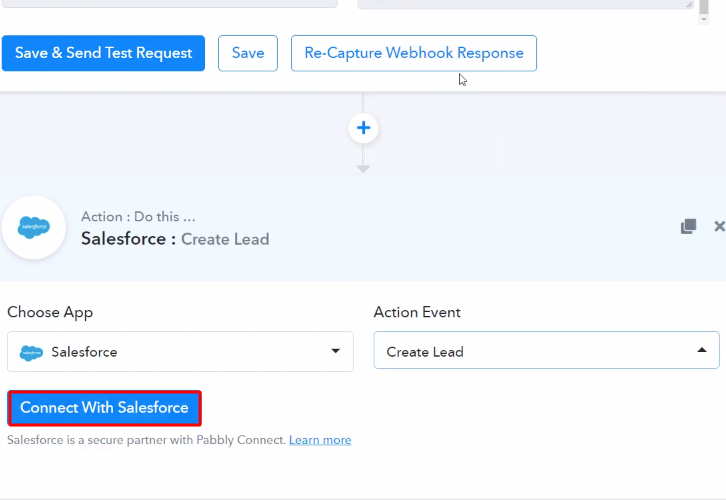
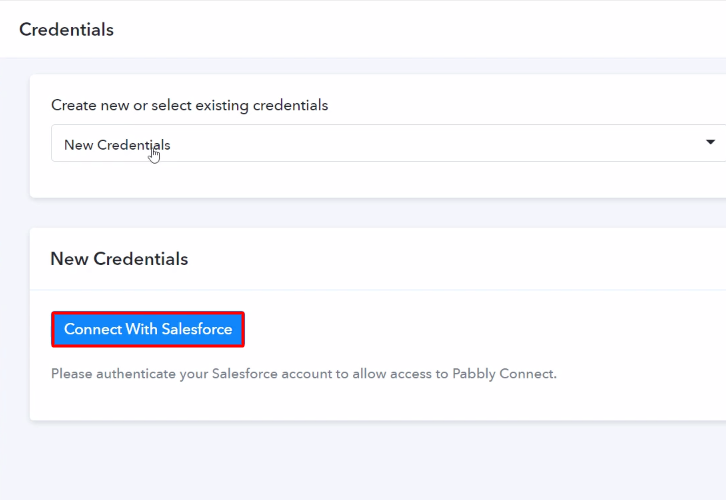
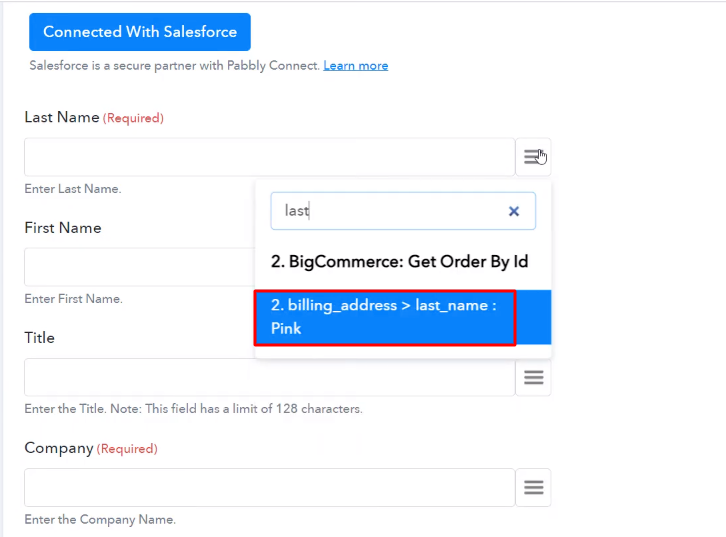
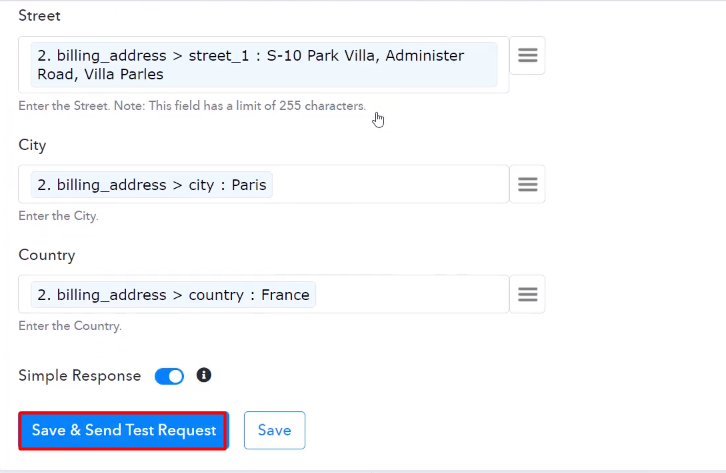
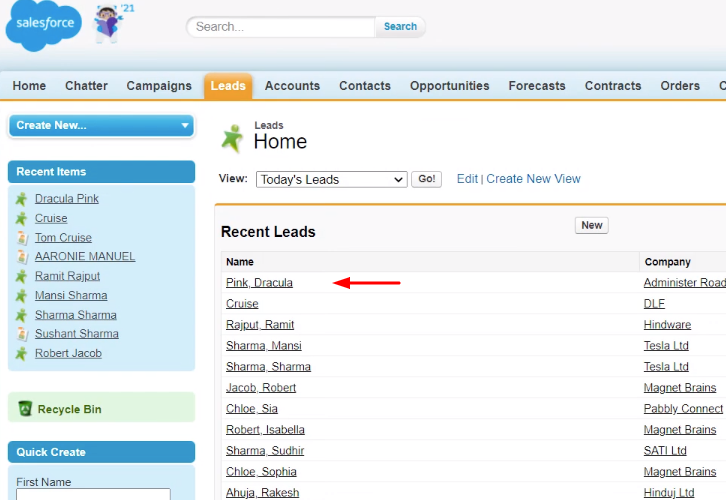
Subsequently, after logging into the account, click on the ‘Access Now’ button of the Connect section in the dashboard. Start with creating a workflow for your project by clicking on the ‘Create Workflow’ button. Now, you need to name the workflow just like in the above-shown image. I named the workflow ‘BigCommerce to Salesforce’, you can obviously name the workflow as per your requirements. As soon as you are done naming your workflow, you will have to select the application you want to integrate. Pabbly Connect allows you to connect unlimited premium apps, create your free account now. Now, you have to select the application that you want to integrate. In this case, we are choosing ‘BigCommerce’ for integration. In the method section, select ‘New Order Created’. The next step is to click on the ‘Connect with BigCommerce’ button on the dashboard just like in the above-shown image. To connect BigCommerce to Pabbly Connect, you have to add the client ID and access token from your BigCommerce account to Pabbly Connect. For that, you have to log in to your BigCommerce account. After login into the BigCommerce account, go to the ‘Advanced Settings’ section on the bottom of the menu. Next, you have to click on the ‘API Accounts’ option. Now, click on the ‘Create API Accounts’ button then select the ‘Create V2/V3 API Token’ option. Name the API account according to your requirements to move forward. After making changes in all the settings, click on the ‘Save’ button. Simply copy the appearing credentials from the BigCommerce dashboard. Just paste the copied credentials in Pabbly Connect and hit the ‘Save’ button. Now, we need to set this webhook URL in your BigCommerce account and to do that, we will hit the ‘Save & Send Test Request’ button. To check this integration, we will make a sample purchase in BigCommerce to capture the data. Now, to capture the data from BigCommerce, click on the ‘Capture Webhook Response’ button in Pabbly Connect. Next, select any of the listed products in your BigCommerce store and hit the ‘Add to Cart’ button. The next step is to click on the ‘Proceed to Checkout’ button. In this step, now you have to add all the required details of the customer like email ID, address, etc and hit the ‘Continue’ button. Now, add your credit/debit card details and hit the ‘Place Order’ button. Once you click on the ‘Place Order’ in BigCommerce, the order info will appear on the Pabbly Connect dashboard. Then, click on the ‘Save’ button. To make this BigCommerce-Salesforce integration work, you have to choose two actions for your trigger. The first action is of BigCommerce to acquire the order details from the order ID, and the second action is of Salesforce to add the lead. Now in this step, click on the + button below and choose the application that you want to integrate. Here we will choose ‘BigCommerce’ to integrate and in the method section select ‘Get Order By ID’. After choosing the application click on the ‘Connect with BigCommerce’ button to move forward. Thereafter clicking on the ‘Connect’ button, again we have to add the credentials that we pasted in the trigger section and hit the ‘Save’ button to connect with BigCommerce. Next, map the order ID that we got in the trigger section of this integration and click on the ‘Save & Send Test Request’ button. Here, we can see that the order details are fetched, now hit the ‘Save’ button to move forward. Now in this step, click on the + button below and choose the application that you want to integrate. Here we have chosen ‘Salesforce’ to integrate and in the method section select ‘Create Lead’. After choosing the application click on the ‘Connect with Salesforce’ button to move forward. To connect Salesforce to Pabbly Connect, you have to authorize the application. For this, you have to log in to your Salesforce account. When we click on connect button, a window will slide in from the right side, here we will again click on the ‘Connect with Salesforce’ button and grant permission to integrate Salesforce with Pabbly Connect. After connecting with your Salesforce account, map all the fields quickly like name, email, etc. Once you are done adding up all field data click on the ‘Save & Send Test Request’ button. Finally, you can check the lead’s entry in your Salesforce account. So now you know how to create Salesforce lead from new BigCommerce order using Pabbly Connect. To sum up, this was all about ‘How to Create Salesforce Lead from New BigCommerce Order’. Consequently, after completing the step-by-step procedure, you will end up auto-creating the Salesforce lead from the newly placed BigCommerce orders. Meanwhile, you can opt for Pabbly Connect for FREE with all its premium features. Also, comment below your queries and suggestions.Step 2: Access Pabbly Connect

Step 3: Workflow for BigCommerce to Salesforce Integration
(a) Start with a New Workflow

(b) Name the Workflow
Step 4: Setting Trigger for BigCommerce to Salesforce Integration
(a) Select Application you Want to Integrate
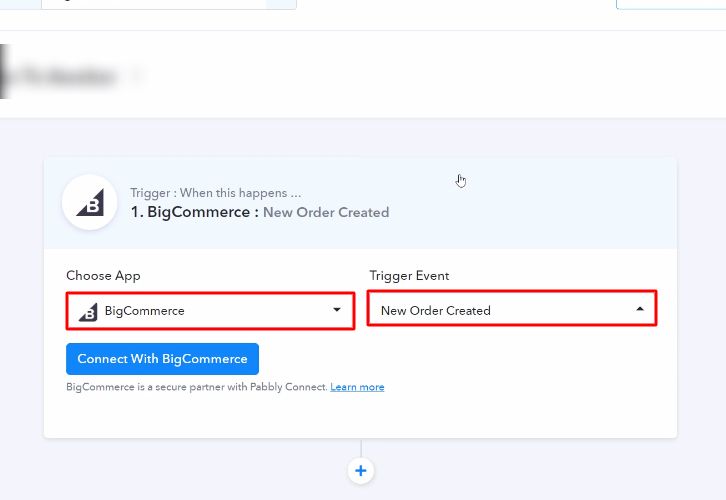
(b) Click the Connect Button

Step 5: Connecting BigCommerce to Pabbly Connect
(a) Click on Advanced Settings
(b) Click on API Accounts
(c) Click on Create API Accounts
(d) Name the API Account
(e) Save the API Account
(f) Copy the Credentials
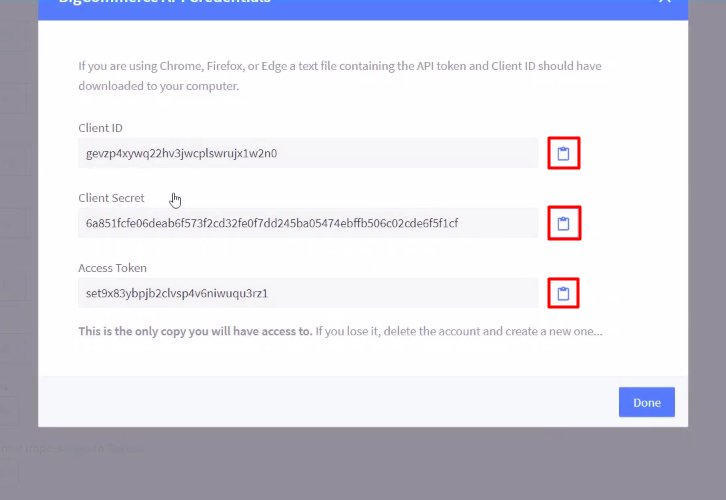
(g) Paste the Credentials
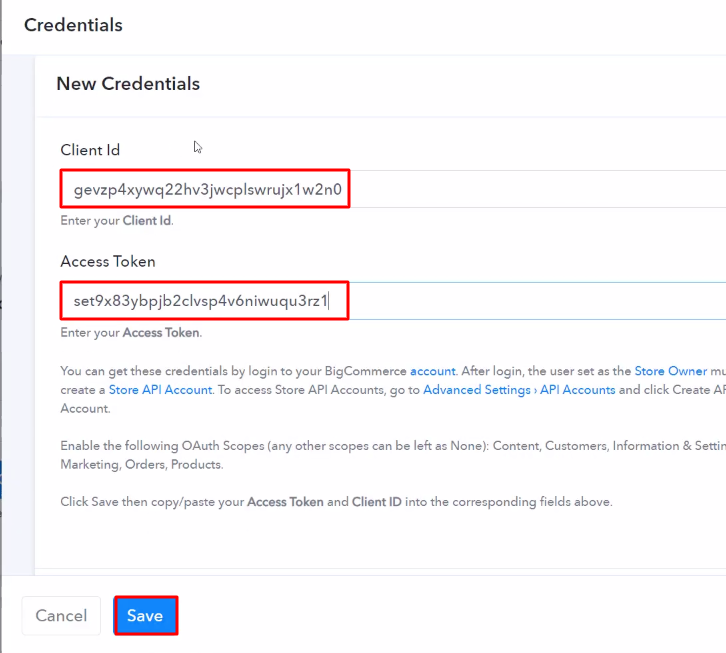
(h) Send Test Request
Step 6: Make a Test Purchase
(a) Capture the Webhook Response
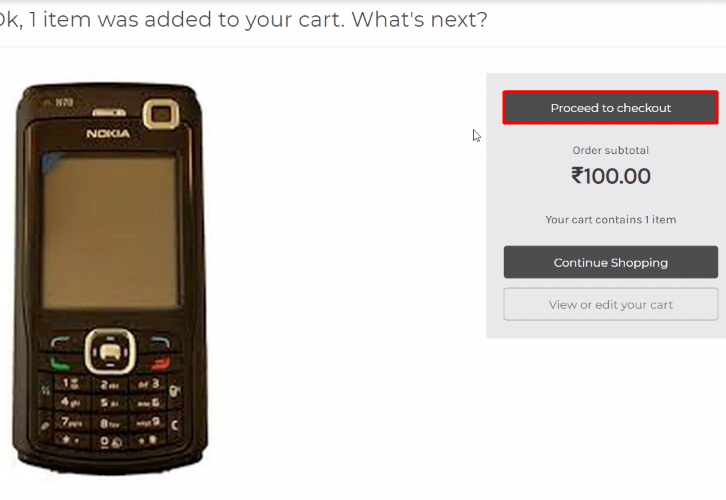
(b) Add to Cart

(c) Click on Proceed to Checkout
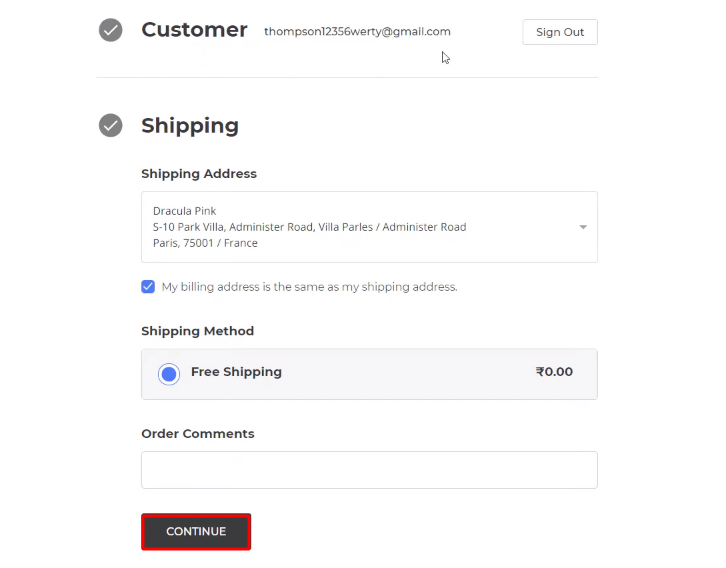
(d) Add Shipping Details
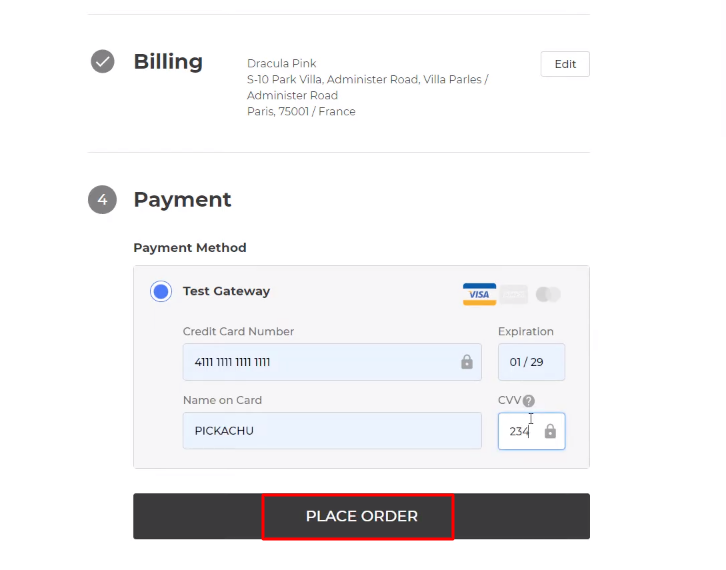
(e) Place an Order
Step 7: Test the Response in Pabbly Connect Dashboard
Step 8: Setting Actions for BigCommerce to Salesforce Integration
(a) Select Application you Want to Integrate
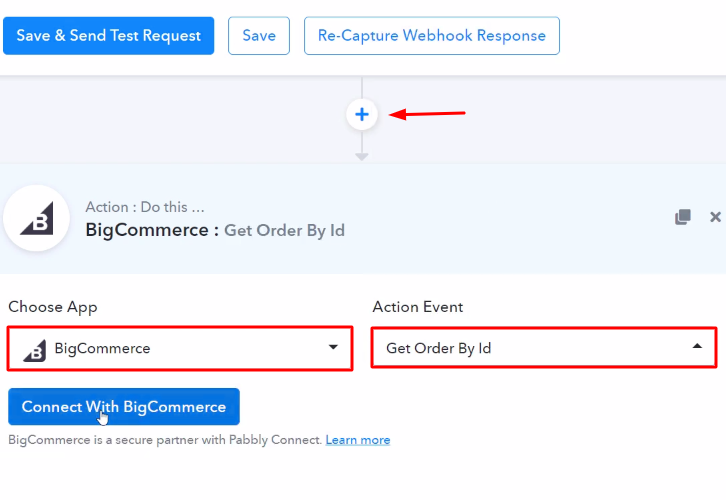
(b) Click the Connect Button
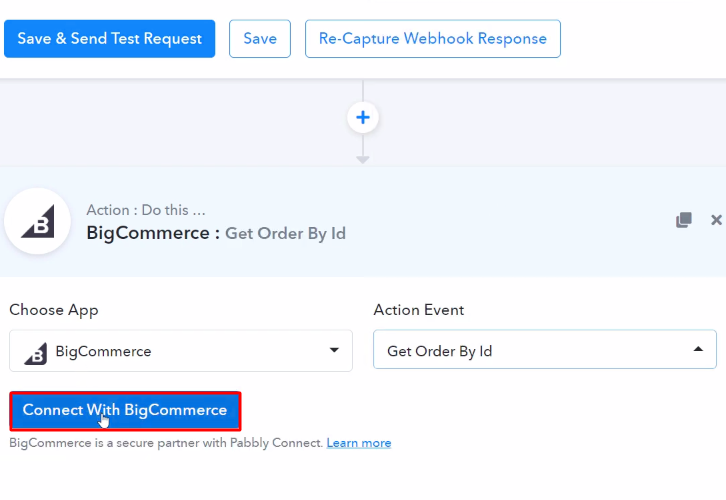
(c) Add the Credentials
(d) Map the Order ID
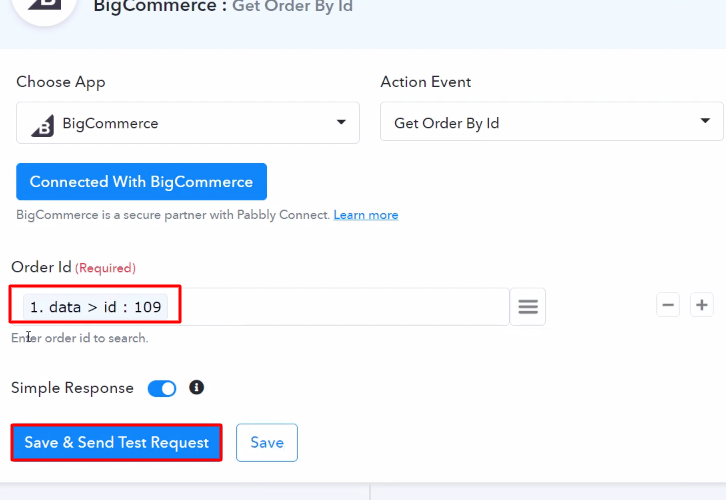
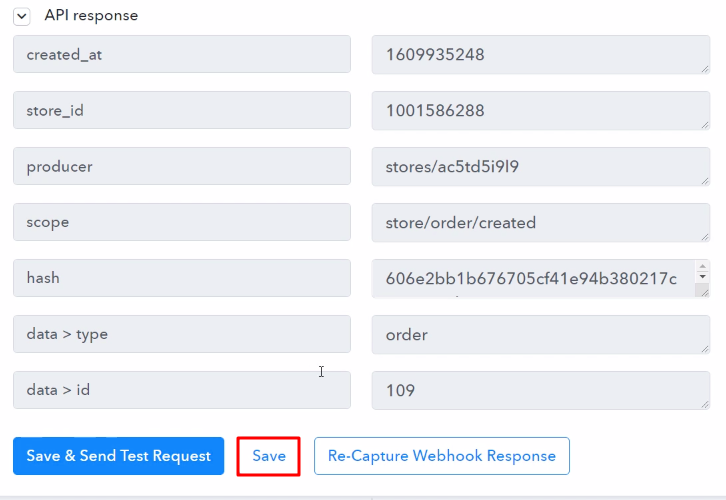
(e) Save the API Response
(f) Select Application you Want to Integrate
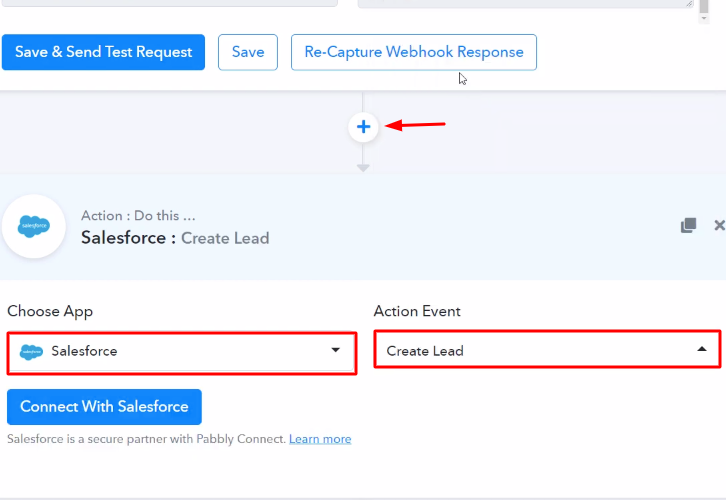
(g) Click the Connect Button
Step 9: Connecting Salesforce to Pabbly Connect
(a) Authorize Application
(b) Map the Fields
(c) Save and Send Test Request
Step 10: Check the Response in Salesforce Dashboard
Conclusion –
You May Also Like to Read:


