Are you searching for a free and fastest way to create ClickUp task from new Help Scout conversations automatically? If yes, then we have an amazing tool suggestion for you i.e, Pabbly Connect.
Basically, Pabbly Connect is an integration and automation software that lets you migrate data from one app to another automatically in real-time.

Sometimes, we want the tasks to be created in ClickUp automatically on new conversations in Help Scout. And to do so we have Pabbly Connect to connect both the application for transferring data automatically.
However, instead of jumping straight into the integration process, let’s discuss a little bit about both the services. So, Help Scout is a global remote company which is a provider of email-based customer support platform, knowledge base tool, and an embeddable search/contact widget for customer service professionals. Whereas, ClickUp is a cloud-based collaboration and project management tool suitable for businesses of all sizes and industries.
Why Choose This Method Of Integration?
In contrast with other integration services-
- Pabbly Connect does not charge you for its in-built apps like filters, Iterator, Router, Data transformer, and more
- Create “Unlimited Workflows” and smoothly define multiple tasks for each action
- As compared to other services which offer 750 tasks at $24.99, Pabbly Connect offers 50000 tasks in the starter plan of $29 itself
- Unlike Zapier, there’s no restriction on features. Get access to advanced features even in the basic plan
- Try before you buy! Before spending your money, you can actually signup & try out the working of Pabbly Connect for FREE
After integrating these applications, you can easily create ClickUp tasks from new Help Scout conversations in real-time. You can also refer to the below video to easily understand the usage of Pabbly Connect-
However, there is no direct integration possible for these two services yet. Hence, we are going to use Pabbly Connect to make this integration possible.
With the help of this software, you can effortlessly share data within multiple premium services easily. Further, it won’t need any coding skills & even a newcomer can use it effectively. Besides, this would be just a one-time setup. Later on, the data will automatically be transferred in real-time.
Moreover, we’ve attached a template for this integration to help you get started more quickly. You can click on the image below to get started. Plus, you can go to the Marketplace & look for more apps/integrations.

Therefore, without taking any more of your time, let’s move according to plan & follow the step by step procedure to integrate Help Scout and ClickUp.
Step 1: Sign up to Pabbly Connect

Let’s start the process to create ClickUp task from new Help Scout conversations by visiting the website of Pabbly Connect and then click on the ‘Sign-Up Free‘ button. On the registration page, either signup using an existing Gmail account or manually fill out the form.
Try Pabbly Connect for FREE
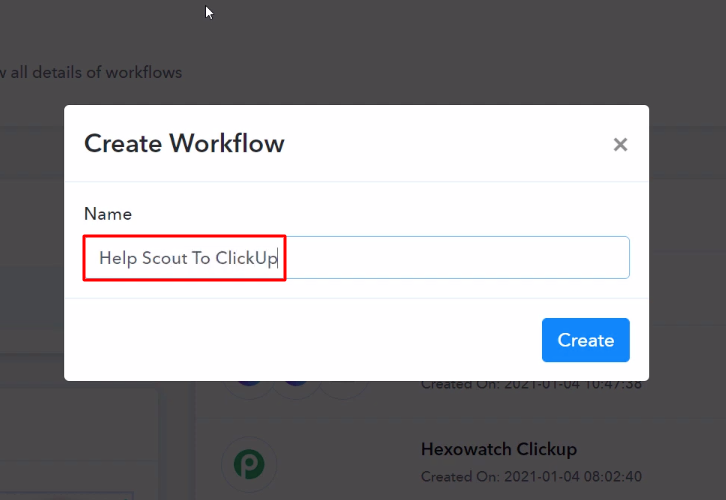
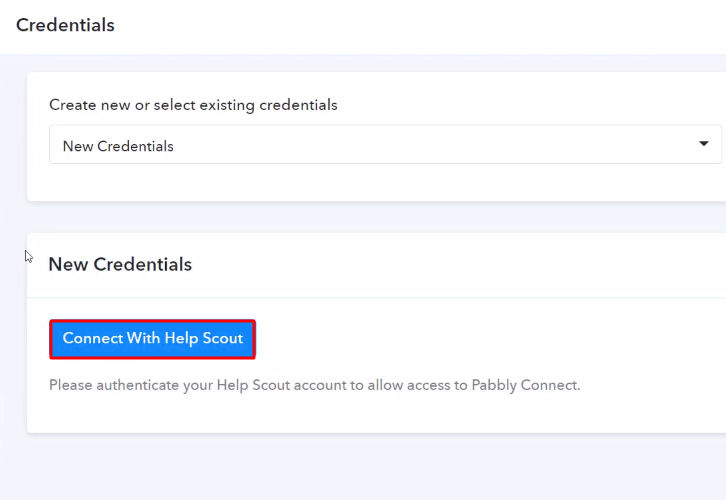
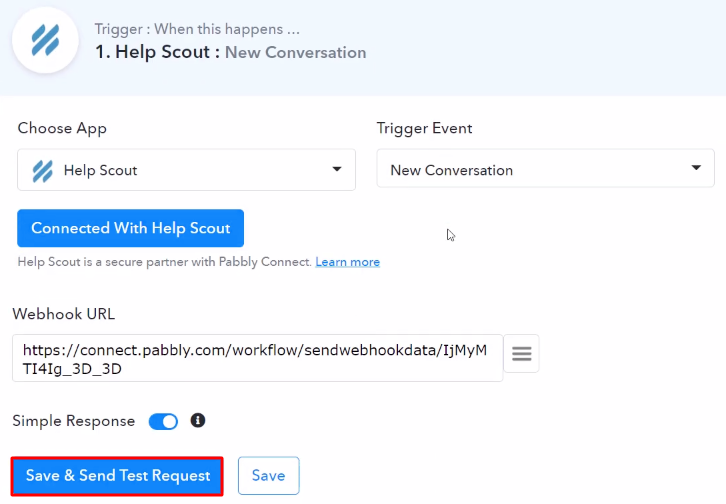
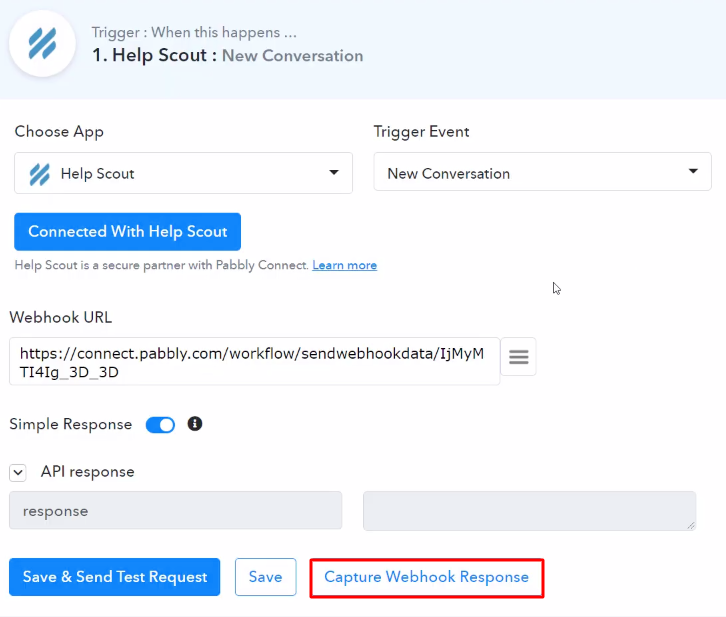
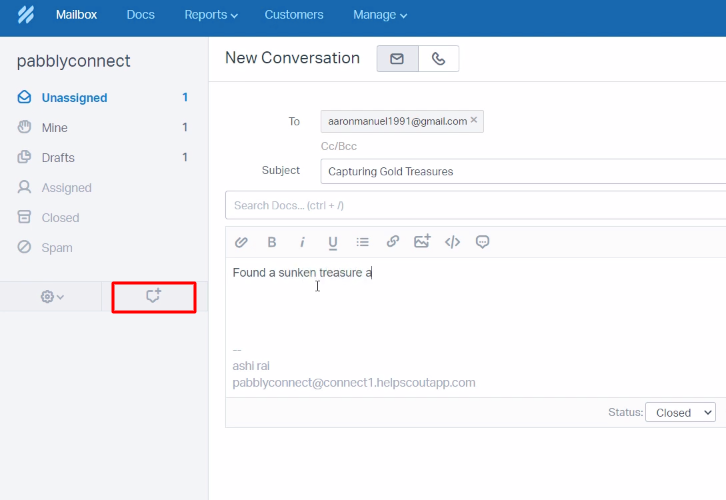
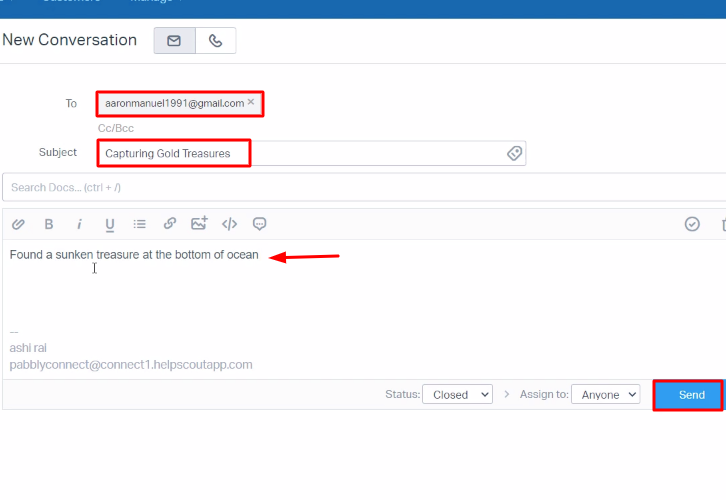
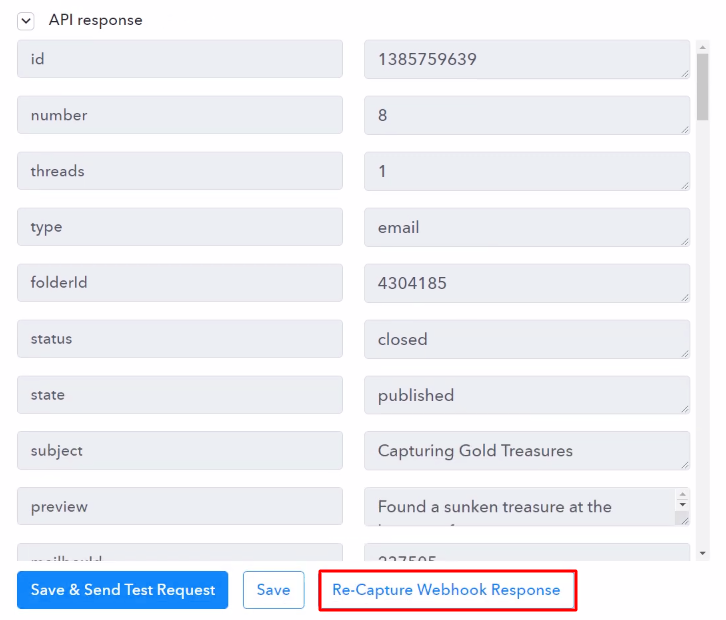
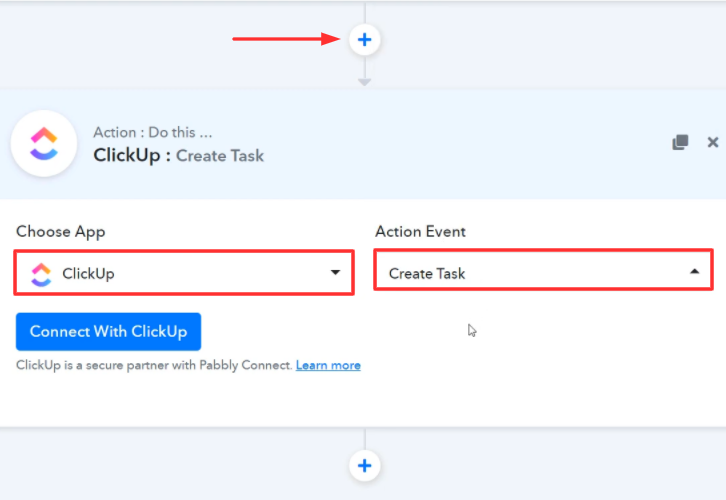
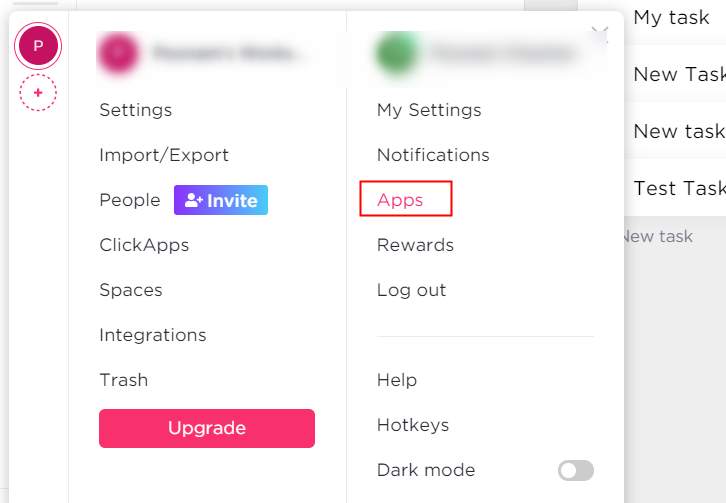
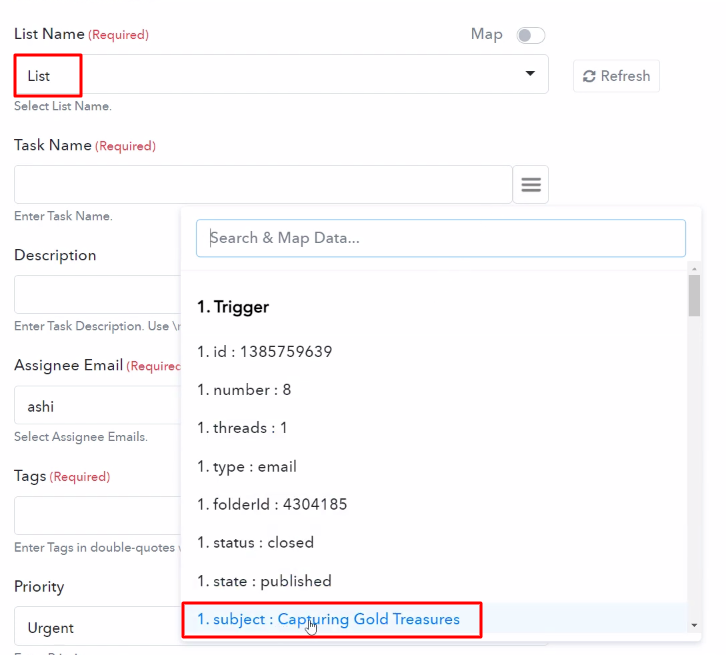
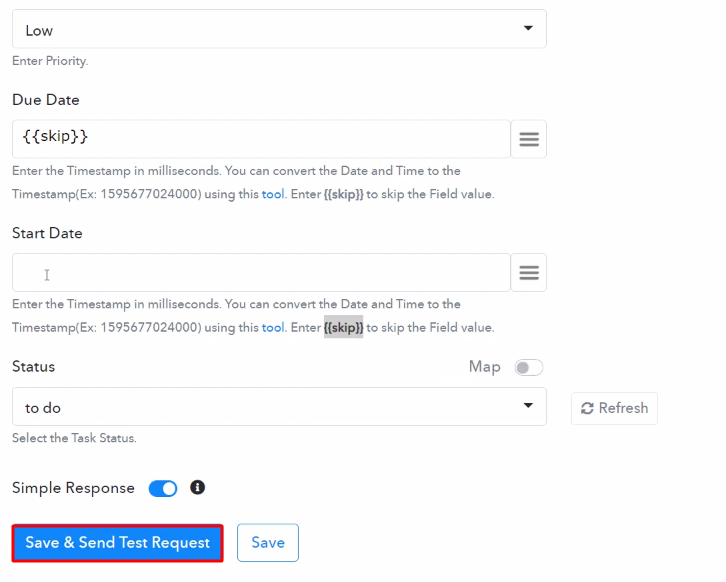
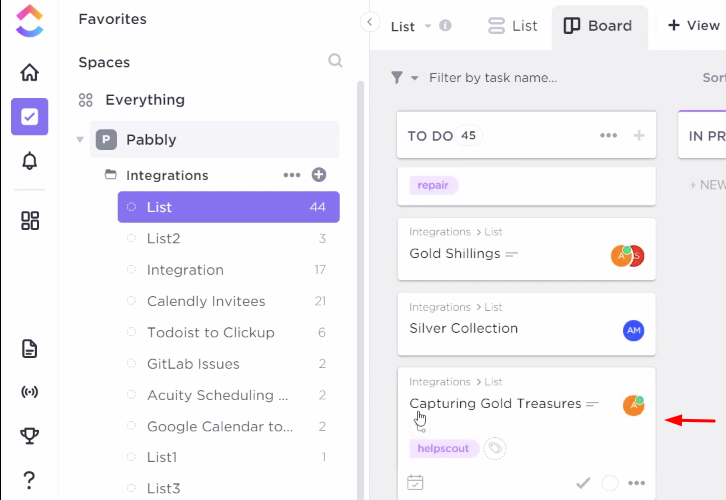
Once you have completed the signup process, click on the Connect section in the dashboard to access Pabbly Connect. Start with creating a workflow for your project by clicking on the ‘Create Workflow’ button. Now, you need to name the workflow just like in the above-shown image. I named the workflow “Help Scout to ClickUp”, you can obviously name the workflow as per your requirements and needs. After creating a workflow, you have to select the application you want to integrate. Using Pabbly Connect, you can integrate any two or more than two applications, create your free account now. Now, you have to select the application that you want to integrate. In this case, we are choosing “Help Scout” for integration. After selecting the application select “New Conversation” in the choose method section. After selecting the application, now you have to click on the “Connect with Help Scout” button just like in the above-shown image to take further the integration process. To connect Help Scout with Pabbly Connect, you have to authorize your Help Scout account, for that, you need to log in to your Help Scout account. When you click on the “Connect” button, a window will slide in from the right, here you have to again click on the “Connect with Help Scout” button and then grant the permission to connect Help Scout account to Pabbly Connect. Now after authorizing your Help Scout account, we will set up the webhook URL in Help Scout by clicking on the “Save and Send a Test Request” button in Pabbly Connect. To check if this integration is capturing data or not, we will fill out a sample form. After setting up the webhook URL in Help Scout by sending test request, now we will click on the “Capture Webhook Response” button to capture the data from Help Scout. Now, to start a new conversation, click on the new conversation button in your Help Scout dashboard. Next, add the recipient’s email, subject of the email and description of the message and then hit the “Send” button. As soon as you click on the “Send” in Help Scout the email info will appear on the Pabbly Connect dashboard. Then, click on the “Save” button. In this step, we will be adding an action for your trigger to complete this integration process. Now in this step, click on the + button below and choose “ClickUp” and in the method section select “Create Task”. After choosing the application click on the “Connect with ClickUp” button to move forward. To connect ClickUp with Pabbly Connect, you need to paste the API token from ClickUp to Pabbly Connect. For that, you need to log into your ClickUp account. At the bottom of the ClickUp dashboard, you will see the Profile option, just tap on it. After pressing the profile option, it will open up different options, choose “Apps” from it. Now, simply copy the “API Token” appearing on the dashboard. Afterwards, paste the copied API Key, and hit the “Save” button. Once you are connected with your ClickUp account, now you have to add all the field’s data like list name, task name, etc. Map up all the fields quickly. Once you are done mapping up all fields click on the “Save & Send Test Request” button. Lastly, when you check your ClickUp dashboard, the task has been successfully created from the Help Scout conversation. At last, this is the most effective and time-saving way to create ClickUp task from new Help Scout conversations. Pabbly Connect is the answer to all your integration needs, as you just have to make a few clicks and you are good to go. Therefore, signup for free today and explore the world of hassle-free integrations. In case of any doubts or suggestions, please leave your comments down below.Step 2: Access Pabbly Connect

Step 3: Workflow for Help Scout with ClickUp Integration
(a) Create New Workflow

(b) Name the Workflow
Step 4: Setting Triggers for Help Scout with ClickUp Integration
(a) Select Application you want to Integrate
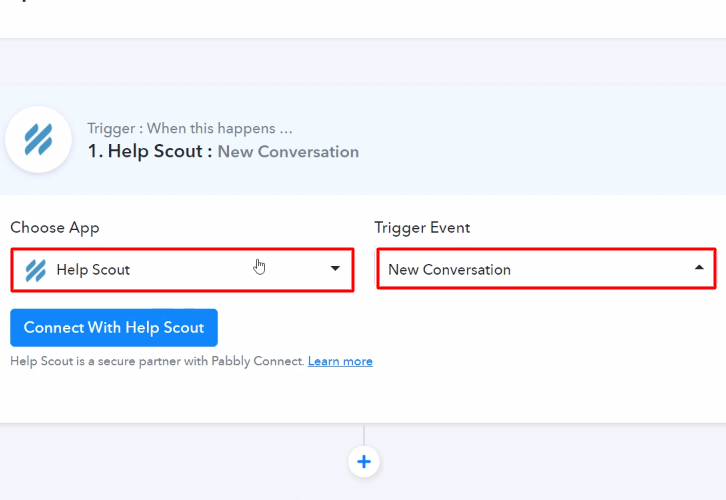
(b) Click Connect Button
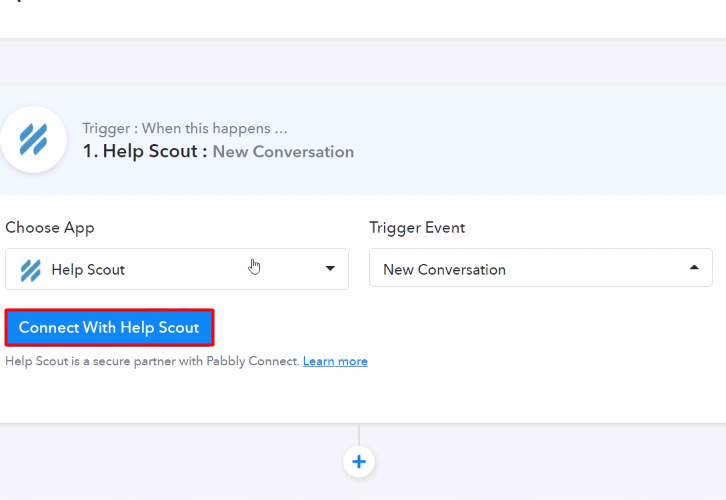
Step 5: Connecting Help Scout to Pabbly Connect
(a) Authorize Application
(b) Send Test Request
Step 6: Start a Sample Conversation
(a) Capture Webhook Response
(b) Start New Conversation
(c) Send Message
Step 7: Test the Submission in Pabbly Connect Dashboard
Step 8: Setting Action for Help Scout with ClickUp Integration
(a) Select Application you want to Integrate
(b) Click on Connect Button
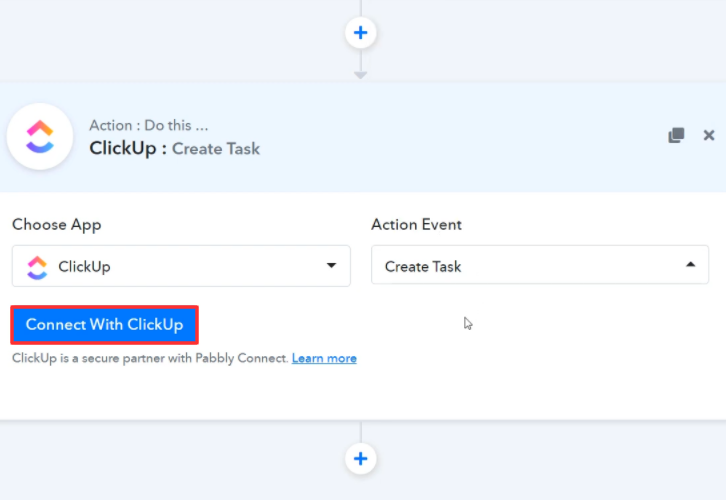
Step 9: Connecting ClickUp to Pabbly Connect
(a) Go to ClickUp Profile
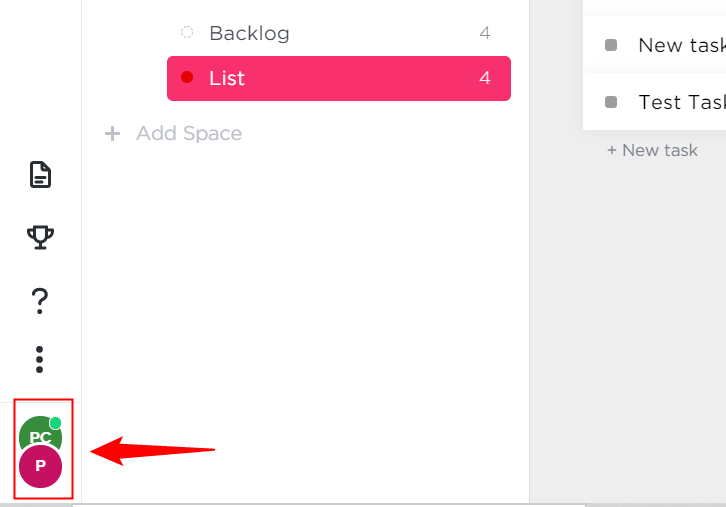
(b) Click on Apps Option
(c) Copy the API Token
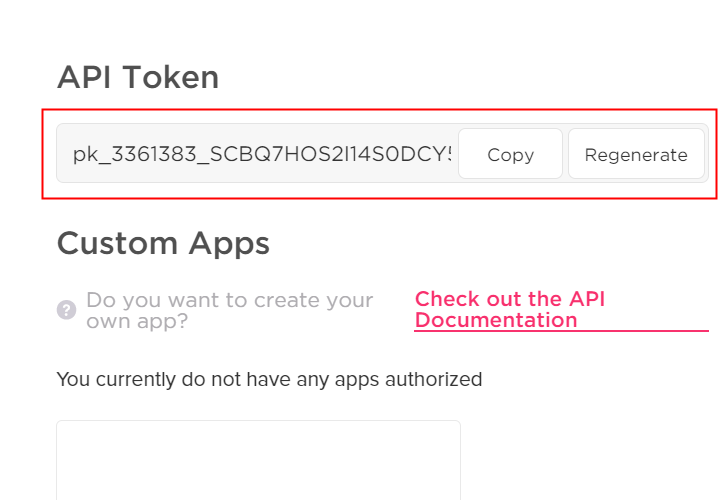
(d) Paste the API Key

(e) Map the Fields
(f) Send a Test Request
Step 10: Check Response in ClickUp Dashboard
Conclusion –
You May Also Like to Read –


