Are you eagerly want to find a way to create ClickUp task from new Google Calendar event automatically? In this case, we have a perfect tool namely Pabbly Connect to automate this task in real-time.

Basically, Pabbly Connect is an automation and integration software that lets you transfer data between two software applications without the need for any coding language or technical expertise.
With the assistance of Pabbly Connect, you can effortlessly integrate Google Calendar and ClickUp, in such a manner that whenever a new event is created in Google Calendar then it will automatically create a task in ClickUp
Why Choose This Method Of Integration?
In contrast with other integration services-
- Pabbly Connect does not charge you for its in-built apps like filters, Iterator, Router, Data transformer, and more
- Create “Unlimited Workflows” and smoothly define multiple tasks for each action
- As compared to other services which offer 750 tasks at $24.99, Pabbly Connect offers 50000 tasks in the starter plan of $29 itself
- Unlike Zapier, there’s no restriction on features. Get access to advanced features even in the basic plan
- Try before you buy! Before spending your money, you can actually signup & try out the working of Pabbly Connect for FREE
But before getting into the whole procedure let’s first understand a bit about the services that are involved in the workflow. Google Calendar is a time-management and scheduling calendar service developed by Google. Whereas, ClickUp is an all-in-one cloud-based project management tool that offers features like reminders, goals, chat, scheduling, assigned comments, custom views, & more.
Since, there is no way possible to integrate both this software so far. But, with the help of Pabbly Connect, you have the advantage to automate or integrate not only these but plenty of applications. And the best part of using Pabbly Connect is that you can even try out this integration for free as well by creating your free account.
We’ve also attached a video below to help you know about this integration process in a simple manner.
Besides, we have also added the template for this integration to help you get started more quickly. You can strike the ‘Use Workflow’ button given below to begin. Additionally, you can also visit the Marketplace & look for more integrations and apps.

So, buckle up as we’re going to discover the Google Calendar and ClickUp integration.
Step 1: Sign up to Pabbly Connect

Start the procedure to create ClickUp task from new Google Calendar event by visiting the Pabbly Connect website. Then, hit the ‘Sign-Up Free‘ button available on the home page. Next, either use your existing Google account or manually fill in the registration form to signup.
Try Pabbly Connect for FREE
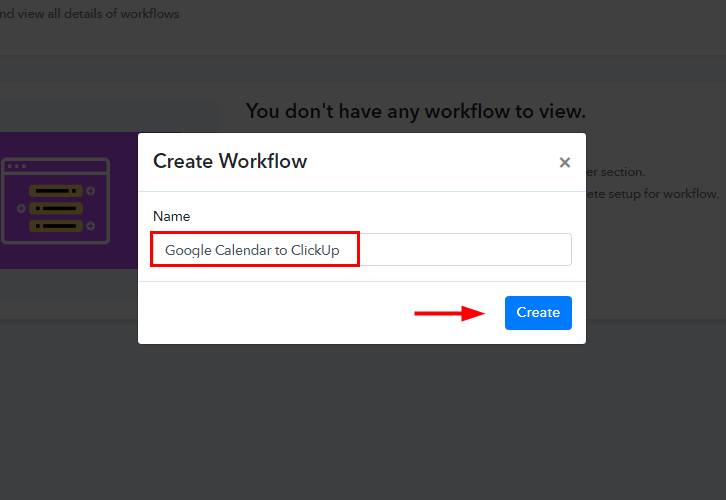
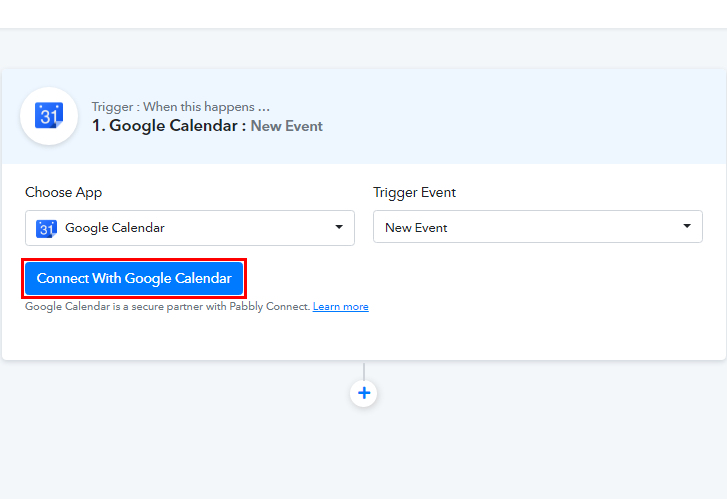
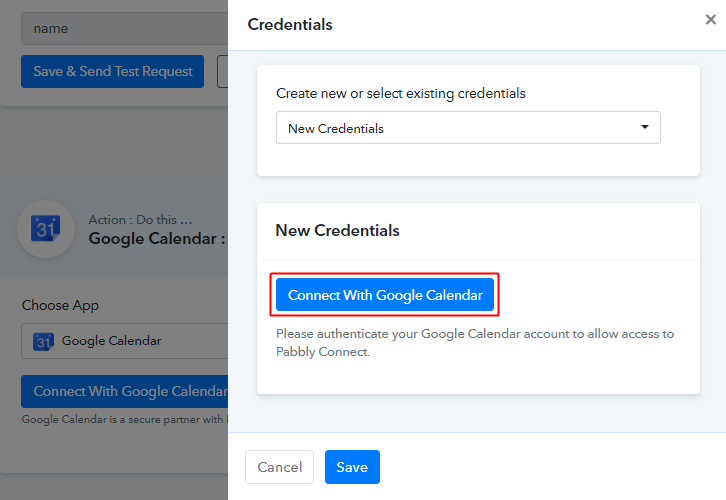
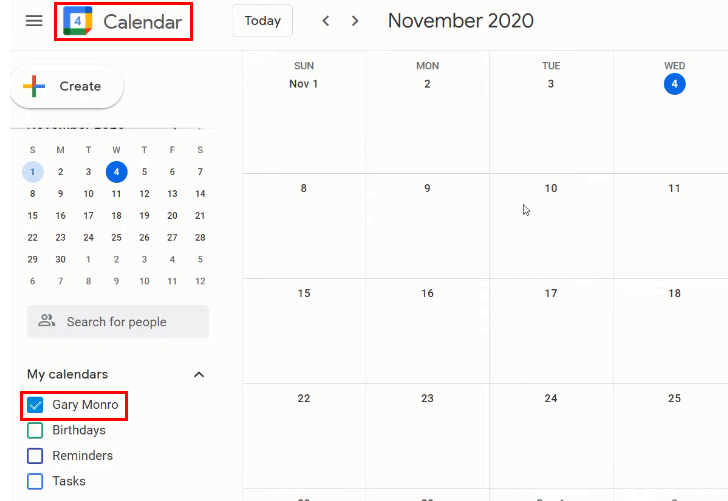
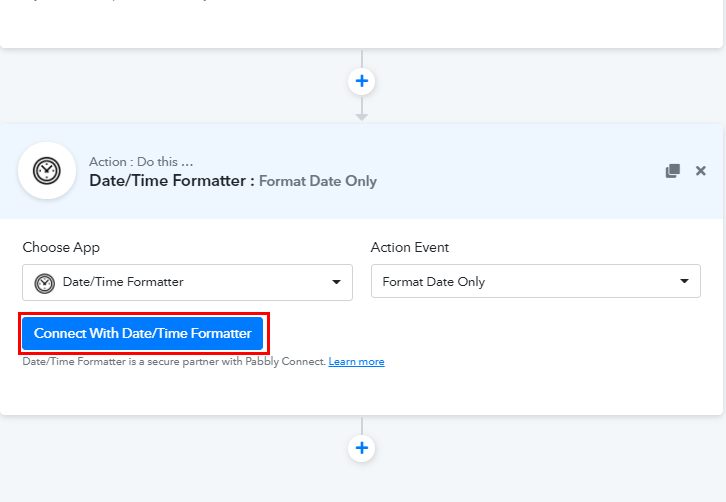
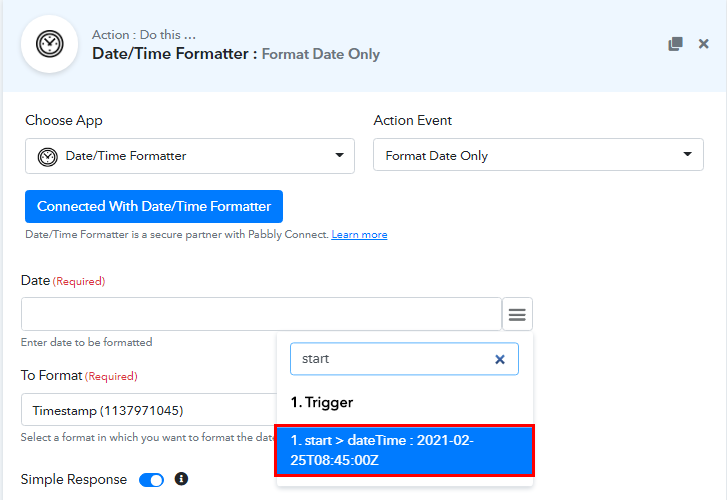
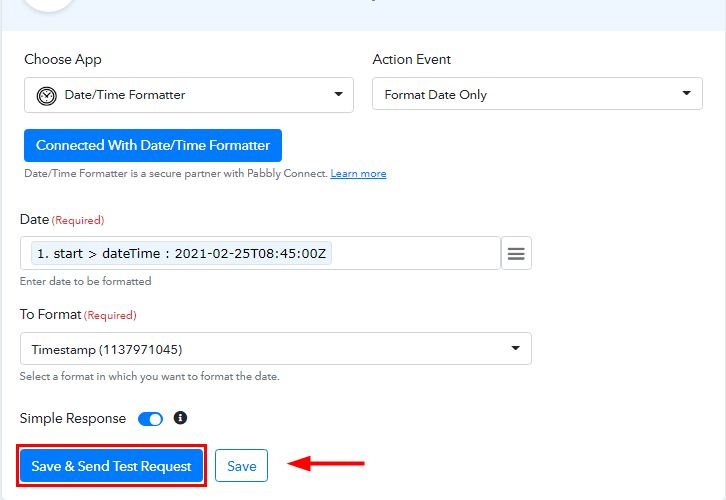
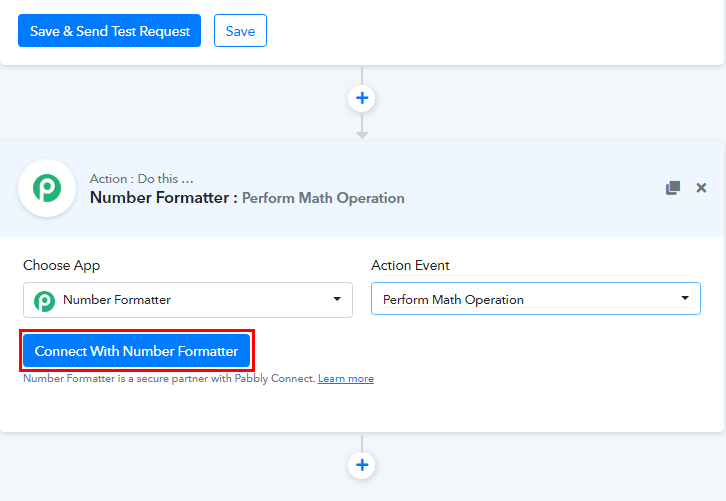
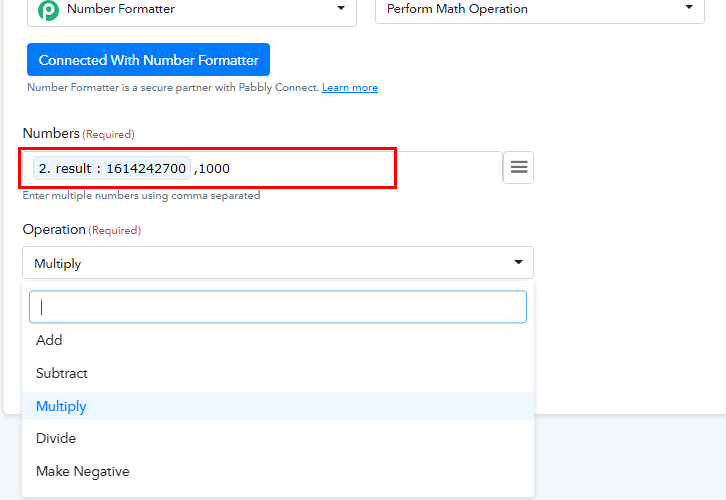
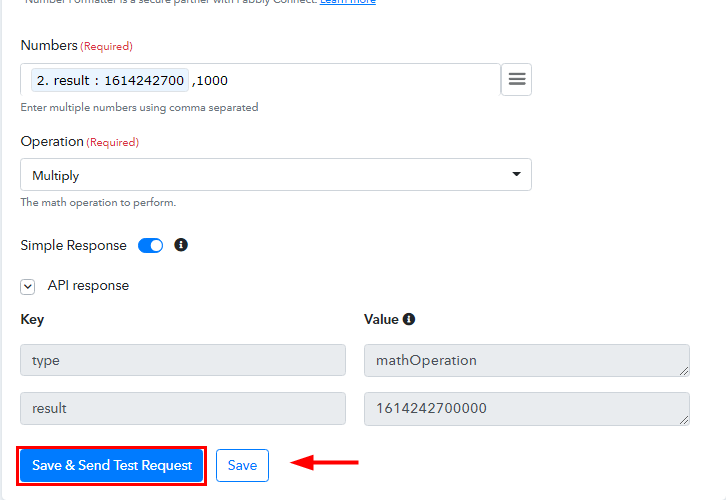
After that, strike the ‘Access Now’ button of the software ‘Connect’ amongst the Pabbly applications. Start with building a workflow to create ClickUp task from new Google Calendar event by pushing the ‘Create Workflow’ button on the Pabbly Connect dashboard. Now, name the workflow as per your need (for instance: Google Calendar to ClickUp) and push the ‘Create’ button. To automatically add a Google Calendar event as a task in ClickUp, you’ll need to set-up a trigger by selecting an application. When you click on the create button, a page containing the trigger window will open next. Select the ‘Google Calendar’ from the ‘Choose App’ field option and in the ‘Trigger Event’ section choose ‘New Event’. After choosing the application click on the ‘Connect with Google Calendar’ button to move forward. Now, you have to authorize your Google account by clicking on ‘Connect with Google Calendar’ again and then click on ‘Save’ button. Once you have authorized your Google account, promptly select the calendar in which you want to create an event. To test the trigger settings, you have to visit Google Calendar window and start creating a new event. Go to the Google Calendar and select the same calendar from ‘My Calendar’ section which you have selected above. Select any of the desired date, and then a pop-up window will open. Promptly, add event details like title, add time, guest, etc and in the end, hit the ‘Save’ button. Next, head back to Pabbly Connect window and click on ‘Save and Send Test Request’ button to capture the response. At last, click on the ‘Save’ button to save the response. As we can see that the start and end date is not in the correct format. So, to change the format of date in timestamp we need to integrate Date/Time Formatter as an action step. Next, in order to format the date, simply tap on the (+) button and then, select Date/Time Formatter’ in choose app, and in the action event choose ‘Format Date Only’. Promptly, click on the ‘Connect With Date/Time Formatter’ button. Now, you have to map the field to make the date in a proper format like map ‘start date’ in the Date field, and choose ‘Timestamp’ in To Format field. Once you are done mapping all the fields, click on ‘Save and Sent Request’ to get the API response. Finally, hit the ‘Save’ button. Now to change the date in millisecond format we have to integrate ‘Number Formatter’ in the next action step. Now, to format the date, just hit the (+) button and then, select Number Formatter’ in choose app, and in the action event select ‘Perform Math Operation’. After selecting the application, click on ‘Connect with Number Formatter’ button. Next, map the timestamp formatted date in ‘Number’ field and choose ‘Operation’ as ‘Multiple’ as shown in above image. Once you are done mapping all the details, hit the ‘Save and Sent Test Request’. Soon, you will get the API response and the date is in milliseconds now. Finally, hit the ‘Save’ button. Since, we have changed the format of start date successfully. Simply follow the above-mentioned steps to change the format of end date in timestamp format (milliseconds). To make Google Calendar and ClickUp integration work, you have to choose the action for your trigger. In addition, press the + icon to add an action to the trigger. Here we can select ‘ClickUp’ from the ‘Choose App’ drop-down and choose the method ‘Create Task’. Now, click on the ‘Connect with ClickUp’ button. Eventually, when you click on the ‘Connect with ClickUp’ button, it will ask you to enter the ‘API Token’ and for that, you need to log in to your ClickUp account. Go to your ClickUp dashboard and then click on your profile icon present at the bottom left corner. Promptly, you will see many options, simply click on the ‘Apps’ from it. Next, copy the given API token. Further, paste the copied API Token in Pabbly Connect window, and hit the ‘Save’ button. After this, map all the respective field data like task name, description, and so on. Once you are done mapping all the fields, click on the ‘Save and Send Test Request’ button to get the API response. Ultimately, when you check your ClickUp dashboard, a new task has been created successfully. There you have it! Here we have successfully mentioned all the crucial steps to create ClickUp task from new Google Calendar event using Pabbly Connect. You can blindly rely on Pabbly Connect for your all automation tasks it is just like a boon in the automation industry. Not only this, one can use this software to connect unlimited apps within minutes. So, what’s stopping you now! Go and catch your deal by signing up for a free account. In case of any doubts or suggestions, please leave your comments below.Step 2: Access Pabbly Connect

Step 3: Workflow for Google Calendar with ClickUp Integration
(a) Start with a New Workflow

(b) Name the Workflow
Step 4: Setting Trigger for Google Calendar to ClickUp Integration
(a) Select Application you want to integrate

(b) Click the Connect Button
(c) Authorize Application
(d) Choose Calendar

Step 5: Create a New Event
(a) Go to Google Calendar
(b) Create an Event
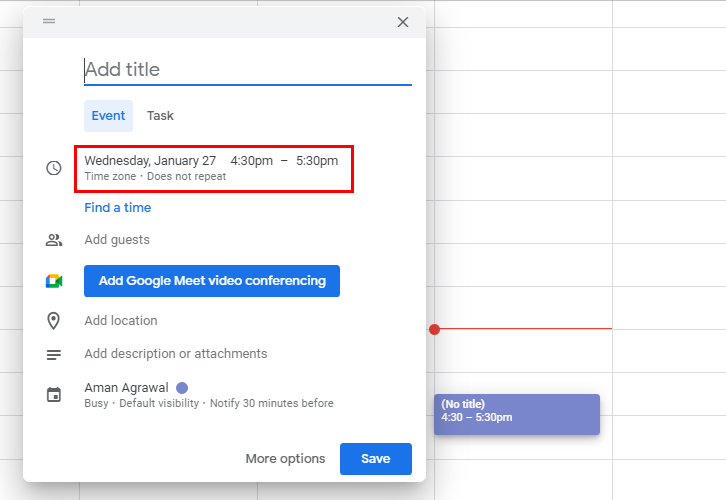
(c) Add Event Details
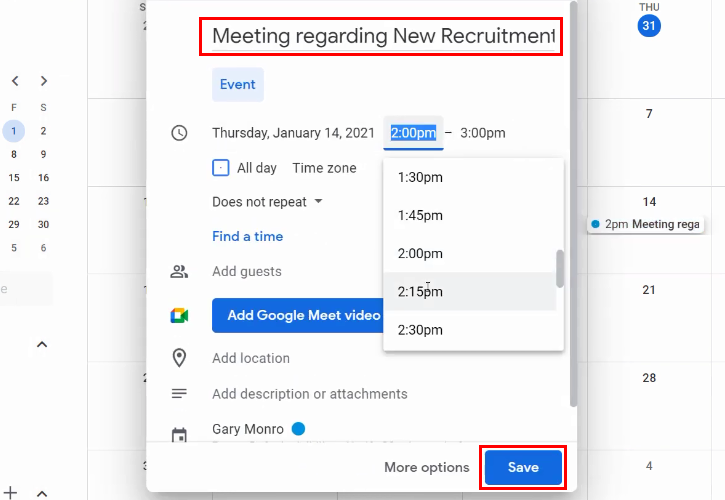
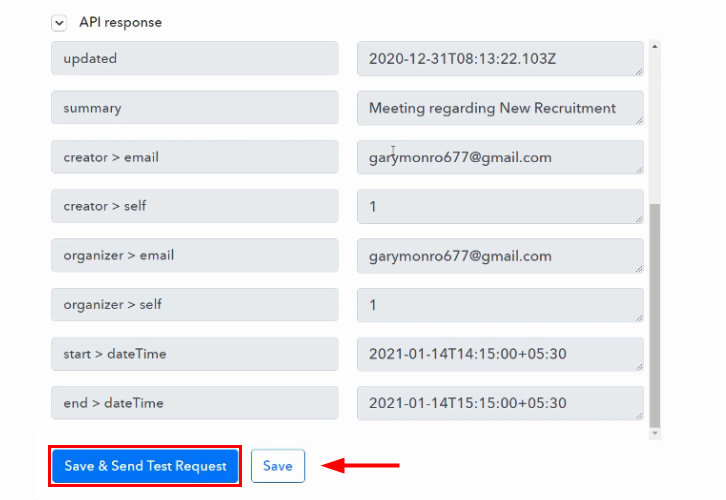
(d) Save and Send Test Request
Step 6: Setting Date/Time Formatter for Google Calendar to ClickUp Integration
(a) Select Application to Format Date
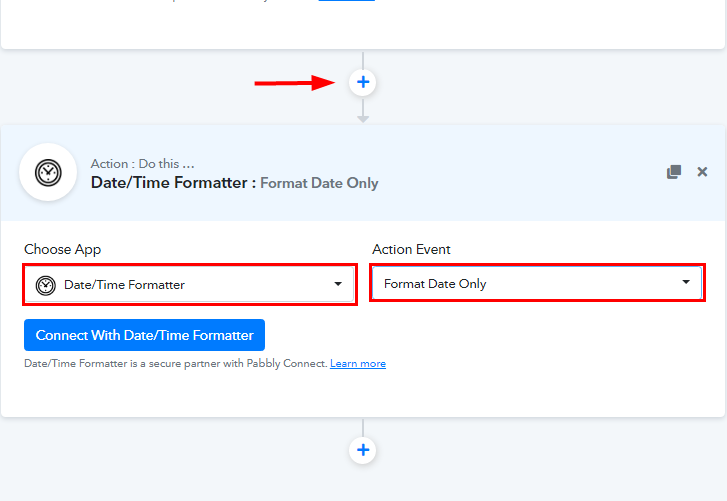
(b) Connect with Date/Time Formatter
(c) Map the Fields
(d) Save and Sent Test Request
Step 7: Setting Number Formatter for Google Calendar to ClickUp Integration
(a) Select Application to Format Number
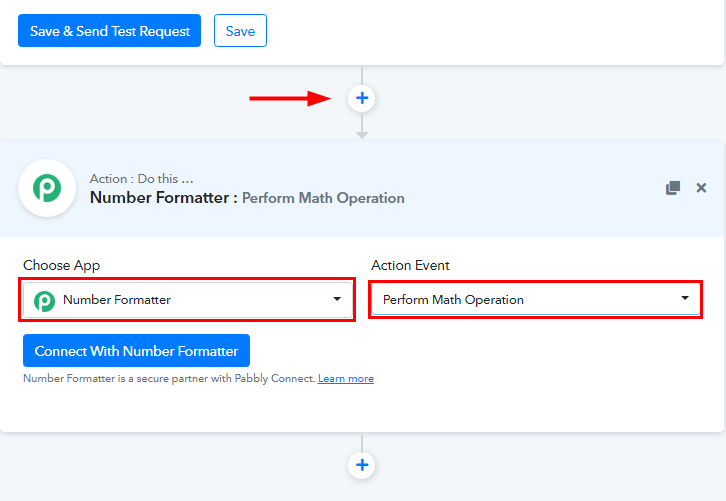
(b) Connect with Number Formatter
(c) Map the Fields
(d) Save and Sent Test Request
Step 8: Setting Action for Google Calendar to ClickUp Integration
(a) Select Application you Want to Integrate
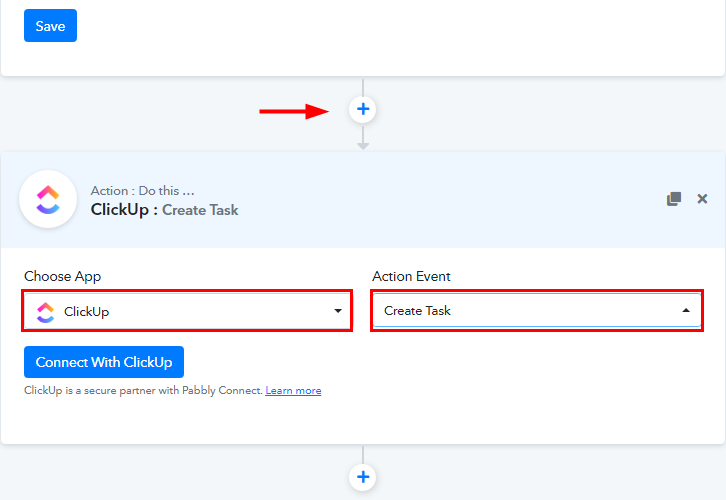
(b) Click on Connect Button
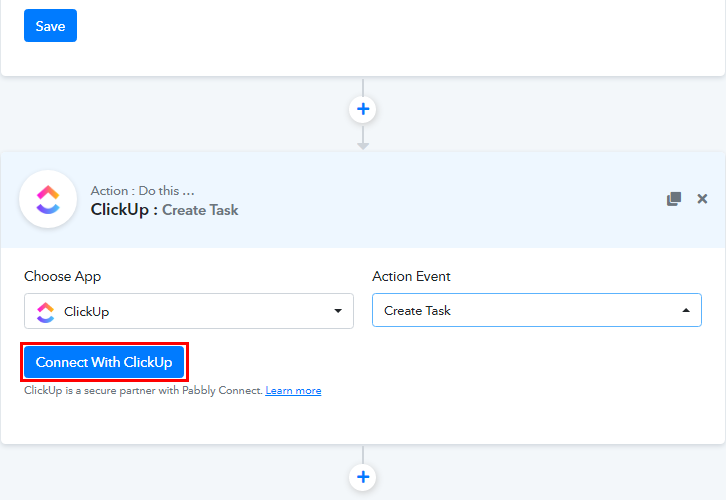
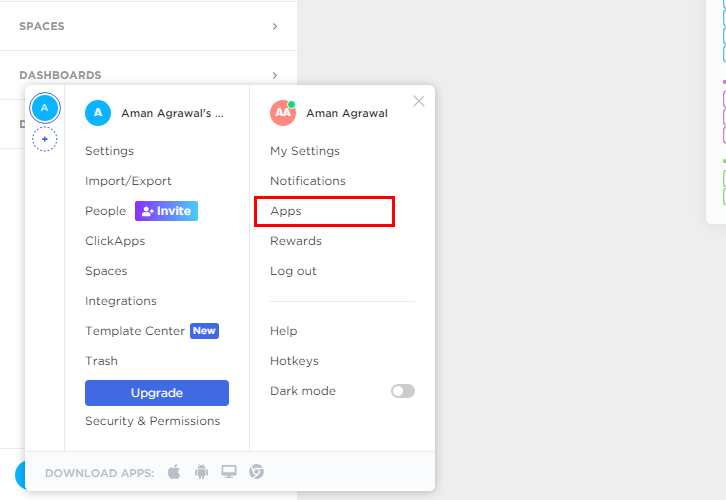
Step 9: Connecting ClickUp to Pabbly Connect
(a) Click on ClickUp Profile Icon
![]()
(b) Go to Apps Option
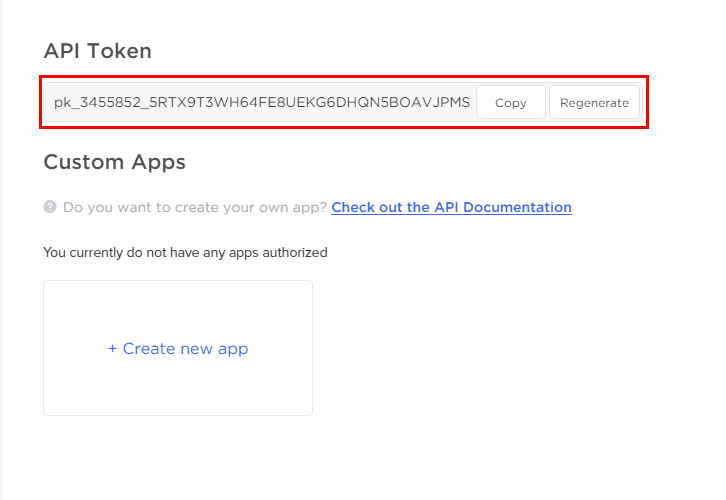
(c) Copy the API Token
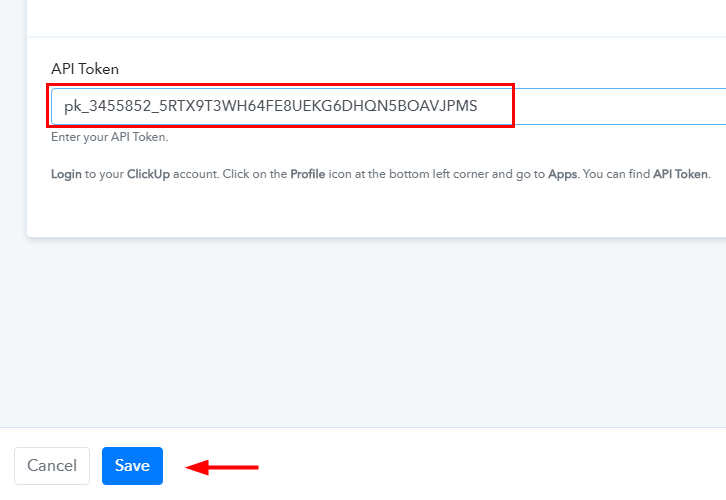
(d) Paste the API Token
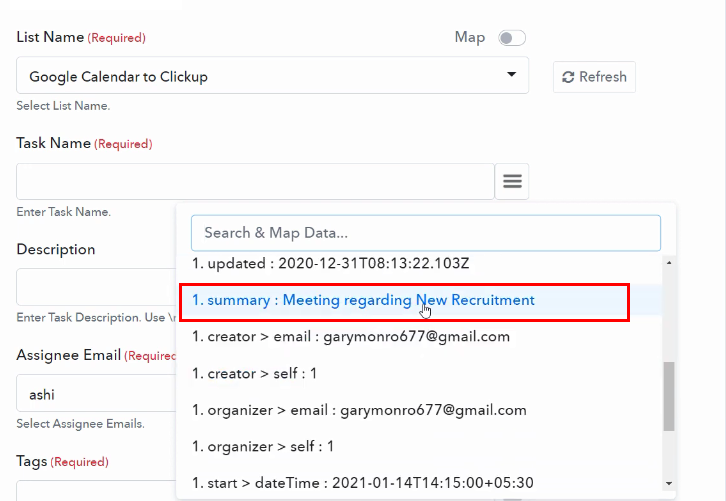
(e) Map the Fields
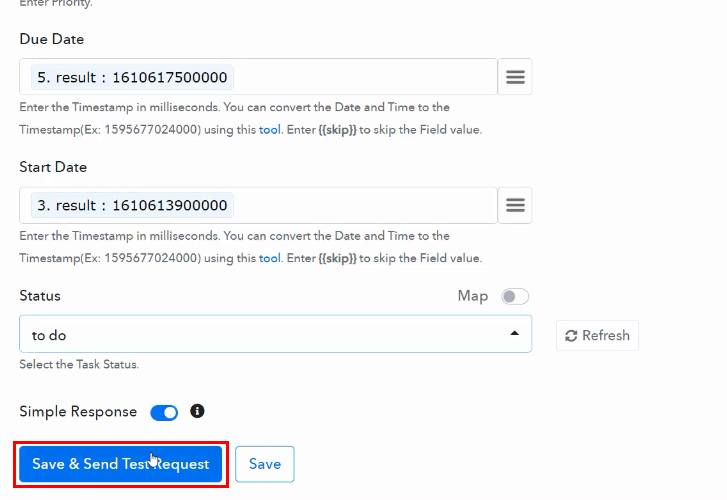
(f) Save and Send Test Request
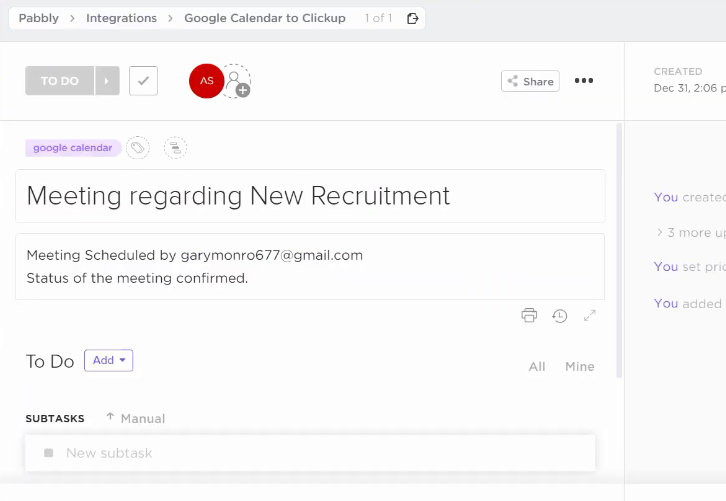
Step 10: Check Response in ClickUp Dashboard
Conclusion –
You May Also Like to Read –


