Have you tried to create GitHub issues from new Trello cards? You might have but here we are going to show you the easiest way to integrate Trello and GitHub using an amazing integration tool named Pabbly Connect.

But first, let’s put light on both software and the need for integrating GitHub and Trello. Trello is a collaborating and planning tool that organizes all your business projects on board. It helps in keeping track of all business activities. On the other hand, GitHub is an open-source community that manages all your Git repositories.
Why Choose This Method Of Integration?
In contrast with other integration services-
- Pabbly Connect does not charge you for its in-built apps like filters, Iterator, Router, Data transformer, and more
- Create “Unlimited Workflows” and smoothly define multiple tasks for each action
- As compared to other services which offer 750 tasks at $24.99, Pabbly Connect proffers 50000 tasks in the starter plan of $29 itself
- Unlike Zapier, there’s no restriction on features. Get access to advanced features even in the basic plan
- Try before you buy! Before spending your money, you can actually signup & try out the working of Pabbly Connect for FREE
By connecting Trello and GitHub, you can easily send issues from Trello into GitHub software. It will automate all the manual work of adding repositories in GitHub. However, connecting these two software is not a walk-in park and that’s why we are using an application named Pabbly Connect.
Pabbly Connect is an automation and integration tool that allows you to connect multiple premium applications in a matter of time. Also, you can easily transmit data from one service to another without using a single line of code.
Above all, the only integration tool available in the market that offers unlimited workflows, triggers, actions, and much more even in its free plan.
Here, in this article, we will learn how to create GitHub issues from new Trello cards in real-time.
So, without any ado, let’s started the process of connecting Trello and GitHub.
Step 1: Sign up to Pabbly Connect

Start the process of connecting Trello and GitHub by clicking on the “Sign Up Free” icon on the Pabbly Connect dashboard. Subsequently, either fill-up the details manually or sign up using Gmail credentials.
Try Pabbly Connect for FREE
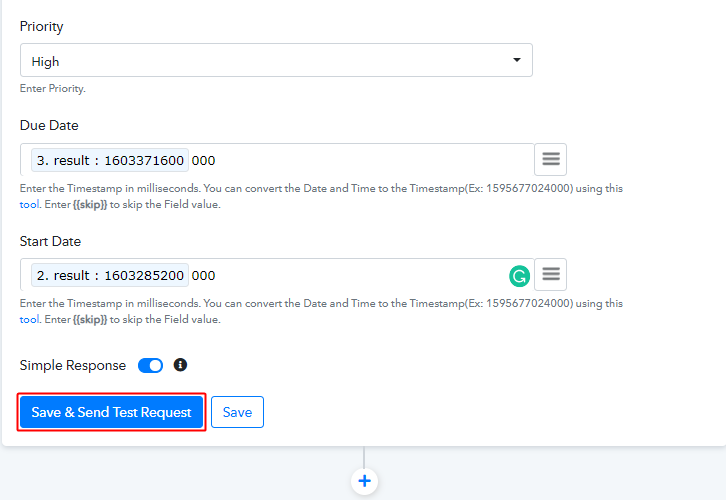
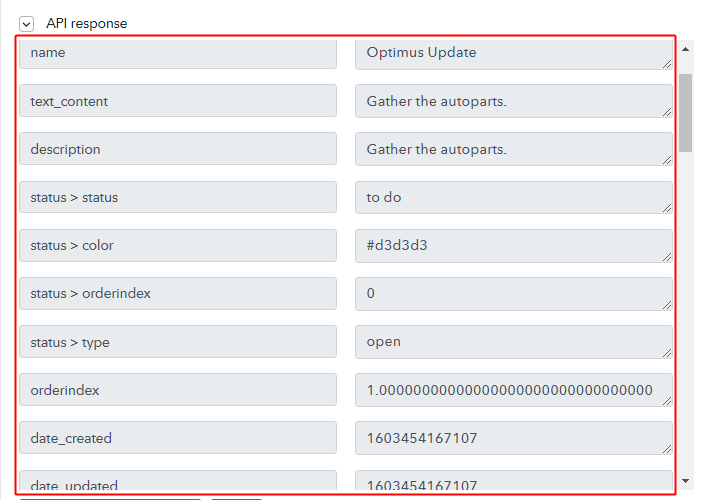
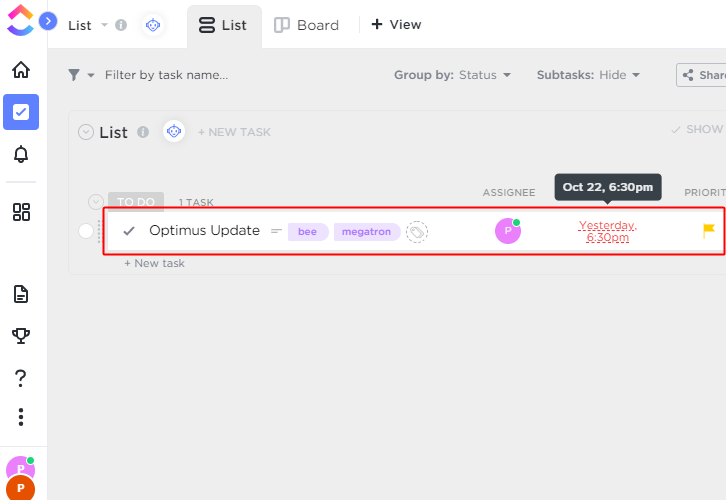
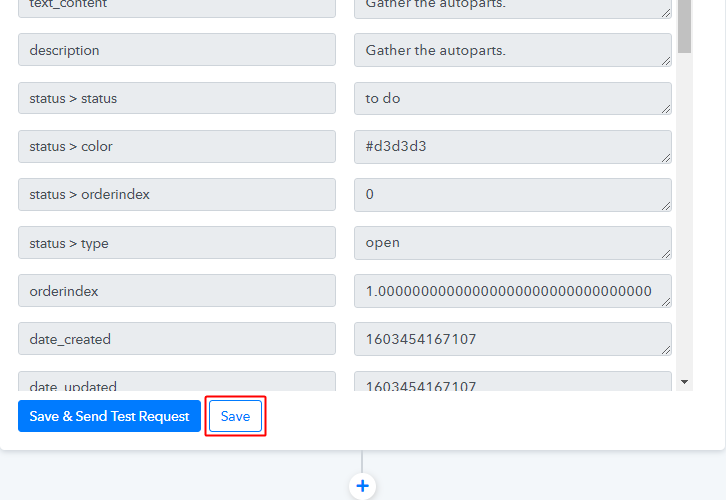
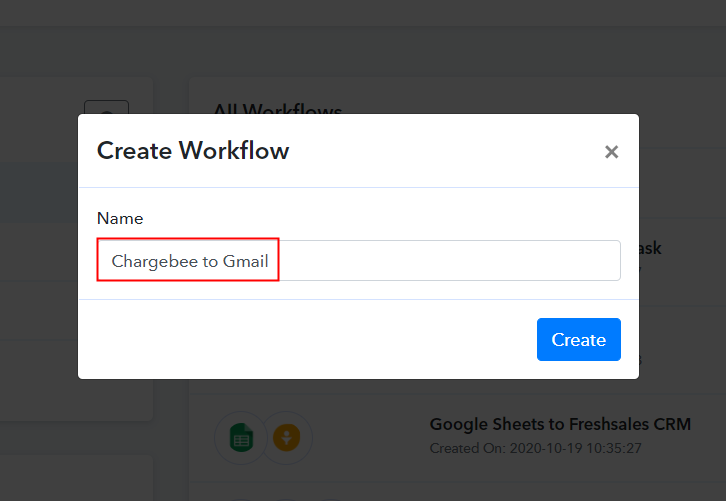
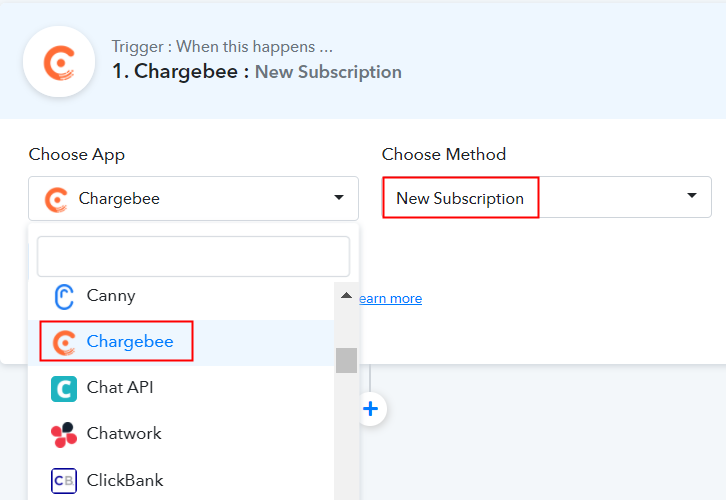
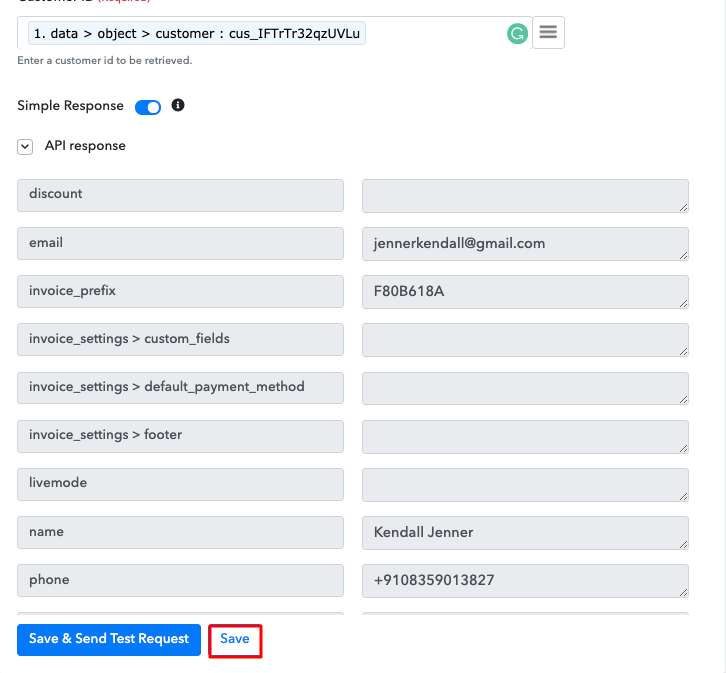
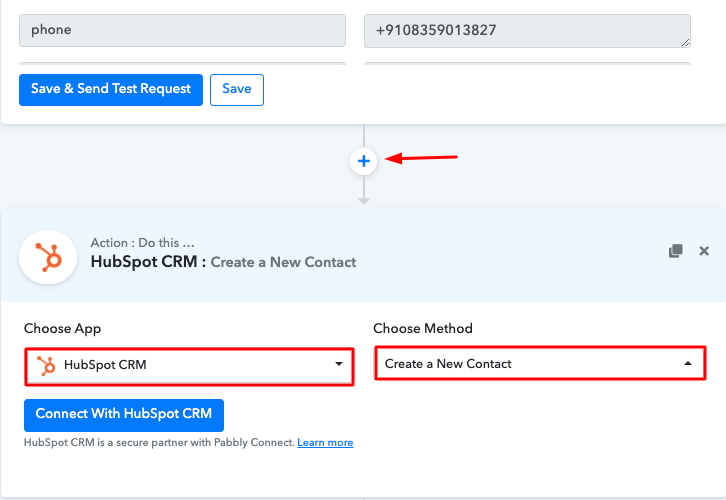
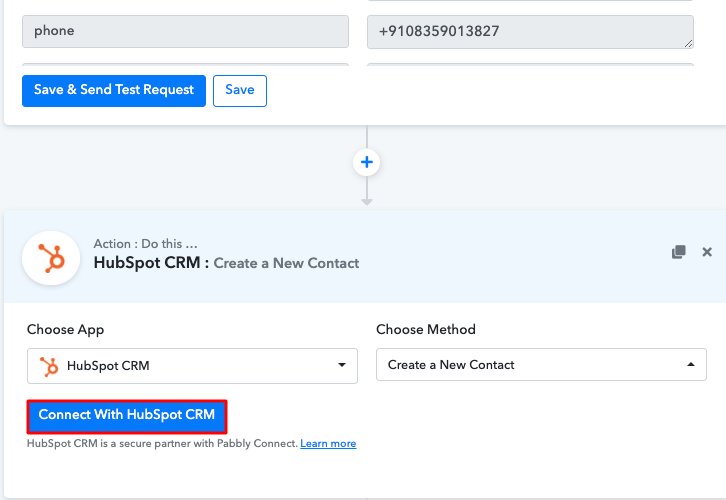
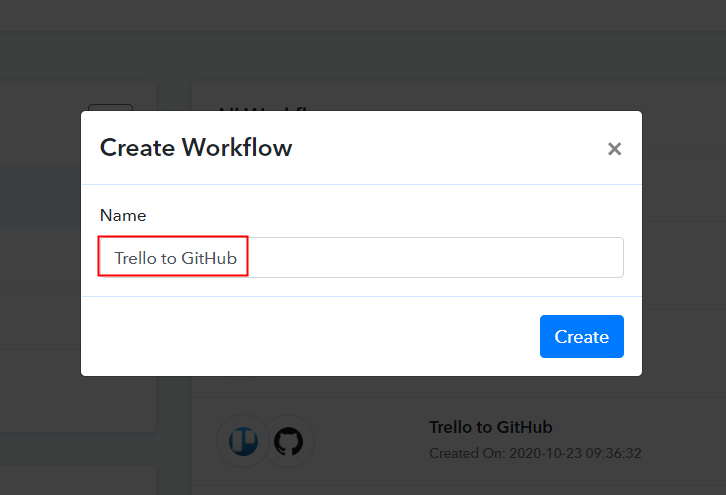
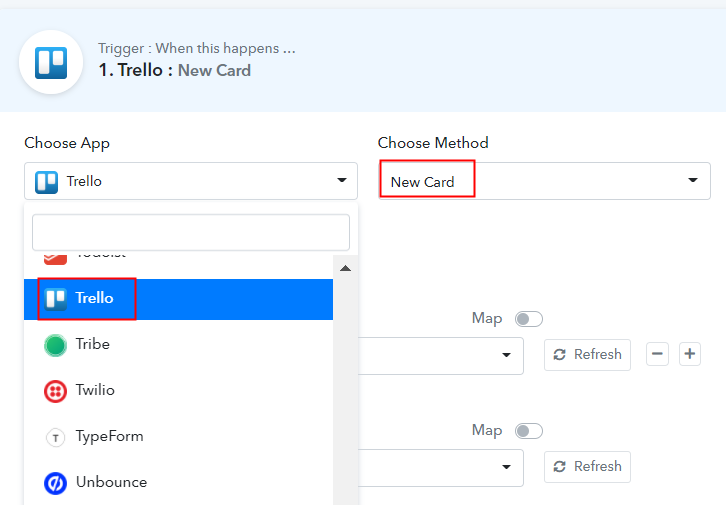
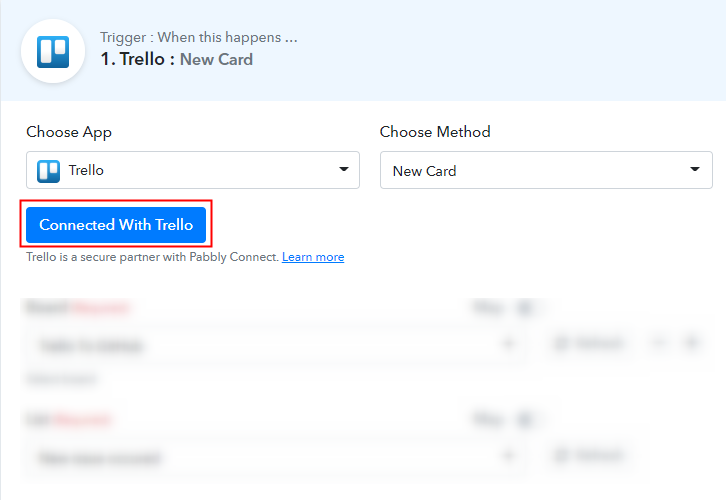
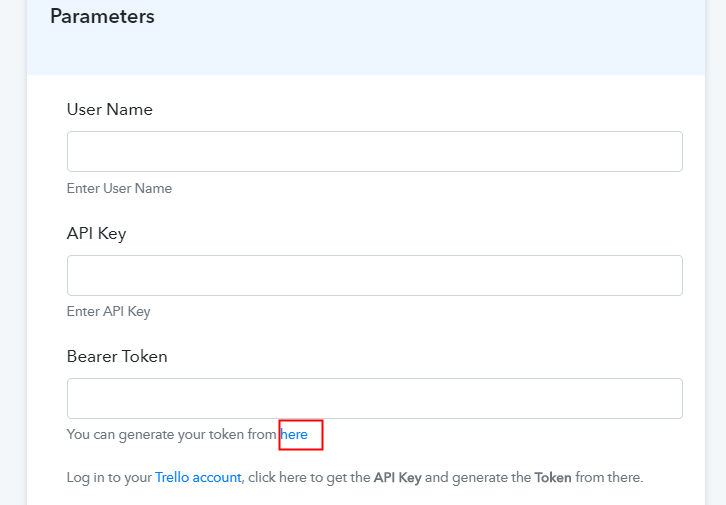
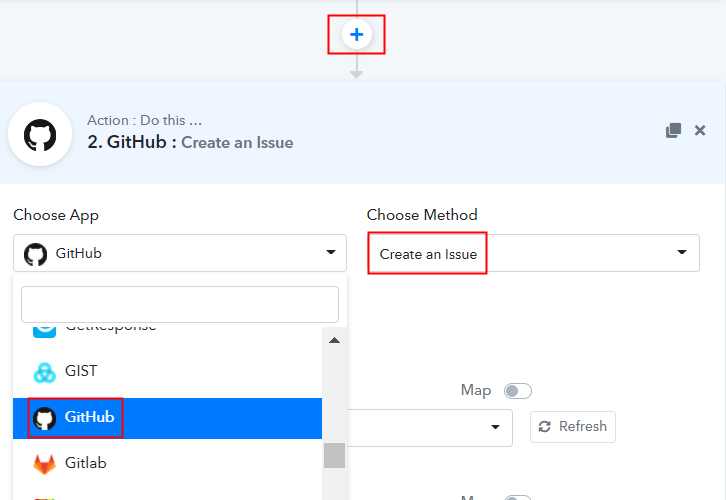
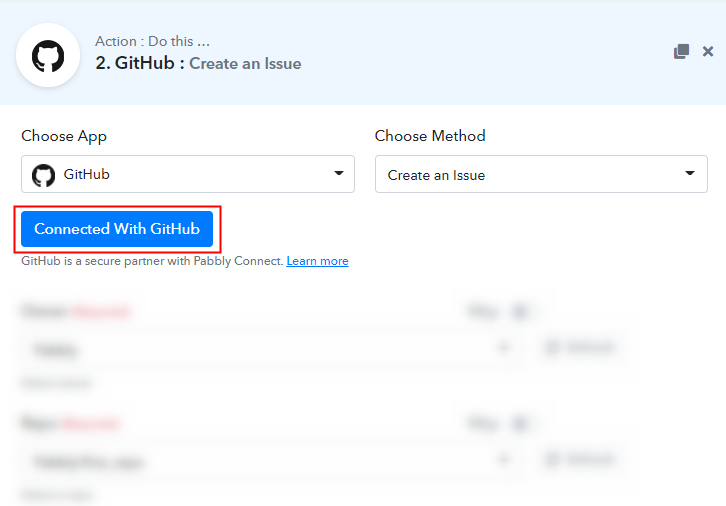
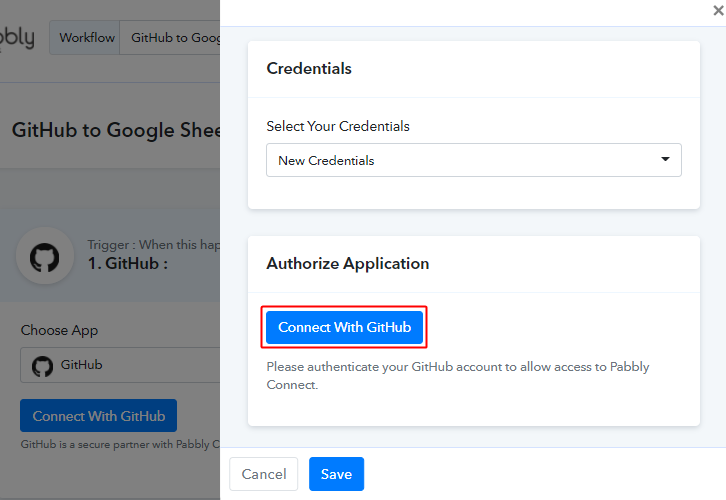
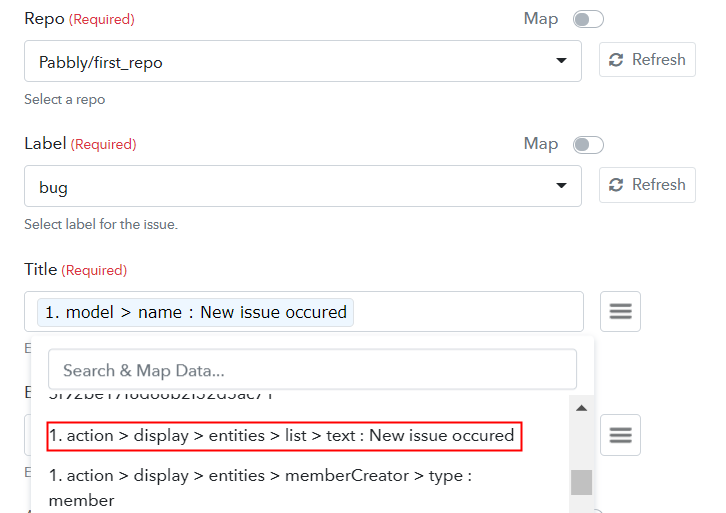
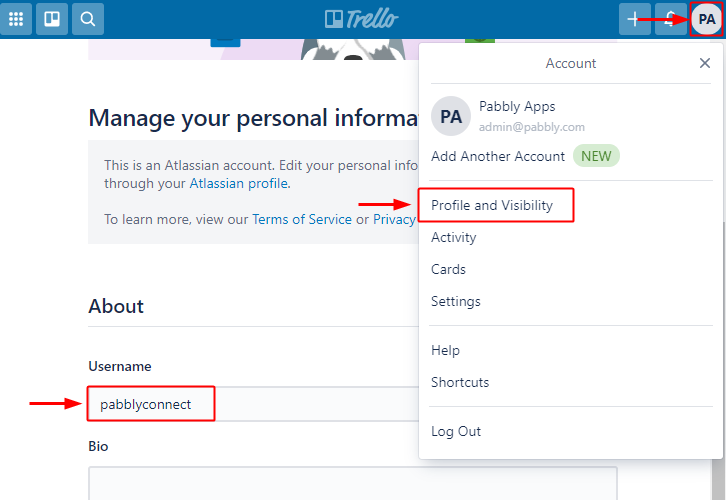
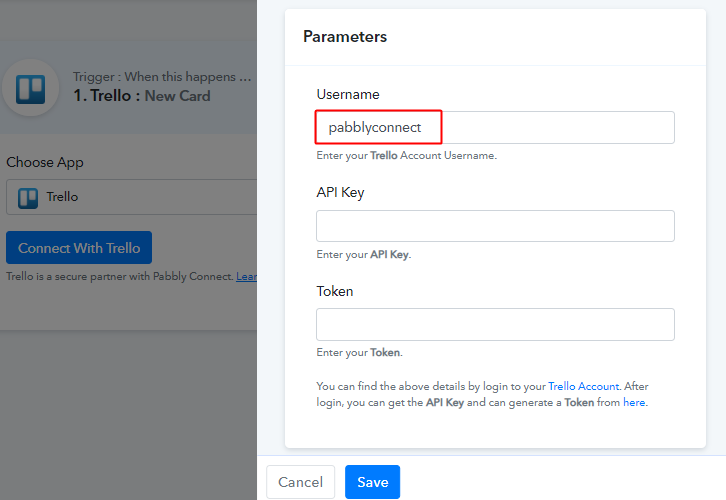
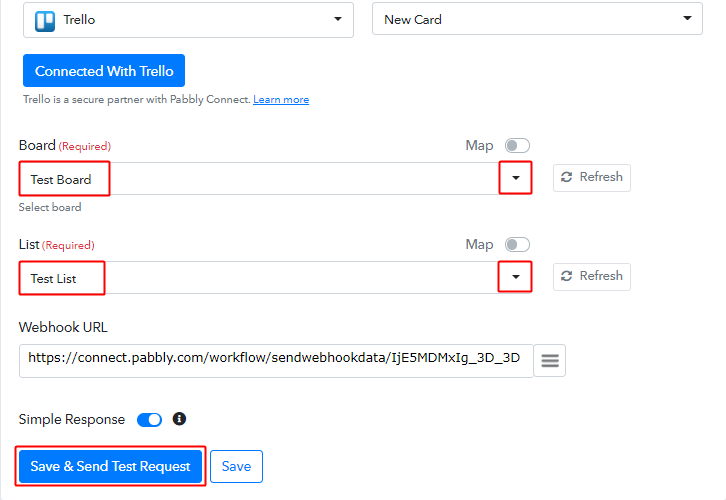
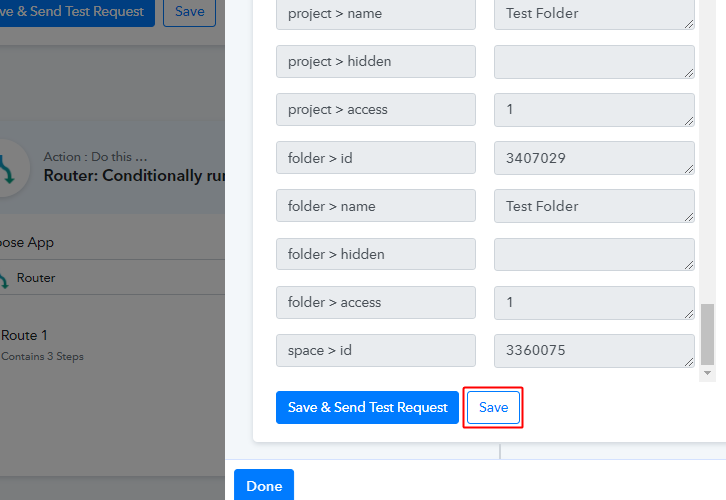
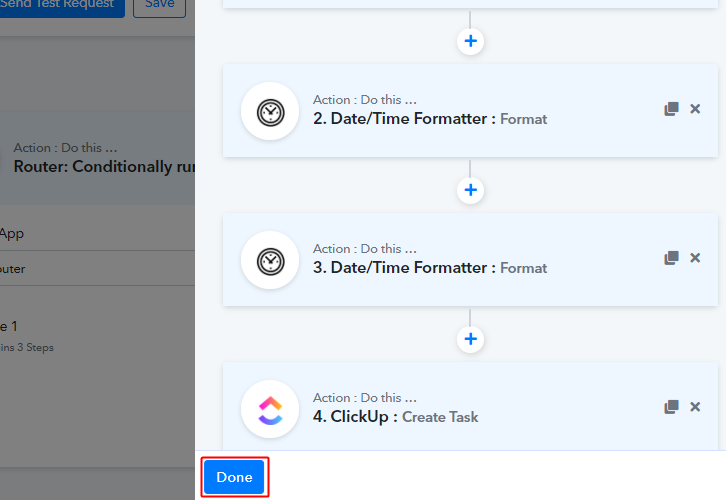
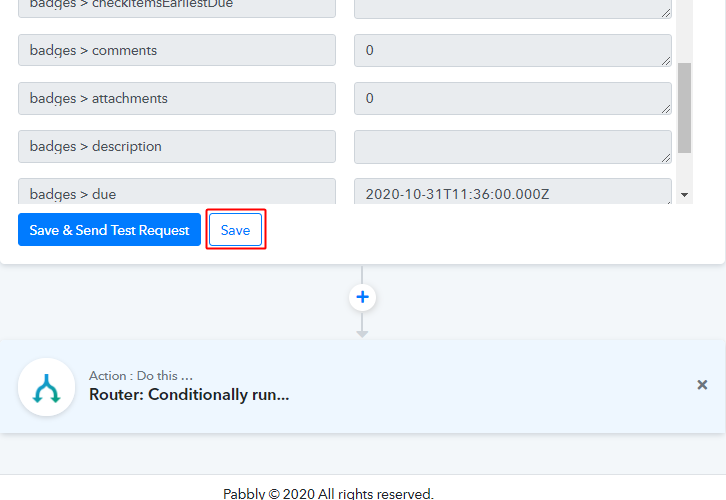
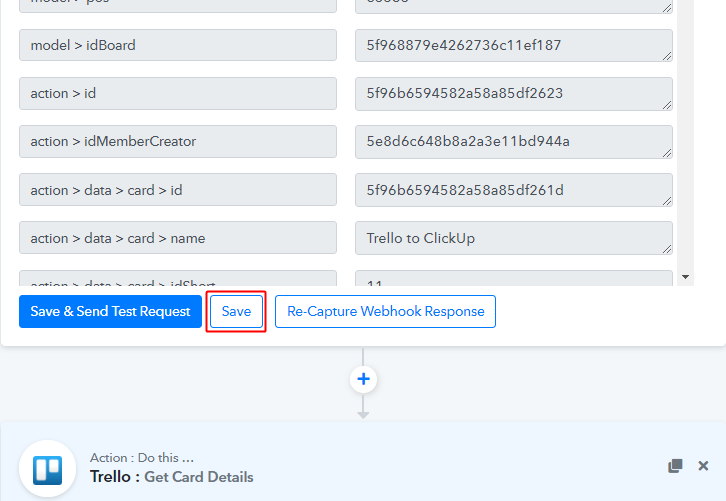
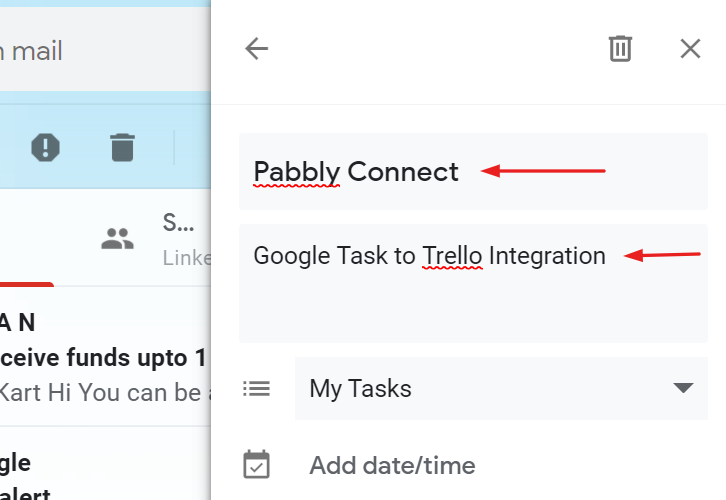
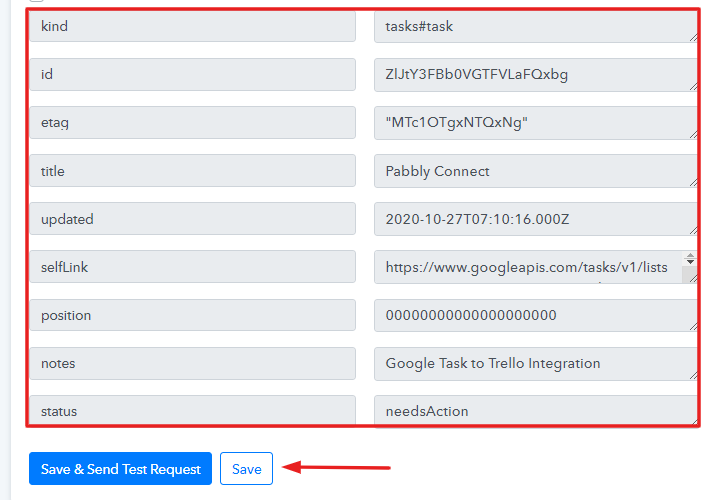
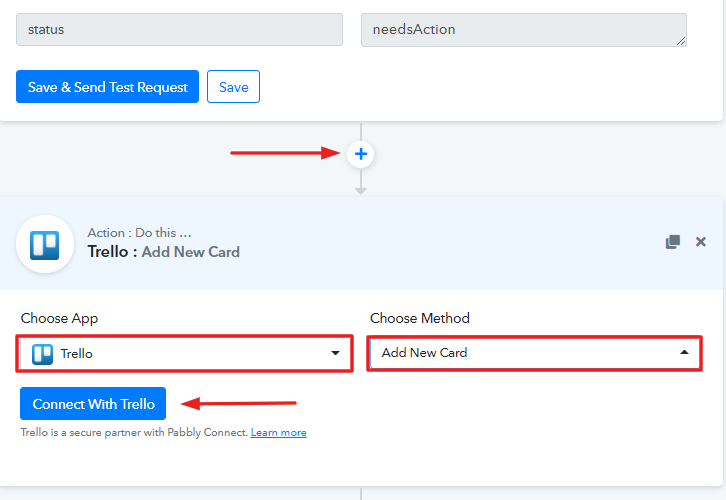
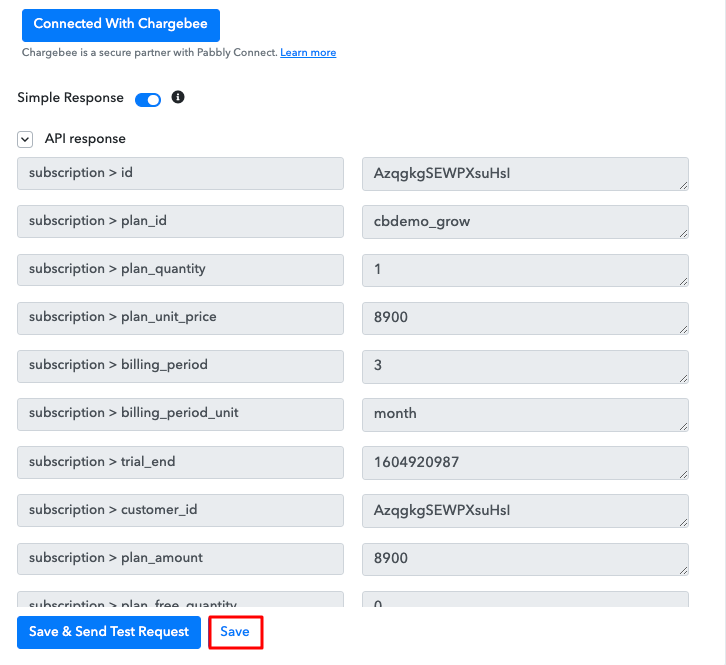
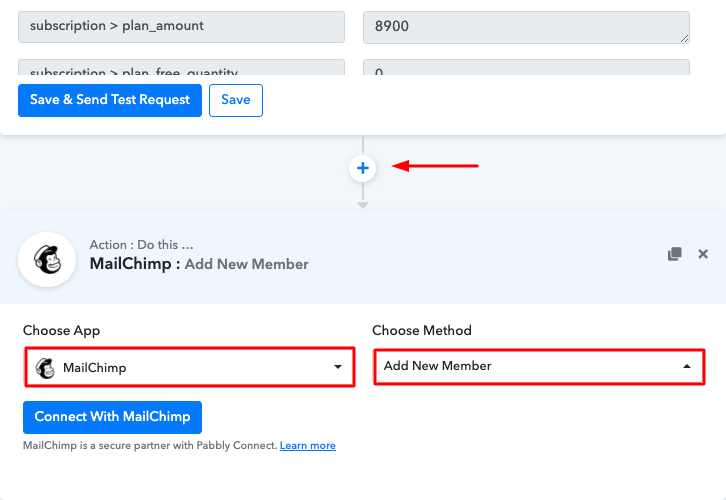
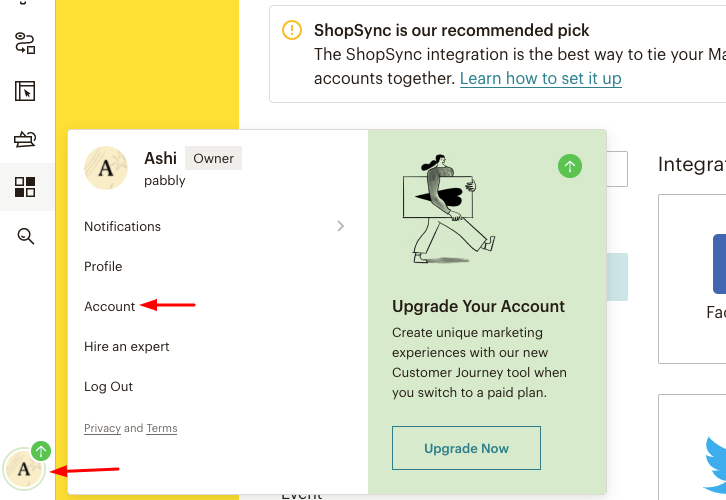
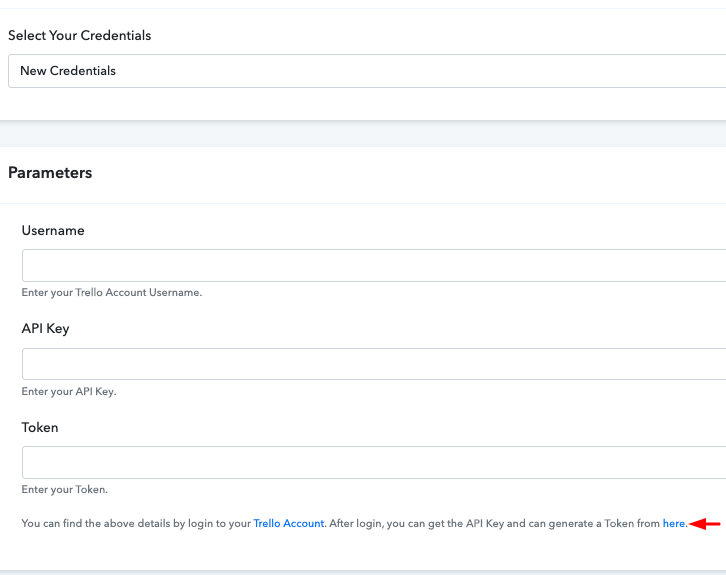
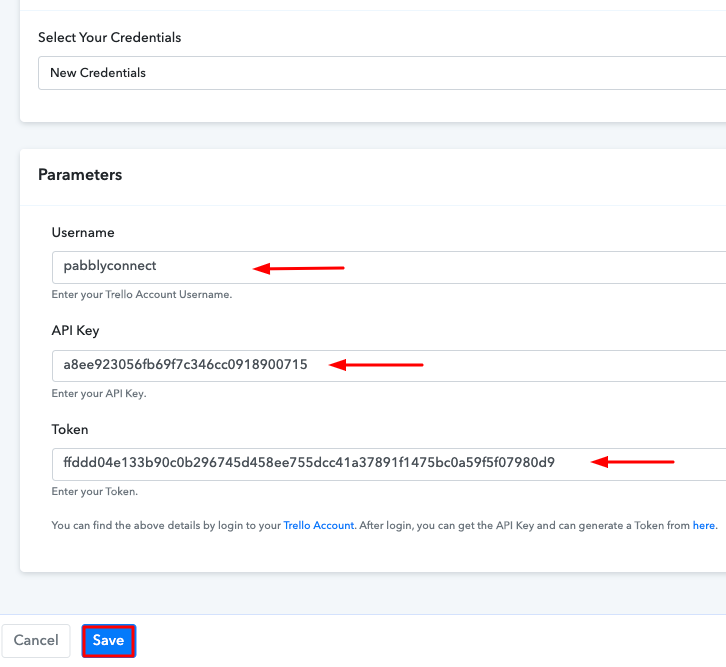
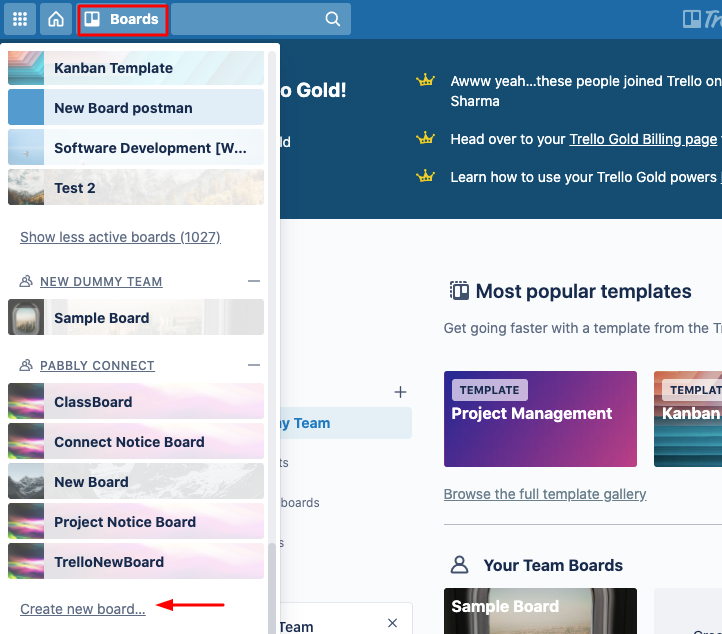
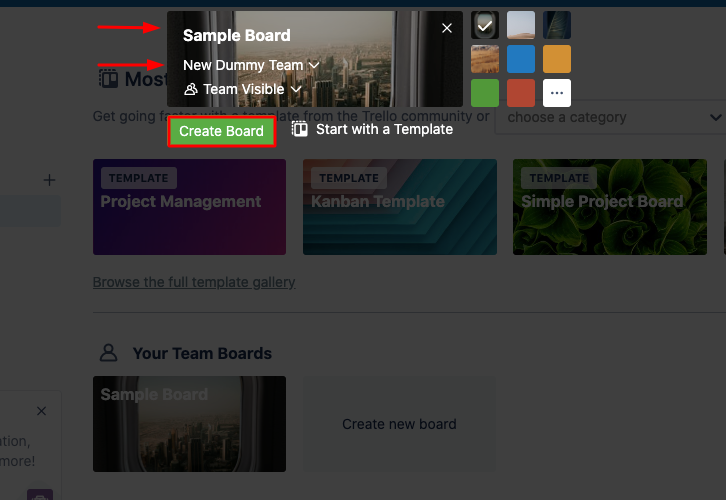
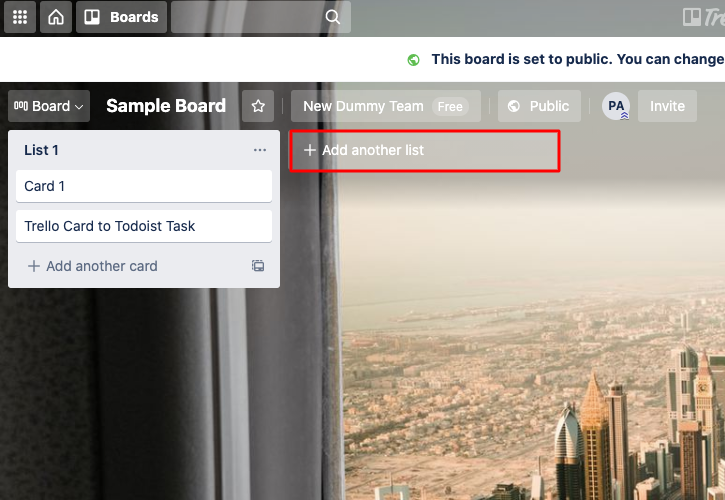
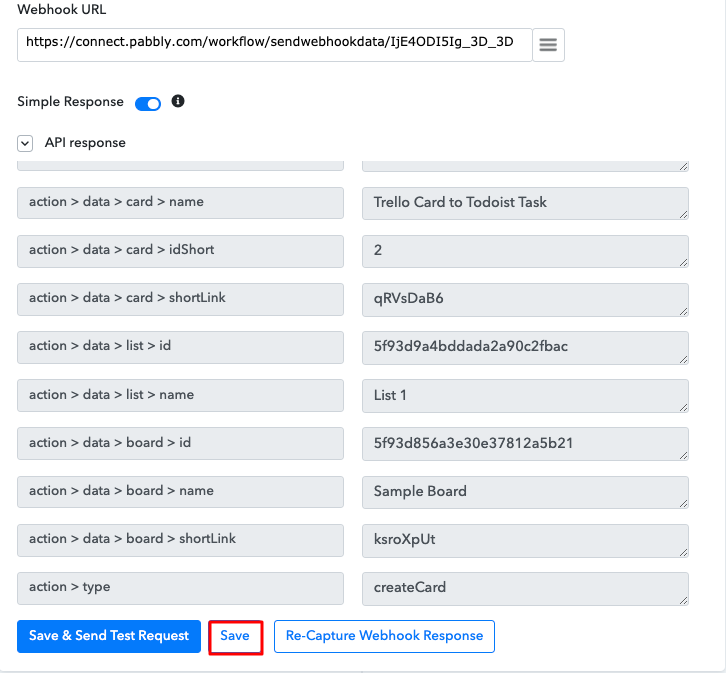
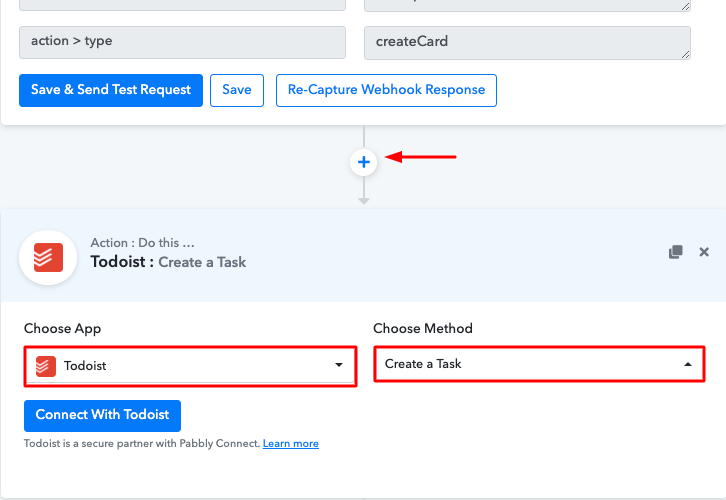
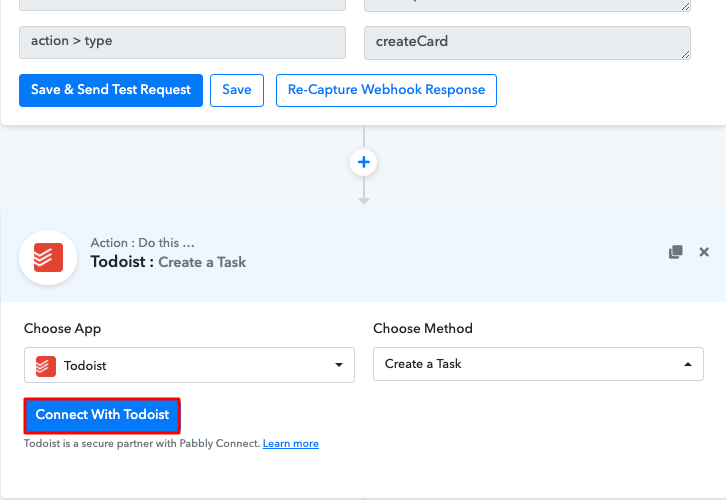
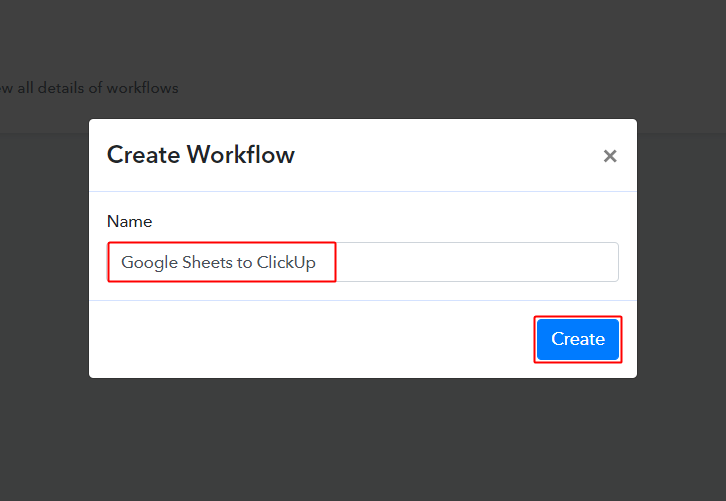
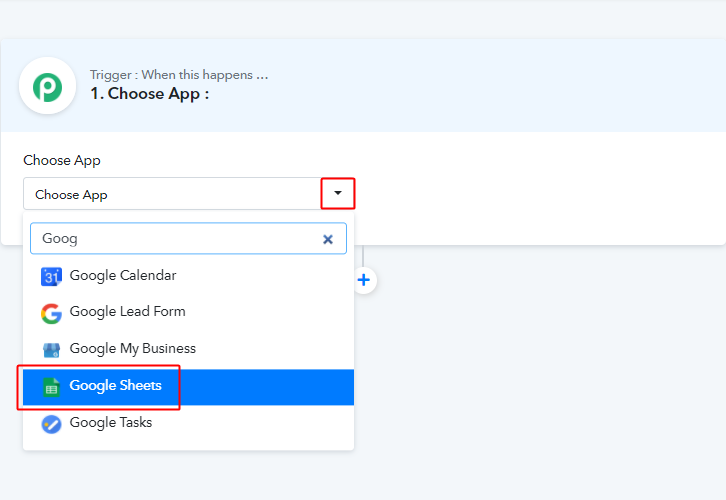
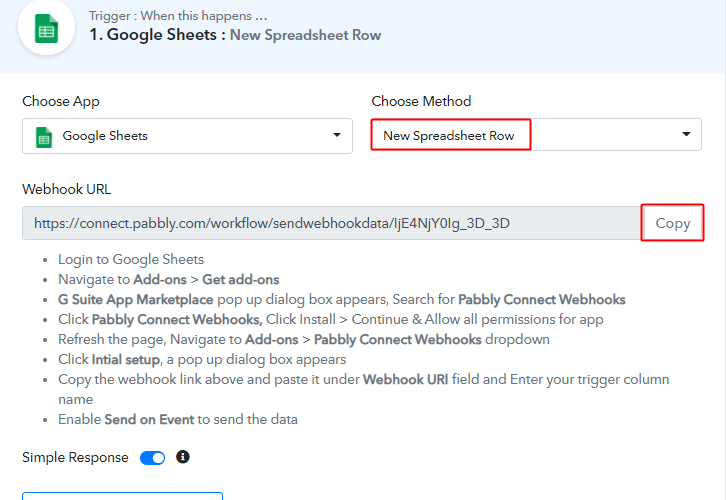
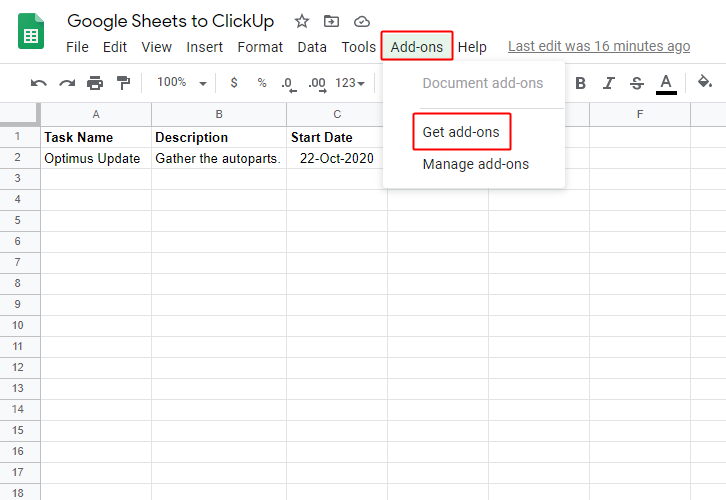
Next, after logging into the account, click on the “Access Now” button as shown in the above image. Start the process of building a workflow for integration by clicking on the “Create New Workflow” button. Moreover, add the name of workflow which in our case is “Trello to GitHub”. Nevertheless, you can always name the workflow according to your requirements. Next, after building a workflow, you have to choose the integration app to create a workflow for connecting Trello and GitHub. Using Pabbly Connect you can avail unlimited actions and triggers, click here to sign up for unlimited workflows for free. The following step is to select “Trello” from the dropdown, then choose the “New Card” option to create GitHub issues from new Trello cards. Click on the “Connected with Trello” button after making all the necessary adjustments. In addition, the permission window will open asking for an API key for which you have to log in to your Trello account. To connect Trello to GitHub, you need to paste the “API Key” for which you have to log in to your Trello account or click the link shown in Pabbly Connect dashboard. Further, it will ask for “Bearer Token/API key/Username”, for which you have to log in to Trello account or click on the “here” link as shown in the red box in the image. Now when you click on the “Token” link as shown in the image, it will redirect to another tab that has a username, simply keep that username in mind. Below on this page, you have to allow access by clicking on the “Allow” button. Now after allowing access it will open up the page with your token. Just copy it. Just fill all the details and hit the “Save” button. Subsequently, to create GitHub issues from new Trello cards. Hence to do that, you need to log into your Trello account. Now after logging, click on the “Create new board” option. Now just assign a name to your board. Here we have mentioned, “Trello to GitHub”. After assigning a name, click “Create Board”. Further, just create a card on your board and hit the “Add Card” button. But, before clicking on the save button, go to the Pabbly Connect dashboard and press the “Save & Send Test Request” button. As soon as you hit the “Add Card” button, the entry will appear on the “Pabbly Connect” dashboard. Simply click on the “Save” option. To make this Trello GitHub integration work, you have to choose the action for your trigger. Further, click on the “+” icon to add an action for your trigger. Here we are going to select “GitHub” from the dropdown. Then, select the “Create an Issue” option. Now, after making all the necessary changes, click on the “Connect with GitHub” button. After clicking on the “Connect with GitHub” button, the authorization window will appear for which you have to log in to your GitHub account. Just map all the fields like we did, such as for Title, select the title of your Trello board. After mapping all the necessary fields, click on the ‘Save & Send Test Request’ button. As you can see the Trello Card is registered here as a GitHub issue. And, the good thing is. it is a one-time process. After that, you can easily create GitHub issues from all the new Trello cards. Alright! This was our explanation on “How to create GitHub issues from new Trello cards”. Using Pabbly Connect, you can easily integrate two or more services without needing any technical expertise. Creating workflow within the software is easy, one can operate it without any difficulty. So, what are you waiting for? Go and grab a deal by signing up for a free account.Step 2: Access Pabbly Connect

Step 3: Workflow for Trello to GitHub Integration
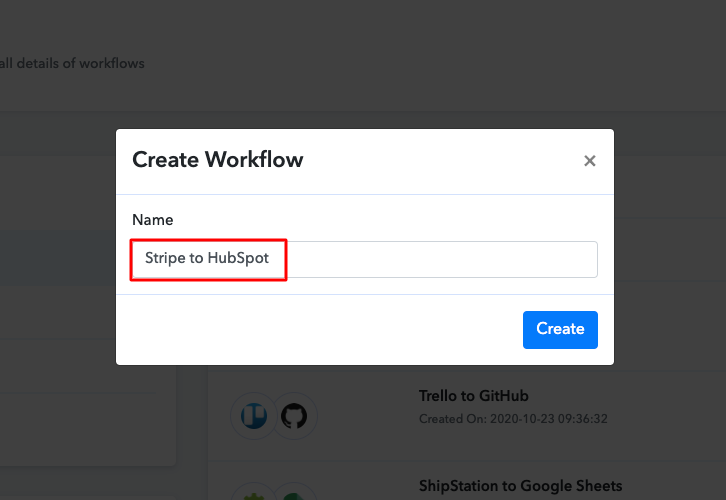
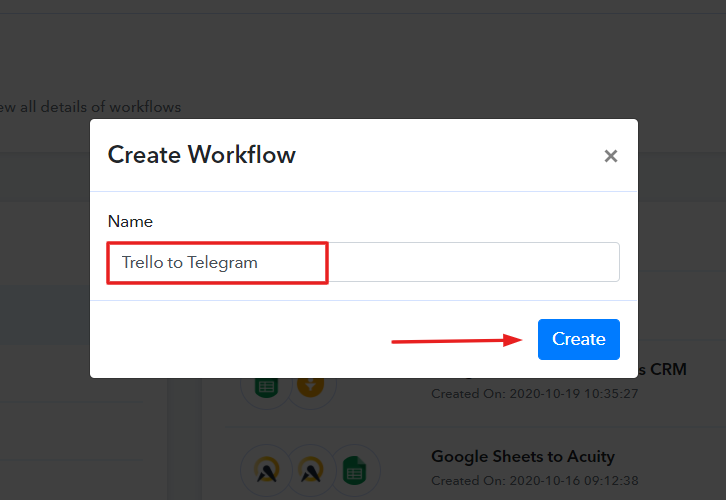
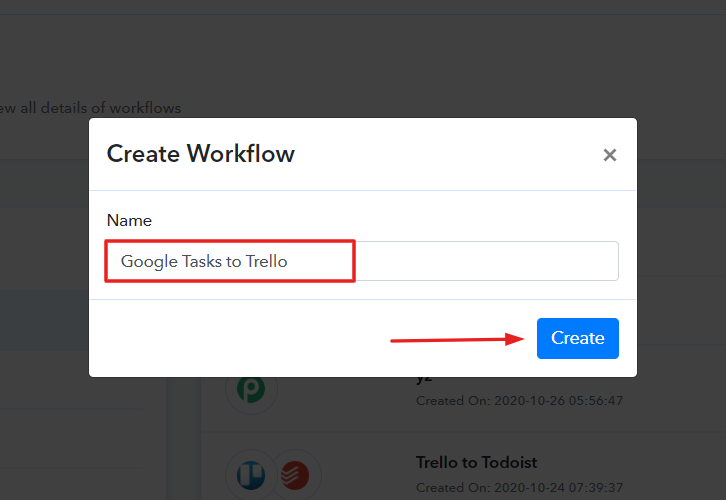
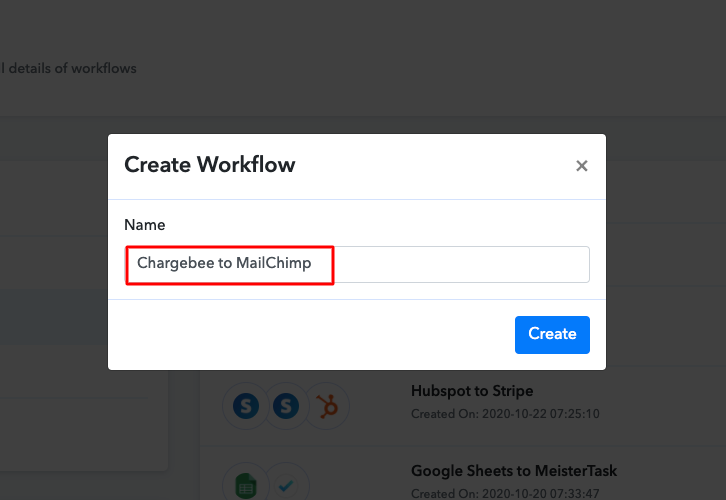
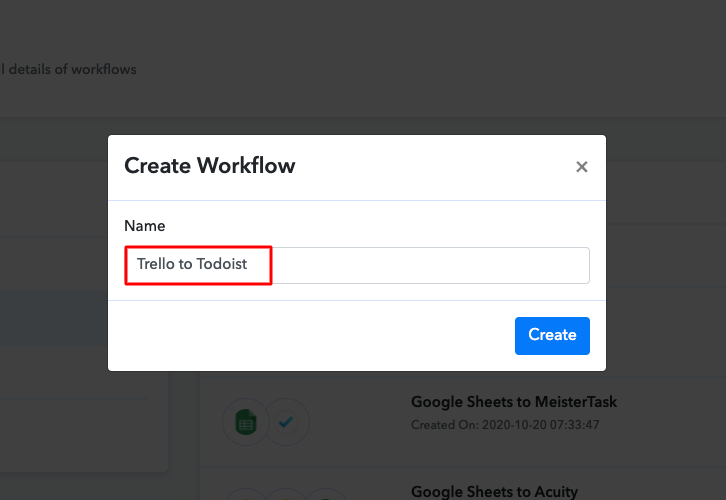
(a) Start with a New Workflow

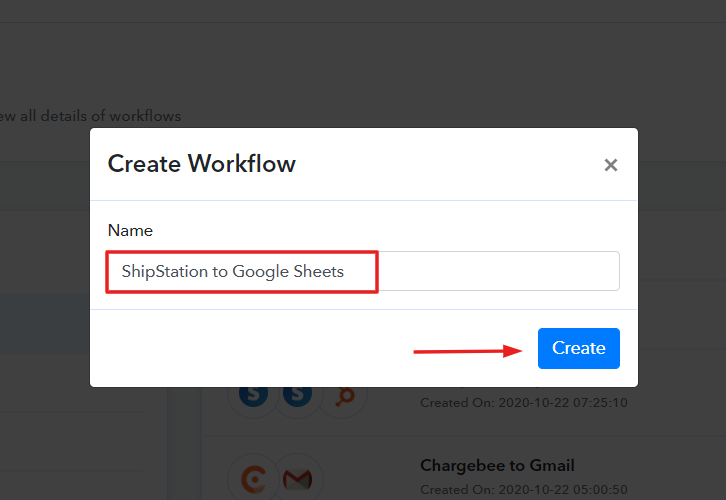
(b) Name the Workflow
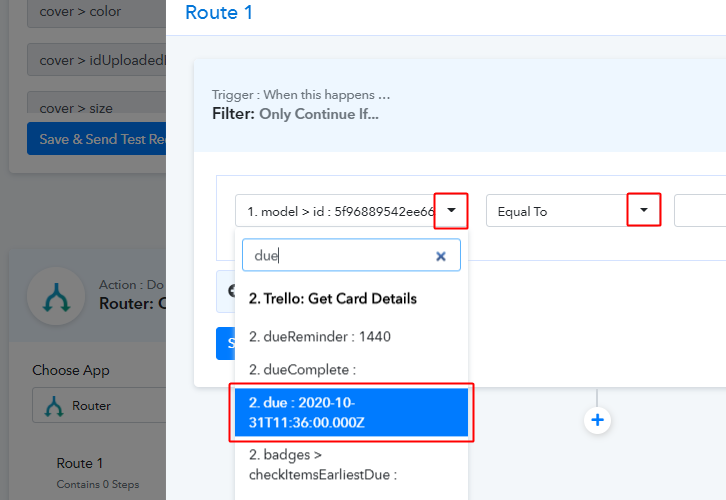
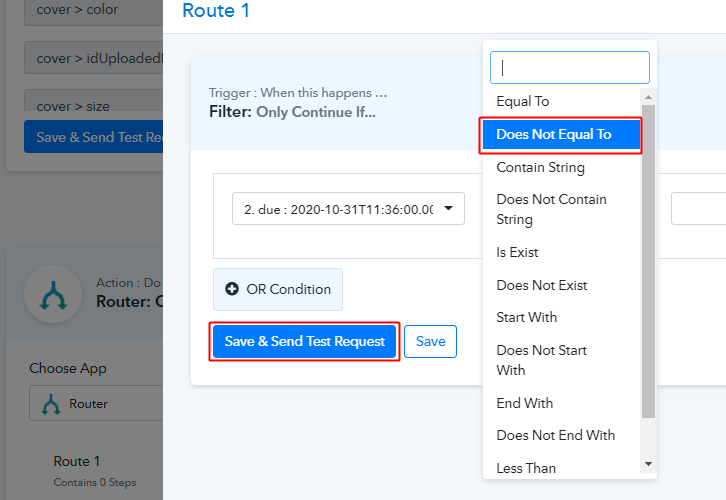
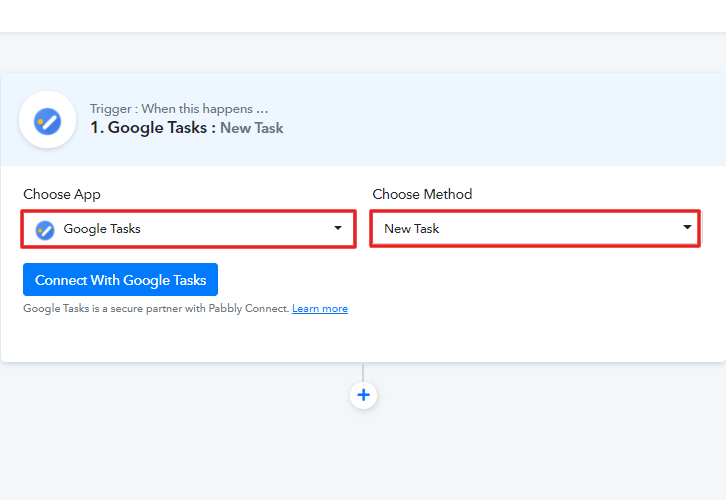
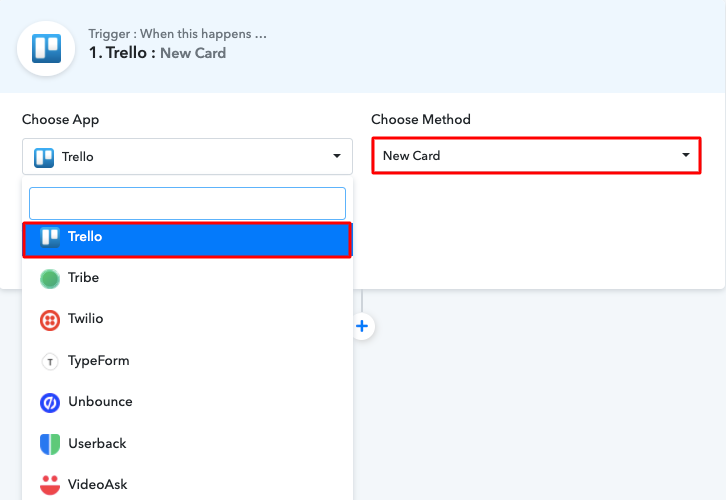
Step 4: Setting Trigger for Trello to GitHub Integration
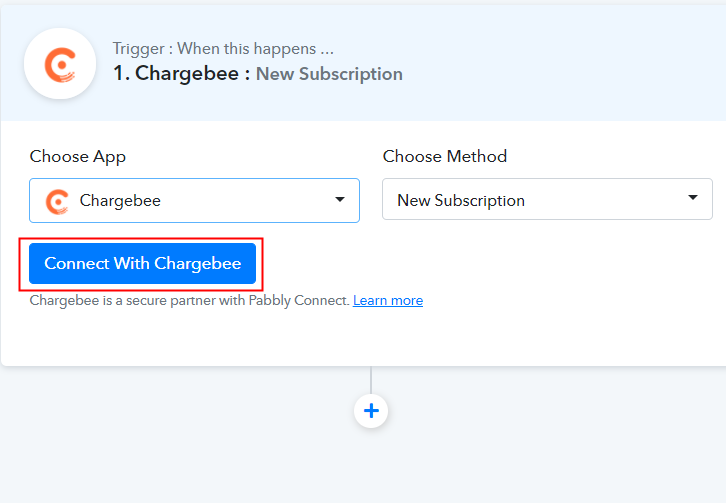
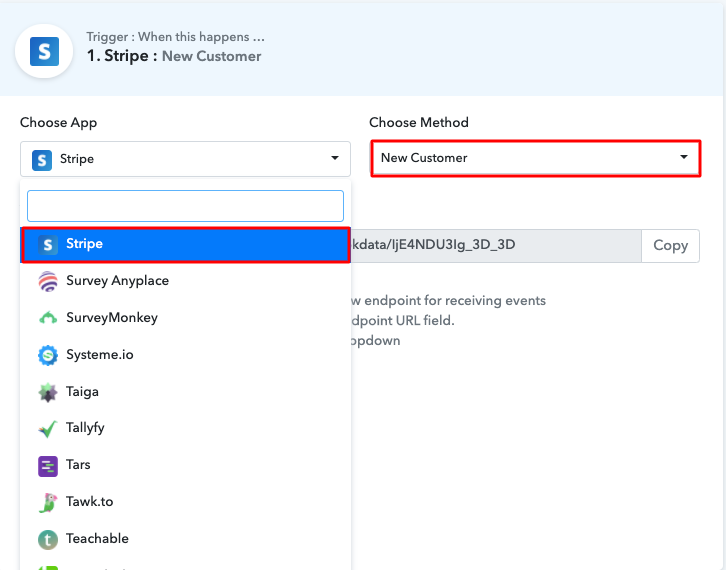
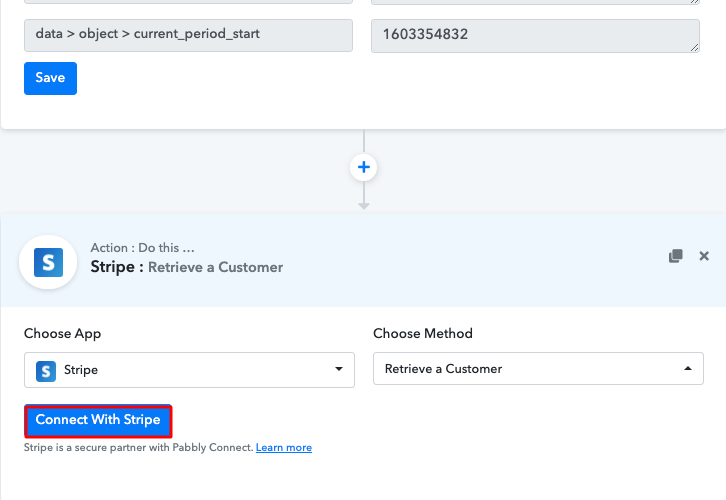
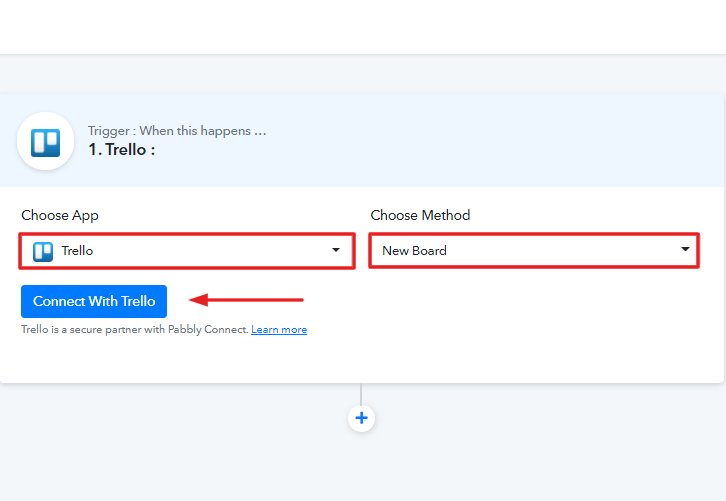
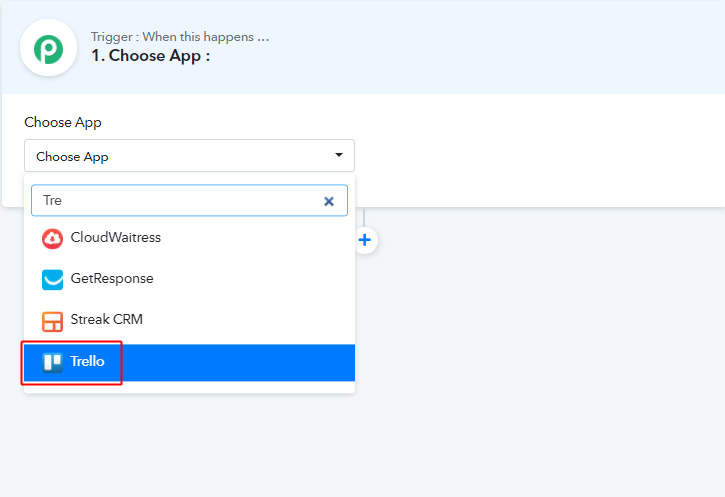
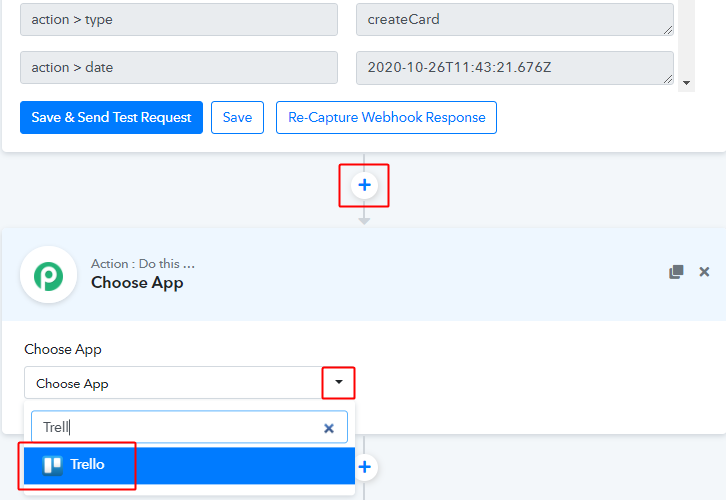
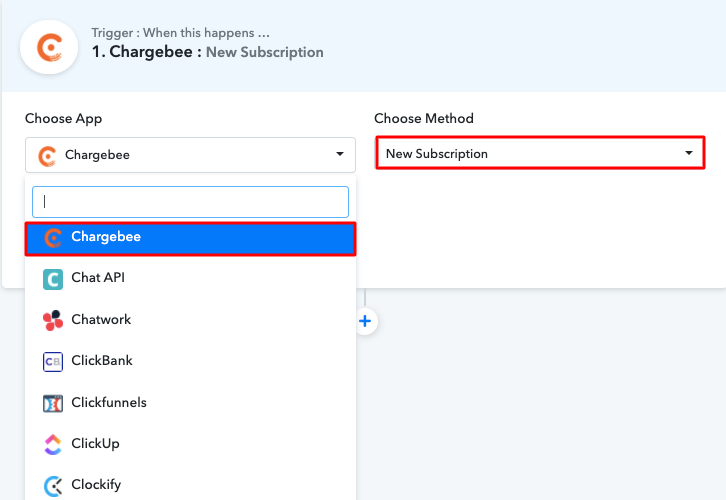
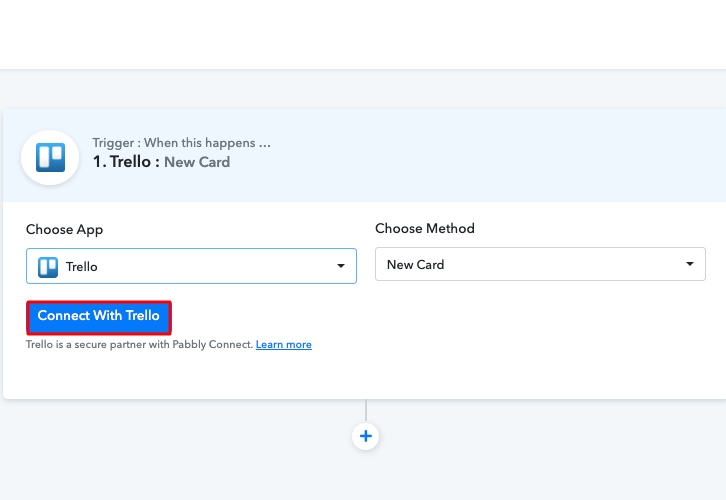
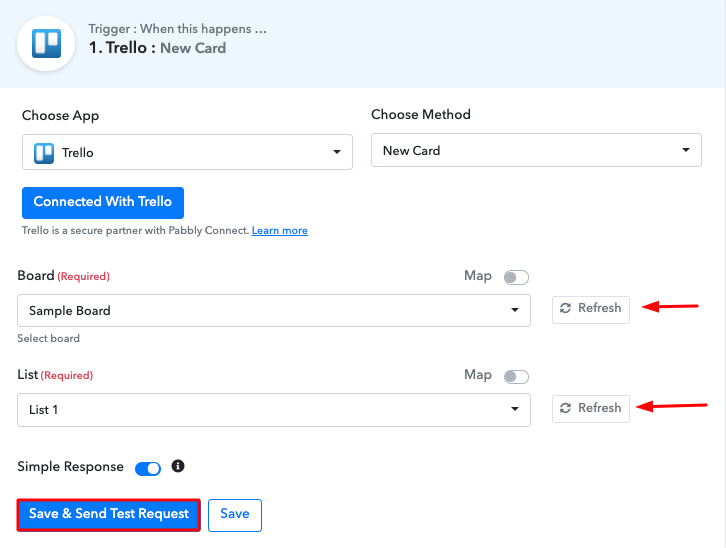
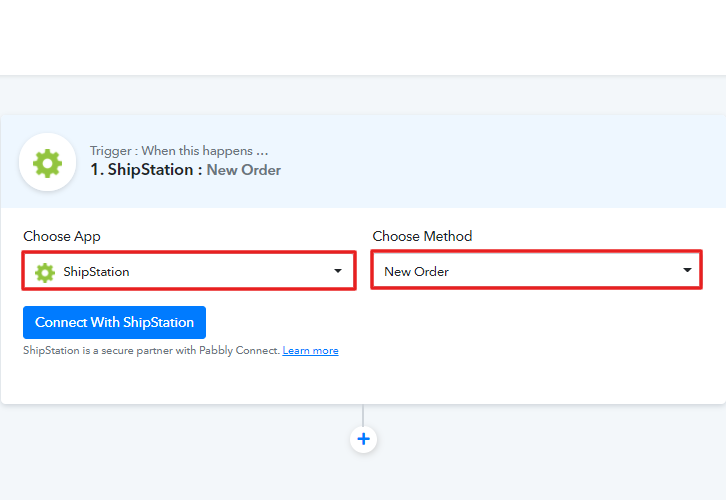
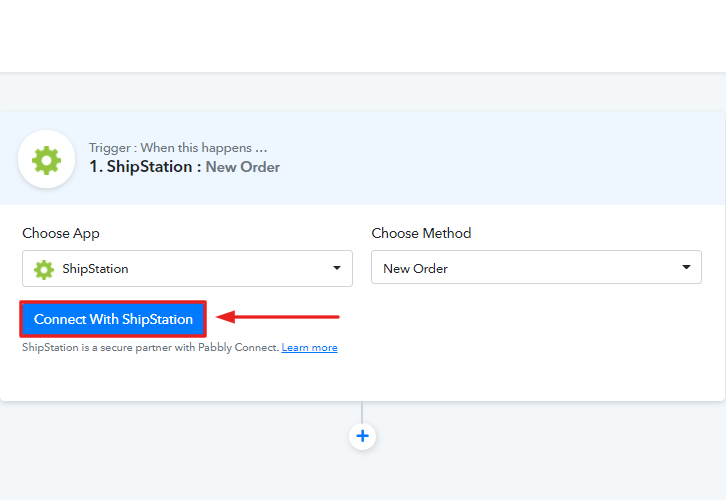
(a) Select Application you Want to Integrate
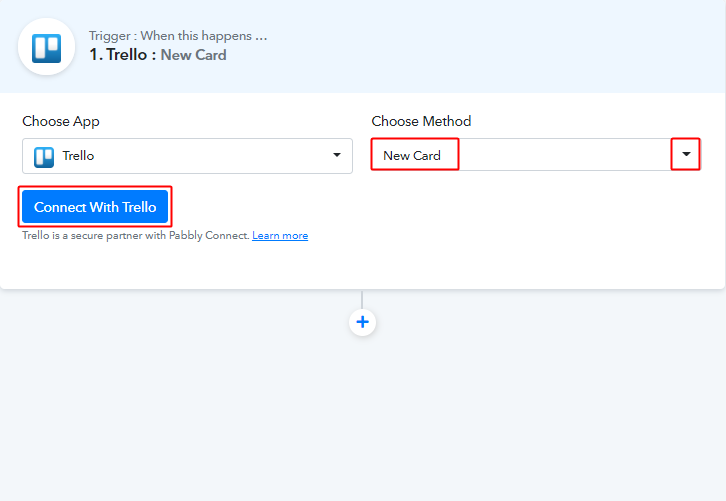
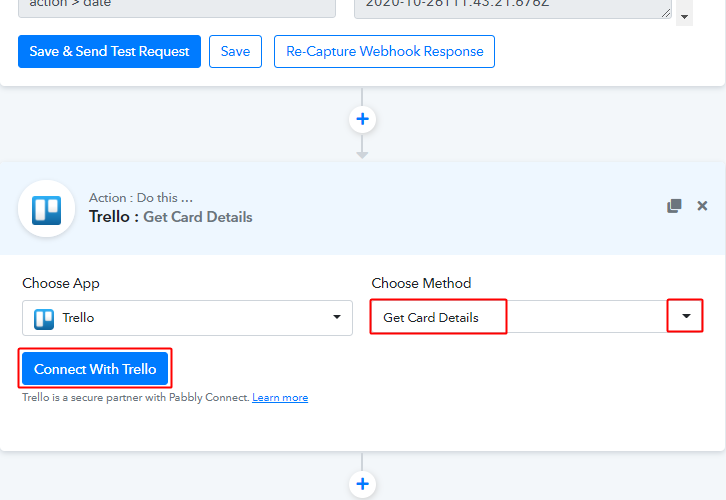
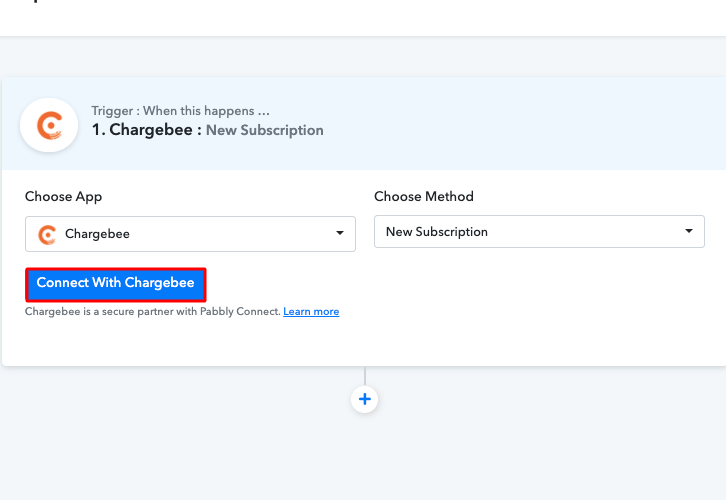
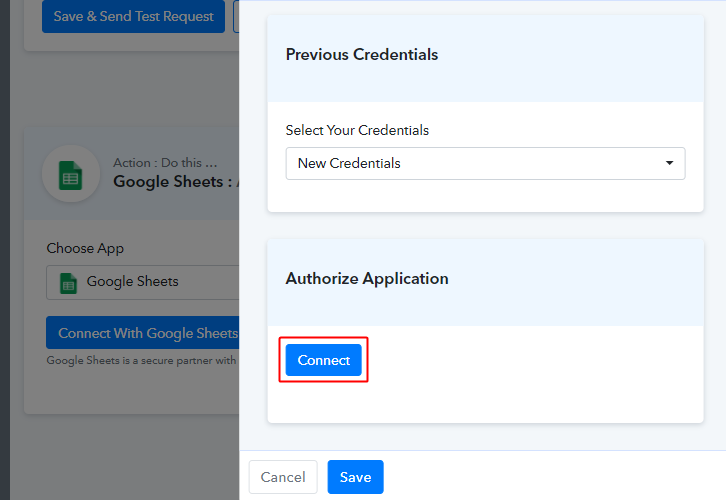
(b) Click the Connect Button
Step 5: Connecting Trello to Pabbly Connect
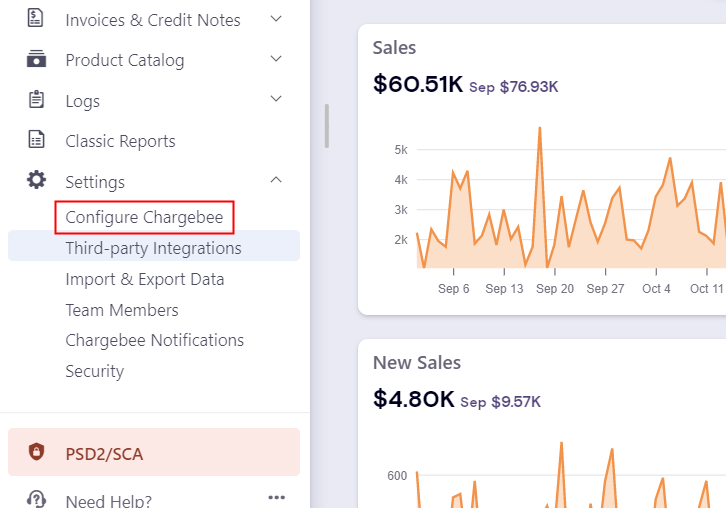
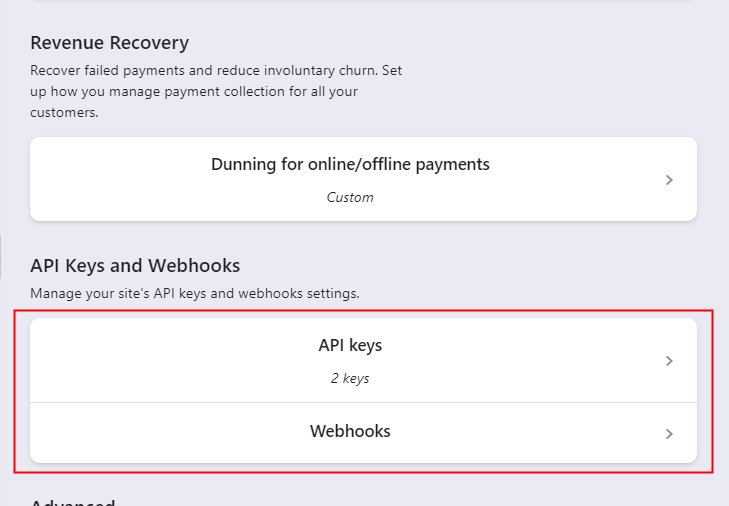
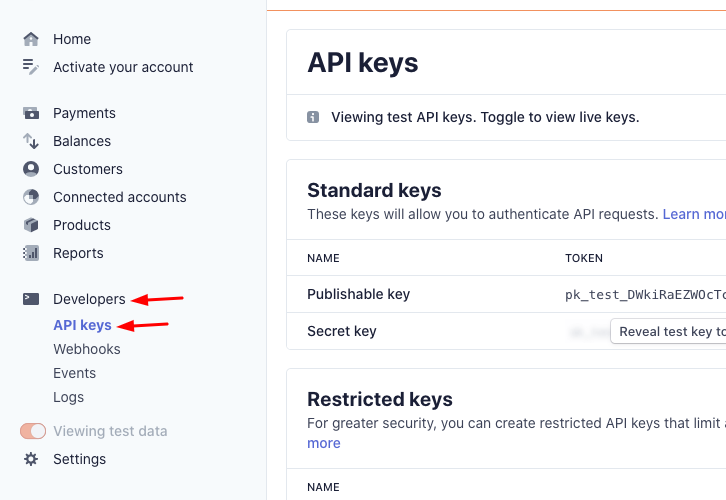
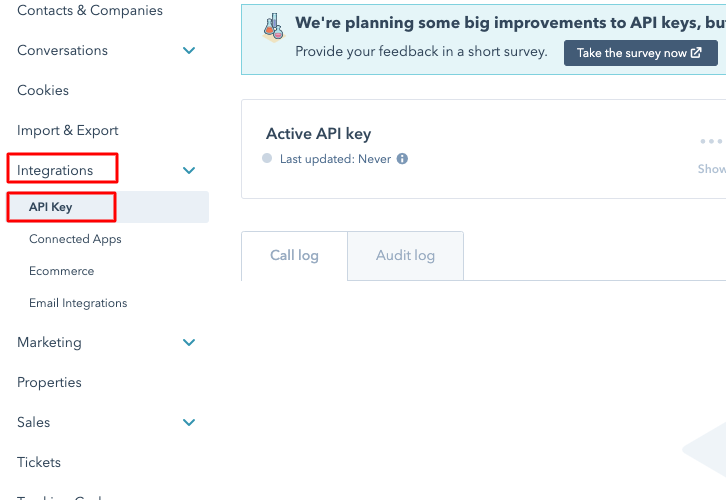
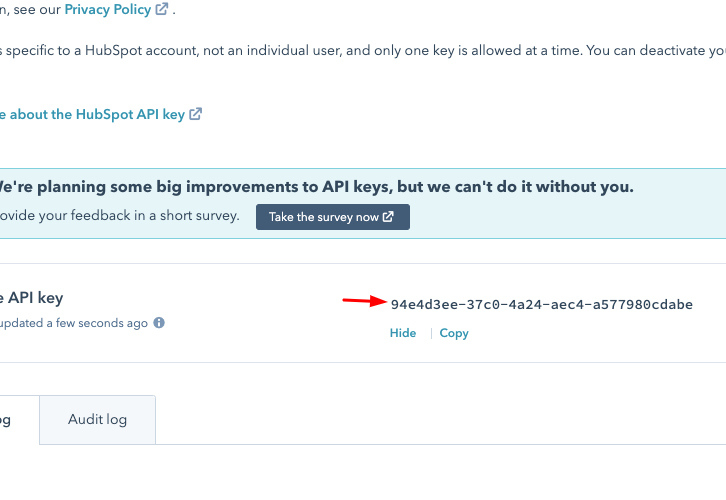
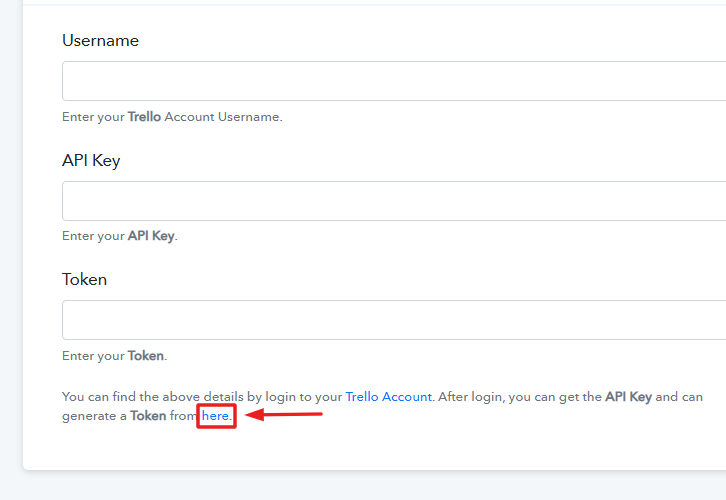
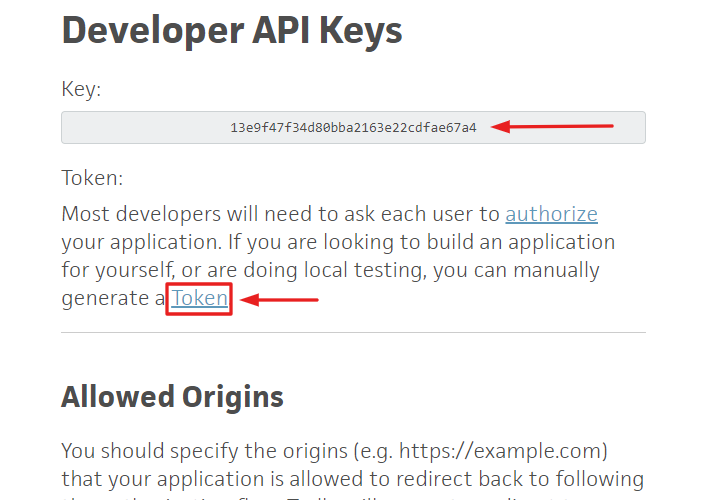
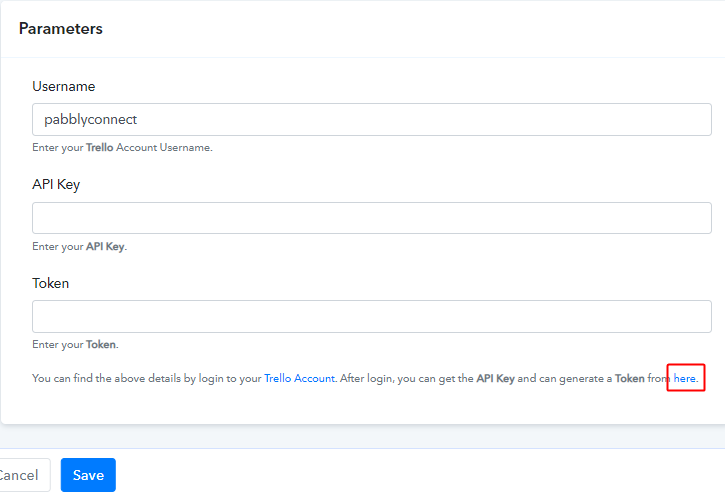
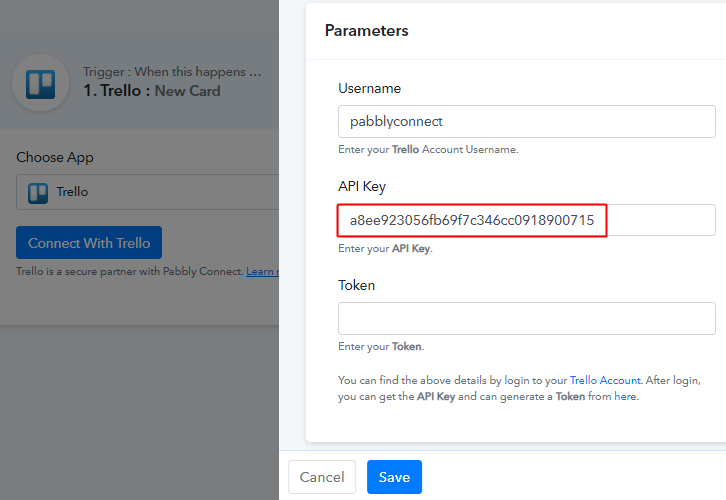
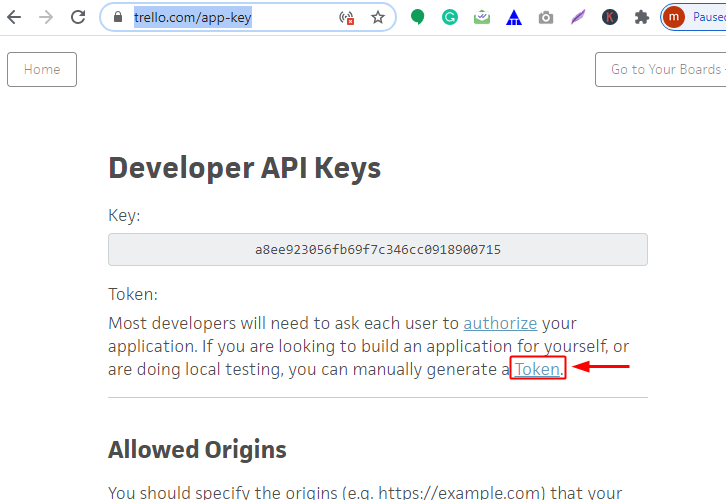
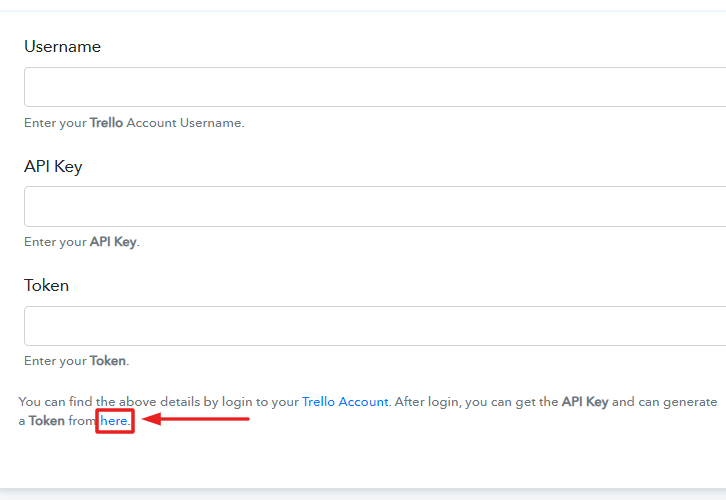
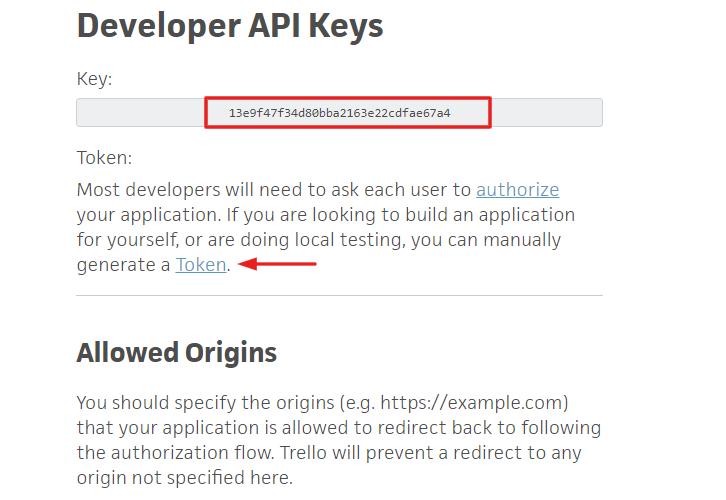
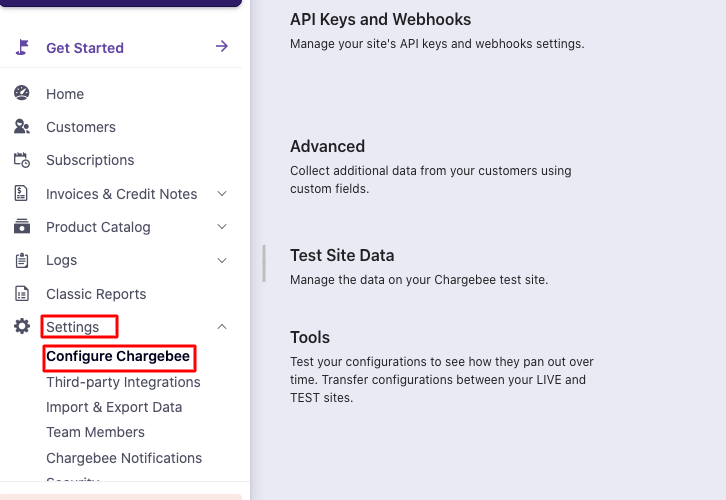
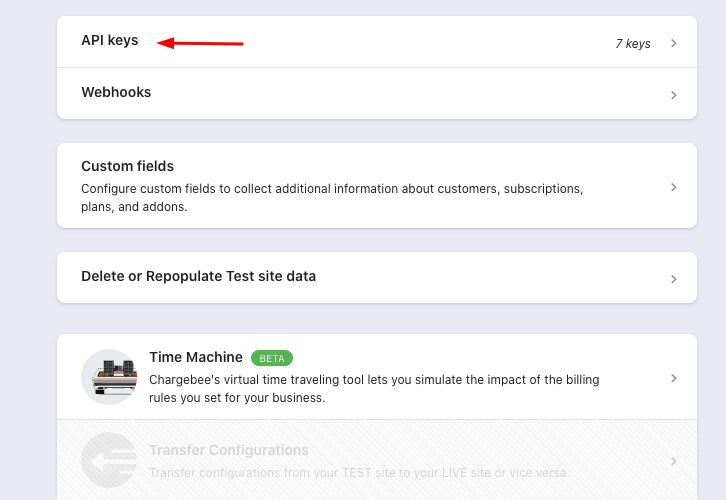
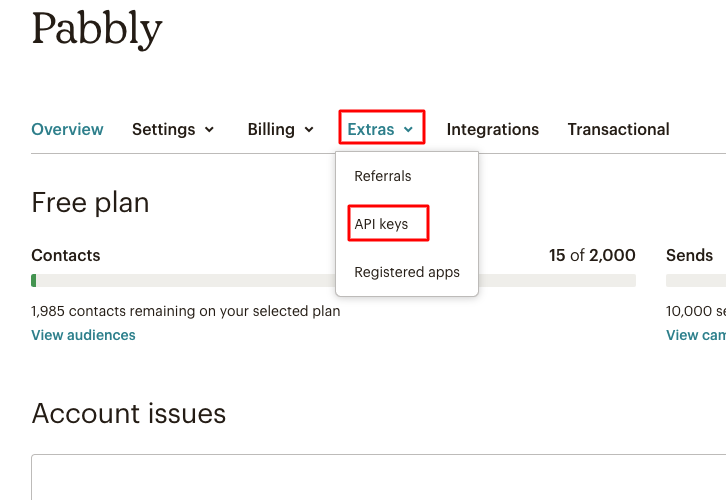
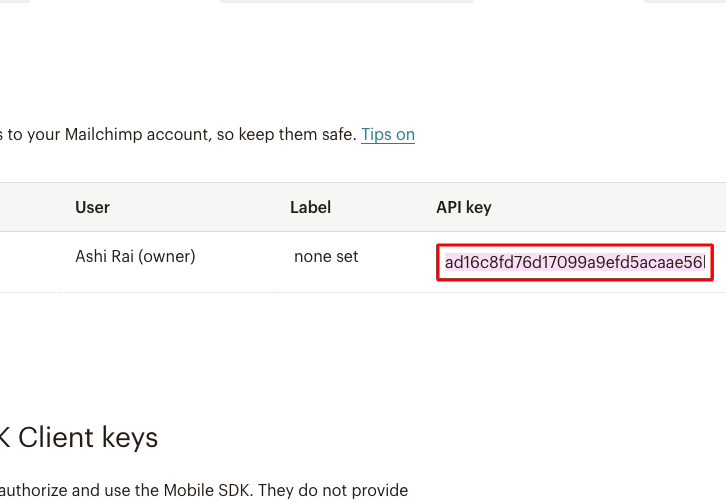
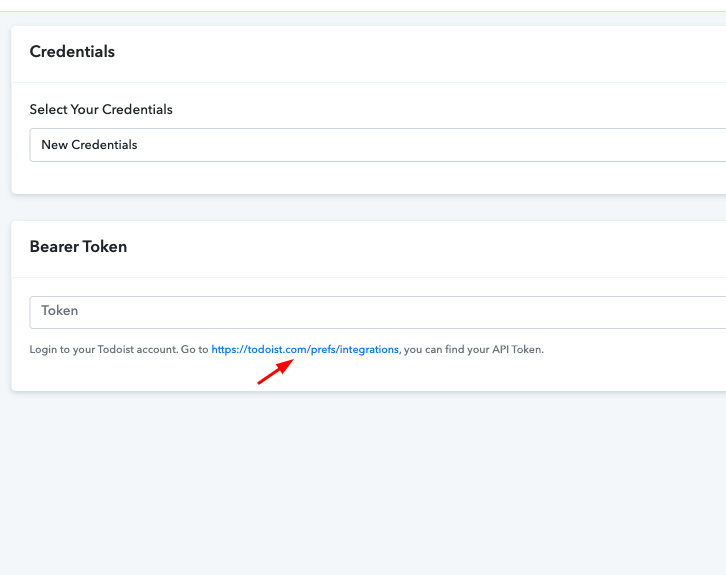
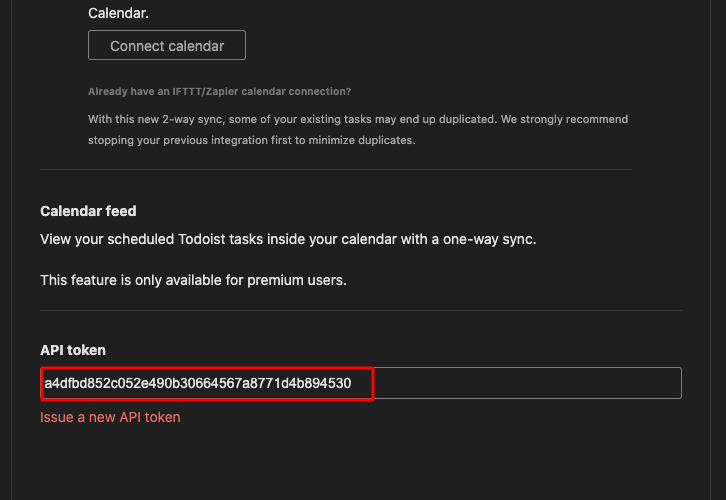
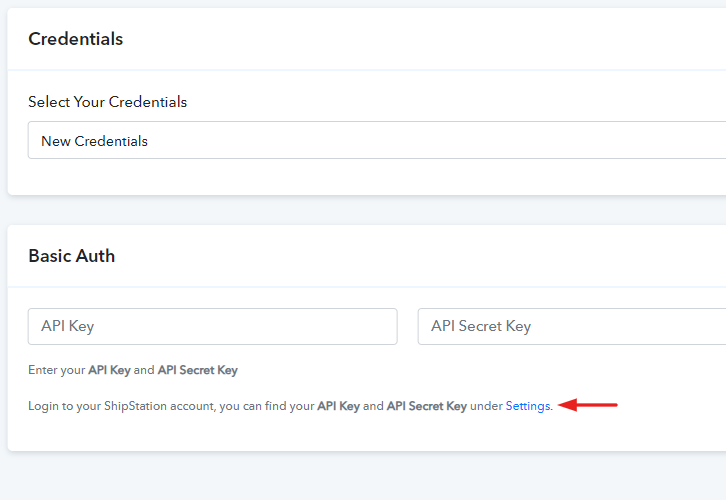
(a) Get your API Key & Bearer Token
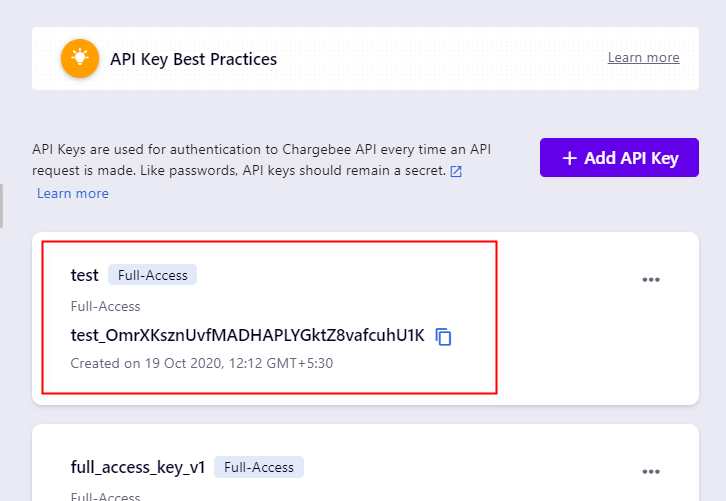
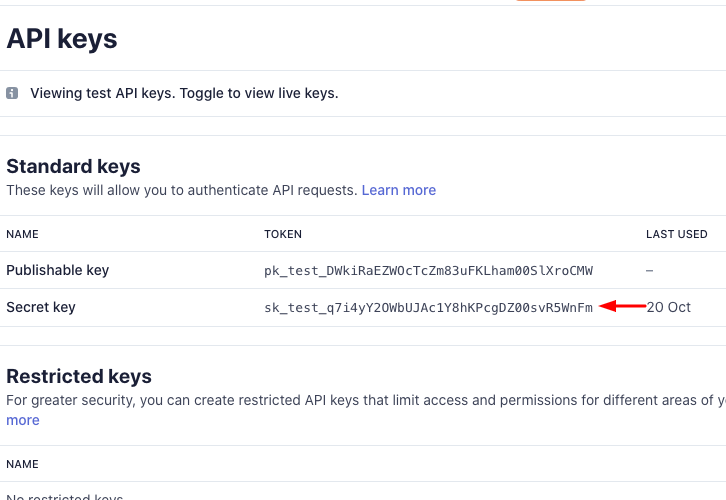
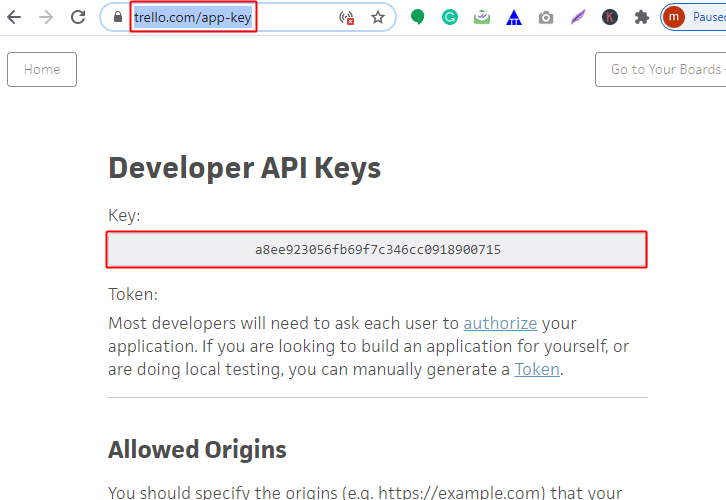
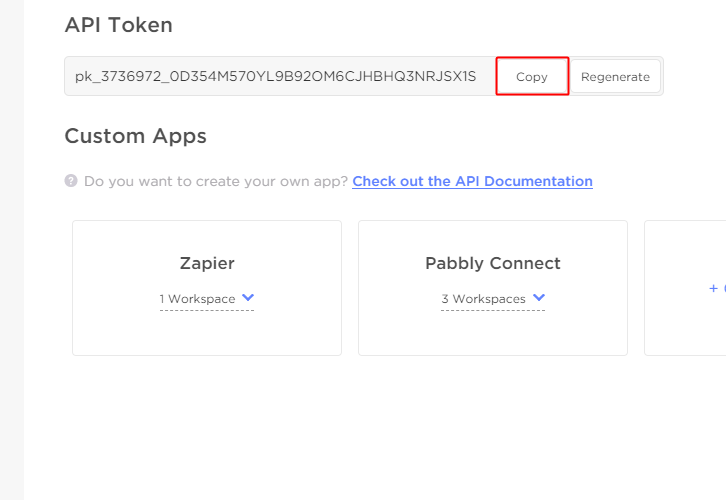
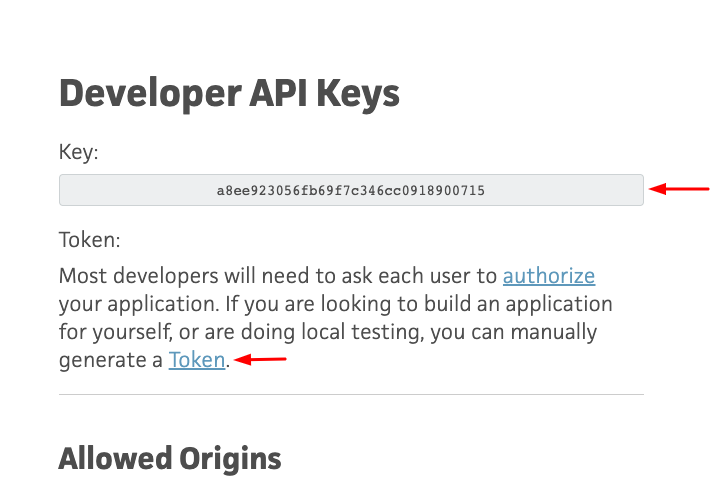
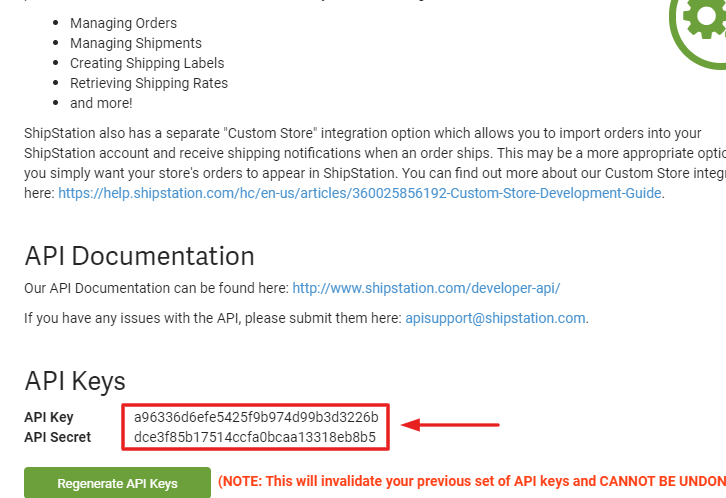
(b) Copy API Key
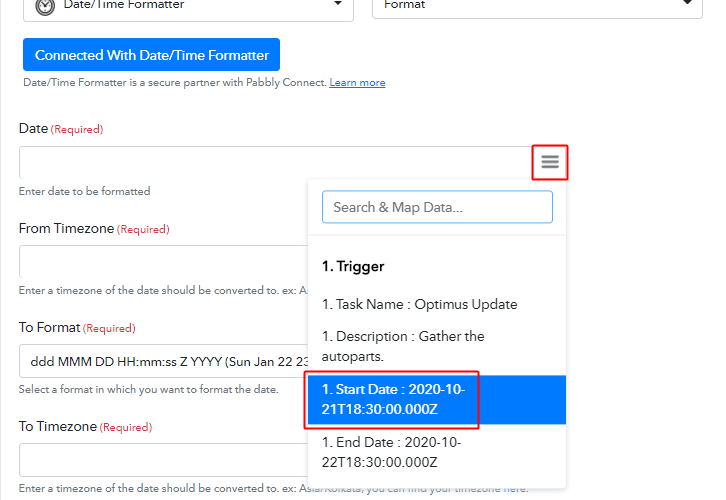
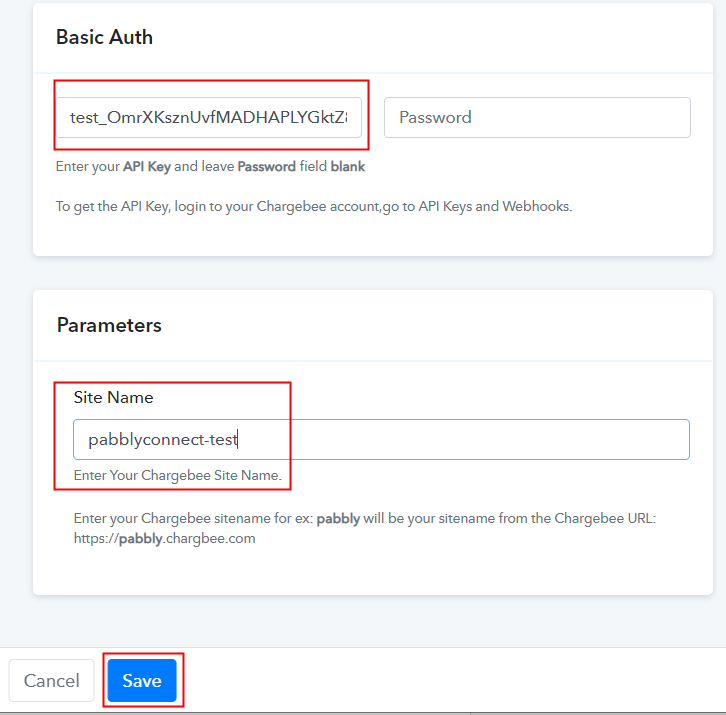
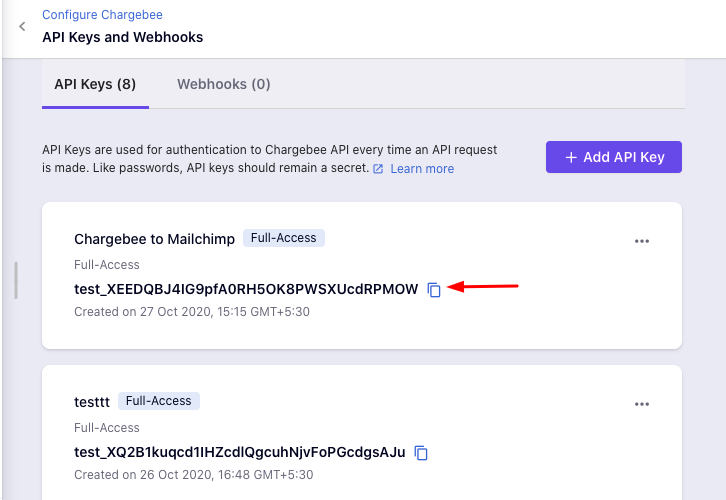
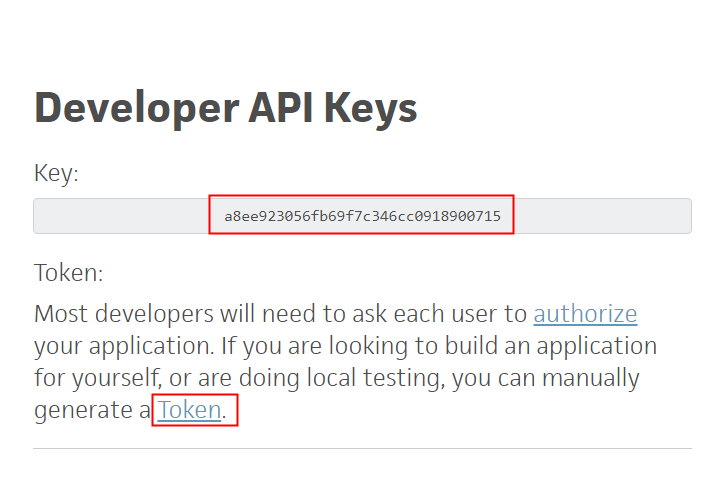 As soon as you click on the “Here” link, it will open up the page with the API key, paste that key in the API Key section. For “Bearer Token”, click on the “Token” link as shown in the image.
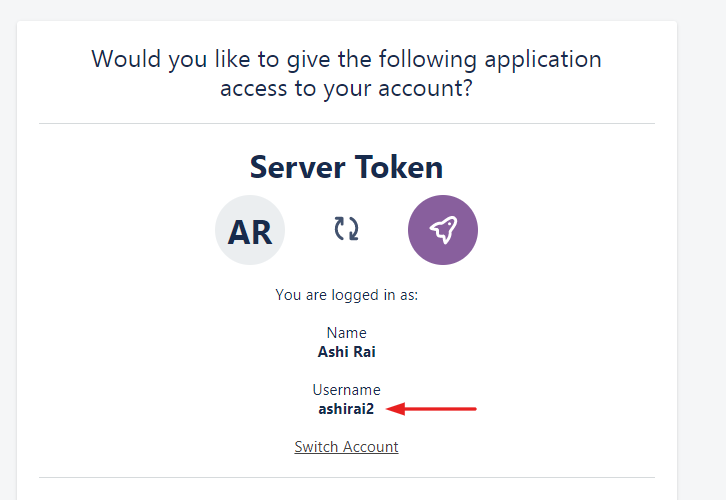
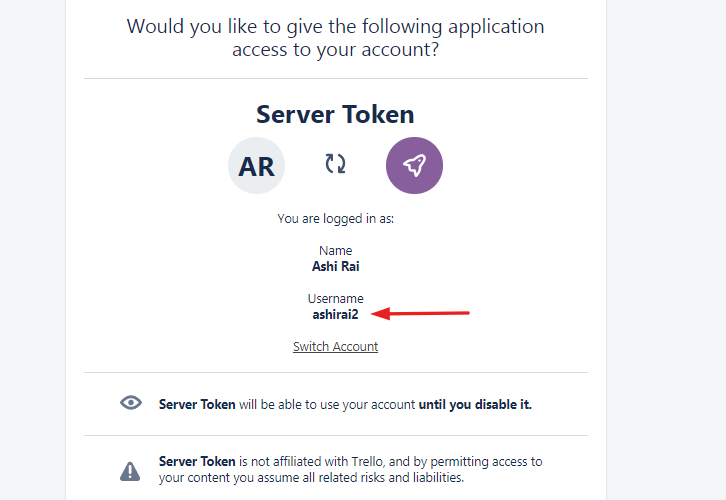
(c) Copy Username
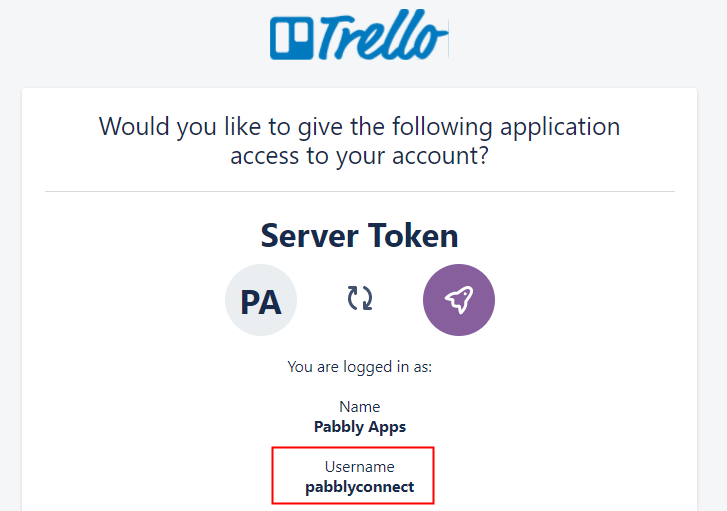
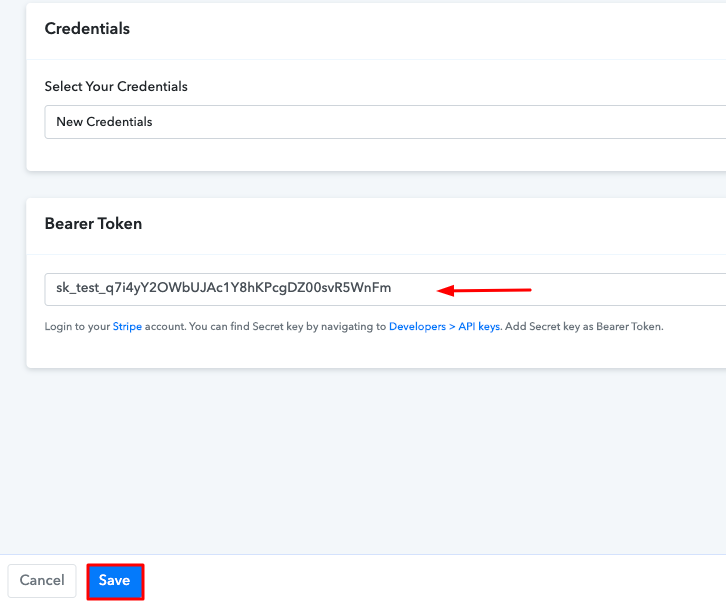
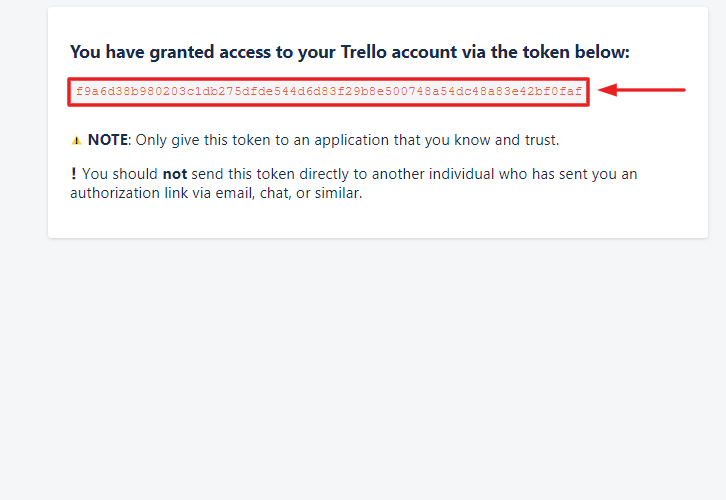
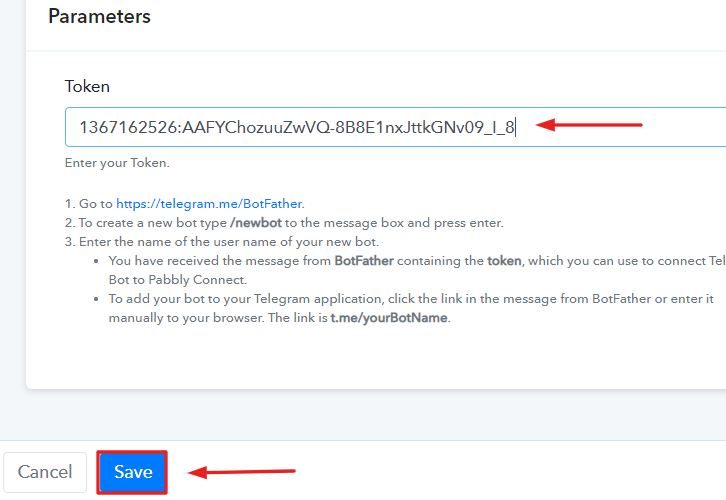
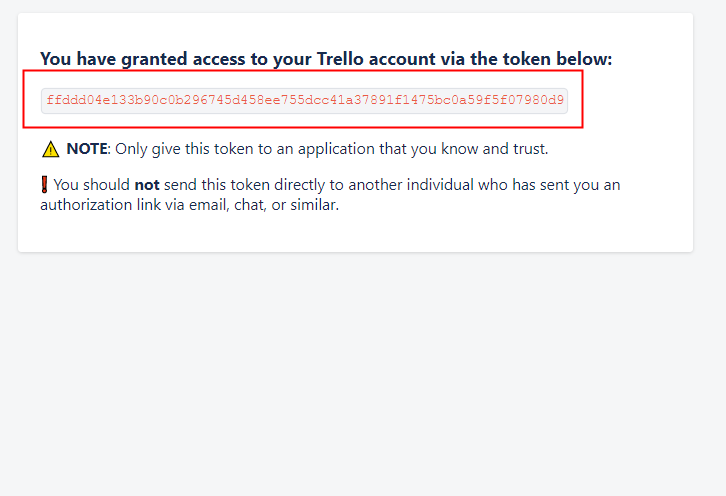
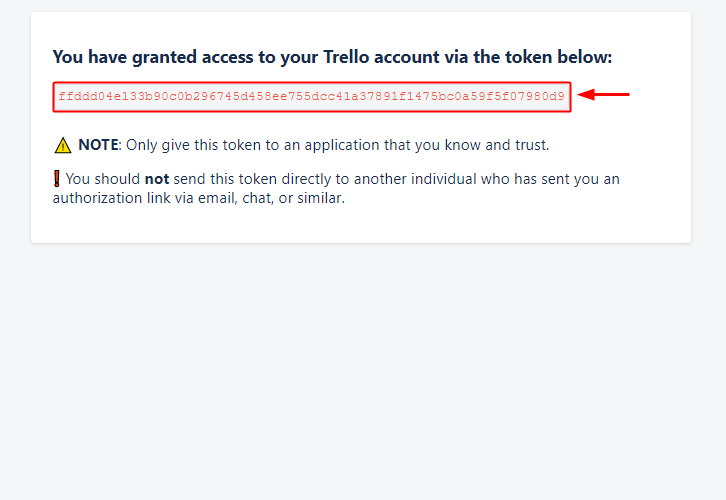
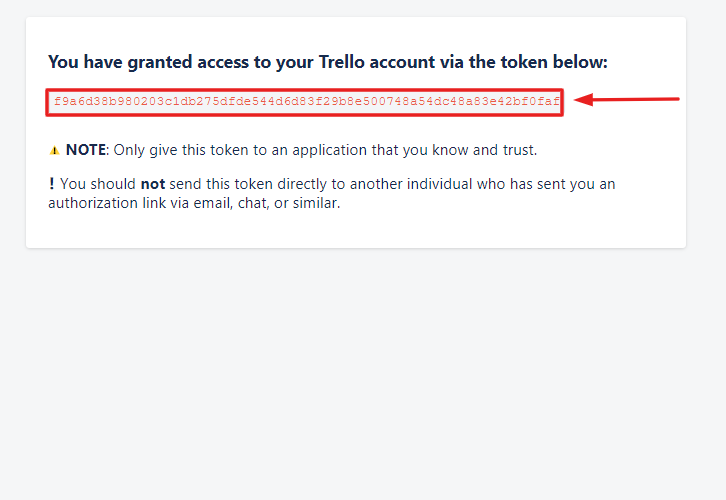
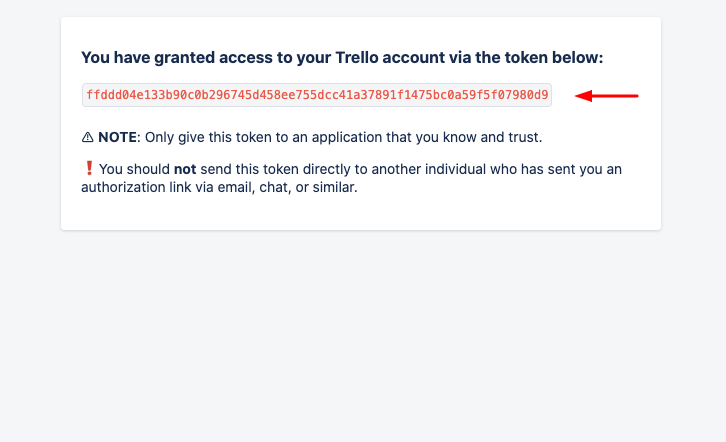
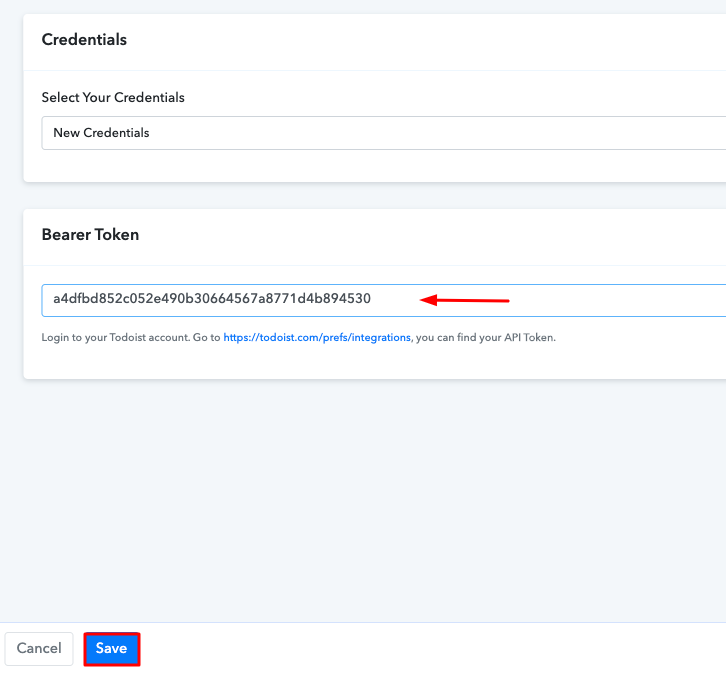
(d) Copy Bearer Token
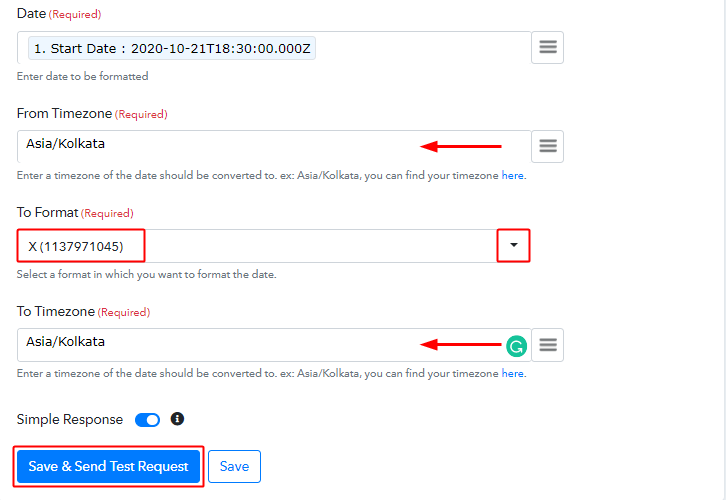
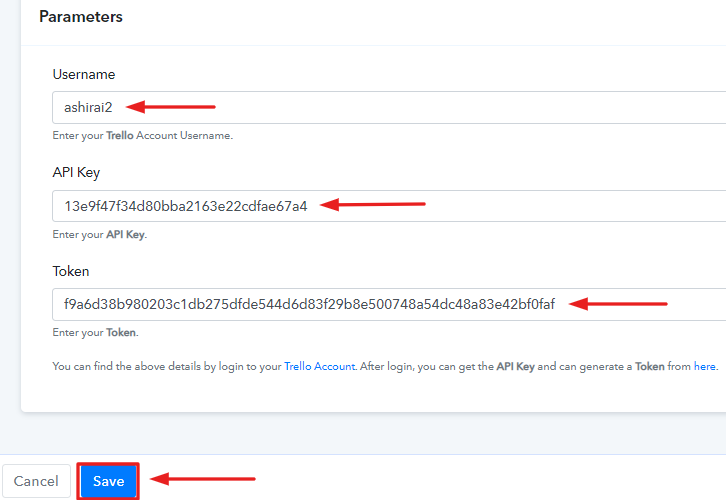
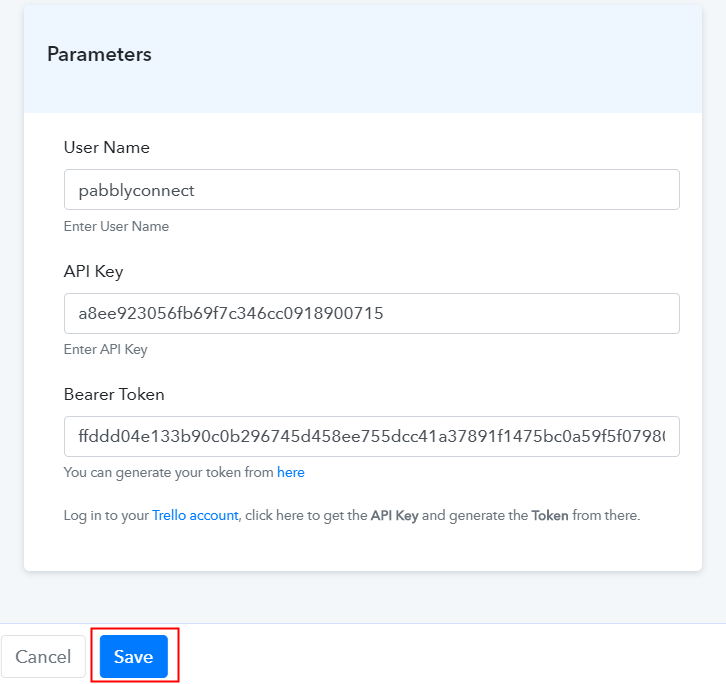
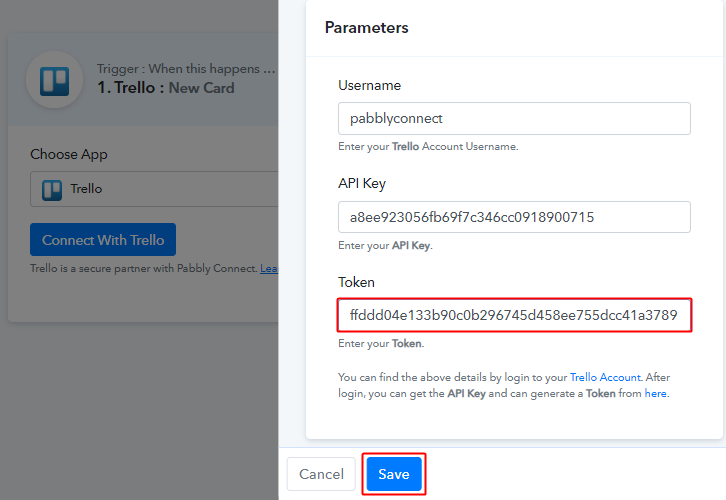
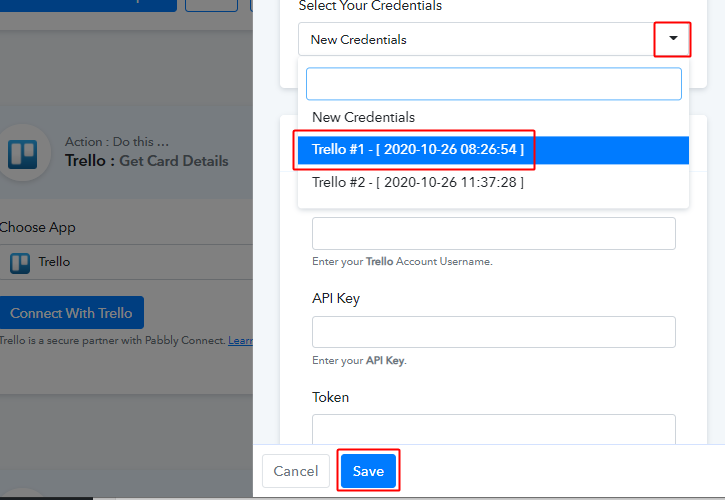
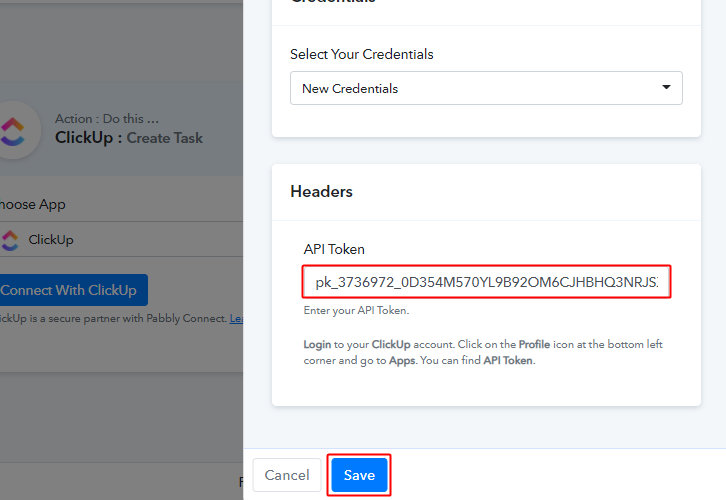
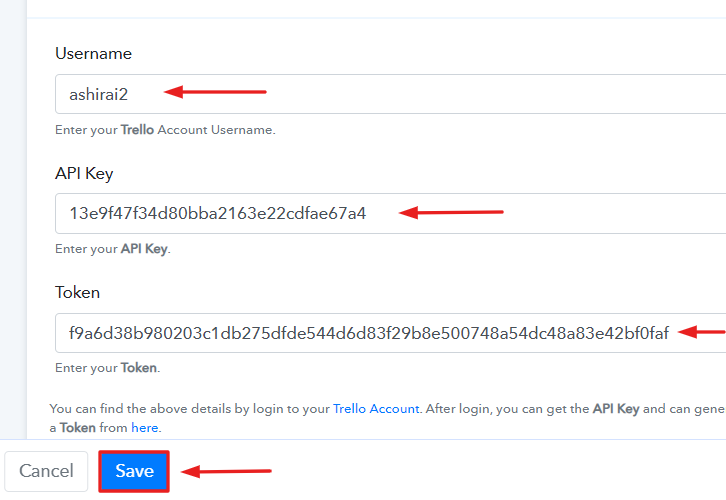
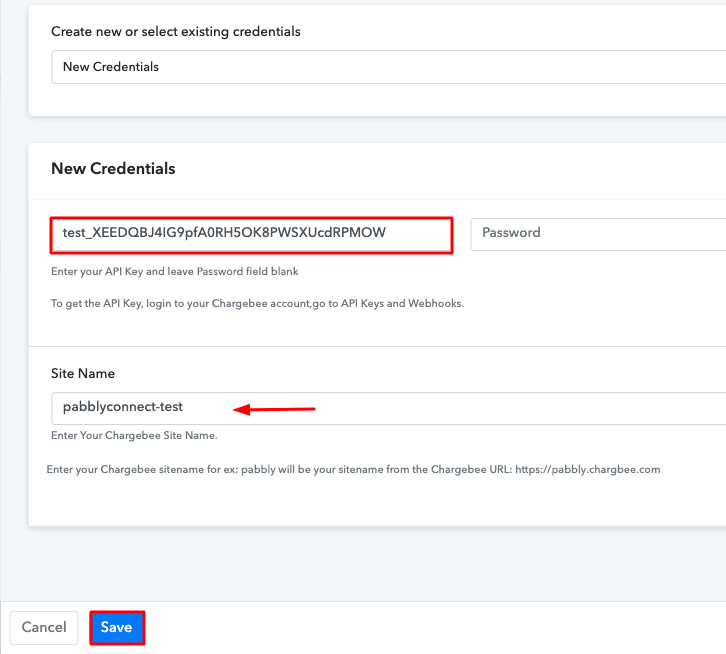
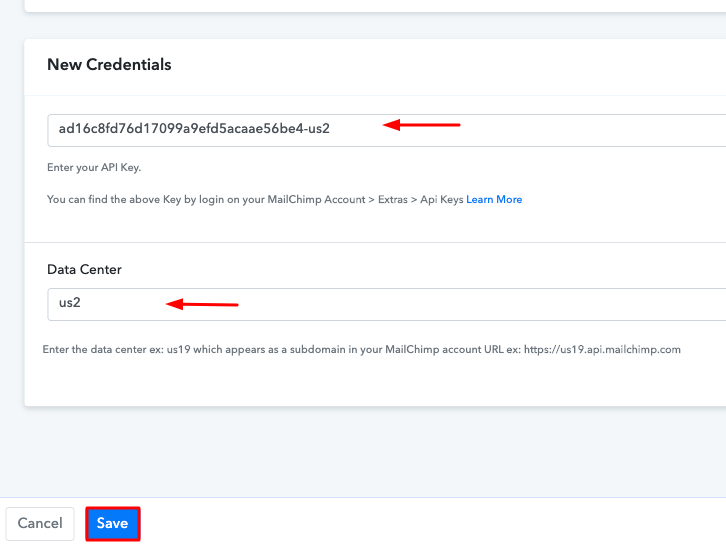
(e) Paste Credentials in Pabbly Connect Dashboard
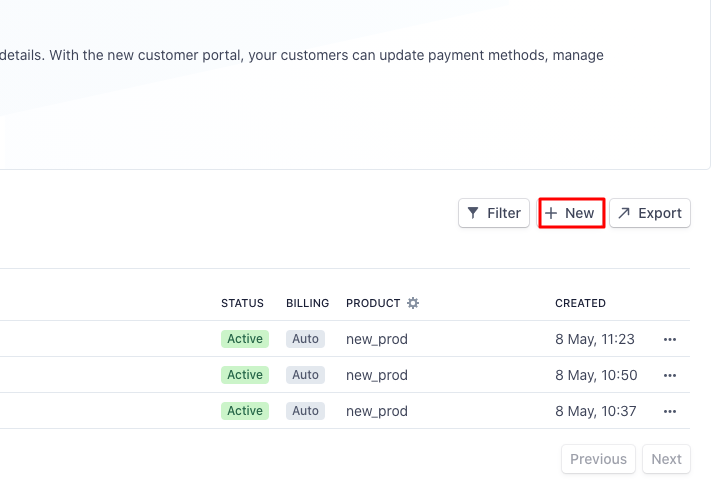
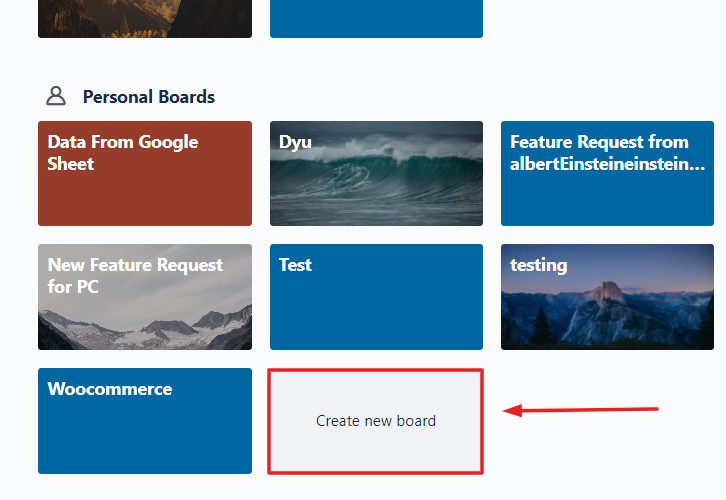
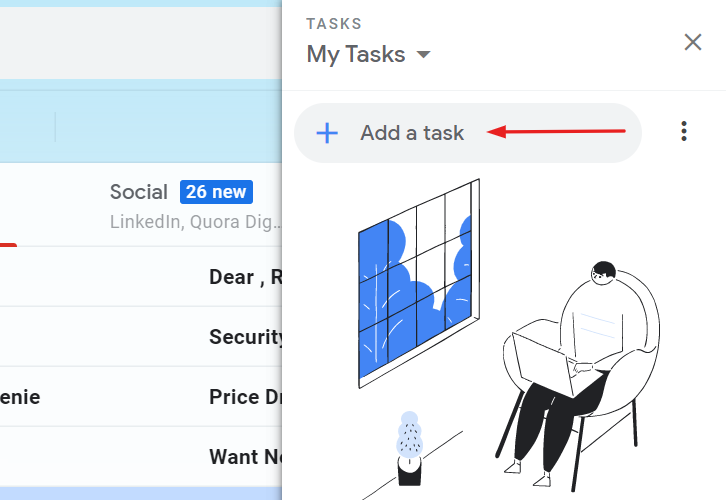
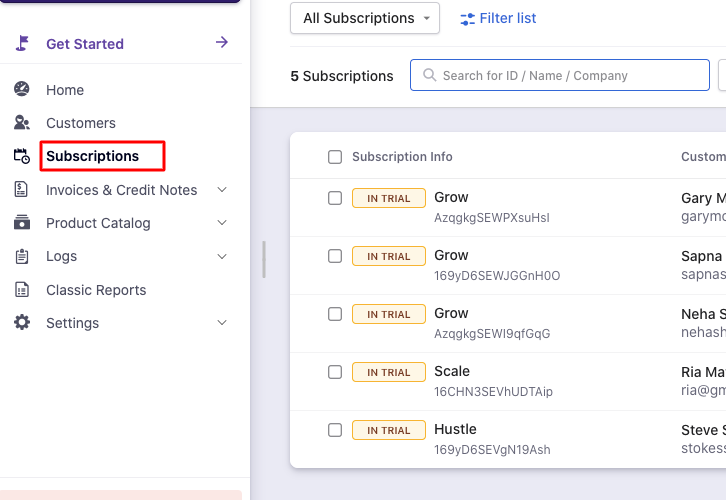
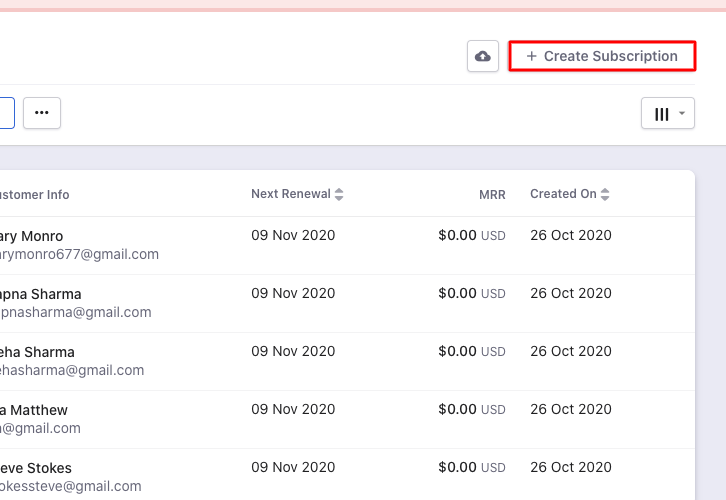
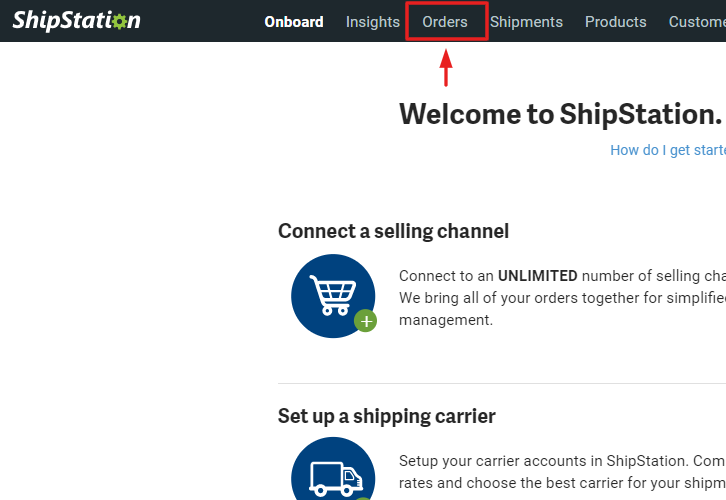
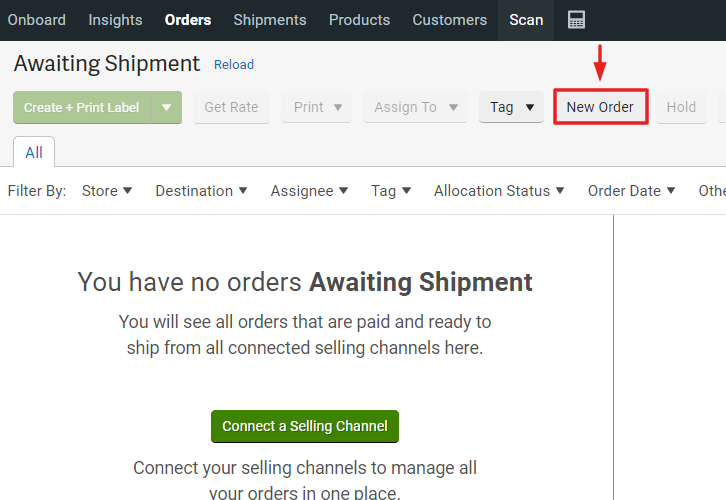
Step 6: Create a New Card In Trello
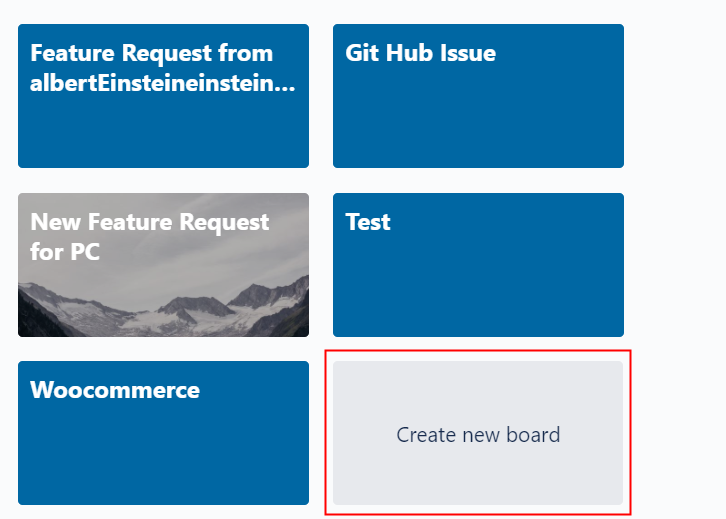
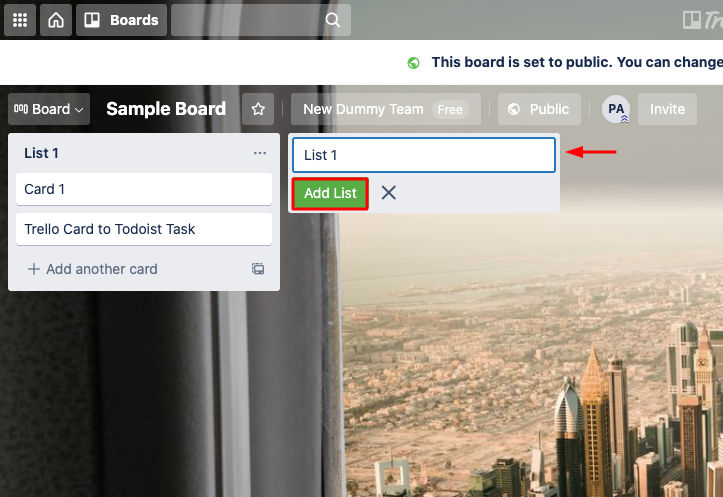
(a) Click on Create New Board
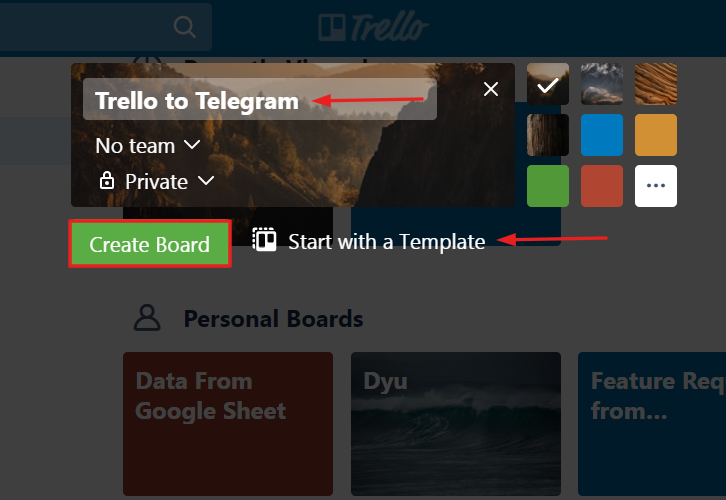
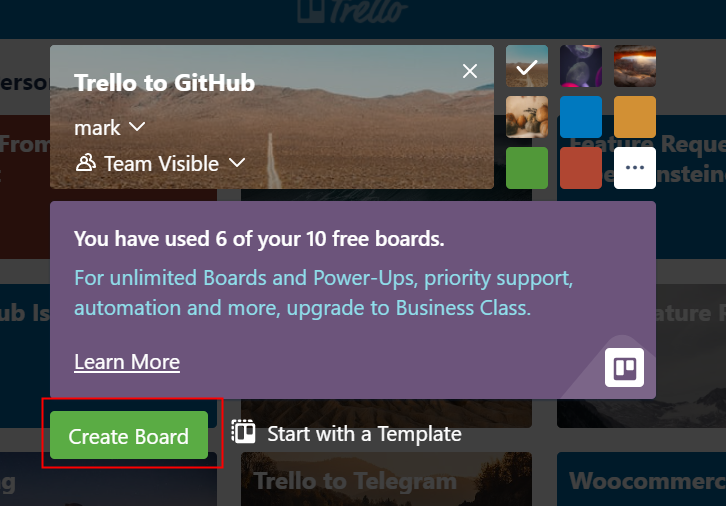
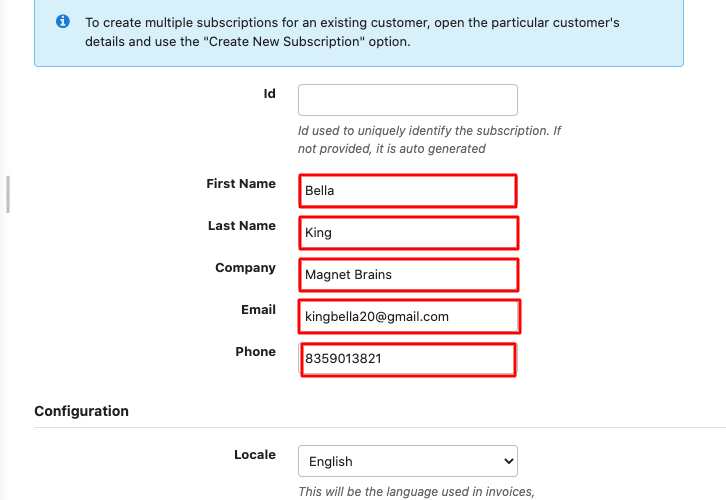
(b) Assign Name to Board
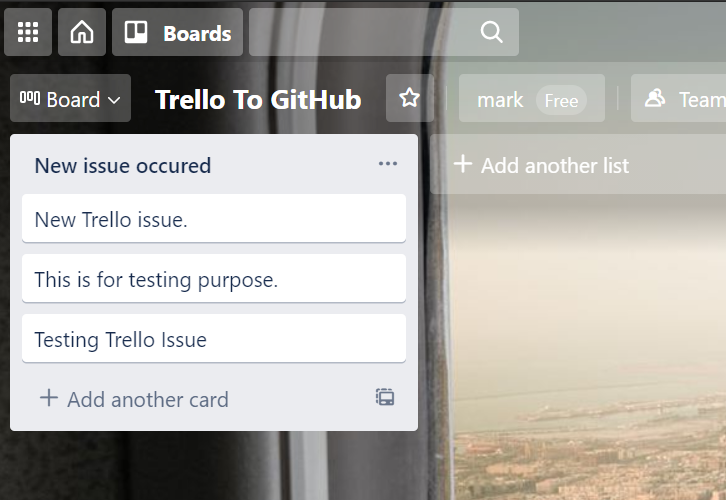
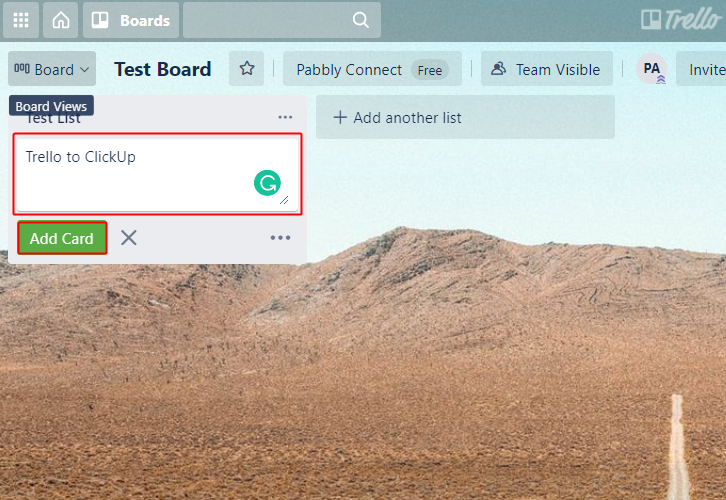
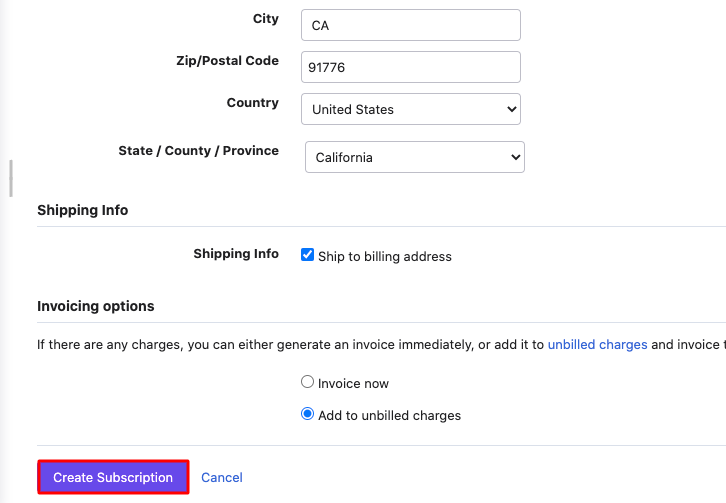
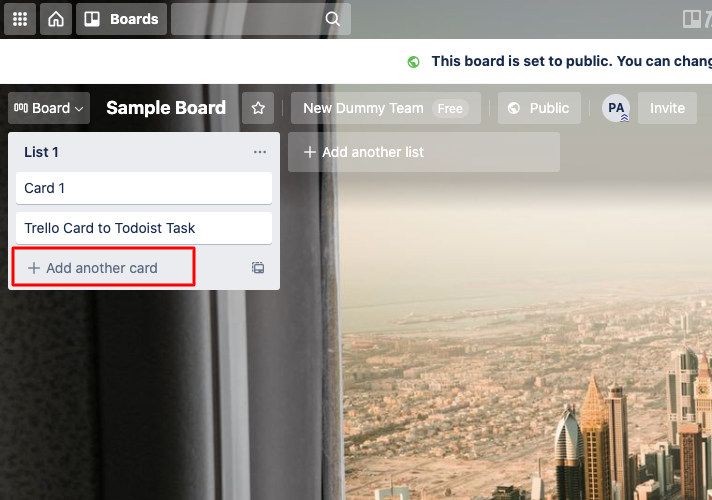
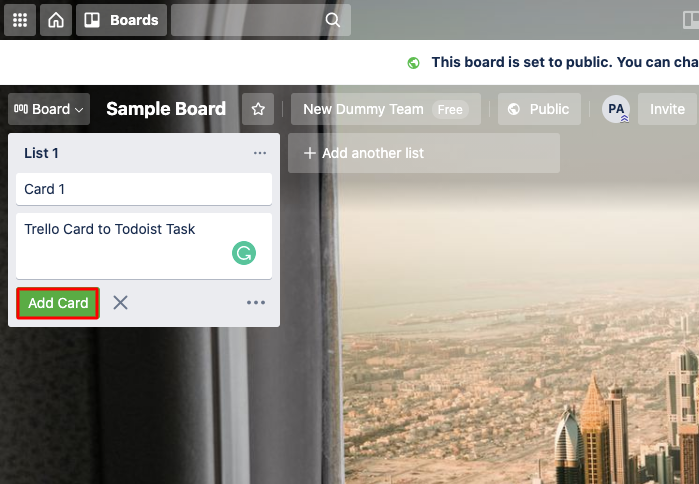
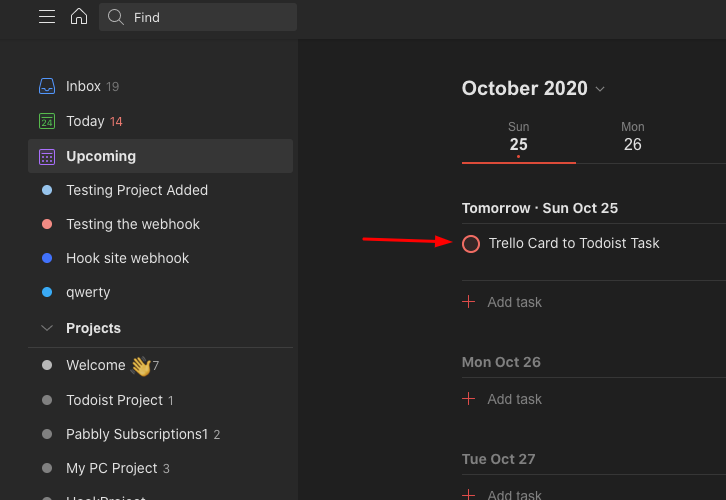
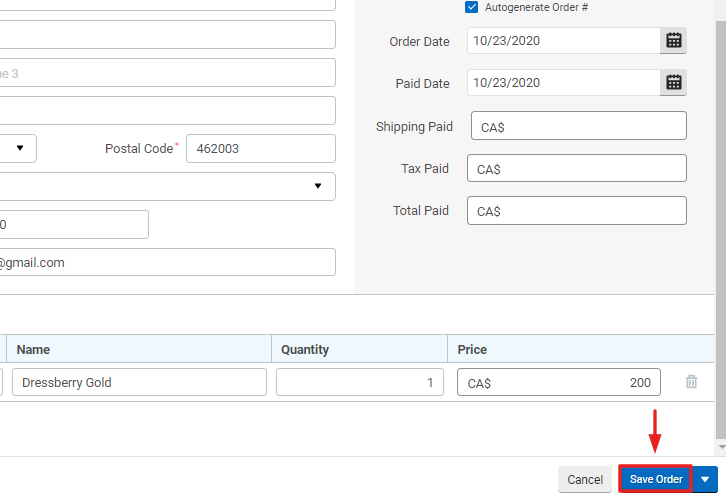
(c) Create Card in Board
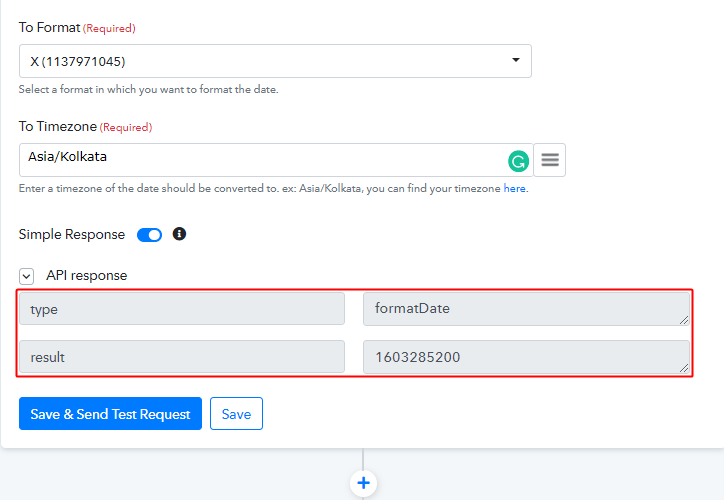
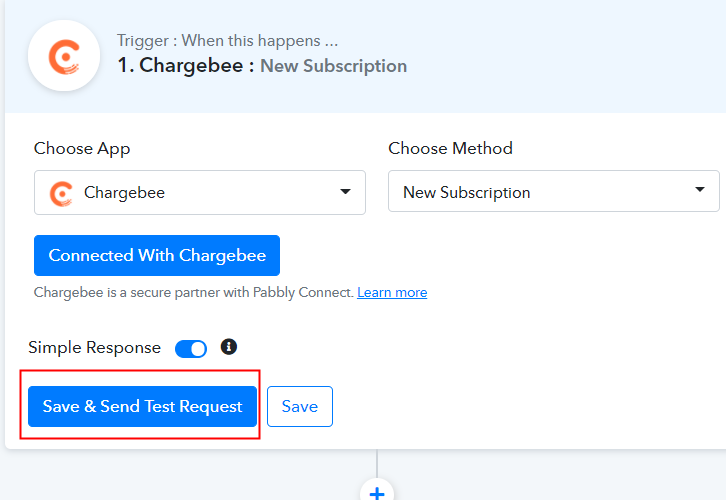
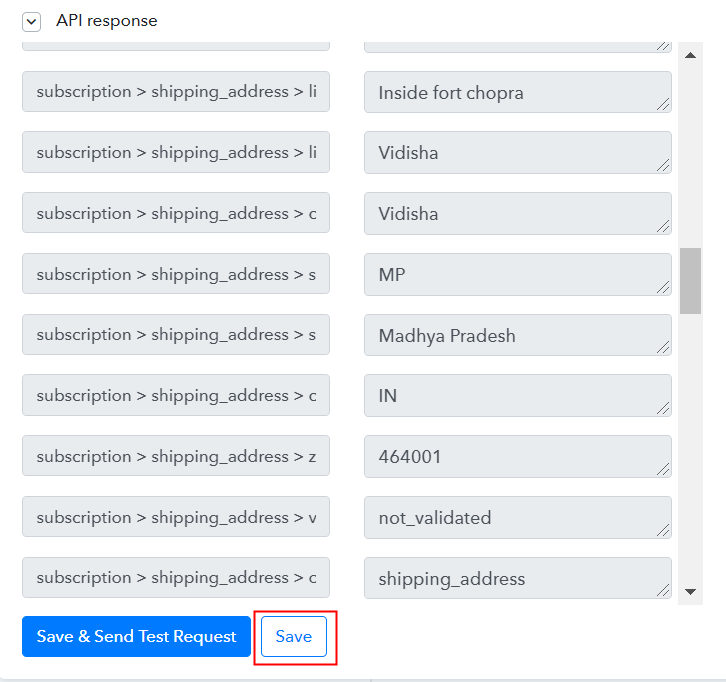
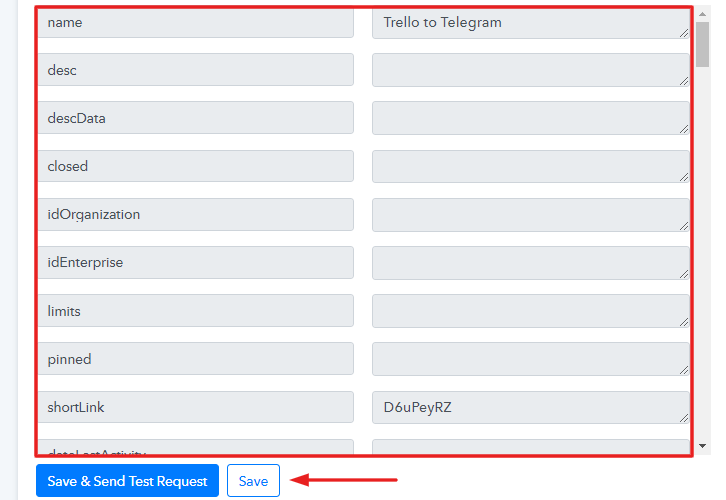
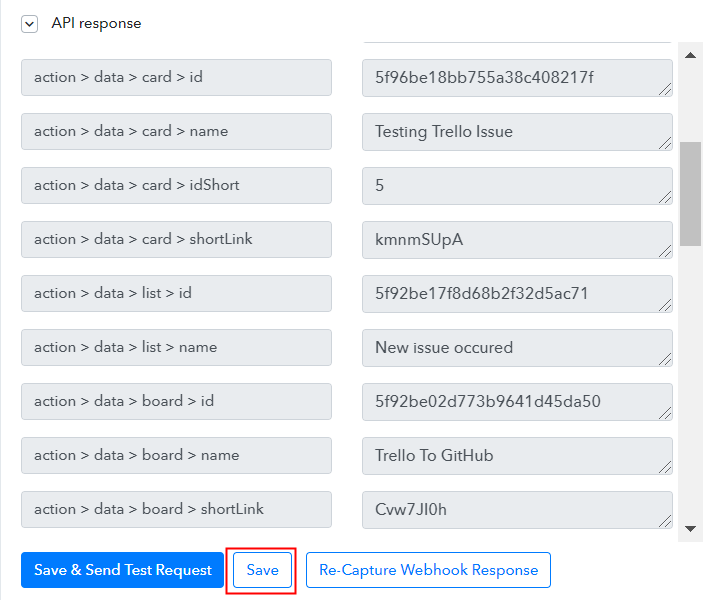
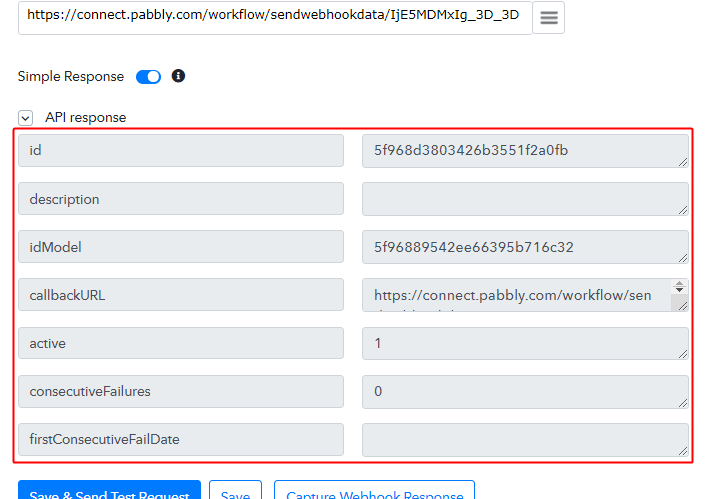
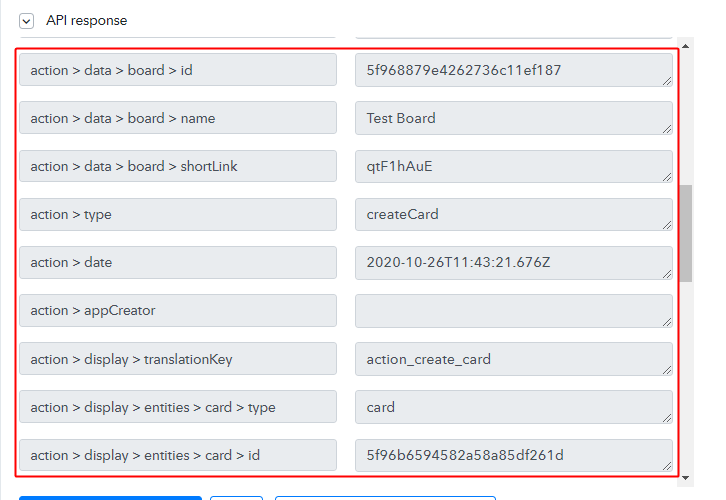
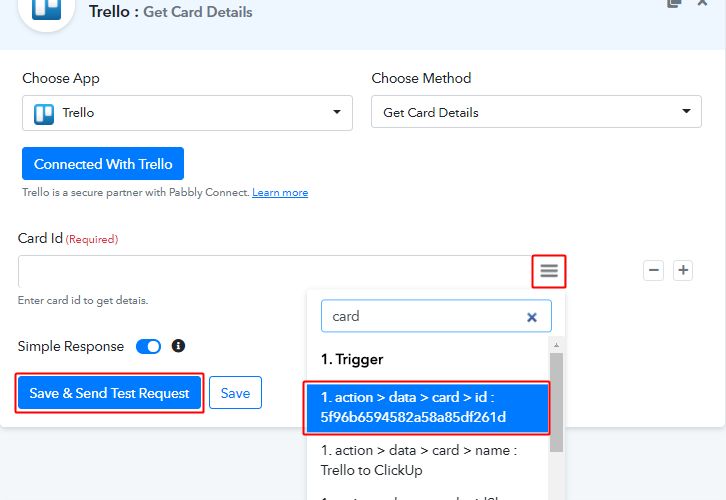
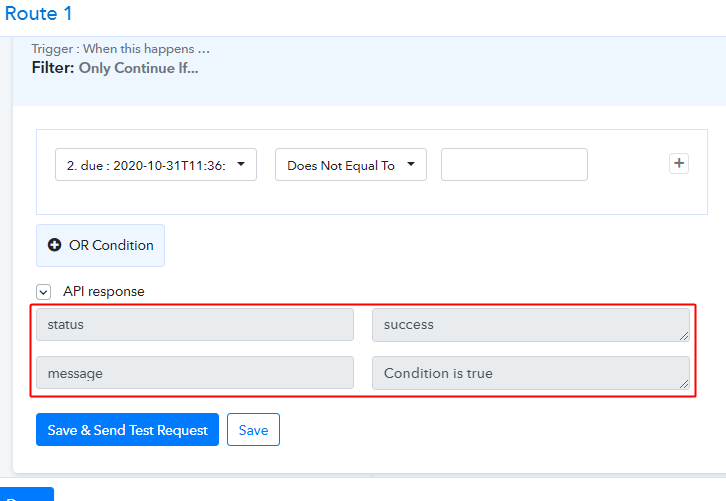
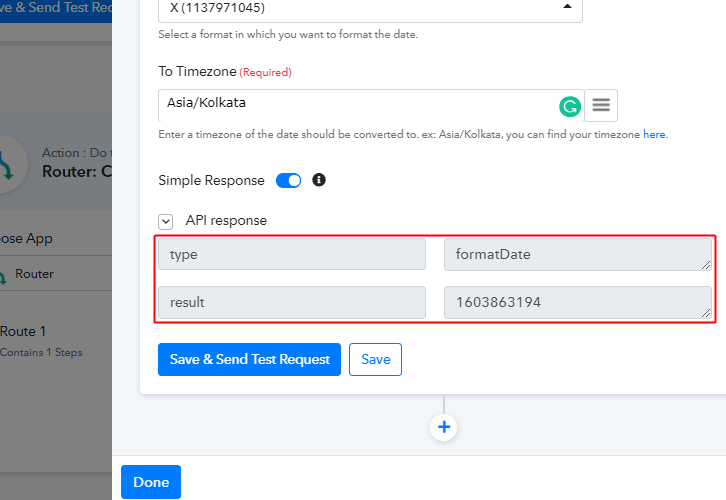
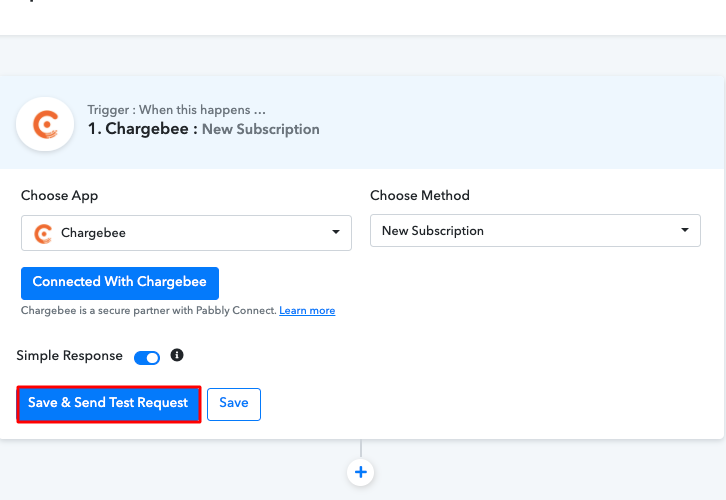
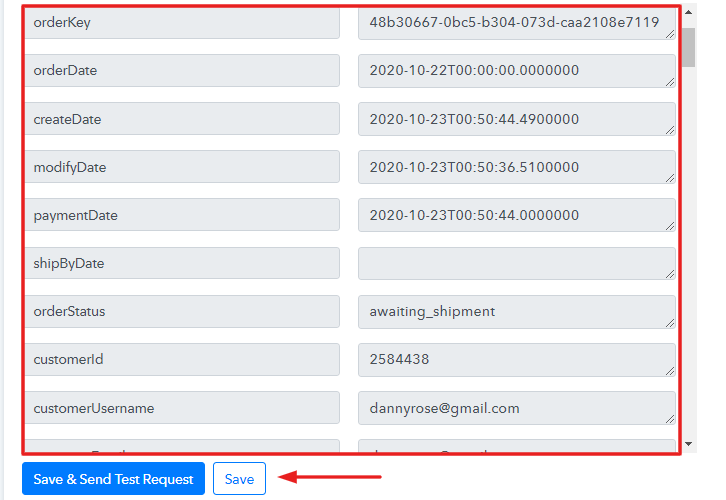
Step 7: Test the Response in Pabbly Connect Dashboard
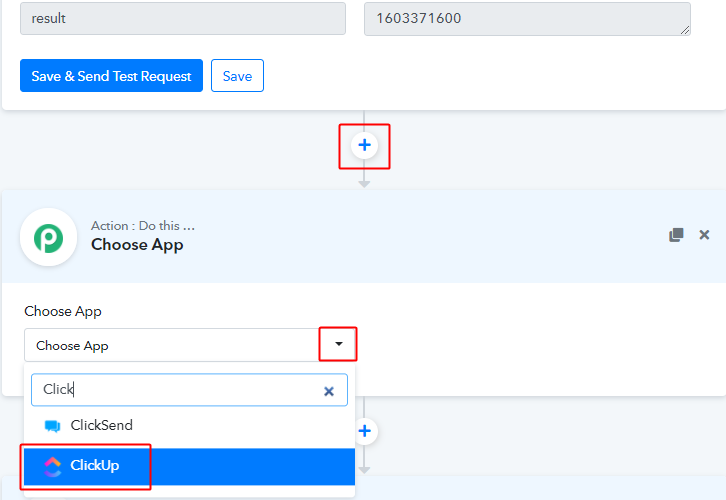
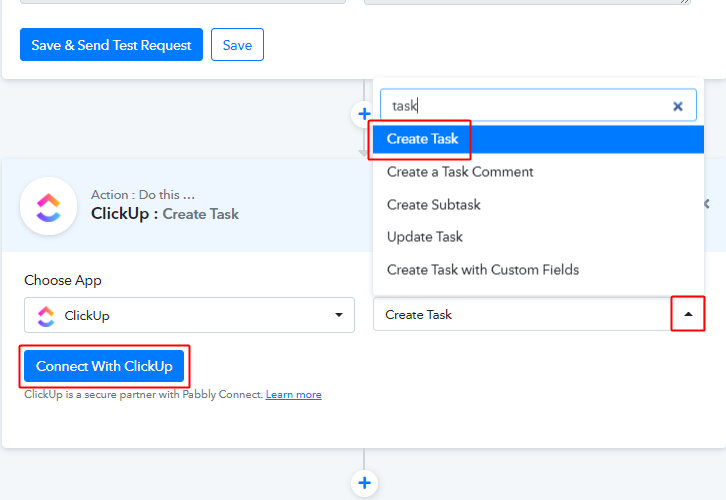
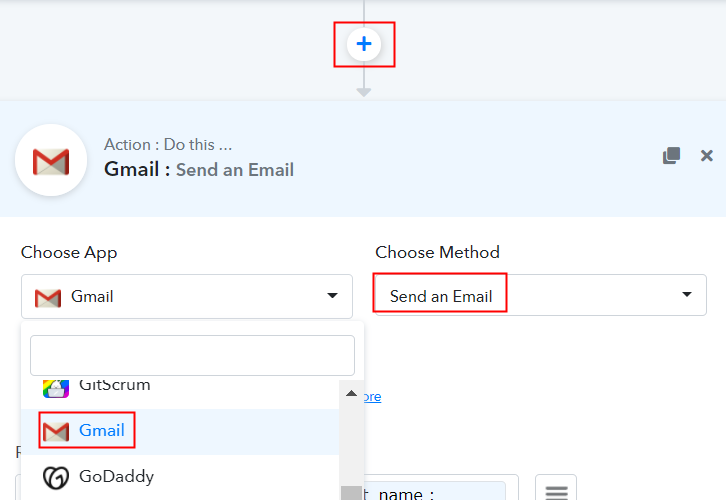
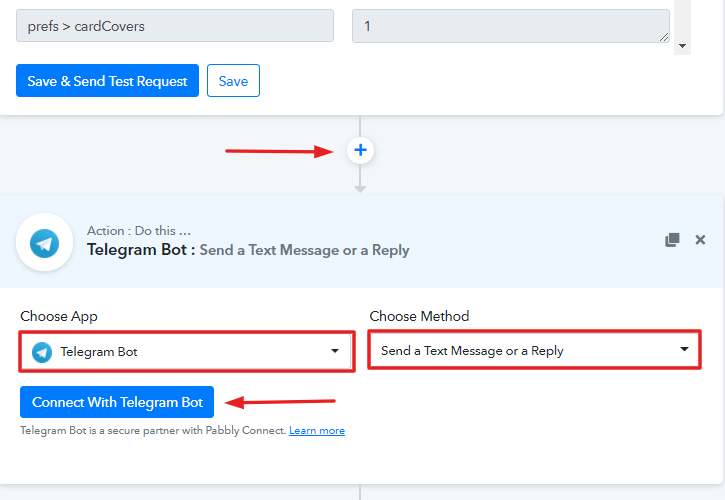
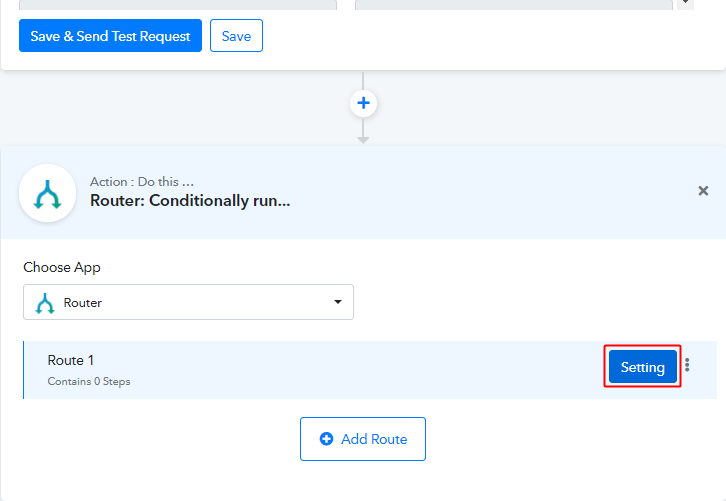
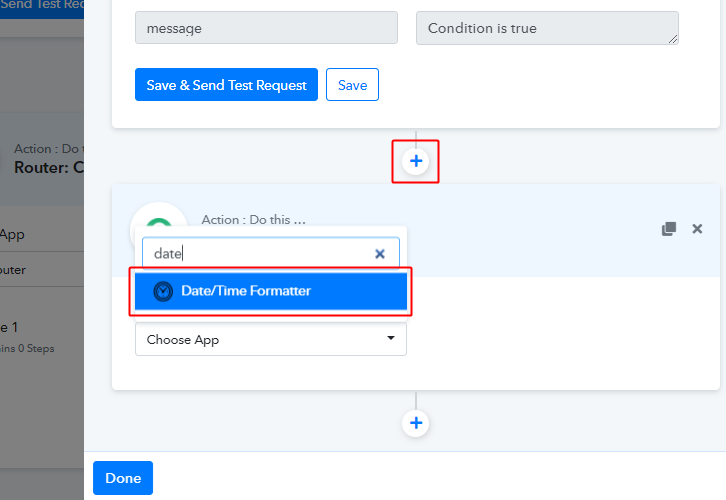
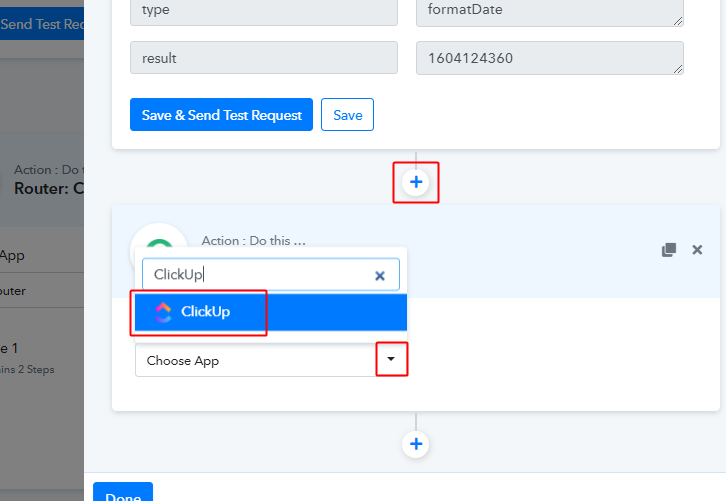
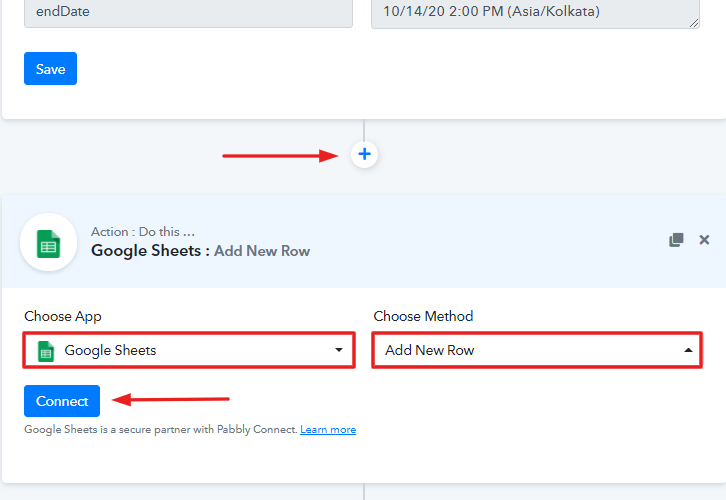
Step 8: Setting Action for Trello to GitHub Integration
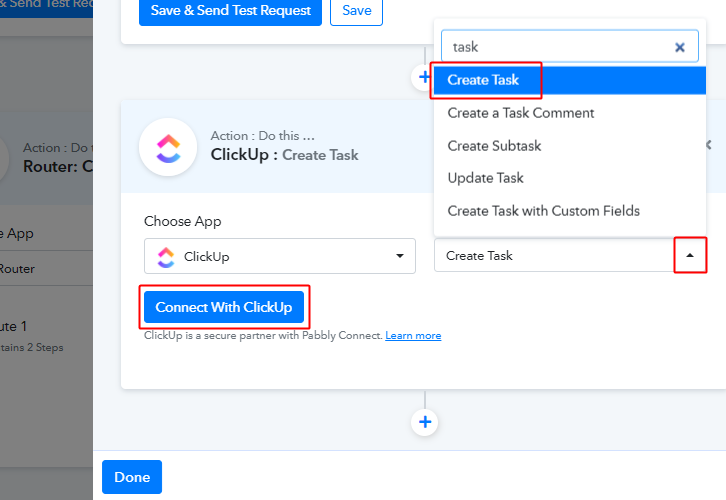
(a) Select Application you Want to Integrate
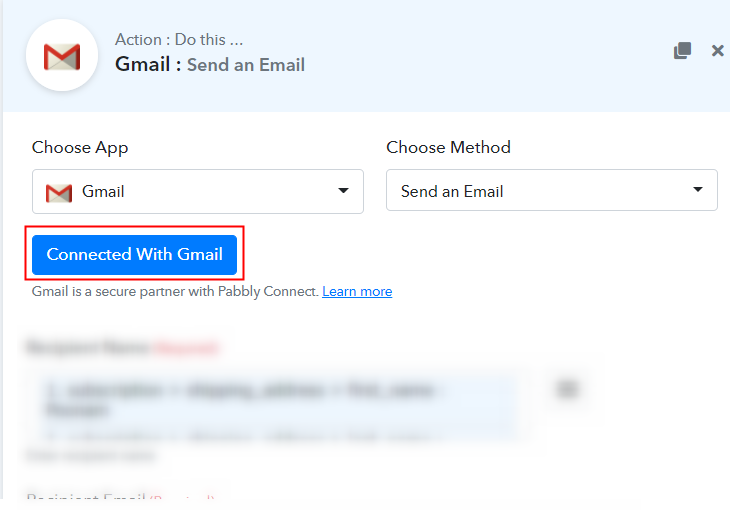
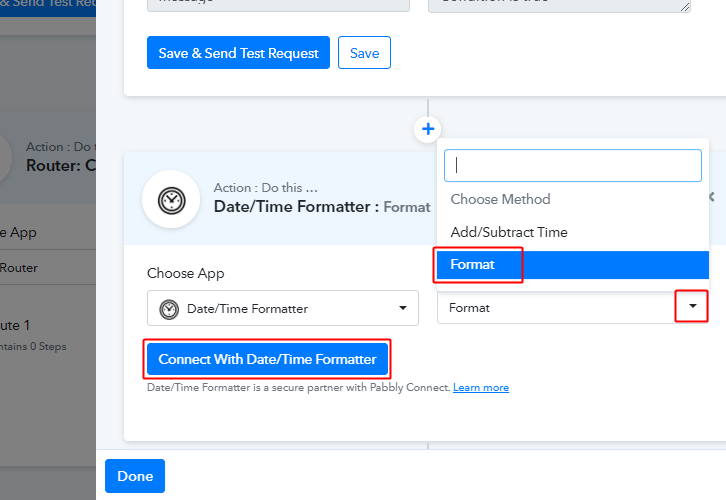
(b) Click the Connect Button
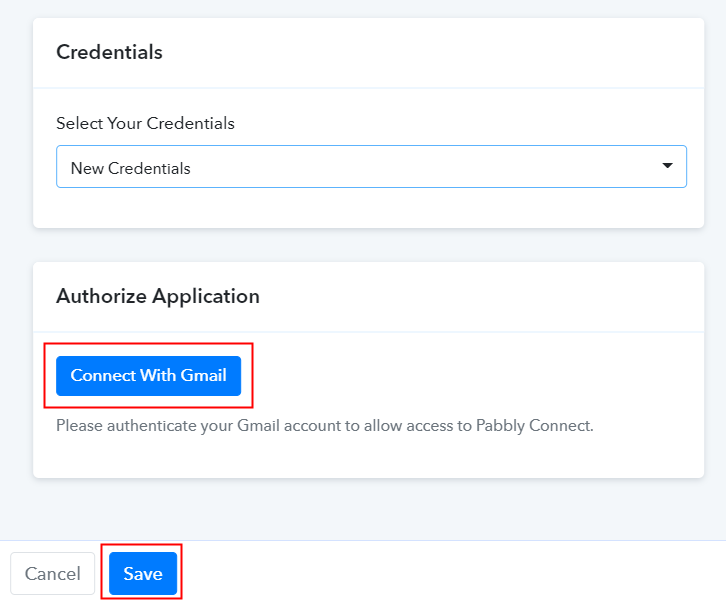
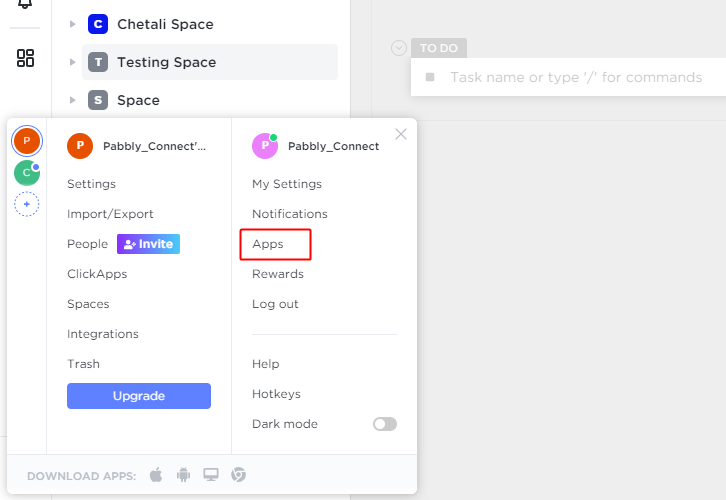
(c) Authorize GitHub Account
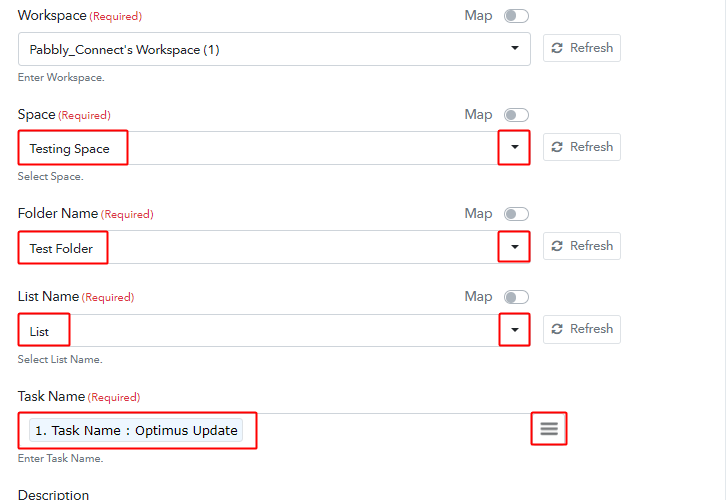
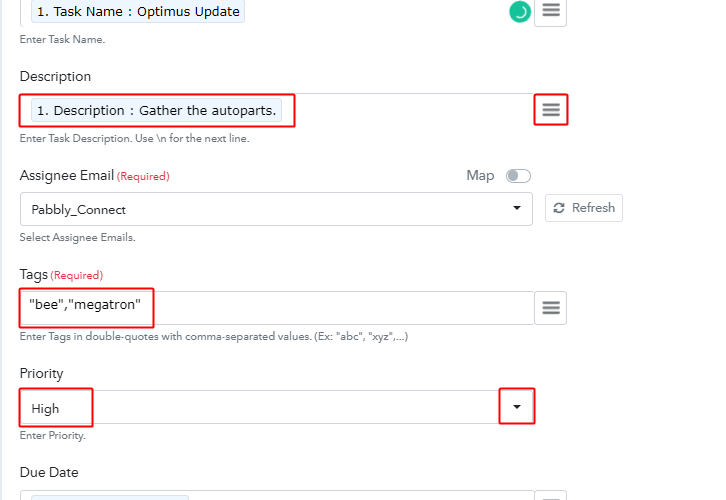
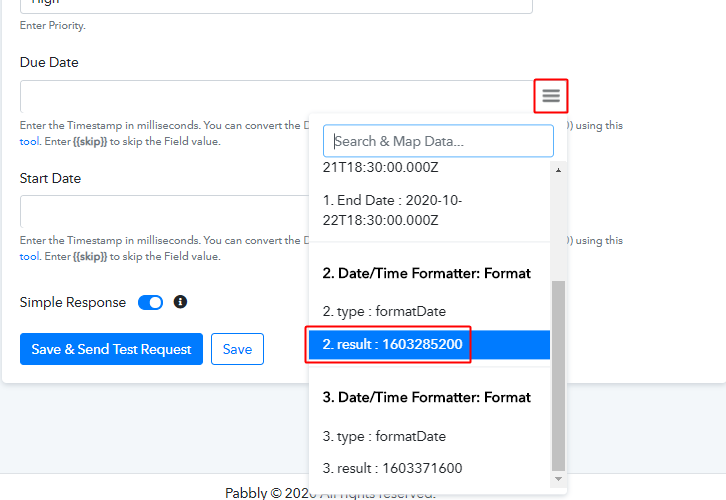
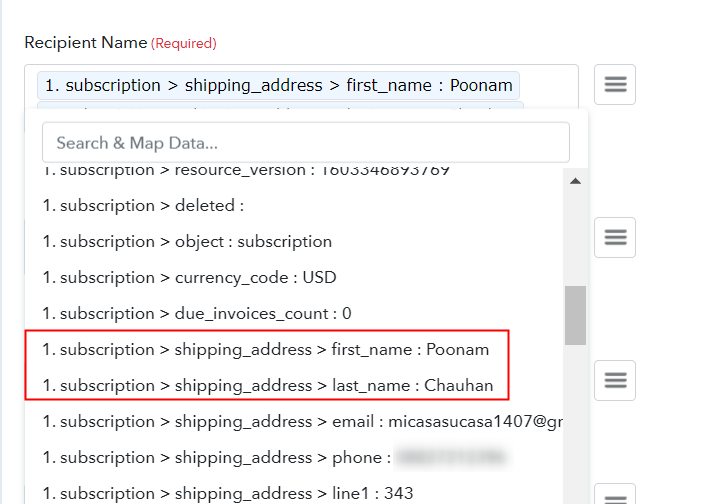
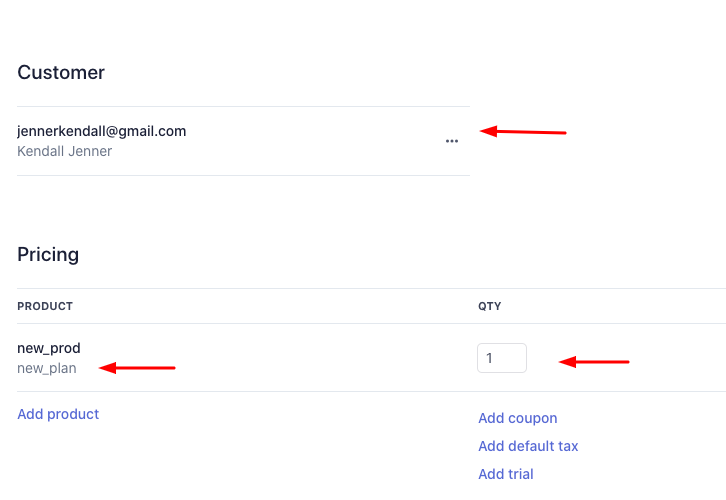
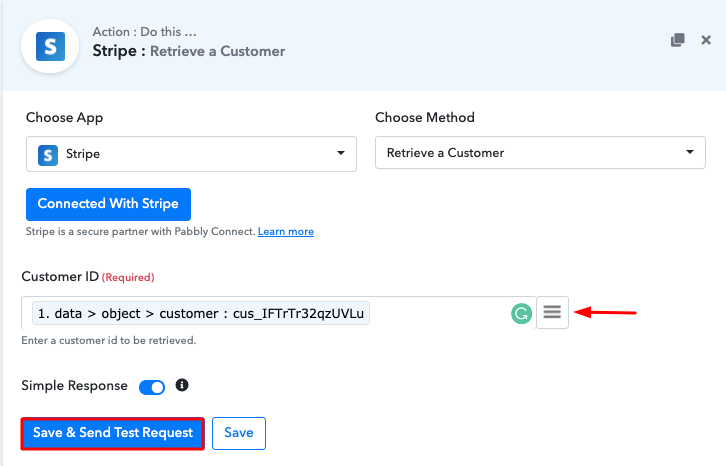
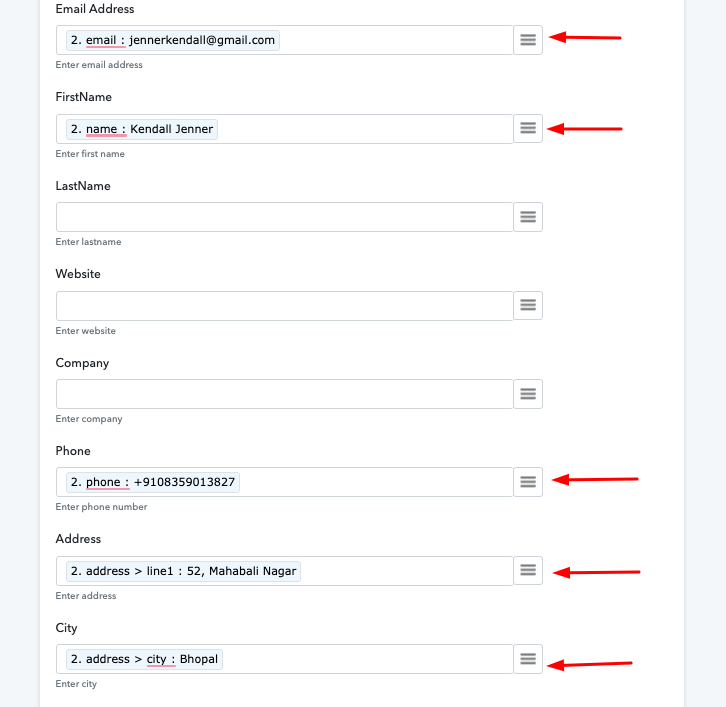
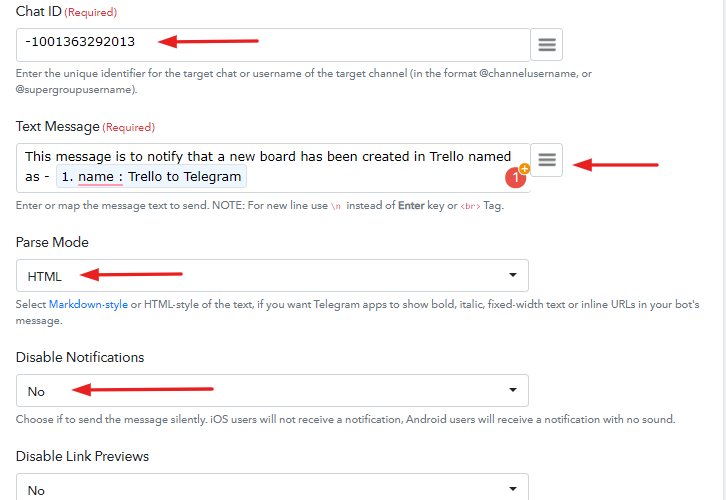
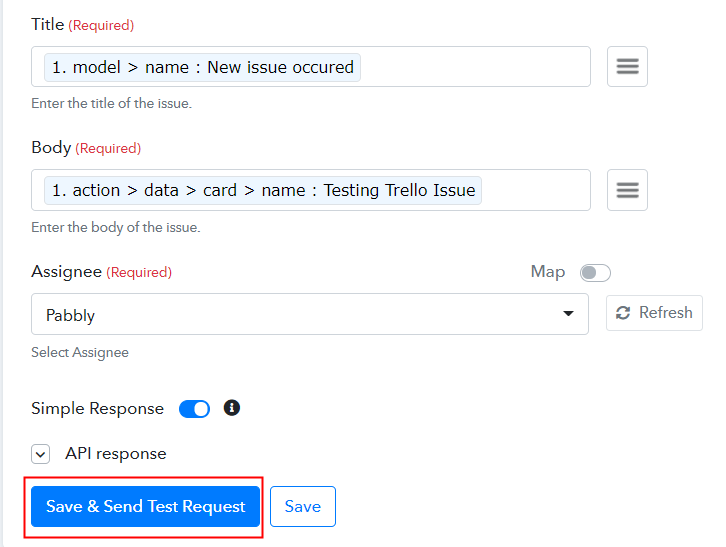
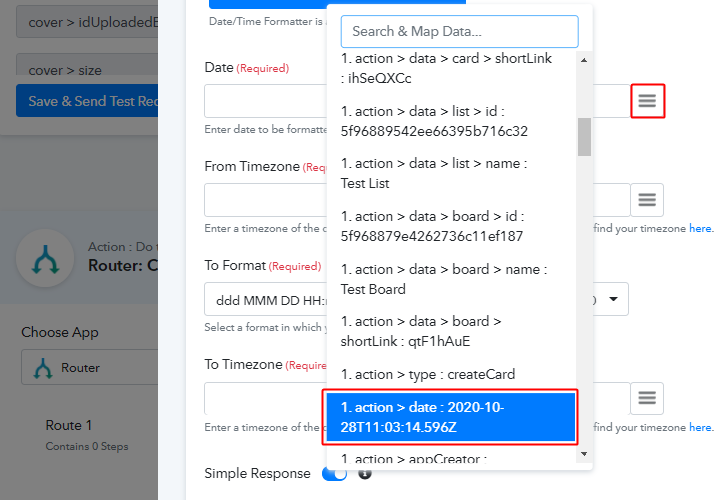
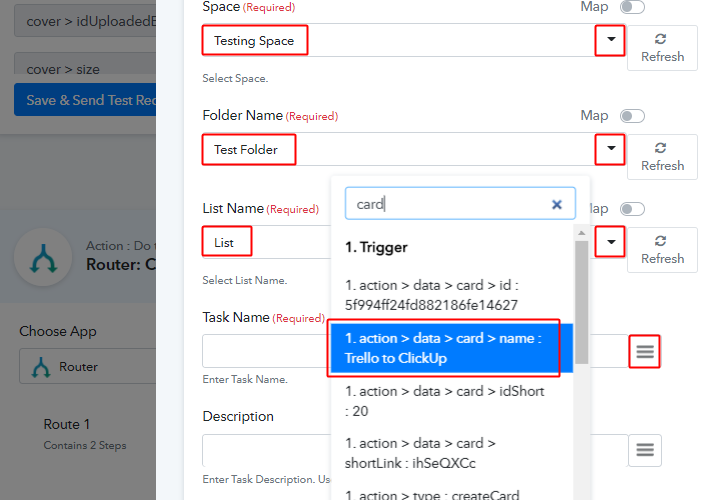
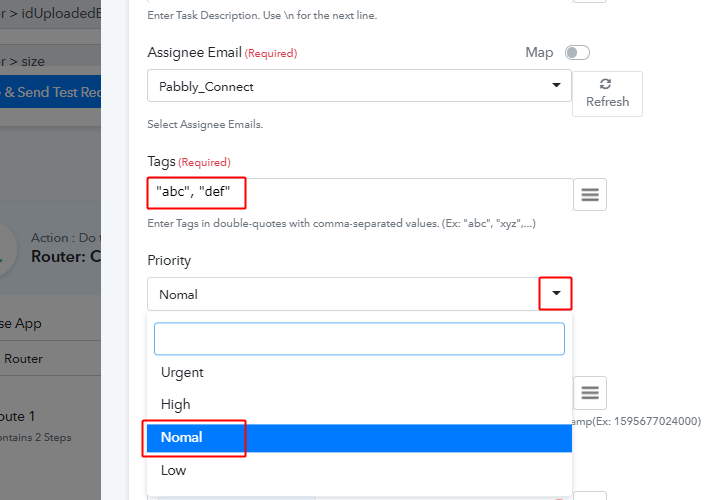
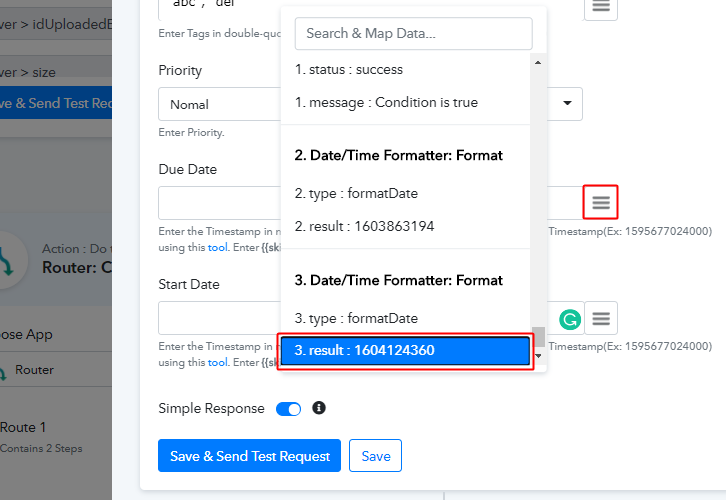
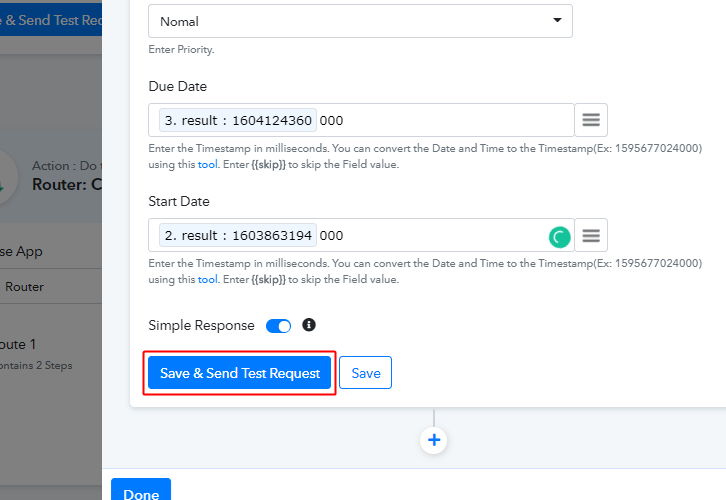
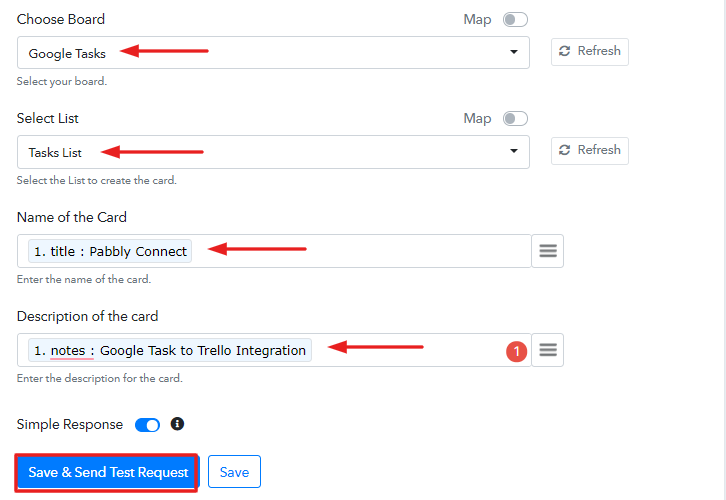
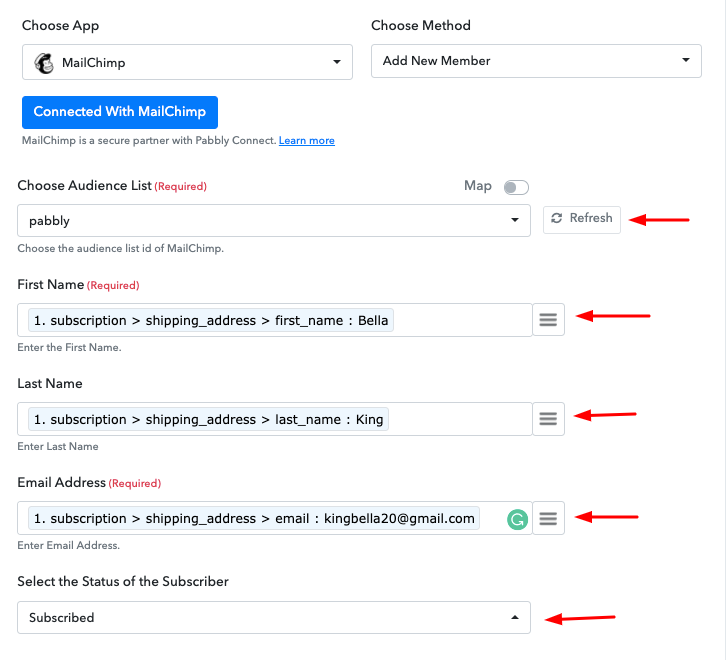
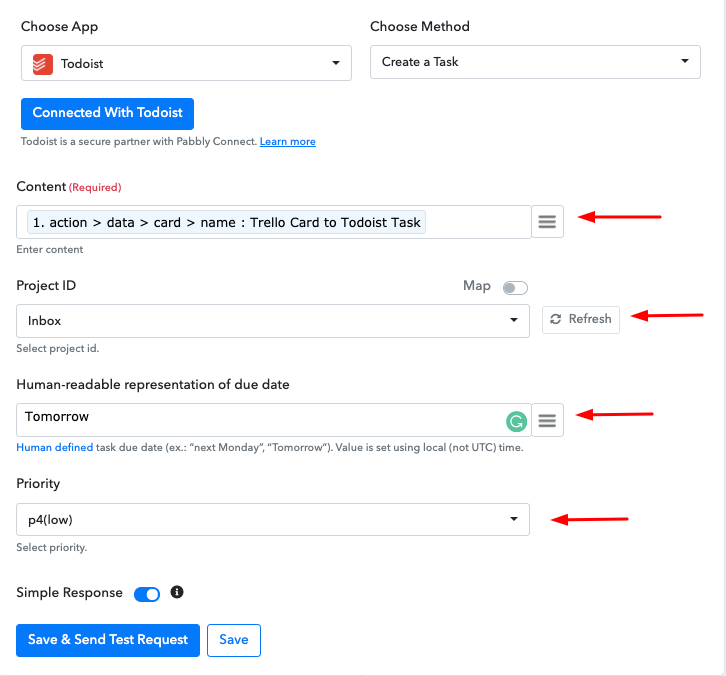
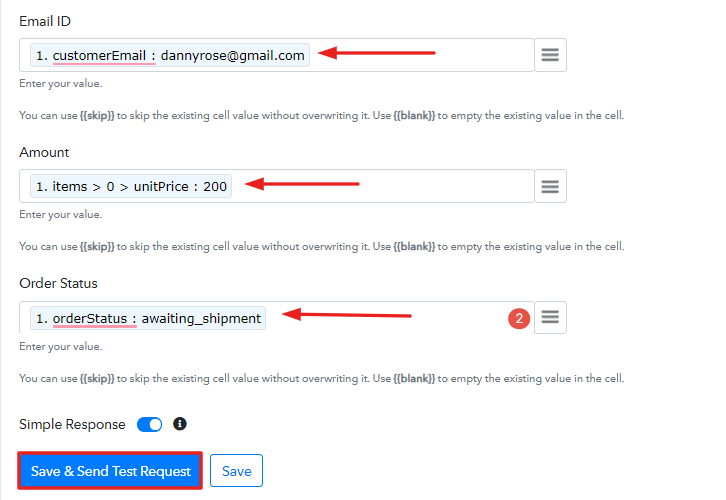
(d) Map Field Data
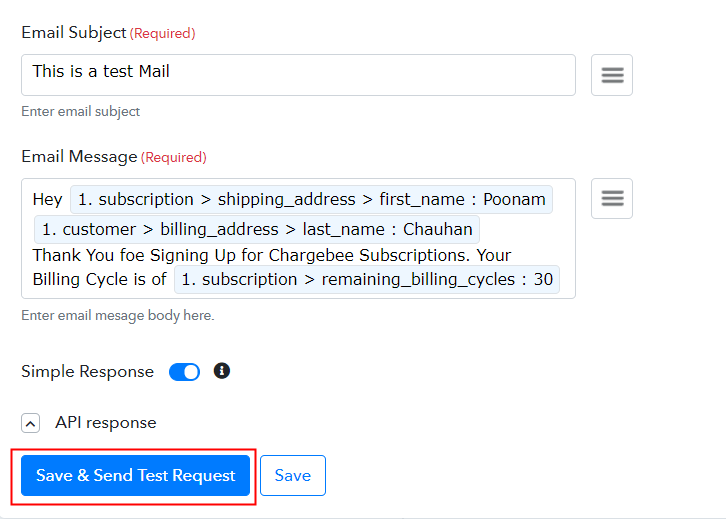
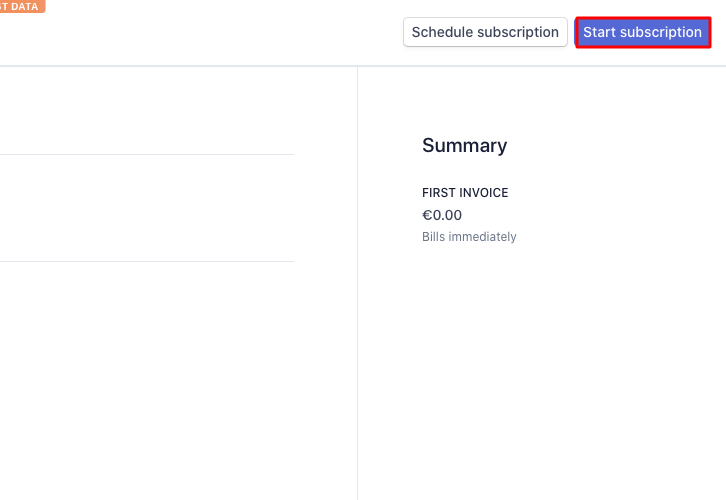
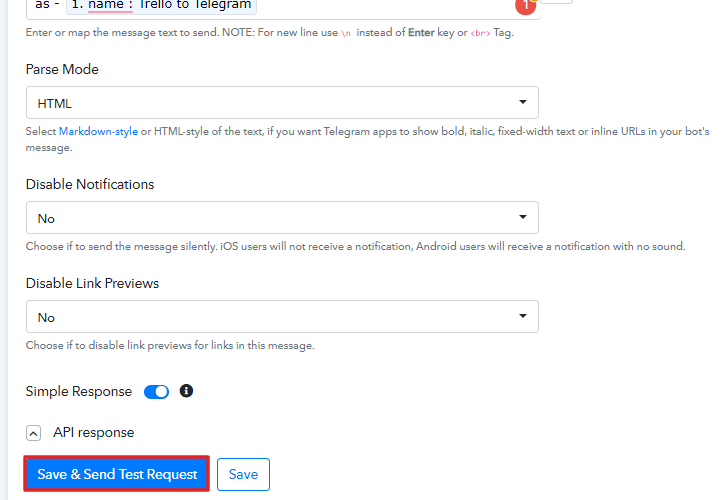
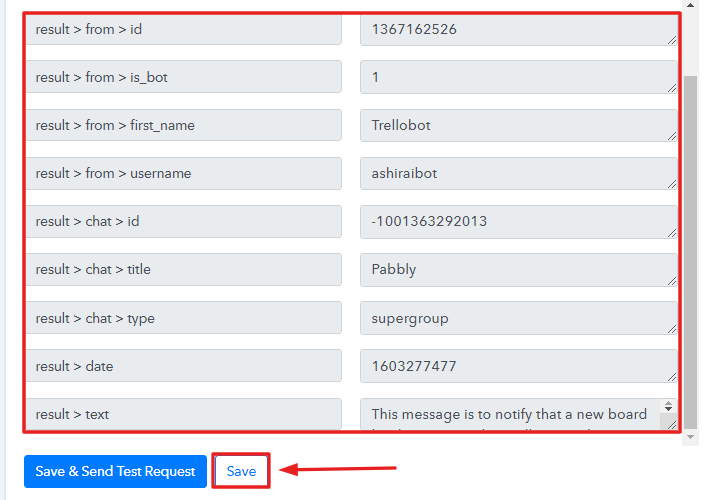
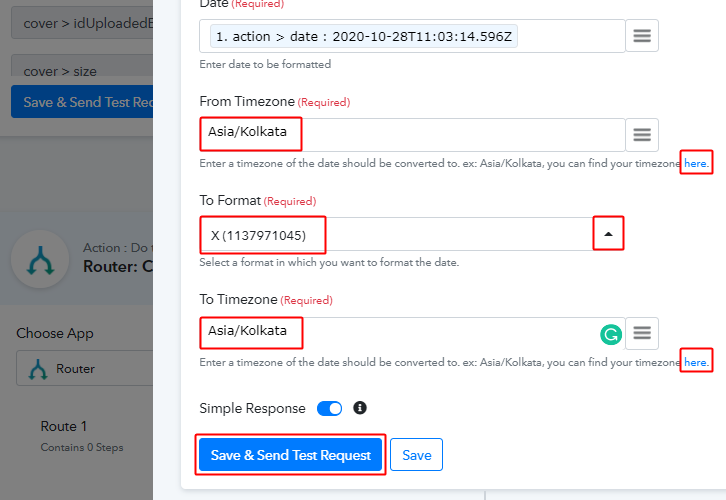
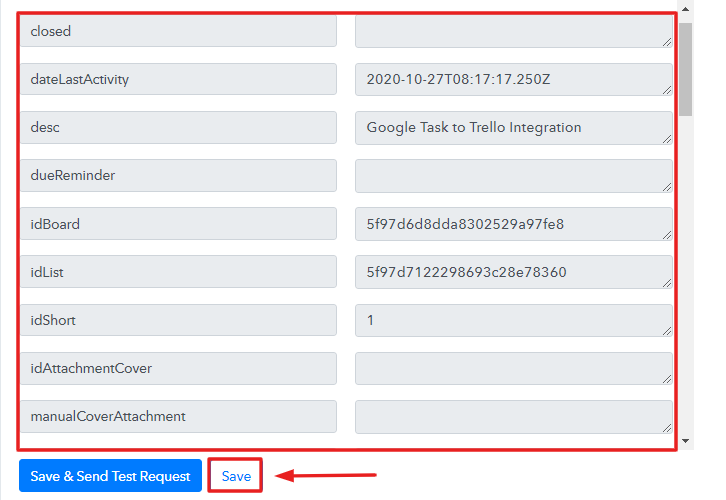
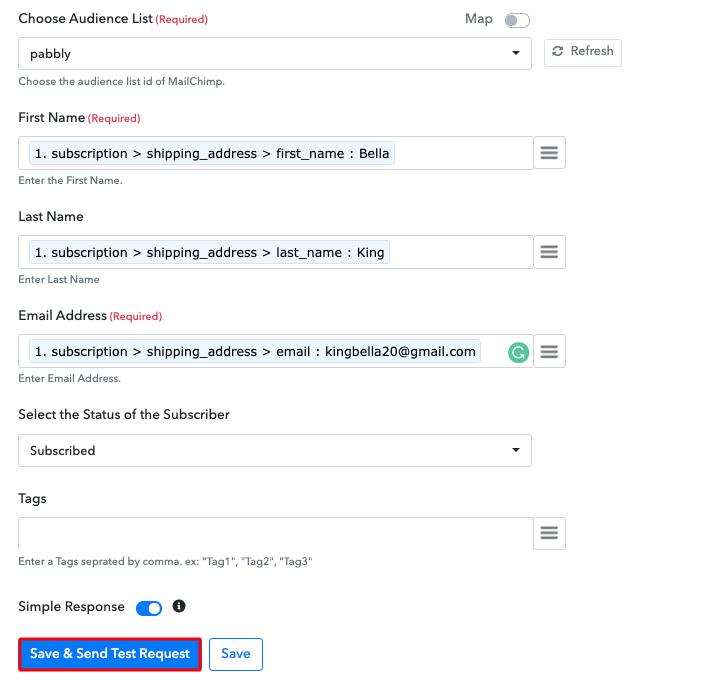
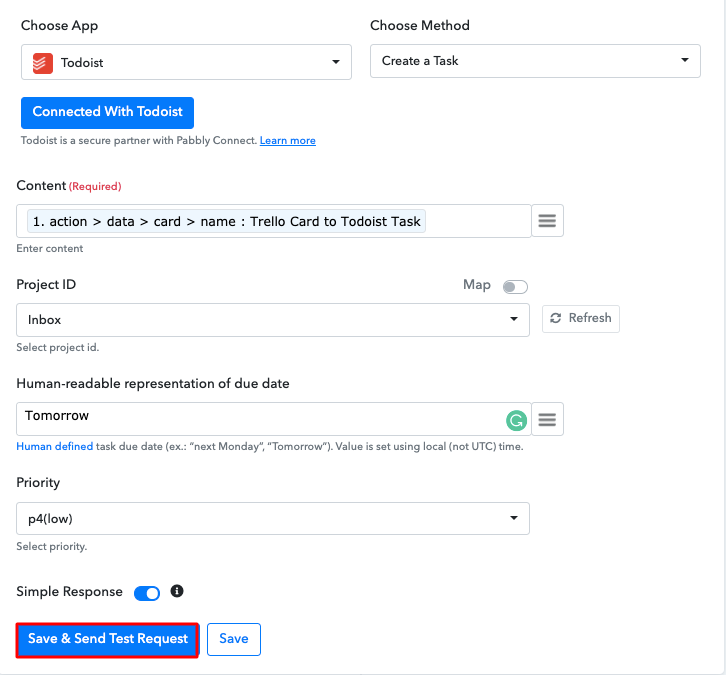
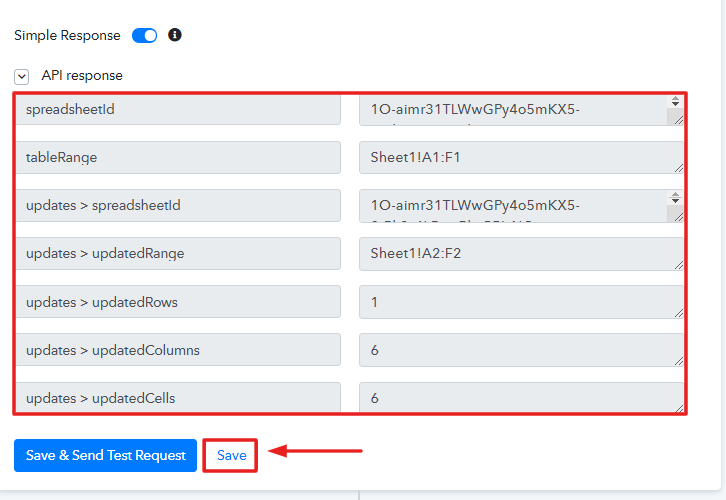
(e) Save & Send Test Request
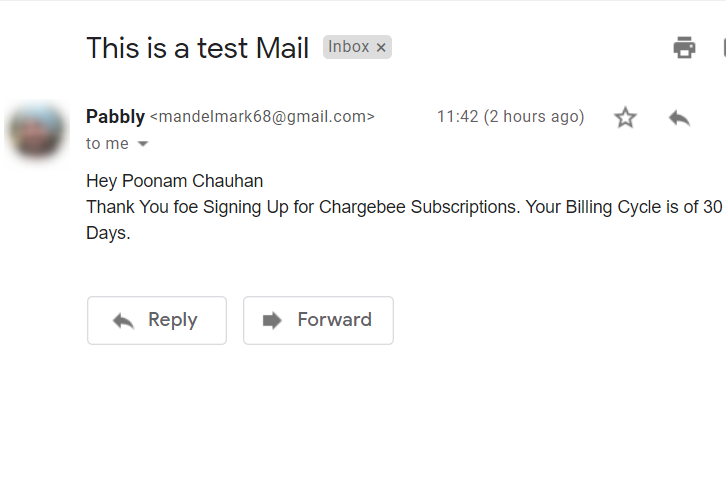
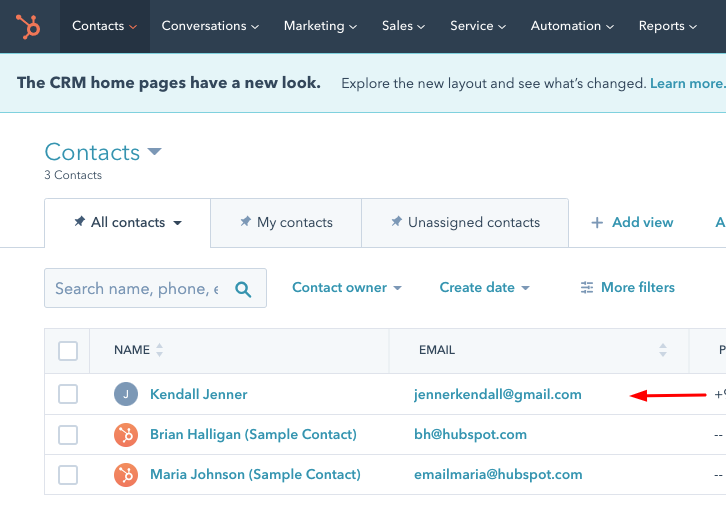
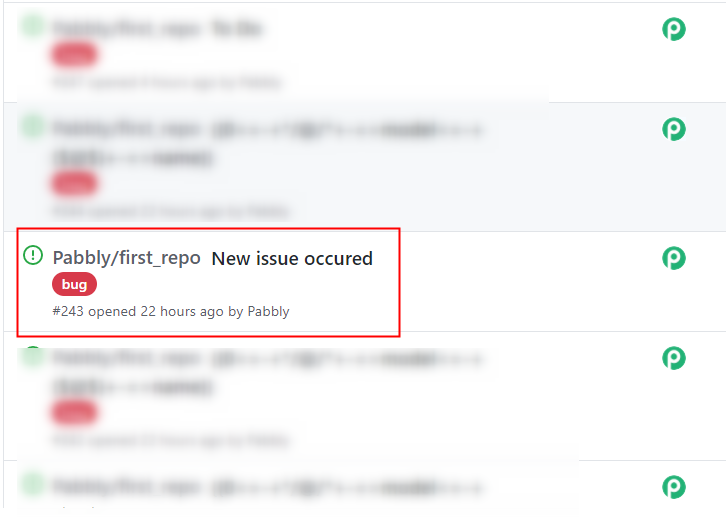
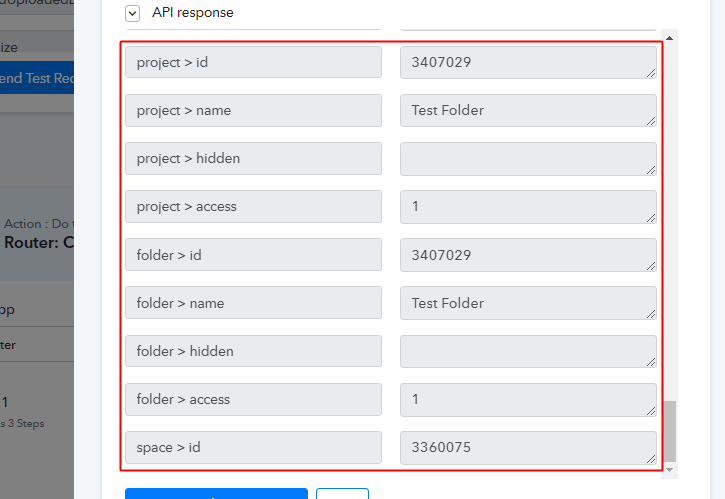
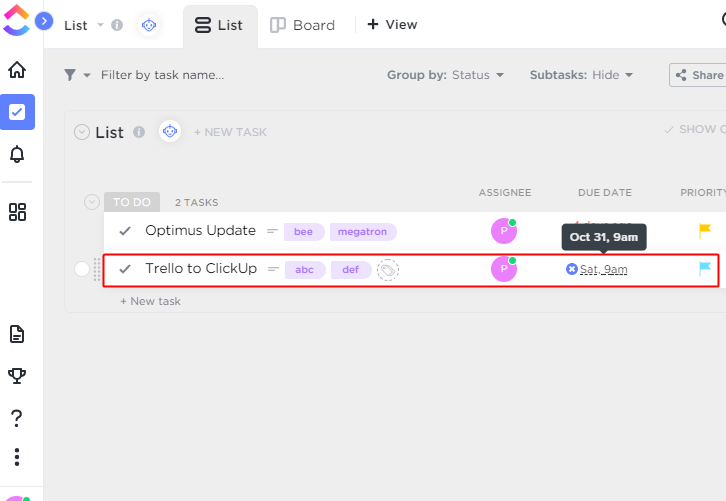
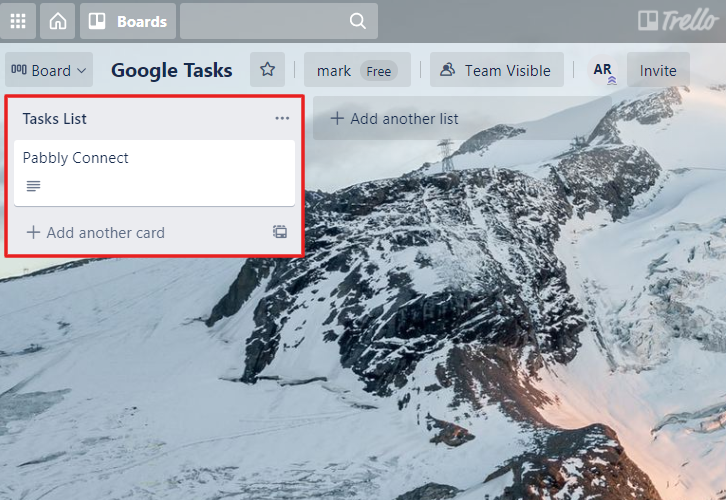
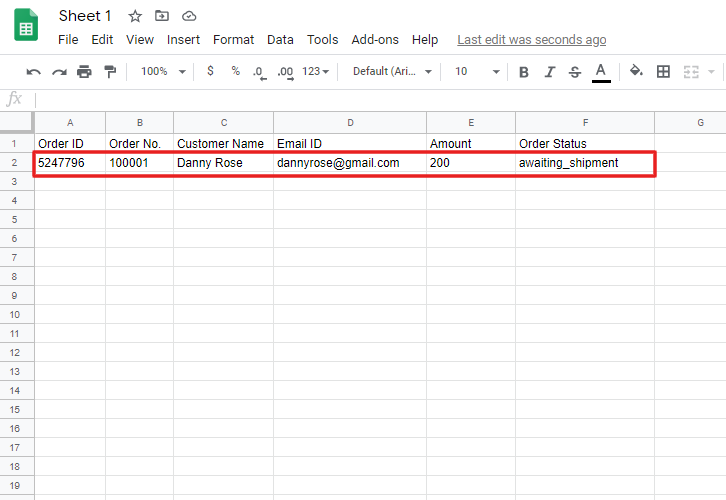
Step 9: Check Response in GitHub Dashboard
Conclusion –
You May Also Like To Read –


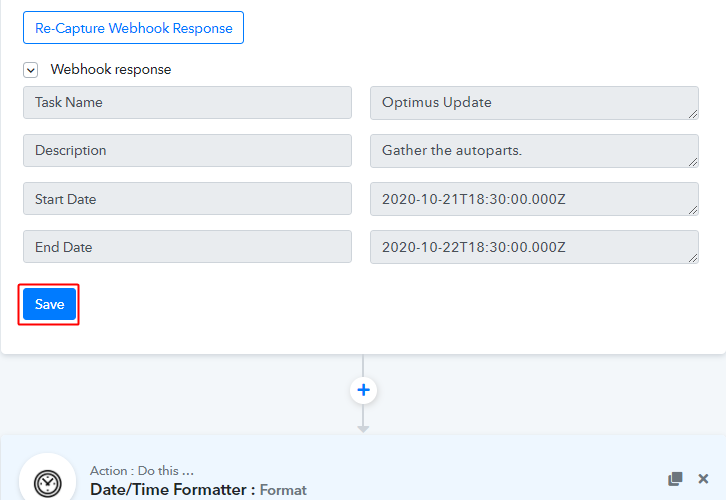
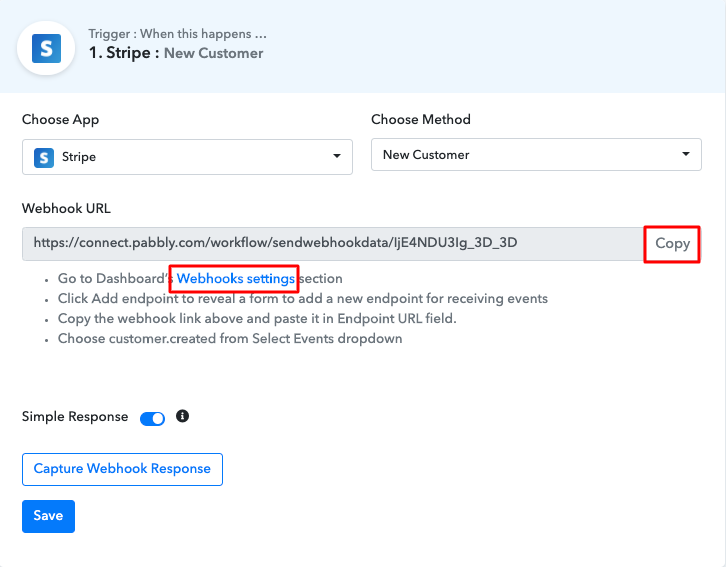
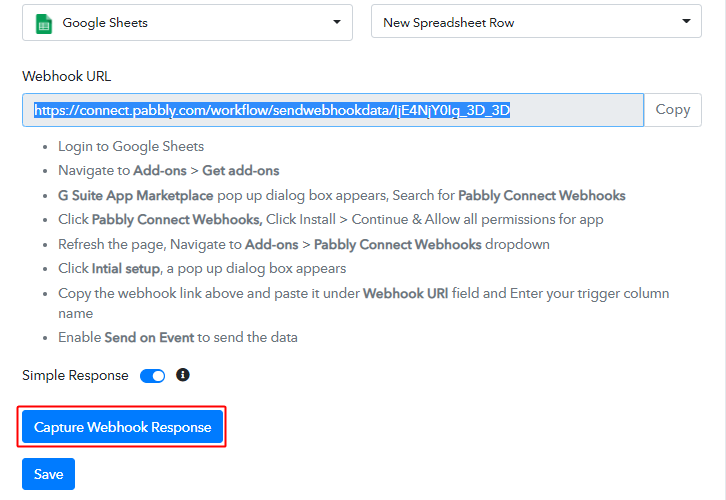
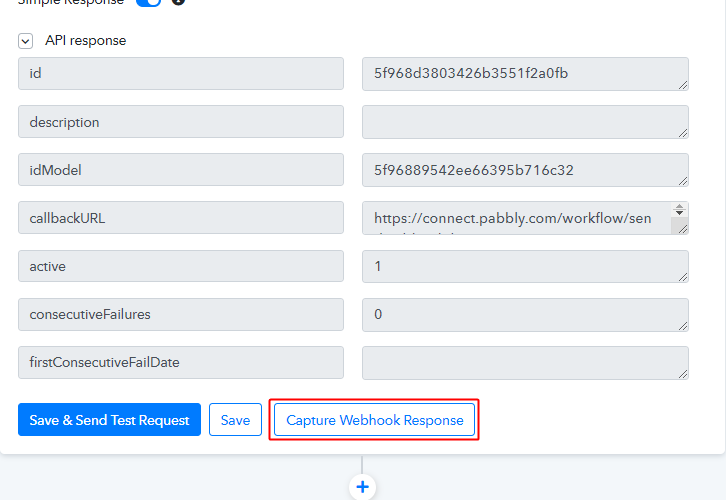 Click the ‘Capture Webhook Response’ button first.
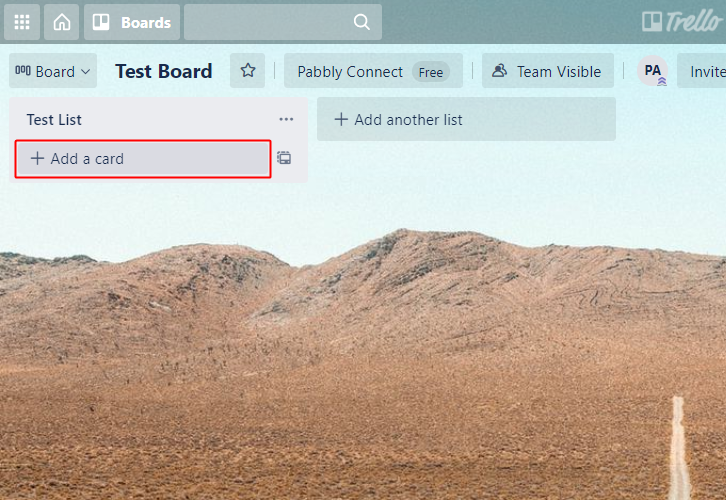


 Click the ‘Capture Webhook Response’ button first.