Real-Time Automation for Lead Conversion 📊

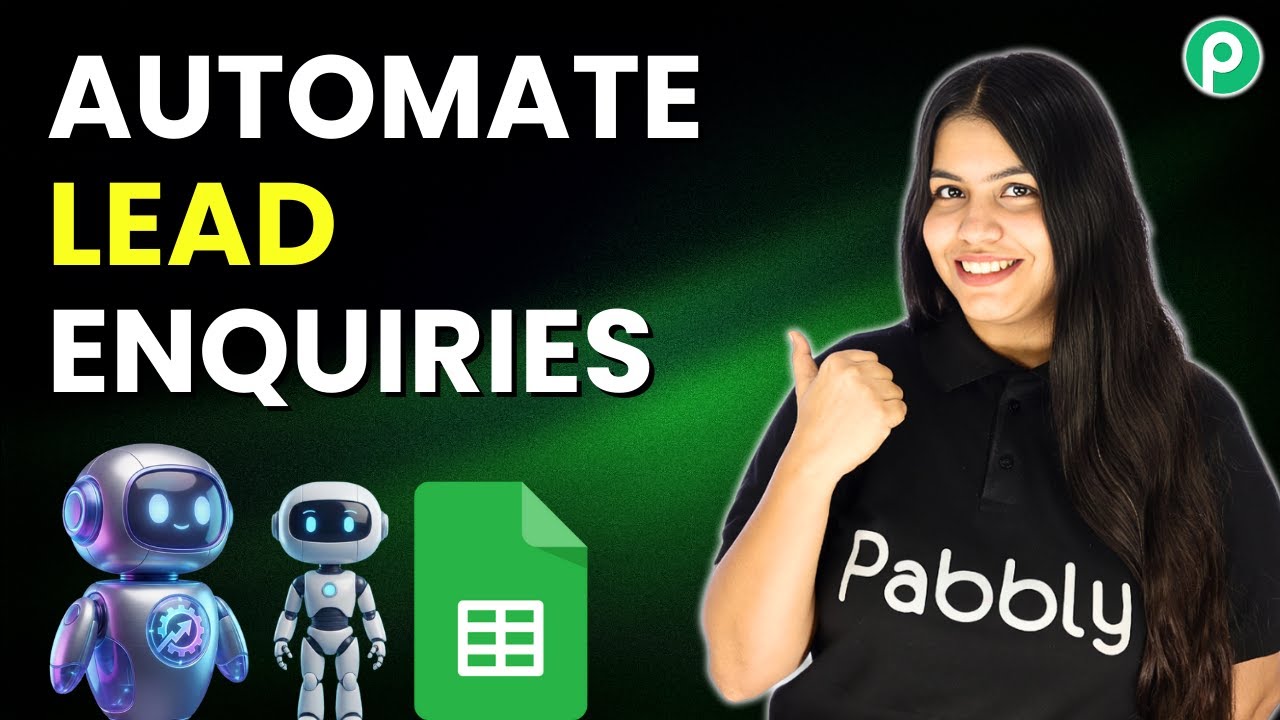
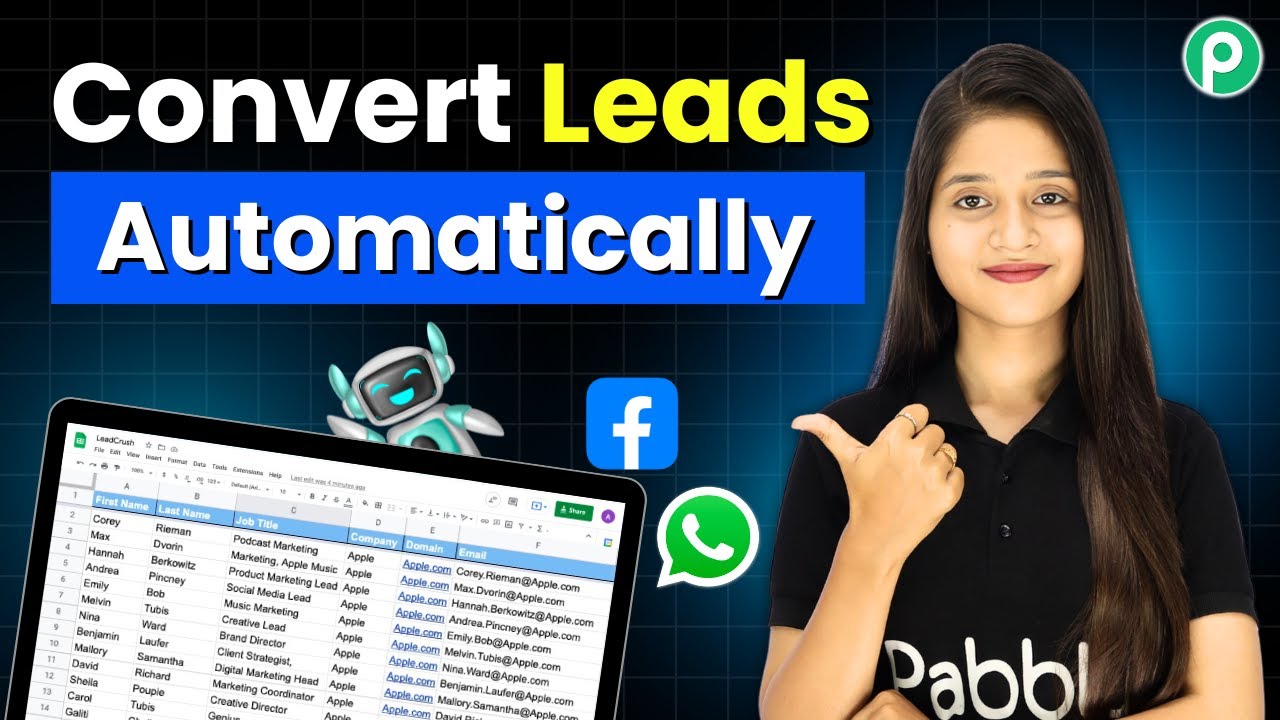
Learn how to automate lead conversion in real-time using Pabbly Connect, integrating Facebook Lead Ads with Google Sheets and WhatsApp for instant follow-ups. Learn to create powerful connections between your critical applications without requiring specialized programming knowledge or extensive technical background.

Watch Step By Step Video Tutorial Below


1. Accessing Pabbly Connect for Automation

To begin automating lead conversion, first access Pabbly Connect by navigating to Pabbly.com/connect. This platform allows you to integrate multiple applications seamlessly without any coding.

If you are new to Pabbly Connect, click on the ‘Sign Up Free’ option to create an account and get 100 free tasks every month. Existing users can simply click ‘Sign In’ to access their dashboard.


2. Creating a New Workflow in Pabbly Connect

Once logged in, click on the ‘Create Workflow’ button in Pabbly Connect. You will be prompted to choose between the new beta version or the classic version for workflow creation. Select the new beta version.

  • Enter your workflow name as ‘Realtime Automation for Lead Conversion’.
  • Select the folder as ‘Pabbly Connect’.
  • Click the ‘Create’ button to finalize your workflow.

Your workflow is now created successfully, and you can proceed to set up the trigger for your automation.


3. Setting Up the Trigger with Facebook Lead Ads

In this step, you will select Facebook Lead Ads as the trigger application in Pabbly Connect. Choose the event as ‘New Lead Instant’ to capture leads as they come in.

  • Click on the ‘Connect’ button and select ‘Add New Connection’.
  • Authorize Pabbly Connect to access your Facebook account.
  • Select the Facebook page and lead generation form to capture the data.

After setting up the connection, click on the ‘Save and Send Test Request’ button to verify that the trigger is functioning correctly.


4. Storing Leads in Google Sheets

The next step involves integrating Google Sheets with Pabbly Connect to store the captured leads. Select Google Sheets as the action application and choose ‘Add New Row’ as the event.

Connect your Google Sheets account by clicking ‘Add New Connection’. Select the spreadsheet and map the fields to capture lead data dynamically. Click ‘Save and Send Test Request’ to confirm the integration.

Once confirmed, a new row will automatically be added to your specified Google Sheet, reflecting the new lead details.


5. Sending WhatsApp Confirmation Messages

To send instant confirmation messages via WhatsApp, select Pabbly Chatflow as the next action application in Pabbly Connect. Choose ‘Send Template Message’ as the event.

Connect your Pabbly Chatflow account and enter the required API token. Map the user’s mobile number and select the template you created for lead confirmations. Click ‘Save and Send Test Request’ to send a test message.

This setup allows you to send personalized WhatsApp messages instantly to users upon lead submission.


Conclusion: Setting Up Follow-Up Reminders

In this final step, you can add a delay action in Pabbly Connect for follow-up reminders. Select the delay app and set it for 72 hours, followed by another action in Pabbly Chatflow to send a follow-up message.

Ensure you check out Pabbly Connect to create business automation workflows and reduce manual tasks. Pabbly Connect currently offer integration with 2,000+ applications.

Check out Pabbly Connect – Automate your business workflows effortlessly! Sign Up Free – Start your journey with ease! 10,000+ Video Tutorials – Learn step by step! Join Pabbly Facebook Group – Connect with 21,000+ like minded people!

This entire automation process significantly reduces manual effort and ensures timely follow-ups with leads, enhancing your business efficiency. By utilizing Pabbly Connect, you can seamlessly integrate various applications for real-time automation of lead conversion.

Send AI-Powered Replies for Product Inquiries Automatically

Learn how to automate AI-powered replies for product inquiries using Pabbly Connect. Step-by-step guide to streamline your e-commerce communication. Eliminate manual repetitive tasks from your workflow. Discover proven automation methods with intuitive steps designed for efficiency-minded professionals.

Watch Step By Step Video Tutorial Below


1. Accessing Pabbly Connect for Automation

To automate AI-powered replies for product inquiries, start by accessing Pabbly Connect. Navigate to the Pabbly Connect website and either sign in or create a new account. If you’re a new user, click on the ‘Sign Up Free’ button to create your account and get 100 free tasks each month.

Once logged in, you’ll be directed to the dashboard where you can create your workflow. Click on the ‘Create Workflow’ button to initiate the setup process. This is where Pabbly Connect will enable the integration between your inquiry form and the AI response system.


2. Creating Your Workflow in Pabbly Connect

After accessing Pabbly Connect, you will need to create a new workflow. Select the new beta version of the workflow builder for a more modern experience. Name your workflow something meaningful, like ‘Send AI-Powered Replies for Product Inquiries Automatically’ and choose a folder to save it in.

  • Click on ‘Create Workflow’.
  • Select the type of workflow builder.
  • Name your workflow appropriately.

With your workflow created, you can now add a trigger. This will be set to your inquiry form, which can be a JotForm or any other form service that Pabbly Connect supports. This action will initiate the automation whenever a new inquiry is submitted.


3. Setting Up the Trigger in Pabbly Connect

To set up the trigger, choose the form application you are using, such as JotForm. Select the event that will trigger the workflow, which is ‘New Response’ in this case. After selecting JotForm, you will need to create a connection by clicking on the ‘Connect’ button.

Copy the webhook URL provided by Pabbly Connect and navigate to your JotForm account. Under the settings, select the integration option and look for the webhook settings. Paste the copied URL in the webhook box and complete the integration. This will ensure that any new response in your form will trigger the workflow in Pabbly Connect.


4. Setting Up AI Response Generation

After successfully setting the trigger, the next step in Pabbly Connect is to set up the action for generating AI responses. Select OpenAI as your action application and choose the event ‘Generate Response Using Text Input’. This will allow you to create a dynamic response based on the inquiry details.

To connect OpenAI to Pabbly Connect, click the ‘Connect’ button and enter your OpenAI token. This token is necessary for authentication and can be obtained from your OpenAI account. Once connected, map the fields correctly to ensure the AI generates a relevant response to the customer’s inquiry.

  • Select the appropriate AI model to use.
  • Map customer details from the inquiry.
  • Set the processing mode to return responses immediately.

Once you have configured the AI response settings, save your configuration. This step is critical as it allows Pabbly Connect to generate personalized replies based on the inquiries received from customers.


5. Sending AI Responses via Email

With the AI response generated, the final step involves sending this response to the customer’s email. In Pabbly Connect, add Gmail as the next action application and select the ‘Send Email’ event. Again, create a connection between Gmail and Pabbly Connect by clicking on the connect button.

Map the fields necessary for sending the email, including the recipient’s email address, subject, and body of the email. Use the AI-generated response as the content of the email. Once everything is set, click on the ‘Save and Send Test Request’ button to ensure that the email is sent successfully.


Conclusion

Using Pabbly Connect, you can automate AI-powered replies for product inquiries efficiently. By following the steps outlined, you can streamline your e-commerce communication and enhance customer satisfaction. This integration not only saves time but also ensures that your customers receive prompt responses to their inquiries.

Ensure you check out Pabbly Connect to create business automation workflows and reduce manual tasks. Pabbly Connect currently offer integration with 2,000+ applications.

Bulk WhatsApp Messaging Using Best Practices

Learn how to send bulk WhatsApp messages using Pabbly Chatflow. Follow our step-by-step tutorial to integrate YouTube, Google Sheets, and more for effective messaging. Master conversational marketing with practical techniques for creating chatbots that engage visitors at exactly the right moment in their journey.

Watch Step By Step Video Tutorial Below


1. Accessing Pabbly Chatflow for Bulk WhatsApp Messaging

To begin bulk WhatsApp messaging using Pabbly Chatflow, first, you need to access the platform. Open your browser and navigate to pabby.com/chatflow. This will direct you to the homepage of Pabbly Chatflow, where you can either sign in or sign up for a free account.

If you are a new user, click on ‘Sign Up Free’ to create your account. Existing users can simply sign in. Once logged in, you will see all available Pabbly applications. Click on the ‘Access Now’ button under Pabbly Chatflow to enter the dashboard and start setting up your WhatsApp messaging system.


2. Setting Up Your WhatsApp Number in Pabbly Chatflow

Once you are in the Pabbly Chatflow dashboard, the next step is to set up your WhatsApp number. Click on the ‘Add WhatsApp Number’ button. You will see two options: WhatsApp Connect and Manual Token Connect. Choose the option that best fits your needs.

  • Choose WhatsApp Connect for easier integration.
  • Select Manual Token Connect if you have a token from WhatsApp.

After connecting your WhatsApp number, you are now ready to utilize the broadcast feature within Pabbly Chatflow to send bulk messages to your contacts.


3. Creating Message Templates for Bulk Messaging

To send bulk WhatsApp messages effectively, you need to create message templates within Pabbly Chatflow. Navigate to the ‘Template’ section on the left sidebar. Here, you can view existing templates or create a new one by clicking the ‘Add Template’ button.

When creating a new template, you must ensure it is pre-approved. Fill in the required fields and submit your template. Remember, once approved, you can use this template for your bulk messaging campaigns. This feature is crucial for maintaining compliance with WhatsApp’s messaging policies.


4. Broadcasting Messages to Your Contacts

Now that you have set up your templates, it’s time to broadcast your messages using Pabbly Chatflow. Click on the ‘Broadcast’ section in the left sidebar and select ‘Add Broadcast’. You will need to specify whether you are sending a campaign or a regular message.

  • Select ‘Broadcast Campaign’ for marketing messages.
  • Choose ‘Regular Message’ for personal communications.

Next, enter the broadcast name and select your contact list. If your contacts are stored in Google Sheets, download them as a CSV file and upload it to Pabbly Chatflow to create your contact list. This integration with Google Sheets simplifies the process of managing your contacts.


5. Testing and Scheduling Your Broadcast Messages

Before sending out your bulk messages, it’s essential to test them. In Pabbly Chatflow, you can send a test message to ensure everything is set up correctly. Enter your details and click on ‘Send Test Message’. This allows you to verify that your message appears as intended.

Once testing is complete, you can schedule your broadcast. Specify the date and time for sending the message, ensuring you follow the correct format. Pabbly Chatflow allows you to send messages immediately or schedule them for a future date, providing flexibility in your communication strategy.


Conclusion

In this tutorial, we explored how to effectively send bulk WhatsApp messages using Pabbly Chatflow. By following these steps, you can streamline your communication process, ensuring messages reach your contacts safely and efficiently. Utilize Pabbly Chatflow to enhance your messaging practices and improve engagement with your audience.

Ensure you check out Pabbly Connect to create business automation workflows and reduce manual tasks. Pabbly Connect currently offer integration with 2,000+ applications.

The Smartest Way to Deliver Offer PDFs After Landingi Form Submission

Learn how to automate the delivery of offer PDFs after Landingi form submissions using Pabbly Connect. Follow our detailed tutorial for step-by-step guidance. Learn to create powerful connections between your critical applications without requiring specialized programming knowledge or extensive technical background.

Watch Step By Step Video Tutorial Below


1. Accessing Pabbly Connect for Automation

To automate the delivery of offer PDFs after Landingi form submissions, you first need to access Pabbly Connect. Start by navigating to the Pabbly Connect dashboard by visiting Pabbly.com/connect.

If you are a new user, click on the ‘Sign Up Free’ button to create your account. This will give you access to 100 free tasks every month. If you are already a user, simply click on ‘Sign In’ to access your account.


2. Creating a Workflow on Pabbly Connect

Once you are logged in to Pabbly Connect, click on the ‘Create Workflow’ button. You will then be prompted to select a workflow builder. Choose the new beta version for a more modern experience.

Next, give your workflow a meaningful name, such as ‘The Smartest Way to Deliver Offer PDFs After Landingi Form Submission’. Select the appropriate folder to keep your workflow organized and click ‘Create’.

  • Click ‘Create Workflow’
  • Choose the new beta version
  • Name your workflow
  • Select a folder

Now, you will see the trigger button. This is where you will select Landingi as your trigger application. Click on the plus button and search for Landingi, then select it.


3. Setting Up the Trigger with Landingi

In this step, you will configure the trigger for your workflow in Pabbly Connect. Choose the event ‘New Lead from Landing Page’ to activate the workflow whenever a new lead fills out the form.

Click on the ‘Connect’ button to obtain your webhook URL. Copy this URL as you will need it to set up the webhook in your Landingi account. Follow the instructions provided by Pabbly Connect to successfully set up the webhook.

  • Select ‘New Lead from Landing Page’ as the event
  • Copy the webhook URL
  • Follow the instructions to set up the webhook in Landingi

Once you have set up the webhook in Landingi, publish your landing page. This will ensure that the form submissions trigger the workflow in Pabbly Connect.


4. Adding the Action Application: WhatsApp Cloud API

Now that the trigger is set, it’s time to add the action application in Pabbly Connect. Click on the plus button to add WhatsApp Cloud API as your action application.

Select the event to send a text message. You will need to create a new connection between WhatsApp Cloud API and Pabbly Connect. Enter the required details such as token, phone number ID, and WhatsApp business account ID.

Select WhatsApp Cloud API as the action application Choose the event to send a text message Create a new connection by entering the required details

After entering the information, click ‘Save’. This will establish the connection and allow you to send messages through WhatsApp.


5. Testing the Automation

With the workflow fully set up in Pabbly Connect, it’s time to test the automation. Fill out the form on your Landingi page to trigger the workflow.

Once the form is submitted, check your WhatsApp account to see if the offer PDF is sent successfully. You should receive a message with the details and a link to the PDF.

This confirms that the integration is working perfectly. You have successfully automated the process of sending offer PDFs after Landingi form submissions using Pabbly Connect.


Conclusion

In this tutorial, we have demonstrated how to use Pabbly Connect to automate the delivery of offer PDFs after a Landingi form submission. By following the steps outlined, you can streamline your lead generation process and enhance customer engagement.

Ensure you check out Pabbly Connect to create business automation workflows and reduce manual tasks. Pabbly Connect currently offer integration with 2,000+ applications.

Set It Once, and Let WhatsApp Talk for You 24×7!

Learn how to automate your WhatsApp chatbot using Pabbly Chatflow in this detailed tutorial. Follow our step-by-step guide to integrate YouTube, Google, and more! Implement professional chat automation that answers common questions, qualifies leads, and books appointments without human intervention.

Watch Step By Step Video Tutorial Below


1. Accessing Pabbly Chatflow for WhatsApp Automation

To automate your WhatsApp chatbot, the first step is to access Pabbly Chatflow. You can do this by navigating to the Pabbly Chatflow website. This platform allows you to manage your WhatsApp communications seamlessly.

Once you are on the Pabbly Chatflow landing page, you will find options to either sign up for free or log in if you are an existing user. Signing up provides you with 100 free tasks every month, while logging in gives you access to your dashboard where you can manage your WhatsApp numbers and flows.


2. Creating Your Chatbot Flow in Pabbly Chatflow

After signing into Pabbly Chatflow, navigate to the dashboard and select the flow feature to start creating your WhatsApp chatbot. Click on the ‘Add Flow’ button and name your flow appropriately, for example, ‘WhatsApp Chatbot for Therapy Center’.

  • Click on ‘Add Flow’ to create a new flow.
  • Name your flow related to your business.
  • Select the trigger event from the dropdown options.

For this chatbot, select keywords as your trigger event. This means the conversation will start when a specific keyword is entered by the user. After defining your trigger, you can begin adding actions to respond to the user’s input.


3. Defining User Interactions in Pabbly Chatflow

In this step, you will set up how the chatbot interacts with users. Use the drag-and-drop feature to add a media message and a welcome message that greets users when they initiate the conversation. using Pabbly Connect

  • Drag and drop a media button to send an image.
  • Add a welcome message with options for users to choose from.
  • Connect each option to a custom field to store user choices.

Once the welcome message is set, you can connect user responses to specific actions, such as confirming a therapy session or collecting user details like name and contact number. This setup ensures that you can gather essential information automatically.


4. Integrating Pabbly Chatflow with Google Sheets

To store user data, you will integrate Pabbly Chatflow with Google Sheets. This allows you to keep track of all interactions and user details in a structured format. First, drag and drop an API request action after the user inputs.

In the API request settings, you will need to enter the webhook URL generated by Pabbly Connect. This URL connects your chatbot data to Google Sheets, ensuring that every time a user interacts, their details are logged.

Copy the webhook URL from Pabbly Connect. Set the API request method to POST. Map the data fields (name, session type, contact number, date) correctly.

This integration ensures that all user details are automatically added to your Google Sheets, making it easy to manage and analyze your data.


5. Finalizing Your Chatbot Setup in Pabbly Chatflow

After setting up the API request, you can finalize your chatbot by sending a confirmation message to the user. This message should include all the details they provided during the interaction.

Use the text button in Pabbly Chatflow to create a personalized confirmation message. Include placeholders for user data, ensuring that each message is customized based on the user’s input.

Create a confirmation message that summarizes the session details. Use variables to personalize the message for each user. Test your chatbot to ensure all functionalities work as expected.

Once everything is set, your WhatsApp chatbot will be operational 24/7, providing seamless customer support without manual intervention.


Conclusion

In this tutorial, we explored how to automate your WhatsApp chatbot using Pabbly Chatflow. By integrating various applications and setting up user interactions, you can ensure your business is available 24/7. Automate your processes today and enhance customer engagement effortlessly.

Ensure you check out Pabbly Connect to create business automation workflows and reduce manual tasks. Pabbly Connect currently offer integration with 2,000+ applications.

This Razorpay Workflow Does 5 Things Automatically 😱

Learn how to automate your Razorpay workflow using Pabbly Connect. This tutorial covers step-by-step integration with Google Sheets, Salesforce, and more! Learn to create powerful connections between your critical applications without requiring specialized programming knowledge or extensive technical background.

Watch Step By Step Video Tutorial Below


1. Setting Up Pabbly Connect for Razorpay Integration

To start automating your Razorpay workflow, first access Pabbly Connect by visiting the Pabbly website. Sign in or create a new account to gain access to the automation features. Once logged in, navigate to the Pabbly Connect dashboard where you can create a new workflow for your Razorpay payments.

After accessing the dashboard, click on the ‘Create Workflow’ button. You will be prompted to name your workflow. For this tutorial, we will name it ‘This Razorpay Workflow Does 5 Things Automatically’. Once named, select the builder method and hit the create button to initiate your workflow setup.


2. Configuring Razorpay as the Trigger in Pabbly Connect

In this step, you will configure Razorpay as the trigger application in Pabbly Connect. Select Razorpay as your trigger app and choose the event as ‘Payment Captured’. This means that every time a new payment is made, Pabbly Connect will capture this event and trigger the subsequent actions.

  • Select Razorpay as the trigger application.
  • Choose ‘Payment Captured’ as the trigger event.
  • Copy the webhook URL provided by Pabbly Connect.

Next, log into your Razorpay account and set up the webhook by navigating to the settings. Paste the copied URL into the webhook URL field and select the event ‘Payment Captured’. This establishes a connection between Razorpay and Pabbly Connect, ensuring that payment data is sent automatically whenever a transaction occurs.


3. Processing Payment Details in Pabbly Connect

Once the payment is captured, the next step in Pabbly Connect is to process the payment details. Perform a test payment using the Razorpay payment link you created earlier. Fill in the required customer details, including name, email, and payment method (e.g., UPI), and complete the payment.

After successfully completing the payment, return to Pabbly Connect and check if the webhook response has been captured. You should see all relevant payment details, including the customer’s name, email address, and payment amount. This data is essential for the subsequent steps in your automation workflow.


4. Sending Notifications and Storing Data Automatically

Now that the payment details are captured, you will automate sending notifications and storing data. Use Pabbly Connect to set up actions for sending a WhatsApp message and an SMS to the customer. First, select the WhatsApp action and choose to send a template message. Map the customer’s phone number and use a template to personalize the message.

  • Select WhatsApp as the action application.
  • Choose the ‘Send Template Message’ event.
  • Map the customer’s name and phone number in the template.

After setting up the WhatsApp notification, add another action to send an SMS using Twilio. Map the same customer details and send a confirmation SMS. Finally, store the payment details in Google Sheets by selecting Google Sheets as an action application and mapping the necessary fields, such as the payment ID and customer information.


5. Integrating CRM and Email Marketing with Pabbly Connect

The final steps involve integrating your CRM and email marketing tools using Pabbly Connect. Select your CRM application (e.g., Salesforce) as the next action and configure it to create a new contact with the payment details. Map all relevant customer information to ensure it is stored correctly in your CRM.

Next, integrate Mailchimp to add the customer as a subscriber. Select Mailchimp as the action application and map the email address and other details. This way, you can ensure that the customer receives future marketing communications.

With all steps completed, you have successfully automated the Razorpay workflow using Pabbly Connect. This integration allows you to streamline payment processing, customer notifications, and data management seamlessly.


Conclusion

By following this tutorial, you can automate your Razorpay workflow using Pabbly Connect. This integration helps manage customer notifications, store payment details, and maintain your CRM and email marketing efficiently. Experience the power of automation today!

Ensure you check out Pabbly Connect to create business automation workflows and reduce manual tasks. Pabbly Connect currently offer integration with 2,000+ applications.

Google Ads Lead Automation for Real Estate Business

Learn how to automate Google Ads leads into Zoho CRM for your real estate business using Pabbly Connect. Step-by-step tutorial included. Implement the precise methodologies leading organizations use to automate repetitive tasks, illustrated with practical examples designed for immediate application.

Watch Step By Step Video Tutorial Below


1. Accessing Pabbly Connect for Google Ads Lead Automation

To start automating Google Ads leads for your real estate business, you need to access Pabbly Connect. Begin by searching for ‘Pabbly.com connect’ in your browser, which will take you to the Pabbly Connect homepage.

Once on the homepage, you will see two options: ‘Sign In’ and ‘Sign Up Free’. If you are a new user, click on ‘Sign Up Free’ to create an account and get 100 free tasks every month. Existing users can simply sign in to their accounts to get started with the automation process.


2. Creating a New Workflow in Pabbly Connect

After signing in, navigate to the Pabbly Connect dashboard where you will create a new workflow. Click on the ‘Create Workflow’ button to begin setting up your automation for Google Ads leads.

  • Select the ‘Beta’ version for a modern workflow experience.
  • Name your workflow, e.g., ‘Google Ads Lead Automation for Real Estate Business’.
  • Choose a folder for organization, such as ‘Automations’.

Once the workflow is named and organized, you will see options for setting up triggers and actions. This is where Pabbly Connect will facilitate the connection between Google Ads and Zoho CRM.


3. Setting Up the Trigger for Google Ads Leads

In this step, you will set up the trigger to receive new leads from Google Ads. Select ‘Google Ads’ as your trigger application and choose ‘New Lead Form Entry’ as the trigger event.

After selecting the trigger, you will be provided with a webhook URL. This URL is essential as it allows Google Ads to communicate with Pabbly Connect. Copy this webhook URL and proceed to your Google Ads account to set up the lead form integration.


4. Configuring Google Ads for Lead Delivery

In your Google Ads account, navigate to the lead form you created. Scroll down to the ‘Lead Delivery’ section and find the option for ‘Webhook Integration’. Here, paste the webhook URL you copied from Pabbly Connect.

  • Ensure to map the required fields such as Name, Email, and Phone Number.
  • Test the integration by sending test data to verify the setup.

Once you have configured the webhook, you are ready to receive leads directly into Pabbly Connect, which will then process them for your CRM.


5. Integrating Zoho CRM with Pabbly Connect

The final step involves integrating Zoho CRM to store the leads received from Google Ads. In Pabbly Connect, add an action step and select ‘Zoho CRM’ as your application. Choose the action event as ‘Create Contact’.

Connect your Zoho CRM account by providing the necessary domain and authorizing access. After successful connection, map the fields from the Google Ads lead to the corresponding fields in Zoho CRM. This ensures that every new lead is logged correctly.


Conclusion

In conclusion, using Pabbly Connect for automating Google Ads leads into Zoho CRM can significantly enhance your real estate business efficiency. This step-by-step guide has outlined how to set up this integration seamlessly, ensuring no lead is missed. Start automating your lead management today!

Ensure you check out Pabbly Connect to create business automation workflows and reduce manual tasks. Pabbly Connect currently offer integration with 2,000+ applications.

How to Add Lead Enquiries to Google Sheets Automatically

Learn how to automatically add lead enquiries to Google Sheets using Pabbly Connect. Follow our detailed tutorial for seamless integration. Transform complex automation concepts into accessible, actionable steps that eliminate unnecessary manual work while maximizing existing application capabilities.

Watch Step By Step Video Tutorial Below


1. Accessing Pabbly Connect for Automation

To start adding lead enquiries to Google Sheets automatically, you need to access Pabbly Connect. Open your browser and go to pabbl.com/connect. If you are a new user, click on ‘Sign Up for Free’ in the top right corner, allowing you to explore Pabbly Connect with 100 free tasks each month.

Once signed up, you can begin creating your automation workflow. This free trial will help you experience how Pabbly Connect can streamline your lead management process. If you find it valuable, consider subscribing for more features and capabilities.


2. Setting Up Your Workflow in Pabbly Connect

Inside Pabbly Connect, navigate to the workflow builder. This is where you will define triggers and actions for your automation. Start by clicking on the ‘Add Trigger’ button and search for LinkedIn as your trigger application.

  • Select ‘Lead Notifications’ as the event.
  • Connect your LinkedIn account by clicking on ‘Add New Connection’.
  • Log in with your LinkedIn credentials.

After logging in, select the sponsored account. If no options appear, click ‘Refresh Fields’. This ensures that Pabbly Connect can capture all necessary lead data correctly.


3. Testing Your LinkedIn Trigger

Once your LinkedIn account is connected, you need to test the trigger. Click on ‘Save and Send Test Request’. Here, you can either wait for a real lead or submit a test lead manually. To submit a test lead, fill in the required fields and click ‘Submit’.

After submitting, Pabbly Connect will capture the test lead data, allowing you to verify that everything is functioning correctly. This step is crucial as it ensures that your automation will work seamlessly with real leads.


4. Adding Data to Google Sheets Automatically

Next, you need to add an action step to your workflow. Click on ‘Add New Action Step’ and search for Google Sheets. Select it and choose ‘Add New Row’ as the event. using Pabbly Connect

  • If you have an existing connection, select it; otherwise, click ‘Add New Connection’.
  • Sign in with your Google account and allow necessary permissions.
  • Select your desired spreadsheet and sheet for the data.

Now, map the lead data from LinkedIn to the Google Sheets fields. This mapping is essential as it ensures that every new lead is dynamically added to your spreadsheet. Click ‘Save and Send Test Request’ to finalize the setup.


5. Finalizing Your Automation with Pabbly Connect

After successfully mapping your data, check your Google Sheets to confirm that the lead details have been added. This automation means that every time a new lead is generated on LinkedIn, it will automatically be recorded in your Google Sheets without any manual effort.

With Pabbly Connect, you have streamlined your lead management process. Whenever a new lead comes in, it will be automatically logged, ensuring you never miss an opportunity. This powerful automation can save you time and improve your efficiency.


Conclusion

Using Pabbly Connect, you can easily automate the process of adding lead enquiries to Google Sheets. This integration helps streamline your workflow and ensures that you capture every lead efficiently.

Ensure you check out Pabbly Connect to create business automation workflows and reduce manual tasks. Pabbly Connect currently offer integration with 2,000+ applications.

How to Create an AI Agent for Occasion Management Services — Cakes, Flowers & Surprise Bookings

Learn how to create an AI agent for occasion management services using Pabbly Chatflow. This step-by-step guide covers integration with WhatsApp and more. Master conversational marketing with practical techniques for creating chatbots that engage visitors at exactly the right moment in their journey.

Watch Step By Step Video Tutorial Below


1. Accessing Pabbly Chatflow for Occasion Management Services

To create an AI agent for occasion management services, you first need to access Pabbly Chatflow. Begin by navigating to www.Pabbly.com/chatflow in your web browser. This platform is essential for automating responses to customer queries through WhatsApp.

Once on the Pabbly Chatflow website, you will need to sign in. If you’re a new user, you can sign up for free and receive 100 credits each month. Existing users can simply click the ‘Sign In’ button located at the top right corner. This will grant you access to all the features necessary for setting up your AI agent.


2. Setting Up WhatsApp Integration with Pabbly Chatflow

After signing in to Pabbly Chatflow, the next step is to integrate your WhatsApp account. On your dashboard, locate the ‘Add WhatsApp Number’ option. Click on this and choose the preferred method to connect your WhatsApp account, either through WhatsApp Connect or by entering a manual token.

  • Click on ‘Add WhatsApp Number’ on your dashboard.
  • Choose WhatsApp Connect for easier integration.
  • Follow the prompts to complete the connection.

Once connected, you will be able to automate responses based on customer queries. This feature is crucial for managing occasion services effectively.


3. Creating Your AI Agent in Pabbly Chatflow

To create your AI agent, navigate to the ‘AI Assistant’ option on the left-hand side of the Pabbly Chatflow dashboard. Click on it and then select ‘Create New AI Assistant.’ Name your assistant, for example, ‘Occasion Management Services,’ to reflect its purpose.

Next, you will need to configure the AI settings. Set the instruction type to ‘AI Agent’ and adjust the creativity level by setting the temperature. A temperature of 0.7 is recommended for balanced responses. Don’t forget to enter your OpenAI API key, which is necessary for your AI agent to function properly.

  • Set the instruction type to ‘AI Agent’.
  • Adjust the temperature setting to 0.7 for optimal creativity.
  • Enter your OpenAI API key to enable functionality.

This configuration will ensure your AI agent provides accurate and relevant responses to customer inquiries about occasion management services.


4. Setting Up Knowledge Source and Assistant Interface

The knowledge source is critical for guiding your AI agent’s responses. In Pabbly Chatflow, click on the ‘Knowledge Source’ option and upload a document containing all relevant information about your services. This document should detail your offerings, pricing, and contact information.

Additionally, customize the assistant interface by adding initial messages and selecting a theme. You can choose between light or dark mode for the interface. This personalization helps create a more engaging user experience for customers interacting with your AI agent.

Upload a comprehensive knowledge base document. Add initial messages to greet users. Select a theme that matches your brand.

With these settings, your AI agent will be well-equipped to assist customers effectively, ensuring a smooth interaction.


5. Assigning Your AI Agent to Chats

Once your AI agent is created and configured, the final step is to assign it to your WhatsApp chats. In Pabbly Chatflow, navigate to the ‘Inbox’ settings. Here, you can enable AI auto-replies and select the specific contacts or groups that your AI agent will respond to.

For broader engagement, you can also assign the AI agent to all contacts in a list. This feature allows you to automate responses to a larger audience, making it easier to manage multiple queries simultaneously. Ensure you save all changes to activate the AI agent.

Testing your AI agent is crucial. Send a test message through WhatsApp to see if it responds correctly. If everything is set up properly, your AI agent should provide accurate and timely responses.


Conclusion

Creating an AI agent for occasion management services using Pabbly Chatflow simplifies customer interactions. By following these detailed steps, you can automate responses, improve service efficiency, and enhance customer satisfaction. Start leveraging the power of AI for your business today!

Ensure you check out Pabbly Connect to create business automation workflows and reduce manual tasks. Pabbly Connect currently offer integration with 2,000+ applications.

How to Add Facebook Lead Ads to Google Sheets for Agencies

Learn how to integrate Facebook Lead Ads with Google Sheets using Pabbly Connect. Follow this step-by-step tutorial for seamless automation. Discover how to seamlessly connect your essential tools through accessible instructions that make powerful automation available to professionals at every skill level.

Watch Step By Step Video Tutorial Below


1. Accessing Pabbly Connect for Integration

To begin integrating Facebook Lead Ads with Google Sheets, first access Pabbly Connect. Visit the Pabbly website and click on the ‘Sign Up Free’ button if you’re a new user, or simply sign in if you already have an account.

Once logged in, locate the ‘Access Now’ button for Pabbly Connect. This will take you to the Pabbly Connect dashboard, where you can create a new workflow for your Facebook Lead Ads integration.


2. Creating a New Workflow in Pabbly Connect

In the Pabbly Connect dashboard, click on the ‘Create Workflow’ button, which opens the workflow builder. Name your workflow something descriptive, like ‘Add Facebook Lead Ads to Google Sheets for Agencies’. Choose a folder to organize your workflows, such as ‘Facebook Lead Ads’. using Pabbly Connect

  • Click on the ‘Create’ button to initiate your workflow.
  • Select the trigger application as ‘Facebook Lead Ads’.
  • Set the trigger event to ‘New Lead’.

Now you can proceed to set up the connection with Facebook Lead Ads, allowing Pabbly Connect to capture new leads automatically.


3. Connecting Facebook Lead Ads to Pabbly Connect

To connect your Facebook Lead Ads, click on the ‘Connect’ button within Pabbly Connect. You will be prompted to select your Facebook account. Choose the appropriate account and click on ‘Continue’ to grant Pabbly Connect access to your Facebook data. using Pabbly Connect

Next, select the Facebook page associated with your lead ads and choose the lead form you want to connect. This step ensures that Pabbly Connect captures leads from the correct source.


4. Setting Up Google Sheets with Pabbly Connect

After connecting Facebook Lead Ads, the next step is to integrate Google Sheets. In the Pabbly Connect workflow, select Google Sheets as the action application, and choose the action event as ‘Add a New Row’. using Pabbly Connect

  • Connect your Google account by clicking on ‘Sign in with Google’.
  • Choose the spreadsheet where you want to add new leads.
  • Map the lead fields like first name, last name, email, and phone number to the corresponding columns in your Google Sheet.

This setup allows new leads from Facebook to be automatically added as rows in your Google Sheets document, streamlining your lead management process.


5. Testing the Integration

To ensure everything is working smoothly, you need to test your integration. Go back to your Facebook Lead Ads form and submit a test lead. After submission, return to Pabbly Connect and check the workflow for a successful response. using Pabbly Connect

If the test is successful, you should see a new row in your Google Sheets with the lead details. This confirms that your integration is functioning properly and that Pabbly Connect is effectively bridging Facebook Lead Ads and Google Sheets.


Conclusion

Integrating Facebook Lead Ads with Google Sheets using Pabbly Connect can significantly enhance your lead management efficiency. By following these detailed steps, you can automate the process of capturing leads directly into your Google Sheets, saving time and reducing manual entry errors. Start using Pabbly Connect today for seamless automation!

Ensure you check out Pabbly Connect to create business automation workflows and reduce manual tasks. Pabbly Connect currently offer integration with 2,000+ applications.