How to Sync TikTok Leads with Your Email Marketing Tool

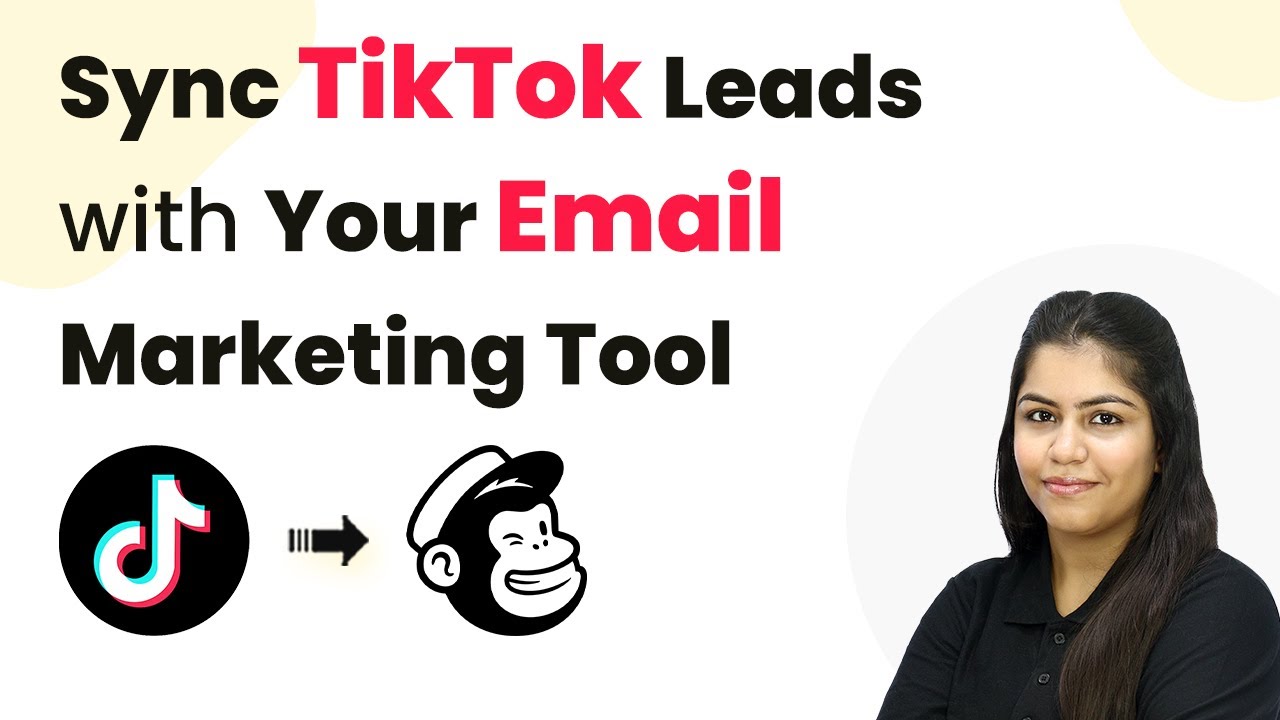
Learn how to sync TikTok leads with your email marketing tool using Pabbly Connect. This detailed tutorial guides you through the integration process step-by-step. Build sophisticated automated workflows in less time than you think. This guide translates complex integrations into straightforward steps for immediate implementation.

Watch Step By Step Video Tutorial Below


1. Accessing Pabbly Connect for TikTok Integration

To sync TikTok leads with your email marketing tool, you first need to access Pabbly Connect. If you are an existing user, simply open your workflow builder. For new users, visit pabbl.com/connect in your browser.

Once on the landing page, click on the ‘Sign up for free’ option in the top right corner. This allows you to explore Pabbly Connect with 100 free tasks each month, enabling you to add up to 100 leads into your email marketing tool without any cost.


2. Creating Your Workflow in Pabbly Connect

After logging into Pabbly Connect, you will be directed to the workflow builder. This is where the automation process begins, utilizing triggers and actions. A trigger is an event that starts the workflow, while an action is the outcome that follows.

  • Click on the ‘Add Trigger’ button.
  • Search for ‘TikTok Lead Generation’.
  • Select the event as ‘New Lead’ and click ‘Connect’.

Once you select the trigger, if you have previously connected TikTok to Pabbly Connect, choose the existing connection. Otherwise, create a new connection by logging into your TikTok account and granting necessary permissions.


3. Configuring TikTok for Lead Generation

After connecting your TikTok account, you must select the advertiser ID and the specific form you want to use for lead generation. For instance, if you are using the Legion forms, select this form. using Pabbly Connect

Next, click on the ‘Save and Send Test Request’ button, ensuring you set the response format to ‘Advanced’. This step is critical as it prepares your workflow to capture real-time leads from TikTok.

  • Wait for a real lead or generate a test lead.
  • Capture the response from the TikTok lead generation app.

Once the test lead is captured, you will see the details such as first name, last name, email, and phone number. This information will be used in the next step to add the lead to your email marketing tool.


4. Adding Leads to Mailchimp via Pabbly Connect

To add the captured TikTok lead to Mailchimp, click on the ‘Add New Action Step’. Search for Mailchimp and select it. For the event, choose ‘Add a New Member with Custom Fields’ and click ‘Connect’.

If you have already established a connection between Mailchimp and Pabbly Connect, select it. Otherwise, create a new connection by entering your Mailchimp API key and data center. You can find the data center in your Mailchimp account URL.

Navigate to your Mailchimp account and find the API key under ‘Extras’. Generate a new API key if needed and copy it into Pabbly Connect.

After creating the connection, you need to select the audience list and map the details from the TikTok lead. Mapping allows the data to be dynamic, ensuring that each new lead’s details are automatically filled in.


5. Finalizing Your Integration with Pabbly Connect

Once you have mapped the TikTok lead details, click on the ‘Save and Send Test Request’ button to finalize the integration. You should receive a positive response indicating that the lead has been successfully added to your Mailchimp audience.

To verify, go back to your Mailchimp account and check the audience section. You will see the new TikTok lead details added automatically. This confirms that your integration via Pabbly Connect is functioning correctly.

Now, every time you receive a new lead from TikTok, their details will automatically be added to Mailchimp without any further action required from you.


Conclusion

In this tutorial, we demonstrated how to sync TikTok leads with your email marketing tool using Pabbly Connect. This integration simplifies the process, ensuring that your leads are captured and added to your email marketing tool automatically. Take advantage of this automation to streamline your lead management process.

Ensure you check out Pabbly Connect to create business automation workflows and reduce manual tasks. Pabbly Connect currently offer integration with 2,000+ applications.

I Automated WhatsApp Replies for Every TikTok Lead — Game Changer!

Learn how to automate WhatsApp replies for TikTok leads using Pabbly Connect. Step-by-step guide to streamline your lead management process. Follow this definitive guide to creating powerful automated workflows with straightforward, efficiency-focused solutions that save valuable time.

Watch Step By Step Video Tutorial Below


1. Accessing Pabbly Connect for WhatsApp Automation

To automate WhatsApp replies for every TikTok lead, you first need to access Pabbly Connect. Open a new tab and navigate to pabby.com/connect. This is the starting point for all your automation needs.

Once on the landing page, you will see two options: ‘Sign In’ or ‘Sign Up for Free’. If you are a new user, click on ‘Sign Up for Free’ to create your account and receive 100 free tasks each month. If you already have an account, simply sign in. After signing in, click on the ‘Access Now’ button to enter the Pabbly Connect dashboard.


2. Creating Your Workflow in Pabbly Connect

In the Pabbly Connect dashboard, you can create a new workflow by clicking on the ‘Create Workflow’ button. For this automation, name your workflow ‘I Automated WhatsApp Replies to New TikTok Lead’ and select the appropriate folder for organization.

  • Click on ‘Create’ to set up your workflow.
  • Choose the trigger application as ‘TikTok Lead Generation’.
  • Select the event ‘New Lead’ to capture new leads generated from your TikTok ads.

After setting the trigger, click the ‘Connect’ button to establish a connection with TikTok. You can either select an existing connection or create a new one by clicking on ‘Connect with TikTok Lead Generation’. Log into your TikTok account to proceed.


3. Generating Test Leads in Pabbly Connect

After connecting to TikTok, you need to set up a test lead to capture the trigger response. Since there may not be real-time leads available, use the ‘Create Test Lead’ action in Pabbly Connect.

  • Select ‘TikTok Lead Generation’ as the action application.
  • Choose the event ‘Create Test Lead’ to simulate a lead.
  • Fill in the required details such as advertisement ID and form ID.

Once the test lead is generated, you will see the response captured in Pabbly Connect. This response will include details like the lead’s name, email, and phone number, which can be used for sending WhatsApp messages.


4. Sending WhatsApp Messages Using Pabbly Connect

Now that you have captured the test lead in Pabbly Connect, the next step is to send a WhatsApp message to the lead. To do this, you need to add another action step and select ‘Pabbly Chatflow’ as the action application.

Choose the event ‘Send Template Message’ to send a pre-defined message. Connect to your Pabbly Chatflow account by providing the API token. Map the phone number of the lead to the recipient field.

After mapping the necessary fields, you can customize the message template. The message can include variables such as the lead’s name and a welcome code. Once everything is set up, click on ‘Send Test Request’ to verify if the WhatsApp message is sent successfully.


5. Conclusion: Streamlining Your Lead Management with Pabbly Connect

In this tutorial, we explored how to automate WhatsApp replies for every TikTok lead using Pabbly Connect. By following the outlined steps, you can set up a seamless workflow that enhances your lead management process.

Ensure you check out Pabbly Connect to create business automation workflows and reduce manual tasks. Pabbly Connect currently offer integration with 2,000+ applications.

Check out Pabbly Connect – Automate your business workflows effortlessly! Sign Up Free – Start your journey with ease! 10,000+ Video Tutorials – Learn step by step! Join Pabbly Facebook Group – Connect with 21,000+ like minded people!

With Pabbly Connect, you can ensure that new leads receive timely WhatsApp messages, thereby increasing the chances of conversion. This automation not only saves time but also improves customer engagement, making it a game changer for your business.


By implementing this automation, you can focus on growing your business while Pabbly Connect handles the communication with your leads effectively.

Pabbly Connect Tutorial for Beginners – Start Automation Today

Learn how to automate your tasks using Pabbly Connect with this step-by-step tutorial, integrating Google Forms and WhatsApp seamlessly. Develop expertise in application integration and learn how to design streamlined automation workflows using proven, simplified approaches.

Watch Step By Step Video Tutorial Below


1. Accessing Pabbly Connect for Automation

To start using Pabbly Connect, open a new tab and enter the URL Pabbly.com/connect. This will take you to the homepage of Pabbly Connect where you can sign up or log in.

If you are a new user, click on the ‘Sign Up Free’ option. This allows you to create an account that gives you access to 100 free tasks every month. For existing users, simply click on ‘Sign In’ to access your account.


2. Creating Your First Workflow in Pabbly Connect

Once logged into Pabbly Connect, navigate to the dashboard. Here, you can see all your workflows organized in folders. To create a new workflow, click on the ‘Create Workflow’ button.

  • Select the modern workflow builder for better flexibility.
  • Name your workflow, e.g., ‘Send WhatsApp Messages to Google Form Leads’.
  • Choose a folder to save your workflow for better organization.

After naming your workflow, click on the ‘Create’ button to proceed to the workflow page where you can set up triggers and actions.


3. Setting Up a Trigger in Pabbly Connect

In this step, you will set up a trigger that initiates your workflow. For this integration, select ‘Google Forms’ as your trigger app. Click on ‘Add Trigger’ and choose the event ‘New Response Received’.

  • Connect your Google account to allow Pabbly Connect to access your forms.
  • Copy the provided webhook URL to link Google Forms with Pabbly Connect.
  • Set up the trigger column in your Google Sheet, typically the last column where responses are recorded.

Once the trigger is configured, test it by submitting a new response in your Google Form. This will send data to Pabbly Connect for processing.


4. Sending WhatsApp Messages via Pabbly Connect

After setting up the trigger, it’s time to add an action step. Click on ‘Add New Action Step’ and select ‘WhatsApp Cloud API’ to send messages to leads. using Pabbly Connect

Choose the action event ‘Send Template Message’. Connect your WhatsApp account by entering the required details like token and phone number ID. Map the phone number field from Google Forms to ensure personalized messages are sent.

After configuring the action step, click on ‘Save and Send Test Request’ to verify that the message is sent successfully to the designated WhatsApp number.


5. Testing Your Automation Workflow

Once everything is set up, it’s crucial to test your automation. Go back to your Google Form and fill it out with test data. Submit the form to trigger the automation.

Check your WhatsApp to confirm that the message has been received. The message should indicate that the inquiry has been received, personalized with the user’s name. This confirms that your Pabbly Connect automation is functioning correctly.


Conclusion

In this tutorial, we demonstrated how to use Pabbly Connect to automate the process of sending WhatsApp messages when a new lead is captured via Google Forms. This powerful integration not only saves time but also enhances communication efficiency.

Ensure you check out Pabbly Connect to create business automation workflows and reduce manual tasks. Pabbly Connect currently offer integration with 2,000+ applications.

How to Automate Airtable Entries Step-by-Step

Learn how to automate Airtable entries using Pabbly Connect. This step-by-step guide covers integration with LinkedIn and Box for seamless data management. Learn to create powerful connections between your critical applications without requiring specialized programming knowledge or extensive technical background.

Watch Step By Step Video Tutorial Below


1. Accessing Pabbly Connect for Automation

To automate Airtable entries, the first step is to access Pabbly Connect. Open your browser and go to Pabbly.com/connect. Here, you’ll find options to sign in or sign up. New users can click on ‘Sign up free’ to receive 100 free tasks each month, while existing users can simply sign in.

After signing in, you’ll see the Pabbly apps window. Click on ‘Access Now’ under Pabbly Connect to reach the dashboard. This platform is essential for creating workflows that connect Airtable with other applications like LinkedIn. You can easily manage your leads data in one place using this integration.


2. Creating a Workflow in Pabbly Connect

Now that you have accessed Pabbly Connect, the next step is to create a workflow. Click on the ‘Create Workflow’ button. You will be prompted to choose between the new beta version or the classic version. For this tutorial, select the beta version for its modern features.

  • Click on the ‘Create Workflow’ button.
  • Choose a name for your workflow, such as ‘Automate Airtable Entry Step by Step’.
  • Select a folder for your workflow, for example, ‘Automations’.

After naming your workflow and selecting the folder, click on the ‘Create’ button. You will now see the workflow window where you can set up your automation process. Remember, every automation consists of a trigger and an action, and Pabbly Connect will facilitate this process.


3. Setting Up the Trigger with LinkedIn

To automate entries in Airtable, the first trigger you need to set up in Pabbly Connect is LinkedIn. Click on the trigger option and select LinkedIn from the application list. For the app event, choose ‘Lead Notifications’ and proceed to connect your LinkedIn account.

After clicking on ‘Connect’, select ‘Add a New Connection’. You will be asked to log into your LinkedIn account. Once connected, choose your sponsored account from the drop-down menu in the LinkedIn Campaign Manager. Click on ‘Save and Send Test Request’ to confirm the connection.


4. Generating a Test Lead for Automation

After setting up the trigger, you need to generate a test lead to test the integration. Navigate back to your LinkedIn Ads Campaign Manager and create a test lead using the draft campaign. Fill in the required fields such as email address and phone number, and submit the form.

  • Enter a dummy email address, like [email protected].
  • Add a random phone number.
  • Click on the submit button to send the information to Pabbly Connect.

Once the test lead is submitted, check back in Pabbly Connect to see if you have received a successful response. This confirms that your trigger is working correctly and is ready to automate entries into Airtable.


5. Adding Action Step to Create Record in Airtable

With the trigger set up, the next step is to add an action in Pabbly Connect to create a record in Airtable. Select Airtable as your application and choose ‘Create Record’ for the app event. Click on ‘Connect’ and then select ‘Add a New Connection’ to link your Airtable account.

Grant access to Pabbly Connect for your Airtable account. You will need to specify the base name and table name where you want to store the lead details. For example, select ‘LinkedIn Lead Automation’ as the base and ‘Table 1’ as the table name. Then, map the fields such as first name, last name, phone number, and email address using the data from your LinkedIn trigger.

Finally, click on ‘Save and Send Test Request’ to add a new record in Airtable. Check your Airtable account to confirm that the lead details have been successfully added, completing the automation process using Pabbly Connect.


Conclusion

In this tutorial, we explored how to automate Airtable entries step-by-step using Pabbly Connect. By integrating LinkedIn with Airtable, you can streamline your lead management process and save valuable time. Follow these steps to set up your automation and enhance your business workflow.

Ensure you check out Pabbly Connect to create business automation workflows and reduce manual tasks. Pabbly Connect currently offer integration with 2,000+ applications.

Replace Manual Work with Smart Logic 🔄

Learn how to automate tasks and replace manual work with smart logic using Pabbly Connect to integrate Google Sheets, Google Docs, Gmail, and Google Drive.

Watch Step By Step Video Tutorial Below


1. Accessing Pabbly Connect for Automation

To start replacing manual work with smart logic, open a new tab and navigate to Pabbly Connect by searching for Pabbly.com/connect. This platform is essential for automating workflows efficiently.

Once on the Pabbly Connect page, you will see options to sign in or sign up for free. If you are new, click on the ‘Sign Up Free’ button to create an account. Existing users can simply sign in. After logging in, click on the ‘Access Now’ button to enter the Pabbly Connect dashboard.


2. Creating a Workflow in Pabbly Connect

In the Pabbly Connect dashboard, click on the ‘+ Create Workflow’ button. This will prompt you to select a workflow builder. Choose the ‘New Beta’ version for an enhanced experience. Name your workflow as ‘Replace Manual Work with Smart Logic’ and select a folder for organization.

After naming your workflow, click the ‘Create’ button. Your workflow is now created. The next step is crucial as it involves setting up a trigger. Click on the plus icon to select your trigger application, which in this case will be Google Sheets.

  • Select ‘Google Sheets’ as the application.
  • Choose the event as ‘New or Updated Spreadsheet Row’.
  • Click on the ‘Connect’ button to establish the connection.

Once connected, a webhook URL will be provided. Copy this URL to link your Pabbly Connect account with Google Sheets.


3. Configuring Google Sheets with Pabbly Connect

Now, open your Google Sheets account where you maintain employee service records. Click on the ‘Extensions’ menu, then select ‘Pabbly Connect Webhook’, and proceed to ‘Initial Setup’. Paste the copied webhook URL into the designated field.

Next, specify the trigger column, which is the final data column where you enter information. For this example, enter ‘K’ as the trigger column. Click on the ‘Send Test’ button to verify the connection. You should see a success message indicating that test data was sent successfully.

  • Ensure that the trigger column corresponds to the correct column in your Google Sheets.
  • Confirm that you receive a new response in Pabbly Connect after the test.

Once confirmed, your Google Sheets is now successfully integrated with Pabbly Connect.


4. Creating Documents via Google Docs

Next, we will set up the action application as Google Docs to create experience letters. Click on the plus icon again and select ‘Google Docs’. Choose the event as ‘Create Document from Template’. Click on ‘Connect’ and select ‘Add New Connection’. Sign in to your Google account to establish the link with Pabbly Connect.

Now, select the template document titled ‘Experience Letter’. This document should contain placeholders for fields such as date, employee full name, employee ID, and department. Mapping these fields is essential for creating a dynamic document.

Map the employee’s full name by entering a slash (/) to select from previous responses. Ensure all necessary fields are mapped correctly to generate a personalized document.

After mapping, save your settings and send a test request to confirm that the experience letter is generated correctly in your Google Drive.


5. Sending Emails through Gmail

Finally, we need to send the experience letter via email using Gmail. Select Gmail as your next application and choose the event as ‘Send Email’. Connect your Gmail account to Pabbly Connect by selecting the existing connection.

In the email setup, map the sender’s name and email address from the previous responses. For the recipient email address, map the employee’s email address. Write a subject for the email and include the content, ensuring to personalize it with the employee’s name.

Attach the experience letter PDF using the mapped URL from Google Drive. Select the email content type as HTML for better formatting.

After filling in all fields, click on the ‘Save and Send Test Request’ button. Check your Gmail to confirm that the email was sent successfully with the attached experience letter.


Conclusion

In this tutorial, we explored how to replace manual work with smart logic using Pabbly Connect. By integrating Google Sheets, Google Docs, and Gmail, you can automate the process of creating and sending experience letters efficiently. This automation not only saves time but also enhances accuracy in your workflows.

Ensure you check out Pabbly Connect to create business automation workflows and reduce manual tasks. Pabbly Connect currently offer integration with 2,000+ applications.

How to Add JustDial Leads to Your Database Automatically

Learn how to automate adding JustDial leads to your database using Pabbly Connect. Follow this step-by-step tutorial for seamless integration. Implement the precise methodologies leading organizations use to automate repetitive tasks, illustrated with practical examples designed for immediate application.

Watch Step By Step Video Tutorial Below


1. Access Pabbly Connect for Automation

To automate adding JustDial leads to your database, start by accessing Pabbly Connect. If you are a new user, open a new tab and type in pabbl.com/connect in your browser. This will take you to the Pabbly Connect landing page where you can sign up for free.

Existing users can directly open their dashboard. New users will find a ‘sign up for free’ button in the top right corner. By creating an account, you get 100 free tasks every month, allowing you to explore the capabilities of Pabbly Connect without any cost.


2. Creating a Workflow in Pabbly Connect

Once you are logged into Pabbly Connect, the next step is to create a new workflow. This is where you will set up the trigger and action for your automation. Click on the ‘Create Workflow’ button to get started.

In this section, you will set up the trigger. Select JustDial as your trigger application. For the event, choose ‘New Leads’. After selecting the event, click on ‘Connect’ to proceed. You will receive a webhook URL that needs to be configured in your JustDial account.

  • Click on ‘Add Trigger’ in Pabbly Connect.
  • Search for and select JustDial.
  • Choose ‘New Leads’ as the event and click ‘Connect’.

After configuring the webhook URL with your JustDial account, you can proceed to capture the lead details that will be sent to Pabbly Connect.


3. Capturing Lead Details from JustDial

After setting up the webhook, it’s time to capture the lead details. When a new lead comes in through JustDial, the details such as first name, last name, phone number, and email will be sent to Pabbly Connect via the webhook.

Once the webhook response is received, you can view the captured lead details in the Pabbly Connect interface. This is crucial as it confirms that the integration is working correctly and that the data is being received as expected.

  • Verify that the lead details are correctly captured.
  • Ensure that the first name, last name, phone number, and email are visible.

With the lead details captured, you are now ready to add these details to your database using Google Sheets.


4. Adding Lead Details to Google Sheets

The next step involves adding the captured lead details into Google Sheets. In your Pabbly Connect workflow, click on the ‘+’ icon to add a new action step. Search for Google Sheets and select it as your action application.

For the event, select ‘Add New Row’ and click on ‘Connect’. If you have previously connected Google Sheets with Pabbly Connect, you can select the existing connection. Otherwise, create a new connection by signing in with your Google account and granting the necessary permissions.

Select your spreadsheet named ‘New Lead Details’. Choose the sheet within the spreadsheet where the data will be added.

Once the spreadsheet is selected, map the lead details from the previous step into the appropriate columns in Google Sheets. This ensures that each new lead is added dynamically as they come in.


5. Mapping Data and Testing the Workflow

Mapping the data is a crucial step in ensuring that the lead details are correctly added to your Google Sheets. In Pabbly Connect, you will map each lead detail by selecting the corresponding field from the previous step. This allows the data to be dynamic and updated automatically with each new lead.

After mapping all the required fields, click on ‘Save and Send Test Request’. If everything is set up correctly, you will receive a positive response confirming that the lead details have been successfully added to your Google Sheets.

Verify that the details appear correctly in your Google Sheets. Ensure that future leads are added automatically without manual intervention.

This automation enables you to streamline your lead management process, ensuring that new leads from JustDial are captured and stored efficiently in your database.


Conclusion

By following these steps, you can successfully automate the process of adding JustDial leads to your database using Pabbly Connect. This integration not only saves time but also enhances your lead management efficiency.

Ensure you check out Pabbly Connect to create business automation workflows and reduce manual tasks. Pabbly Connect currently offer integration with 2,000+ applications.

Utilizing Pabbly Connect allows you to focus on your business while ensuring that all lead details are captured accurately in real-time. Start your free trial today and experience the benefits of automation!

Automatically Add Google Ads Leads to Pipedrive

Learn how to automatically add Google Ads leads to Pipedrive using Pabbly Connect in this step-by-step tutorial. Simplify your lead management process now! This comprehensive guide reveals exactly how to connect your applications and automate repetitive tasks — accessible for professionals of all technical backgrounds.

Watch Step By Step Video Tutorial Below


1. Accessing Pabbly Connect for Integration

To start integrating Google Ads leads with Pipedrive, first, you need to access Pabbly Connect. Open your browser and navigate to Pabbly.com/connect. Here, you will find options to either sign in or sign up for free.

If you are new to Pabbly Connect, click on ‘Sign up free’ to create an account and receive 100 free tasks each month. For existing users, simply log in. Once logged in, click on the ‘Access Now’ button to enter the Pabbly Connect dashboard and begin setting up your automation.


2. Creating a Workflow in Pabbly Connect

After accessing the dashboard, the next step is to create a workflow in Pabbly Connect. Click on the ‘Create Workflow’ button, and you will see options for workflow types. Choose the beta version for a modern experience.

In the dialog box that appears, name your workflow ‘Automatically Add Google Ads Leads to Pipedrive’ and select a folder for organization. After selecting your preferred folder, click on the ‘Create’ button to finalize your workflow setup.


3. Setting Up the Trigger for Google Ads

Now that your workflow is created, it’s time to set up the trigger. In Pabbly Connect, select Google Ads as your trigger application and choose the event ‘New Lead Form Entry’. Click on the ‘Connect’ button to establish the connection.

You will receive a webhook URL, which you need to copy. This URL will be used to connect your Google Ads account with Pabbly Connect. In your Google Ads account, navigate to your lead form settings and locate the ‘Lead Delivery’ section. Paste the webhook URL here and set the key as ‘test’. Then, send a test data to verify the connection.

  • Select Google Ads as the trigger application.
  • Choose ‘New Lead Form Entry’ as the event.
  • Copy the webhook URL provided.
  • Paste it into your Google Ads lead form settings.

After sending the test data, check back in Pabbly Connect to confirm that the data has been received successfully.


4. Adding an Action Step to Create a Person in Pipedrive

With the trigger set up, the next action is to add a new person in Pipedrive whenever a new lead is received. In Pabbly Connect, select Pipedrive as your action application and choose ‘Create Person’ as the action event.

To connect to Pipedrive, you will need to enter your API token. Log in to your Pipedrive account, navigate to your profile settings, and find the API section to copy your token. Paste this token into Pabbly Connect and save the connection.

  • Select Pipedrive as the action application.
  • Choose ‘Create Person’ as the action event.
  • Enter your Pipedrive API token to establish the connection.

Once connected, you will need to map the data from the Google Ads lead to the relevant fields in Pipedrive. This ensures that the correct information is entered into your CRM.


5. Finalizing Your Automation in Pabbly Connect

After mapping the necessary fields, click on ‘Save and Send Test Request’ to finalize your automation. You should see a successful response indicating that a new person has been created in your Pipedrive account.

To verify, go to your Pipedrive contacts and check for the newly added lead. You will find the lead’s name, email, phone number, and other details populated correctly. This confirms that the integration between Google Ads and Pipedrive via Pabbly Connect is working seamlessly.


Conclusion

In this tutorial, we have successfully demonstrated how to automatically add Google Ads leads to Pipedrive using Pabbly Connect. By following these steps, you can streamline your lead management process, ensuring that no potential client is missed. Utilize Pabbly Connect to enhance your automation and efficiency in managing leads from Google Ads.

Ensure you check out Pabbly Connect to create business automation workflows and reduce manual tasks. Pabbly Connect currently offer integration with 2,000+ applications.

Auto Add Student Leads to Sheets for Trading Classes

Learn how to automate adding student leads to Google Sheets for trading classes using Pabbly Connect. Follow this step-by-step tutorial to streamline your process. Follow this definitive guide to creating powerful automated workflows with straightforward, efficiency-focused solutions that save valuable time.

Watch Step By Step Video Tutorial Below


1. Accessing Pabbly Connect for Automation

To automate adding student leads to Google Sheets, start by accessing Pabbly Connect. If you are a new user, visit pabbl.com/connect and click on ‘Sign Up for Free’ in the top right corner. You will receive 100 tasks free every month, allowing you to explore the capabilities of Pabbly Connect without any cost.

Existing users can simply log into their Pabbly Connect account. Once logged in, navigate to the workflow builder, which is the central hub for creating your automation. This is where you will set up the trigger and action for your integration.


2. Setting Up the Trigger with Google Ads

In this step, you will set the trigger in Pabbly Connect to automatically capture new student leads from Google Ads. Click on the ‘Add Trigger’ button and search for ‘Google Ads’. Select ‘New Lead Form Entry’ as the event and click ‘Connect’.

  • Search for Google Ads in the trigger application.
  • Select ‘New Lead Form Entry’ as the event.
  • Click ‘Connect’ to generate the webhook URL.

Copy the generated webhook URL and paste it into your Google Ads campaign under lead delivery. This will allow Pabbly Connect to receive lead data whenever a new lead is generated.


3. Capturing Lead Data in Pabbly Connect

After setting up the trigger, you need to test the connection by sending a test lead from Google Ads. In your Google Ads account, enter the webhook URL and click on ‘Send Test Data’. This action will allow Pabbly Connect to capture the lead information such as name, email, and phone number.

Once the test data is sent, return to Pabbly Connect to check if the data is captured successfully. You will see the captured details displayed in the workflow. If everything is correct, you can proceed to create the action step.


4. Adding Action Step to Google Sheets

Now that you have captured the lead data, it’s time to add this information to Google Sheets. Click on ‘Add New Action Step’ and search for ‘Google Sheets’. Select ‘Add New Row’ as the event and click ‘Connect’. If you have an existing connection, select it; otherwise, create a new connection by signing in with your Google account.

  • Choose ‘Google Sheets’ as the action application.
  • Select ‘Add New Row’ as the action event.
  • Map the lead details to the corresponding columns in your Google Sheet.

Ensure you select the correct spreadsheet and sheet where you want to store the lead details. Mapping the fields correctly will allow Pabbly Connect to dynamically insert the lead information into your sheet.


5. Finalizing Your Automation

After mapping the lead details, click on ‘Save and Send Test Request’. This will send the captured lead data to your selected Google Sheet. Check your Google Sheets to confirm that the lead details have been successfully added.

With this setup in place, every time a new lead is generated via Google Ads, Pabbly Connect will automatically add the lead details to your Google Sheets. This automation eliminates the need for manual entry, allowing your sales team to follow up efficiently.


Conclusion

In this tutorial, we explored how to use Pabbly Connect to automate the process of adding student leads to Google Sheets for trading classes. By following these steps, you can streamline your lead management process and enhance your efficiency.

Ensure you check out Pabbly Connect to create business automation workflows and reduce manual tasks. Pabbly Connect currently offer integration with 2,000+ applications.

WhatsApp Broadcast Messages Made Easy

Learn how to send bulk WhatsApp messages effortlessly using Pabbly Chatflow. Follow our detailed tutorial to streamline your communications! Discover practical methods for designing chat sequences that capture leads, answer questions, and guide users to the next step in your funnel.

Watch Step By Step Video Tutorial Below


1. Accessing Pabbly Chatflow for WhatsApp Broadcasts

To start sending bulk WhatsApp messages, you need to access Pabbly Chatflow. Begin by navigating to the official Pabbly website and searching for Pabbly.com/chatflow in your browser. This will take you to the homepage of Pabbly Chatflow.

Once on the homepage, you will see options to either sign in or sign up for free. If you are a new user, click on ‘Sign up free’ to create an account and explore the features of Pabbly Chatflow. If you already have an account, simply sign in to access your dashboard.


2. Connecting Your WhatsApp Number in Pabbly Chatflow

After signing in, you will be directed to the Pabbly apps window. Here, click on ‘Access Now’ under Pabbly Chatflow to reach the dashboard. To connect your WhatsApp number, select the ‘Add WhatsApp Number’ option.

  • Choose your preferred method for connecting WhatsApp.
  • Follow the on-screen instructions to successfully link your WhatsApp account.

Once connected, you can start utilizing the features of Pabbly Chatflow to send personalized broadcast messages to your customers effortlessly.


3. Creating a Message Template in Pabbly Chatflow

To send a broadcast message, you first need to create a message template in Pabbly Chatflow. Navigate to the ‘Template’ section in the left sidebar and click on ‘Add Template’. Fill in the required details such as template name and message content, then click ‘Submit’ to save your template.

Ensure that your template is approved by Meta before using it. You can check the status of your template in the same section. Once approved, you are ready to send your broadcast messages using the created template.


4. Setting Up Your WhatsApp Broadcast Message

To set up your broadcast message, go to the ‘Broadcast’ section in Pabbly Chatflow. Click on ‘Add Broadcast’ and select ‘Broadcast Campaign’ from the dropdown menu. Name your broadcast, for example, ‘New Discount Code’.

  • Select the contact list you wish to send the message to.
  • Choose between a pre-approved template message or a regular message.

After selecting the appropriate options, you can preview your message and ensure everything is set up correctly before sending it out through Pabbly Chatflow.


5. Testing and Scheduling Your Broadcast Message

Before sending the broadcast, it is essential to test the message. Input your details and click on the ‘Send Test Message’ button to verify that the message appears correctly on WhatsApp. This ensures that your broadcast will look professional and personalized. using Pabbly Connect

If everything is satisfactory, you can choose to send the message immediately or schedule it for a later time. For scheduling, select the date and time in the specified format, then click on the ‘Add Broadcast’ button to finalize your scheduled message.


Conclusion

In conclusion, using Pabbly Chatflow makes it easy to send bulk WhatsApp messages efficiently. By following the steps outlined in this tutorial, you can streamline your communication with customers and enhance your marketing efforts. Start utilizing Pabbly Chatflow today to maximize your outreach!

Ensure you check out Pabbly Connect to create business automation workflows and reduce manual tasks. Pabbly Connect currently offer integration with 2,000+ applications.

WhatsApp Chatbot That Doubles Event Attendance (Without Spam)

Learn how to create a WhatsApp chatbot that effectively doubles event attendance using Pabbly Chatflow. Step-by-step guide included! Discover practical methods for designing chat sequences that capture leads, answer questions, and guide users to the next step in your funnel.

Watch Step By Step Video Tutorial Below


1. Introduction to Pabbly Chatflow for Event Attendance

Pabbly Chatflow is an innovative platform that allows you to create chatbots for various messaging applications, including WhatsApp. By utilizing Pabbly Chatflow, you can effectively increase attendance at your events by sending timely reminders and engaging messages to your audience.

In this tutorial, we will explore how to set up a WhatsApp chatbot using Pabbly Chatflow that not only informs users about upcoming events but also encourages them to participate. This process is straightforward and can be accomplished with just a few clicks.


2. Creating Your WhatsApp Chatbot in Pabbly Chatflow

To create your WhatsApp chatbot, you’ll first need to access your Pabbly Chatflow account. Navigate to the Pabbly Chatflow dashboard by visiting pav.com/chatflow. If you’re a new user, click on the ‘Sign Up Free’ button to create your account and receive 100 free credits monthly. using Pabbly Connect

  • Sign in to your account.
  • Add your WhatsApp number using either the WhatsApp connect method or manual token method.
  • Click on the ‘Flows’ button to start creating your chatbot.

Once you are in the flows section, click on the ‘Add Flow’ button to begin setting up your WhatsApp chatbot. Name your flow appropriately, such as ‘WhatsApp Chatbot That Doubles Event Attendance.’ This name will help you easily identify the chatbot later.


3. Setting Up Chatbot Templates in Pabbly Chatflow

After naming your flow, the next step involves selecting a template that will serve as the initial message for your users. Choose the template that boosts event attendance. This template will be sent to users when they interact with your chatbot. using Pabbly Connect

To create a new template, click on the ‘Add Template’ button and fill out the required fields. Make sure to select the appropriate category for your template, such as marketing. Enter the template name in lowercase, and choose English as the language. You can also add dynamic fields to personalize the messages.

  • Enter a header and body text for your template.
  • Add quick reply options like ‘Yes’ to confirm attendance and ‘Details’ to request more information.
  • Submit the template for approval by Meta.

Once your template is approved, you can utilize it within your flows to engage users effectively.


4. Configuring Actions for Your WhatsApp Chatbot

With your template ready, you can configure the actions that will occur when a user interacts with your chatbot. For instance, when a user clicks the ‘Yes’ button, you can set up a delay action that triggers a reminder message 24 hours before the event. using Pabbly Connect

To do this, drag the delay action into your flow and set the delay time. You can choose from seconds, minutes, or specific dates. After the delay, connect another message action to send a reminder template to the user.

This reminder template can include dynamic fields such as the user’s name and event details. This personalization helps increase engagement and ensures that users receive relevant information.


5. Testing and Launching Your WhatsApp Chatbot

After configuring your WhatsApp chatbot in Pabbly Chatflow, it’s essential to test its functionality. You can do this by sending a test message using the approved template to your WhatsApp account. Ensure that the chatbot responds correctly to user interactions.

If everything works as expected, your WhatsApp chatbot is ready to be launched. You can also utilize the broadcast feature in Pabbly Chatflow to send messages to multiple users simultaneously, increasing your event’s reach.

For further queries or assistance, consider joining the Pabbly community on Facebook or contacting support for help. Creating a WhatsApp chatbot using Pabbly Chatflow can significantly enhance your event attendance and engagement.


Conclusion

In conclusion, using Pabbly Chatflow to create a WhatsApp chatbot can effectively double your event attendance without spamming your audience. By sending timely reminders and engaging messages, you can ensure that your audience stays informed and excited about your events.

Ensure you check out Pabbly Connect to create business automation workflows and reduce manual tasks. Pabbly Connect currently offer integration with 2,000+ applications.