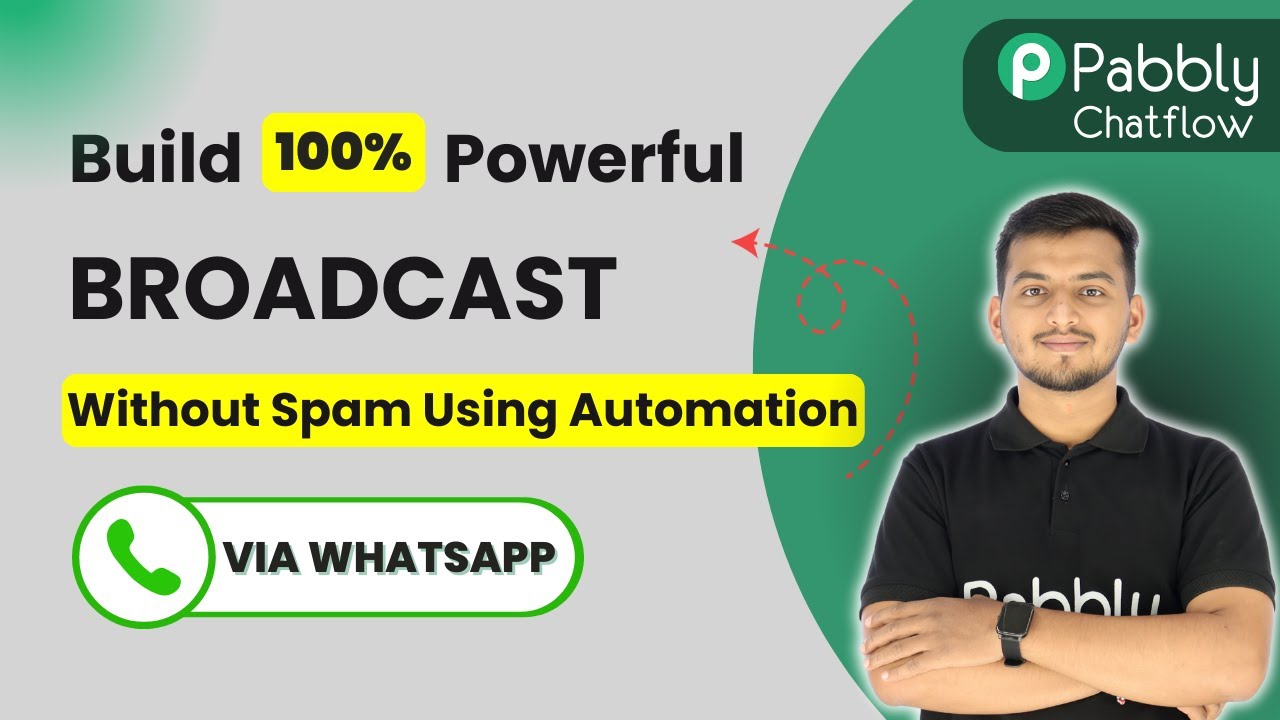
How to Log Leads from Facebook Lead Ads to Google Sheets Automatically Using Pabbly Connect

Learn how to automate the logging of leads from Facebook Lead Ads to Google Sheets seamlessly using Pabbly Connect. Step-by-step tutorial included. Implement the precise methodologies leading organizations use to automate repetitive tasks, illustrated with practical examples designed for immediate application.

Watch Step By Step Video Tutorial Below


1. Accessing Pabbly Connect for Integration

To log leads from Facebook Lead Ads to Google Sheets automatically, you first need to access Pabbly Connect. Open your web browser and go to Pabbly.com/connect.

Once on the landing page, you have two options: ‘Sign In’ or ‘Sign Up for Free.’ If you are new, choose the latter to start with 100 free tasks each month. For existing users, click on ‘Sign In’ to access your account.


2. Creating a New Workflow in Pabbly Connect

After signing in, you will be directed to the dashboard of Pabbly Connect. Click on the ‘Create Workflow’ button to initiate the automation process.

In the workflow builder, you will be prompted to select between the new workflow builder and the classic one. Choose the new workflow builder for a modern experience. Name your workflow ‘Log Leads from Facebook Lead Ads to Google Sheets Automatically’ and select a suitable folder for saving.

  • Click on ‘Create’ to proceed to the workflow window.
  • Understand the concept of triggers and actions, where a trigger initiates an action.

Now, you are ready to set up the trigger for your workflow.


3. Setting Up the Trigger with Facebook Lead Ads

To log leads, click on ‘Add Trigger’ and select ‘Facebook Lead Ads’ as your trigger application. Choose the trigger event as ‘New Lead Instant’ and click on ‘Connect’.

You will need to connect your Facebook account to Pabbly Connect. After selecting your account, click on ‘Continue’. Then, select the Facebook page and the lead generation form you want to use.

  • Select the page name (e.g., Digital Dynamics).
  • Choose the lead generation form (e.g., New Form).

Click on ‘Save and Send Test Request’ to capture the webhook response from Facebook Lead Ads.


4. Capturing the Webhook Response

To capture the webhook response, open a new tab and navigate to Meta for Developers. Find the Lead Ads Testing Tool to create a test lead.

Fill out the test lead form with details such as name, email, and service interested. Once submitted, return to Pabbly Connect to check if the response has been captured successfully.

Ensure that the captured response includes all the fields you filled in, such as first name, last name, email, phone number, and company name. This confirms that the trigger is set correctly.


5. Adding Action to Google Sheets

After successfully capturing the response, click on ‘Add Action Step’ and select ‘Google Sheets’ as your action application. Choose the action event as ‘Add New Row’ and click on ‘Connect’.

Connect your Google Sheets account with Pabbly Connect by selecting your Gmail account and granting the necessary permissions. After the connection is established, select the spreadsheet and sheet where you want to log the leads.

Choose the spreadsheet (e.g., Lead Details). Select the sheet (e.g., Sheet1).

Map the fields from the trigger response to the corresponding columns in Google Sheets, such as first name, last name, email, phone, company, and service interested. Click on ‘Save and Send Test Request’ to verify that the data is logged correctly.


Conclusion

By following these steps, you can automate the process of logging leads from Facebook Lead Ads to Google Sheets using Pabbly Connect. This integration not only saves time but also ensures that your lead management is efficient and organized. Start using this automation today to streamline your workflow!

Ensure you check out Pabbly Connect to create business automation workflows and reduce manual tasks. Pabbly Connect currently offer integration with 2,000+ applications.

How to Send AI-Generated Customer Support Responses After New Inquiry via Google Forms Using Pabbly Connect

Learn how to automate customer support responses using Pabbly Connect with Google Forms and OpenAI. Step-by-step guide to streamline your inquiry process. Discover how to seamlessly connect your essential tools through accessible instructions that make powerful automation available to professionals at every skill level.

Watch Step By Step Video Tutorial Below


1. Accessing Pabbly Connect for Automation

To begin automating customer support responses, you need to access Pabbly Connect. Visit the Pabbly website and navigate to the Pabbly Connect section. After signing up or logging in, you will be directed to your dashboard, where you can create new workflows.

Once you are on the dashboard, click on the ‘Create Workflow’ button. This will allow you to set up the automation process that connects Google Forms, OpenAI, and Gmail through Pabbly Connect. You can name your workflow something like ‘Send AI-Generated Customer Support Responses After New Inquiry via Google Forms’ for easy identification.


2. Setting Up Google Forms as the Trigger Application

In this step, you will set up Google Forms as the trigger application in Pabbly Connect. Click on the trigger application box and select Google Forms. Choose the trigger event as ‘New Response Received’. This means that every time a new inquiry is submitted through your Google Form, it will trigger the workflow.

  • Select Google Forms as the trigger application.
  • Choose ‘New Response Received’ as the trigger event.
  • Copy the provided webhook URL to connect Google Forms with Pabbly Connect.

After setting up the trigger, ensure that your Google Form is correctly configured to collect all necessary information. This includes fields like first name, last name, email, and inquiry details. With Pabbly Connect, any new submission will automatically be captured and processed.


3. Connecting Google Sheets to Capture Responses

Next, you will need to connect Google Sheets to capture the responses from your Google Form. Open your Google Sheets linked with the form and navigate to the Extensions menu. From there, select Pabbly Connect Webhooks and install the add-on if you haven’t done so already.

Once installed, go back to the Pabbly Connect dashboard and configure the webhook URL in your Google Sheets. This URL will act as a bridge between Pabbly Connect and your Google Sheets. Make sure to set the trigger column to the final data entry column where new responses will be recorded.


4. Generating AI Responses with OpenAI

Now that your Google Forms and Sheets are set up, it’s time to generate responses using OpenAI. In Pabbly Connect, add a new action step and select OpenAI as the action application. Choose the action event as ‘ChatGPT Structured AI Output’ which will allow you to generate a structured response based on the inquiry submitted.

In this step, you will need to provide the API token to connect OpenAI with Pabbly Connect. After connecting, you will enter the prompt that describes the inquiry details and instructs OpenAI on how to respond. This prompt should include the customer’s name, email, product of interest, and the inquiry message.

  • Select OpenAI as the action application.
  • Choose ‘ChatGPT Structured AI Output’ as the action event.
  • Enter the prompt with customer details for generating the response.

After setting up the OpenAI action, you can test it to ensure that the AI generates a suitable response based on the inquiry received. This step is crucial for providing timely and accurate customer support.


5. Sending Email Responses via Gmail

Finally, you will set up Gmail to send the AI-generated responses to customers. In Pabbly Connect, add another action step and select Gmail as the action application. Choose the action event as ‘Send Email’. This will allow you to automatically send the generated response to the customer’s email address.

Map the recipient’s email address from the Google Forms response and use the AI-generated content as the email body. Enter the subject line for the email, which can be something like ‘Your Inquiry Response’. After configuring these details, test the email sending action to ensure everything is working smoothly.


Conclusion

In this tutorial, we explored how to use Pabbly Connect to automate the process of sending AI-generated customer support responses after new inquiries via Google Forms. By connecting Google Forms, OpenAI, and Gmail, you can streamline your customer support workflow efficiently.

Ensure you check out Pabbly Connect to create business automation workflows and reduce manual tasks. Pabbly Connect currently offer integration with 2,000+ applications.

With this setup, you can ensure that every customer inquiry is addressed promptly, enhancing customer satisfaction and saving valuable time. Start using Pabbly Connect today to elevate your customer support experience!

How to Send Personalized Product Updates After Google Ads Conversion Using Pabbly Connect

Learn how to send personalized product updates after Google Ads conversion using Pabbly Connect. Follow this detailed step-by-step tutorial for seamless integration. Navigate the automation landscape confidently with clear, structured guidance suitable for professionals regardless of prior technical experience.

Watch Step By Step Video Tutorial Below


1. Accessing Pabbly Connect for Google Ads Integration

To send personalized product updates after Google Ads conversion, the first step is to access Pabbly Connect. Visit the Pabbly Connect website and either sign in or sign up for a free account. This platform enables seamless automation without coding.

Once logged in, you will see the dashboard where you can create a new workflow. Click on the ‘Create Workflow’ button to start the integration process. By using Pabbly Connect, you can easily connect Google Ads with Gmail to automate email updates for new leads.


2. Creating a New Workflow in Pabbly Connect

In the Pabbly Connect dashboard, you will need to create a new workflow specifically for sending personalized updates. Click on the ‘Create Workflow’ button and choose a name for your workflow, such as ‘Send Personalized Product Updates After Google Ads Conversion’.

After naming your workflow, select the trigger application. For this integration, choose Google Ads as the trigger application. The event you want to capture is ‘New Lead Form Entry’. This setup allows Pabbly Connect to detect when a new lead is generated from your Google Ads campaign.


3. Setting Up Google Ads Trigger in Pabbly Connect

Once you have selected Google Ads as your trigger, Pabbly Connect will provide you with a webhook URL. You need to copy this URL and paste it into your Google Ads lead form settings. This step is crucial for connecting Google Ads to Pabbly Connect.

Here are the steps to set up the Google Ads trigger:

  • Open your Google Ads campaign and navigate to the lead form settings.
  • Paste the copied webhook URL in the lead delivery options.
  • Test the webhook to ensure data is being sent to Pabbly Connect.

After testing the webhook, you should see a response in your Pabbly Connect workflow, confirming that the integration is successful.


4. Configuring Action Steps in Pabbly Connect

With the Google Ads trigger set up, the next step is to configure the action steps in Pabbly Connect. You will need to set up conditions to send personalized emails based on the lead’s interest. For this, select ‘Router by Pabbly’ as the action application.

Set up two routes in the router: one for each course you offer. For instance, if a lead shows interest in the ‘Digital Marketing Mystery’ course, create a route that captures this interest and sends them a personalized email. The same goes for the ‘Beginner’s Guide to Stock Trading’ course. This way, Pabbly Connect can send targeted emails based on the courses selected by the leads.


5. Sending Personalized Emails via Gmail Using Pabbly Connect

The final step is to configure Gmail as the action application in Pabbly Connect. For each route, you’ll need to set up the email content, including the recipient’s email address, subject, and body. Use dynamic fields to insert the lead’s name and course details.

Here’s how to set up the Gmail action:

  • Select Gmail as the action application and choose ‘Send Email’ as the action event.
  • Map the recipient’s email address from the previous step.
  • Compose the email content, including the subject and personalized message.

After configuring the Gmail action, test the workflow to ensure that the emails are sent successfully to the leads based on their course selections.


Conclusion

In this tutorial, we explored how to send personalized product updates after Google Ads conversion using Pabbly Connect. By setting up triggers and actions, you can automate your email communications effectively, ensuring that your leads receive updates tailored to their interests.

Ensure you check out Pabbly Connect to create business automation workflows and reduce manual tasks. Pabbly Connect currently offer integration with 2,000+ applications.

How to Send AI-Powered Follow-Up Emails After Payment via Stripe with Pabbly Connect

Learn how to use Pabbly Connect to automate AI-powered follow-up emails after payments made through Stripe. Step-by-step tutorial included! Build sophisticated automated workflows in less time than you think. This guide translates complex integrations into straightforward steps for immediate implementation.

Watch Step By Step Video Tutorial Below


1. Accessing Pabbly Connect to Set Up Automation

To send AI-powered follow-up emails after payment via Stripe, the first step is accessing Pabbly Connect. Open a new tab in your browser and go to the Pabbly Connect landing page by entering ‘Pabbly.com/connect’.

Once on the landing page, you have the option to either sign up for a free account or sign in if you’re an existing user. New users can click on ‘Sign up for free’ and receive 100 free tasks monthly to explore the application. If you’re an existing user, simply click on ‘Sign in’ to access your account.


2. Creating a New Workflow in Pabbly Connect

After signing in, you will see all the Pabbly applications. Click on ‘Access Now’ for Pabbly Connect. This will take you to your dashboard. To create a new workflow, click on the ‘Create Workflow’ button.

You will be prompted to select a workflow builder. Choose between the new workflow builder for a modern interface or the classic one. For this tutorial, we will use the classic option. Name your workflow something descriptive, like ‘Send AI-Powered Follow-Up Emails After Stripe Payment,’ and select a folder to save it in.

  • Click on ‘Create’ to finalize your workflow setup.
  • This opens the workflow window where you can set triggers and actions.

In this window, you will define the trigger and action for your workflow. The trigger will be a new payment from Stripe, and the actions will be to generate an email through OpenAI and send it via Gmail.


3. Setting Up the Stripe Trigger in Pabbly Connect

Now, let’s set up the trigger for our workflow. In the trigger application field, search for and select Pabbly Connect as the application. For the trigger event, choose ‘New Charge’ from the dropdown menu.

Pabbly Connect will provide you with a webhook URL. Copy this URL, as you will need it to connect Stripe with Pabbly Connect. Open your Stripe account, navigate to the ‘Developers’ section, and select ‘Webhooks’. Here, you will add a new endpoint.

  • Paste the copied webhook URL into the endpoint URL field.
  • For the event type, select ‘Charge Succeeded’ from the dropdown menu.

Click on ‘Add Endpoint’ to complete this action. Once the endpoint is added, return to your Pabbly Connect workflow, which should now be waiting for a webhook response.


4. Testing the Workflow with a Payment Submission

To capture the webhook response, you need to perform a test submission. Go back to your Stripe dashboard and navigate to ‘Payment Links’. Select a product, such as the ‘Natural Glow Refreshing Face Toner’, and proceed to purchase it as a test user. using Pabbly Connect

Fill in the required details, including your email and payment information, and click ‘Pay’. Once the payment is processed, return to your Pabbly Connect workflow. You should see that the webhook response has been captured, displaying the details you entered during the test submission.

Check that the customer details are correctly captured in the workflow. This confirms that the trigger step is successfully completed.

With this, we have successfully set up the trigger for our workflow, which will activate whenever a charge is succeeded in Stripe.


5. Generating and Sending Emails via OpenAI and Gmail

Next, we will set up the action steps to generate emails using OpenAI and send them via Gmail. In the action application field, select OpenAI and choose ‘ChatGPT’ as the action event. using Pabbly Connect

To connect OpenAI, you will need to enter your API key. Follow the instructions to create a new secret key on the OpenAI platform, then paste it into Pabbly Connect. After connecting OpenAI, select the AI model you want to use, such as GPT-4.

Enter a prompt that specifies the type of email you want to generate. Use mapping to insert customer details dynamically into the email.

Once the email body is generated, add another action step to send the email via Gmail. Connect your Gmail account and fill in the recipient’s email, subject line, and email body. Use mapping to personalize the email with the customer’s name and ensure the email content type is set to HTML.


Conclusion

In this tutorial, we explored how to send AI-powered follow-up emails after payments via Stripe using Pabbly Connect. By automating this process, businesses can enhance customer engagement and save time on manual email writing. Try out this powerful integration for your own business today!

Ensure you check out Pabbly Connect to create business automation workflows and reduce manual tasks. Pabbly Connect currently offer integration with 2,000+ applications.

Automatically Add Leads from Facebook Lead Ads to Pipedrive CRM Using Pabbly Connect

Learn how to integrate Facebook Lead Ads with Pipedrive CRM automatically using Pabbly Connect. Follow this step-by-step guide for seamless lead management. Implement the precise methodologies leading organizations use to automate repetitive tasks, illustrated with practical examples designed for immediate application.

Watch Step By Step Video Tutorial Below


1. Accessing Pabbly Connect for Integration

To begin the integration of Facebook Lead Ads with Pipedrive CRM, first access Pabbly Connect. You can do this by visiting Pabbly’s official website and signing in or signing up for a new account.

Once you are logged in, you will be directed to the Pabbly Connect dashboard where you can create a new workflow to automate your lead management process.


2. Creating a New Workflow in Pabbly Connect

In this step, you will create a workflow that connects Facebook Lead Ads with Pipedrive CRM using Pabbly Connect. Click on the ‘Create Workflow’ button located on the top right corner of the dashboard.

  • Name your workflow appropriately, such as ‘Leads from Facebook Lead Ads to Pipedrive CRM Automatically’.
  • Select a folder to organize your workflows, like ‘Facebook Lead Ads’.

After naming your workflow, click on the ‘Create’ button to proceed. This will initiate the setup process for automating the lead transfer from Facebook to Pipedrive using Pabbly Connect.


3. Setting Up the Trigger for Facebook Lead Ads

The next step involves setting up the trigger for your workflow. Click on the ‘Add Trigger’ button and select Facebook Lead Ads as your trigger application.

Choose the event as ‘New Lead Instant’ to ensure that every new lead generated from your Facebook ads will trigger this workflow. Connect your Facebook account to Pabbly Connect by following the prompts to authorize access.


4. Setting Up the Action to Create a Deal in Pipedrive

Once the trigger is established, you will add an action step that specifies what happens when a new lead is received. Select Pipedrive as the action application and choose the event ‘Create Deal’.

  • Enter your Pipedrive API token to connect your Pipedrive account with Pabbly Connect.
  • Map the lead details from Facebook Lead Ads to the corresponding fields in Pipedrive.

Make sure to fill in the required fields, such as the deal title, lead name, and other relevant details to ensure that the lead is accurately captured in your Pipedrive CRM.


5. Testing the Automation Workflow

After setting up the trigger and action, it’s crucial to test your workflow to ensure everything is functioning correctly. Generate a test lead through the Facebook Lead Ads testing tool.

Check your Pipedrive CRM to confirm that the new lead has been added as a deal. This verification step is essential to ensure that Pabbly Connect is effectively automating the lead transfer process.


Conclusion

In this tutorial, we explored how to automatically add leads from Facebook Lead Ads to Pipedrive CRM using Pabbly Connect. This seamless integration allows businesses to manage their leads efficiently, saving time and enhancing productivity.

Ensure you check out Pabbly Connect to create business automation workflows and reduce manual tasks. Pabbly Connect currently offer integration with 2,000+ applications.

How to Send Custom SMS After Payment Success via Razorpay Using Pabbly Connect

Learn how to automate sending custom SMS after payment success via Razorpay using Pabbly Connect. Follow our detailed tutorial for step-by-step guidance. Revolutionize your productivity approach with just a few strategic clicks. Uncover professional methods for connecting applications and creating workflows that reclaim hours of your week.

Watch Step By Step Video Tutorial Below


1. Accessing Pabbly Connect for Razorpay Integration

To send custom SMS after payment success via Razorpay, you first need to access Pabbly Connect. Start by visiting the Pabbly Connect website by typing ‘pabyt.com/connect’ in your browser. This platform enables seamless integration between Razorpay and other applications.

After reaching the Pabbly Connect homepage, you need to sign in or create a new account. Click on the ‘Sign In’ button if you are an existing user, or ‘Sign Up for Free’ to create a new account. Signing up grants you 100 tasks monthly, allowing you to automate tasks effectively.


2. Creating a Workflow in Pabbly Connect

Once signed in, navigate to the Pabbly Connect dashboard. Here, you will see options to create a new workflow. Click on the ‘Create Workflow’ button to initiate the process. You will be prompted to choose between the new beta workflow builder or the classic version; select the new beta for a modern experience. using Pabbly Connect

  • Name your workflow as ‘Send Custom SMS After Payment Success via Razorpay’.
  • Select a folder for organization, such as ‘Razorpay Automations’.
  • Click on ‘Create’ to finalize the workflow setup.

Upon creating the workflow, you will see a prompt to add a trigger. In this automation, the trigger will be a new payment captured in Razorpay, which will activate the SMS sending process.


3. Setting Up the Trigger with Razorpay

In the workflow builder, click on the ‘+’ icon to add a trigger application. Select Razorpay as your trigger application and choose ‘Payment Captured’ as the trigger event. This configuration ensures that every time a payment is made, the workflow will be triggered.

Next, you will need to connect Pabbly Connect with your Razorpay account. A webhook URL will be provided, which acts as a bridge between Razorpay and Pabbly Connect. Copy this URL and proceed to your Razorpay dashboard.

  • In Razorpay, navigate to the ‘Developers’ section and select ‘Webhooks’.
  • Click on ‘Add New Webhook’ and paste the copied URL.
  • Set the active event as ‘Payment Captured’ and click ‘Create Webhook’.

After saving the webhook, return to Pabbly Connect, where it will show that it is waiting for a webhook response. This indicates that the connection has been established successfully.


4. Testing the Integration

To test the integration, you need to make a payment through Razorpay. Open the payment page link, fill in the required details, and complete the payment process. Once the payment is successful, Razorpay will send the payment details to Pabbly Connect.

After making the payment, return to the Pabbly Connect dashboard. You should see the captured payment details, including the name, phone number, and amount. This confirms that the trigger is working correctly and that Pabbly Connect is receiving the data from Razorpay.

Ensure you have the correct details in the captured response. Check the connection status to verify it is active. Prepare to send an SMS using the captured information.

With the successful test, you are ready to set up the action step to send an SMS using Twilio.


5. Sending SMS via Twilio Using Pabbly Connect

Now that you have captured the payment details, the next step is to send a custom SMS using Twilio. Click on ‘Add New Action Step’ in your workflow and select Twilio as the action application. Choose ‘Send SMS Message’ as the action event.

To connect Twilio with Pabbly Connect, you will need your Twilio Account SID and Auth Token. These can be found in your Twilio account dashboard. Enter these details in Pabbly Connect to establish the connection.

Input the body of the SMS, including a personalized message. Map the recipient’s phone number and other details from the Razorpay response. Ensure the sender number is your Twilio number.

Once all details are entered, click on ‘Save and Send Test Request’. If successful, you will receive a confirmation message indicating that the SMS has been sent. This completes your workflow, enabling automated SMS notifications after payment success via Razorpay.


Conclusion

In this tutorial, we demonstrated how to automate sending custom SMS after payment success via Razorpay using Pabbly Connect. By following the steps outlined, you can easily set up this integration to enhance customer communication and streamline your payment processes. Automating such tasks not only saves time but also improves customer satisfaction.

Ensure you check out Pabbly Connect to create business automation workflows and reduce manual tasks. Pabbly Connect currently offer integration with 2,000+ applications.

How to Create a WhatsApp Chatbot for Your Plastic Surgeon Clinic Using Pabbly Chatflow

Learn how to create a WhatsApp chatbot for your plastic surgeon clinic using Pabbly Chatflow. Step-by-step guide for seamless integration and automation. Master conversational marketing with practical techniques for creating chatbots that engage visitors at exactly the right moment in their journey.

Watch Step By Step Video Tutorial Below


1. Getting Started with Pabbly Chatflow for Your Plastic Surgeon Clinic

To create a WhatsApp chatbot for your plastic surgeon clinic, you first need to access Pabbly Chatflow. This platform allows you to automate responses and manage inquiries efficiently. Start by visiting the Pabbly website and signing up for an account.

Once logged in, navigate to the dashboard where you will find options to create and manage your chatbot. The user-friendly interface will guide you through the initial setup process, allowing you to customize your chatbot according to your clinic’s needs.


2. Creating the WhatsApp Chatbot with Pabbly Chatflow

After setting up your account, the next step is to create your WhatsApp chatbot using Pabbly Chatflow. Click on the ‘Add Flow’ button to start building your chatbot. You will need to give your flow a meaningful name, such as ‘WhatsApp Chatbot for Your Plastic Surgeon Clinic’.

  • Select the template option to customize your chatbot.
  • Add action buttons for different inquiries like booking consultations.
  • Configure response messages for user interactions.

With these elements in place, you can start designing the conversation flow that your customers will experience when they reach out to your clinic via WhatsApp. This setup ensures that inquiries are handled promptly and efficiently.


3. Integrating Google Sheets with Pabbly Chatflow

To manage customer data effectively, you can integrate Google Sheets with Pabbly Chatflow. This allows you to automatically store customer inquiries and details without manual input. To do this, navigate to the API section in your Pabbly dashboard.

Here, create a new API request that will connect your chatbot to Google Sheets. You will need to:

  • Select the data fields you want to capture, such as name, phone number, and appointment date.
  • Map these fields to the corresponding columns in your Google Sheet.
  • Test the integration to ensure data is being sent correctly.

This integration will streamline your data management process, making it easier to follow up with clients and maintain records.


4. Finalizing Your WhatsApp Chatbot Setup

After configuring your chatbot and integrating Google Sheets, it’s time to finalize your setup in Pabbly Chatflow. Make sure to review all the conversation flows and test the responses to ensure they are working as intended.

Once you are satisfied with the setup, activate your chatbot. This will allow it to start responding to customer inquiries in real-time. Remember to monitor the chatbot interactions regularly to adjust and improve responses based on customer feedback.


Conclusion

Creating a WhatsApp chatbot for your plastic surgeon clinic using Pabbly Chatflow is a straightforward process that enhances customer engagement and streamlines operations. By integrating Google Sheets, you can efficiently manage client data and inquiries, ensuring a seamless experience for both your clinic and your customers.

Ensure you check out Pabbly Connect to create business automation workflows and reduce manual tasks. Pabbly Connect currently offer integration with 2,000+ applications.

With the steps outlined in this tutorial, you can set up your chatbot quickly, allowing you to focus more on providing excellent patient care. Start automating your clinic’s communication today with Pabbly Chatflow!

How to Sync Leads from LinkedIn Lead Ads to Google Sheets Using Pabbly Connect

Learn how to seamlessly sync leads from LinkedIn Lead Ads to Google Sheets using Pabbly Connect for easy access and management. Revolutionize your productivity approach with just a few strategic clicks. Uncover professional methods for connecting applications and creating workflows that reclaim hours of your week.

Watch Step By Step Video Tutorial Below


1. Accessing Pabbly Connect for Integration

To sync leads from LinkedIn Lead Ads to Google Sheets, the first step is to access Pabbly Connect. Begin by navigating to the Pabbly website and signing in to your account. If you are a new user, you can sign up for free and explore the features available.

Once logged in, you will be directed to the Pabbly Connect dashboard. Here, you can create a new workflow to automate the process of capturing leads from LinkedIn. This integration will allow you to manage your leads efficiently without manual effort.


2. Creating a Workflow in Pabbly Connect

In this section, we will create a workflow in Pabbly Connect to automate the lead syncing process. Click on the ‘Create Workflow’ button located at the top right corner of the dashboard. You will be prompted to name your workflow. Enter a name that reflects its purpose, such as ‘Sync Leads from LinkedIn Lead Ads to Google Sheets’.

  • Click on the ‘Create’ button to proceed.
  • Select the trigger application as LinkedIn.
  • Choose the event as ‘Lead Notification’.

After selecting these options, click on the ‘Connect’ button to establish a connection with your LinkedIn account. This step is crucial as it allows Pabbly Connect to receive leads directly from LinkedIn Lead Ads.


3. Setting Up the Trigger for LinkedIn Lead Ads

Now that we have created a workflow, it’s time to set up the trigger in Pabbly Connect. Click on the ‘Add Trigger’ button, and select LinkedIn as the application. Next, you will need to authenticate your LinkedIn account by signing in and allowing permissions.

Once connected, you will be asked to select the sponsored account from which you want to receive leads. Choose the relevant account and click on ‘Save and Send Test Request’ to test the connection.


4. Adding Action Step to Google Sheets

After successfully setting up the trigger, the next step is to add an action to store the lead data in Google Sheets. Click on the ‘Add Action’ button and select Google Sheets as your action application. Choose the event ‘Add a New Row’. using Pabbly Connect

  • Connect your Google Sheets account by clicking on ‘Connect’.
  • Select the specific spreadsheet where you want to store the leads.
  • Map the fields from LinkedIn to the corresponding columns in Google Sheets.

After mapping the fields such as Name, Email, Phone Number, and Company Name, click on ‘Save and Send Test Request’ to ensure the data is being sent correctly to Google Sheets.


5. Finalizing Your Integration Workflow

With the action step configured, your integration workflow is almost complete. Check the Google Sheets to confirm that the lead data has been added successfully. This automation ensures that every new lead from LinkedIn Lead Ads is captured in real-time without manual input.

In summary, using Pabbly Connect to sync leads from LinkedIn Lead Ads to Google Sheets streamlines your lead management process. You can now easily access and manage your leads in one place, enhancing your workflow efficiency.


Conclusion

In this tutorial, we explored how to use Pabbly Connect to sync leads from LinkedIn Lead Ads to Google Sheets. This integration simplifies lead management, allowing for easy access and organization of lead data. Implementing this automation can significantly improve your workflow efficiency.

Ensure you check out Pabbly Connect to create business automation workflows and reduce manual tasks. Pabbly Connect currently offer integration with 2,000+ applications.

Automate Lead Nurturing with AI Agents in Salesforce Using Pabbly Connect

Learn how to automate lead nurturing in Salesforce using Pabbly Connect. Step-by-step guide to integrate Gmail and WhatsApp for personalized communication. Revolutionize your productivity approach with just a few strategic clicks. Uncover professional methods for connecting applications and creating workflows that reclaim hours of your week.

Watch Step By Step Video Tutorial Below


1. Accessing Pabbly Connect for Lead Nurturing Automation

To automate lead nurturing with AI agents in Salesforce, the first step is to access Pabbly Connect. This platform allows you to create automated workflows without any coding skills. Start by visiting the Pabbly Connect website at www.Pabbly.com/connect.

Once on the Pabbly Connect landing page, you will see options to sign in or sign up. If you’re a new user, you can sign up for free and receive 100 tasks per month. Existing users should sign in to their accounts. After logging in, you will be directed to the dashboard where you can create your automation workflow.


2. Creating a Workflow in Pabbly Connect

After signing into Pabbly Connect, the next step is to create a new workflow. Click on the ‘Create Workflow’ button located at the top right corner of the dashboard. You will be presented with options to choose between the new beta method or the classic method. For this tutorial, select the classic method.

  • Name your workflow: ‘Automate Lead Nurturing with AI Agents in Salesforce’.
  • Choose a folder to save your workflow.
  • Click the ‘Create’ button to finalize your workflow setup.

Once created, you will see two windows: the trigger window and the action window. The trigger window is where you will specify the event that starts your automation, while the action window defines what happens next.


3. Setting Up the Trigger for Salesforce

In the trigger window, select Salesforce as your trigger application. The trigger event you want to capture is ‘New Lead’. This means that whenever a new lead is added in Salesforce, it will initiate your workflow in Pabbly Connect.

To connect Salesforce, click the ‘Connect’ button and then select ‘Add New Connection’. You will be prompted to log in to your Salesforce account and allow permissions. After connecting, you will need to enter your Salesforce instance URL. This can be found in your Salesforce account settings under Company Information.

  • Navigate to Setup in Salesforce.
  • Go to Company Profile and select Company Information.
  • Copy the instance URL and paste it into Pabbly Connect.

After saving and sending a test request, you should see the details of the last lead captured in the response. This confirms that the trigger setup is successful.


4. Configuring Action Steps with AI Agents

With the trigger set, the next step is to configure the action that occurs after a new lead is captured. For this, select OpenAI as your action application. The action event will be ‘ChatGPT’ which will generate personalized emails based on the lead’s interests. using Pabbly Connect

To connect OpenAI, click on the ‘Connect’ button and select ‘Add New Connection’. You will need to provide an API key which can be generated from your OpenAI account. Once connected, you will specify the AI model to use for generating emails and create a prompt that details the email’s content.

Set the AI model to ‘GBT4 Mini’. Craft a prompt that instructs the AI to create a personalized email. Map the lead’s name, email, and service description from the previous step.

After completing these steps, click on ‘Save and Send Test Request’ to generate the email content. The AI will respond with the email body that can be sent to the lead.


5. Sending the Email and WhatsApp Message

Once the email content is generated, the next action is to send this email to the lead using Gmail. Select Gmail as your action application and choose the action event ‘Send Email V1’. using Pabbly Connect

Connect your Gmail account by clicking on the ‘Connect’ button and allowing permissions. After connecting, map the lead’s email address to the ‘To’ field, set the sender’s name, and enter the email subject. For the email content, map the generated email body from the previous step.

Enter the subject: ‘Your Exclusive 30% Discount Code Inside’. Set the email content type to HTML. Click ‘Save and Send Test Request’ to send the email.

After successfully sending the email, the final step is to notify the lead via WhatsApp. Select WhatsApp Cloud API as your action application and choose ‘Send Template Message’ as the action event. Connect your WhatsApp account and map the lead’s phone number to the receiver field. Use the template created for discount follow-ups to personalize the message.


Conclusion

In this tutorial, we explored how to automate lead nurturing in Salesforce using Pabbly Connect. By integrating Gmail and WhatsApp, you can enhance your communication with leads and improve engagement. This process allows you to send personalized emails and notifications seamlessly, ensuring no lead goes unnoticed.

Ensure you check out Pabbly Connect to create business automation workflows and reduce manual tasks. Pabbly Connect currently offer integration with 2,000+ applications.

How to Broadcast WhatsApp Messages for Your Digital Marketing Agency Using Pabbly Chatflow

Learn how to effectively broadcast WhatsApp messages for your digital marketing agency using Pabbly Chatflow. Step-by-step guide included! Discover practical methods for designing chat sequences that capture leads, answer questions, and guide users to the next step in your funnel.

Watch Step By Step Video Tutorial Below


1. Accessing Pabbly Chatflow for WhatsApp Broadcasting

To effectively broadcast WhatsApp messages for your digital marketing agency, you will need to access Pabbly Chatflow. This platform allows you to streamline the process of sending messages to your clients without manual effort. Begin by navigating to the Pabbly Chatflow website and either sign in or create a new account.

Once you have logged in, you will be directed to the Pabbly Chatflow dashboard. Here, you can manage your WhatsApp numbers and set up your broadcasting features. The user-friendly interface ensures that you can easily find the tools needed for your broadcast campaigns.


2. Setting Up Your WhatsApp Number in Pabbly Chatflow

Setting up your WhatsApp number is a crucial step for broadcasting messages. In Pabbly Chatflow, click on the ‘Add WhatsApp Number’ button located at the top right corner of the dashboard. This allows you to connect your WhatsApp Business account seamlessly.

  • Verify your Meta Business Manager account.
  • Link your WhatsApp Business account.
  • Enter your phone number ID and access token.

After successfully adding your WhatsApp number, Pabbly Chatflow allows you to manage all your conversations from one place. This integration is essential for sending bulk messages efficiently.


3. Creating Broadcast Messages Using Pabbly Chatflow

To create a broadcast message, click on the ‘Broadcast’ section in Pabbly Chatflow. Here, you will find the option to add a new broadcast. This feature is perfect for sending announcements, promotions, and timely updates to your clients.

When you click on ‘Add Broadcast’, you will need to fill in some details including the broadcast type, name, contact list, and message type. Select the appropriate options to customize your broadcast according to your marketing strategy.

  • Choose between Broadcast Campaign and API Campaign.
  • Specify the name of your broadcast.
  • Select your contact list for the broadcast.

Once you have set up your broadcast details, Pabbly Chatflow will allow you to preview your message before sending it out.


4. Scheduling Your Broadcast in Pabbly Chatflow

Scheduling your broadcast is a straightforward process in Pabbly Chatflow. After creating your broadcast message, you can choose to send it instantly or schedule it for a specific date and time. This feature is invaluable for managing your marketing campaigns effectively.

Select the ‘Schedule Broadcast’ option and specify the date and time you want your message to be sent. This ensures that your clients receive timely updates without the need for manual intervention.

Once scheduled, Pabbly Chatflow will handle the rest, sending out your broadcast message at the designated time. This automated feature helps save time and ensures consistent communication with your clients.


5. Testing Your Broadcast Messages with Pabbly Chatflow

Before finalizing your broadcast, it’s essential to test it. In Pabbly Chatflow, you can send a test message to yourself or a colleague to ensure everything is working correctly. This step is crucial to confirm that your broadcast message appears as intended.

To send a test message, simply enter the recipient’s number and click on the ‘Send Test’ button. Once the test is sent, check your WhatsApp to confirm the message’s delivery. This ensures that your broadcast setup is functioning perfectly before you go live.

After confirming successful delivery, you can proceed to schedule or send your broadcast message to your entire contact list. Using Pabbly Chatflow simplifies this process significantly, making it easy to manage your digital marketing efforts.


Conclusion

Broadcasting WhatsApp messages for your digital marketing agency is streamlined and efficient with Pabbly Chatflow. By following these steps, you can ensure effective communication with your clients, enhancing your marketing strategies.

Ensure you check out Pabbly Connect to create business automation workflows and reduce manual tasks. Pabbly Connect currently offer integration with 2,000+ applications.