Automate Order Confirmation & Customer Notification

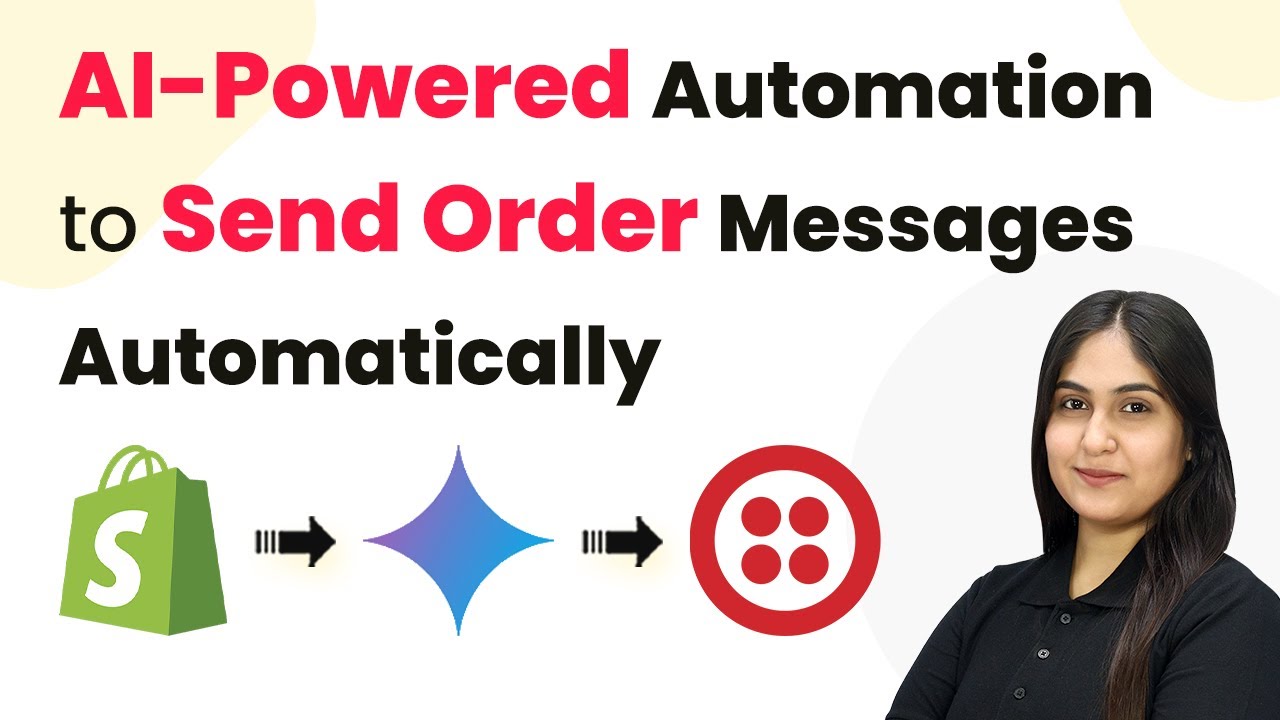
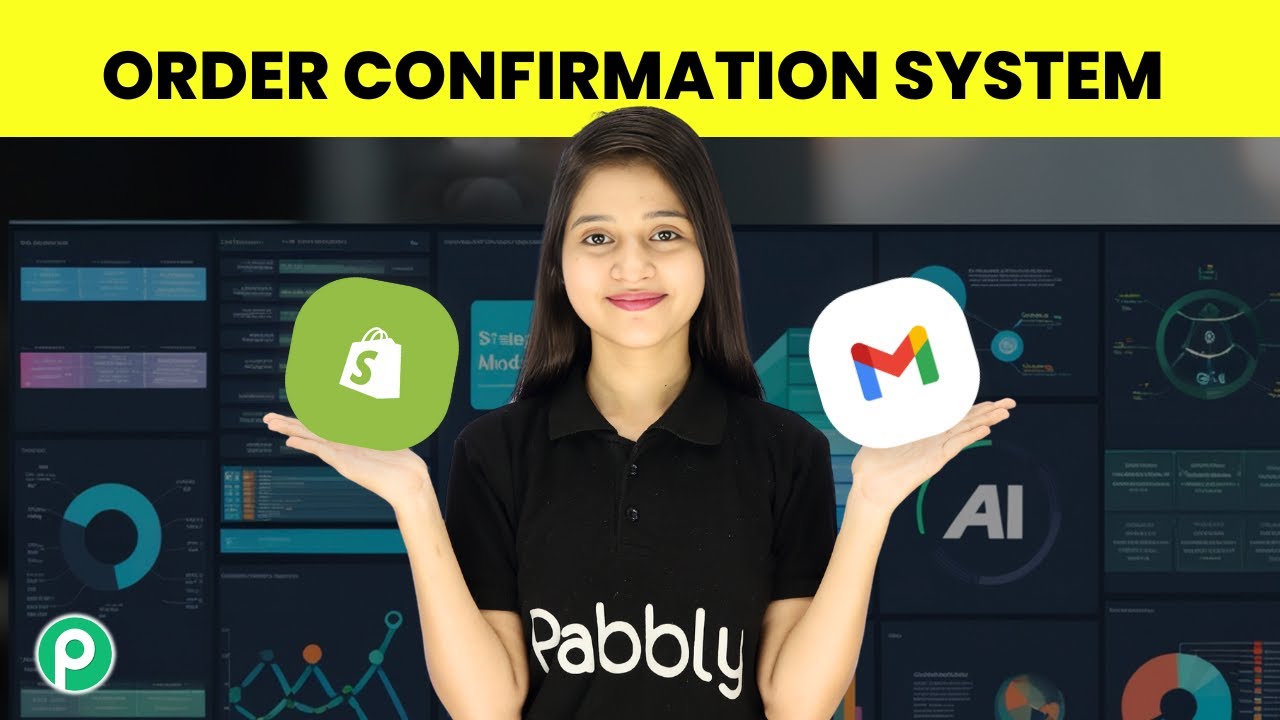
Learn how to automate order confirmations and customer notifications using Pabbly Connect with Gmail and Shopify in this detailed tutorial. Build sophisticated automated workflows in less time than you think. This guide translates complex integrations into straightforward steps for immediate implementation.

Watch Step By Step Video Tutorial Below


1. Accessing Pabbly Connect for Automation

To start automating order confirmations and customer notifications, first access Pabbly Connect by visiting Pabbly.com/connect. This platform allows you to integrate various applications seamlessly without any coding.

On the Pabbly Connect homepage, you will see options to either sign in or sign up for a free account. If you are new, click on the ‘Sign Up Free’ button to create an account and get free tasks every month. Existing users should click ‘Sign In’ to access their dashboard.


2. Creating a Workflow in Pabbly Connect

Once logged in, navigate to Pabbly Connect and click on the ‘Access Now’ button. This will take you to your dashboard where you can create a new workflow. Click on the ‘+ Create Workflow’ button to begin.

  • Select the new beta version for the workflow builder.
  • Name your workflow ‘Automate Order Confirmation and Customer Notification’.
  • Choose the folder as ‘Pabbly Connect’.

After setting these parameters, click on the ‘Create’ button. Your workflow is now successfully created and ready for the next steps.


3. Setting Up the Trigger in Pabbly Connect

The next step involves setting up the trigger for your workflow. In this case, select Pabbly Connect as the trigger application and choose ‘Shopify’ as the app event.

For the event, select ‘New Order’. Click on the ‘Connect’ button, and you will receive a webhook URL. Copy this URL as it will be needed to connect your Shopify account.

  • Go to your Shopify account settings.
  • Click on ‘Notifications’ and then ‘Webhooks’.
  • Create a new webhook for ‘Order Creation’ using the copied URL.

After saving the webhook, make a test purchase in your Shopify store to trigger the webhook response. This will confirm that your Shopify account is successfully connected to Pabbly Connect.


4. Setting Up the Action in Pabbly Connect

Now, it’s time to set up the action that will occur after the trigger. In this case, select Pabbly Connect and choose ‘Gmail’ as the action application. For the action event, select ‘Send Email’.

Next, click on the ‘Connect’ button. You can either add a new connection or select an existing one. For new connections, sign in with your Google account and grant the necessary permissions.

Enter the sender name as ‘G4U Store’. Map the recipient email address from the Shopify response. Set the email subject and content dynamically using mapping.

Once everything is set, click on the ‘Save and Send Test Request’ button to send a test email. This will ensure that your automation is functioning correctly.


5. Finalizing and Testing Your Workflow

After successfully sending a test email, it’s important to finalize your workflow in Pabbly Connect. Ensure to enable the toggle for your workflow to keep it active.

To test the automation, make another test purchase in your Shopify store. Check your Gmail account to see if the confirmation email is received with the correct details.

Confirm that the email contains the user’s name, item purchased, and payment status. Verify that the workflow is functioning as expected with each new order.

This confirms that your automation is working perfectly, allowing you to send personalized emails automatically to your customers after each order.


Conclusion

In this tutorial, we explored how to automate order confirmations and customer notifications using Pabbly Connect, integrating Shopify with Gmail. This automation streamlines your order process and enhances customer communication effectively.

Ensure you check out Pabbly Connect to create business automation workflows and reduce manual tasks. Pabbly Connect currently offer integration with 2,000+ applications.

By following the steps outlined, you can easily set up this workflow and improve your business operations with automation.

This Chatbot Handles 100+ Customer Messages Daily

Learn how to use Pabbly Chatflow to create a WhatsApp chatbot that can handle over 100 customer messages daily with ease. Step-by-step tutorial included. Master conversational marketing with practical techniques for creating chatbots that engage visitors at exactly the right moment in their journey.

Watch Step By Step Video Tutorial Below


1. Accessing Pabbly Chatflow to Create Your WhatsApp Chatbot

To begin, access Pabbly Chatflow by opening a new tab and entering its URL: pabby.com/chatflow. This platform allows you to create and manage chatbots effectively.

Once you reach the homepage, you will see two options: ‘Sign In’ and ‘Sign Up Free.’ If you are a new user, select ‘Sign Up Free’ to create an account, which gives you 100 free credits monthly. Existing users can simply click ‘Sign In’ to access their accounts.


2. Creating the Chatbot Flow in Pabbly Chatflow

After logging into Pabbly Chatflow, navigate to the dashboard and click on the ‘Flows’ option in the sidebar. To create a new chatbot flow, click the ‘Add Flow’ button. Name your flow, for instance, ‘This Chatbot Handles 100+ Customer Messages Daily,’ and set the trigger to initiate the chatbot.

  • Enter the trigger as ‘Keyword Regex Match’.
  • Input the keyword that will trigger the chatbot, such as ‘hello’.
  • Remove any regex if not needed.

Now, drag and drop the message node to send a welcome message. Customize your message to greet users and provide options with buttons for browsing packages or talking to an expert.


3. Building Your WhatsApp Chatbot with Pabbly Chatflow

To build your WhatsApp chatbot, utilize Pabbly Chatflow features effectively. After creating your welcome message, add buttons that users can click. For instance, the button ‘Browse Packages’ will lead customers to view available travel packages.

  • Create a button named ‘Browse Packages’ of type ‘Quick Reply’.
  • Add another button named ‘Talk to Expert’ for customer inquiries.
  • Connect these buttons to their respective actions.

With these buttons set, your chatbot can efficiently guide users through the travel planning process, responding to hundreds of messages simultaneously.


4. Configuring Package Details and User Input

Next, configure the details for the packages offered through your chatbot using Pabbly Chatflow. After the user selects ‘Browse Packages,’ provide a list of travel options. For each package, include a title, description, and a button to plan the trip.

Add items like ‘Goa Getaway’ and ‘Manali Escape’ to your package list. Create a button for each package that allows users to plan their trip. Incorporate custom fields for user details like travel dates and number of travelers.

By asking users for their travel details, your chatbot can effectively manage inquiries and bookings, enhancing customer interaction.


5. Finalizing and Sharing Your Chatbot Flow

Once you’ve completed your chatbot flow in Pabbly Chatflow, it’s essential to save your progress. Click the ‘Save’ button to ensure your chatbot is ready to handle customer inquiries.

After saving, you can share your chatbot flow with colleagues or team members by selecting the three dots next to your flow and choosing the ‘Share Flow’ option. This will generate a link for easy sharing.

Encouraging others to use Pabbly Chatflow can help streamline customer interactions across various businesses, promoting efficiency and customer satisfaction.


Conclusion

In conclusion, using Pabbly Chatflow allows businesses to create effective WhatsApp chatbots that can manage over 100 customer messages daily. This tutorial outlined the steps for accessing, building, and sharing your chatbot, ensuring seamless customer engagement.

Ensure you check out Pabbly Connect to create business automation workflows and reduce manual tasks. Pabbly Connect currently offer integration with 2,000+ applications.

Wedding Planners Getting Bookings on WhatsApp Non-Stop

Discover how wedding planners can automate bookings on WhatsApp using Pabbly Chatflow. Follow this detailed tutorial for seamless integration and instant responses. Learn step-by-step how to create, test, and optimize chatbots that enhance customer experience while reducing support workload.

Watch Step By Step Video Tutorial Below


1. Accessing Pabbly Chatflow for WhatsApp Automation

To begin automating your WhatsApp bookings, first access Pabbly Chatflow by visiting Pabbly.com/chatflow. This platform is designed to help businesses automate their WhatsApp messaging seamlessly.

On the Pabbly Chatflow homepage, you will find options to either sign in or sign up for a free account. New users should select the ‘Sign Up Free’ option to receive 100 free credits monthly. Existing users can simply sign in to start using the service.


2. Creating Your WhatsApp Chatbot Flow with Pabbly Chatflow

Once logged in, navigate to the dashboard and click on the ‘Access Now’ button for Pabbly Chatflow. Here, you will create a new flow by clicking the plus ‘Add Flow’ button.

  • Choose a name for your flow, such as ‘Wedding Planners Getting Bookings on WhatsApp Non-Stop’.
  • Select the trigger event; for this example, choose ‘Keywords’.
  • Enter relevant keywords like ‘hi’ and ‘hello’ that users might send to initiate the chat.

After setting your keywords, add a welcome message that will be sent automatically when users trigger the chatbot. This setup is crucial for engaging potential clients immediately.


3. Setting Up Questions for Client Interaction

After creating the welcome message, you can set up a series of questions to gather information from the clients. Using Pabbly Chatflow, add buttons for users to select options like ‘Book Consultation’ or ‘Our Services’.

  • Create a list of services that users can choose from, such as ‘Full Wedding Planning’ and ‘Photography’.
  • Link these options back to the flow to ensure users receive relevant responses.
  • Incorporate custom fields to capture user responses dynamically.

This interaction flow allows the chatbot to personalize responses based on user input, enhancing the overall experience for potential clients.


4. Finalizing Your Chatbot Flow in Pabbly Chatflow

Once you have set up all the necessary questions, it’s time to finalize your flow in Pabbly Chatflow. Make sure to save your flow regularly to avoid losing any progress.

After saving, test the flow by sending a keyword to your WhatsApp business number. Ensure that the bot responds correctly and follows the intended sequence of questions and answers.

By testing the flow, you can identify any issues and make necessary adjustments before launching it for actual client interactions.


5. Testing and Optimizing Your WhatsApp Chatbot

Testing is crucial to ensure your Pabbly Chatflow setup works as expected. Send various keywords to your WhatsApp number and observe the bot’s responses.

Verify that the welcome message is sent promptly. Check if the follow-up questions are asked in the correct order. Ensure that the responses are dynamic and personalized based on user input.

After thorough testing, you can optimize the flow based on user feedback and interaction patterns to improve the overall effectiveness of your WhatsApp chatbot.


Conclusion

Using Pabbly Chatflow, wedding planners can automate their WhatsApp interactions effectively. This tutorial outlined the steps to create a responsive chatbot that handles bookings seamlessly, ensuring no potential client is missed.

Ensure you check out Pabbly Connect to create business automation workflows and reduce manual tasks. Pabbly Connect currently offer integration with 2,000+ applications.

AI-Powered Automation to Send Order Messages Automatically

Learn how to automate order messages using Pabbly Connect with Shopify and Twilio. Follow this detailed tutorial for seamless integration. Build sophisticated automated workflows in less time than you think. This guide translates complex integrations into straightforward steps for immediate implementation.

Watch Step By Step Video Tutorial Below


1. Setting Up Pabbly Connect for Automation

To start automating order messages, you need to access Pabbly Connect. Open your browser and navigate to pav.com/connect. This is where you can sign up or log in to your Pabbly account.

Once logged in, you will see the Pabbly apps window. Click on ‘Access Now’ under Pabbly Connect to reach the dashboard. Here, you can create a new workflow by clicking the ‘Create Workflow’ button, which will guide you through the automation setup process.


2. Creating a Workflow in Pabbly Connect

After accessing Pabbly Connect, you’ll need to create a new workflow. Select the beta version for a modern experience. Name your workflow something like ‘AI-Powered Automation to Send Order Messages Automatically’ and choose a folder for organization.

  • Click on ‘Create’ to finalize your workflow setup.
  • Understand that automation consists of triggers and actions.
  • Choose your trigger as ‘Shopify’ and event as ‘New Order’.

With your workflow created, you are now ready to establish the connection between Shopify and Pabbly Connect.


3. Connecting Shopify to Pabbly Connect

To connect Shopify to Pabbly Connect, copy the provided webhook URL from your workflow. Log into your Shopify account and navigate to ‘Settings’ followed by ‘Notifications’. Here, you will find the option to create a new webhook.

  • Select ‘Create Webhook’ and choose ‘Order Creation’ as the event.
  • Set the format to JSON and paste the webhook URL.
  • Save your settings to establish the connection.

Your Shopify store is now successfully connected to Pabbly Connect, allowing it to receive order details automatically.


4. Generating Personalized SMS with Google Gemini

Once you receive an order, the next step involves generating a personalized SMS using Google Gemini through Pabbly Connect. Add an action step and select Google Gemini as the application, then choose ‘Generate Content’ as the event.

Connect your Google Gemini account by providing your API key. You can find this key in your Google AI Studio account. After connecting, you will need to provide a prompt for the SMS content, including customer details and order information.

Map the data from the previous Shopify order step to ensure that the SMS contains relevant information. Once the SMS is generated, it will be ready to send via Twilio.


5. Sending SMS via Twilio

The final step in your automation is sending the generated SMS through Twilio using Pabbly Connect. Create another action step and select Twilio as the application, then choose ‘Send SMS Message’ as the event.

To connect your Twilio account, you will need your Account SID and Authorization Token. After entering these details, specify the SMS body, which should be the content generated by Google Gemini. Map the recipient’s phone number to ensure the message reaches the correct customer.

After completing these steps, click on ‘Save and Send Test Request’. You will receive a successful response indicating that the SMS has been sent. This confirms that your automation is working seamlessly with Pabbly Connect.


Conclusion

This tutorial has guided you through the steps to automate order messages using Pabbly Connect, integrating Shopify, Google Gemini, and Twilio. With this setup, you can enhance customer communication effectively and efficiently.

Ensure you check out Pabbly Connect to create business automation workflows and reduce manual tasks. Pabbly Connect currently offer integration with 2,000+ applications.

WhatsApp Food Orders on Autopilot for Cloud Kitchens

Learn how to automate WhatsApp food orders for cloud kitchens using Pabbly Chatflow. Step-by-step guide for creating your AI assistant. Discover how to design chat experiences that feel personal and responsive while handling customer inquiries automatically around the clock.

Watch Step By Step Video Tutorial Below


1. Accessing Pabbly Chatflow for WhatsApp Automation

To create an automated WhatsApp assistant for cloud kitchens, start by accessing Pabbly Chatflow. Open a new tab and search for Pabbly.com/chatflow. This platform allows you to automate WhatsApp messaging without any programming knowledge.

Once on the Pabbly Chatflow page, you’ll see options to sign in or sign up. If you are new, click on the ‘Sign Up Free’ option to get 100 free credits each month. For existing users, click ‘Sign In’ to access your dashboard.


2. Creating Your AI Assistant in Pabbly Chatflow

After logging into Pabbly Chatflow, navigate to the AI assistant section by clicking on the ‘AI Assistant’ option. This section allows you to train your assistant to respond to common inquiries related to your cloud kitchen.

  • Click on the ‘Add Assistant’ button.
  • Name your assistant, e.g., ‘WhatsApp Food Orders on Autopilot for Cloud Kitchens’.
  • Select the AI agent instructions and set the temperature for responses.
  • Choose Open AI as the model provider and select GPT4 mini.

Once you complete these steps, you will be prompted to enter your Open AI API key. After entering the key, click the ‘Connect’ button to save your settings.


3. Configuring AI Settings in Pabbly Chatflow

In this section, you will configure the AI settings for your assistant in Pabbly Chatflow. Start by setting a header message, which is displayed when the conversation begins. This could be a welcome message.

  • Define a footer message for the end of the conversation.
  • Set stop keywords that will halt the assistant’s responses.
  • Specify retry attempts for the assistant to respond to users.
  • Create a fallback message for technical failures.

Next, you will upload a knowledge source file that contains specific information about your cloud kitchen. This file helps the AI provide accurate responses. Ensure the file is in PDF or TXT format and less than 90 MB.


4. Designing Your Assistant Interface in Pabbly Chatflow

After configuring the settings, proceed to design the assistant interface using Pabbly Chatflow. Enter a heading and subheading that will be visible to users. You can also customize the initial message that greets users when they start a conversation.

In this section, you can also style your assistant by adjusting themes, colors, and shapes. Once you are satisfied with the design, enable the toggle to activate your assistant and click the ‘Save AI Assistant’ button.


5. Testing Your AI Assistant on WhatsApp

Finally, test your AI assistant created in Pabbly Chatflow by sending a message through WhatsApp. This will help you confirm that it is functioning correctly and responding to inquiries as intended.

Send messages like ‘Hi’ or ‘Tell me about the cloud kitchen’ to see how the assistant responds. You can also simulate placing an order by asking for specific menu items, and the assistant will guide you through the ordering process.

If everything works as expected, your automated WhatsApp AI assistant for cloud kitchens is ready to handle inquiries and orders efficiently.


Conclusion

In this tutorial, we explored how to automate WhatsApp food orders for cloud kitchens using Pabbly Chatflow. By following the steps outlined, you can create an efficient AI assistant that enhances customer interaction and streamlines order processing.

Ensure you check out Pabbly Connect to create business automation workflows and reduce manual tasks. Pabbly Connect currently offer integration with 2,000+ applications.

Real Estate AI Agent for Serious Buyer Filtering

Learn how to set up a Real Estate AI Agent for serious buyer filtering using Pabbly Chatflow. Step-by-step tutorial with detailed instructions. Learn step-by-step how to create, test, and optimize chatbots that enhance customer experience while reducing support workload.

Watch Step By Step Video Tutorial Below


1. Access Pabbly Chatflow to Create Your AI Agent

To start using Pabbly Chatflow, navigate to the Pabbly Chatflow website. You can sign up for a free account, which gives you access to 100 free credits monthly. This will allow you to create your AI assistant without any initial investment.

After signing up, log into your Pabbly Chatflow account. You will see a dashboard with various applications. Click on the Pabbly Chatflow icon to access the features necessary for building your real estate AI agent.


2. Adding Your WhatsApp Number in Pabbly Chatflow

Once inside Pabbly Chatflow, the next step is to add your WhatsApp number. This is essential for the AI agent to interact with potential buyers. You can do this by selecting the appropriate option from the left column of the dashboard.

  • Choose the method to add your WhatsApp number.
  • Follow the prompts to verify your number.

After adding your WhatsApp number, you are ready to create the AI assistant that will filter serious buyers efficiently.


3. Creating Your Real Estate AI Assistant in Pabbly Chatflow

To create your AI assistant, click on the ‘AI Assistant’ option in the left column of Pabbly Chatflow. Here, you will deactivate any existing assistants if necessary and then click on ‘Add an Assistant’ to start the creation process.

When prompted, name your assistant (e.g., ‘Real Estate AI Agent’). Follow the four steps provided: AI instructions, knowledge source, assistant interface, and styling. In the instructions section, define the role of your AI assistant to ensure it meets the needs of serious buyers.

  • Set the AI temperature to 0.5 for balanced responses.
  • Select the OpenAI model you prefer.

After setting these parameters, your AI assistant is ready to be configured with the necessary knowledge base.


4. Uploading Your Knowledge Base to Pabbly Chatflow

Next, it’s crucial to upload a knowledge base that your AI assistant will use when responding to inquiries. This should include FAQs and other relevant information about your real estate services. In Pabbly Chatflow, navigate to the knowledge source section and upload your file in PDF or .txt format.

Make sure your file size is less than 90 MB and contains all the necessary details. After uploading, the AI assistant will be equipped to provide informative responses to potential buyers, increasing the chances of serious inquiries.


5. Testing Your AI Assistant in Pabbly Chatflow

Once your AI assistant is set up, it’s important to test its functionality. Send a message through WhatsApp to see if the AI responds correctly. In Pabbly Chatflow, you can set up a flow that triggers the assistant when a specific keyword is sent by a user.

For testing, type ‘hello’ in your WhatsApp chat. If everything is configured properly, the AI assistant will respond immediately, confirming that it is functioning as intended. This step ensures that serious buyers are filtered correctly, allowing only high-intent inquiries to reach your sales team.


Conclusion

In this tutorial, we explored how to create a Real Estate AI agent using Pabbly Chatflow for serious buyer filtering. By following these steps, you can effectively capture buyer preferences and streamline your sales process.

Ensure you check out Pabbly Connect to create business automation workflows and reduce manual tasks. Pabbly Connect currently offer integration with 2,000+ applications.

How to Automatically Send Website Leads to Salesforce CRM

Learn how to automatically send website leads to Salesforce CRM using Pabbly Connect. Follow this step-by-step tutorial for seamless integration. Build sophisticated automated workflows in less time than you think. This guide translates complex integrations into straightforward steps for immediate implementation.

Watch Step By Step Video Tutorial Below


1. Accessing Pabbly Connect for Integration

To automatically send website leads to Salesforce CRM, the first step is to access Pabbly Connect. Begin by opening a new tab and navigating to Pabbly’s official website at Pabbly.com/connect. Once there, you will find options to either sign in or sign up for free.

If you are new, click on the ‘Sign Up Free’ button. Existing users should click on ‘Sign In’. After logging in, locate the ‘Access Now’ button for Pabbly Connect to enter the dashboard where all automation workflows can be managed.


2. Creating a New Workflow in Pabbly Connect

Once you are in the Pabbly Connect dashboard, click on the ‘+ Create Workflow’ button. This will prompt you to select a workflow builder. Choose the new beta version for a streamlined experience. Name your workflow ‘Automatically Send Website Leads to Salesforce CRM’ and select a folder for organization.

  • Click on the ‘Create’ button to finalize your workflow setup.
  • Ensure you have a clear workflow name for easy identification.

With the workflow created, the next step involves setting up the trigger. This is crucial for ensuring that whenever a new lead is submitted through your website, a corresponding contact is created in Salesforce CRM via Pabbly Connect.


3. Setting Up the Trigger Application

For the trigger application, select ‘Webhook by Pabbly’, which acts as a bridge between your website form and Pabbly Connect. Choose the ‘Webhook’ event and click on the ‘Connect’ button to receive a unique webhook URL.

Copy this webhook URL and paste it into your website form code in the appropriate field. Save the changes and refresh your form in the browser. Now, fill out the form with test details to trigger the webhook and check if the data is received in Pabbly Connect.


4. Mapping Data to Salesforce CRM

After successfully receiving the webhook response in Pabbly Connect, the next step is to format the data for Salesforce. Add a new action step by selecting ‘Text Formatter’ and choose the ‘Split Text’ option. This will allow you to split the full name into first and last names for better data management.

  • Map the user’s full name from the webhook response.
  • Set the separator to a space and select ‘All’ for the segment index.

Once the data is formatted, the next action will involve creating a contact in Salesforce. Select ‘Salesforce’ as the action application and choose ‘Create Contact’ as the event. Connect to your Salesforce account and map the fields accordingly using the data from the previous steps. This ensures that each new lead is accurately entered into Salesforce CRM via Pabbly Connect.


5. Finalizing the Integration and Testing

After mapping all necessary fields, such as first name, last name, email address, and contact number, click on ‘Save and Send Test Request’ to send a test contact to Salesforce. Check your Salesforce account to confirm that a new contact has been created with the correct information.

Finally, ensure to enable the toggle for your workflow in Pabbly Connect to keep it active. This will allow the automation to run seamlessly without any manual intervention. Whenever a new lead submits their information through your website, a contact will automatically be created in Salesforce CRM.


Conclusion

Using Pabbly Connect to automatically send website leads to Salesforce CRM streamlines your workflow and enhances data management. By following this detailed tutorial, you can set up an efficient integration that saves time and reduces manual errors.

Ensure you check out Pabbly Connect to create business automation workflows and reduce manual tasks. Pabbly Connect currently offer integration with 2,000+ applications.

Next-Gen AI Chatbot for Cybersecurity Companies

Learn how to integrate Pabbly Chatflow with YouTube to create a next-gen AI chatbot for cybersecurity companies. Step-by-step tutorial included. This detailed guide shows you how to build powerful chat automation that engages visitors and converts prospects—without any coding required.

Watch Step By Step Video Tutorial Below


1. Accessing Pabbly Chatflow for AI Chatbots

To create a next-gen AI chatbot for cybersecurity companies, start by accessing Pabbly Chatflow. This platform enables seamless integration with YouTube, facilitating the development of advanced chatbots.

Log in to your Pabbly Chatflow account. If you don’t have an account, you can easily sign up on their website. Once logged in, navigate to the dashboard where you can begin setting up your chatbot.


2. Setting Up Integration with YouTube

The integration process in Pabbly Chatflow is straightforward. First, find the option to create a new workflow. Click on the ‘Create Workflow’ button located at the top right of the dashboard.

  • Choose YouTube as the application to integrate.
  • Select the trigger event, such as ‘New Video Uploaded’.
  • Connect your YouTube account by following the authentication prompts.

After connecting, you will be able to set specific parameters for the videos you want to monitor. This allows your chatbot to respond based on the latest content from your YouTube channel.


3. Customizing Chatbot Responses in Pabbly Chatflow

With the integration established, it’s time to customize your chatbot’s responses. In Pabbly Chatflow, navigate to the response settings. Here, you can define how the chatbot will interact with users based on the YouTube video content.

  • Create response templates that reflect the content of your videos.
  • Utilize AI capabilities to generate dynamic responses.
  • Test the responses to ensure they align with user inquiries.

This customization is crucial for providing relevant information to users and enhancing their experience with your chatbot.


4. Testing Your Chatbot Integration

Once your chatbot is set up, it’s essential to test the integration. In Pabbly Chatflow, use the testing feature to simulate interactions. This allows you to see how the chatbot responds to various prompts.

During testing, pay attention to the accuracy of the responses and the overall flow of conversation. Make adjustments as needed to improve user interaction. This step ensures that your chatbot is ready for real-world usage.


5. Deploying Your AI Chatbot for Cybersecurity Companies

After successful testing, you can deploy your AI chatbot. In Pabbly Chatflow, navigate to the deployment settings. Here, you can choose how to make your chatbot accessible to users.

Options may include embedding the chatbot on your website or integrating it with messaging platforms. Ensure that your chatbot is easily accessible to your target audience, especially within the cybersecurity sector.


Conclusion

Integrating Pabbly Chatflow with YouTube allows cybersecurity companies to create a next-gen AI chatbot that enhances user engagement. By following the detailed steps outlined, you can effectively set up and deploy a chatbot that meets your business needs.

Ensure you check out Pabbly Connect to create business automation workflows and reduce manual tasks. Pabbly Connect currently offer integration with 2,000+ applications.

Automate 100% Customer Replies with One Powerful AI Chatbot

Learn how to automate customer replies using Pabbly Chatflow and a powerful AI chatbot. Follow our step-by-step tutorial for seamless integration with YouTube. Master conversational marketing with practical techniques for creating chatbots that engage visitors at exactly the right moment in their journey.

Watch Step By Step Video Tutorial Below


1. Accessing Pabbly Chatflow for Customer Replies

To automate customer replies, you first need to access Pabbly Chatflow. This platform is essential for integrating your AI chatbot with YouTube to manage customer interactions effectively. Start by logging into your Pabbly account and navigating to the Chatflow dashboard.

Once in the dashboard, you will see various options for creating workflows. Select the option to create a new workflow, which allows you to set up the integration that will handle customer replies automatically. This step is crucial for ensuring that your AI chatbot can respond to inquiries seamlessly.


2. Creating a Workflow in Pabbly Chatflow

Creating a workflow in Pabbly Chatflow is straightforward. Click on the ‘Create Workflow’ button, and you will be prompted to name your workflow. Choose a descriptive name that reflects its purpose, such as ‘YouTube Customer Replies Automation.’ This will help you identify the workflow later.

After naming your workflow, you will need to set the trigger event. For this integration, select YouTube as the trigger app. You can then specify the event that will initiate the workflow, such as when a new comment is posted on your YouTube videos. This setup is essential for automating customer replies effectively.

  • Click on ‘Create Workflow’
  • Name your workflow (e.g., ‘YouTube Customer Replies Automation’)
  • Select YouTube as the trigger app
  • Choose the trigger event (e.g., new comment)

Once these settings are configured, you can proceed to connect your AI chatbot to handle the replies automatically. This integration is what makes Pabbly Chatflow a powerful tool for managing customer interactions.


3. Integrating the AI Chatbot with Pabbly Chatflow

Next, you need to integrate your AI chatbot with Pabbly Chatflow. This step is crucial for ensuring that the chatbot can respond to customer inquiries automatically. Select the option to add an action step in your workflow.

Choose your AI chatbot application as the action app. You will then need to specify the action event, such as sending a reply to the comment. Configure the fields to include the necessary information, like the comment text and the response you want the chatbot to provide. This configuration allows the AI chatbot to function effectively within your automated workflow.

  • Select the action step in your workflow
  • Choose your AI chatbot as the action app
  • Specify the action event (e.g., send reply)
  • Configure the fields with necessary information

With these actions set up, your AI chatbot will be ready to engage with customers automatically, enhancing your customer service capabilities through Pabbly Chatflow.


4. Testing the Workflow in Pabbly Chatflow

Once you have set up the integration, it’s important to test the workflow in Pabbly Chatflow. This ensures that everything functions as expected. Start by clicking on the ‘Test’ button in your workflow settings. This will simulate a new comment on your YouTube video to check if the AI chatbot replies correctly.

If the test is successful, you will see the AI chatbot responding to the comment as configured. If there are any issues, you can troubleshoot by checking the workflow settings and ensuring that all fields are correctly filled. Testing is crucial to confirm that your automation is working smoothly.


5. Activating the Workflow for Live Use

After successful testing, you can activate your workflow in Pabbly Chatflow. Click on the ‘Activate’ button to enable the workflow for live use. This means that your AI chatbot will now automatically respond to customer comments on your YouTube videos.

It’s important to monitor the workflow initially to ensure it operates as expected. You can make adjustments as needed based on customer interactions. With Pabbly Chatflow, you can streamline your customer replies and enhance engagement effectively.


Conclusion

In conclusion, using Pabbly Chatflow to automate customer replies with a powerful AI chatbot is an efficient way to enhance your customer service. By following the steps outlined in this tutorial, you can set up a seamless integration with YouTube and ensure that your customers receive timely responses. This automation not only saves time but also improves customer satisfaction.

Ensure you check out Pabbly Connect to create business automation workflows and reduce manual tasks. Pabbly Connect currently offer integration with 2,000+ applications.

This Automation Turns Your Leads into Customers

Learn how to automate your lead conversion process using Pabbly Connect, Google Ads, and Gmail to enhance your business efficiency. Develop expertise in application integration and learn how to design streamlined automation workflows using proven, simplified approaches.

Watch Step By Step Video Tutorial Below


1. Accessing Pabbly Connect for Lead Automation

To begin automating your lead conversion process, you need to access Pabbly Connect. Start by visiting Pabbly.com in your browser. This platform is essential for integrating Google Ads and Gmail to streamline your lead management.

Once on the homepage, you will find two options: ‘Sign In’ and ‘Sign Up for Free’. If you are new, click on ‘Sign Up for Free’ to create an account and explore the software with 100 free tasks each month. If you already have an account, simply click ‘Sign In’ to access your dashboard.


2. Creating a Workflow in Pabbly Connect

After signing in to Pabbly Connect, navigate to the dashboard and select the ‘Access Now’ button to enter the Pabbly Connect interface. Here, you will create a new workflow that will automate the lead conversion process.

  • Click on the ‘Create Workflow’ button.
  • Name your workflow (e.g., ‘This Automation Turns Your Leads into Customers’).
  • Choose a folder for organization.

Once you have set these parameters, click on the ‘Create’ button to finalize your workflow setup. This workflow will serve as the backbone for automating your lead management.


3. Setting Up the Trigger in Pabbly Connect

The next step involves setting up a trigger that will initiate the automation process. Select Google Ads as your trigger application in Pabbly Connect. This is where you will capture new leads generated from your Google Ads campaigns.

Choose the event ‘New Lead Form Entry’ to specify the exact moment a new lead is captured. After selecting this event, click on the ‘Connect’ button to establish a connection with your Google Ads account.

Once connected, you will receive a Webhook URL from Pabbly Connect. This URL needs to be integrated into your Google Ads account to enable data transfer. Copy this URL and proceed to your Google Ads account to set up the Webhook integration.


4. Configuring Google Ads for Webhook Integration

In your Google Ads account, navigate to the lead form section and select the form you want to use. Look for the option to set up lead delivery and choose ‘Webhook Integration’. Here, you will paste the Webhook URL you copied from Pabbly Connect.

  • Add your business name and required fields in the lead form.
  • Select the Webhook URL option for lead delivery.
  • Test the integration by sending dummy data.

After completing these steps, send a test lead from your Google Ads form. This will confirm that the integration is working correctly and that Pabbly Connect is receiving the lead data.


5. Generating and Sending Emails via Gmail

Now that your trigger is set up and tested, it’s time to create an action step to send personalized emails to your leads. In Pabbly Connect, select Gmail as your action application and choose the event ‘Send Email’.

Connect your Gmail account by clicking on the ‘Connect’ button. After establishing the connection, configure the email details, including the sender name, recipient email address, subject, and content. Use the data mapped from the lead form to personalize the email.

Finally, click on the ‘Save and Send Test Request’ button to send a test email. Once you confirm that the email has been successfully sent, your automation is complete. You can now watch your leads turn into customers with the help of Pabbly Connect.


Conclusion

In conclusion, using Pabbly Connect to automate your lead conversion process is a game-changer for any business. By integrating Google Ads and Gmail, you can efficiently turn leads into paying customers through personalized email communication. Start automating today to enhance your business efficiency!

Ensure you check out Pabbly Connect to create business automation workflows and reduce manual tasks. Pabbly Connect currently offer integration with 2,000+ applications.