How to Log Payments in Google Sheets from Razorpay Orders Using Pabbly Connect

Learn how to log payments in Google Sheets from Razorpay orders using Pabbly Connect. This step-by-step guide covers all necessary integrations and actions. Master proven automation processes with practical implementation examples and strategic recommendations you can apply immediately in your workflow.

Watch Step By Step Video Tutorial Below


1. Access Pabbly Connect for Integration

To log payments in Google Sheets from Razorpay orders, you need to access Pabbly Connect. Start by visiting Pabbly.com/connect in your web browser. This platform serves as the automation solution connecting your payment gateway with Google Sheets.

Once on the Pabbly Connect homepage, you can either sign in if you are an existing user or sign up for a free account. New users can explore the service with 100 free tasks every month, while existing users can quickly access their dashboards.


2. Creating a Workflow in Pabbly Connect

After signing in, click on the ‘Create Workflow’ button in Pabbly Connect. This action allows you to set up the automation process needed to log payments from Razorpay into Google Sheets. Choose the classic version for a familiar interface. using Pabbly Connect

  • Select a name for your workflow, such as ‘Log Payments in Google Sheets from Razorpay Orders’.
  • Choose a folder to save your workflow, like ‘Google Sheets’.

Once you have set the name and folder, click on the ‘Create’ button. This initializes your workflow, where you will define triggers and actions necessary for the automation.


3. Setting Up the Trigger with Razorpay

In this step, you will set Razorpay as the trigger application in your Pabbly Connect workflow. Select ‘Razorpay’ as the trigger application and choose ‘Payment Captured’ as the trigger event. This configuration will allow Pabbly Connect to listen for new payment events.

After selecting the trigger, you will be provided with a webhook URL. Copy this URL to set up the webhook in your Razorpay account. Navigate to the Razorpay dashboard, click on the ‘Developers’ section, and select ‘Webhooks’.

  • Click on ‘Add a New Webhook’.
  • Paste the copied webhook URL and leave the secret field blank.
  • Select the event as ‘Payment Captured’ and click ‘Create Webhook’.

Now, your Razorpay account is successfully connected to Pabbly Connect, and it’s ready to send payment data to your workflow.


4. Connecting Google Sheets as the Action Application

With the trigger set, the next step is to connect Google Sheets as the action application in your Pabbly Connect workflow. Select ‘Google Sheets’ and choose the action event as ‘Add a New Row’. This action will enable you to log the payment details received from Razorpay.

To connect Google Sheets, click on ‘Connect’ and then choose to add a new connection. Sign in with your Google account and grant access to Pabbly Connect for managing your spreadsheets.

Select the spreadsheet where you want to log the payments (e.g., ‘Razorpay Orders’). Choose the specific sheet (e.g., ‘Sheet1’).

Now, map the fields from Razorpay to Google Sheets, entering the customer name, email, phone number, and product purchased. This dynamic mapping ensures that every new payment is logged accurately in your Google Sheets.


5. Testing the Automation

To ensure that your automation works, it’s essential to test the entire workflow. Make a test payment through your Razorpay payment page. Use the pre-filled details and select your payment method, such as UPI.

After successfully making the payment, return to Pabbly Connect to check for the webhook response. You should see the payment details captured from Razorpay, confirming that the trigger is working correctly.

Verify that the payment details are logged as a new row in your Google Sheets. Ensure all fields are populated with the correct data from Razorpay.

Once verified, your automation is successfully set up! You can now log payments automatically in Google Sheets from Razorpay orders using Pabbly Connect.


Conclusion

In this tutorial, we explored how to log payments in Google Sheets from Razorpay orders using Pabbly Connect. By setting up triggers and actions, we automated the process of capturing payment details seamlessly. This integration enhances efficiency and accuracy in managing payment records.

Ensure you check out Pabbly Connect to create business automation workflows and reduce manual tasks. Pabbly Connect currently offer integration with 2,000+ applications.

Automate WhatsApp Messages for Your Justdial Leads with Pabbly Connect

Learn how to automate WhatsApp messages for your Justdial leads effortlessly using Pabbly Connect. Follow our step-by-step tutorial to set up your integration. Develop expertise in application integration and learn how to design streamlined automation workflows using proven, simplified approaches.

Watch Step By Step Video Tutorial Below


1. Accessing Pabbly Connect for Automation

To automate WhatsApp messages for your Justdial leads, you first need to access Pabbly Connect. Start by visiting the Pabbly Connect homepage by searching for Pabbly.com/connect in your browser. This is the gateway to setting up your automation.

Once on the homepage, you will see options to sign in or sign up. If you are a new user, click on the ‘Sign Up Free’ button to create an account and get 300 tasks every month to explore the software. Existing users should click on ‘Sign In’ to access their accounts.


2. Creating a Workflow in Pabbly Connect

After logging into Pabbly Connect, navigate to the ‘All Pabbly Apps’ window and select Pabbly Connect by clicking on the ‘Access Now’ button. This will take you to the dashboard where you can create a new workflow.

To initiate the automation process, click on the ‘Create Workflow’ button located at the top right corner. You will be prompted to choose between the new beta version and the classic version. For this tutorial, select the classic version for a familiar experience. Name your workflow, for example, ‘Automate WhatsApp Messages for Your Justdial Leads Effortlessly,’ and choose a folder to save your workflow.

  • Click on ‘Create’ to finalize your workflow.
  • Understand that each workflow consists of triggers and actions.

After creating the workflow, you will see the principles of automation: triggers and actions. Set up your trigger by selecting Justdial as your trigger app and the event as ‘New Lead.’ This will allow Pabbly Connect to listen for new leads coming from Justdial.


3. Setting Up the Trigger with Justdial

With Pabbly Connect, the next step is to set up the trigger for your Justdial leads. After selecting Justdial as your trigger application, you will receive a webhook URL. This URL is crucial as it connects Justdial with Pabbly Connect.

Copy the webhook URL and send it to your Justdial account manager since the Justdial portal does not allow you to add the webhook directly. Once they have configured it, you can expect to receive a test lead response shortly. This confirms that your trigger is working as intended.

  • Ensure to wait for the test lead response after sending the webhook URL.
  • Verify that the response includes essential lead details like name, email, and contact number.

Once you receive the response with the lead’s details, you have successfully set up your trigger in Pabbly Connect.


4. Setting Up Action Step with WhatsApp Cloud API

After successfully setting up the trigger, the next step is to configure the action using Pabbly Connect. Select WhatsApp Cloud API as your action application and choose ‘Send Template Message’ as the action event. This will allow you to send automated WhatsApp messages to your leads.

To create a new connection, click on ‘Add a New Connection’ and enter the required details: access token, phone number ID, and WhatsApp business account ID. These details can be obtained by setting up your WhatsApp Cloud API account through Meta.

Copy and paste the access token and IDs into Pabbly Connect. Map the lead’s phone number dynamically to ensure personalized messages.

After entering all required information, click on ‘Save’ to establish the connection. This integration will enable you to send personalized WhatsApp messages automatically to new leads captured from Justdial.


5. Finalizing Your Automation Process

To finalize your automation process in Pabbly Connect, ensure that you have set up all necessary fields in the WhatsApp Cloud API action. Map the lead’s name dynamically to personalize your messages.

Once everything is set, click on ‘Save and Send Request’ to test your automation. Replace any placeholder numbers with your actual phone number to receive the WhatsApp message. After executing this, check your WhatsApp for the automated message confirming the setup.

In summary, using Pabbly Connect, you have successfully integrated Justdial with WhatsApp Cloud API to automate WhatsApp messages for new leads. This setup not only saves time but also enhances customer engagement.


Conclusion

In this tutorial, we detailed how to automate WhatsApp messages for your Justdial leads effortlessly using Pabbly Connect. By following these steps, you can streamline your lead communication process and ensure prompt responses to potential clients.

Ensure you check out Pabbly Connect to create business automation workflows and reduce manual tasks. Pabbly Connect currently offer integration with 2,000+ applications.

Automate Posting New Blog Articles to LinkedIn with Pabbly Connect

Learn how to automatically post new blog articles to LinkedIn using Pabbly Connect in this detailed tutorial. Follow the step-by-step guide for seamless integration. Discover hidden automation capabilities within your existing tools. This guide shows you how to connect your essential applications and permanently eliminate redundant manual processes.

Watch Step By Step Video Tutorial Below


1. Accessing Pabbly Connect for Automation

To start automating the posting of new blog articles to LinkedIn, you first need to access Pabbly Connect. Simply visit the Pabbly website by typing ‘Pabbly.com’ into your browser. Once on the site, you can either sign in or create a free account, which gives you access to 100 tasks monthly.

After logging in, navigate to the Pabbly Connect dashboard. Here, you can create new workflows that connect different applications. You will specifically create a workflow that links WordPress with LinkedIn, enabling automatic posting of new blog articles.


2. Creating a New Workflow in Pabbly Connect

Once you are in the Pabbly Connect dashboard, click on the ‘Create Workflow’ button. You will be prompted to choose between the modern and classic workflow builders. For this tutorial, select the classic option to maintain familiarity. Name your workflow as ‘Post New Blog Articles to LinkedIn Automatically’ and choose a folder for organization.

  • Click on ‘Create’ to initiate the workflow.
  • You will see two boxes: Trigger and Action.
  • Select WordPress as the trigger application.
  • Choose ‘Post Published’ as the trigger event.

This setup ensures that every time a new post is published on WordPress, it will trigger the automation to post on LinkedIn via Pabbly Connect.


3. Connecting WordPress to Pabbly Connect

To connect WordPress with Pabbly Connect, you need to use a webhook URL provided by Pabbly. This URL acts as a bridge between your WordPress site and Pabbly Connect. First, ensure you have the WP Webhooks plugin installed and activated on your WordPress dashboard.

Next, navigate to the WP Webhooks settings in your WordPress admin panel. Here, you will add the webhook URL from Pabbly Connect. Set the trigger for post creation by selecting the appropriate options in the WP Webhooks settings. This configuration allows Pabbly Connect to listen for new posts published on your site.


4. Testing the Connection Between WordPress and Pabbly Connect

After setting up the webhook in WordPress, it’s essential to test the connection. To do this, create a new blog post in WordPress. Fill in the title and content, then publish the post. Once published, check back in Pabbly Connect to see if the webhook response has been recorded.

If the connection is successful, you will see the details of the new post reflected in your Pabbly Connect workflow. This confirms that your setup between WordPress and Pabbly Connect is functioning correctly, allowing for seamless data transfer.


5. Linking LinkedIn to Pabbly Connect for Posting

Now that you have successfully connected WordPress to Pabbly Connect, the next step is to link your LinkedIn account. In the action application, select LinkedIn and choose the action event as ‘Share Simple Text’. If you have not connected LinkedIn before, you will need to enter your login credentials and grant necessary permissions.

After establishing the connection, you can configure the content that will be posted to LinkedIn. You can either share the post content directly or include a permalink to the blog post. This flexibility allows you to choose how you want your audience to engage with your content on LinkedIn.


Conclusion

In this tutorial, we explored how to automate posting new blog articles to LinkedIn using Pabbly Connect. By following the steps outlined, you can streamline your blogging process and enhance your online presence effortlessly. This integration not only saves time but also ensures that your audience on LinkedIn is consistently updated with your latest content.

Ensure you check out Pabbly Connect to create business automation workflows and reduce manual tasks. Pabbly Connect currently offer integration with 2,000+ applications.

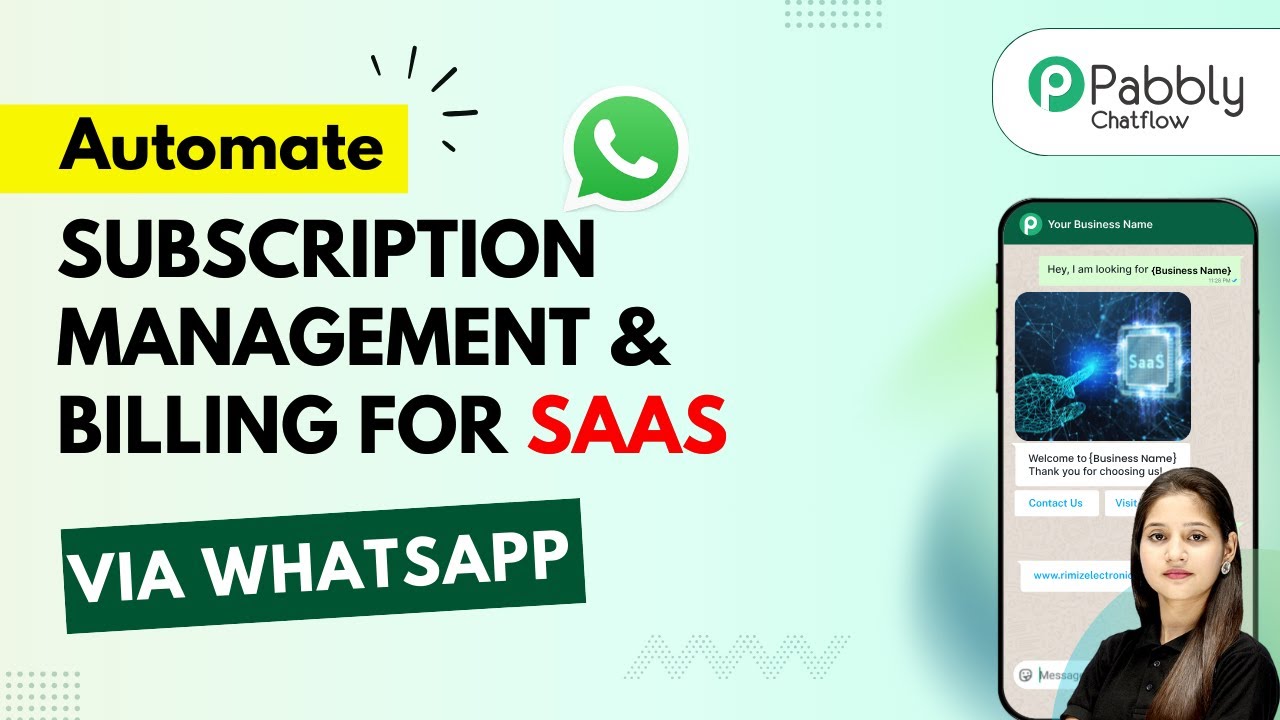
Automate Subscription Management and Billing via WhatsApp for SaaS Companies with Pabbly Chatflow

Learn how to automate subscription management and billing via WhatsApp for SaaS companies using Pabbly Chatflow with this step-by-step tutorial. Implement professional chat automation that answers common questions, qualifies leads, and books appointments without human intervention.

Watch Step By Step Video Tutorial Below


1. Accessing Pabbly Chatflow for Subscription Management

To automate subscription management and billing for SaaS companies via WhatsApp, start by accessing Pabbly Chatflow. Open a new tab and search for Pabbly.com/chatflow. This platform provides an all-in-one solution for automating WhatsApp messages and responses.

Once on the Pabbly Chatflow page, you have two options: sign in if you are an existing user or sign up to get 100 free credits. After signing in, navigate to the Pabbly Chatflow dashboard where you can manage your WhatsApp numbers and access various features.


2. Creating Your WhatsApp Chatbot with Pabbly Chatflow

In this section, you will create a WhatsApp chatbot using Pabbly Chatflow. Click on the ‘Add Flow’ button to start creating your chatbot. Name your flow appropriately, such as ‘Automate Subscription Management and Billing for SaaS via WhatsApp.’ This name will help you identify your flow later.

  • Select the trigger event for your chatbot.
  • Choose ‘Template Selected’ as the trigger.
  • Select the template you created for subscription management.

After selecting the template, your chatbot will be configured to respond to users who interact with your WhatsApp messages. This setup is crucial for ensuring automated responses for subscription inquiries.


3. Creating a Template in Pabbly Chatflow

Next, you will create a WhatsApp message template in Pabbly Chatflow. Navigate to the template section and click on the ‘Add Template’ button. Ensure you categorize your template correctly, and choose a name that is simple and lowercase.

  • Select the language for your template.
  • Choose the template type, such as text.
  • Add quick replies for user interaction, like ‘Renew Subscription’ and ‘Upgrade Plan.’

Once your template is created, submit it for approval. This process will allow your users to receive structured messages that prompt them for actions regarding their subscriptions.


4. Building the Chatbot Flow in Pabbly Chatflow

Now it’s time to build the actual flow of your WhatsApp chatbot using Pabbly Chatflow. Start by dragging and dropping elements to create your desired conversation structure. Begin with a message that welcomes users and asks how they would like to manage their subscriptions.

Next, add buttons that allow users to select their subscription plans. For each plan option, create a corresponding message that asks for the user’s full name and billing address. This ensures that you collect the necessary information for processing their subscriptions.

Ask for the user’s full name. Request the billing address for the subscription. Set tags for subscription renewals to help with organization.

Finally, connect all elements in your flow to ensure a seamless user experience. This structure will help maintain engagement and facilitate easy processing of subscription requests.


5. Finalizing Your WhatsApp Chatbot in Pabbly Chatflow

In the last step, you will finalize your WhatsApp chatbot using Pabbly Chatflow. After ensuring all elements are connected correctly, save your flow to make it active. This will allow the chatbot to automatically respond to user queries about subscription management and billing.

To enhance user experience, provide a payment link in the final message of your flow. This will enable users to complete their subscription renewals directly through WhatsApp. Make sure to test your chatbot to confirm that all functionalities are working as intended.

With your WhatsApp chatbot now active, users will receive instant responses regarding their subscription inquiries, making management much easier for your SaaS business. This automation is only possible through the capabilities of Pabbly Chatflow.


Conclusion

By following this tutorial, you have successfully automated subscription management and billing via WhatsApp for your SaaS company using Pabbly Chatflow. This integration streamlines user interactions and enhances customer satisfaction, ensuring efficient management of subscriptions.

Ensure you check out Pabbly Connect to create business automation workflows and reduce manual tasks. Pabbly Connect currently offer integration with 2,000+ applications.

How to Create Salesforce Contacts from Typeform Responses Using Pabbly Connect

Learn how to integrate Salesforce with Typeform using Pabbly Connect to automate contact creation from form responses. Discover hidden automation capabilities within your existing tools. This guide shows you how to connect your essential applications and permanently eliminate redundant manual processes.

Watch Step By Step Video Tutorial Below


1. Accessing Pabbly Connect for Integration

To create Salesforce contacts from Typeform responses, you first need to access Pabbly Connect. Begin by opening a new browser tab and navigating to the Pabbly Connect landing page by typing Pabbly.com/connect.

Once on the landing page, you will see options to either sign in or sign up for free. If you are a new user, click on the sign up for free button to get started with 100 free tasks monthly. Existing users should click sign in to access their accounts and utilize Pabbly Connect for automation.


2. Creating a Workflow in Pabbly Connect

After signing in, the next step is to create a workflow in Pabbly Connect. Click on the create workflow button to start. You will be prompted to choose between the new and classic workflow builders. For this tutorial, select the classic option for a familiar interface.

  • Enter a name for your workflow, such as Create Salesforce Contacts from Typeform Responses.
  • Select an existing folder or create a new one for your workflow.
  • Click on the create button to finalize your workflow setup.

Once the workflow is created, you will land on the workflow window where you can set up triggers and actions using Pabbly Connect. This is where the automation process begins.


3. Setting Up the Trigger with Typeform

To begin the automation, the first step is to set up the trigger using Typeform in Pabbly Connect. Search for and select Typeform as your trigger application. Choose New Entry as the trigger event, and click on connect.

You will then be given two options: to add a new connection or select an existing one. If you are new, click on add a new connection and then click on connect with Typeform. Accept the permissions requested by Pabbly to complete the connection.

  • Select the Typeform you wish to connect.
  • Click on save and send test request to test the connection.
  • Ensure that the simple response is disabled to avoid errors.

After the test submission, you will see that Pabbly Connect has captured the response successfully, allowing you to use this data in the next steps.


4. Creating a Salesforce Contact from Typeform Responses

With the trigger set, the next step is to create a contact in Salesforce using the data captured from Typeform. In Pabbly Connect, search for and select Salesforce as your action application. Choose Create a Contact as the action event and click on connect.

Similar to the previous connection, you will need to add a new connection to Salesforce. Click on connect with Salesforce and allow the necessary permissions. After connecting, you will need to map the fields from Typeform to Salesforce.

Map the first name, last name, email, phone number, and company name from the Typeform response. For lead source, enter Web and leave other fields blank unless necessary. Click on save and send test request to create the contact.

Upon successful completion, you will receive a confirmation that a new contact has been created in Salesforce, reflecting the details provided in the Typeform response.


5. Testing the Integration for Real-Time Updates

To ensure everything is functioning correctly, it’s essential to test the integration. Open the Typeform you set up earlier and fill it out with new test data. After submitting the form, check your Salesforce account to see if the new contact appears.

If the integration is successful, you will see a new contact created in Salesforce with the details you entered in Typeform. This confirms that Pabbly Connect is working seamlessly to automate the process.

From now on, every time a new entry is submitted via Typeform, a corresponding contact will be created in Salesforce automatically, enhancing your workflow efficiency.


Conclusion

In this tutorial, we explored how to create Salesforce contacts from Typeform responses using Pabbly Connect. By following these steps, you can automate your lead management process effectively. With Pabbly Connect, you can streamline your workflows and save valuable time.

Ensure you check out Pabbly Connect to create business automation workflows and reduce manual tasks. Pabbly Connect currently offer integration with 2,000+ applications.

How to Add Facebook Leads to Notion Automatically Using Pabbly Connect

Learn how to seamlessly integrate Facebook Leads with Notion using Pabbly Connect. Follow our step-by-step guide for automatic lead management. Develop expertise in application integration and learn how to design streamlined automation workflows using proven, simplified approaches.

Watch Step By Step Video Tutorial Below


1. Accessing Pabbly Connect for Integration

To begin the process of adding Facebook leads to Notion automatically, you first need to access Pabbly Connect. Simply open your browser and type in Pabbly.com/connect to reach the Pabbly Connect landing page.

Once on the landing page, you have two options: Sign In if you are an existing user or Sign Up for Free if you are new. If you choose to sign up, you will receive 100 free tasks every month to explore the application.


2. Creating a Workflow in Pabbly Connect

After signing in, you will be directed to the Pabbly Connect dashboard. Click on the Create Workflow button to start setting up your automation. You will be prompted to choose between the new workflow builder and the classic one; select the new workflow builder for a modern interface. using Pabbly Connect

  • Enter a name for your workflow, such as Add Facebook Leads to Notion Automatically.
  • Select a folder to save your workflow.
  • Click on Create to proceed.

This will open the workflow window, where you can set up triggers and actions. Triggers initiate the process, while actions define what happens as a result.


3. Setting Up Facebook Lead Ads as the Trigger

In the workflow window, click on the Add Trigger button and search for Facebook Lead Ads. Select it as your trigger application and choose New Lead Instant as the trigger event.

Next, click on the Connect button. If you have previously connected your Facebook account, select it; otherwise, choose Add a New Connection. Follow the prompts to connect your Facebook Lead Ads account to Pabbly Connect.

  • Select your Facebook page from the dropdown.
  • Choose the lead ad form you want to connect.
  • Click Save and Send Test Request to capture the lead details.

This step ensures that your Facebook leads are captured in real-time, ready to be sent to Notion.


4. Adding Notion as an Action Step

After setting up the trigger, it’s time to add Notion as the action step. Click on Add New Action Step, search for Notion, and select it. Choose Create Database Item as the action event.

Click on the Connect button to establish a connection between Pabbly Connect and Notion. You will need to grant permissions to access specific pages in Notion. Select the page where you want to store lead details, such as Lead Details, and allow access.

Map the fields from the Facebook lead to the corresponding fields in Notion. For example, map first name, last name, email, and phone number. Click Save and Send Test Request to finalize the action.

This step allows Pabbly Connect to add new leads directly into your Notion database automatically.


5. Testing the Integration

To ensure everything is set up correctly, you need to test the integration. Go back to the Facebook Lead Ads testing tool and create a test lead. After submitting the lead form, return to Pabbly Connect to check if the lead details have been captured.

Once you verify that the lead information has been captured successfully, refresh your Notion database to see if the new lead appears. This confirms that your automation is functioning as expected.

Now, every time a new lead is generated from Facebook Lead Ads, it will automatically be added to your Notion database, streamlining your lead management process.


Conclusion

In this tutorial, we have demonstrated how to integrate Facebook Leads with Notion using Pabbly Connect. This automation not only saves time but also enhances lead management efficiency. By following these steps, you can easily set up your own automated workflow.

Ensure you check out Pabbly Connect to create business automation workflows and reduce manual tasks. Pabbly Connect currently offer integration with 2,000+ applications.

Introducing GPT-5o Inside Pabbly Connect for Your AI Automations

Learn how to leverage GPT-5o with Pabbly Connect for creating powerful AI automations. Step-by-step guide on integrating various applications seamlessly. Implement the precise methodologies leading organizations use to automate repetitive tasks, illustrated with practical examples designed for immediate application.

Watch Step By Step Video Tutorial Below


1. Introduction to GPT-5o and Pabbly Connect

In this section, we will explore how Pabbly Connect integrates with GPT-5o to enhance AI automations. Pabbly Connect allows users to create powerful workflows that utilize the capabilities of GPT-5o, making automations faster and more efficient.

The integration of GPT-5o within Pabbly Connect offers numerous benefits including smarter responses and enhanced accuracy. With this new model, users can streamline their processes and achieve more with less effort.


2. Setting Up Pabbly Connect for AI Automations

To begin using Pabbly Connect for your AI automations, you first need to access the platform. Start by visiting the Pabbly Connect website and signing in to your account. If you are a new user, you can easily sign up for free to explore the features available.

  • Go to Pabbly Connect and click on ‘Sign In’ or ‘Sign Up for Free’.
  • Select the ‘Create Workflow’ button to start a new automation.
  • Choose between the new or classic workflow builder based on your preference.

Once you have set up your account and chosen your workflow builder, you can begin creating automations that leverage GPT-5o’s capabilities through Pabbly Connect.


3. Creating AI YouTube SEO Automation

One of the first automations you can create with Pabbly Connect and GPT-5o is for YouTube SEO. This automation generates SEO titles, descriptions, and tags based on the video concept you provide. To set this up, follow these steps:

  • Add the video concept to your designated field in the workflow.
  • Wait for a few seconds as GPT-5o processes the information.
  • The generated title, description, and tags will be automatically added to your Google Sheets.

This integration showcases how Pabbly Connect can automate content creation tasks, saving you time and effort while ensuring quality output.


4. Generating Blog Ideas Using Pabbly Connect and GPT-5o

Another powerful automation you can create is for generating blog ideas. By using Pabbly Connect with GPT-5o, you can automate the brainstorming process based on keywords and target audience. Here’s how to set it up:

Start by defining the keywords and target audience in your workflow. Once these details are entered, GPT-5o will generate relevant blog ideas in real-time.

Input the keyword topic, niche, and target audience into the specified fields. Allow GPT-5o to process the information and generate ideas. The generated ideas will be displayed in your Google Sheets for review.

This automation effectively illustrates how Pabbly Connect can enhance your content strategy by providing instant access to creative ideas.


5. Creating SEO Audit Reports with Pabbly Connect

Using Pabbly Connect, you can also automate the generation of SEO audit reports through GPT-5o. This process involves entering the company name and website URL, which triggers the AI to generate a comprehensive report. Here’s the step-by-step guide:

Once the company details are inputted, GPT-5o will analyze the website and provide an SEO audit report link in real-time.

Enter the company name and website URL into the workflow. Wait for GPT-5o to generate the SEO report. Access the report link provided by the automation.

This integration demonstrates how Pabbly Connect can facilitate thorough analysis and reporting, enhancing your SEO efforts.


Conclusion

In conclusion, leveraging Pabbly Connect with GPT-5o empowers users to create dynamic and efficient AI automations. From generating YouTube SEO content to creating blog ideas and SEO audit reports, the possibilities are vast. By following the steps outlined in this tutorial, you can harness the power of AI to streamline your workflows and enhance productivity.

Ensure you check out Pabbly Connect to create business automation workflows and reduce manual tasks. Pabbly Connect currently offer integration with 2,000+ applications.

Automatically Post Blog Updates to Twitter from WordPress Using Pabbly Connect

Learn how to automatically post blog updates from WordPress to Twitter using Pabbly Connect with this detailed step-by-step tutorial. Explore systematic approaches to creating efficient automation solutions that convert technical concepts into practical, implementable instructions.

Watch Step By Step Video Tutorial Below


1. Accessing Pabbly Connect for Integration

To automatically post blog updates from WordPress to Twitter, you first need to access Pabbly Connect. This powerful automation platform allows you to create workflows without any coding skills. Simply visit the Pabbly website and sign in to your account.

Once logged in, navigate to the Pabbly Connect dashboard. Here, you can create a new workflow that will connect your WordPress blog to your Twitter account. Click on the ‘Create Workflow’ button to begin setting up your automation.


2. Creating a Workflow to Post Blog Updates

In this section, you will create a workflow in Pabbly Connect specifically designed for posting updates. After selecting ‘Create Workflow’, name your workflow as ‘Automatically Post Blog Updates to Twitter from WordPress’. Choose the appropriate folder for your workflow.

  • Name the workflow appropriately.
  • Select the correct folder for organization.
  • Click on ‘Create’ to finalize the workflow.

After creating the workflow, you will see two options: Trigger and Action. The trigger will be set to WordPress, while the action will connect to Twitter. This setup ensures that every time a new post is published on WordPress, it will automatically be tweeted on Twitter.


3. Setting Up the Trigger from WordPress

To set up the trigger in Pabbly Connect, select WordPress as the trigger application. The specific event we want to trigger is ‘New Post Published’. This means every time a new blog post is created, it will initiate the workflow.

Next, you will need to connect Pabbly Connect with your WordPress account. A webhook URL will be provided, which acts as a bridge between WordPress and Pabbly Connect. Copy this URL and proceed to your WordPress dashboard.

  • Go to settings in WordPress and navigate to WP Webhooks.
  • Add the webhook URL and name it appropriately.
  • Select the post type and status as published.

After saving the settings, your WordPress account will be linked to Pabbly Connect, allowing it to send data whenever a new post is published.


4. Setting Up the Action to Post on Twitter

Now, it’s time to set up the action step in Pabbly Connect. Here, you will select Twitter as the action application. The action event will be ‘Create Tweet’. Click on connect to establish the link between Pabbly Connect and your Twitter account.

If you do not have an existing connection, you will be prompted to enter your Twitter API credentials, including Client ID and Client Secret. These can be obtained from the Twitter Developer Portal. After entering this information, authorize the application to connect.

Select the correct action event as ‘Create Tweet’. Enter the required API credentials for Twitter. Authorize the application to finalize the connection.

Once connected, you can set up the tweet message. Use dynamic mapping to pull in the blog post title and permalink from the previous response. This ensures that every new tweet will reflect the latest blog post automatically.


5. Testing the Integration and Finalizing Setup

After configuring both the trigger and action, it’s essential to test the integration in Pabbly Connect. Create a new post in your WordPress account to see if it triggers the workflow correctly. Once the post is published, check your Twitter account to verify that the tweet appears as expected.

If the test is successful, you will see the tweet reflecting the new blog post instantly. This confirms that the integration between WordPress and Twitter through Pabbly Connect is functioning as intended.

In case you encounter any issues, revisit the settings in both WordPress and Pabbly Connect to ensure everything is configured correctly. With this setup, you can now automatically post updates to Twitter every time you publish a new blog post on WordPress.


Conclusion

In this tutorial, we explored how to use Pabbly Connect to automatically post blog updates from WordPress to Twitter. By following the steps outlined, you can enhance your online presence without the hassle of manual posting. Automate your social media updates today to save time and increase engagement.

Ensure you check out Pabbly Connect to create business automation workflows and reduce manual tasks. Pabbly Connect currently offer integration with 2,000+ applications.

Automate Fitness Class Bookings and Membership Renewal via WhatsApp with Pabbly Chatflow

Learn how to automate fitness class bookings and membership renewal via WhatsApp using Pabbly Chatflow. Step-by-step guide for seamless integration. Discover practical methods for designing chat sequences that capture leads, answer questions, and guide users to the next step in your funnel.

Watch Step By Step Video Tutorial Below


1. Accessing Pabbly Chatflow for Automation

To automate fitness class bookings and membership renewal via WhatsApp, first, access Pabbly Chatflow by visiting the official website. This platform is designed to streamline your WhatsApp communications and automate responses efficiently.

Once on the Pabbly Chatflow homepage, you will see options for signing in or signing up. If you are a new user, click on the ‘Sign Up’ button to create your account and receive 100 free credits. Existing users can log in using the ‘Sign In’ option. After logging in, navigate to the Pabbly Chatflow dashboard to begin setting up your automation.


2. Setting Up Your WhatsApp Chatbot in Pabbly Chatflow

In the Pabbly Chatflow dashboard, click on the ‘Access Now’ button for the Chatflow app. This will take you to the flow builder where you can create a WhatsApp chatbot. Click on the ‘Plus Add Flow’ button to start a new flow for automating fitness class bookings. using Pabbly Connect

  • Provide a name for your bot, such as ‘Automate Fitness Class Bookings and Membership Renewal’.
  • Select the trigger event for your flow, using the ‘Keyword/Regex’ option to respond to specific user inquiries.
  • Add a list button to prompt users to choose a class type, such as Yoga, Zumba, or HIIT.

These steps will set the foundation for your WhatsApp chatbot, allowing it to respond to users automatically when they send messages related to fitness class bookings.


3. Creating the Flow for Class Bookings

After setting up the initial flow, you will need to configure how your bot interacts with users. Start by adding a message that prompts users to select a class. Use the list button feature to provide options like Yoga, Zumba, and HIIT. using Pabbly Connect

Once a user selects a class, the bot should ask for the date and time they wish to attend. Add an ‘Ask a Question’ button to capture this information, ensuring that the contact custom fields are set up to store the date and time.

  • Prompt for the user’s full name after confirming the class details.
  • Ensure the bot provides a confirmation message that includes the selected class, date, and time.

This structured interaction allows users to easily book classes through WhatsApp, making the process efficient and user-friendly.


4. Handling Membership Renewals with Pabbly Chatflow

In addition to class bookings, your WhatsApp chatbot should handle membership renewals. After collecting the user’s details, the bot should present options for either renewing their membership or making a new booking. using Pabbly Connect

Utilize the quick button feature to allow users to select their choice. Based on their selection, the bot should respond with a customized message confirming their action and providing a payment link. This ensures that users can complete their transactions smoothly.

Connect the membership renewal option to a payment processing link. Ensure the bot sends a dynamic message that includes the class name and payment details.

By integrating membership renewals into your chatbot, you can enhance user satisfaction and streamline your operations.


5. Finalizing Your Pabbly Chatflow Automation

Once you have configured all interactions within your flow, it’s crucial to save your settings. Click the ‘Save’ button to ensure that all changes are applied and your bot is ready to interact with users.

Your final flow should allow users to seamlessly book fitness classes and renew memberships via WhatsApp, with the bot providing necessary information and payment links dynamically. This automation will save you time and enhance customer engagement.

Remember, the entire process can be done without any coding skills, thanks to the user-friendly interface of Pabbly Chatflow.


Conclusion

In conclusion, automating fitness class bookings and membership renewals via WhatsApp is made easy with Pabbly Chatflow. This platform allows for seamless integration and efficient communication, enhancing user experience and operational efficiency.

Ensure you check out Pabbly Connect to create business automation workflows and reduce manual tasks. Pabbly Connect currently offer integration with 2,000+ applications.

How to Sync New Stripe Orders with Google Sheets Using Pabbly Connect

Learn how to sync new Stripe orders with Google Sheets using Pabbly Connect. This detailed tutorial guides you through the exact steps for seamless integration.

Watch Step By Step Video Tutorial Below


1. Accessing Pabbly Connect for Integration

To begin syncing new Stripe orders with Google Sheets, you need to access Pabbly Connect. Start by navigating to the Pabbly Connect homepage by entering ‘Pabbly.com/connect’ in your browser.

Once on the homepage, you will see options to either sign in or sign up. If you’re new to Pabbly Connect, click on ‘Sign Up Free’ to create an account and receive 100 free tasks monthly. Existing users should click on ‘Sign In’ to access their account.


2. Creating a Workflow in Pabbly Connect

After signing in, you will be directed to the Pabbly Apps window. From here, click on Pabbly Connect to access the dashboard. To create a new workflow, click on the ‘Create Workflow’ button located at the top right corner.

  • Select the workflow builder (choose between the new beta version or classic).
  • Name your workflow, e.g., ‘Sync New Stripe Orders with Google Sheets’.
  • Select a folder to save your workflow.

Once you have set up your workflow, click on the ‘Create’ button to proceed. This initiates the automation process where you will set up the trigger and action steps.


3. Setting Up the Trigger for Stripe Payments

In this step, you will configure the trigger that will activate the workflow. Click on the ‘Add Trigger’ button and select Pabbly Connect as the trigger application. Choose ‘New Charge’ as the event.

After selecting the event, you will receive a webhook URL. Copy this URL, as it will be used to connect your Stripe account with Pabbly Connect. Log in to your Stripe account, navigate to the ‘Developers’ section, and select ‘Webhooks’ to set up a new webhook using the copied URL.

  • Click on ‘Add Endpoint’ in Stripe Webhooks.
  • Select ‘Charge Succeeded’ as the event to listen for.
  • Paste the webhook URL in the endpoint URL field and click ‘Create Destination’.

With the webhook set up, return to Pabbly Connect and proceed to test the connection by making a test payment in Stripe.


4. Configuring the Action Step in Google Sheets

After successfully setting up the trigger, it’s time to configure the action step that will add new order details to Google Sheets. In Pabbly Connect, click on ‘Add Action’ and select Google Sheets as the action application. Choose ‘Add a New Row’ as the event.

Next, connect your Google Sheets account by clicking ‘Sign in with Google’. Select your account and allow access to Pabbly Connect. Once connected, select the spreadsheet where you want to store the order details.

Choose the spreadsheet you created for Stripe payments. Select the specific sheet within the spreadsheet. Map the fields such as name, email, amount, and payment method from the Stripe response.

After mapping the required fields, click on ‘Save and Send Test Request’ to finalize the action. Verify that the new order details appear in your Google Sheets.


5. Finalizing the Integration and Testing

With both the trigger and action steps configured, your integration between Stripe and Google Sheets via Pabbly Connect is nearly complete. To ensure everything is working correctly, conduct a test payment in your Stripe account.

Check your Google Sheets to confirm that the order details have been added as a new row. If the details appear correctly, your automation is functioning as intended. You can now seamlessly sync new Stripe orders with Google Sheets using Pabbly Connect.

In summary, this integration allows you to automate the process of recording new Stripe orders in Google Sheets, enhancing efficiency and accuracy in your business operations.


Conclusion

By following this tutorial, you have learned how to sync new Stripe orders with Google Sheets using Pabbly Connect. This powerful integration streamlines your order management process, ensuring that every payment is recorded accurately and efficiently.

Ensure you check out Pabbly Connect to create business automation workflows and reduce manual tasks. Pabbly Connect currently offer integration with 2,000+ applications.

Utilizing Pabbly Connect not only saves time but also minimizes the risk of errors in data entry. Now you can focus on growing your business while Pabbly Connect handles the automation for you.