Integrating Razorpay Payments into Zoho CRM with Pabbly Connect

Learn how to seamlessly integrate Razorpay payments into Zoho CRM using Pabbly Connect with our step-by-step tutorial. Automate your payment processes today! Eliminate manual repetitive tasks from your workflow. Discover proven automation methods with intuitive steps designed for efficiency-minded professionals.

Watch Step By Step Video Tutorial Below


1. Accessing Pabbly Connect for Integration

To integrate Razorpay payments into Zoho CRM, you need to access Pabbly Connect. Start by navigating to pabyt.com/connect in your web browser. This will take you to the Pabbly Connect homepage, where you can sign up or log in.

Once logged in, you will see the dashboard of Pabbly Connect. This is where you will create a workflow to automate the process of adding Razorpay payments to Zoho CRM. Click on the ‘Create Workflow’ button to get started.


2. Creating a Workflow in Pabbly Connect

In the workflow creation process, select the beta version for a modern approach. Name your workflow as ‘Add Razorpay Payments into Zoho CRM’ and choose a folder to save it. You can create new folders as needed to organize your workflows efficiently. using Pabbly Connect

  • Select the beta version for flexibility.
  • Name your workflow appropriately.
  • Choose or create a folder for organization.

After setting up your workflow, you will need to define a trigger and action. The trigger will be a payment captured from Razorpay, which will initiate the process of creating a contact in Zoho CRM.


3. Setting Up the Trigger for Razorpay Payments

To set up the trigger, click on the ‘Add Trigger’ button in Pabbly Connect. Choose Razorpay as your application and select ‘Payment Captured’ as the event. This will allow Pabbly Connect to listen for new payments made through Razorpay.

Next, you will receive a webhook URL. Copy this URL and go to your Razorpay account. Under the ‘Developers’ section, find the ‘Webhooks’ option to create a new webhook. Paste the copied URL into the webhook setup dialogue and select ‘Payment Captured’ as the active event.


4. Mapping Data to Create a Contact in Zoho CRM

After setting up the webhook, return to Pabbly Connect to test the trigger. Make a test payment through Razorpay to generate the required data. You will see the payment details appear in Pabbly Connect, confirming that the trigger is working.

Now, add an action step to create a contact in Zoho CRM. Select Zoho CRM as your application and ‘Create Contact’ as the event. You’ll need to connect your Zoho account by entering the domain of your Zoho account. This step ensures that Pabbly Connect can send data to Zoho CRM.

  • Select Zoho CRM for the action step.
  • Map the data fields such as first name, last name, and email from the Razorpay payment details.
  • Save the action to complete the setup.

After mapping the data, you can test the action to ensure that a new contact is created in Zoho CRM whenever a payment is captured in Razorpay.


5. Testing the Automation

Now that your workflow is set up, it’s time to test the automation. Make another test payment through Razorpay to see if a new contact is created in Zoho CRM. Refresh your Zoho CRM account to verify that the details of the new contact appear as expected.

This step confirms that Pabbly Connect successfully integrates Razorpay payments into Zoho CRM, automating the entire process. You should see the contact with the name, email, and phone number populated correctly in your Zoho CRM account.


Conclusion

By following these steps, you can easily integrate Razorpay payments into Zoho CRM using Pabbly Connect. This automation saves time and ensures that your customer data is always up to date, enhancing your CRM capabilities.

Ensure you check out Pabbly Connect to create business automation workflows and reduce manual tasks. Pabbly Connect currently offer integration with 2,000+ applications.

How to Send WhatsApp Booking Details for Jotform Leads Automatically Using Pabbly Connect

Learn how to automate sending WhatsApp booking details for Jotform leads with Pabbly Connect. Step-by-step guide for seamless integration. Learn to create powerful connections between your critical applications without requiring specialized programming knowledge or extensive technical background.

Watch Step By Step Video Tutorial Below


1. Introduction to Pabbly Connect for WhatsApp Integration

Pabbly Connect is an automation platform that facilitates the integration of various applications, including Jotform and WhatsApp. In this tutorial, we will explore how to send WhatsApp booking details for Jotform leads automatically using Pabbly Connect. This integration will save time by automating the process of sending booking details.

To begin, you need to create an account on Pabbly Connect. Once logged in, you can access the dashboard where you will set up your automation. The first step is to create a new workflow that will connect Jotform with WhatsApp.


2. Setting Up Your Pabbly Connect Workflow

To set up your workflow in Pabbly Connect, start by clicking on the plus icon to create a new folder. This helps keep your dashboard organized. Name your folder appropriately, and then click on ‘Create Workflow’ to start.

  • Click on the plus icon to create a new folder.
  • Name your workflow as ‘Send WhatsApp Booking Details for Jotform Leads Automatically’.
  • Select the new beta version of the workflow builder.

After naming your workflow, you will be directed to the workflow setup page. Here, you will select Jotform as your trigger application, specifically choosing the event ‘New Response Received’ to capture booking details automatically.


3. Connecting Jotform to Pabbly Connect

In this step, you will connect your Jotform account to Pabbly Connect. Log into your Jotform account and create a form that collects booking details. Once your form is ready, navigate to the settings and select the integrations option.

Within the integrations, search for webhooks and paste the webhook URL provided by Pabbly Connect. After completing the integration, your Jotform will be set up to send data to Pabbly Connect whenever a new response is received.

  • Copy the webhook URL from Pabbly Connect.
  • Paste it into the Jotform integrations settings.
  • Complete the integration to finalize the setup.

Once the webhook is active, fill out a test form to capture the response in Pabbly Connect. This will allow you to see the data that will be sent to WhatsApp.


4. Integrating WhatsApp with Pabbly Connect

Now that Jotform is connected, the next step is to integrate WhatsApp using Pabbly Connect. In your workflow, click on the plus icon to add a new action setup and select WhatsApp Cloud API as your action application.

Choose the action event ‘Send Template Message’ and connect your WhatsApp account by entering the required credentials, including the token and phone number ID. These details can be obtained from the Meta for Developers page.

Select ‘Send Template Message’ as the action event. Enter the token, phone number ID, and WhatsApp business account ID. Save the connection once all details are filled.

After saving the connection, you will need to create a template message that will be sent via WhatsApp. This template will include dynamic fields that map to the data received from Jotform.


5. Sending WhatsApp Messages Automatically

With everything set up, you can now send WhatsApp messages automatically using Pabbly Connect. Map the fields from the Jotform response to the WhatsApp message template. This includes the receiver’s phone number and any other relevant details.

Finally, click on ‘Save and Send Test Request’ to test the integration. You should receive a WhatsApp message containing the booking details filled in the Jotform. This confirms that your automation is working effectively.

To summarize the steps taken:

Map the receiver’s phone number and other fields to the template. Click on ‘Save and Send Test Request’. Check your WhatsApp for the received message.

This is how you can automate the process of sending WhatsApp booking details for Jotform leads using Pabbly Connect. If you want to create similar automations, follow the steps outlined in this tutorial.


Conclusion

In this tutorial, we successfully demonstrated how to use Pabbly Connect to send WhatsApp booking details for Jotform leads automatically. By following the detailed steps, you can streamline your booking process and enhance your communication with clients.

Ensure you check out Pabbly Connect to create business automation workflows and reduce manual tasks. Pabbly Connect currently offer integration with 2,000+ applications.

Utilizing Pabbly Connect not only saves time but also ensures that your leads receive timely updates through WhatsApp. Start automating your workflows today!

How to Create Contacts in Salesforce from Facebook Lead Ads Using Pabbly Connect

Learn how to create contacts in Salesforce from Facebook Lead Ads using Pabbly Connect with this detailed step-by-step tutorial. Follow this definitive guide to creating powerful automated workflows with straightforward, efficiency-focused solutions that save valuable time.

Watch Step By Step Video Tutorial Below


1. Accessing Pabbly Connect for Integration

To create contacts in Salesforce from Facebook Lead Ads, you first need to access Pabbly Connect. Start by visiting Pabbly.com/connect in your web browser. This will take you to the homepage of Pabbly Connect, where you can sign in or create a new account.

If you are a new user, click on the ‘Sign Up Free’ button to get started. Existing users can simply sign in. Once logged in, navigate to the Pabbly Connect dashboard where you can create workflows to automate your tasks.


2. Creating a Workflow in Pabbly Connect

After accessing Pabbly Connect, the next step is to create a new workflow. Click on the ‘Create Workflow’ button located at the top right corner of the dashboard. A dialog box will appear, asking you to name your workflow.

  • Enter a name for your workflow, such as ‘Create Contacts from Facebook Lead Ads’.
  • Select a folder to save your workflow. You can create a new folder if necessary.

Once you have named your workflow and selected a folder, click on the ‘Create’ button to proceed. This will take you to the workflow builder where you can set up triggers and actions for your automation.


3. Setting Up Triggers in Pabbly Connect

In this section, you will set up the trigger for your workflow using Pabbly Connect. Click on the ‘Add Trigger’ button. Since you are using Facebook Lead Ads, select it as your trigger application and choose ‘New Lead Instant’ as the event.

Next, click on ‘Connect’ to establish a connection with Facebook Lead Ads. If you haven’t connected before, select ‘Add a New Connection’ and log in to your Facebook account. Once connected, choose your Facebook page and the lead generation form you want to use.

  • Select your Facebook page (e.g., ‘The Yoga Nest’).
  • Choose the lead form you created, such as ‘Sign Up Form New’.

After making these selections, click on ‘Save and Send Test Request’. This will prepare your workflow to capture leads from Facebook.


4. Mapping Data to Create Contacts in Salesforce

With your trigger set, the next step is to add an action to create contacts in Salesforce using Pabbly Connect. Click on ‘Add Action’ and choose Salesforce as your action application. Select ‘Create Contact’ as the event.

Similar to the trigger setup, click on ‘Connect’ to link your Salesforce account. If you haven’t connected before, select ‘Add a New Connection’ and log in to your Salesforce account. Once connected, you will be prompted to map the data from your Facebook lead.

Map the first name and last name from the lead data. Map the email address and phone number accordingly.

After mapping the required fields, click on ‘Save and Send Test Request’ to create a contact in Salesforce using the lead information gathered from Facebook.


5. Testing the Integration with Pabbly Connect

Now that you have set up your workflow, it’s time to test the integration using Pabbly Connect. Go to the Facebook Lead Ads testing tool to generate a test lead. Fill in the required fields and submit the form.

After submitting, return to Pabbly Connect and refresh the workflow to see if the new contact was created in Salesforce. You should see the new contact information populated in your Salesforce account, confirming that the integration works seamlessly.

With this, you have successfully set up an automated process to create contacts in Salesforce from Facebook Lead Ads using Pabbly Connect. This integration saves time and ensures that no leads are missed in your business operations.


Conclusion

In conclusion, using Pabbly Connect to create contacts in Salesforce from Facebook Lead Ads automates the lead management process effectively. By following these detailed steps, you can ensure that every new lead is captured and added as a contact in Salesforce without manual intervention. This integration enhances your workflow and improves efficiency in managing leads.

Ensure you check out Pabbly Connect to create business automation workflows and reduce manual tasks. Pabbly Connect currently offer integration with 2,000+ applications.

How to Track WooCommerce Sales Orders in Google Sheets Automatically Using Pabbly Connect

Learn how to automatically track WooCommerce sales orders in Google Sheets using Pabbly Connect. Follow our step-by-step tutorial for seamless integration. This comprehensive guide reveals exactly how to connect your applications and automate repetitive tasks — accessible for professionals of all technical backgrounds.

Watch Step By Step Video Tutorial Below


1. Accessing Pabbly Connect for WooCommerce Integration

To track WooCommerce sales orders in Google Sheets automatically, you need to access Pabbly Connect. Start by opening your browser and navigating to the Pabbly Connect landing page by typing ‘Pabbly.com/connect’. This platform is crucial for creating seamless integrations between WooCommerce and Google Sheets.

Once you reach the landing page, you will see options for signing in or signing up. If you’re new, click on ‘Sign up for free’ to get started. Existing users can click ‘Sign in’ to access their account. After logging in, select ‘Pabbly Connect’ to begin setting up your workflow for tracking sales orders from WooCommerce to Google Sheets.


2. Creating a Workflow in Pabbly Connect

After accessing Pabbly Connect, the next step is to create a new workflow. Click on the ‘Create Workflow’ button. You will be prompted to choose between the new and classic workflow builders. For this tutorial, select the new workflow builder as it is more flexible and user-friendly.

Now, name your workflow as ‘Track WooCommerce Sales Orders in Google Sheets Automatically’ and choose a folder to save it, such as ‘Automations’. Click on the ‘Create’ button to open the workflow window, where you will set up the trigger and action for your integration.

  • Click on ‘Add Trigger’.
  • Search for and select ‘WooCommerce’.
  • Choose ‘New Order Created’ as the trigger event.

This setup will allow Pabbly Connect to listen for new orders in WooCommerce, which will then be processed in Google Sheets.


3. Setting Up WooCommerce for Pabbly Connect

To establish a connection between WooCommerce and Pabbly Connect, you need to copy the webhook URL provided after setting the trigger. Open your WooCommerce account, navigate to the settings, and then to the ‘Advanced’ tab to find ‘Webhooks’.

Click on ‘Add Webhook’ and fill in the necessary fields: name it ‘New Order’, set the status to active, and for the topic, select ‘Order Created’. Paste the copied webhook URL into the delivery URL field. Finally, click ‘Save Webhook’ to complete the setup. This step ensures that WooCommerce sends order data to Pabbly Connect whenever a new order is placed.

  • Name: New Order
  • Status: Active
  • Topic: Order Created

This configuration allows Pabbly Connect to receive real-time order information from WooCommerce.


4. Capturing Order Details in Pabbly Connect

Once your webhook is set up, you need to capture the new order details in Pabbly Connect. Click on ‘Recapture Webhook Response’ to test the connection. To do this, go to your WooCommerce store and place a test order.

After placing the order, return to Pabbly Connect to see if the webhook response has been captured. You should see all the order details, including order number, customer information, and total amount. This data will be used to populate your Google Sheets automatically.

Verify that the order details are accurately displayed. Ensure that all fields match your Google Sheets columns.

With these details captured, you are now ready to send this information to Google Sheets through Pabbly Connect.


5. Adding Order Details to Google Sheets

To send the captured order details to Google Sheets, click on ‘Add New Action Step’ in Pabbly Connect and select ‘Google Sheets’ as your action application. Choose ‘Add New Row’ as the action event and connect your Google Sheets account.

Sign in with your Google account and allow Pabbly Connect the necessary permissions to access your Google Sheets. Select the spreadsheet you want to use, such as ‘Payment Tracking’, and choose the appropriate sheet (like ‘Sheet1’). Now, map the fields from the WooCommerce order to the corresponding columns in Google Sheets.

Map Order ID, Customer Name, Email, Address, City, Postcode, Quantity, and Total Amount. Click on ‘Save and Send Test Request’ to verify the integration.

After successfully mapping and testing, your Google Sheets will automatically update with new WooCommerce orders, streamlining your sales order management process.


Conclusion

In this tutorial, we demonstrated how to track WooCommerce sales orders in Google Sheets automatically using Pabbly Connect. By following the steps outlined, you can easily integrate these applications and manage your sales orders efficiently. Automating this process saves time and enhances productivity in your business.

Ensure you check out Pabbly Connect to create business automation workflows and reduce manual tasks. Pabbly Connect currently offer integration with 2,000+ applications.

How to Create Tasks in HubSpot CRM from Facebook Lead Ads Using Pabbly Connect

Learn how to automate task creation in HubSpot CRM from Facebook Lead Ads using Pabbly Connect in this detailed step-by-step tutorial. This comprehensive guide reveals exactly how to connect your applications and automate repetitive tasks — accessible for professionals of all technical backgrounds.

Watch Step By Step Video Tutorial Below


1. Accessing Pabbly Connect for Integration

To create tasks in HubSpot CRM from Facebook Lead Ads, you first need to access Pabbly Connect. Open your browser and go to pabby.com/connect. This platform is essential for automating your workflow between Facebook and HubSpot.

Once on the homepage, you will see options to sign in or sign up. If you are a new user, click on ‘Sign Up Free’ to receive 100 free tasks every month. Existing users can simply sign in to their accounts.


2. Creating a Workflow in Pabbly Connect

After signing in, you will be directed to your Pabbly apps window. Here, select Pabbly Connect to create a workflow for integrating Facebook Lead Ads with HubSpot CRM. Click on the ‘Create Workflow’ button in the top right corner.

  • Choose the beta version for a modern and flexible interface.
  • Name your workflow, such as ‘Create Task in HubSpot CRM from Facebook Lead Ads’.
  • Select the appropriate folder for organization.

Once your workflow is named and the folder is selected, click ‘Create’ to proceed. This action sets the foundation for your automation process.


3. Setting Up the Trigger in Pabbly Connect

In this step, you will set up the trigger that initiates the workflow when a new lead is generated from Facebook Lead Ads. Click on the ‘Add Trigger’ button and select Facebook Lead Ads as the trigger application. using Pabbly Connect

Choose the event as ‘New Lead Instant’, then connect to your Facebook account. If your Facebook account is not already connected, select ‘Add a New Connection’. You will need to log in to your Facebook account to establish this connection.

  • Select your Facebook page, e.g., ‘Prime Properties’.
  • Choose the lead form you have created.

After selecting the page and form, click ‘Save and Send Test Request’ to ensure the trigger is set correctly. This step prepares Pabbly Connect to receive lead data.


4. Creating a Task in HubSpot CRM

Now that the trigger is set, the next step is to create a task in HubSpot CRM using the lead details captured from Facebook Lead Ads. Click on ‘Add Action’ and choose HubSpot CRM as the action application. using Pabbly Connect

Select ‘Create Task’ as the action event. Again, you will need to connect to your HubSpot account. If it’s not connected, select ‘Add a New Connection’ and log into your HubSpot account. Ensure you are logged in to simplify the connection process.

Set the task subject as ‘Follow Up with’ followed by the lead’s name. Map the lead details such as email, phone number, and address into the task body.

After filling in the required fields, click ‘Save and Send Test Request’ to create the task in HubSpot CRM. This confirms that your automation workflow is functioning properly.


5. Testing the Integration

To verify that everything is working correctly, you will need to test the integration by generating a test lead in your Facebook Lead Ads. Use the Leads Testing Tool by Meta to create a test lead.

Enter dummy details such as property type, first name, last name, email, and phone number, then submit the lead. After submitting, check your HubSpot CRM to see if the task has been created successfully.

Refresh your HubSpot CRM account, and you should see a new task with the details you provided in the lead. This confirms that Pabbly Connect has effectively integrated Facebook Lead Ads with HubSpot CRM.


Conclusion

In conclusion, using Pabbly Connect to create tasks in HubSpot CRM from Facebook Lead Ads streamlines your workflow and ensures no lead goes unattended. By following these steps, you can automate the task creation process efficiently.

Ensure you check out Pabbly Connect to create business automation workflows and reduce manual tasks. Pabbly Connect currently offer integration with 2,000+ applications.

How to Connect Website Forms to Salesforce CRM Using Pabbly Connect

Learn how to integrate website forms with Salesforce CRM using Pabbly Connect in this step-by-step tutorial. Automate your lead management effortlessly! Follow this definitive guide to creating powerful automated workflows with straightforward, efficiency-focused solutions that save valuable time.

Watch Step By Step Video Tutorial Below


1. Access Pabbly Connect to Get Started

To connect website forms to Salesforce CRM, the first step is accessing Pabbly Connect. Open your browser and go to the Pabbly Connect landing page by typing Pabbly.com/connect.

Once on the landing page, you have the option to sign in or sign up for free. If you are a new user, click on ‘Sign up for free’ to receive 100 free tasks each month. If you’re an existing user, simply click ‘Sign in’ to access your account.


2. Create a New Workflow in Pabbly Connect

After logging into Pabbly Connect, click on the ‘Create Workflow’ button. This action will prompt you to choose between the new workflow builder and the classic one. For this tutorial, select the new workflow builder for a modern experience.

Next, name your workflow as ‘Connect Website Forms to Salesforce CRM’ and choose a folder for organization. Click ‘Create’ to proceed to the workflow window, which is crucial for setting up your automation.


3. Set Up Trigger for Website Forms

In the workflow window of Pabbly Connect, click on the ‘Add Trigger’ button. Search for and select ‘Elementor’ as your trigger application since it is the form tool you are using for your website.

Choose ‘New Form Submission’ as the trigger event, and click ‘Connect’. Pabbly Connect will generate a webhook URL. Copy this URL, as it will be used to link your Elementor form to Pabbly Connect.

  • Open your Elementor form and edit it.
  • Navigate to ‘Actions After Submit’ in the form settings.
  • Add a new action by selecting ‘Webhook’ and paste the copied URL.

Once you have pasted the webhook URL, click ‘Publish’ to activate the connection. Pabbly Connect will now be waiting for a webhook response, which will be captured during a test submission.


4. Perform a Test Submission

To test the connection, preview the Elementor form and fill it out with sample data. For instance, enter a name, email, phone number, and other relevant details, then click ‘Submit’. This action will trigger the webhook and send the data to Pabbly Connect.

After submission, return to your Pabbly Connect workflow to see if the response has been captured. You should see the details you entered during the test submission displayed in the workflow.


5. Create a Contact in Salesforce

Now that the trigger is working, it’s time to add an action step to create a contact in Salesforce. Click on ‘Add New Action Step’ and search for ‘Salesforce’. Select it as your action application. using Pabbly Connect

Choose ‘Create Contact’ as the action event and click ‘Connect’. You will have the option to add a new connection to Salesforce or select an existing one. If you are creating a new connection, follow the prompts to log in and allow permissions.

  • Map the fields from your Elementor form to the Salesforce contact fields.
  • Ensure that you fill in all required fields such as first name, last name, and email.
  • Click on ‘Save and Send Test Request’ to create the contact.

If successful, you will receive a confirmation response, and you can check Salesforce to verify that the new contact has been created with the details provided in the test submission.


Conclusion

In this tutorial, we demonstrated how to connect website forms to Salesforce CRM using Pabbly Connect. By following these steps, you can automate the process of adding new contacts to Salesforce effortlessly. This integration not only saves time but also enhances your lead management process.

Ensure you check out Pabbly Connect to create business automation workflows and reduce manual tasks. Pabbly Connect currently offer integration with 2,000+ applications.

How to Add Google Forms Leads to Pipedrive Using Pabbly Connect

Learn how to seamlessly integrate Google Forms leads into Pipedrive using Pabbly Connect with this step-by-step tutorial. Revolutionize your productivity approach with just a few strategic clicks. Uncover professional methods for connecting applications and creating workflows that reclaim hours of your week.

Watch Step By Step Video Tutorial Below


1. Accessing Pabbly Connect for Integration

To integrate Google Forms leads into Pipedrive, the first step is to access Pabbly Connect. You can do this by navigating to the Pabbly website and selecting the Connect option. This platform is essential for automating the process of transferring data from Google Forms to Pipedrive.

Once you’re on the Pabbly Connect homepage, you can either sign up for a new account or log in if you’re an existing user. After logging in, you will see the dashboard where you can manage your workflows. This is where you will create the automation to connect Google Forms with Pipedrive.


2. Creating a Workflow in Pabbly Connect

After accessing Pabbly Connect, the next step is to create a workflow. Click on the ‘Create Workflow’ button located at the top right corner of the dashboard. You will be prompted to choose between the new beta version and the classic version. For this tutorial, select the beta version for a more modern experience.

  • Click on the ‘Create Workflow’ button.
  • Select the beta version for better features.
  • Name your workflow, e.g., ‘Add Google Form Leads to Pipedrive’.

After naming your workflow and selecting the appropriate folder to save it in, click on the ‘Create’ button. This establishes the foundation for your automation process, which will now connect Google Forms submissions to your Pipedrive account.


3. Setting Up the Trigger in Pabbly Connect

In this section, you will set up the trigger for your workflow. Click on the ‘Add Trigger’ button and select Google Forms as the application. Choose the event as ‘New Response Received’ to capture submissions from your Google Form.

Once you have selected the trigger, Pabbly Connect will provide you with a webhook URL. Copy this URL, as it will be used to connect your Google Form to Pabbly Connect.

  • Select Google Forms as the trigger application.
  • Choose ‘New Response Received’ as the event.
  • Copy the webhook URL provided by Pabbly Connect.

This webhook URL is crucial for linking your Google Form submissions to Pabbly Connect, ensuring that every new response automatically triggers the next steps in your workflow.


4. Connecting Google Forms to Pabbly Connect

Now, navigate to your Google Form and go to the ‘Responses’ tab. Here, you will find the option to link to Google Sheets. This step is essential because it allows you to store the form responses in a spreadsheet, which Pabbly Connect can then access.

After linking your Google Form to Google Sheets, make a test submission to ensure everything is working correctly. Once the form is submitted, check the Google Sheets to confirm that the data has been recorded. This step is vital as it will serve as the data source for Pabbly Connect.

Go to the ‘Responses’ tab in your Google Form. Select ‘Link to Sheets’ and create a new spreadsheet. Submit a test response to ensure data is captured.

Once you have verified that the data appears in Google Sheets, you can proceed to the next step of connecting Google Sheets to Pabbly Connect to automate the transfer of leads to Pipedrive.


5. Adding Action to Create Leads in Pipedrive

With your Google Form and Google Sheets connected, the next step is to add an action to create a new lead in Pipedrive. In Pabbly Connect, select Pipedrive as the action application and choose the event as ‘Create Person’. using Pabbly Connect

You will need to connect your Pipedrive account by entering your API token. This allows Pabbly Connect to communicate with your Pipedrive account and create new leads based on the data submitted in your Google Form.

Select Pipedrive as the action application. Choose ‘Create Person’ as the action event. Enter your API token to connect Pipedrive.

After connecting, map the fields from your Google Form responses to the corresponding fields in Pipedrive. This ensures that when a new form submission occurs, a new lead is automatically created in your Pipedrive account with all the relevant information.


Conclusion

In this tutorial, we explored how to use Pabbly Connect to add Google Forms leads to Pipedrive seamlessly. By following the steps outlined, you can automate the process of capturing leads from Google Forms and creating new entries in Pipedrive for efficient lead management. This integration not only saves time but also enhances your workflow efficiency.

Ensure you check out Pabbly Connect to create business automation workflows and reduce manual tasks. Pabbly Connect currently offer integration with 2,000+ applications.

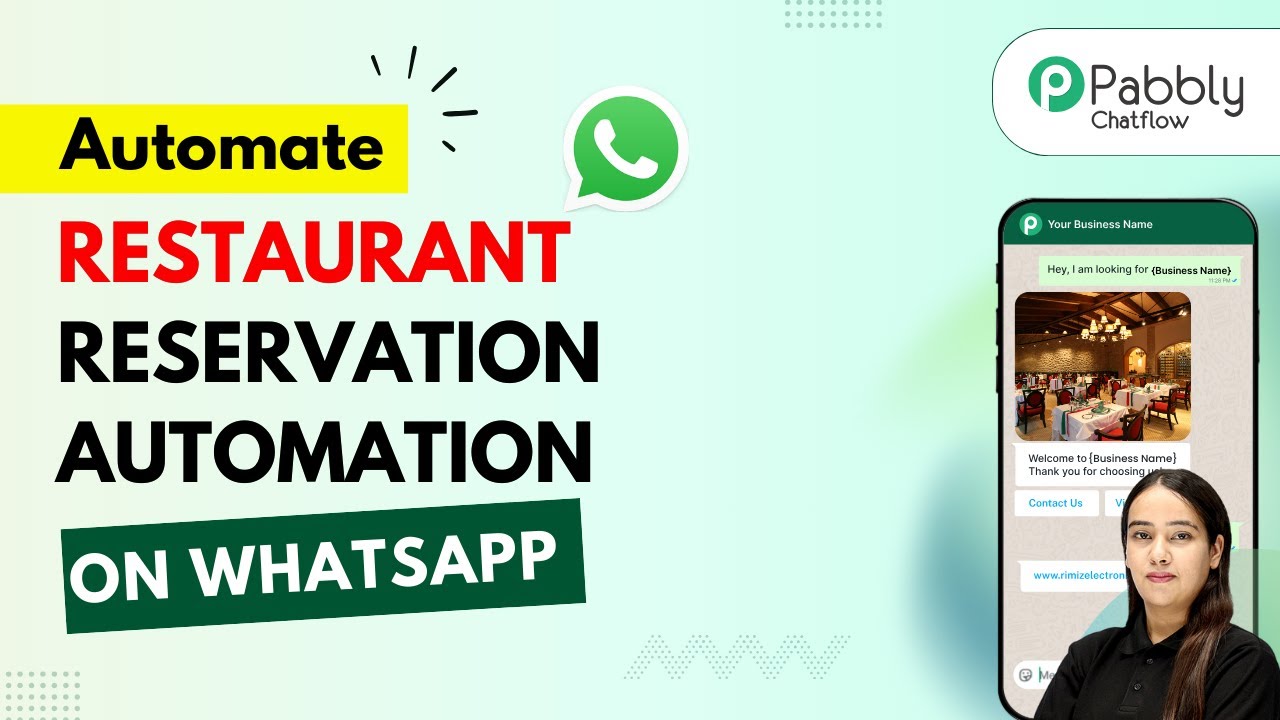
Automate Restaurant Reservations and Customer Queries with Pabbly Chatflow

Learn how to automate restaurant reservations and customer queries using Pabbly Chatflow and Pabbly Chatflow. Step-by-step guide for seamless integration with WhatsApp. Discover practical methods for designing chat sequences that capture leads, answer questions, and guide users to the next step in your funnel.

Watch Step By Step Video Tutorial Below


1. Getting Started with Pabbly Chatflow for Restaurant Automation

To automate restaurant reservations and customer queries, you first need to access Pabbly Chatflow. This platform allows you to create a WhatsApp chatbot that can handle queries without manual effort. Begin by visiting the Pabbly Chatflow website and signing up for an account.

Once you are logged in, you will be directed to the dashboard where you can manage your WhatsApp numbers. To start creating your chatbot, click on the ‘Add Flow’ button. This flow will guide your customers through the reservation process seamlessly.


2. Creating the Chatbot Flow with Pabbly Chatflow

In this section, we will create a flow that responds to customer queries. Start by clicking on the ‘Add Flow’ button on the dashboard. Name your flow something descriptive, like ‘Restaurant Reservation and Customer Query Bot’. This will help you identify it later. using Pabbly Connect

  • Click on the ‘Add Trigger’ option.
  • Select ‘Keyword’ as your trigger type.
  • Enter keywords that customers might use to start a conversation, such as ‘Reservation’ or ‘Query’.

After setting up the trigger, you will need to design the welcome message that customers see when they initiate a chat. Use the ‘Add Content’ button to include a friendly greeting and action buttons like ‘Reserve a Table’, ‘View Menu’, and ‘Ask a Question’. This setup makes interactions intuitive and user-friendly.


3. Setting Up Reservation Questions in Pabbly Chatflow

To make reservations, your chatbot needs to ask specific questions. Begin by dragging and dropping the ‘Ask Question’ element into your flow. This will allow you to gather necessary information from customers. using Pabbly Connect

  • Ask for the reservation date.
  • Request the time for the reservation.
  • Collect the customer’s full name and contact number.

After collecting this information, connect the responses to an API request that will store these details in a Google Sheet. This integration ensures that all reservation data is systematically organized and easily accessible.


4. Finalizing the Chatbot Flow with Pabbly Chatflow

Once the reservation questions are set, you can finalize the flow by adding a confirmation message. Use the ‘Text’ button to inform customers that their reservation has been confirmed. Include a dynamic field that shows the reservation date they provided. using Pabbly Connect

Additionally, connect the ‘View Menu’ action button to a media button where you can upload the menu document. This allows customers to easily access the menu right after they make a reservation. Finally, ensure that the ‘Ask a Question’ button connects to a message that provides common answers to customer inquiries.


5. Testing and Activating Your Chatbot on Pabbly Chatflow

After setting up your chatbot, it’s essential to test it to ensure everything works as expected. Use the ‘Test’ feature in Pabbly Chatflow to simulate customer interactions. Check that all questions are asked correctly and that the data is stored in Google Sheets.

Once you are satisfied with the testing, activate your flow. This will make your chatbot live and ready to handle customer queries and reservations in real-time. You can share the flow link with your customers to start interacting through WhatsApp.


Conclusion

In conclusion, automating restaurant reservations and customer queries using Pabbly Chatflow streamlines your customer interaction process. By following the steps outlined in this tutorial, you can create an effective WhatsApp chatbot that enhances customer experience and reduces manual workload.

Ensure you check out Pabbly Connect to create business automation workflows and reduce manual tasks. Pabbly Connect currently offer integration with 2,000+ applications.

How to Capture and Track JustDial Leads in Google Sheets with Pabbly Connect

Learn how to automate JustDial lead tracking in Google Sheets using Pabbly Connect for real-time management. Follow our step-by-step guide for seamless integration. Explore efficient methods for automating routine tasks with clear, concise instructions suited for both newcomers and experienced professionals.

Watch Step By Step Video Tutorial Below


1. Accessing Pabbly Connect for Lead Management

To capture and track JustDial leads in Google Sheets, you need to access Pabbly Connect. Start by visiting the Pabbly website and signing into your account. If you are a new user, you can sign up for free and get 100 tasks every month.

Once logged in, navigate to the Pabbly Connect dashboard. Here, you can create workflows that automate your tasks. For this integration, you will be creating a workflow that connects JustDial to Google Sheets using Pabbly Connect.


2. Creating a New Workflow in Pabbly Connect

To create a new workflow, select the option to create a workflow in Pabbly Connect. Choose the new beta workflow builder for a modern experience. Name your workflow ‘Capture and Track JustDial Leads in Google Sheets for Real-Time Management’ and select a folder for organization.

  • Click on the ‘Create’ button to finalize your new workflow.
  • Choose JustDial as the trigger application.
  • Select ‘New Lead’ as the trigger event.

After setting the trigger, you will be prompted to connect JustDial to Pabbly Connect. This connection will allow you to capture lead details automatically whenever a new lead is generated.


3. Setting Up the Trigger for JustDial

For the trigger setup, copy the provided webhook URL from Pabbly Connect. This URL acts as a bridge between JustDial and Pabbly. You will need to configure this URL in your JustDial account by reaching out to your account manager.

Once the webhook is configured, return to Pabbly Connect and wait for a response. This response confirms that the connection is successfully established. You will see the lead details such as name, phone number, and email address captured from JustDial.


4. Adding Google Sheets as the Action Step

Next, you will add Google Sheets as the action application in your workflow. In Pabbly Connect, click on the ‘Add New Action Step’ and select Google Sheets from the list. Choose the action event as ‘Add New Row’ to insert new lead details into your Google Sheet.

  • Connect your Google account by signing in and granting permissions.
  • Select the spreadsheet you want to use for tracking leads.
  • Map the fields from the JustDial response to the corresponding columns in your Google Sheet.

After mapping the fields, execute the workflow by clicking on ‘Save and Send Test Request’. This will send the lead details to your Google Sheet, confirming that the integration works as intended.


5. Verifying the Integration in Google Sheets

To verify the integration, open your Google Sheet where you set up the lead tracking. You should see that the lead details from JustDial have been added automatically. This confirms that Pabbly Connect is successfully capturing and tracking leads in real-time.

By following these steps, you have automated the process of tracking JustDial leads in Google Sheets using Pabbly Connect. This saves time and ensures that you have real-time access to your lead data.


Conclusion

In this tutorial, we demonstrated how to capture and track JustDial leads in Google Sheets using Pabbly Connect. By automating this process, you can manage your leads efficiently and in real-time. Implement this integration to streamline your workflow and enhance your lead management.

Ensure you check out Pabbly Connect to create business automation workflows and reduce manual tasks. Pabbly Connect currently offer integration with 2,000+ applications.

How to Save Ninja Forms Submissions into a Brevo List Using Pabbly Connect

Learn how to save Ninja Forms submissions into a Brevo list using Pabbly Connect. Follow this detailed tutorial for seamless integration. Transform complex automation concepts into accessible, actionable steps that eliminate unnecessary manual work while maximizing existing application capabilities.

Watch Step By Step Video Tutorial Below


1. Accessing Pabbly Connect for Integration

To save Ninja Forms submissions into a Brevo list, you first need to access Pabbly Connect. Begin by navigating to Pabbly.com/connect in your browser. This will take you to the Pabbly Connect homepage where you can either sign in or sign up for free.

If you are a new user, click on ‘Sign Up Free’ to create your account. Existing users can simply click on ‘Sign In’. Once logged in, you will see the dashboard where all Pabbly applications are listed, including Pabbly Connect.


2. Creating a Workflow in Pabbly Connect

After accessing Pabbly Connect, the next step is to create a workflow. Click on the ‘Create Workflow’ button located at the top right corner of the dashboard. You will be prompted to select a workflow builder option: either the new beta version or the classic version. Select the beta version for a modern experience.

  • Click on ‘Create Workflow’ in the dashboard.
  • Choose the beta version for faster processing.
  • Name your workflow, for example, ‘Save Ninja Form Submissions into a Brevo List’.

Next, select the appropriate folder to save your workflow. You can create new folders as needed. Once done, click the ‘Create’ button to finalize your workflow setup in Pabbly Connect.


3. Setting the Trigger for Ninja Forms

With your workflow created, it’s time to set the trigger. Click on the ‘Add Trigger’ button and select Ninja Forms as your trigger application. Choose the event as ‘New Form Submission’. Once selected, click on ‘Connect’ to generate a webhook URL.

This webhook URL is crucial as it connects Ninja Forms with Pabbly Connect. Copy the URL and proceed to your WordPress account where Ninja Forms is installed. In the Ninja Forms builder, navigate to the ‘Emails & Actions’ section and click ‘Add a New Action’. Select ‘Webhooks’ as the action type.


4. Configuring the Webhook in Ninja Forms

In the Ninja Forms webhook configuration, name your action (e.g., Brevo) and paste the webhook URL previously copied from Pabbly Connect. Select the method as POST to ensure submissions are sent to the webhook. You will need to create keys for the form fields such as first name, last name, email, and others.

  • Name your webhook action (e.g., Brevo).
  • Paste the webhook URL into the remote URL field.
  • Select POST as the method.

After adding the keys for each field, click ‘Save’ and then ‘Publish’ to activate the webhook. This setup allows Pabbly Connect to receive submissions from Ninja Forms effectively.


5. Testing the Integration with Brevo

Once the webhook is configured, it’s essential to test the integration. Go back to your form and submit a test entry with dummy details. After submission, return to Pabbly Connect and check if the webhook has received the response.

If successful, you will see the details of the form submission reflected in your workflow. Now, proceed to add an action step by selecting Brevo as your action application and choose ‘Create or Update a Contact’ as the event. Connect your Brevo account by entering your API key.

Map the required fields from your Ninja Forms submission to the corresponding fields in Brevo. Finally, click ‘Save and Send Test Request’ to confirm that a new contact is created in Brevo. Refresh your Brevo account to verify the new contact has been successfully added.


Conclusion

This tutorial detailed how to save Ninja Forms submissions into a Brevo list using Pabbly Connect. By following these steps, you can automate the process of adding new contacts to your Brevo account seamlessly. Enjoy the benefits of automation with Pabbly Connect!

Ensure you check out Pabbly Connect to create business automation workflows and reduce manual tasks. Pabbly Connect currently offer integration with 2,000+ applications.