How to Send SMS Reminders for Appointments from Google Calendar Using Pabbly Connect

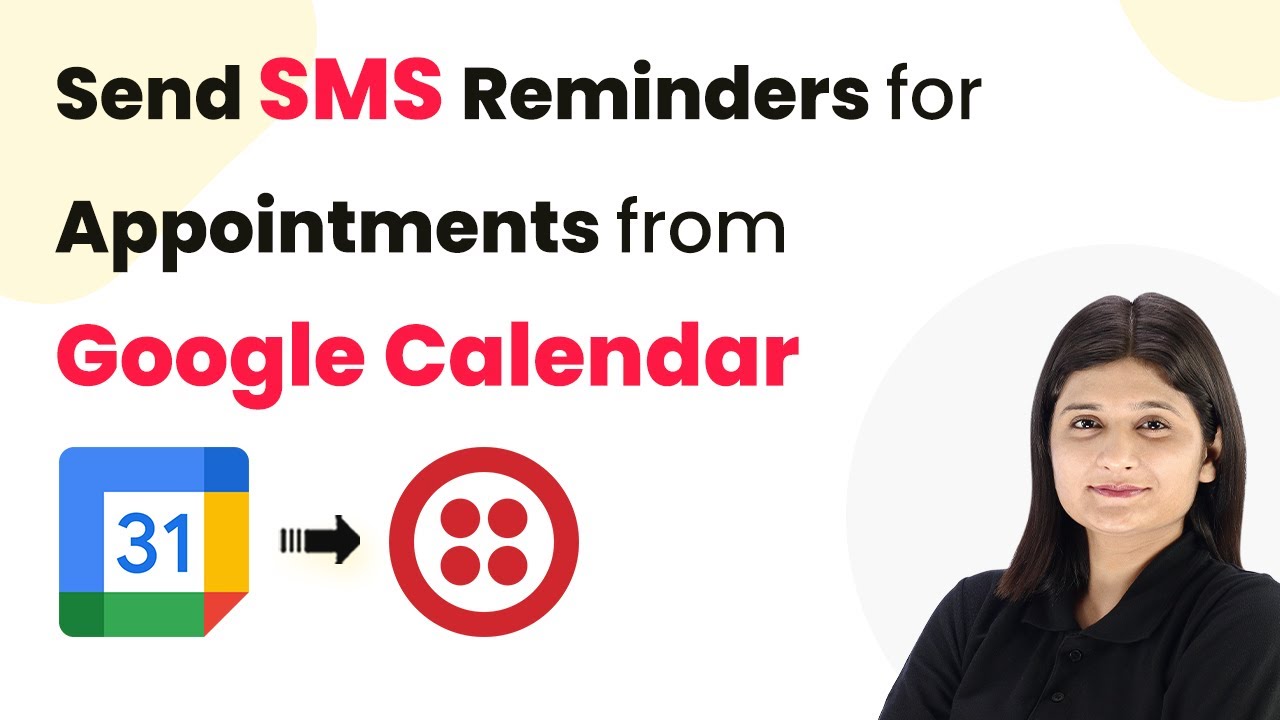
Learn how to automate SMS reminders for appointments from Google Calendar using Pabbly Connect. Follow our step-by-step tutorial for seamless integration. Implement the precise methodologies leading organizations use to automate repetitive tasks, illustrated with practical examples designed for immediate application.

Watch Step By Step Video Tutorial Below


1. Accessing Pabbly Connect for SMS Reminders

To send SMS reminders for appointments from Google Calendar, you need to access Pabbly Connect. Start by visiting the Pabbly website at pabby.com. Once there, you can either sign in or sign up for a new account if you are a new user. Signing up gives you access to 100 free tasks monthly.

After logging in, navigate to the Pabbly Connect dashboard. Here, you will find options to create new workflows. Click on the ‘Create Workflow’ button to initiate the process of setting up your SMS reminder automation.


2. Creating the Workflow with Pabbly Connect

In this step, you will create a workflow to connect Google Calendar and SMS services. Name the workflow as ‘Send SMS Reminder for Appointments from Google Calendar’ and select a relevant folder for organization. This naming helps in identifying your workflow later.

  • Click on ‘Create’ to finalize the workflow setup.
  • Select Google Calendar as the trigger application.
  • Choose ‘New Event’ as the trigger event.

After setting the trigger, connect your Google Calendar account to Pabbly Connect. You will need to authorize access to your calendar data, allowing Pabbly Connect to monitor for new events.


3. Configuring Google Calendar in Pabbly Connect

Once Google Calendar is connected, select the specific calendar you want to monitor for new events. This is crucial as it determines which events will trigger the SMS reminders. After selecting your calendar, create a test event to ensure the connection is working properly.

After creating an event, return to Pabbly Connect and click on ‘Save and Send Test Request’ to verify that the event details are captured correctly. You should see a successful response indicating that the event has been detected.

Remember that Google Calendar operates on a polling basis, meaning it checks for new events every 10 minutes. Thus, you may not receive instant notifications. Adjust the polling time if necessary to suit your needs.


4. Adding SMS Action Step with Pabbly Connect

After configuring the Google Calendar trigger, the next step is to add an action to send SMS reminders. In this step, select Twilio as the action application for sending SMS messages. Choose the ‘Send SMS’ action event to proceed.

  • Connect your Twilio account by entering your Account SID and Auth Token.
  • Map the SMS body to include event details from Google Calendar.
  • Specify the sender and recipient phone numbers.

Once all the fields are filled, click on ‘Save and Send Test Request’ to send a test SMS. You should receive a confirmation that the SMS was sent successfully, demonstrating that Pabbly Connect has successfully facilitated the integration.


5. Finalizing the Automation with Pabbly Connect

To finalize your automation, ensure all steps are correctly set up and test the entire workflow. After confirming that the SMS reminders are sent correctly, you can activate your workflow. This automation will now run seamlessly, sending SMS reminders for all new appointments added to your Google Calendar.

By utilizing Pabbly Connect, you can automate not only SMS reminders but also integrate various other applications for enhanced productivity. This integration saves time and ensures that important appointments are not missed.

With the automation successfully set up, you can explore more features and integrations offered by Pabbly Connect to enhance your workflows further.


Conclusion

In this tutorial, we demonstrated how to send SMS reminders for appointments from Google Calendar using Pabbly Connect. By following the steps outlined, you can automate your appointment reminders efficiently, ensuring timely notifications for your clients.

Ensure you check out Pabbly Connect to create business automation workflows and reduce manual tasks. Pabbly Connect currently offer integration with 2,000+ applications.

How to Build an AI Assistant for Your Massage Therapy Clinic Using Pabbly Chatflow

Learn how to create an AI assistant for your massage therapy clinic using Pabbly Chatflow. Step-by-step guide with exact integration processes. Master conversational marketing with practical techniques for creating chatbots that engage visitors at exactly the right moment in their journey.

Watch Step By Step Video Tutorial Below


1. Accessing Pabbly Chatflow for Your AI Assistant

To create an AI assistant for your massage therapy clinic, the first step is to access Pabbly Chatflow. Start by opening a new browser tab and entering the URL pabby.com/chatflow. This will take you to the main landing page of Pabbly Chatflow.

If you are a new user, click on the ‘Sign Up for Free’ button. Existing users should click on ‘Sign In’ to access their accounts. Once logged in, click on ‘Access Now’ to enter the Pabbly Chatflow dashboard where you can manage your chatbot functionalities.


2. Creating Your AI Assistant in Pabbly Chatflow

Now that you are in the Pabbly Chatflow dashboard, the next step is to create your AI assistant. Click on the ‘Add AI Assistant’ button. You will need to provide a name for your assistant—here, you can use ‘Massage Therapy Clinic AI Assistant’. using Pabbly Connect

  • Click on the ‘Add AI Assistant’ button.
  • Provide the assistant name.
  • Select the instruction type as ‘AI Agent’.

After naming your assistant, you will be directed to the configuration page. Here, select ‘AI Agent’ from the instruction type options. This is crucial, as it defines the primary functions and constraints of your AI assistant.


3. Configuring AI Settings in Pabbly Chatflow

In this section, you will configure the AI settings for your assistant. Set the creativity level by adjusting the temperature slider; a setting of 0.6 is recommended for a balance between focus and creativity. Choose ‘Open AI’ as your AI tool and select the model as ‘GPT 4.0 Mini’. using Pabbly Connect

To complete this configuration, you will need an API token from Open AI. Visit the Open AI API keys page, create a new secret key, and copy it. Paste this token into the designated field in Pabbly Chatflow and click ‘Connect’. Your AI tool is now linked successfully.


4. Customizing Your AI Assistant’s Interface

With your AI assistant configured, it’s time to customize its interface. In the settings, you can provide a display heading and subheading. For instance, use ‘Massage Therapy Clinic’ as your display heading. The initial message can be customized to greet users, such as ‘Hi there! How can I assist you today?’. using Pabbly Connect

  • Customize the display heading and subheading.
  • Set an initial greeting message.
  • Enable or disable the ‘Powered by Pabbly’ label.

Make sure to include a privacy policy link, as this is essential for user trust. Finally, enable the toggle to activate your AI assistant. Once satisfied with the customizations, click ‘Save’ to store your settings.


5. Testing Your AI Assistant Functionality

Now that your AI assistant is set up and customized, it’s time to test its functionality. Open your WhatsApp and send the message ‘Hey, I need help.’ Your AI assistant should respond with a prompt asking what assistance you require.

For example, if you ask about the types of massage services offered, it should reply with a detailed list of services, such as Swedish massage, deep tissue massage, and more. This real-time interaction showcases how Pabbly Chatflow effectively automates responses, enhancing customer engagement.


Conclusion

By following this detailed tutorial, you can successfully build an AI assistant for your massage therapy clinic using Pabbly Chatflow. This integration allows for efficient customer interaction and automated responses, significantly improving your clinic’s operational efficiency.

Ensure you check out Pabbly Connect to create business automation workflows and reduce manual tasks. Pabbly Connect currently offer integration with 2,000+ applications.

How to Broadcast WhatsApp Messages for Your Yoga Training Center Using Pabbly Chatflow

Learn how to effectively broadcast WhatsApp messages for your yoga training center using Pabbly Chatflow with this step-by-step tutorial. Learn step-by-step how to create, test, and optimize chatbots that enhance customer experience while reducing support workload.

Watch Step By Step Video Tutorial Below


1. Accessing Pabbly Chatflow for Your Yoga Training Center

To broadcast WhatsApp messages for your yoga training center, the first step is to access Pabbly Chatflow. This platform enables you to create and manage broadcasts effectively. Visit the Pabbly Chatflow website by entering the URL pabyt.com/chatflow in your browser.

If you are an existing user, click on ‘Sign In’. New users should click on ‘Sign Up for Free’. After logging in, you will be directed to the Pabbly Chatflow dashboard, where you can access all features necessary for setting up your broadcasts.


Once inside Pabbly Chatflow, you will find various features on the left side of the dashboard. These include:

  • Dashboard: Overview of chatbot performance and stats.
  • Inbox: Manage and reply to customer conversations.
  • Contacts: Store details of users interacting with your chatbot.
  • Broadcast: Send bulk messages to multiple users.

These features will help you set up your WhatsApp broadcasts efficiently. The broadcast feature is particularly important as it allows you to send messages to your yoga training center audience quickly.


3. Setting Up WhatsApp Integration in Pabbly Chatflow

To send WhatsApp messages, you need to integrate your WhatsApp account with Pabbly Chatflow. Navigate to the settings and click on ‘Add WhatsApp Number’. You will have two options: WhatsApp Connect Beta and Manual Token Connect.

Choose Manual Token Connect, which requires you to generate a Meta Access Token from Facebook for developers. Once you have the token, input it into the Pabbly Chatflow settings. This integration is crucial for broadcasting messages to your WhatsApp contacts.


4. Creating a Broadcast Message in Pabbly Chatflow

With your WhatsApp integrated, you can now create a broadcast message. In Pabbly Chatflow, click on the ‘Broadcast’ feature and then select ‘Add Broadcast’. Choose the broadcast type as ‘Broadcast Campaign’ and name it accordingly, such as ‘Yoga Training Center’.

Select a contact list, which you can create in the ‘Contacts’ feature. After creating the contact list, return to the broadcast setup and select it. You can then choose between pre-approved template messages or regular messages for your broadcast.

  • Select a pre-approved template for your message.
  • Provide necessary details and schedule the broadcast.

Once everything is set, click on ‘Add Broadcast’ to finalize your broadcast setup.


5. Testing and Scheduling Your Broadcast in Pabbly Chatflow

After creating your broadcast, it’s essential to test it. In Pabbly Chatflow, you have the option to send a test message to ensure everything is functioning correctly. Input the recipient’s details and click on ‘Send Test Message’.

Once you receive confirmation that the message is sent, check your WhatsApp to see how the template appears. If everything looks good, you can schedule the broadcast for later or send it immediately by selecting the appropriate options.

Finally, confirm your settings and click on ‘Add Broadcast’ to make your broadcast live. This ensures that your yoga training center can effectively communicate with clients through WhatsApp.


Conclusion

In conclusion, using Pabbly Chatflow allows yoga training centers to efficiently broadcast WhatsApp messages. By following the steps outlined in this tutorial, you can create, test, and manage your broadcasts effectively. This integration streamlines communication and enhances engagement with your audience.

Ensure you check out Pabbly Connect to create business automation workflows and reduce manual tasks. Pabbly Connect currently offer integration with 2,000+ applications.

How to Build an AI Assistant for Your IT Services Business with Pabbly Chatflow

Learn to create an AI assistant for your IT services business using Pabbly Chatflow. Step-by-step tutorial for seamless integration with WhatsApp and more. Learn step-by-step how to create, test, and optimize chatbots that enhance customer experience while reducing support workload.

Watch Step By Step Video Tutorial Below


1. Accessing Pabbly Chatflow for Your IT Services Business

To build an AI assistant for your IT services business, first, you need to access Pabbly Chatflow. Open a new tab and go to Pabbly.com/chatflow. This platform is essential for automating your WhatsApp messages and responses.

Once you are on the Pabbly Chatflow homepage, you will see options to sign in or sign up. If you are a new user, click on the ‘Sign Up’ button. Existing users should click ‘Sign In’ to access their accounts. After signing in, navigate to the dashboard where you can manage your WhatsApp numbers and view your credits.


2. Creating Your AI Assistant with Pabbly Chatflow

After logging into Pabbly Chatflow, you will find various options on your dashboard. To create your AI assistant, click on the ‘AI Assistant’ option. This feature allows you to train an AI to respond to common queries from your clients in the IT services sector.

  • Click on the ‘+ Add AI Assistant’ button.
  • Provide a descriptive name for your assistant, such as ‘AI Assistant for IT Services Business.’
  • Select the instruction type as ‘AI Agent.’

After setting up the basic information, you will be prompted to select the AI model. Choose the OpenAI model and set the temperature to 0.5 to control the creativity of the responses. This setup is crucial for tailoring the assistant to your business needs.


3. Configuring AI Settings in Pabbly Chatflow

Next, you need to configure the AI settings in Pabbly Chatflow. You will be asked to enter your OpenAI API token, which is necessary for connecting your assistant to the AI model. After entering the token, click the ‘Connect’ button to save the configuration.

In this section, you can customize various AI settings, such as the header message, footer message, and fallback message. The fallback message is particularly important, as it will provide responses when the AI does not understand a query. Enable this feature to ensure your users receive a response even if the AI is unsure.

  • Set the header message to introduce your assistant.
  • Customize the footer message with links to privacy policies.
  • Upload your knowledge source file to train your AI assistant.

Once you have configured these settings, your AI assistant will be better equipped to handle inquiries from your clients effectively.


4. Finalizing Your AI Assistant in Pabbly Chatflow

After setting up the AI configurations, it’s time to finalize your AI assistant in Pabbly Chatflow. Ensure all settings are correctly configured and click on the ‘Save AI Assistant’ button. This action activates your assistant, allowing it to respond to user queries automatically.

To test your assistant, send a message through your WhatsApp business account. The AI assistant should respond with predefined messages based on the queries received. For example, if a user asks about pricing, the assistant should provide the relevant information automatically.

This automation significantly enhances customer service efficiency by allowing your IT services business to handle multiple inquiries simultaneously without manual intervention.


5. Conclusion: Enhance Your IT Services with Pabbly Chatflow

In conclusion, creating an AI assistant for your IT services business using Pabbly Chatflow is a straightforward process that automates responses to customer inquiries. By following the steps outlined, you can set up your assistant to handle various queries effectively.

Ensure you check out Pabbly Connect to create business automation workflows and reduce manual tasks. Pabbly Connect currently offer integration with 2,000+ applications.

Check out Pabbly Connect – Automate your business workflows effortlessly! Sign Up Free – Start your journey with ease! 10,000+ Video Tutorials – Learn step by step! Join Pabbly Facebook Group – Connect with 21,000+ like minded people!

With the integration of WhatsApp and the capabilities of Pabbly Chatflow, your business can improve customer engagement and streamline communication. Start building your AI assistant today and take your IT services business to the next level!

How to Create a WhatsApp Chatbot for Your Paper Supply Store Using Pabbly Chatflow

Learn how to create a WhatsApp chatbot for your paper supply store using Pabbly Chatflow. Step-by-step guide to automate customer queries. Learn how to create intelligent chat workflows that provide instant customer support while qualifying leads 24/7 without human intervention.

Watch Step By Step Video Tutorial Below


1. Accessing Pabbly Chatflow for Your WhatsApp Chatbot

To create a WhatsApp chatbot for your paper supply store, you need to access Pabbly Chatflow. Start by opening a new browser tab and entering the URL Pabbly.com/chatflow. This will take you to the main landing page of Pabbly Chatflow.

If you are an existing user, simply click on the ‘Sign In’ button. For new users, click on ‘Sign Up for Free’ to create your account. Once logged in, you will see all the applications provided by Pabbly Chatflow. Click on ‘Access Now’ to enter the dashboard.


2. Setting Up Your WhatsApp Chatbot in Pabbly Chatflow

After accessing the dashboard of Pabbly Chatflow, you can begin setting up your WhatsApp chatbot. On the left side of the screen, you will find various features. Start by selecting the ‘Flows’ option to create a new chatbot flow.

  • Click on ‘Add Flow’ to create a new flow.
  • Rename the flow to ‘WhatsApp Chatbot for Your Paper Supply Store’.
  • Enter keywords that will activate the chatbot.

This setup allows Pabbly Chatflow to respond to user inquiries effectively. You can also enable regex for advanced keyword matching, ensuring your chatbot is responsive to various user inputs.


3. Creating the Chatbot Conversation Flow

With your flow set up, it’s time to create the conversation for your WhatsApp chatbot using Pabbly Chatflow. Begin by adding a welcome message that greets users when they initiate a chat. You can format this message to include bold text for emphasis.

  • Add quick reply options for users to choose from.
  • Set up questions to ask users about their product needs and quantities.
  • Create confirmation messages that summarize the user’s requests.

Each of these components can be easily configured in Pabbly Chatflow, allowing you to customize the user experience and streamline interactions with your customers.


4. Finalizing and Testing Your Chatbot

Once you have set up the conversation flow in Pabbly Chatflow, it’s important to finalize your chatbot. Make sure to review all messages and ensure that they are correctly formatted and linked to the appropriate quick replies.

After finalizing, click the ‘Save’ button to update your chatbot. Once saved, you can test your chatbot by sending a message through WhatsApp and checking if the responses are as expected. This step is crucial for ensuring your chatbot operates smoothly and meets customer needs.


5. Conclusion: Automate Customer Interactions with Pabbly Chatflow

Creating a WhatsApp chatbot for your paper supply store using Pabbly Chatflow can significantly streamline customer interactions. By following the steps outlined in this tutorial, you can automate responses to common queries, enhancing customer satisfaction and reducing manual workload.

Ensure you check out Pabbly Connect to create business automation workflows and reduce manual tasks. Pabbly Connect currently offer integration with 2,000+ applications.

With Pabbly Chatflow, you have the tools necessary to build a responsive and effective chatbot tailored to your business needs. Start automating your customer service today!


How to Capture Leads from Typeform and Send to Google Sheets Using Pabbly Connect

Learn how to capture leads from Typeform and send them to Google Sheets seamlessly using Pabbly Connect in this step-by-step tutorial. Develop expertise in application integration and learn how to design streamlined automation workflows using proven, simplified approaches.

Watch Step By Step Video Tutorial Below


1. Accessing Pabbly Connect for Integration

To start capturing leads from Typeform and sending them to Google Sheets, you need to access Pabbly Connect. This powerful automation tool allows seamless integration between various applications without any coding skills.

Open a new tab and navigate to Pabbly.com/connect. Here, you can either sign up for a new account or log in if you’re an existing user. After signing in, you will be directed to the Pabbly Connect dashboard, where you can create your workflow.


2. Creating Your Workflow in Pabbly Connect

Once you are in the dashboard of Pabbly Connect, click on the ‘Create Workflow’ button. You will be prompted to name your workflow; for this integration, you can name it ‘Add Google Sheet Rows on Typeform Submission’. Choose the appropriate folder, then click on the ‘Create’ button.

After creating the workflow, you will see the options for setting up a trigger and action. The trigger is the event that starts the workflow, while the action is what happens as a result. In this case, the trigger will be a new submission from Typeform, and the action will be adding a new row in Google Sheets.


3. Setting Up the Trigger from Typeform

To set up the trigger in Pabbly Connect, select Typeform as the trigger application. Choose the event as ‘New Entry’. This means that every time there is a new form submission in Typeform, it will trigger the workflow.

Click on ‘Connect’ to link your Typeform account with Pabbly Connect. If it’s your first time, select ‘Add New Connection’. You will need to authorize Pabbly Connect to access your Typeform account. Once connected, select the form you want to monitor for submissions.

  • Select ‘Typeform’ as the trigger application.
  • Choose ‘New Entry’ as the trigger event.
  • Connect your Typeform account to Pabbly Connect.

After successfully connecting, click on ‘Save and Send Test Request’ to ensure your setup is working correctly. This will allow you to verify that Pabbly Connect is receiving the form submissions.


4. Adding Action to Google Sheets

Next, you need to set up the action in Pabbly Connect. Select Google Sheets as the action application and choose ‘Add New Row’ as the action event. This means that every new submission from Typeform will be added as a new row in your Google Sheets.

Click on ‘Connect’ to link your Google Sheets account. If you have an existing connection, you can select that; otherwise, create a new connection by signing in with your Google account. After connecting, choose the specific Google Sheet where you want the data to be added.

  • Select ‘Google Sheets’ as the action application.
  • Choose ‘Add New Row’ as the action event.
  • Connect your Google Sheets account to Pabbly Connect.

Map the fields from the Typeform submission to the respective columns in Google Sheets. This process ensures that the data captured from Typeform is accurately reflected in your Google Sheet.


5. Testing Your Integration

After setting up the action in Pabbly Connect, it’s time to test the integration. Fill out your Typeform and submit it. Go back to Pabbly Connect and click on ‘Save and Send Test Request’ for the Google Sheets action. This will send the test data to your Google Sheet.

Check your Google Sheet to confirm that the new row has been added with the data from your Typeform submission. If everything is set up correctly, you should see the first name, last name, phone number, email, and any other mapped fields appearing in the new row.

Remember to keep your workflow active in Pabbly Connect to ensure that future submissions are also captured and sent to Google Sheets automatically. This integration allows you to manage leads effortlessly without manual intervention.


Conclusion

In this tutorial, you learned how to capture leads from Typeform and send them to Google Sheets using Pabbly Connect. By following these steps, you can automate the process of lead capturing, ensuring that your data is organized and easily accessible for follow-ups. With Pabbly Connect, you can streamline your workflows and save time on manual tasks.

Ensure you check out Pabbly Connect to create business automation workflows and reduce manual tasks. Pabbly Connect currently offer integration with 2,000+ applications.

How to Broadcast WhatsApp Messages for Your Bakery Business Using Pabbly Chatflow

Learn how to broadcast WhatsApp messages for your bakery business using Pabbly Chatflow. Step-by-step tutorial for seamless integration. Explore how leading businesses automate customer interactions with carefully designed chat sequences that feel natural and helpful.

Watch Step By Step Video Tutorial Below


1. Accessing Pabbly Chatflow for Your Bakery Business

To begin broadcasting WhatsApp messages for your bakery business, first access Pabbly Chatflow. Open a new browser tab and enter the URL pabby.com/chatflow. This will direct you to the main landing page of Pabbly Chatflow.

If you are an existing user, click on the ‘Sign In’ button. If you are new, click on ‘Sign Up for Free’. Once signed in, you can access the various features of Pabbly Chatflow.


2. Exploring Pabbly Chatflow Features

Once logged into Pabbly Chatflow, you will see a dashboard displaying several features. These include options such as Inbox, Contacts, and Broadcast, which are essential for managing communications effectively.

  • Dashboard: Overview of chatbot performance and recent activities.
  • Inbox: Manage and reply to incoming customer conversations.
  • Contacts: Store details of users who interacted with your chatbot.

These features will help streamline your interactions with customers and set the stage for effective WhatsApp broadcasts through Pabbly Chatflow.


3. Adding Your WhatsApp Number to Pabbly Chatflow

To send messages via WhatsApp, you need to add your WhatsApp number in Pabbly Chatflow. Click on ‘Add WhatsApp Number’ and choose between WhatsApp Connect Beta or Manual Token Connect. For this tutorial, select Manual Token Connect.

You will need to generate a Meta Access Token from Facebook’s developer portal. Once you have the token, input it into Pabbly Chatflow. This step is crucial for enabling WhatsApp messaging capabilities.


4. Creating a Broadcast in Pabbly Chatflow

To create a broadcast, navigate to the Broadcast feature in Pabbly Chatflow. Click on ‘Add Broadcast’ and set your campaign type as a broadcast campaign. Name your broadcast, for example, ‘Bakery Business’, and select a contact list.

  • Choose a pre-approved WhatsApp template or create a new message.
  • Test the message by sending it to yourself before finalizing the broadcast.

Once satisfied with the setup, you can either schedule the broadcast for a later date or send it instantly. Click on ‘Add Broadcast’ to finalize your setup in Pabbly Chatflow.


5. Testing and Finalizing Your Broadcast

After creating your broadcast in Pabbly Chatflow, it is essential to test it. Send a test message to ensure everything is working correctly. Check your WhatsApp to confirm receipt of the broadcast message.

If the test is successful, your broadcast will show as live and working in Pabbly Chatflow. You can now confidently use this feature to keep your bakery customers informed about offers and updates.


Conclusion

By following this guide, you can effectively broadcast WhatsApp messages for your bakery business using Pabbly Chatflow. This integration streamlines communication and enhances customer engagement.

Ensure you check out Pabbly Connect to create business automation workflows and reduce manual tasks. Pabbly Connect currently offer integration with 2,000+ applications.

How to Store New Housing.com Leads in Brevo Using Pabbly Connect

Learn how to automate the process of storing new Housing.com leads in Brevo for real estate campaigns using Pabbly Connect. Follow our step-by-step tutorial! Navigate the automation landscape confidently with clear, structured guidance suitable for professionals regardless of prior technical experience.

Watch Step By Step Video Tutorial Below


1. Accessing Pabbly Connect for Automation

To start the process of storing new Housing.com leads in Brevo, first, you need to access Pabbly Connect. This platform allows you to create workflows that automate tasks without any coding skills. Simply visit the Pabbly website and log into your account.

Once logged in, you will see the Pabbly dashboard. Here, you can create new workflows that will help connect your Housing.com leads to Brevo. This automation will save you time by eliminating the need for manual data entry.


2. Creating a New Workflow in Pabbly Connect

To create a new workflow, click on the ‘Create Workflow’ button on the dashboard. You will need to name your workflow, for example, ‘Store New Housing.com Leads in Brevo for Real Estate Campaigns.’ After naming, select the appropriate folder to save your workflow.

  • Click on the ‘Create’ button to finalize your workflow setup.
  • You will see two boxes appear: one for the trigger and one for the action.
  • Select ‘Housing.com’ as your trigger application and ‘Brevo’ as your action application.

By using Pabbly Connect, you set up a trigger that activates whenever a new lead is captured from Housing.com. This ensures that your leads are automatically stored in Brevo, streamlining your workflow.


3. Setting Up the Trigger for Housing.com Leads

In this step, you will configure the trigger for your workflow. Select ‘New Leads’ from the trigger event options in Housing.com. A webhook URL will be generated by Pabbly Connect, which you need to copy and send to your Housing.com account manager.

This webhook acts as a bridge between Housing.com and Pabbly Connect. Once your account manager activates this integration, you will start receiving new leads directly into your Brevo account. Make sure to follow up with them to ensure the integration is set up correctly.


4. Configuring the Brevo Action to Store Leads

After setting up the trigger, you need to configure the action in Brevo. Select ‘Create or Update Contact’ as your action event. If you don’t have an existing connection, click on ‘Add New Connection’ and enter the required API key and domain for your Brevo account.

  • Generate a new API token from your Brevo account and copy it into Pabbly Connect.
  • Enter your domain in the specified format (e.g., app.brevo.com).
  • Click ‘Save’ to connect Brevo with Pabbly Connect.

Now, you can utilize the mapping feature to dynamically insert lead information such as email addresses and phone numbers from the Housing.com response into Brevo. This ensures that each new lead is correctly recorded in your Brevo account.


5. Testing and Finalizing Your Integration

Once all configurations are complete, it’s time to test your integration. Send a test request from Pabbly Connect to check if the data flows correctly from Housing.com to Brevo. You should see a confirmation that the lead has been successfully created in your Brevo account.

After testing, make sure to monitor your workflow for any issues. With Pabbly Connect, you can easily adjust settings or troubleshoot problems as they arise, ensuring a seamless integration experience.


Conclusion

In this tutorial, we demonstrated how to effectively store new Housing.com leads in Brevo using Pabbly Connect. By automating this process, you can save valuable time and ensure that all leads are captured efficiently. Start using Pabbly Connect today to enhance your real estate campaigns!

Ensure you check out Pabbly Connect to create business automation workflows and reduce manual tasks. Pabbly Connect currently offer integration with 2,000+ applications.

How to Build an AI Assistant for Your Telecommunication Service Business Using Pabbly Chatflow

Learn how to create an AI assistant for your telecommunication service business using Pabbly Chatflow. Step-by-step guide with detailed instructions. Discover practical methods for designing chat sequences that capture leads, answer questions, and guide users to the next step in your funnel.

Watch Step By Step Video Tutorial Below


1. Accessing Pabbly Chatflow for Your AI Assistant

To create an AI assistant for your telecommunication service business, you need to access Pabbly Chatflow. Start by opening a new browser tab and entering the URL Pabbly.com/chatflow. This will take you to the main landing page of Pabbly Chatflow.

If you are an existing user, click on the ‘Sign In’ button. For new users, select ‘Sign Up for Free’ to create an account. Once signed in, you will see all the applications provided by Pabbly Chatflow. Click on ‘Access Now’ to enter the Pabbly Chatflow dashboard.


2. Exploring Features of Pabbly Chatflow

Once you are in the Pabbly Chatflow dashboard, you’ll find several features on the left side of the screen. These tools are essential for building your AI assistant.

  • Dashboard: Overview of chatbot performance and stats.
  • Inbox: Manage and reply to incoming customer conversations.
  • Contacts: Store details of users who interacted with your chatbot.

These features will help you manage your AI assistant effectively. With Pabbly Chatflow, you can create chat flows, manage contacts, and analyze performance metrics to enhance user interaction.


3. Setting Up Your AI Assistant in Pabbly Chatflow

To create your AI assistant, navigate to the ‘AI Assistant’ feature and click on ‘Add AI Assistant’. You will need to provide a name for your assistant, such as ‘Telecommunication Service Assistant’. After naming your assistant, click on ‘Add AI Assistant’ to proceed. using Pabbly Connect

Next, select the instruction type for your AI assistant. Choose ‘AI Agent’ from the options provided. You will also set the creativity level by adjusting the temperature; for instance, a temperature of 0.6 allows for moderate creativity. Ensure to select Open AI as the AI tool and choose the Chat GPT 4.0 mini model.


4. Integrating WhatsApp with Pabbly Chatflow

To connect your WhatsApp number to Pabbly Chatflow, click on ‘Add WhatsApp Number’. You will be given two options: WhatsApp Connect Beta and Manual Token Connect. Choose Manual Token Connect, which requires you to generate a Meta Access Token from Facebook Meta for Developers.

  • Generate your Meta Access Token from the Facebook Developer platform.
  • Paste the generated token into the required field in Pabbly Chatflow.

After successfully adding your WhatsApp number, you can manage all incoming messages through the Pabbly Chatflow inbox. This integration allows your AI assistant to respond to customer queries directly via WhatsApp.


5. Customizing Your AI Assistant’s Responses

In the AI Assistant settings, you can customize various aspects of your assistant’s responses. Start by uploading a knowledge source that contains all relevant information about your telecommunication services. This is crucial as the AI assistant will base its responses on this knowledge. using Pabbly Connect

You can also add a header and footer to your assistant, customize the initial message, and set the activation message. For example, set the activation message to ‘Hey, I need help’ to trigger the assistant’s response when users send this message. Once all settings are configured, enable the toggle to make your AI assistant active.


Conclusion

In this tutorial, we explored how to build an AI assistant for your telecommunication service business using Pabbly Chatflow. By following the detailed steps outlined, you can automate customer interactions and enhance service delivery efficiently. Start leveraging the power of Pabbly Chatflow today to streamline your operations and improve customer satisfaction.

Ensure you check out Pabbly Connect to create business automation workflows and reduce manual tasks. Pabbly Connect currently offer integration with 2,000+ applications.

Building an AI Assistant for Your Travel & Tourism Business Using Pabbly Chatflow

Learn how to create an AI assistant for your travel and tourism business using Pabbly Chatflow. Follow our step-by-step guide for seamless integration. This detailed guide shows you how to build powerful chat automation that engages visitors and converts prospects—without any coding required.

Watch Step By Step Video Tutorial Below


1. Accessing Pabbly Chatflow for Your AI Assistant

To create an AI assistant for your travel and tourism business, you first need to access Pabbly Chatflow. Start by opening a new tab and navigating to Pabbly.com/chatflow. This platform is specifically designed for automating WhatsApp interactions, making it an ideal choice for businesses in the travel sector.

Once on the Pabbly Chatflow page, you will see options to sign in or sign up. If you are a new user, click on the ‘Sign Up’ option. Existing users should click on ‘Sign In’. After signing in, you will be directed to the dashboard where you can manage your WhatsApp interactions effectively.


2. Setting Up Your AI Assistant in Pabbly Chatflow

Now that you are in Pabbly Chatflow, the next step is to set up your AI assistant. Click on the ‘AI Assistant’ option from the dashboard. This section allows you to create a new AI assistant tailored for your travel and tourism business.

  • Click on the ‘Add AI Assistant’ button.
  • Provide a name for your assistant related to travel.
  • Set the instruction type as AI agent.

Once you have filled in these details, click on the ‘Add AI Assistant’ button to proceed. This will initiate the process of creating your AI assistant, allowing you to customize its responses based on user interactions.


3. Configuring AI Assistant Features in Pabbly Chatflow

After creating your AI assistant, you will need to configure its features. In Pabbly Chatflow, you can set the temperature for responses, choose the AI model, and provide an API token from your OpenAI account. These settings will define how your assistant interacts with users.

Make sure to select the appropriate AI model, such as GPT-4 Mini, for optimal performance. You will also be prompted to upload a knowledge source file that contains common queries and responses relevant to your travel business.

  • Upload a knowledge base in plain text format.
  • Configure the assistant interface with a greeting message.
  • Enable or disable the display label powered by Pabbly.

Once all settings are configured, ensure to save your assistant to make it operational. This step is crucial as it allows your AI assistant to provide automated responses to user queries.


4. Testing Your AI Assistant on Pabbly Chatflow

With your AI assistant configured, it’s time to test its functionality. In Pabbly Chatflow, you can simulate user interactions to see how your assistant responds. Send a test message such as ‘I need help’ to verify if the assistant provides the expected response.

During testing, ensure that the AI assistant can handle various queries related to booking, customization, and payment methods. This phase is essential to ensure that your assistant is ready to assist real users effectively.

Check responses for booking queries. Verify customization options provided. Ensure payment methods are accurately described.

After thorough testing, your AI assistant will be ready to assist users on platforms like WhatsApp, enhancing customer interaction for your travel business.


5. Launching Your AI Assistant with Pabbly Chatflow

Finally, to launch your AI assistant, return to Pabbly Chatflow and enable the assistant by toggling the activation switch. This will make your assistant live and ready to respond to user inquiries automatically.

Remember, the AI assistant will now be available to handle queries 24/7, providing timely responses to your customers. This automation will save you time and improve customer satisfaction significantly.

To ensure everything runs smoothly, monitor the assistant’s performance through the activity logs available in Pabbly Chatflow. This will help you make necessary adjustments based on user interactions and feedback.


Conclusion

Creating an AI assistant for your travel and tourism business using Pabbly Chatflow streamlines customer interactions and enhances service efficiency. By following these steps, you can ensure your assistant is well-equipped to handle user queries effectively.

Ensure you check out Pabbly Connect to create business automation workflows and reduce manual tasks. Pabbly Connect currently offer integration with 2,000+ applications.