How to Auto-Add WhatsApp Leads to ActiveCampaign for Drip Emails

Learn how to integrate WhatsApp leads into ActiveCampaign for drip emails using Pabbly Connect. Follow this step-by-step tutorial for seamless automation. Follow this definitive guide to creating powerful automated workflows with straightforward, efficiency-focused solutions that save valuable time.

Watch Step By Step Video Tutorial Below


1. Accessing Pabbly Connect to Create Your Workflow

To start integrating WhatsApp leads into ActiveCampaign for drip emails, you need to access Pabbly Connect. Open your browser and go to Pabbly.com/connect. If you’re a new user, click on the ‘Sign Up Free’ button to create your account. Existing users can simply click on ‘Sign In’.

After signing in, you will be directed to the Pabbly Connect dashboard. Here, click on the ‘Create Workflow’ button. You can also organize your workflows into folders by clicking the plus button to create a new folder. Once you’re ready, select the new beta version of the workflow builder for a more modern experience.


2. Setting Up the Webhook Trigger in Pabbly Connect

Now, it’s time to set up the trigger for your workflow using Pabbly Connect. Name your workflow as ‘Auto Add WhatsApp Leads to ActiveCampaign for Drip Emails’. Click on the ‘Add Trigger’ button, and select ‘Webhook’ as your trigger application.

  • Select ‘Catch Webhook’ as the event.
  • Copy the generated webhook URL.

Next, you will use this webhook URL in your WhatsApp chatbot setup. This webhook will be triggered whenever a new lead interacts with your WhatsApp bot, sending their details to Pabbly Connect.


3. Configuring Your WhatsApp Chatbot with Pabbly Connect

To collect leads through WhatsApp, you need to set up your chatbot. In your Pabbly Chatflow account, create a chatbot and add an API request action. Paste the webhook URL from Pabbly Connect into the API request settings.

  • Set the request type to POST.
  • Enter the contact fields like name, phone, and email in the parameters.

Once configured, test the API request to ensure it’s working correctly. This setup allows the chatbot to send user data directly to Pabbly Connect whenever a new lead interacts with it.


4. Integrating ActiveCampaign with Pabbly Connect

After setting up the webhook, the next step is to integrate ActiveCampaign. In your Pabbly Connect workflow, click on the plus button to add an action step and select ActiveCampaign as the application. Choose the event ‘Subscribe or Unsubscribe Contact’.

To connect ActiveCampaign with Pabbly Connect, you will need to enter your ActiveCampaign API URL and API key. You can find these in your ActiveCampaign account under Settings > Developer. After entering these details, save the connection.


5. Finalizing the Workflow for Drip Emails

Now that you have integrated ActiveCampaign, you must specify the list ID and map the contact fields. Select the list ID for your contacts and map the fields like name, email, and phone number from the webhook response.

After mapping all the necessary fields, click on ‘Save and Send Test Request’. This action will add the contact to your ActiveCampaign list, enabling you to send drip emails. Refresh your ActiveCampaign contacts to see the newly added lead.

With this setup, you have successfully automated the process of adding WhatsApp leads to ActiveCampaign using Pabbly Connect. You can now send targeted drip emails to your leads, enhancing your marketing efforts.


Conclusion

This tutorial demonstrated how to seamlessly integrate WhatsApp leads into ActiveCampaign for drip emails using Pabbly Connect. By following the steps outlined, you can automate lead collection and improve your email marketing strategy effectively.

Ensure you check out Pabbly Connect to create business automation workflows and reduce manual tasks. Pabbly Connect currently offer integration with 2,000+ applications.

How to Add New Contacts in Kommo from Google Sheets

Learn how to seamlessly add new contacts in Kommo from Google Sheets using Pabbly Connect. Follow this step-by-step guide for a hassle-free integration. Discover hidden automation capabilities within your existing tools. This guide shows you how to connect your essential applications and permanently eliminate redundant manual processes.

Watch Step By Step Video Tutorial Below


1. Introduction to Pabbly Connect for Automation

Pabbly Connect is an essential automation tool that simplifies the process of adding new contacts in Kommo from Google Sheets. By using Pabbly Connect, you can automate the transfer of customer data without manual entry, saving time and reducing errors.

In this tutorial, we will explore how to set up this integration step-by-step. This will ensure that every new lead added to your Google Sheets is automatically captured in your Kommo CRM. Using Pabbly Connect eliminates the need for coding skills, making it accessible for everyone.


2. Setting Up Pabbly Connect for Google Sheets Integration

To start, navigate to the Pabbly Connect website and log in to your account. If you are a new user, you can easily sign up and get 100 free tasks every month to explore its features.

  • Visit www.Pabbly.com/connect.
  • Log in or sign up for a new account.
  • Click on the ‘Create Workflow’ button.

After creating a new workflow, select the new beta method for a modern experience. Name your workflow as ‘Add New Contacts in Kommo from Google Sheets’ and create it. This sets the foundation for your automation using Pabbly Connect.


3. Configuring Google Sheets Trigger in Pabbly Connect

Next, to establish the connection, you need to set Google Sheets as the trigger application in Pabbly Connect. This means that any new or updated row in your Google Sheets will trigger the workflow.

In the trigger settings, select ‘New or Updated Spreadsheet Row’ as the event. Click on the connect button to obtain the webhook URL. This URL will be essential for connecting Google Sheets to Pabbly Connect.

  • Copy the webhook URL provided.
  • Open your Google Sheets and go to Extensions > Add-ons > Get Add-ons.
  • Search for Pabbly Connect Webhooks and install it.

After installation, refresh your spreadsheet and set up the initial configuration by pasting the webhook URL and specifying the trigger column. This column will determine which data is sent to Pabbly Connect.


4. Mapping Data from Google Sheets to Kommo

Once the trigger is set up, the next step is to configure the action to create a contact in Kommo. In Pabbly Connect, select Kommo as the action application and choose the event ‘Create Contact’.

Connect your Kommo account by entering your subdomain. After establishing the connection, you will need to map the data fields from Google Sheets to Kommo. This includes first name, last name, email, and phone number, ensuring that the data flows seamlessly.

Map the first name from the previous response. Map the last name, email, and phone number accordingly. Click on ‘Save and Send Test Request’ to verify the setup.

Upon successful mapping, a new contact will be created in your Kommo account, confirming that Google Sheets and Kommo are effectively integrated through Pabbly Connect.


5. Testing the Integration for Success

After setting up the action, it’s crucial to test the integration. Add a new contact in your Google Sheets and check if it appears in your Kommo account. This ensures that the automation is functioning correctly.

For example, input a new customer’s details like first name, last name, email, and phone number in Google Sheets. After a few moments, refresh your Kommo contacts page to see if the new contact has been added. This real-time verification is a vital step in confirming the success of your integration with Pabbly Connect.

By following these steps, you can automate your workflow efficiently, allowing you to focus on other aspects of your business. The integration between Google Sheets and Kommo through Pabbly Connect streamlines your customer management process.


Conclusion

In conclusion, using Pabbly Connect to add new contacts in Kommo from Google Sheets is a straightforward and efficient process. By following these steps, you can automate data entry, ensuring that your customer information is always up-to-date and organized.

Ensure you check out Pabbly Connect to create business automation workflows and reduce manual tasks. Pabbly Connect currently offer integration with 2,000+ applications.

AI-Powered Auto-Blogging — Publish Fresh Content Every Day!

Learn how to automate blogging using Pabbly Connect by integrating Google Sheets, OpenAI, and WordPress to publish fresh content daily. Navigate the automation landscape confidently with clear, structured guidance suitable for professionals regardless of prior technical experience.

Watch Step By Step Video Tutorial Below


1. Introduction to Pabbly Connect for Auto-Blogging

Pabbly Connect is a powerful automation platform that allows you to integrate various applications seamlessly. In this tutorial, we will explore how to use Pabbly Connect to automate the blogging process by connecting Google Sheets, OpenAI, and WordPress. This integration saves time and effort by automatically publishing fresh content every day.

To get started, you need to create an account on Pabbly Connect. Once you’re logged in, you can create a new workflow that will act as the backbone of this automation process. This workflow will connect the applications needed to generate and publish blog content effectively.


2. Setting Up Pabbly Connect Workflow

To set up your workflow in Pabbly Connect, navigate to the dashboard and click on the ‘Create Workflow’ button. You will be prompted to name your workflow; for this tutorial, let’s call it ‘AI Powered Auto Blogging Publish Fresh Content Every Day’.

  • Name your workflow as ‘AI Powered Auto Blogging’.
  • Select a folder for better organization.
  • Choose the trigger application, which will be Google Sheets.

Once your workflow is named and organized, you can proceed to set up the trigger. The trigger will be activated whenever a new title is added to your Google Sheets, kicking off the automated blogging process.


3. Connecting Google Sheets to Pabbly Connect

In this step, we will connect Google Sheets to Pabbly Connect. Start by selecting Google Sheets as your trigger application and choose the event ‘New or Updated Spreadsheet Row’. After selecting this, click on ‘Connect’ to establish the connection.

To connect your Google Sheets with Pabbly Connect, a webhook URL will be provided. This URL acts as a bridge between your Google Sheets and Pabbly Connect. You must copy this URL and paste it into the Google Sheets add-on for Pabbly Connect Webhooks.

  • Open your Google Sheets and navigate to Extensions > Add-ons > Get Add-ons.
  • Search for Pabbly Connect Webhooks and install it.
  • Refresh Google Sheets, then go to Extensions > Pabbly Connect Webhooks > Initial Setup.

After pasting the webhook URL, set the trigger column to the final data entry column (e.g., Column D) and click ‘Send Test’. This will test the connection and ensure that data is being sent correctly to Pabbly Connect.


4. Generating Blog Content Using OpenAI

Now that Google Sheets is connected to Pabbly Connect, the next step is to generate blog content using OpenAI. Add a new action step in your workflow and select OpenAI as the action application. Choose the event ‘Chat GPT’ and click on ‘Connect’.

You will need to enter your OpenAI API key to authorize the connection. Once connected, you can specify the AI model you wish to use (e.g., GPT-4) and set up a prompt that instructs OpenAI to generate a blog post based on the title and other parameters from Google Sheets.

Enter the prompt in a way that includes title, tone, audience, and keywords. Use mapping to dynamically pull data from Google Sheets. Save the action and test the request to see the generated blog content.

After testing, you should receive a response containing the generated blog content, which will be used in the next step to publish on WordPress.


5. Publishing the Generated Blog on WordPress

With the blog content generated, it’s time to publish it on WordPress using Pabbly Connect. Add another action step, select WordPress as your action application, and choose ‘Create Post’ as the event.

Connect to your WordPress account by entering the base URL, username, and password. Once connected, you can map the title and content fields to the corresponding data from the previous steps to ensure that the blog post is created accurately.

Select the post type (e.g., ‘Post’). Map the title and content fields to the generated data from OpenAI. Set the post status to ‘Published’ and click ‘Save’.

After saving, check your WordPress dashboard to confirm that the blog post has been successfully created and published. This completes the automation process, allowing you to publish fresh content daily with minimal effort.


Conclusion

In this tutorial, we demonstrated how to use Pabbly Connect to automate the blogging process by integrating Google Sheets, OpenAI, and WordPress. This powerful combination allows you to publish fresh content every day without manual effort. By following these steps, you can streamline your blogging workflow and enhance your online presence.

Ensure you check out Pabbly Connect to create business automation workflows and reduce manual tasks. Pabbly Connect currently offer integration with 2,000+ applications.

How to Add 99acres Leads to Brevo Automatically

Learn how to automatically add 99acres leads to Brevo using Pabbly Connect. Follow this step-by-step tutorial for seamless integration. Master proven automation processes with practical implementation examples and strategic recommendations you can apply immediately in your workflow.

Watch Step By Step Video Tutorial Below


1. Accessing Pabbly Connect for Integration

To add 99acres leads to Brevo automatically, you will first need to access Pabbly Connect. If you are an existing user, log in directly to your account and navigate to the workflow builder. For new users, open a new tab and search for Pabbly.com/connect.

Once on the landing page, click on the ‘Sign Up for Free’ option in the top right corner. You will receive hundreds of free tasks every month to explore Pabbly Connect. After signing up, log in and open your workflow builder to begin the integration process.


2. Setting Up the Trigger in Pabbly Connect

In Pabbly Connect, the first step is to set up a trigger. Click on the ‘Add Trigger’ button and search for ’99 acres’ to select it. For the event, choose ‘New Leads’ and click on ‘Connect’ to proceed.

  • Select ’99 acres’ as the trigger application.
  • Choose the event as ‘New Leads’.
  • Click ‘Connect’ to generate the webhook URL.

After connecting, you will receive a webhook URL. This URL needs to be configured in your 99 acres account. Contact your account manager to add this webhook URL, as the portal does not allow users to configure it directly.


3. Capturing Lead Details from 99acres

Once your webhook URL is added, Pabbly Connect will start capturing lead details automatically. You can test this by sending a lead from your 99 acres account, which will show up in Pabbly Connect as a webhook response.

The captured lead details will include the first name, last name, phone number, and email address. This information is crucial for creating a new contact in Brevo.


4. Adding Action Step to Create Contact in Brevo

Next, click on the ‘Add New Action’ step in Pabbly Connect. Search for ‘Brevo’ and select it. For the event, choose ‘Create or Update a Contact’ and click ‘Connect’.

  • Select ‘Brevo’ as the action application.
  • Choose the event ‘Create or Update a Contact’.
  • Connect your Brevo account using the domain and API key.

If you have previously connected Brevo, select the existing connection. Otherwise, you will need to provide your Brevo domain and API key. To generate a new API key, navigate to the SMTP and API page in your Brevo account, create a new key, and copy it into Pabbly Connect.


5. Mapping Lead Details to Brevo Contact

After connecting Brevo, it’s time to map the lead details to create a contact. In Pabbly Connect, map the email address, first name, and last name from the captured lead details. This dynamic mapping ensures that the data updates automatically with each new lead.

Once you have mapped the necessary fields, click on ‘Save and Send Test Request’. If everything is set up correctly, you will receive a confirmation that a new contact has been created in Brevo. You can verify this by refreshing your contact list in Brevo.

With this setup, every new lead from 99 acres will automatically be added as a contact in Brevo without any manual intervention. This seamless integration allows you to focus on converting leads into clients.


Conclusion

By following this tutorial, you can effortlessly add 99acres leads to Brevo using Pabbly Connect. This automation allows for efficient lead management and enhances your email marketing campaigns. Start using this integration today to streamline your processes and improve your business outcomes.

Ensure you check out Pabbly Connect to create business automation workflows and reduce manual tasks. Pabbly Connect currently offer integration with 2,000+ applications.

Create a WhatsApp Chatbot for Your Nutrition Consultations🥗

Learn how to create a WhatsApp chatbot for nutrition consultations using Pabbly Chatflow in this detailed step-by-step tutorial. Discover how to design chat experiences that feel personal and responsive while handling customer inquiries automatically around the clock.

Watch Step By Step Video Tutorial Below


1. Accessing Pabbly Chatflow for Your Chatbot

To create a WhatsApp chatbot for your nutrition consultations, you first need to access Pabbly Chatflow. Start by entering the URL Pabbly.com/chatflow in your web browser. This will take you to the Pabbly Chatflow landing page.

On this page, you will find options to sign in or sign up. If you are a new user, click on the ‘Sign Up Free’ button to create an account. Existing users can simply sign in. Remember, signing up gives you 100 free credits each month to practice using Pabbly Chatflow.


2. Creating Your Chatbot Flow in Pabbly Chatflow

Once logged into Pabbly Chatflow, navigate to the dashboard where you will see various options. Click on the ‘Flows’ option from the sidebar to start building your chatbot flow. This will lead you to the flow builder page.

  • Click on the ‘Add Flow’ button.
  • Provide a name for your flow, such as ‘WhatsApp Chatbot for Nutrition Consultation’.
  • Select the trigger event as ‘Keyword Rejects Match’.

In this section, you will set up keywords that will trigger your chatbot. For example, you can use the keyword ‘nutrition’ to initiate the chatbot whenever a user sends a message containing this word. This functionality is crucial for engaging users effectively through Pabbly Chatflow.


3. Designing Chatbot Interactions Using Pabbly Chatflow

After setting up the trigger, it’s time to create the interactions for your users. Use the drag-and-drop feature to add a text node where you will enter a welcome message. For instance, you can greet users with: ‘Hi there! Welcome to XYZ Nutritionist, your personal guide to healthier living. How can I help you today?’

  • Create buttons for user options, such as ‘Consultation Service’ and ‘Talk to Nutritionist’.
  • Set up a list node to display the services offered.
  • Add items to the list, including options like ‘One-Time Diet Plan’ and ‘Monthly Consult’.

By structuring your chatbot interactions this way, Pabbly Chatflow allows you to provide personalized experiences for your clients, enhancing user engagement and satisfaction.


4. Collecting User Information Through Pabbly Chatflow

Once users select a service, your chatbot should collect necessary information such as their name, email address, and preferred consultation date. To do this, create a series of question nodes in Pabbly Chatflow.

For each question, specify the contact custom fields where the responses will be stored. For example, after asking for the user’s full name, you can store this response in a custom field named ‘Full Name’. Similarly, follow this process for collecting email and preferred date.

After gathering this information, you can send a confirmation message back to the user, summarizing their details. This message can include buttons for options like ‘Confirm Details’ or ‘Edit Details’. This feature ensures clarity and allows users to make adjustments if necessary.


5. Testing Your Chatbot with Pabbly Chatflow

After designing your chatbot and collecting user information, it’s essential to test the entire flow. Navigate to the inbox section in Pabbly Chatflow where you can see messages received from users.

Send a test message through WhatsApp to the number connected to your Pabbly Chatflow account. Ensure that the chatbot responds with the correct welcome message and that all buttons and options function as intended.

By testing your chatbot, you can confirm that all interactions are seamless and that users receive timely responses. This step is crucial for ensuring the success of your WhatsApp chatbot for nutrition consultations.


Conclusion

In this tutorial, we explored how to create a WhatsApp chatbot for your nutrition consultations using Pabbly Chatflow. From accessing the platform to designing interactions and testing your chatbot, each step is essential for effective user engagement. Start using Pabbly Chatflow today to enhance your nutrition consultation services!

Ensure you check out Pabbly Connect to create business automation workflows and reduce manual tasks. Pabbly Connect currently offer integration with 2,000+ applications.

Auto-Post Blogger Articles to Facebook — Share Content Instantly!

Learn how to seamlessly integrate Google Blogger with Facebook using Pabbly Connect to automate your social media sharing. Explore systematic approaches to creating efficient automation solutions that convert technical concepts into practical, implementable instructions.

Watch Step By Step Video Tutorial Below


1. Accessing Pabbly Connect for Integration

To start the process of integrating Google Blogger with Facebook, you first need to access Pabbly Connect. Visit the Pabbly website by typing ‘Pabbly.com’ in your browser. Once on the site, sign in to your existing account or create a new one to get started. New users can enjoy 100 free tasks per month.

After signing in, navigate to the Pabbly Connect dashboard. You will find all your workflows here. To create a new automation, click on the ‘Create Workflow’ button. Select the classic workflow builder for a familiar interface and name your workflow as ‘Auto Post Blogger Articles to Facebook’. This is the first step in setting up your automation.


2. Setting Up the Trigger with Google Blogger

The next step involves setting up the trigger for your workflow. In Pabbly Connect, a trigger is an event that starts the automation. For this integration, select Google Blogger as your trigger application. Choose the trigger event as ‘New Post Added’. This means every time a new blog post is created on Google Blogger, it will trigger the workflow.

  • Select ‘Google Blogger’ from the applications list.
  • Choose ‘New Post Added’ as the trigger event.
  • Connect your Google account to authorize Pabbly Connect.

Once connected, you can set the polling time. Google Blogger checks for new posts every 8 hours by default, but you can change this to 90 minutes for quicker updates. This adjustment ensures that Pabbly Connect checks for new posts more frequently.


3. Creating a New Blog Post in Google Blogger

After setting up the trigger, it’s time to create a new blog post in Google Blogger. Navigate to your Google Blogger account and click on ‘New Post’. Enter the title and content for your blog. For example, you might title your post ‘Why Automation is Becoming the Backbone of Modern Content Creation’.

Once you have filled in the post details, click on ‘Publish’ to make it live. After publishing, return to Pabbly Connect and click on ‘Save and Send Test Request’. This action will fetch the details of the newly created blog post, which will then be used in the next step of the automation.

  • Enter the blog title and content.
  • Publish the post to make it live.
  • Click ‘Save and Send Test Request’ in Pabbly Connect.

This process will ensure that the blog post details are captured and ready to be shared on Facebook.


4. Sharing the Blog Post on Facebook

With the blog post created and details fetched, the next step is to share this content on Facebook using Pabbly Connect. For this, select Facebook Pages as the action application. Choose the action event ‘Create Page Post’. This will allow you to post the blog link directly to your Facebook page.

Connect your Facebook account to Pabbly Connect if you haven’t done so already. After connecting, you will need to select the Facebook page where you want to share the post. Use the mapping feature to insert the blog title and URL dynamically into the post message. This means each time a new blog is published, the corresponding details will automatically populate in the Facebook post.

Select ‘Facebook Pages’ as the action application. Choose ‘Create Page Post’ as the action event. Map the blog title and URL into the post message.

Once all details are mapped, click on ‘Save and Send Test Request’ to publish the post on your Facebook page. You should see the post appear on your selected Facebook page shortly after.


5. Conclusion: Automating Blogger to Facebook Posts

In conclusion, integrating Google Blogger with Facebook using Pabbly Connect streamlines the process of sharing new blog posts. By setting up a trigger for new posts in Google Blogger and an action to share on Facebook, you can automate your social media presence effortlessly.

Ensure you check out Pabbly Connect to create business automation workflows and reduce manual tasks. Pabbly Connect currently offer integration with 2,000+ applications.

Check out Pabbly Connect – Automate your business workflows effortlessly! Sign Up Free – Start your journey with ease! 10,000+ Video Tutorials – Learn step by step! Join Pabbly Facebook Group – Connect with 21,000+ like minded people!
This integration not only saves time but also ensures that your audience is always updated with your latest content. With Pabbly Connect, you can focus on creating quality content while it handles the sharing process for you.

By following the steps outlined in this tutorial, you can successfully automate the sharing of your Blogger articles to Facebook, enhancing your online reach and engagement.

How to Send Google Ads Leads to Mailchimp Instantly

Learn how to effortlessly send Google Ads leads to Mailchimp using Pabbly Connect. Follow our step-by-step guide for seamless integration. Revolutionize your productivity approach with just a few strategic clicks. Uncover professional methods for connecting applications and creating workflows that reclaim hours of your week.

Watch Step By Step Video Tutorial Below


1. Accessing Pabbly Connect for Google Ads Leads

To start sending Google Ads leads to Mailchimp instantly, you need to access Pabbly Connect. Begin by visiting the Pabbly Connect website by entering ‘Pabbly.com/connect’ in your browser.

If you are new to Pabbly, you can sign up for a free account which includes 100 tasks every month. Existing users can simply log in. After logging in, navigate to the ‘All Pabbly Apps’ window and click on ‘Access Now’ under Pabbly Connect to reach the dashboard.


2. Creating a Workflow in Pabbly Connect

Once you’re in the Pabbly Connect dashboard, the next step is to create a workflow. Click on the ‘Create Workflow’ button. You will be prompted to choose between the new beta version or the classic version; select the beta version for a modern interface. using Pabbly Connect

  • Click on the ‘Create’ button to start building your workflow.
  • Name your workflow, for example, ‘Send Google Ads Leads to Mailchimp Instantly’.
  • Select a folder for your workflow or create a new one.

After naming your workflow, you will see that it consists of two main principles: the trigger and the action. The trigger signifies when an event occurs, while the action is the response to that event.


3. Setting Up Google Ads Trigger in Pabbly Connect

Now it’s time to set up the trigger in Pabbly Connect. Since we are using Google Ads to receive leads, select Google Ads as your trigger application and the event as ‘New Lead Form Entry’.

Upon connecting, you will receive a webhook URL. Copy this URL to integrate with your Google Ads account. In your Google Ads account, navigate to the lead form you wish to use. Scroll down to the lead delivery section and paste the webhook URL into the appropriate field.

  • Set the key name as ‘test’.
  • Send test data to confirm the integration.

Once you send the test data, check your Pabbly Connect workflow for an instant response confirming the receipt of lead details.


4. Adding Mailchimp Action Step in Pabbly Connect

The next step involves adding Mailchimp as the action application in Pabbly Connect. Select Mailchimp and choose ‘Add New Member with Custom Fields’ as the event.

To connect your Mailchimp account, you will need to provide your API key and data center. To find these, go to your Mailchimp account, click on your profile, and navigate to ‘Account and Billing’. From there, select ‘Extras’ and then ‘API Keys’ to generate a new key.

Copy the API key and data center. Map the necessary fields such as email address, first name, last name, and phone number.

Once you’ve mapped the fields correctly, click on ‘Save and Send Test Request’ to add the new subscriber to your Mailchimp account.


5. Verifying Integration in Pabbly Connect

After saving the action step, it’s essential to verify that the integration works correctly. Go back to your Mailchimp account and refresh the subscriber list to see if the new lead has been added successfully.

Upon refreshing, you should see the new subscriber with all the details such as email, first name, last name, and phone number. This confirms that your setup is complete and working as intended.

With this, you have successfully automated the process of sending Google Ads leads to Mailchimp using Pabbly Connect. This integration allows you to manage your leads efficiently and enhance your email marketing campaigns.


Conclusion

In this tutorial, we explored how to send Google Ads leads to Mailchimp instantly using Pabbly Connect. By following the steps outlined, you can streamline your lead management process and enhance your email campaigns effectively.

Ensure you check out Pabbly Connect to create business automation workflows and reduce manual tasks. Pabbly Connect currently offer integration with 2,000+ applications.

AI Project Management Assistant for Agencies 📂🚀

Learn how to create an AI Project Management Assistant for agencies using Pabbly Chatflow to automate responses and manage inquiries efficiently. Explore how leading businesses automate customer interactions with carefully designed chat sequences that feel natural and helpful.

Watch Step By Step Video Tutorial Below


1. Accessing Pabbly Chatflow to Create Your AI Assistant

To create an AI Project Management Assistant, you first need to access Pabbly Chatflow. This platform allows you to automate responses to customer queries via WhatsApp. Start by navigating to the Pabbly Chatflow website at Pabbly.com/chatflow and click on either the ‘Sign Up Free’ or ‘Sign In’ button, depending on whether you are a new or existing user.

Once logged in, you will see the dashboard of Pabbly Chatflow. Here you can manage your WhatsApp numbers and create your AI assistant. If you are a new user, Pabbly Chatflow offers 100 free credits every month for practice, making it an excellent option for beginners.


2. Creating Your AI Assistant in Pabbly Chatflow

After accessing the dashboard of Pabbly Chatflow, the next step is to create your AI assistant. Click on the ‘AI Assistant’ option from the sidebar. You will be directed to the AI assistant page where you can see existing assistants and the option to add a new one.

  • Click on the ‘Add AI Assistant’ button.
  • Enter a name for your assistant, such as ‘Project Management AI’.
  • Select the instruction type as ‘AI Agent’.

Once you have named your assistant and selected the instruction type, you will be taken to the AI instructions tab. Here, you can customize various settings, including the temperature of the AI, which determines its creativity level. For a balanced response, set the temperature to 0.5.


3. Configuring the Knowledge Source for Your AI Assistant

Next, you need to configure the knowledge source for your AI assistant in Pabbly Chatflow. This knowledge base will provide the AI with information to answer customer queries accurately. You can upload your knowledge base in either .txt or .pdf format.

  • Choose the ‘Knowledge Source’ tab in your AI assistant settings.
  • Click on ‘Choose or Drag a File Here’ to upload your knowledge base.
  • Ensure your file is in the correct format to avoid upload errors.

After successfully uploading your knowledge base, you will receive a confirmation message. This step is crucial as it enables your AI assistant to fetch relevant data and respond to user inquiries based on the provided information.


4. Customizing the AI Assistant Interface in Pabbly Chatflow

With the knowledge base configured, the next step is to customize the interface of your AI assistant in Pabbly Chatflow. You can modify the appearance and initial messages to align with your brand identity. Start by entering a header and subheader for your assistant.

For example, you can set the header to ‘XYZ Agency’ and the subheader to ‘We are online and happy to assist you’. Additionally, you can customize the initial message that users will see when they first interact with the assistant. This could be something like ‘Hi there! How can I help you today?’


5. Enabling Your AI Assistant for Customer Interactions

The final step is to enable your AI assistant for customer interactions through Pabbly Chatflow. Go to the ‘Inbox Settings’ where you can enable AI auto-replies for all contacts or specific contact lists. This feature allows your AI assistant to respond to inquiries automatically.

Scroll down to find the option for ‘Enable AI Auto Replies’. Select the contact list or all contacts for which you want to enable the assistant. Save your settings to activate the assistant.

After enabling your AI assistant, it will start responding to customer queries via WhatsApp, providing assistance based on the knowledge base you created. This automation can significantly enhance your agency’s efficiency and customer satisfaction.


Conclusion

In conclusion, using Pabbly Chatflow to create an AI Project Management Assistant can streamline your agency’s customer interactions. By following the steps outlined, you can automate responses and ensure your clients receive timely assistance.

Ensure you check out Pabbly Connect to create business automation workflows and reduce manual tasks. Pabbly Connect currently offer integration with 2,000+ applications.

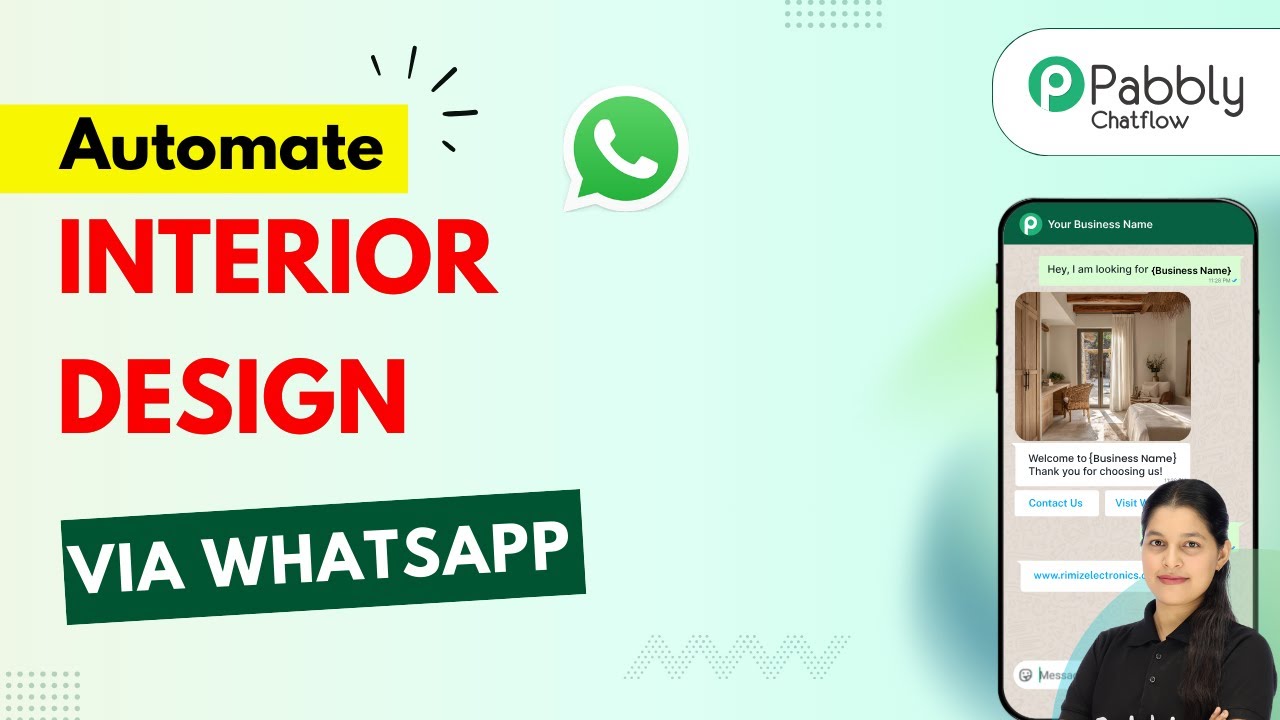
WhatsApp Chatbot for Your Interior Design Business🛋️

Learn how to set up a WhatsApp chatbot for your interior design business using Pabbly Chatflow. Follow our step-by-step guide for seamless integration. Explore how leading businesses automate customer interactions with carefully designed chat sequences that feel natural and helpful.

Watch Step By Step Video Tutorial Below


1. Accessing Pabbly Chatflow for Your WhatsApp Chatbot

To create a WhatsApp chatbot for your interior design business, you need to access Pabbly Chatflow. Start by entering the URL Pabbly.com/chatflow in your browser. This will take you to the Pabbly Chatflow landing page.

Once you are on the landing page, you will see two options: ‘Sign In’ and ‘Sign Up Free.’ If you are a new user, click on ‘Sign Up Free’ to create an account. Existing users can simply sign in. Remember, signing up grants you 100 free credits every month to practice using Pabbly Chatflow.


2. Creating Your WhatsApp Chatbot Flow in Pabbly Chatflow

After signing in, navigate to the Pabbly Chatflow dashboard. Here, you can see your connected WhatsApp numbers. To start creating your chatbot, click on ‘Add WhatsApp Number’ if you haven’t connected one yet.

  • Choose between ‘WhatsApp Connect’ or ‘Manual Token Connect’ options.
  • Follow the prompts to link your WhatsApp number to Pabbly Chatflow.

Once your number is connected, click on ‘Flows’ in the sidebar to access the flow builder. Click on ‘Add Flow’ to create a new flow for your WhatsApp chatbot. Enter a name for your flow, such as ‘WhatsApp Chatbot for Your Interior Design Business.’ This flow will manage the responses and interactions with users.


3. Setting Up Triggers in Pabbly Chatflow

The next step involves setting up triggers that will activate your chatbot. In Pabbly Chatflow, triggers are actions that initiate the chatbot. Select the trigger event as ‘Keyword Match’ and input the keyword that users will send to start the conversation, such as ‘interior design.’ Press enter to save this keyword.

After setting up the keyword trigger, it’s time to create a welcome message for users. Drag and drop the ‘Text’ button node into the flow and enter a friendly welcome message. You can also add buttons for user interaction, like ‘View Services’ and ‘Contact Our Team.’ This will enhance user engagement and provide clear options.


4. Building the Chatbot Flow with Pabbly Chatflow

Now, you will build the main features of your WhatsApp chatbot. After the welcome message, create a ‘List’ node that will display the services offered by your interior design business. Input the body of the list and add items such as ‘Room Makeover’ and ‘Color Consult.’ Each item should be linked to a contact custom field to capture user responses. using Pabbly Connect

  • Create a section titled ‘Services’ and add items with descriptions.
  • Connect each list item to the corresponding custom field to save user selections.

After users select a service, prompt them with questions to gather their details, such as their name, city, and preferred date for consultation. Use the ‘Ask Question’ node for this, ensuring that each question is linked to the appropriate contact custom field.


5. Finalizing Your WhatsApp Chatbot in Pabbly Chatflow

Once you have created the flow and all necessary questions, it’s time to finalize your chatbot. Use the ‘Text’ button again to send a thank you message after users complete the questionnaire. This will confirm their submission and inform them that a design expert will contact them shortly. using Pabbly Connect

Finally, save your flow by clicking the ‘Save’ button. You will receive a notification confirming that your flow has been updated successfully. You can also test your chatbot by sending a message to your WhatsApp number to see how it interacts with users.


Conclusion

Setting up a WhatsApp chatbot for your interior design business using Pabbly Chatflow is straightforward and efficient. By following these steps, you can enhance customer interaction and streamline your consultation process. Start using Pabbly Chatflow today to elevate your business communication!

Ensure you check out Pabbly Connect to create business automation workflows and reduce manual tasks. Pabbly Connect currently offer integration with 2,000+ applications.

Add WooCommerce Orders to Monday.com Automatically

Learn how to automate the integration of WooCommerce orders into Monday.com using Pabbly Connect. Follow this step-by-step guide for seamless workflow management. Navigate the automation landscape confidently with clear, structured guidance suitable for professionals regardless of prior technical experience.

Watch Step By Step Video Tutorial Below


1. Accessing Pabbly Connect for Integration

To start integrating WooCommerce orders with Monday.com, first access Pabbly Connect. Open your browser and go to the Pabbly Connect website, where you can sign up for a free account. Once signed in, navigate to the workflow builder, which is essential for setting up your automation.

In the workflow builder, you will see options to create triggers and actions. The trigger will initiate the process when a new order is created in WooCommerce, and the action will send this information to Monday.com. This setup will allow you to manage your orders seamlessly.


2. Setting Up WooCommerce Trigger in Pabbly Connect

Now, let’s set up the trigger in Pabbly Connect. Click on the ‘Add Trigger’ button and search for WooCommerce. Select it and choose the event ‘New Order Created’. After connecting, you will receive a webhook URL that you need to copy for the next step.

  • Click on ‘Add Trigger’
  • Search for WooCommerce
  • Select ‘New Order Created’
  • Copy the webhook URL

Next, open your WordPress account where WooCommerce is installed. Navigate to WooCommerce settings, find the ‘Advanced’ tab, and then go to ‘Webhooks’. Here, you will create a new webhook using the URL copied from Pabbly Connect.


3. Creating a Webhook in WooCommerce

In the WooCommerce settings, click on ‘Add Webhook’. Name it something like ‘New Order’. Set its status to active and select ‘Order Created’ as the topic. Paste the webhook URL from Pabbly Connect in the delivery URL field. Finally, save the webhook.

Once saved, WooCommerce will confirm that the webhook was created successfully. This establishes a connection between WooCommerce and Pabbly Connect. You can now test this by placing a new order to see if the data is captured correctly.


4. Testing the Integration with a New Order

To test the integration, go back to your WooCommerce store and purchase a product. Fill in the necessary customer details and complete the checkout process. After placing the order, return to Pabbly Connect to check if the webhook response has been captured.

If successful, you will see the order details populated in the webhook response. This includes the customer’s name, email, phone number, and order ID. This data is critical for the next step of sending it to Monday.com.


5. Adding Order Details to Monday.com

Now that you have successfully captured the order details in Pabbly Connect, it’s time to send this information to Monday.com. Click on ‘Add New Action Step’ and select Monday.com as the action application. Choose the event ‘Create Item’ and connect your Monday.com account using the API token.

After connecting, select the board where you want to add the order details. Map the fields from the webhook response to the corresponding fields in Monday.com. This includes mapping the customer’s name, email, phone number, and product name. Finally, save and send a test request to ensure everything works correctly.

Once the test is successful, you will see the new order details appear in your Monday.com board. This automation allows you to manage and track your WooCommerce orders efficiently, all thanks to Pabbly Connect.


Conclusion

In conclusion, using Pabbly Connect to integrate WooCommerce orders with Monday.com streamlines your order management process. By following the steps outlined, you can automate the addition of new orders into your Monday.com dashboard, enhancing your team’s organization and efficiency.

Ensure you check out Pabbly Connect to create business automation workflows and reduce manual tasks. Pabbly Connect currently offer integration with 2,000+ applications.