Auto-Sync Instagram Leads to Salesforce — Capture & Convert Prospects Instantly!

Learn how to auto-sync Instagram leads to Salesforce using Pabbly Connect. Capture and convert prospects instantly with this detailed tutorial! Navigate the automation landscape confidently with clear, structured guidance suitable for professionals regardless of prior technical experience.

Watch Step By Step Video Tutorial Below


1. Setting Up Pabbly Connect for Instagram Leads

To auto-sync Instagram leads to Salesforce, you first need to set up Pabbly Connect. This powerful integration platform facilitates the connection between Instagram and Salesforce, allowing you to capture and convert prospects instantly. Start by logging into your Pabbly Connect account or sign up if you don’t have one.

Once logged in, navigate to the dashboard. Here, you can create a new workflow specifically for syncing Instagram leads with Salesforce. Click on the ‘Create Workflow’ button, give it a relevant name, and select ‘Instagram’ as your trigger application.


2. Connecting Instagram to Pabbly Connect

In this section, you will connect Instagram to your Pabbly Connect workflow. Select the trigger event as ‘New Lead’. This event will activate the workflow whenever a new lead is captured from Instagram. After selecting the trigger event, you will be prompted to connect your Instagram account.

  • Click on ‘Connect Instagram Account’.
  • Authenticate your Instagram account by logging in.
  • Grant necessary permissions for Pabbly Connect to access your leads.

After successfully connecting your Instagram account, you can test the trigger to ensure leads are being captured correctly. This step is crucial to verify that your integration is set up properly in Pabbly Connect.


3. Integrating Salesforce with Pabbly Connect

Next, you will integrate Salesforce into your Pabbly Connect workflow. Select Salesforce as your action application. Choose the action event as ‘Create Lead’. This will allow you to automatically create a new lead in Salesforce whenever a new lead is captured from Instagram.

Connect your Salesforce account by clicking ‘Connect Salesforce Account’. You will need to authenticate with your Salesforce credentials and allow Pabbly Connect to access your Salesforce data. This step ensures that all leads captured from Instagram are sent directly to your Salesforce account.


4. Finalizing the Integration and Testing

After setting up both Instagram and Salesforce, it’s time to finalize the integration in Pabbly Connect. Map the fields from Instagram to Salesforce. For instance, ensure that the lead’s name, email, and any other relevant details are correctly matched to the corresponding fields in Salesforce.

Once you have mapped the fields, you can perform a test to check if the integration works as expected. Generate a test lead from Instagram and see if it appears in Salesforce. If everything is set up correctly, the lead should sync instantly!


5. Conclusion: Capture and Convert Prospects Instantly

In conclusion, using Pabbly Connect to auto-sync Instagram leads to Salesforce is an efficient way to capture and convert prospects instantly. By following these steps, you can ensure that every lead from Instagram is automatically added to your Salesforce account, streamlining your lead management process.

Ensure you check out Pabbly Connect to create business automation workflows and reduce manual tasks. Pabbly Connect currently offer integration with 2,000+ applications.

This integration not only saves time but also enhances your ability to convert leads effectively. Start using Pabbly Connect today to simplify your workflow and boost your sales efforts!
Auto-Sync Facebook Leads to Apollo CRM — Capture, Enrich & Follow-Up Instantly!

Learn how to auto-sync Facebook leads to Apollo CRM using Pabbly Connect for seamless lead management. Capture, enrich, and follow up instantly with this detailed tutorial.

Watch Step By Step Video Tutorial Below


1. Accessing Pabbly Connect for Integration

To auto-sync Facebook leads to Apollo CRM, we start by accessing Pabbly Connect. This platform allows you to seamlessly integrate various applications without any coding skills. You can visit Pabbly’s website by typing ‘Pabbly.com’ in your browser.

Once on the website, you’ll need to sign in or create a new account. If you are an existing user, click on the ‘Sign In’ button located at the top right corner. New users can click ‘Sign Up for Free’ to get started with 100 free tasks monthly.


2. Creating a New Workflow in Pabbly Connect

After signing into Pabbly Connect, you will be directed to the dashboard. Here, you can create a new workflow by clicking on the ‘Create Workflow’ button. Select the ‘New Beta’ workflow builder for a faster experience.

  • Name your workflow: Sync Facebook Leads to Apollo CRM.
  • Choose a folder: Facebook Lead Automations.

Once you have named your workflow and selected the appropriate folder, click ‘Create’. This initiates the process of setting up your automation between Facebook Lead Ads and Apollo CRM.


3. Setting Up the Trigger with Facebook Lead Ads

The next step involves setting up the trigger application in Pabbly Connect. For this integration, select Facebook Lead Ads as your trigger application. In the trigger event, choose ‘New Lead Instant’ and connect your Facebook account.

After connecting, you will need to select the Facebook page where your lead ads are running. For example, if your page is named ‘Digital Dynamics’, select it and then choose the lead form you want to use. This setup will ensure that every new lead captured will trigger the workflow.

  • Connect to Facebook Lead Ads.
  • Select your page and lead form.

Once the trigger is set, click ‘Save and Send Test Request’ to ensure the connection is working correctly. You will see a confirmation that the webhook is waiting for a response.


4. Testing the Connection with Dummy Data

To test if the integration works, you will need to generate a lead using the Facebook Lead Ads Testing Tool. Enter dummy details such as your name, email, and phone number, and submit the form.

Once you submit the form, return to Pabbly Connect and check if the response from Facebook Lead Ads has been captured. This confirms that the connection is functioning as expected.

Open the Facebook Lead Ads Testing Tool. Submit dummy lead details.

If the details appear in the webhook response, the trigger setup is successful, and you are ready to move on to the next step.


5. Adding Action to Create Contacts in Apollo CRM

Now that the trigger is set up, it’s time to add an action step in Pabbly Connect to create a contact in Apollo CRM. Select Apollo as your action application and choose ‘Create Contact’ as the action event.

You will need to connect your Apollo account by entering the API key. To get this key, log into your Apollo account, navigate to the API keys section, and create a new key. Copy this key and paste it into Pabbly Connect.

Connect to Apollo CRM using the API key. Map the fields from Facebook lead ads to Apollo CRM.

After mapping the fields, click ‘Save and Send Test Request’. You should see a confirmation indicating that the contact has been created successfully in Apollo CRM. This completes the integration process.


Conclusion

In this tutorial, you learned how to auto-sync Facebook leads to Apollo CRM using Pabbly Connect. By following these steps, you can capture, enrich, and follow up on leads instantly, streamlining your lead management process effectively.

Ensure you check out Pabbly Connect to create business automation workflows and reduce manual tasks. Pabbly Connect currently offer integration with 2,000+ applications.

I Built a WhatsApp AI Assistant for a Makeup Brand — INSANE Results!

Learn how to create a WhatsApp AI Assistant for your makeup brand using Pabbly Chatflow. This detailed tutorial shows you how to build powerful chat automation that engages visitors and converts prospects—without any coding required.

Watch Step By Step Video Tutorial Below


1. Introduction to Pabbly Chatflow for WhatsApp AI Assistant

In this tutorial, we will explore how to create a WhatsApp AI Assistant for your makeup brand using Pabbly Chatflow. This powerful platform allows you to manage customer queries efficiently without needing any coding skills.

With Pabbly Chatflow, you can automate responses and provide 24/7 support to your customers. This ensures that all inquiries are addressed promptly, enhancing customer satisfaction and engagement.


2. Setting Up Your Pabbly Chatflow Account

To get started, you need to set up your Pabbly Chatflow account. Visit the Pabbly website and sign up for a free account. If you’re a new user, you will receive 100 free credits monthly to explore the features.

  • Go to www.Pabbly.com/chatflow
  • Click on ‘Sign Up’ to create a new account
  • Log in to your account after confirmation

Once logged in, you will be directed to the Pabbly Chatflow dashboard, where you can start creating your WhatsApp AI Assistant. This dashboard provides access to all the tools you need for integration and setup.


3. Creating Your WhatsApp AI Assistant

Now that your Pabbly Chatflow account is set up, you can create your WhatsApp AI Assistant. Navigate to the ‘Assistant’ section in the dashboard to begin.

Click on the ‘Add Assistant’ button and name your assistant, for example, ‘WhatsApp Assistant for Makeup Brand’. This name will help you identify your assistant later on.

  • Select ‘AI Agent’ as your instruction type
  • Configure the assistant settings, including response parameters
  • Set the API key from your OpenAI account for AI responses

After filling in these details, click on the ‘Create Assistant’ button. Your WhatsApp AI Assistant is now ready to handle customer queries effectively.


4. Configuring Your Assistant Settings in Pabbly Chatflow

With your assistant created, the next step is to configure its settings in Pabbly Chatflow. This includes setting up instructions, knowledge sources, and fallback messages.

Under the assistant settings, you can define how the assistant responds to various queries. For instance, you can set a response time and specify the types of questions it can answer.

Add a knowledge base that includes FAQs about your makeup brand Input fallback messages for unrecognized queries Customize the assistant’s greeting and closing messages

Make sure to save all changes to ensure your assistant is fully operational and ready to assist customers with their inquiries.


5. Testing Your WhatsApp AI Assistant

Once you have configured your assistant’s settings, it’s crucial to test its functionality using Pabbly Chatflow. Send queries through WhatsApp to see how the assistant responds.

For example, ask questions like ‘What is your delivery time?’ or ‘Do you provide cash on delivery?’ and observe the responses. This will help you gauge if the assistant is providing accurate and helpful information.

After testing, make any necessary adjustments to improve response accuracy. This ensures that your assistant can handle customer queries effectively, providing a seamless experience.


Conclusion

Creating a WhatsApp AI Assistant for your makeup brand using Pabbly Chatflow is a straightforward process that enhances customer interaction. By following the steps outlined in this tutorial, you can ensure your assistant is ready to assist customers effectively.

Ensure you check out Pabbly Connect to create business automation workflows and reduce manual tasks. Pabbly Connect currently offer integration with 2,000+ applications.

Utilizing Pabbly Chatflow not only streamlines your customer service but also allows you to provide instant responses, improving overall customer satisfaction. Start building your assistant today!

Every Tech Company Needs This WhatsApp AI Assistant!

Learn how to create a WhatsApp AI Assistant for your tech company using Pabbly Chatflow. Step-by-step tutorial with detailed instructions. Discover practical methods for designing chat sequences that capture leads, answer questions, and guide users to the next step in your funnel.

Watch Step By Step Video Tutorial Below


1. Accessing Pabbly Chatflow for Your WhatsApp AI Assistant

To create a WhatsApp AI Assistant, the first step is to access Pabbly Chatflow. Simply open a new tab and navigate to www.Pabbly.com/chatflow. This will take you to the dashboard where you can sign in or sign up for free.

If you’re a new user, click on the ‘Sign Up for Free’ option and create an account to receive 100 free credits every month. Existing users can directly log in to their Pabbly Chatflow account. Once logged in, you will see various Pabbly applications, and you should select the Pabbly Chatflow option to proceed.


2. Creating Your WhatsApp AI Assistant in Pabbly Chatflow

After accessing Pabbly Chatflow, navigate to the assistant section. Click on the ‘Add a Assistant’ button to start creating your WhatsApp AI Assistant. Name your assistant, for instance, ‘Every Tech Company Needs This WhatsApp AI Assistant’.

  • Click on ‘Add a Assistant’ to create a new assistant.
  • Input the name of your assistant.
  • Follow the on-screen instructions to set it up.

Once you have named your assistant, it’s time to configure its settings. Select the instruction type as ‘AI Agent’ to ensure it functions properly. You can customize the parameters such as temperature, AI model, and API key to enhance its performance.


3. Configuring AI Settings in Pabbly Chatflow

In this section, you will configure the settings for your AI Assistant using Pabbly Chatflow. Set the temperature to 0.5 for balanced responses. Choose the AI model, preferably GPT-4, and provide the required API key from your OpenAI account.

  • Select the AI model as GPT-4.
  • Input your OpenAI API key to connect.
  • Adjust the temperature for response style.

After entering the API key, toggle the necessary settings for message headers and footers. This ensures that your assistant provides consistent and professional responses. Finally, save your settings to finalize the configuration.


4. Uploading Knowledge Source in Pabbly Chatflow

To enhance your WhatsApp AI Assistant’s capabilities, upload a knowledge source document in Pabbly Chatflow. This document should contain comprehensive information about your business, including services, FAQs, and billing details.

Prepare a detailed knowledge source document. Click on the upload button in the knowledge source section. Verify that the file uploads successfully.

Once uploaded, your assistant will be able to utilize this knowledge base to answer customer queries effectively. Make sure the document is well-structured and informative to provide accurate responses.


5. Testing Your WhatsApp AI Assistant in Pabbly Chatflow

After creating and configuring your AI Assistant, it’s time to test its functionality. Use WhatsApp to send queries to your assistant and check if it responds accurately. This step is crucial to ensure that the assistant can handle real-time customer interactions. using Pabbly Connect

Send a test query to your WhatsApp AI Assistant. Wait for the assistant to respond with the correct information. Adjust settings based on the responses received.

Once you confirm that your assistant is functioning correctly, enable the auto-reply settings to assign it to all contacts. This will help streamline customer support and enhance user experience.


Conclusion

In conclusion, creating a WhatsApp AI Assistant with Pabbly Chatflow is a straightforward process that enhances customer interaction for tech companies. By following the steps outlined, businesses can efficiently automate responses and improve customer satisfaction.

Ensure you check out Pabbly Connect to create business automation workflows and reduce manual tasks. Pabbly Connect currently offer integration with 2,000+ applications.

Auto-Add Facebook Leads to Brevo & Get Instant Gmail Alerts!

Learn how to automate adding Facebook leads to Brevo and receive instant Gmail alerts using Pabbly Connect in this detailed tutorial. Implement the precise methodologies leading organizations use to automate repetitive tasks, illustrated with practical examples designed for immediate application.

Watch Step By Step Video Tutorial Below


1. Accessing Pabbly Connect for Facebook Leads and Brevo Integration

To automate the process of adding Facebook leads to Brevo and sending Gmail alerts, first, access Pabbly Connect. Visit Pabbly’s website by typing Pabbly.com in your browser. Once there, sign in to your account. If you are a new user, you can sign up for free and start with 100 tasks per month.

After logging in, navigate to the Pabbly Connect dashboard. Here, you can manage your workflows and create new ones. Click on the ‘Create Workflow’ button, and select the new beta workflow builder for a more modern experience. Name your workflow something like ‘Auto Add Facebook Leads to Brevo & Get Instant Gmail Alerts’ and choose a folder for organization.


2. Setting Up Trigger with Facebook Lead Ads in Pabbly Connect

In this section, you’ll set up the trigger for your workflow using Facebook Lead Ads. Select Facebook Lead Ads as your trigger application, and choose the event as ‘New Lead Instant.’ Click on ‘Connect’ to establish the connection with Facebook. using Pabbly Connect

  • If you don’t have a connection, click on ‘Add New Connection’ and log in to your Facebook account.
  • Grant necessary permissions to Pabbly Connect to access your Facebook lead data.
  • Select the page name and lead form from your Facebook account.

Once the connection is established, you’ll need to test the workflow by submitting a lead form. This will help ensure that Pabbly Connect is capturing the lead data correctly from Facebook Lead Ads.


3. Adding Brevo Action Step to Create Contacts

After successfully capturing leads from Facebook, the next step is to add Brevo as an action application in your workflow. Click on ‘Add New Action Step’ and search for Brevo. Choose the action event as ‘Create/Update Contact’ and click on ‘Connect’. using Pabbly Connect

To connect Brevo, you’ll need to enter your API key. Generate a new API key from your Brevo account by navigating to the SMTP and APIs section. Copy the generated API key and paste it into Pabbly Connect. Ensure your domain is also correctly entered.

  • Map the lead data fields from Facebook to Brevo, such as email, first name, and last name.
  • Select the appropriate list in Brevo where you want to add the lead.
  • Click on ‘Save and Send Test Request’ to ensure the contact is created successfully.

Once the test is successful, you can verify that the lead has been added to your Brevo account.


4. Sending Gmail Alerts to New Leads

The final step in your automation workflow is to send an instant Gmail alert to the new leads. Click on ‘Add New Action Step’ again and search for Gmail. Choose the action event as ‘Send Email’ and connect your Gmail account.

After connecting Gmail, fill out the email details such as sender name, recipient email, subject, and content. You can map the recipient email from the lead data captured earlier. Customize the email content to welcome the new lead and inform them about the inquiry.

Set the email subject as ‘Welcome! We Have Received Your Inquiry’. In the email body, include personalized greetings using mapped lead data. Click ‘Save and Send Test Request’ to send a test email.

Once the test email is sent successfully, check your Gmail inbox to confirm that the email has been received. This completes your automation process using Pabbly Connect.


5. Conclusion

By using Pabbly Connect, you have successfully automated the process of adding Facebook leads to Brevo and sending instant Gmail alerts. This integration streamlines your workflow and saves you time, allowing you to focus on growing your business.

Ensure you check out Pabbly Connect to create business automation workflows and reduce manual tasks. Pabbly Connect currently offer integration with 2,000+ applications.

Check out Pabbly Connect – Automate your business workflows effortlessly! Sign Up Free – Start your journey with ease! 10,000+ Video Tutorials – Learn step by step! Join Pabbly Facebook Group – Connect with 21,000+ like minded people!

WhatsApp Agent for Wedding & Event Booking Inquiries

Learn how to create a WhatsApp agent for wedding and event booking inquiries using Pabbly Chatflow. Step-by-step guide for seamless integration! Implement professional chat automation that answers common questions, qualifies leads, and books appointments without human intervention.

Watch Step By Step Video Tutorial Below


1. Accessing Pabbly Chatflow for WhatsApp Integration

To create a WhatsApp agent for your wedding and event planning business, the first step is to access Pabbly Chatflow. You can do this by visiting Pabbly.com/chatflow in your web browser. If you are a new user, click on the ‘Sign Up Free’ button to create an account. Existing users should simply sign in.

Once you are signed in, you will see the Pabbly apps window. Click on the ‘Access Now’ button next to Pabbly Chatflow to navigate to the dashboard. From here, you can start creating your WhatsApp agent.


2. Adding Your WhatsApp Number in Pabbly Chatflow

Next, you need to add your WhatsApp number to Pabbly Chatflow. On the dashboard, locate the ‘Add WhatsApp Number’ button. You will be presented with two options: WhatsApp Connect and Manual Token Connect. It is recommended to use the WhatsApp Connect method for seamless integration.

  • Click on ‘Add WhatsApp Number’.
  • Select the WhatsApp Connect option.
  • Follow the prompts to link your WhatsApp account.

After successfully adding your WhatsApp number, you can proceed to create your AI assistant for handling inquiries related to wedding and event bookings.


3. Creating an AI Assistant in Pabbly Chatflow

To create an AI assistant, navigate to the AI Assistant feature in Pabbly Chatflow. Click on the ‘Add Assistant’ button. You will be prompted to name your assistant. Choose a name that reflects its purpose, such as ‘Event Booking Assistant’ and click ‘Add’.

After naming your assistant, you will be directed to the flow window. Here, select the instruction type from the drop-down menu. Choose the option labeled ‘AI Agent’. This will automatically fill in some basic instructions for your assistant. You can customize these instructions further as per your requirement.


4. Configuring Your AI Assistant in Pabbly Chatflow

In this step, you will configure your AI assistant’s settings in Pabbly Chatflow. Set the temperature, which controls how creative the assistant’s responses will be. A lower value makes the responses more focused. For example, setting it to 0.4 will provide concise answers suitable for inquiries.

  • Select the AI model, typically OpenAI GPT-4.
  • Input your OpenAI API key for authentication.
  • Add header and footer messages to personalize your assistant’s responses.

Additionally, set up stop keywords that users can type to halt the assistant’s responses. This ensures that a human can take over if needed. After configuring these settings, save your changes to finalize the assistant’s setup.


5. Assigning Your Assistant to WhatsApp Chats

To assign your newly created assistant to WhatsApp chats, navigate to the inbox settings in Pabbly Chatflow. You will find the option for AI auto-reply settings. Enable this feature to allow your assistant to respond to inquiries automatically.

Select the contact list that you wish to assign your assistant to, and choose the assistant you just created. Once you have made your selections, click the ‘Save’ button to apply these settings. This will allow your assistant to handle inquiries from users on WhatsApp effectively.


Conclusion

In conclusion, creating a WhatsApp agent for wedding and event booking inquiries using Pabbly Chatflow is a straightforward process. By following the steps outlined, you can set up an AI assistant that efficiently manages customer inquiries, enhancing your business’s responsiveness.

Ensure you check out Pabbly Connect to create business automation workflows and reduce manual tasks. Pabbly Connect currently offer integration with 2,000+ applications.

Create Certificates & Send on WhatsApp Automatically

Learn how to create participation certificates and send them via WhatsApp automatically using Pabbly Connect and Pabbly Connect in this detailed tutorial. Explore systematic approaches to creating efficient automation solutions that convert technical concepts into practical, implementable instructions.

Watch Step By Step Video Tutorial Below


1. Introduction to Automating Certificate Creation with Pabbly Connect

In this tutorial, we will explore how to use Pabbly Connect to create participation certificates automatically and send them via WhatsApp. This automation streamlines the process, making it efficient and hassle-free for event organizers.

We will be integrating Google Forms, Google Sheets, Google Slides, and Pabbly Chatflow with Pabbly Connect to achieve this. The goal is to collect participant information, generate certificates, and send them directly to participants through WhatsApp.


2. Setting Up Pabbly Connect for Certificate Automation

To begin, access Pabbly Connect by visiting the Pabbly Connect website. If you do not have an account, sign up for free to get started. Once logged in, navigate to the dashboard and click on the ‘Create Workflow’ button to start the automation setup.

  • Click on the ‘Create Workflow’ button.
  • Name your workflow (e.g., ‘Create Certificates and Send on WhatsApp Automatically’).
  • Select the ‘Google Forms’ application as the trigger.

After setting up the trigger, you will need to connect your Google Forms account to Pabbly Connect. This connection allows Pabbly Connect to capture form submissions automatically.


3. Integrating Google Forms and Google Sheets with Pabbly Connect

Once you have connected Google Forms, the next step is to link it with Google Sheets. This allows the participant data to be stored automatically in a spreadsheet. In Pabbly Connect, select the event ‘New Response Received’ to trigger the action whenever a form submission occurs.

To link Google Sheets, follow these steps:

  • Go to the Google Sheets extension and select the Pabbly Connect Webhooks add-on.
  • Paste the webhook URL provided by Pabbly Connect.
  • Set the trigger column to the column where the final data will be sent.

With this integration, every new form submission will automatically populate the Google Sheet, which Pabbly Connect will use for generating certificates.


4. Creating Certificates Using Google Slides and Pabbly Connect

Now that your data is flowing into Google Sheets, the next step is to create the certificate template in Google Slides. Use placeholders in the template for participant names and event details. This template will be used to generate personalized certificates.

In Pabbly Connect, add an action step to create a presentation from the template. Here’s how:

Select Google Slides as the action application. Choose the event ‘Create Presentation from Template’. Map the participant’s name to the designated placeholder in the template.

This action will generate a personalized certificate for each participant based on the data captured from Google Forms through Pabbly Connect.


5. Sending Certificates via WhatsApp Using Pabbly Chatflow

After generating the certificates, the final step is to send them to participants via WhatsApp. For this, we will utilize Pabbly Chatflow, which integrates seamlessly with Pabbly Connect.

To send the certificates, follow these steps:

Add an action step in Pabbly Connect for Pabbly Chatflow. Select the event ‘Send Template Message’. Map the recipient phone number and document URL for the certificate.

This process ensures that each participant receives their certificate promptly via WhatsApp, completing the automation workflow set up with Pabbly Connect.


Conclusion

In this tutorial, we demonstrated how to automate the creation and distribution of participation certificates using Pabbly Connect. By integrating Google Forms, Google Sheets, Google Slides, and Pabbly Chatflow, you can streamline your processes and enhance participant engagement.

Ensure you check out Pabbly Connect to create business automation workflows and reduce manual tasks. Pabbly Connect currently offer integration with 2,000+ applications.

Now, you can easily create and send certificates without any manual effort, ensuring a smooth experience for both you and your participants.

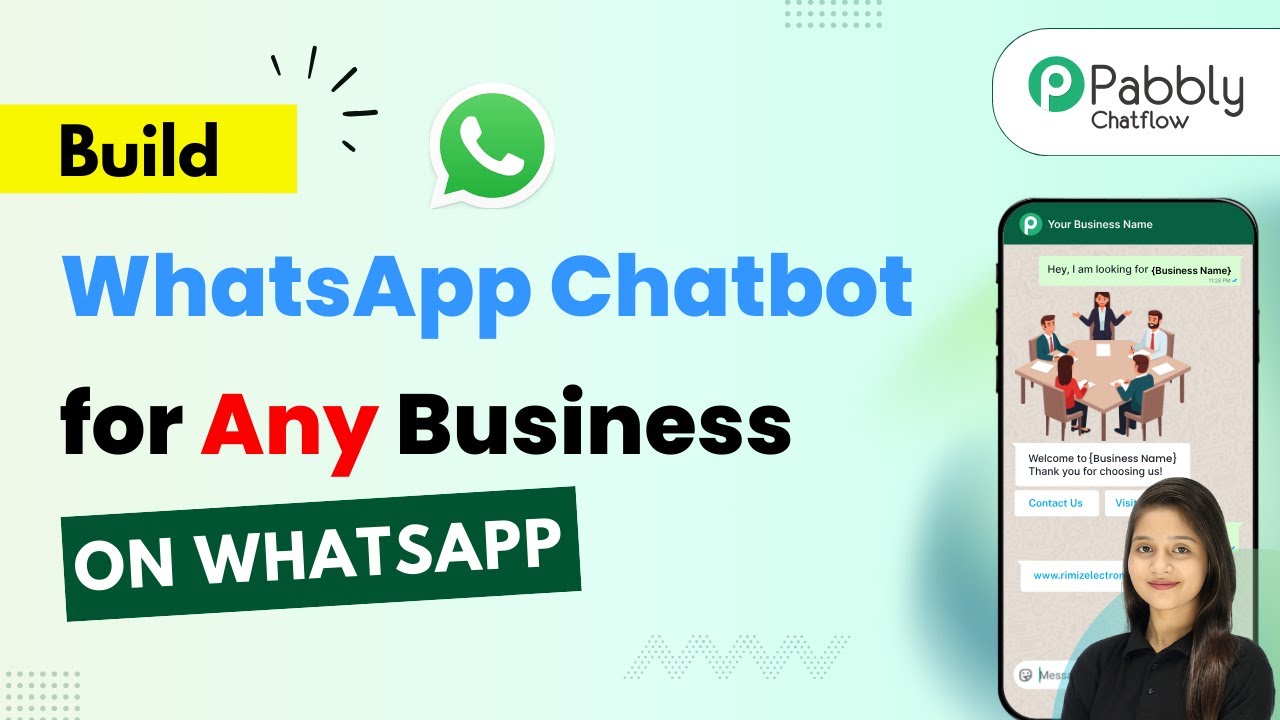
Build a WhatsApp Chatbot for Any Business (Beginner-Friendly Full Tutorial)

Learn how to build a WhatsApp chatbot for any business using Pabbly Chatflow. Follow this beginner-friendly guide to automate your responses effectively. Explore how leading businesses automate customer interactions with carefully designed chat sequences that feel natural and helpful.

Watch Step By Step Video Tutorial Below


1. Accessing Pabbly Chatflow for WhatsApp Automation

To start building your WhatsApp chatbot, the first step is to access Pabbly Chatflow. Open a new tab and navigate to Pabbly.com/chatflow. This tool is essential for automating WhatsApp messages for your business.

Once on the Pabbly Chatflow page, you will see options to sign in or sign up. If you’re new, click on ‘Sign Up Free’ to create an account and receive 100 free credits monthly. Existing users can simply sign in. After logging in, click on the ‘Access Now’ button to enter the Pabbly Chatflow dashboard.


2. Creating Your WhatsApp Chatbot Flow

In the Pabbly Chatflow dashboard, you can create a chatbot flow by clicking on the ‘Flows’ option. This section allows you to design your chatbot using a user-friendly drag-and-drop interface. Start by clicking the ‘+ Add Flow’ button to create a new flow for your business.

  • Name your flow (e.g., ‘Build a WhatsApp Chatbot for Any Business’).
  • Select a trigger event (e.g., keyword match).
  • Configure action buttons for user responses.

After naming your flow, select the appropriate trigger event. For this tutorial, you will choose a keyword match to respond to specific messages sent by users. This setup will enable your WhatsApp chatbot to automatically reply with a welcome message when users send keywords like ‘hello’ or ‘hi’.


3. Configuring Responses in Pabbly Chatflow

In this step, you’ll set up the responses that your Pabbly Chatflow chatbot will provide to users. Start by dragging a text button into the flow and entering your welcome message, such as ‘Hello, welcome to Fresh View Coffee House! How can I help you today?’ Add three action buttons: ‘View Menu’, ‘Place Order’, and ‘Contact Support’.

Next, connect the trigger point to your welcome message by dragging a line from the trigger circle to the text button. This connection ensures that when users send the specified keywords, they receive your welcome message immediately. For example, if a user clicks ‘View Menu’, the bot should send a menu image with a button to place an order.


4. Gathering User Information for Orders

To collect user information such as name, item name, quantity, address, and contact number, you will need to create additional action buttons in your Pabbly Chatflow flow. When users click ‘Place Order’, the bot should ask for their full name first. Use the ‘Ask a Question’ action and set the custom field to capture their response.

  • Ask for the user’s full name.
  • Request the item name they wish to order.
  • Inquire about the quantity and delivery address.
  • Ask for their contact number.

Each of these questions should be connected in sequence, ensuring a smooth flow of information. After gathering all necessary details, the bot will send a confirmation message summarizing the order, which includes dynamically inserted user responses like their name and order details.


5. Testing Your WhatsApp Chatbot

Once your flow is complete, it’s time to test your Pabbly Chatflow WhatsApp chatbot. Save your flow to ensure all configurations are stored. Then, send a test message to your WhatsApp business account using one of the keywords you set up, such as ‘hi’.

If everything is configured correctly, your chatbot should respond instantly with the welcome message and buttons. This confirms that the integration is working perfectly, allowing you to automate responses without manual effort.


Conclusion

In this tutorial, we explored how to build a WhatsApp chatbot for any business using Pabbly Chatflow. By following the steps outlined, you can automate your customer interactions effectively. Start enhancing your business communication today with Pabbly Chatflow!

Ensure you check out Pabbly Connect to create business automation workflows and reduce manual tasks. Pabbly Connect currently offer integration with 2,000+ applications.

Sync LinkedIn Leads to Apollo CRM — Never Miss a Hot Prospect Again!

Learn how to sync LinkedIn leads to Apollo CRM effortlessly using Pabbly Connect. Follow our detailed tutorial for seamless integration. Eliminate manual repetitive tasks from your workflow. Discover proven automation methods with intuitive steps designed for efficiency-minded professionals.

Watch Step By Step Video Tutorial Below


1. Accessing Pabbly Connect for LinkedIn and Apollo Integration

To sync LinkedIn leads to Apollo CRM, start by accessing Pabbly Connect. This powerful automation platform allows you to integrate various applications without any coding skills. Simply visit the Pabbly website and sign in to your account.

Once logged in, navigate to the dashboard where you can create a new workflow. Click on the ‘Create Workflow’ button, and select the new beta version of the workflow builder for a smoother experience. Name your workflow appropriately to reflect its purpose, such as ‘Sync LinkedIn Leads to Apollo CRM’.


2. Setting Up LinkedIn as the Trigger Application

In this step, you will set up LinkedIn as your trigger application using Pabbly Connect. A trigger is an event that starts your automation workflow. Select LinkedIn from the trigger application options.

  • Choose ‘Lead Notification’ as the trigger event.
  • Connect your LinkedIn account by clicking on ‘Connect with LinkedIn’.
  • Select your sponsored account from the dropdown menu.

After successfully connecting LinkedIn, click on ‘Save and Send Test Request’. This action will allow you to capture the webhook response, confirming that your connection is working correctly.


3. Testing Lead Capture from LinkedIn

Now that LinkedIn is set up as the trigger, it’s time to test the lead capture process. Fill out a lead generation form on LinkedIn to simulate a new lead. Make sure to include necessary details like email and phone number.

After submitting the form, return to your Pabbly Connect workflow to check if the lead details have been captured successfully. You should see a response indicating that the lead data has been received, confirming that the integration is functioning as intended.


4. Adding Apollo CRM as the Action Application

Next, you will set up Apollo CRM as the action application within Pabbly Connect. This step involves creating a new action that will automatically add the captured LinkedIn lead as a contact in Apollo.

  • Select Apollo.io as your action application.
  • Choose ‘Create Contact’ as the action event.
  • Connect Apollo by entering your API key.

After connecting Apollo, map the lead details received from LinkedIn to the respective fields in Apollo. This ensures that every new lead is accurately recorded in your CRM.


5. Finalizing the Integration and Workflow Execution

Finally, review all the mapped fields in your Pabbly Connect workflow and ensure everything is set up correctly. Click on ‘Save and Send Test Request’ to finalize the integration. This will execute the workflow and create a new contact in Apollo CRM based on the lead captured from LinkedIn.

Check your Apollo account to verify that the new contact has been added successfully. This confirms that your integration between LinkedIn and Apollo CRM via Pabbly Connect is complete and functioning effectively.


Conclusion

Integrating LinkedIn leads to Apollo CRM using Pabbly Connect streamlines your lead management process. By automating this workflow, you can ensure that no hot prospect is missed, enhancing your business’s efficiency.

Ensure you check out Pabbly Connect to create business automation workflows and reduce manual tasks. Pabbly Connect currently offer integration with 2,000+ applications.

How to Automatically Send SMS to Google Ads Leads with Twilio

Learn how to automatically send SMS to Google Ads leads using Pabbly Connect and Twilio with this step-by-step tutorial. Build sophisticated automated workflows in less time than you think. This guide translates complex integrations into straightforward steps for immediate implementation.

Watch Step By Step Video Tutorial Below


1. Accessing Pabbly Connect for SMS Automation

To start using Pabbly Connect, you need to visit the Pabbly Connect homepage by entering Pabbly.com/connect in your browser. Here, you will find two options: ‘Sign In’ and ‘Sign Up Free.’ If you are a new user, click on ‘Sign Up Free’ to create an account and receive 100 free tasks every month to explore the software.

Once you have signed in, you will be taken to the Pabbly apps window. From here, select Pabbly Connect by clicking on the ‘Access Now’ button. This will direct you to the Pabbly Connect dashboard, where you can begin setting up your automation for sending SMS to Google Ads leads.


2. Creating a New Workflow in Pabbly Connect

In the Pabbly Connect dashboard, the next step is to create a new workflow. Click on the ‘Create Workflow’ button to initiate this process. You will be prompted to choose between the new beta version and the classic version of the workflow builder. For this tutorial, we will select the beta version for its modern features. using Pabbly Connect

  • Click on ‘Create Workflow’.
  • Select the beta version of the workflow builder.
  • Name your workflow (e.g., ‘Automatically Send SMS to Google Ads Leads with Twilio’).

After naming your workflow, you can create a folder to organize it. Click on the folder dropdown menu to select an existing folder or create a new one. With your workflow set up, you are ready to define the trigger and action for your automation.


3. Setting Up the Trigger for Google Ads Leads

The next step involves setting up the trigger for your workflow. Since we want to send an SMS whenever there is a new lead from Google Ads, select ‘Google Ads’ as your trigger app and choose ‘New Lead Form Entry’ as the event. Click on the ‘Connect’ button to proceed.

Upon connecting, you will receive a webhook URL from Pabbly Connect. This URL is essential for linking your Google Ads account with Pabbly Connect. Copy this URL and navigate to your Google Ads account where you have created a lead form. In the lead form settings, find the option for lead delivery and select the webhook integration option to add the copied URL.

  • Paste the webhook URL from Pabbly Connect into the Google Ads lead form settings.
  • Set the key as ‘test’ in the Google Ads settings.
  • Click on ‘Send Test Data’ to verify the connection.

After sending the test data, return to Pabbly Connect to confirm that the data has been successfully received. This step ensures that your trigger is correctly set up and ready to initiate the SMS sending process whenever a new lead is generated.


4. Adding the Action Step to Send SMS via Twilio

With the trigger successfully set, the next step is to add an action to send an SMS through Twilio. In Pabbly Connect, select Twilio as the action application and choose ‘Send SMS Message’ as the event. Click on ‘Connect’ to proceed with the integration.

To establish a new connection with Twilio, you will need to provide your Account SID and Authorization Token, which you can find in your Twilio account. After entering these details, click on ‘Save’ to connect your Twilio account with Pabbly Connect.

Enter the SMS body you want to send (e.g., ‘Hi {First Name}, thanks for contacting us!’). Map the lead’s first name dynamically in the SMS body. Specify the sender number from your Twilio account.

Once you have configured the SMS details, click on ‘Save and Send Test Request’ to test the SMS functionality. If everything is set up correctly, you will receive a confirmation that the SMS has been sent successfully to the specified phone number.


5. Conclusion: Automating SMS for Google Ads Leads

In this tutorial, we successfully set up an automation using Pabbly Connect to send SMS messages to Google Ads leads via Twilio. By following the steps outlined, you can ensure that every new lead generated through Google Ads receives a personalized SMS message, enhancing your customer engagement.

Ensure you check out Pabbly Connect to create business automation workflows and reduce manual tasks. Pabbly Connect currently offer integration with 2,000+ applications.

Utilizing Pabbly Connect for this integration not only streamlines your workflow but also improves communication with potential clients. This automation allows you to focus on other important tasks while ensuring that leads are promptly acknowledged. For further assistance or to explore more automation possibilities, feel free to visit the Pabbly community.