How to Create a WhatsApp Chatbot for Your Paper Supply Store Using Pabbly Chatflow

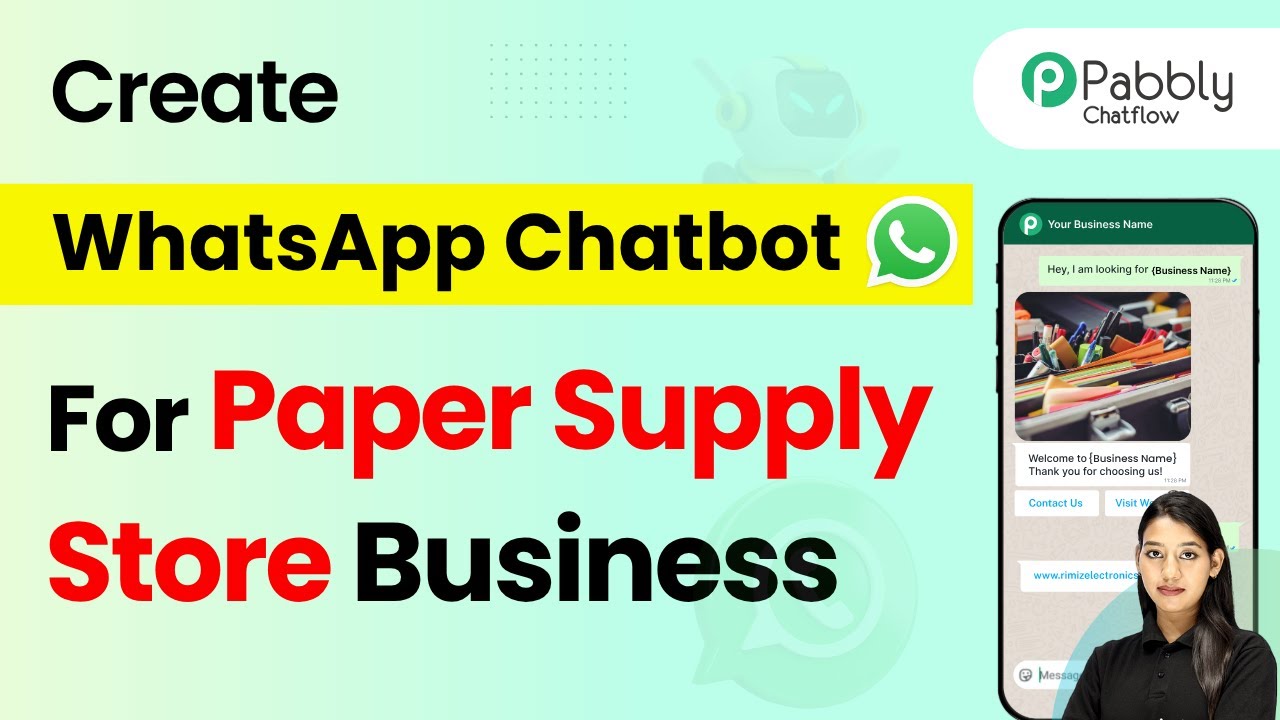
Learn how to create a WhatsApp chatbot for your paper supply store using Pabbly Chatflow. Step-by-step guide to automate customer queries. Learn how to create intelligent chat workflows that provide instant customer support while qualifying leads 24/7 without human intervention.

Watch Step By Step Video Tutorial Below


1. Accessing Pabbly Chatflow for Your WhatsApp Chatbot

To create a WhatsApp chatbot for your paper supply store, you need to access Pabbly Chatflow. Start by opening a new browser tab and entering the URL Pabbly.com/chatflow. This will take you to the main landing page of Pabbly Chatflow.

If you are an existing user, simply click on the ‘Sign In’ button. For new users, click on ‘Sign Up for Free’ to create your account. Once logged in, you will see all the applications provided by Pabbly Chatflow. Click on ‘Access Now’ to enter the dashboard.


2. Setting Up Your WhatsApp Chatbot in Pabbly Chatflow

After accessing the dashboard of Pabbly Chatflow, you can begin setting up your WhatsApp chatbot. On the left side of the screen, you will find various features. Start by selecting the ‘Flows’ option to create a new chatbot flow.

  • Click on ‘Add Flow’ to create a new flow.
  • Rename the flow to ‘WhatsApp Chatbot for Your Paper Supply Store’.
  • Enter keywords that will activate the chatbot.

This setup allows Pabbly Chatflow to respond to user inquiries effectively. You can also enable regex for advanced keyword matching, ensuring your chatbot is responsive to various user inputs.


3. Creating the Chatbot Conversation Flow

With your flow set up, it’s time to create the conversation for your WhatsApp chatbot using Pabbly Chatflow. Begin by adding a welcome message that greets users when they initiate a chat. You can format this message to include bold text for emphasis.

  • Add quick reply options for users to choose from.
  • Set up questions to ask users about their product needs and quantities.
  • Create confirmation messages that summarize the user’s requests.

Each of these components can be easily configured in Pabbly Chatflow, allowing you to customize the user experience and streamline interactions with your customers.


4. Finalizing and Testing Your Chatbot

Once you have set up the conversation flow in Pabbly Chatflow, it’s important to finalize your chatbot. Make sure to review all messages and ensure that they are correctly formatted and linked to the appropriate quick replies.

After finalizing, click the ‘Save’ button to update your chatbot. Once saved, you can test your chatbot by sending a message through WhatsApp and checking if the responses are as expected. This step is crucial for ensuring your chatbot operates smoothly and meets customer needs.


5. Conclusion: Automate Customer Interactions with Pabbly Chatflow

Creating a WhatsApp chatbot for your paper supply store using Pabbly Chatflow can significantly streamline customer interactions. By following the steps outlined in this tutorial, you can automate responses to common queries, enhancing customer satisfaction and reducing manual workload.

Ensure you check out Pabbly Connect to create business automation workflows and reduce manual tasks. Pabbly Connect currently offer integration with 2,000+ applications.

With Pabbly Chatflow, you have the tools necessary to build a responsive and effective chatbot tailored to your business needs. Start automating your customer service today!


How to Capture Leads from Typeform and Send to Google Sheets Using Pabbly Connect

Learn how to capture leads from Typeform and send them to Google Sheets seamlessly using Pabbly Connect in this step-by-step tutorial. Develop expertise in application integration and learn how to design streamlined automation workflows using proven, simplified approaches.

Watch Step By Step Video Tutorial Below


1. Accessing Pabbly Connect for Integration

To start capturing leads from Typeform and sending them to Google Sheets, you need to access Pabbly Connect. This powerful automation tool allows seamless integration between various applications without any coding skills.

Open a new tab and navigate to Pabbly.com/connect. Here, you can either sign up for a new account or log in if you’re an existing user. After signing in, you will be directed to the Pabbly Connect dashboard, where you can create your workflow.


2. Creating Your Workflow in Pabbly Connect

Once you are in the dashboard of Pabbly Connect, click on the ‘Create Workflow’ button. You will be prompted to name your workflow; for this integration, you can name it ‘Add Google Sheet Rows on Typeform Submission’. Choose the appropriate folder, then click on the ‘Create’ button.

After creating the workflow, you will see the options for setting up a trigger and action. The trigger is the event that starts the workflow, while the action is what happens as a result. In this case, the trigger will be a new submission from Typeform, and the action will be adding a new row in Google Sheets.


3. Setting Up the Trigger from Typeform

To set up the trigger in Pabbly Connect, select Typeform as the trigger application. Choose the event as ‘New Entry’. This means that every time there is a new form submission in Typeform, it will trigger the workflow.

Click on ‘Connect’ to link your Typeform account with Pabbly Connect. If it’s your first time, select ‘Add New Connection’. You will need to authorize Pabbly Connect to access your Typeform account. Once connected, select the form you want to monitor for submissions.

  • Select ‘Typeform’ as the trigger application.
  • Choose ‘New Entry’ as the trigger event.
  • Connect your Typeform account to Pabbly Connect.

After successfully connecting, click on ‘Save and Send Test Request’ to ensure your setup is working correctly. This will allow you to verify that Pabbly Connect is receiving the form submissions.


4. Adding Action to Google Sheets

Next, you need to set up the action in Pabbly Connect. Select Google Sheets as the action application and choose ‘Add New Row’ as the action event. This means that every new submission from Typeform will be added as a new row in your Google Sheets.

Click on ‘Connect’ to link your Google Sheets account. If you have an existing connection, you can select that; otherwise, create a new connection by signing in with your Google account. After connecting, choose the specific Google Sheet where you want the data to be added.

  • Select ‘Google Sheets’ as the action application.
  • Choose ‘Add New Row’ as the action event.
  • Connect your Google Sheets account to Pabbly Connect.

Map the fields from the Typeform submission to the respective columns in Google Sheets. This process ensures that the data captured from Typeform is accurately reflected in your Google Sheet.


5. Testing Your Integration

After setting up the action in Pabbly Connect, it’s time to test the integration. Fill out your Typeform and submit it. Go back to Pabbly Connect and click on ‘Save and Send Test Request’ for the Google Sheets action. This will send the test data to your Google Sheet.

Check your Google Sheet to confirm that the new row has been added with the data from your Typeform submission. If everything is set up correctly, you should see the first name, last name, phone number, email, and any other mapped fields appearing in the new row.

Remember to keep your workflow active in Pabbly Connect to ensure that future submissions are also captured and sent to Google Sheets automatically. This integration allows you to manage leads effortlessly without manual intervention.


Conclusion

In this tutorial, you learned how to capture leads from Typeform and send them to Google Sheets using Pabbly Connect. By following these steps, you can automate the process of lead capturing, ensuring that your data is organized and easily accessible for follow-ups. With Pabbly Connect, you can streamline your workflows and save time on manual tasks.

Ensure you check out Pabbly Connect to create business automation workflows and reduce manual tasks. Pabbly Connect currently offer integration with 2,000+ applications.

How to Broadcast WhatsApp Messages for Your Bakery Business Using Pabbly Chatflow

Learn how to broadcast WhatsApp messages for your bakery business using Pabbly Chatflow. Step-by-step tutorial for seamless integration. Explore how leading businesses automate customer interactions with carefully designed chat sequences that feel natural and helpful.

Watch Step By Step Video Tutorial Below


1. Accessing Pabbly Chatflow for Your Bakery Business

To begin broadcasting WhatsApp messages for your bakery business, first access Pabbly Chatflow. Open a new browser tab and enter the URL pabby.com/chatflow. This will direct you to the main landing page of Pabbly Chatflow.

If you are an existing user, click on the ‘Sign In’ button. If you are new, click on ‘Sign Up for Free’. Once signed in, you can access the various features of Pabbly Chatflow.


2. Exploring Pabbly Chatflow Features

Once logged into Pabbly Chatflow, you will see a dashboard displaying several features. These include options such as Inbox, Contacts, and Broadcast, which are essential for managing communications effectively.

  • Dashboard: Overview of chatbot performance and recent activities.
  • Inbox: Manage and reply to incoming customer conversations.
  • Contacts: Store details of users who interacted with your chatbot.

These features will help streamline your interactions with customers and set the stage for effective WhatsApp broadcasts through Pabbly Chatflow.


3. Adding Your WhatsApp Number to Pabbly Chatflow

To send messages via WhatsApp, you need to add your WhatsApp number in Pabbly Chatflow. Click on ‘Add WhatsApp Number’ and choose between WhatsApp Connect Beta or Manual Token Connect. For this tutorial, select Manual Token Connect.

You will need to generate a Meta Access Token from Facebook’s developer portal. Once you have the token, input it into Pabbly Chatflow. This step is crucial for enabling WhatsApp messaging capabilities.


4. Creating a Broadcast in Pabbly Chatflow

To create a broadcast, navigate to the Broadcast feature in Pabbly Chatflow. Click on ‘Add Broadcast’ and set your campaign type as a broadcast campaign. Name your broadcast, for example, ‘Bakery Business’, and select a contact list.

  • Choose a pre-approved WhatsApp template or create a new message.
  • Test the message by sending it to yourself before finalizing the broadcast.

Once satisfied with the setup, you can either schedule the broadcast for a later date or send it instantly. Click on ‘Add Broadcast’ to finalize your setup in Pabbly Chatflow.


5. Testing and Finalizing Your Broadcast

After creating your broadcast in Pabbly Chatflow, it is essential to test it. Send a test message to ensure everything is working correctly. Check your WhatsApp to confirm receipt of the broadcast message.

If the test is successful, your broadcast will show as live and working in Pabbly Chatflow. You can now confidently use this feature to keep your bakery customers informed about offers and updates.


Conclusion

By following this guide, you can effectively broadcast WhatsApp messages for your bakery business using Pabbly Chatflow. This integration streamlines communication and enhances customer engagement.

Ensure you check out Pabbly Connect to create business automation workflows and reduce manual tasks. Pabbly Connect currently offer integration with 2,000+ applications.

How to Store New Housing.com Leads in Brevo Using Pabbly Connect

Learn how to automate the process of storing new Housing.com leads in Brevo for real estate campaigns using Pabbly Connect. Follow our step-by-step tutorial! Navigate the automation landscape confidently with clear, structured guidance suitable for professionals regardless of prior technical experience.

Watch Step By Step Video Tutorial Below


1. Accessing Pabbly Connect for Automation

To start the process of storing new Housing.com leads in Brevo, first, you need to access Pabbly Connect. This platform allows you to create workflows that automate tasks without any coding skills. Simply visit the Pabbly website and log into your account.

Once logged in, you will see the Pabbly dashboard. Here, you can create new workflows that will help connect your Housing.com leads to Brevo. This automation will save you time by eliminating the need for manual data entry.


2. Creating a New Workflow in Pabbly Connect

To create a new workflow, click on the ‘Create Workflow’ button on the dashboard. You will need to name your workflow, for example, ‘Store New Housing.com Leads in Brevo for Real Estate Campaigns.’ After naming, select the appropriate folder to save your workflow.

  • Click on the ‘Create’ button to finalize your workflow setup.
  • You will see two boxes appear: one for the trigger and one for the action.
  • Select ‘Housing.com’ as your trigger application and ‘Brevo’ as your action application.

By using Pabbly Connect, you set up a trigger that activates whenever a new lead is captured from Housing.com. This ensures that your leads are automatically stored in Brevo, streamlining your workflow.


3. Setting Up the Trigger for Housing.com Leads

In this step, you will configure the trigger for your workflow. Select ‘New Leads’ from the trigger event options in Housing.com. A webhook URL will be generated by Pabbly Connect, which you need to copy and send to your Housing.com account manager.

This webhook acts as a bridge between Housing.com and Pabbly Connect. Once your account manager activates this integration, you will start receiving new leads directly into your Brevo account. Make sure to follow up with them to ensure the integration is set up correctly.


4. Configuring the Brevo Action to Store Leads

After setting up the trigger, you need to configure the action in Brevo. Select ‘Create or Update Contact’ as your action event. If you don’t have an existing connection, click on ‘Add New Connection’ and enter the required API key and domain for your Brevo account.

  • Generate a new API token from your Brevo account and copy it into Pabbly Connect.
  • Enter your domain in the specified format (e.g., app.brevo.com).
  • Click ‘Save’ to connect Brevo with Pabbly Connect.

Now, you can utilize the mapping feature to dynamically insert lead information such as email addresses and phone numbers from the Housing.com response into Brevo. This ensures that each new lead is correctly recorded in your Brevo account.


5. Testing and Finalizing Your Integration

Once all configurations are complete, it’s time to test your integration. Send a test request from Pabbly Connect to check if the data flows correctly from Housing.com to Brevo. You should see a confirmation that the lead has been successfully created in your Brevo account.

After testing, make sure to monitor your workflow for any issues. With Pabbly Connect, you can easily adjust settings or troubleshoot problems as they arise, ensuring a seamless integration experience.


Conclusion

In this tutorial, we demonstrated how to effectively store new Housing.com leads in Brevo using Pabbly Connect. By automating this process, you can save valuable time and ensure that all leads are captured efficiently. Start using Pabbly Connect today to enhance your real estate campaigns!

Ensure you check out Pabbly Connect to create business automation workflows and reduce manual tasks. Pabbly Connect currently offer integration with 2,000+ applications.

How to Build an AI Assistant for Your Telecommunication Service Business Using Pabbly Chatflow

Learn how to create an AI assistant for your telecommunication service business using Pabbly Chatflow. Step-by-step guide with detailed instructions. Discover practical methods for designing chat sequences that capture leads, answer questions, and guide users to the next step in your funnel.

Watch Step By Step Video Tutorial Below


1. Accessing Pabbly Chatflow for Your AI Assistant

To create an AI assistant for your telecommunication service business, you need to access Pabbly Chatflow. Start by opening a new browser tab and entering the URL Pabbly.com/chatflow. This will take you to the main landing page of Pabbly Chatflow.

If you are an existing user, click on the ‘Sign In’ button. For new users, select ‘Sign Up for Free’ to create an account. Once signed in, you will see all the applications provided by Pabbly Chatflow. Click on ‘Access Now’ to enter the Pabbly Chatflow dashboard.


2. Exploring Features of Pabbly Chatflow

Once you are in the Pabbly Chatflow dashboard, you’ll find several features on the left side of the screen. These tools are essential for building your AI assistant.

  • Dashboard: Overview of chatbot performance and stats.
  • Inbox: Manage and reply to incoming customer conversations.
  • Contacts: Store details of users who interacted with your chatbot.

These features will help you manage your AI assistant effectively. With Pabbly Chatflow, you can create chat flows, manage contacts, and analyze performance metrics to enhance user interaction.


3. Setting Up Your AI Assistant in Pabbly Chatflow

To create your AI assistant, navigate to the ‘AI Assistant’ feature and click on ‘Add AI Assistant’. You will need to provide a name for your assistant, such as ‘Telecommunication Service Assistant’. After naming your assistant, click on ‘Add AI Assistant’ to proceed. using Pabbly Connect

Next, select the instruction type for your AI assistant. Choose ‘AI Agent’ from the options provided. You will also set the creativity level by adjusting the temperature; for instance, a temperature of 0.6 allows for moderate creativity. Ensure to select Open AI as the AI tool and choose the Chat GPT 4.0 mini model.


4. Integrating WhatsApp with Pabbly Chatflow

To connect your WhatsApp number to Pabbly Chatflow, click on ‘Add WhatsApp Number’. You will be given two options: WhatsApp Connect Beta and Manual Token Connect. Choose Manual Token Connect, which requires you to generate a Meta Access Token from Facebook Meta for Developers.

  • Generate your Meta Access Token from the Facebook Developer platform.
  • Paste the generated token into the required field in Pabbly Chatflow.

After successfully adding your WhatsApp number, you can manage all incoming messages through the Pabbly Chatflow inbox. This integration allows your AI assistant to respond to customer queries directly via WhatsApp.


5. Customizing Your AI Assistant’s Responses

In the AI Assistant settings, you can customize various aspects of your assistant’s responses. Start by uploading a knowledge source that contains all relevant information about your telecommunication services. This is crucial as the AI assistant will base its responses on this knowledge. using Pabbly Connect

You can also add a header and footer to your assistant, customize the initial message, and set the activation message. For example, set the activation message to ‘Hey, I need help’ to trigger the assistant’s response when users send this message. Once all settings are configured, enable the toggle to make your AI assistant active.


Conclusion

In this tutorial, we explored how to build an AI assistant for your telecommunication service business using Pabbly Chatflow. By following the detailed steps outlined, you can automate customer interactions and enhance service delivery efficiently. Start leveraging the power of Pabbly Chatflow today to streamline your operations and improve customer satisfaction.

Ensure you check out Pabbly Connect to create business automation workflows and reduce manual tasks. Pabbly Connect currently offer integration with 2,000+ applications.

Building an AI Assistant for Your Travel & Tourism Business Using Pabbly Chatflow

Learn how to create an AI assistant for your travel and tourism business using Pabbly Chatflow. Follow our step-by-step guide for seamless integration. This detailed guide shows you how to build powerful chat automation that engages visitors and converts prospects—without any coding required.

Watch Step By Step Video Tutorial Below


1. Accessing Pabbly Chatflow for Your AI Assistant

To create an AI assistant for your travel and tourism business, you first need to access Pabbly Chatflow. Start by opening a new tab and navigating to Pabbly.com/chatflow. This platform is specifically designed for automating WhatsApp interactions, making it an ideal choice for businesses in the travel sector.

Once on the Pabbly Chatflow page, you will see options to sign in or sign up. If you are a new user, click on the ‘Sign Up’ option. Existing users should click on ‘Sign In’. After signing in, you will be directed to the dashboard where you can manage your WhatsApp interactions effectively.


2. Setting Up Your AI Assistant in Pabbly Chatflow

Now that you are in Pabbly Chatflow, the next step is to set up your AI assistant. Click on the ‘AI Assistant’ option from the dashboard. This section allows you to create a new AI assistant tailored for your travel and tourism business.

  • Click on the ‘Add AI Assistant’ button.
  • Provide a name for your assistant related to travel.
  • Set the instruction type as AI agent.

Once you have filled in these details, click on the ‘Add AI Assistant’ button to proceed. This will initiate the process of creating your AI assistant, allowing you to customize its responses based on user interactions.


3. Configuring AI Assistant Features in Pabbly Chatflow

After creating your AI assistant, you will need to configure its features. In Pabbly Chatflow, you can set the temperature for responses, choose the AI model, and provide an API token from your OpenAI account. These settings will define how your assistant interacts with users.

Make sure to select the appropriate AI model, such as GPT-4 Mini, for optimal performance. You will also be prompted to upload a knowledge source file that contains common queries and responses relevant to your travel business.

  • Upload a knowledge base in plain text format.
  • Configure the assistant interface with a greeting message.
  • Enable or disable the display label powered by Pabbly.

Once all settings are configured, ensure to save your assistant to make it operational. This step is crucial as it allows your AI assistant to provide automated responses to user queries.


4. Testing Your AI Assistant on Pabbly Chatflow

With your AI assistant configured, it’s time to test its functionality. In Pabbly Chatflow, you can simulate user interactions to see how your assistant responds. Send a test message such as ‘I need help’ to verify if the assistant provides the expected response.

During testing, ensure that the AI assistant can handle various queries related to booking, customization, and payment methods. This phase is essential to ensure that your assistant is ready to assist real users effectively.

Check responses for booking queries. Verify customization options provided. Ensure payment methods are accurately described.

After thorough testing, your AI assistant will be ready to assist users on platforms like WhatsApp, enhancing customer interaction for your travel business.


5. Launching Your AI Assistant with Pabbly Chatflow

Finally, to launch your AI assistant, return to Pabbly Chatflow and enable the assistant by toggling the activation switch. This will make your assistant live and ready to respond to user inquiries automatically.

Remember, the AI assistant will now be available to handle queries 24/7, providing timely responses to your customers. This automation will save you time and improve customer satisfaction significantly.

To ensure everything runs smoothly, monitor the assistant’s performance through the activity logs available in Pabbly Chatflow. This will help you make necessary adjustments based on user interactions and feedback.


Conclusion

Creating an AI assistant for your travel and tourism business using Pabbly Chatflow streamlines customer interactions and enhances service efficiency. By following these steps, you can ensure your assistant is well-equipped to handle user queries effectively.

Ensure you check out Pabbly Connect to create business automation workflows and reduce manual tasks. Pabbly Connect currently offer integration with 2,000+ applications.

Integrating 99 Acres Buyer Leads into Airtable with Pabbly Connect

Learn how to use Pabbly Connect to push buyer leads from 99 Acres into Airtable seamlessly with agent notes. Step-by-step tutorial included. Discover how to seamlessly connect your essential tools through accessible instructions that make powerful automation available to professionals at every skill level.

Watch Step By Step Video Tutorial Below


1. Accessing Pabbly Connect for Integration

To start integrating 99 Acres buyer leads into Airtable, you first need to access Pabbly Connect. Simply open your browser and search for the Pabbly Connect landing page by entering Pabbly.com/connect.

Once on the landing page, you will see options to sign in or sign up for free. If you are new, click on the Sign Up for Free button to create an account and enjoy 100 free tasks per month. Existing users can click Sign In to access their account.


2. Creating a Workflow in Pabbly Connect

After signing in, you will be directed to the Pabbly Connect dashboard. Here, click on the Create Workflow button to initiate your new automation. You will be prompted to name your workflow; enter Push 99 Acres Buyer Leads into Airtable with Agent Notes. using Pabbly Connect

  • Click on Create to open the workflow window.
  • This window will allow you to set up the trigger and action for your automation.

In this workflow, you will set 99 Acres as the trigger application. Select New Leads as the trigger event, which will activate the workflow whenever a new lead is received from 99 Acres.


3. Connecting 99 Acres to Pabbly Connect

After setting your trigger, Pabbly Connect will provide you with a webhook URL. This URL needs to be configured in your 99 Acres account to capture lead data. To do this, reach out to your 99 Acres account manager and request them to add the webhook URL to your account.

Once the webhook is activated by the 99 Acres team, you will start receiving lead information in your Pabbly Connect workflow. You can verify this by checking the webhook response in Pabbly Connect, where you will see details like the lead’s phone number, first name, last name, email, and area of interest.


4. Setting Up Airtable Integration with Pabbly Connect

With the webhook set up and leads coming in, the next step is to configure Airtable within Pabbly Connect. Select Airtable as your action application and choose Create Record as the action event. Click on Connect to establish a connection between Pabbly Connect and your Airtable account.

  • Authorize Pabbly Connect to access your Airtable account.
  • Select the specific base in Airtable where you want to save the lead information.

Once connected, you will need to map the fields from the 99 Acres lead data to the corresponding fields in Airtable. This mapping ensures that the lead details are correctly organized in your Airtable base, allowing for easy tracking and follow-ups.


5. Mapping Lead Details in Airtable via Pabbly Connect

In this final step, you will map the lead details received from 99 Acres into Airtable using Pabbly Connect. Start by mapping the first name and last name together into the name field. Follow this by mapping the email address, phone number, and city from the lead data.

Once all fields are mapped, set the status as New Lead and click on Save and Send Test Request. This action will create a new record in Airtable with the lead’s information. Verify this by checking your Airtable base to see if the lead details have been successfully added.

With this setup, every time a new lead is generated in 99 Acres, the information will automatically populate in your Airtable account without any manual intervention. This automation streamlines your workflow significantly.


Conclusion

In this tutorial, we explored how to use Pabbly Connect to seamlessly push buyer leads from 99 Acres into Airtable along with agent notes. By following these steps, you can automate your lead management process and ensure your team stays organized and responsive.

Ensure you check out Pabbly Connect to create business automation workflows and reduce manual tasks. Pabbly Connect currently offer integration with 2,000+ applications.

How to Share WhatsApp Brochure for Elementor Form Submissions Using Pabbly Connect

Learn how to automate sharing WhatsApp brochures for Elementor form submissions using Pabbly Connect. Step-by-step guide for seamless integration. Explore systematic approaches to creating efficient automation solutions that convert technical concepts into practical, implementable instructions.

Watch Step By Step Video Tutorial Below


1. Accessing Pabbly Connect for Automation

To start automating the process of sharing WhatsApp brochures for Elementor form submissions, the first step is to access Pabbly Connect. Simply navigate to Pabbly.com/connect in your web browser. This will take you to the Pabbly Connect homepage.

Once on the homepage, you need to either sign in or create a free account. New users can sign up for free and get 100 tasks each month to explore the software. Existing users should click on the sign-in option. After logging in, you will be directed to the Pabbly Connect dashboard where the integration process begins.


2. Creating a New Workflow in Pabbly Connect

In the Pabbly Connect dashboard, the next step is to create a new workflow. Click on the ‘Create Workflow’ button in the top right corner. You will be prompted to name your workflow; for this integration, you can name it ‘Share WhatsApp for Elementor Form Submissions’. This name helps identify the workflow later on.

After naming your workflow, you can choose a folder to save it in. Pabbly Connect allows you to organize your workflows into folders. For this example, select the folder named ‘Automations’. If you need to create a new folder, you can do so by following the instructions provided in the Pabbly Connect interface.

  • Click on ‘Create’ to finalize your workflow setup.
  • You will now see options for setting up triggers and actions.

Once the workflow is created, you will need to set up a trigger. This is where Pabbly Connect comes into play, as it will facilitate the connection between your Elementor form and WhatsApp.


3. Setting Up the Trigger for Elementor Form Submissions

To set up the trigger, select ‘Elementor Form’ as your trigger application. Then, choose ‘New Form Submission’ as the trigger event. This means that every time a student submits a form via Elementor, Pabbly Connect will capture this event and initiate the subsequent actions.

After selecting the trigger event, you will receive a webhook URL. This URL is essential for connecting your Elementor form to Pabbly Connect. Copy this webhook URL, as it will be used in the next steps to link your form with the automation.

  • Log in to your WordPress account where Elementor is installed.
  • Edit the form with Elementor and navigate to the ‘Actions After Submit’ section.
  • Select ‘Webhook’ and paste the copied URL.

After publishing the changes to your form, Pabbly Connect will be ready to receive data from the Elementor form submissions.


4. Testing the Integration and Sending WhatsApp Messages

Now that the webhook is set up, it’s time to test the integration. To do this, make a test submission using the Elementor form you just configured. Enter dummy details such as a name and email address, and click on send. This will trigger the webhook and send the details to Pabbly Connect.

Once the test submission is successful, return to your Pabbly Connect dashboard. You should see the captured data from the form submission, including the first name, last name, phone number, and email address. This confirms that the trigger is working correctly.

Proceed to set up the action by selecting ‘AI Sensei’ as the action application. Choose ‘Send Template Message’ as the action event.

This setup allows Pabbly Connect to automate sending WhatsApp messages with the course brochure attached to the student who submitted the form.


5. Finalizing the Setup and Sending the Brochure

To finalize the setup, connect your AI Sensei account with Pabbly Connect. You will need to enter your API token from your AI Sensei account. Navigate to the API section in your AI Sensei account to generate and copy the API key.

After pasting the API token in Pabbly Connect, you will be prompted to enter the campaign name and the mobile number of the student. Make sure to map the phone number and name fields from the previous steps to personalize the message. Additionally, include the publicly accessible URL of the brochure you wish to send.

Click on ‘Save and Send Test Request’ to complete the setup. Check your WhatsApp to confirm that the message with the brochure has been received.

Once you verify that the WhatsApp message is sent successfully, your automation process is complete. This is how Pabbly Connect streamlines the process of sharing WhatsApp brochures for Elementor form submissions.


Conclusion

In this tutorial, we explored how to use Pabbly Connect to automate the sharing of WhatsApp brochures whenever a student submits an Elementor form. By following the steps outlined, you can enhance your communication efficiency and ensure that inquiries are addressed promptly. This integration not only saves time but also keeps students engaged with your university’s offerings.

Ensure you check out Pabbly Connect to create business automation workflows and reduce manual tasks. Pabbly Connect currently offer integration with 2,000+ applications.

Track Leads from Instagram Lead Ads to Google Sheets Automatically Using Pabbly Connect

Learn how to track leads from Instagram Lead Ads to Google Sheets automatically using Pabbly Connect. Step-by-step guide for seamless integration. Build sophisticated automated workflows in less time than you think. This guide translates complex integrations into straightforward steps for immediate implementation.

Watch Step By Step Video Tutorial Below


1. Accessing Pabbly Connect for Automation

To track leads from Instagram Lead Ads to Google Sheets automatically, first, you need to access Pabbly Connect. This powerful integration platform allows you to set up automated workflows without any coding skills.

Start by visiting the Pabbly website and signing in to your account. If you are a new user, you can sign up for free to get started. Once logged in, navigate to the Pabbly Connect dashboard where you can create your first workflow.


2. Creating Your Workflow in Pabbly Connect

In this section, you will learn how to create a workflow in Pabbly Connect to connect Instagram Lead Ads with Google Sheets. Begin by clicking on the ‘Create Workflow’ button. You will be prompted to name your workflow, such as ‘Track Leads from Instagram Lead Ads to Google Sheets Automatically.’ Select the folder for organization.

  • Click on the ‘Create’ button to proceed.
  • You will see two boxes: Trigger and Action.
  • Select Instagram Lead Ads as the Trigger application.

After selecting Instagram Lead Ads, choose the trigger event as ‘New Lead Instant’. This setup ensures that every time a new lead is generated, it will trigger the workflow.


3. Connecting Instagram Lead Ads to Pabbly Connect

Next, you need to establish a connection between Instagram Lead Ads and Pabbly Connect. Click on ‘Connect’ and select ‘Add New Connection’. You will be prompted to log in to your Facebook account, as Instagram is linked to Facebook.

Once logged in, authorize Pabbly Connect to access your Instagram Lead Ads. After successful authorization, you will need to select the Facebook page associated with your Instagram account. This is crucial for capturing leads accurately.


4. Setting Up Google Sheets for Lead Data

Now that you have connected Instagram Lead Ads, it’s time to set up Google Sheets as the Action application in Pabbly Connect. Select Google Sheets and choose the action event as ‘Add New Row’. This action will automatically add new leads to your specified Google Sheet.

  • Connect your Google account to Pabbly Connect.
  • Select the spreadsheet you created for Instagram leads.
  • Map the fields from Instagram Lead Ads to the corresponding columns in Google Sheets.

Mapping is essential for ensuring that each lead’s details, such as first name, last name, email, and phone number, are accurately recorded in the right columns of your Google Sheet.


5. Testing the Integration with Pabbly Connect

To ensure everything is set up correctly, it’s time to test the integration. Submit a test lead through your Instagram Lead Ads form. After submission, check your Google Sheet to see if the new lead details appear automatically.

Once you confirm that the integration works flawlessly, you can save and finalize your workflow in Pabbly Connect. This automation will now run in the background, adding any new leads to Google Sheets without manual input.


Conclusion

Using Pabbly Connect, you can effortlessly track leads from Instagram Lead Ads to Google Sheets automatically. This integration saves time and ensures that all lead information is captured accurately. Start automating your lead tracking today!

Ensure you check out Pabbly Connect to create business automation workflows and reduce manual tasks. Pabbly Connect currently offer integration with 2,000+ applications.

Automate Order Tracking Updates from WooCommerce to Google Sheets Using Pabbly Connect

Learn how to automate order tracking updates from WooCommerce to Google Sheets using Pabbly Connect in this detailed step-by-step tutorial. Master proven automation processes with practical implementation examples and strategic recommendations you can apply immediately in your workflow.

Watch Step By Step Video Tutorial Below


1. Accessing Pabbly Connect for Automation

To automate order tracking updates from WooCommerce to Google Sheets, you first need to access Pabbly Connect. Start by going to the Pabbly Connect website at Pabbly.com/connect.

Once there, you can either sign in if you already have an account or click on ‘Sign Up Free’ to create a new account. After signing in, you will be directed to the Pabbly Connect dashboard where you can create your workflow.


2. Creating a Workflow in Pabbly Connect

After accessing Pabbly Connect, the next step is to create a new workflow. Click on the ‘Create Workflow’ button located at the top right corner of the dashboard. You will be prompted to name your workflow, so enter a descriptive name like ‘Automate Order Tracking Updates from WooCommerce to Google Sheets’.

  • Click on ‘Create’ to proceed.
  • Select the appropriate folder for your workflow.
  • Ensure you understand the trigger-action principle of automation.

With your workflow created, you can now set up the trigger that will initiate the automation process.


3. Setting Up the Trigger from WooCommerce

In this step, you will set up the trigger for your workflow using Pabbly Connect. Choose ‘WooCommerce’ as your trigger application and select the event as ‘Order Updated’. This means that whenever an order status is updated in WooCommerce, it will trigger the workflow.

After selecting the trigger event, you will receive a webhook URL. Copy this URL and head to your WooCommerce account. In WooCommerce, navigate to the settings under ‘Advanced’ and select ‘Webhooks’. Here, you will create a new webhook by providing a name, setting the status to active, and pasting the copied webhook URL.


4. Setting Up Actions in Google Sheets

Once the trigger is set up, the next step is to define the actions that will occur in Google Sheets when an order is updated in WooCommerce. First, select Google Sheets as your action application in Pabbly Connect and choose the action event as ‘Lookup Spreadsheet Row’.

  • Connect your Google Sheets account to Pabbly Connect.
  • Select the spreadsheet containing your order details.
  • Map the order ID from the WooCommerce trigger to find the corresponding row in Google Sheets.

After setting up this action, you will receive a response indicating the row index of the order details, which you will use in the next action step.


5. Updating the Order Status in Google Sheets

In the final step, you will update the order status in Google Sheets based on the information received from WooCommerce. Choose Google Sheets again as your action application and select the action event as ‘Update Cell Value’. This allows you to update the status of the order in the corresponding row. using Pabbly Connect

Map the row index received from the previous step and specify the status column where the new status will be updated. After entering the necessary details, click on ‘Save and Send Request’. You should receive a successful response confirming that the order status has been updated in your Google Sheets.


Conclusion

In this tutorial, we covered how to automate order tracking updates from WooCommerce to Google Sheets using Pabbly Connect. By following these steps, you can streamline your order management process, ensuring that updates are reflected in real-time without manual intervention. This integration enhances efficiency and keeps your order tracking organized.

Ensure you check out Pabbly Connect to create business automation workflows and reduce manual tasks. Pabbly Connect currently offer integration with 2,000+ applications.