Build AI Helpdesk Assistant Without Coding

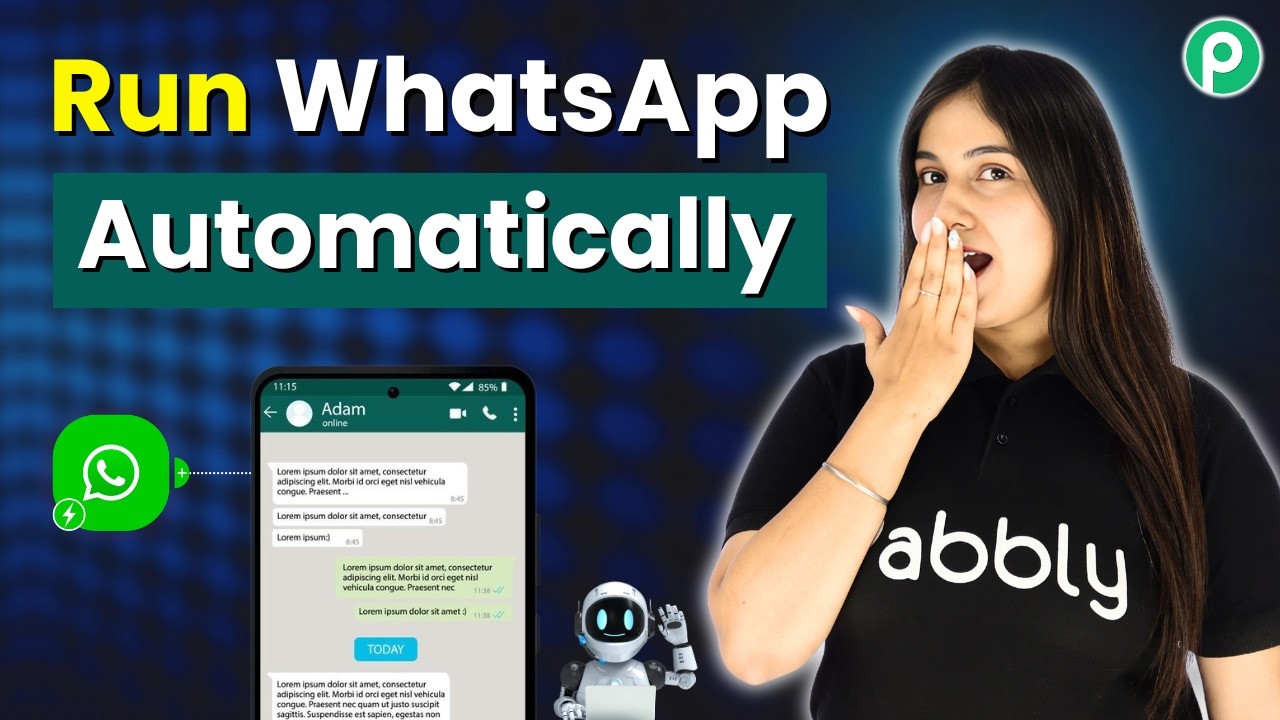
Learn how to create an AI Helpdesk Assistant using Pabbly Chatflow. Follow this detailed tutorial for seamless integration and automation without coding. Learn step-by-step how to create, test, and optimize chatbots that enhance customer experience while reducing support workload.

Watch Step By Step Video Tutorial Below


1. Setting Up Pabbly Chatflow for Your AI Helpdesk Assistant

To build your AI Helpdesk Assistant using Pabbly Chatflow, you first need to access the platform. Start by visiting the Pabbly Chatflow website and signing up for a free account. New users receive 100 free credits each month, allowing you to create chatbots without any cost.

Once you are logged in, navigate to the dashboard. Here, you will find options to add your WhatsApp number, which is essential for your assistant. Click on the ‘Add WhatsApp Number’ button to proceed with your integration.


2. Creating Your AI Assistant in Pabbly Chatflow

After setting up your WhatsApp number, the next step is to create your AI assistant. In your Pabbly Chatflow account, select the ‘AI Assistant’ option from the left sidebar. Press the ‘Add Assistant’ button to begin the creation process.

  • Name your assistant (e.g., AI Helpdesk Assistant).
  • Configure AI instructions, knowledge sources, and interface settings.
  • Style your assistant according to your brand preferences.

Once you have completed these steps, click the ‘Save’ button to finalize your AI assistant setup. This assistant will now be ready to interact with your customers.


3. Uploading Your Knowledge Base in Pabbly Chatflow

A crucial part of your AI assistant is its knowledge base. In Pabbly Chatflow, navigate to the ‘Knowledge Source’ section. Here, you need to upload a file containing essential information about your business, such as FAQs and service details.

Ensure your file is in .txt or PDF format and does not exceed 90 MB. Once uploaded, your assistant will utilize this information to answer customer queries effectively. This step is vital for ensuring your assistant provides accurate responses.


4. Designing Your AI Assistant’s Interface

Next, you will design the interface of your AI assistant within Pabbly Chatflow. Customize the heading and subheading to reflect your brand. You can also add an initial message that customers will see when they interact with the assistant.

  • Select a theme (light or dark).
  • Change the shape of the assistant’s avatar.
  • Add a privacy policy link if required.

After making these adjustments, click the ‘Save’ button to apply your changes. This design will enhance user experience and brand recognition.


5. Testing Your AI Helpdesk Assistant

Finally, it’s time to test your AI Helpdesk Assistant created through Pabbly Chatflow. Open your WhatsApp and send the trigger keyword you set earlier. Your assistant should respond instantly, demonstrating its functionality.

Verify that the assistant correctly answers queries based on the knowledge base you uploaded. If everything works as expected, your AI Helpdesk Assistant is now fully operational and ready to assist customers.


Conclusion

In this tutorial, we explored how to build an AI Helpdesk Assistant using Pabbly Chatflow. By following these steps, you can automate customer support and enhance user experience without any coding knowledge. Start leveraging automation today!

Ensure you check out Pabbly Connect to create business automation workflows and reduce manual tasks. Pabbly Connect currently offer integration with 2,000+ applications.

Put Your WhatsApp on Autopilot Today

Learn how to automate your WhatsApp using Pabbly Connect to streamline customer interactions and enhance your business efficiency. Discover hidden automation capabilities within your existing tools. This guide shows you how to connect your essential applications and permanently eliminate redundant manual processes.

Watch Step By Step Video Tutorial Below


1. Accessing Pabbly Connect for WhatsApp Automation

To put your WhatsApp on autopilot, you first need to access Pabbly Connect. Begin by searching for Pabbly.com/f in your browser. This will direct you to the home page of Pabbly Connect.

Once on the homepage, you will see two options: Sign In and Sign Up for free. If you are a new user, click on ‘Sign Up for Free’ to create an account. Existing users can simply sign in to their account.


2. Creating Your WhatsApp AI Agent with Pabbly Connect

After signing in, navigate to the Pabbly Connect dashboard where you can start creating your WhatsApp AI agent. Click on the ‘Add’ button to begin the process of setting up your AI assistant. using Pabbly Connect

  • Select a name for your assistant.
  • Choose the instruction type from the dropdown.
  • Configure the AI settings, including API key integration.

Once you have set the name and selected the instruction type, you will be directed to a flow window. Here, you can customize your AI agent’s responses and configure various settings to enhance its functionality.


3. Configuring AI Settings in Pabbly Connect

Next, configure the AI settings for your WhatsApp agent. In the configuration section, you will find options to set the temperature, which determines how creative or focused the responses will be. using Pabbly Connect

For example, setting the temperature to 0.4 will yield more focused responses. You will also need to select the AI model, such as GPT-3, from the dropdown menu. This is crucial for ensuring accurate responses to customer queries.

  • Enter your OpenAI API key to connect the AI model.
  • Adjust the header and footer messages to personalize your agent.
  • Specify keywords that will stop the assistant from replying.

After configuring these settings, you can save your changes and proceed to the next steps in setting up your WhatsApp automation.


4. Activating Your WhatsApp Agent with Pabbly Connect

To activate your WhatsApp agent, navigate to the inbox settings in Pabbly Connect. Here, you will find the option to enable AI outbound replies. Select the contact list and assign the assistant you created to these contacts. using Pabbly Connect

Click on the ‘Save’ button to confirm your settings. Your assistant will now be assigned to all contacts in the selected list, allowing it to respond to customer inquiries automatically.


5. Conclusion: Automate Your WhatsApp Today

Using Pabbly Connect to automate your WhatsApp interactions is a straightforward process. By following the steps outlined above, you can create an AI agent that efficiently handles customer queries, enhancing your business operations.

Ensure you check out Pabbly Connect to create business automation workflows and reduce manual tasks. Pabbly Connect currently offer integration with 2,000+ applications.

Start utilizing Pabbly Connect today to streamline your WhatsApp communications and improve customer satisfaction. With this automation, you can focus on growing your business while ensuring timely responses to your clients.

From Lead to Sale — Fully Automated Chatbot 🚀

Learn how to build a fully automated WhatsApp chatbot using Pabbly Connect for seamless lead management and sales enhancement. Build sophisticated automated workflows in less time than you think. This guide translates complex integrations into straightforward steps for immediate implementation.

Watch Step By Step Video Tutorial Below


1. Accessing Pabbly Connect for Your WhatsApp Chatbot

To create a fully automated WhatsApp chatbot, first, you need to access Pabbly Connect. Start by visiting the Pabbly website and navigate to the Chartflow section. Here, you can sign up or log in to your existing account. If you are new, click on the ‘Sign Up Free’ option to get started.

Once logged in, you will see the dashboard where you can manage your WhatsApp numbers. Click on the ‘Access Now’ button to enter the Pabbly Chartflow dashboard. This platform provides a user-friendly interface for building your chatbot without any programming knowledge.


2. Creating Your Chatbot Flow in Pabbly Connect

After accessing the Pabbly Chartflow dashboard, you will begin creating your chatbot flow. Click on the ‘Add Flow’ button to start a new flow. You will be prompted to name your flow; enter a name like ‘From Lead to Sale Fully Automated Chatbot’. This helps in identifying your chatbot easily. using Pabbly Connect

  • Select the trigger event for your chatbot.
  • Choose keywords that will trigger the bot, such as ‘hi’ and ‘hello’.
  • Add a welcome message that the bot will send in response.

For example, you can write, ‘Welcome to Secure Future Financials. How may I assist you today?’ This message sets the tone for user interaction. Make sure to save your flow to avoid losing any progress.


3. Setting Up User Interaction with Pabbly Connect

To enhance user interaction, you can add quick reply buttons. After the welcome message, add options like ‘Book Consultation’, ‘Insurance Plans’, and ‘Talk to Agent’. These buttons guide users to specific actions they can take. using Pabbly Connect

  • Create a button for booking consultations.
  • Link this button to a list of services offered.
  • Ensure all buttons are linked to the respective actions.

Once users select an option, the bot can respond with more detailed information or ask for further details, such as their full name or service interest. This interaction is crucial for capturing leads effectively.


4. Capturing User Information with Pabbly Connect

After users engage with the chatbot, it’s essential to capture their information effectively. Using custom fields in Pabbly Connect, you can ask for details such as the user’s full name, budget, and contact number.

For each question, ensure to set up contact custom fields. For example, when asking, ‘What is your primary goal?’, select the contact custom field as ‘goal’. This allows the bot to store user responses dynamically, ensuring personalized follow-up messages.

Once all questions are set, link the responses to a summary message that the bot will send back to the user. This message should include all collected information, enhancing the user experience and making follow-ups easier.


5. Testing and Finalizing Your Chatbot in Pabbly Connect

After building your chatbot flow, it’s crucial to test it to ensure everything is functioning correctly. Send a test message like ‘hi’ to your WhatsApp business account and observe the bot’s responses.

Ensure that the bot correctly replies with the welcome message and follows through with the options provided. If the flow works as intended, save your changes in Pabbly Connect and deploy the chatbot.

Remember to monitor the interactions to continually improve the chatbot based on user feedback. This will help in refining the user experience and enhancing lead conversion rates.


Conclusion

In conclusion, using Pabbly Connect to create a fully automated WhatsApp chatbot allows businesses to engage with leads efficiently. By following the steps outlined, you can build a chatbot that enhances user interaction and boosts sales.

Ensure you check out Pabbly Connect to create business automation workflows and reduce manual tasks. Pabbly Connect currently offer integration with 2,000+ applications.

How to Recover Failed Transactions Automatically (No Manual Follow-Ups)

Learn how to recover failed transactions automatically with Pabbly Connect. This detailed tutorial covers step-by-step integration with Google Sheets and Twilio. Explore systematic approaches to creating efficient automation solutions that convert technical concepts into practical, implementable instructions.

Watch Step By Step Video Tutorial Below


1. Accessing Pabbly Connect for Workflow Automation

To recover failed transactions automatically, the first step is to access Pabbly Connect. Go to the Pabbly Connect website and sign up for a free account or log in if you are an existing user. Once logged in, you will see the dashboard where you can create and manage your workflows.

After logging in, you can create a new workflow by selecting the option to create from the dashboard. This is where you will set up the automation process that will help you recover failed transactions.


2. Creating a Workflow to Recover Failed Transactions

Now that you have accessed Pabbly Connect, it’s time to create a workflow specifically for recovering failed transactions. Click on the ‘Create New Workflow’ button and name it ‘Recover Failed Transactions Automatically.’ This will help you keep track of your automation.

  • Select the application as Razer Pay to capture failed payment responses.
  • Choose the event as ‘Payment Failed’ to trigger the workflow.

After setting up the trigger, you will receive a Webhook URL from Pabbly Connect. This URL is crucial as it helps connect Razer Pay with Pabbly Connect, allowing data transfer whenever a payment fails.


3. Setting Up the Webhook in Razer Pay

With the Webhook URL provided by Pabbly Connect, you need to set it up in your Razer Pay account. Navigate to the account settings in Razer Pay and find the webhook section. Here, you will add a new webhook and paste the URL you copied from Pabbly Connect.

  • Select the event as ‘Payment Failed’ to ensure you capture the right data.
  • Click on ‘Create Webhook’ to finalize the setup.

Once the webhook is set up, you can test it by making a failed payment on your Razer Pay demo page. This will allow you to see if the connection between Razer Pay and Pabbly Connect is functioning correctly.


4. Sending SMS Alerts via Twilio

After successfully capturing the failed payment data, the next step involves sending an SMS alert using Twilio. In Pabbly Connect, add a new action step and select Twilio as the application. Choose the event as ‘Send SMS’ to notify the customer about the failed transaction.

Connect your Twilio account by entering your Account SID and Authorization Token. Map the customer’s phone number and message body dynamically from the data received from Razer Pay.

This way, whenever a payment fails, the customer will receive an SMS alert with a retry link, ensuring they are informed without any manual follow-ups.


5. Storing Customer Data in Google Sheets

The final step in this workflow is to store the customer data from failed transactions in Google Sheets. In Pabbly Connect, add another action step and select Google Sheets. Choose the event as ‘Add New Row’ to create a new entry for each failed transaction.

Connect your Google Sheets account to Pabbly Connect. Map the columns such as Full Name, Email Address, Phone Number, Order ID, and Payment Status with the data received from Razer Pay.

Once the mapping is complete, click on ‘Save and Send Test Request’. You should see a new row added to your Google Sheets with all the relevant details of the failed transaction, confirming that your workflow is functioning correctly.


Conclusion

In this tutorial, we explored how to recover failed transactions automatically using Pabbly Connect. By integrating Razer Pay, Twilio, and Google Sheets, you can streamline your customer recovery process without any manual follow-ups. This setup not only saves time but also enhances customer satisfaction by keeping them informed promptly.

Ensure you check out Pabbly Connect to create business automation workflows and reduce manual tasks. Pabbly Connect currently offer integration with 2,000+ applications.

How to Send WhatsApp Messages in Bulk

Learn how to send WhatsApp messages in bulk using Pabbly Connect, integrating Google Sheets and other applications for seamless automation. Explore efficient methods for automating routine tasks with clear, concise instructions suited for both newcomers and experienced professionals.

Watch Step By Step Video Tutorial Below


1. Accessing Pabbly Connect for WhatsApp Automation

To start sending WhatsApp messages in bulk, you first need to access Pabbly Connect. If you’re a new user, visit pabbl.com/connect in your browser and sign up for free.

Upon signing up, you will receive 100 free messages monthly. This allows you to explore the capabilities of Pabbly Connect and send up to 100 WhatsApp messages without any cost. If you find it useful, you can opt for a subscription plan using the coupon code RIT YT for a discount.


2. Setting Up Google Sheets as the Trigger in Pabbly Connect

In Pabbly Connect, the first step is to create a workflow by adding a trigger. Click on the ‘Add Trigger’ button and select Google Sheets as your application. Choose the event as ‘New or Updated Spreadsheet Row’ and connect your Google Sheets account.

After connecting, you will receive a webhook URL. Copy this URL, then go to your Google Sheets, navigate to Extensions, and select Add-ons to get the Pabbly Connect Webhooks extension. Install it, refresh your spreadsheet, and set up the webhook by pasting the copied URL. Specify the trigger column, which is the column that will activate the automation.


3. Sending WhatsApp Messages with Pabbly Connect

After setting up the trigger, the next step is to send WhatsApp messages. Click on ‘Add New Action Step’ and choose Pabbly Chatflow as your action application. Select the event as ‘Send Text Message’ and connect your Pabbly Chatflow account by entering the API token from your Chatflow settings. using Pabbly Connect

For the WhatsApp message, you will need to map the recipient’s number and the message content. Ensure you include the country code for the number. You can customize the message to include the recipient’s name by mapping the name fields from the previous step’s response.

  • Access your Pabbly Chatflow dashboard and retrieve the API token.
  • Map the WhatsApp number and message content dynamically using previous step data.
  • Test the setup by sending a message to ensure everything works correctly.

Once you have mapped all the necessary fields, click on ‘Save and Send Test Request’ to verify that the message is sent successfully. Check your WhatsApp to confirm receipt of the message.


4. Sending Bulk WhatsApp Messages Using Pabbly Connect

To send WhatsApp messages to all customers listed in your Google Sheets, return to the Extensions menu in Google Sheets and select Pabbly Connect Webhooks. Click on ‘Send All Data’ to trigger the sending of messages to every contact in your spreadsheet.

With this setup, Pabbly Connect will automatically send WhatsApp messages to all customers in the specified column. This feature is particularly useful for businesses that need to communicate with multiple clients efficiently.

  • Ensure all customer details are correctly entered in Google Sheets.
  • Use the ‘Send on Event’ option in Pabbly Connect Webhooks for future updates.
  • Test the entire workflow to confirm that messages are sent as expected.

This bulk messaging capability showcases the power of Pabbly Connect in automating communication processes, saving time and enhancing outreach.


5. Conclusion: Automate Your WhatsApp Messaging with Pabbly Connect

In conclusion, using Pabbly Connect to send WhatsApp messages in bulk is a straightforward process. By integrating Google Sheets and Pabbly Chatflow, you can effectively manage customer communications. This automation not only saves time but also ensures that your messages reach the intended recipients efficiently.

Ensure you check out Pabbly Connect to create business automation workflows and reduce manual tasks. Pabbly Connect currently offer integration with 2,000+ applications.

Check out Pabbly Connect – Automate your business workflows effortlessly! Sign Up Free – Start your journey with ease! 10,000+ Video Tutorials – Learn step by step! Join Pabbly Facebook Group – Connect with 21,000+ like minded people!

Try out this powerful automation with Pabbly Connect to enhance your business communication strategy today!

Send SMS on Successful Orders Automatically

Learn how to automate SMS notifications for successful orders in Shopify using Pabbly Connect. Step-by-step guide for seamless integration. Follow this definitive guide to creating powerful automated workflows with straightforward, efficiency-focused solutions that save valuable time.

Watch Step By Step Video Tutorial Below


1. Accessing Pabbly Connect for Order Notifications

To automate SMS notifications for successful orders, start by accessing Pabbly Connect. If you are an existing user, simply open your workflow builder. For new users, visit pabbl.com/connect to sign up for free. You get 100 free SMS every month, allowing you to explore the capabilities of Pabbly Connect.

Once signed up, you can use the platform’s workflow builder to create your automation. This section is crucial as it sets the foundation for your SMS notifications. After logging in, navigate to the workflow builder to begin integrating Shopify with Twilio through Pabbly Connect.


2. Setting Up the Trigger in Shopify Using Pabbly Connect

In this step, you will set up the trigger that initiates the SMS notification process. Click on the ‘Add Trigger’ button in Pabbly Connect and search for ‘Shopify’. Select ‘Shopify V2’ and choose the event as ‘New Order’.

  • Select ‘Add Trigger’ in Pabbly Connect.
  • Search for and select ‘Shopify V2’.
  • Choose ‘New Order’ as the event.

After selecting the event, click on ‘Connect’ to receive the webhook URL. Copy this URL and proceed to your Shopify store settings. This connection is essential as it allows Pabbly Connect to capture new order data automatically.


3. Creating a Webhook in Shopify

With the webhook URL copied, navigate to your Shopify store settings. From the left sidebar, click on ‘Settings’ and then ‘Notifications’. Here, locate the ‘Webhooks’ section and click on the ‘Create Webhook’ button.

  • Select ‘Order Creation’ as the event.
  • Choose ‘JSON’ as the format.
  • Paste the copied webhook URL.
  • Select ‘Latest’ for the API version and click ‘Save’.

This setup confirms that your Shopify store is now connected to Pabbly Connect. To verify the connection, you will need to perform a test order, which will send data to Pabbly Connect.


4. Testing the Webhook Response in Pabbly Connect

To capture the webhook response, go to your online store and make a test purchase. Select a product and complete the checkout process. This action will trigger the webhook, sending order details to Pabbly Connect.

Once the order is placed, return to Pabbly Connect to see if it has successfully captured the response. The captured data will include customer details such as name, email, and phone number, confirming the integration is working correctly.


5. Sending SMS Notifications Using Twilio via Pabbly Connect

Now that you have successfully captured the order details in Pabbly Connect, it’s time to set up the action to send an SMS. Click on ‘Add New Action Step’ and search for ‘Twilio’. Choose ‘Send SMS Message’ as the event and click on ‘Connect’.

If you have previously connected Twilio, select the existing connection. Otherwise, create a new connection by entering your Twilio Account SID and Authorization Token. You can find these in your Twilio dashboard.

Enter the SMS body, including dynamic fields for customer name and order number. Map customer details from the previous step to personalize the SMS. Set the sender number from your Twilio account. Map the recipient’s phone number from the order details.

After configuring the SMS settings, click on ‘Save and Send Test Request’. You should receive a confirmation SMS, indicating that the integration is complete. This automation ensures that every time a new order is placed, the customer receives a timely SMS notification, enhancing their shopping experience.


Conclusion

In conclusion, using Pabbly Connect to automate SMS notifications for successful orders is a straightforward process. By integrating Shopify with Twilio, you can ensure your customers receive immediate updates about their purchases, enhancing customer satisfaction and engagement. Try this automation today to streamline your order notification process!

Ensure you check out Pabbly Connect to create business automation workflows and reduce manual tasks. Pabbly Connect currently offer integration with 2,000+ applications.

How to Auto-Add Facebook Leads to GoHighLevel CRM

Learn how to automate the process of adding Facebook leads to GoHighLevel CRM using Pabbly Connect in this step-by-step tutorial. Discover hidden automation capabilities within your existing tools. This guide shows you how to connect your essential applications and permanently eliminate redundant manual processes.

Watch Step By Step Video Tutorial Below


1. Accessing Pabbly Connect for Automation

To start automating the process of adding Facebook leads to GoHighLevel CRM, you need to access Pabbly Connect. Open your browser and navigate to Pabbly.com/n. This will take you to the homepage of Pabbly Connect.

Once on the homepage, you have two options: Sign In if you are an existing user or click on Sign Up Free if you are new. New users can explore the platform with 100 free tasks every month, allowing you to test the automation capabilities of Pabbly Connect.


2. Creating a Workflow in Pabbly Connect

After signing in, you will be directed to the dashboard of Pabbly Connect. To create a new workflow, click on the ‘Access Now’ button under Pabbly Connect. You will see options for creating a workflow.

  • Select the Beta version for a modern interface.
  • Click on the ‘Create Workflow’ button.
  • Name your workflow, e.g., ‘Auto Add Facebook Leads to GoHighLevel CRM’.

Once the workflow is created, you will need to set up a trigger. In this case, the trigger will be the Facebook Lead Ads. This step is crucial as it initiates the automation process in Pabbly Connect.


3. Setting Up the Trigger for Facebook Lead Ads

To set up the trigger, select ‘Facebook Lead Ads’ from the list of applications in Pabbly Connect. Then, choose the event as ‘New Lead Instant’ to capture new leads as they come in.

Next, you need to connect your Facebook account. Click on ‘Connect with Facebook Lead Ads’ and select your desired account. Allow Pabbly Connect to access the necessary data. Once connected, you will be prompted to select the Facebook Page and the Lead Generation Form you want to use.

  • Select your Facebook Page from the dropdown.
  • Choose the specific Lead Generation Form you want to capture leads from.

This setup allows Pabbly Connect to automatically fetch new leads from your Facebook ads, setting the stage for the next steps in your automation process.


4. Adding Leads to GoHighLevel CRM

After successfully setting up the trigger, the next step is to add these leads to GoHighLevel CRM. In Pabbly Connect, add a new action step and select ‘GoHighLevel’ as the application.

For the action event, choose ‘Create or Update Contact’. Connect your GoHighLevel account by selecting it from the existing connections or creating a new connection if necessary. Once connected, you will need to map the data from the Facebook lead to the fields in GoHighLevel.

Map the Full Name from the Facebook lead to the Full Name field in GoHighLevel. Optionally map the Email and Phone Number fields as well.

This mapping ensures that every new lead captured is automatically added as a contact in your GoHighLevel CRM, streamlining your lead management process.


5. Testing the Integration

Once everything is set up, it’s crucial to test the integration to ensure that leads are being captured correctly. In Pabbly Connect, you can do this by generating a test lead using the Facebook Lead Ads testing tool.

After creating a test lead, check your GoHighLevel CRM to verify that the new contact appears with the correct details. This step confirms that the automation is functioning as intended, allowing for seamless lead management.

With the successful testing of your workflow, you can now rely on Pabbly Connect to automatically add Facebook leads to your GoHighLevel CRM without any manual effort.


Conclusion

In this tutorial, we explored how to automate the process of adding Facebook leads to GoHighLevel CRM using Pabbly Connect. By following the steps outlined, you can streamline your lead management and focus more on your business growth. Automating this process not only saves time but also ensures that no lead is missed, enhancing your overall efficiency.

Ensure you check out Pabbly Connect to create business automation workflows and reduce manual tasks. Pabbly Connect currently offer integration with 2,000+ applications.

How to Send WhatsApp Messages Instantly and Automatically

Learn how to send WhatsApp messages instantly and automatically using Pabbly Connect. Follow this step-by-step tutorial for seamless integration with Facebook and YouTube. Master proven automation processes with practical implementation examples and strategic recommendations you can apply immediately in your workflow.

Watch Step By Step Video Tutorial Below


1. Accessing Pabbly Connect for Automation

To send WhatsApp messages instantly and automatically, start by accessing Pabbly Connect. Go to your browser and search for Pabbly.com to reach the Pabbly Connect homepage.

Here, you will find two options: ‘Sign In’ for existing users and ‘Sign Up Free’ for new users. If you’re new, click on ‘Sign Up Free’ to create an account and get 100 tasks per month to explore the software.


2. Creating a Workflow in Pabbly Connect

Once logged into Pabbly Connect, create a new workflow by clicking on the ‘Create’ button. This will take you to the workflow builder.

Here, you can choose between the Beta and Classic versions. Select the Beta version for a modern approach. Name your workflow something like ‘Send WhatsApp Messages Instantly’ and select an appropriate folder from the dropdown menu.

  • Click on the ‘Create’ button to finalize your workflow setup.
  • Ensure that you’ve selected the correct folder for better organization.

After creating the workflow, you will see the trigger and action options. This is where the automation magic happens using Pabbly Connect.


3. Setting Up the Trigger for Facebook Leads

In this step, select ‘Facebook Lead Ads’ as your trigger application in Pabbly Connect. This will allow you to capture new leads from your Facebook page.

Choose the event ‘New Lead Instant’ and click on ‘Connect’. If you haven’t connected your Facebook account yet, follow the prompts to log in and grant access to Pabbly Connect.

  • Select the Facebook page you want to connect to.
  • Choose the lead form associated with your page.

Once connected, test the trigger to ensure it captures the lead data correctly. This step is crucial for the automation to work effectively.


4. Sending WhatsApp Messages Automatically

Now that your trigger is set, it’s time to configure the action to send WhatsApp messages. Select ‘Pabbly Chatflow’ as your action application in Pabbly Connect.

For the event, choose ‘Send Text Message’ and click on ‘Connect’. If your Chatflow account isn’t connected yet, log in to connect it with Pabbly Connect.

Enter the recipient’s WhatsApp mobile number. Map the data from the trigger step to customize your message.

After mapping the necessary fields, click on the ‘Save and Send Request’ button. This will send a test WhatsApp message to verify that everything is functioning correctly.


5. Testing Your Pabbly Connect Workflow

To confirm that your workflow is working as expected, generate a test lead using the Facebook Lead Ads testing tool. This will simulate a new lead coming in.

After generating the test lead, check your WhatsApp for the message sent through Pabbly Connect. You should receive a message confirming the lead details.

With this, you have successfully set up an automation that sends WhatsApp messages instantly and automatically whenever you receive a new lead through Facebook. This integration enhances your business communication effectively.


Conclusion

By following this tutorial, you can easily send WhatsApp messages instantly and automatically using Pabbly Connect. This integration streamlines your communication with new leads, ensuring timely responses and improved engagement.

Ensure you check out Pabbly Connect to create business automation workflows and reduce manual tasks. Pabbly Connect currently offer integration with 2,000+ applications.

I Stopped Updating My Team For Tasks Manually — Built This Instead

Learn how to automate task notifications using Pabbly Connect with Google Sheets and Google Chat. Streamline your workflow and save time! Implement the precise methodologies leading organizations use to automate repetitive tasks, illustrated with practical examples designed for immediate application.

Watch Step By Step Video Tutorial Below


1. Accessing Pabbly Connect for Automation

To automate task notifications, you need to access Pabbly Connect. Start by opening a new tab and navigating to Pabbly.com/connect. This is where you will set up your automation workflow.

Once you arrive at the Pabbly Connect landing page, you can either sign in or sign up for a free account. New users can sign up easily, and you will receive 100 free tasks each month to explore the features of Pabbly Connect. After signing in, click on the ‘Access Now’ button under the Pabbly Connect section to enter the dashboard.


2. Creating a New Workflow in Pabbly Connect

In the Pabbly Connect dashboard, click on the ‘Create Workflow’ button to start building your automation. For your workflow name, enter ‘I Stopped Updating My Team for Tasks Manually’. This name reflects the purpose of your automation.

  • Select the beta method version for your workflow.
  • Choose the appropriate workflow folder from the options available.
  • Click on the ‘Create’ button to finalize your workflow setup.

After creating the workflow, you will see two main sections: trigger and action. The trigger will capture the new task details from Google Sheets, and the action will send notifications to your team using Google Chat. This is where Pabbly Connect plays a crucial role in automating your task updates.


3. Setting Up the Google Sheets Trigger

To set up the trigger, select Google Sheets as your trigger application. The event should be set to ‘New or Updated Spreadsheet Row’. Click on the ‘Connect’ button to establish the connection between Google Sheets and Pabbly Connect.

Once connected, you will receive a webhook URL that you need to copy. Open your Google Sheets, go to ‘Extensions’, then ‘Add-ons’, and select ‘Get Add-ons’. Search for ‘Pabbly Connect Webhooks’ and install it. After installation, refresh your spreadsheet.

  • Go to ‘Extensions’, find ‘Pabbly Connect Webhooks’, and select ‘Initial Setup’.
  • Paste the webhook URL and set the trigger column to the final data column, which should be the due date column (Column G).
  • Click ‘Submit’ to finish the setup.

Make sure to select the ‘Send on Event’ option from the same menu to ensure that new data will be sent to Pabbly Connect whenever you add a new task.


4. Sending Notifications to Google Chat

Now that your trigger is set, it’s time to set up the action. Choose Google Chat as your action application and select ‘Create Message’ as the event. Click on the ‘Connect’ button to link your Google Chat account with Pabbly Connect.

To get the chat webhook URL, navigate to your Google Chat space, click on the space name, and go to ‘Apps and Integrations’. There, you will find the option to add a webhook. Name the webhook ‘New Task Notification’ and save it. Copy the provided webhook URL and paste it back into Pabbly Connect.

In the message field, enter your notification message, such as ‘New task assigned’. Map the data fields such as task title, assigned to, task ID, description, priority, and status from your previous response. Click on ‘Save and Send Test Request’ to test the notification.

Once the test is successful, your team will receive notifications in Google Chat whenever a new task is added in Google Sheets. This integration demonstrates how Pabbly Connect streamlines your task management process.


5. Conclusion: Automate Your Workflow with Pabbly Connect

By using Pabbly Connect to integrate Google Sheets and Google Chat, you can automate your task notifications effectively. This automation saves time and ensures your team is always updated on new tasks without manual intervention.

Ensure you check out Pabbly Connect to create business automation workflows and reduce manual tasks. Pabbly Connect currently offer integration with 2,000+ applications.

With the steps outlined in this tutorial, you can replicate this workflow and enhance your productivity. Explore more features of Pabbly Connect to further streamline your business processes.


Build Your Own CRM Using Google Sheets + WhatsApp

Learn how to build your own CRM using Google Sheets and WhatsApp with Pabbly Connect. Follow this step-by-step tutorial for seamless integration! Learn to create powerful connections between your critical applications without requiring specialized programming knowledge or extensive technical background.

Watch Step By Step Video Tutorial Below


1. Accessing Pabbly Connect for Your CRM

To build your own CRM using Google Sheets and WhatsApp, you first need to access Pabbly Connect. Start by visiting Pabbly.com/connect in your web browser. If you are new to Pabbly, click on the ‘Sign Up Free’ button to create your account. This will give you access to 100 free tasks every month, allowing you to experiment with your CRM setup.

Once you have your account set up, sign in to access the dashboard. From the dashboard, click on the ‘Create Workflow’ button located in the top right corner. You will then be prompted to choose between the new beta version or the classic version of the workflow builder. Select your preferred option and proceed to name your workflow, for example, ‘Horizon Nest Google Sheet CRM Automation’.


2. Setting Up the Trigger Application in Pabbly Connect

In this step, you will set up the trigger application that initiates the workflow in Pabbly Connect. Since the workflow is triggered by form submissions, select JotForm as your trigger application. After selecting JotForm, choose the event as ‘New Response’. Click the ‘Connect’ button to proceed.

  • Select your form from JotForm that you want to connect.
  • Copy the webhook URL provided by Pabbly Connect.
  • Go to your JotForm account, navigate to the form settings, and select the integration option.
  • Search for and select ‘Webhook’ to paste the URL.

After completing the integration in JotForm, publish your form. Now, whenever a user fills out this form, it will trigger the workflow in Pabbly Connect, capturing the response data.


3. Adding Captured Data to Google Sheets

After capturing the form response, the next step is to store this data in Google Sheets using Pabbly Connect. For this, select Google Sheets as your action application. Choose the event ‘Add New Row’ and click ‘Connect’. If it’s your first time connecting, select ‘Add New Connection’.

  • Sign in to your Google account to authorize the connection.
  • Select the spreadsheet and sheet where you want to store the data.
  • Map the fields from the JotForm response to the corresponding columns in Google Sheets.

After mapping the fields, click the ‘Save and Send Test Request’ button. This action will add a new row to your selected Google Sheet with the captured data, confirming that your integration is functioning correctly through Pabbly Connect.


4. Sending Follow-Up Messages via WhatsApp

To enhance your CRM experience, you can send follow-up messages to clients via WhatsApp using Pabbly Chatflow. In your Pabbly Connect workflow, click the plus button to add a new action application and select Pabbly Chatflow. Choose the event ‘Send Text Message’ and click ‘Connect’.

To establish the connection, you will need to log in to your Pabbly Chatflow account and add your WhatsApp number. After adding your number, navigate to the API and Webhook settings to copy the API token. Paste this token back in Pabbly Connect to complete the connection.

Next, map the WhatsApp number and customize the message you want to send. Include personalized elements such as the client’s name and property details. Once everything is set, click ‘Save and Test Request’. You should receive a confirmation of success, indicating that your WhatsApp message was sent, completing the workflow integration through Pabbly Connect.


5. Conclusion: Build Your Own CRM with Pabbly Connect

In this tutorial, you learned how to build your own CRM using Google Sheets and WhatsApp, leveraging the power of Pabbly Connect and Pabbly Chatflow. By following the steps outlined, you can efficiently capture leads, store them in Google Sheets, and send automated follow-up messages via WhatsApp.

Ensure you check out Pabbly Connect to create business automation workflows and reduce manual tasks. Pabbly Connect currently offer integration with 2,000+ applications.

This integration not only streamlines your CRM processes but also enhances your communication with potential clients. With Pabbly Connect, you can customize and expand your CRM functionality as needed, ensuring you stay organized and responsive in your client management efforts.

Start building your own CRM today with Pabbly Connect and experience the benefits of automation!