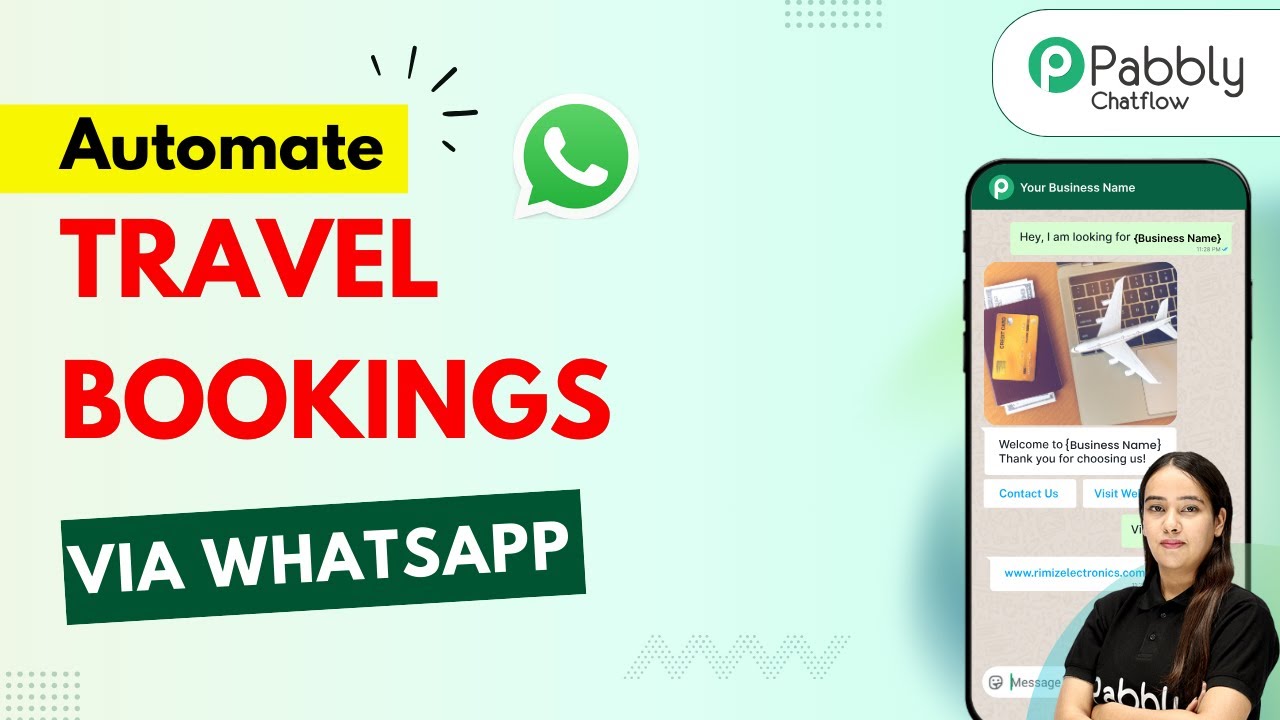
Automate Travel Bookings via WhatsApp

Learn how to automate travel bookings via WhatsApp using Pabbly Chatflow. Follow this step-by-step tutorial to enhance customer service and streamline bookings. Master conversational marketing with practical techniques for creating chatbots that engage visitors at exactly the right moment in their journey.

Watch Step By Step Video Tutorial Below


1. Accessing Pabbly Chatflow for Travel Bookings

To automate travel bookings via WhatsApp, the first step is to access Pabbly Chatflow. Start by navigating to the Pabbly Chatflow website. Here, you can either sign up for a free account or log in if you’re an existing user.

After logging in, the dashboard will provide you with various options to manage your WhatsApp communications. Click on the ‘Add WhatsApp Number’ button to set up your WhatsApp account within Pabbly Chatflow. This setup is crucial as it enables you to interact with your customers seamlessly.


2. Creating a Chatbot in Pabbly Chatflow

Once you have your WhatsApp number set up, the next step is to create a chatbot using Pabbly Chatflow. Click on the ‘Flow’ feature and then select the ‘Add Flow’ button. Name your chatbot appropriately, such as ‘Auto Travel Booking via WhatsApp’.

  • Select a trigger event to initiate the conversation.
  • Use keywords to start the conversation with customers.
  • Drag and drop elements to build your flow.

After naming your chatbot, set up the trigger event. This will allow the chatbot to respond when customers send specific keywords related to travel bookings. Drag and drop the necessary elements to create an engaging interaction.


3. Setting Up Customer Interaction in Pabbly Chatflow

To enhance customer interaction, you can set up a welcome message using Pabbly Chatflow. After the trigger, use the ‘Media’ button to upload an image and provide a warm welcome message to your customers. This creates a friendly atmosphere for the booking process.

Next, you can add buttons for different booking options such as flights, hotels, and holiday packages. For each button, set up a corresponding message that prompts customers for more details. This ensures a smooth flow of information and keeps customers engaged.


4. Finalizing Bookings through Pabbly Chatflow

After customers select their desired booking option, you can guide them through the finalization process using Pabbly Chatflow. For example, if a customer selects a holiday package, prompt them to provide essential details such as travel dates, number of travelers, and room preferences.

  • Request travel dates and number of passengers.
  • Ask for room preferences and any special requests.
  • Confirm the booking details with a summary message.

Once all details are collected, send a confirmation message thanking them for their request and informing them that your team will review the booking. This keeps the customer informed and enhances their experience.


5. Activating Your Chatbot in Pabbly Chatflow

The final step is to activate your chatbot in Pabbly Chatflow. Ensure that all flows are saved correctly and that the chatbot is set to run in real-time. This is essential for providing timely responses to customer inquiries.

Once activated, your chatbot will be ready to assist customers with travel bookings via WhatsApp. This automation not only saves time but also improves customer satisfaction by providing quick responses.


Conclusion

In conclusion, automating travel bookings via WhatsApp using Pabbly Chatflow significantly enhances customer service. By following the steps outlined in this tutorial, you can create an efficient chatbot that manages bookings seamlessly. Start using Pabbly Chatflow today to improve your travel booking process.

Ensure you check out Pabbly Connect to create business automation workflows and reduce manual tasks. Pabbly Connect currently offer integration with 2,000+ applications.

How to Auto-Add SaaS Leads to Google Sheets Using Pabbly

Learn how to automate adding SaaS leads to Google Sheets using Pabbly Connect. Follow this step-by-step tutorial for seamless integration. Eliminate manual repetitive tasks from your workflow. Discover proven automation methods with intuitive steps designed for efficiency-minded professionals.

Watch Step By Step Video Tutorial Below


1. Accessing Pabbly Connect for Automation

To start the automation process of adding SaaS leads to Google Sheets, you need to access Pabbly Connect. If you’re already a user, simply open your workflow builder. New users should visit pabbl.com/connect in their browser.

Once on the landing page, click on the ‘Sign Up for Free’ option in the top right corner. This allows you to explore Pabbly Connect with up to 100 tasks free each month. This free trial is a great way to test the platform before committing to a subscription.


2. Setting Up the Trigger in Pabbly Connect

After logging in to Pabbly Connect, the next step is to set up your trigger. Click on the ‘Add Trigger’ button and search for ‘Google Ads’. Select it and choose the event as ‘New Lead Form Entry’. This will initiate the workflow whenever a new lead is generated.

  • Select ‘Google Ads’ as the trigger application.
  • Choose ‘New Lead Form Entry’ as the event.
  • Click on ‘Connect’ to receive a webhook URL.

Copy the provided webhook URL and navigate to your Google Ads campaign where you have set up your lead form. Paste the URL in the lead delivery section and click ‘Send Test Data’. This will sync the test data with Pabbly Connect.


3. Mapping Lead Data to Google Sheets

Once the test data is received, it’s time to map the lead details to Google Sheets. Click on ‘Add New Action Step’ and search for ‘Google Sheets’. Select it and choose ‘Add New Row’ as the event.

Next, connect your Google Sheets account to Pabbly Connect. If you have an existing connection, select it; otherwise, create a new connection by signing in with your Google account. Allow the necessary permissions to establish the connection.

  • Select your spreadsheet named ‘Lead Details’.
  • Choose the specific sheet where you want to add the data.
  • Refresh fields to see the available mapping options.

Map the fields such as name, email, phone number, and city from the test lead data to the corresponding columns in your Google Sheets. This ensures that each new lead is automatically recorded.


4. Testing the Automation Setup

After mapping the lead data, it’s crucial to test the automation. Click on ‘Save and Send Test Request’. This action will send the mapped data to your Google Sheets, confirming that everything is set up correctly. using Pabbly Connect

Check your Google Sheets to see if the lead details have been added successfully. If the test is successful, your automation is ready to go live. You won’t need to manually intervene each time a new lead is generated through Google Ads.


5. Finalizing Your Automation with Pabbly Connect

Once the test lead details are confirmed in Google Sheets, you have successfully automated the process of adding SaaS leads using Pabbly Connect. Whenever a new lead comes in, it will automatically populate in your Google Sheets without further actions required from you.

This automation not only saves time but also ensures that you never miss capturing a lead. You can now focus on converting leads rather than managing data entry manually.


Conclusion

In conclusion, using Pabbly Connect to automate the addition of SaaS leads to Google Sheets streamlines your workflow significantly. By following the outlined steps, you can set up an efficient system that works seamlessly in the background, allowing you to concentrate on your business growth.

Ensure you check out Pabbly Connect to create business automation workflows and reduce manual tasks. Pabbly Connect currently offer integration with 2,000+ applications.

Grow Your Business Faster Using Pabbly Chatflow 🚀

Learn how to effectively use Pabbly Chatflow to create a WhatsApp chatbot that enhances your business communication and customer engagement. Learn how to create intelligent chat workflows that provide instant customer support while qualifying leads 24/7 without human intervention.

Watch Step By Step Video Tutorial Below


1. Accessing Pabbly Chatflow for Your Business

To grow your business faster using Pabbly Chatflow, the first step is to access the platform. Open a new tab and search for Pabbly Chatflow at Pabbly.com/chartflow. You will find options to either sign in or sign up for free. New users can sign up to receive 100 free credits every month to explore the software.

If you are an existing user, click on the sign-in option. After signing in, you will be directed to the dashboard where you can manage your WhatsApp number and other features. To create a WhatsApp chatbot, click on the Pabbly Chatflow access button on your dashboard.


2. Creating a WhatsApp Chatbot Using Pabbly Chatflow

Once you are in the Pabbly Chatflow dashboard, you can start creating your WhatsApp chatbot. Click on the ‘Flows’ option, which allows you to create various types of chatbots tailored to your business needs. To begin, click on the plus add flow button.

  • Select your flow name as ‘Grow Your Business Faster Using Pabbly Chatflow’.
  • Enable the active toggle to ensure your flow is operational.
  • Click on the save button to update your flow.

After setting up your flow name, you will need to select a trigger event. Choose the keyword option and enter keywords like ‘hi’ and ‘hello’. These keywords will trigger the chatbot when sent by users. Once keywords are set, you can link them to a welcome message that your bot will send back to users.


3. Configuring Responses in Pabbly Chatflow

In this section, you will configure how your WhatsApp chatbot responds to users. After setting up the welcome message, you can add quick reply buttons for user interaction. For instance, create buttons labeled ‘Request Service’, ‘View Services’, and ‘Contact Support’. Drag and drop these buttons into the flow. using Pabbly Connect

  • For the ‘Request Service’ button, link it to a list of services offered.
  • For the ‘View Services’ button, provide a detailed list of services.
  • For the ‘Contact Support’ button, include contact information.

These configurations allow your chatbot to provide users with relevant options and information based on their queries. Make sure to save your flow after making these changes to ensure everything is updated correctly.


4. Utilizing Dynamic Responses and Custom Fields in Pabbly Chatflow

Dynamic responses enhance user interaction by personalizing messages based on user input. In Pabbly Chatflow, you can set up custom fields that capture user data like name, location, and service preferences. This is done by adding a custom field action in your flow.

For each service type, you will create a custom field. For example, when a user selects a service, the bot will prompt for the location and booking date. You can set these custom fields to capture the necessary information. Use the dollar symbol to dynamically insert user responses into confirmation messages.

To ensure your chatbot functions correctly, link all nodes properly and save your flow. Test the bot by sending keywords to your WhatsApp number and observe how it responds with personalized messages based on the information provided by users.


5. Testing and Launching Your Chatbot with Pabbly Chatflow

Once your chatbot is configured, it’s time to test it. Send a message like ‘hi’ to your WhatsApp business account. The bot should respond with a welcome message and present the quick reply buttons you created. This allows you to check if the flow is functioning as intended.

As you interact with the bot, ensure that it captures the user information correctly and responds dynamically. If any issues arise, revisit the Pabbly Chatflow dashboard to make necessary adjustments. Once satisfied with the performance, you can officially launch the chatbot.

By utilizing Pabbly Chatflow, you streamline customer interactions and enhance your business efficiency. Automating responses allows you to focus on other critical areas of your business while ensuring customer queries are handled promptly.


Conclusion

In summary, using Pabbly Chatflow to create a WhatsApp chatbot significantly enhances customer interaction and service delivery. By following the steps outlined, you can automate responses, personalize user experiences, and ultimately grow your business faster.

Ensure you check out Pabbly Connect to create business automation workflows and reduce manual tasks. Pabbly Connect currently offer integration with 2,000+ applications.

Auto-Send WhatsApp Messages to Facebook Real Estate Leads — Convert Property Enquiries Instantly

Learn how to automate sending WhatsApp messages to Facebook real estate leads using Pabbly Connect. Follow this step-by-step tutorial for seamless integration. Explore efficient methods for automating routine tasks with clear, concise instructions suited for both newcomers and experienced professionals.

Watch Step By Step Video Tutorial Below


1. Accessing Pabbly Connect for Automation

To start automating the process of sending WhatsApp messages to Facebook real estate leads, you need to access Pabbly Connect. Go to the Pabbly website by typing Pabbly.com in your browser.

On the top right corner, you will find options to either sign in or sign up for free. If you are a new user, signing up will give you 100 free tasks monthly, allowing you to test the platform. Existing users should simply log in to access the dashboard.


2. Creating a Workflow in Pabbly Connect

Once logged into Pabbly Connect, navigate to the dashboard and click on Create Workflow. You will be prompted to choose between the new beta or classic builder; select the new beta for flexibility.

  • Name your workflow as Auto Send WhatsApp Messages to Facebook Real Estate Leads.
  • Select the folder for your workflow, such as Facebook Lead Automations.
  • Click Create to finalize your workflow setup.

Your new workflow will now be ready to configure the trigger and action steps needed to automate WhatsApp messaging.


3. Setting Up the Trigger Application in Pabbly Connect

The next step involves setting up the trigger application in Pabbly Connect. You will select Facebook Lead Ads as your trigger application. This means that every time a new lead is generated, it will trigger the workflow.

In the trigger event dropdown, choose New Lead Instant and click Connect. If you don’t have an existing connection, select Add New Connection and log in to your Facebook account to authorize the connection.

After successful connection, you will need to specify your Facebook Page and Lead Form. Navigate to your Facebook account to find the page you are using for lead generation, such as Prime Properties, and select the corresponding lead form.


4. Testing the Trigger with a Lead Submission

Now that the trigger is set up, it’s time to test it using Pabbly Connect. Click on Save and Send Test Request to initiate the process. This will change the status to Waiting for Webhook Response.

To capture this response, you need to submit a test lead using the Facebook Lead Ads testing tool. Ensure that you refresh the page and select the correct page and lead form before submitting the lead details.

  • Enter property type, full name, phone number, email, and city.
  • Click Continue and then Submit.

After submission, check your workflow in Pabbly Connect to see if the details have been captured successfully, confirming that the connection is working.


5. Sending WhatsApp Messages via Pabbly Connect

With the trigger successfully tested, you can now set up the action application to send WhatsApp messages. In Pabbly Connect, click on Add New Action Step and select Pabbly Chatflow as your action application.

Choose the action event as Send Template Message and connect using your existing connection or create a new one by entering your API token from Pabbly Chatflow.

Map the recipient’s mobile number from the lead details captured earlier. Select the template you created in Pabbly Chatflow for sending the WhatsApp message. Click Save and Send Request to finalize the action.

Upon successful execution, you will receive a WhatsApp message confirming the automated process, demonstrating how Pabbly Connect effectively integrates Facebook Lead Ads with WhatsApp messaging.


Conclusion

Automating WhatsApp messages to Facebook real estate leads using Pabbly Connect streamlines the communication process, ensuring timely responses to inquiries. By following the steps outlined in this tutorial, you can enhance your lead management and improve client engagement.

Ensure you check out Pabbly Connect to create business automation workflows and reduce manual tasks. Pabbly Connect currently offer integration with 2,000+ applications.

How to Add TikTok Leads to Google Sheets Automatically

Learn how to automate adding TikTok leads to Google Sheets with Pabbly Connect. Follow this detailed tutorial for seamless integration. Discover how to seamlessly connect your essential tools through accessible instructions that make powerful automation available to professionals at every skill level.

Watch Step By Step Video Tutorial Below


1. Accessing Pabbly Connect to Automate TikTok Leads

To start automating the process of adding TikTok leads to Google Sheets, you first need to access Pabbly Connect. If you are an existing user, simply log in to your account. If you are new, visit pabbl.com/connect to sign up for a free trial.

Once you are on the Pabbly Connect workflow builder, you will be ready to create your automation. This platform allows you to connect various applications seamlessly, ensuring that your TikTok leads are added to Google Sheets automatically.


2. Setting Up the Trigger for TikTok Leads

In this step, you will configure the trigger in Pabbly Connect that initiates the workflow when a new lead is generated on TikTok. Click on the ‘Add Trigger’ button and search for TikTok Lead Generation.

  • Select ‘New Lead’ as the event.
  • If you have an existing connection, select it; otherwise, click on ‘Add a New Connection’.
  • Grant the necessary permissions for Pabbly Connect to access your TikTok account.

After connecting TikTok, you will need to choose your Advertiser ID and Form ID to complete the trigger setup. This allows Pabbly Connect to listen for new leads in real-time or through test leads.


3. Adding Action to Google Sheets

Now that the trigger is set up, the next step is to add the action that sends the TikTok lead details to Google Sheets. In the workflow, click on ‘Add Action’ and search for Google Sheets.

Select ‘Add New Row’ as the event and connect to your Google Sheets account. If you have an existing connection, you can select it; otherwise, choose ‘Add a New Connection’ and log in with your Gmail account.

  • Select the spreadsheet where you want to add the leads.
  • Choose the specific sheet within the spreadsheet.
  • Map the lead details from TikTok to the corresponding columns in Google Sheets.

Mapping allows Pabbly Connect to dynamically insert data from TikTok into Google Sheets, ensuring that every new lead is captured accurately.


4. Testing the Automation Setup

After configuring the action step, it’s crucial to test the automation to ensure everything works seamlessly. Click on ‘Save and Send Test Request’ to initiate the test.

If everything is set up correctly, you should receive a positive response indicating that the lead details have been successfully added to your Google Sheets. This confirms that Pabbly Connect is effectively bridging the gap between TikTok and Google Sheets.

To verify, open Google Sheets and check if the test lead data appears correctly. This step is vital to ensure your automation will function with live leads as well.


5. Finalizing Your TikTok to Google Sheets Automation

Once the test is successful, your automation is ready for live use. With Pabbly Connect, every new lead from TikTok will now be automatically added to your Google Sheets without any manual input.

This automation not only saves time but also enhances the efficiency of your lead management process. Remember, you can access your workflow anytime to make adjustments or updates as necessary.

With the free trial currently available, you can explore all the features of Pabbly Connect and see how it can transform your lead management workflow.


Conclusion

In this tutorial, we explored how to use Pabbly Connect to automate the process of adding TikTok leads to Google Sheets. This integration streamlines your workflow and ensures that your sales team has immediate access to new leads, ready for conversion.

Ensure you check out Pabbly Connect to create business automation workflows and reduce manual tasks. Pabbly Connect currently offer integration with 2,000+ applications.

How to Add B2B Leads to Google Sheets Automatically

Learn how to automate adding B2B leads to Google Sheets using Pabbly Connect. This step-by-step tutorial covers the entire process from LinkedIn to Google Sheets.

Watch Step By Step Video Tutorial Below


1. Setting Up Pabbly Connect for Automation

To begin adding B2B leads to Google Sheets automatically, you need to access Pabbly Connect. This powerful automation platform allows you to integrate various applications seamlessly. If you are an existing user, simply log in to your account. New users can visit pabbl.com/connect to sign up for free and explore numerous tasks available each month.

Once logged in, navigate to the workflow builder within Pabbly Connect. This window is essential as it allows you to set up triggers and actions. Triggers initiate the workflow, while actions are the results of those triggers. Click on the ‘Add Trigger’ button to start the integration process.


2. Connecting LinkedIn to Pabbly Connect

For the first step in this automation, you will need to connect LinkedIn to Pabbly Connect. Search for LinkedIn in the trigger application section and select it. This integration is crucial because LinkedIn is an excellent platform for gathering B2B leads.

  • Select ‘Lead Notifications’ as the event.
  • If you have an existing connection, select it; otherwise, create a new connection.
  • Log in to your LinkedIn account when prompted.

After successfully logging in, you will need to select the sponsored account and save the connection. Once this is done, click on ‘Save and Send Test Request’ to capture the webhook response. This step is crucial for ensuring that data flows correctly from LinkedIn to Pabbly Connect.


3. Submitting Test Leads from LinkedIn

After setting up the LinkedIn trigger, it’s time to perform a test submission to verify that everything is working correctly. Fill out the lead form that you are running on LinkedIn. Note that if your campaign is in draft mode, you may not need to fill out all fields.

Once you submit the lead form, you should see a confirmation that the information has been sent to Pabbly Connect. Wait a few seconds for the workflow to capture the response. You will see all the lead details, including email address, phone number, first name, last name, and company name.


4. Adding Leads to Google Sheets

Now that you have captured the lead details, the next step is to add this information to Google Sheets using Pabbly Connect. Click on ‘Add New Action Step’ and search for Google Sheets. Select it to proceed with the integration.

  • Choose ‘Add New Row’ as the event.
  • Connect to Google Sheets by signing in with your Google account.
  • Select the spreadsheet and sheet where you want to store the lead details.

After selecting the spreadsheet (named ‘Lead Details’) and the sheet (named ‘Sheet1’), map the fields from the LinkedIn lead form to the corresponding columns in Google Sheets. This mapping process ensures that the data is dynamic and updates with each new lead.


5. Finalizing the Integration with Pabbly Connect

After mapping all the fields, you will need to click on ‘Save and Send Test Request’ to finalize the integration. You should receive a confirmation that the details have been successfully added to your Google Sheets.

Open your Google Sheets to verify that the lead details have been correctly populated. This automation will now run continuously, adding new B2B leads automatically as they come in. This is how Pabbly Connect empowers your workflow and streamlines your lead management process.


Conclusion

In this tutorial, we explored how to use Pabbly Connect to automate the process of adding B2B leads to Google Sheets. By following the steps outlined, you can streamline your lead management and improve your sales team’s efficiency.

Ensure you check out Pabbly Connect to create business automation workflows and reduce manual tasks. Pabbly Connect currently offer integration with 2,000+ applications.

Create a Slack Bot for Daily Motivation & Inspiration

Learn how to create a Slack bot that delivers daily motivational messages using Pabbly Connect. Step-by-step tutorial for seamless integration. Discover how to seamlessly connect your essential tools through accessible instructions that make powerful automation available to professionals at every skill level.

Watch Step By Step Video Tutorial Below


1. Accessing Pabbly Connect for Slack Bot Integration

To create a Slack bot for daily motivation, start by accessing Pabbly Connect. If you’re a new user, visit pabbl.com/connect in your browser and click on the ‘Sign Up for Free’ button. This will allow you to explore Pabbly Connect with 100 free tasks every month.

Once you’re signed up, navigate to the workflow builder of Pabbly Connect. Here, you will set up the automation that sends daily motivational messages to your Slack channel. This initial setup is crucial for integrating various applications seamlessly.


2. Setting Up Trigger and Action in Pabbly Connect

In the workflow builder of Pabbly Connect, the first step is to add a trigger. Click on the ‘Add Trigger’ button and select ‘Schedule by Pabbly’. This feature allows you to schedule your workflow, which is essential for sending daily messages.

  • Select ‘Schedule Workflow’ as the event.
  • Set the frequency to ‘Every Day’.
  • Choose the time for the message, e.g., 9:00 AM.

After configuring these settings, click ‘Save’ to finalize the trigger. Now, your workflow is set to run daily at the specified time, ensuring your team receives motivational messages each morning.


3. Generating Daily Motivational Messages with Google Gemini

Next, you need to generate the motivational message. Click on ‘Add New Action Step’ and search for ‘Gemini’, then select it. For the event, choose ‘Generate Content’ and click ‘Connect’. This integration allows Pabbly Connect to communicate with Google AI to create the message.

If you haven’t connected Google Gemini yet, you will need to create a new connection. This requires an API key from Google AI Studio. Here’s how to get it:

  • Open Google AI Studio and navigate to the ‘Get API Key’ section.
  • Click on ‘Create API Key’, enter a key name, and select the project.
  • Copy the generated key and paste it into your Pabbly Connect workflow.

Once the connection is established, provide a prompt for Google Gemini to generate your motivational message. You can customize the prompt based on your team’s needs.


4. Sending the Generated Message to Slack

After generating the motivational message, the next step is to send it to Slack. Click on ‘Add New Action Step’ again and search for ‘Slack’. Select it and choose ‘Send Channel Message’ as the event. This action is facilitated by Pabbly Connect, which bridges the gap between Google Gemini and Slack.

If you have not connected Slack yet, you will be prompted to add a new connection. You need to provide a token type, which can be either user or bot. For this integration, select ‘Bot’ and click ‘Save’. After granting necessary permissions, your Slack account will be connected to Pabbly Connect.

Select the Slack channel where you want to send the message. Use the mapping feature to insert the message generated by Google Gemini. Click ‘Save and Send Test Request’ to test the integration.

Once the test is successful, your Slack bot is ready to send daily motivational messages to your team at the scheduled time.


5. Conclusion: Automate Daily Motivation with Pabbly Connect

By following these steps, you can successfully create a Slack bot that delivers daily motivational messages using Pabbly Connect. This automation not only enhances team morale but also streamlines communication within your organization.

Ensure you check out Pabbly Connect to create business automation workflows and reduce manual tasks. Pabbly Connect currently offer integration with 2,000+ applications.

Check out Pabbly Connect – Automate your business workflows effortlessly! Sign Up Free – Start your journey with ease! 10,000+ Video Tutorials – Learn step by step! Join Pabbly Facebook Group – Connect with 21,000+ like minded people!
Utilizing Pabbly Connect simplifies the integration process, allowing you to focus on what truly matters—motivating your team. With the ability to customize prompts and schedule messages, this setup can be tailored to fit your specific needs, ensuring your team is inspired every day.

Try implementing this automation for your business today, and experience the benefits of consistent motivation delivered straight to your Slack channel.

How to Send Google Ads Leads to FluentCRM Automatically — No Manual Import

Learn how to automate sending Google Ads leads to FluentCRM without manual imports using Pabbly Connect. Follow our step-by-step tutorial! Develop expertise in application integration and learn how to design streamlined automation workflows using proven, simplified approaches.

Watch Step By Step Video Tutorial Below


1. Accessing Pabbly Connect for Google Ads and FluentCRM Integration

To automate sending Google Ads leads to FluentCRM, the first step is to access Pabbly Connect. You can do this by visiting the Pabbly website and signing in or signing up for free. As a new user, you can utilize 100 free tasks monthly, allowing you to explore the platform’s capabilities.

Once logged in, navigate to the Pabbly Connect dashboard. Here, you can view existing workflows or create a new one. To start, click on ‘Create Workflow’ and choose the new beta workflow builder for a modern experience. Name your workflow appropriately, such as ‘Send Google Ads Leads to FluentCRM Automatically,’ and select a folder for organization.


2. Setting Up the Trigger in Pabbly Connect

The next step involves setting up the trigger in Pabbly Connect. The trigger is the event that initiates the workflow, which in this case is receiving a new lead from Google Ads. Select Google Ads as the trigger application and choose the event type as ‘New Lead Form Entry.’ After this, you will need to connect your Google Ads account to Pabbly Connect.

  • Select Google Ads as the trigger application.
  • Choose ‘New Lead Form Entry’ as the trigger event.
  • Connect your Google Ads account using the provided webhook URL.

Once you have set up the connection, you can test it by sending a test lead from Google Ads to ensure that the data is correctly captured in Pabbly Connect. If successful, you will see the test data displayed in your workflow, confirming that the integration is working.


3. Adding the Action Step to Create a Contact in FluentCRM

After successfully setting up the trigger, the next step is to add an action in Pabbly Connect to create a contact in FluentCRM. Click on ‘Add New Action Step’ and select FluentCRM as the action application. The action event you want to select is ‘Create a Contact.’ This action will allow you to automatically add leads captured from Google Ads to your CRM.

To connect FluentCRM with Pabbly Connect, you will need to enter your WordPress site URL and your login credentials. Make sure to remove any unnecessary parts from the URL, such as ‘/wp-admin,’ and only enter the base URL. Enter your username and password to establish the connection.

  • Select FluentCRM as the action application.
  • Choose ‘Create a Contact’ as the action event.
  • Enter your WordPress site URL and login credentials.

Once you have connected FluentCRM, you can map the fields from the Google Ads lead response to the corresponding fields in FluentCRM. This mapping ensures that every time a new lead is captured, the relevant details are automatically populated in your CRM.


4. Testing the Integration Between Google Ads and FluentCRM

Now that you have set up the action step in Pabbly Connect, it’s time to test the entire workflow. After mapping the fields, click on ‘Save and Send Test Request’ to send a test lead to FluentCRM. This step is crucial to ensure that the integration is functioning correctly and that the leads are being added as contacts in your CRM.

When you execute this test, check your FluentCRM dashboard to see if the test contact has been created successfully. You should see the lead’s details, including first name, last name, email, and phone number, populated in the CRM. If the test is successful, your automation is now complete and ready to capture real leads.


5. Conclusion: Automating Google Ads Leads with Pabbly Connect

In conclusion, using Pabbly Connect to automate the process of sending Google Ads leads to FluentCRM significantly saves time and eliminates the need for manual imports. By following the steps outlined in this tutorial, you can set up a seamless integration that captures leads directly from Google Ads and adds them to your CRM automatically.

Ensure you check out Pabbly Connect to create business automation workflows and reduce manual tasks. Pabbly Connect currently offer integration with 2,000+ applications.

Check out Pabbly Connect – Automate your business workflows effortlessly! Sign Up Free – Start your journey with ease! 10,000+ Video Tutorials – Learn step by step! Join Pabbly Facebook Group – Connect with 21,000+ like minded people!

This automation not only streamlines your workflow but also ensures that you never miss a lead. With Pabbly Connect, you can easily manage your leads and enhance your marketing efforts without the hassle of manual data entry.

Stop Losing Leads on WhatsApp: Lead Qualification Chatbot That Converts 3x More

Learn how to create a lead qualification chatbot on WhatsApp using Pabbly Chatflow to convert leads effectively and automate your business processes. Discover how to design chat experiences that feel personal and responsive while handling customer inquiries automatically around the clock.

Watch Step By Step Video Tutorial Below


1. Accessing Pabbly Chatflow for Your WhatsApp Chatbot

To start creating a lead qualification chatbot using Pabbly Chatflow, you first need to access the platform. Open your browser and navigate to Pabbly Chatflow. If you don’t have an account, click on the ‘Sign Up Free’ button to create one and get 100 free credits every month.

Once you have logged in, you will be directed to the dashboard. Here, you can see various options. To integrate WhatsApp, you need to add your WhatsApp number. Click on the ‘Add WhatsApp Number’ button located in the top right corner. You can choose between the WhatsApp connect method or the manual token connect method for adding your number.


2. Creating the WhatsApp Chatbot Flow in Pabbly Chatflow

After setting up your WhatsApp number, it’s time to create the actual chatbot flow. Navigate to the ‘Flows’ section in Pabbly Chatflow and click on the ‘Add Flow’ button. This will open the flow builder page where you can create your chatbot.

  • Give your flow a name, such as ‘Lead Qualification Chatbot’.
  • Select the trigger event as ‘Keyword or Reject Match’.
  • Enter keywords like ‘start’ and ‘hello’ to trigger the bot.

Once you have set the keywords, you can start adding action steps to your flow. Use the drag-and-drop feature to add text buttons for your responses. For instance, you can create a welcome message that greets users when they initiate the chat.


3. Setting Up Lead Qualification Questions

To qualify leads effectively, your chatbot should ask relevant questions. In Pabbly Chatflow, you can add multiple questions and options for users to select. For example, after the welcome message, ask, ‘Which service are you interested in?’ and provide buttons for different services.

  • Add buttons for options like ‘Business Coaching’, ‘Marketing Consult’, and ‘Website & Funnel’.
  • Create custom fields to store user responses for later use.
  • Tag leads based on their responses, such as ‘Hot Lead’ or ‘Cold Lead’.

This structured approach ensures that you collect valuable information while keeping the user engaged. After setting up the questions, save your flow to avoid losing any progress.


4. Integrating Google Sheets with Pabbly Connect

Once your chatbot is set up, the next step is to integrate it with Google Sheets using Pabbly Connect. This allows you to automatically log qualified leads into a spreadsheet. Start by creating a new workflow in Pabbly Connect.

In the workflow, select the trigger as ‘Webhook’ and copy the provided URL. Go back to your chatbot flow in Pabbly Chatflow and add an API request action. Paste the webhook URL in the required field. This connection will ensure that whenever a lead is tagged as ‘Hot’ or ‘Promising’, their details are sent to your Google Sheets.

Select the Google Sheets action to add a new row. Map the fields from your chatbot responses to the corresponding columns in Google Sheets. Test the integration to ensure data is being logged correctly.

This integration is crucial as it automates the process of lead management, allowing you to focus on converting leads rather than tracking them manually.


5. Testing and Launching Your WhatsApp Chatbot

After completing the setup and integration, it’s essential to test your WhatsApp chatbot to ensure everything works as intended. In Pabbly Chatflow, you can initiate a test by sending the keyword ‘start’ in your WhatsApp account.

Observe the responses and ensure that the chatbot follows the flow correctly, asking the right questions and tagging leads appropriately. If everything functions smoothly, you can officially launch your chatbot.

Monitor the chatbot’s performance and make adjustments based on user interactions. Gather feedback from users to improve the chatbot experience.

With your lead qualification chatbot live, you will be able to filter leads effectively, ensuring that your business maximizes every opportunity.


Conclusion

In conclusion, using Pabbly Chatflow to create a lead qualification chatbot for WhatsApp is a powerful way to enhance lead management. By following the steps outlined, you can automate your lead filtering process and improve your conversion rates significantly. Start leveraging Pabbly Chatflow today to streamline your business operations and maximize your leads.

Ensure you check out Pabbly Connect to create business automation workflows and reduce manual tasks. Pabbly Connect currently offer integration with 2,000+ applications.

SaaS Lead Management in 2 Minutes | Auto Add to CRM

Learn how to automate your SaaS lead management using Pabbly Connect to seamlessly integrate LinkedIn and Zoho CRM. Follow this detailed tutorial! Explore efficient methods for automating routine tasks with clear, concise instructions suited for both newcomers and experienced professionals.

Watch Step By Step Video Tutorial Below


1. Accessing Pabbly Connect for Lead Management

To start managing your SaaS leads, you need to access Pabbly Connect. If you’re an existing user, simply log in to your account and open the workflow builder. New users should visit pabbl.com/connect and sign up for free to explore the platform.

Once you sign up, you’ll receive 100 free tasks each month, allowing you to add up to 100 leads into your CRM. To begin, navigate to the workflow builder, which is essential for setting up your lead management automation.


2. Setting Up the Trigger in Pabbly Connect

In this step, you will set up the trigger application in Pabbly Connect. Click on the ‘Add Trigger’ button and search for LinkedIn. Select it, and for the event, choose ‘Lead Notifications’.

  • Click ‘Connect’ to establish a connection with LinkedIn.
  • If you have an existing connection, select it; otherwise, create a new one.
  • Log in to your LinkedIn account to complete the connection process.

After connecting, select your sponsored account and refresh the fields to ensure all options are available. Click ‘Save and Send Test Request’ to capture the webhook response.


3. Capturing Lead Details from LinkedIn

Once you have set up the trigger, it’s time to capture lead details. To do this, you will run a test submission by clicking on your LinkedIn ad and filling out the lead form.

Although you may only have limited fields available if your campaign is in draft mode, ensure you fill in the email and phone number. After submission, you will see a confirmation message indicating that the information has been sent to Pabbly Connect.


4. Adding Zoho CRM as the Action in Pabbly Connect

Now, you will add an action to send the captured lead details to Zoho CRM. Click on ‘Add New Action’ and select Zoho CRM from the app list. Choose ‘Create Contact’ as the event and click ‘Connect’. using Pabbly Connect

  • If you have an existing connection, choose it; otherwise, create a new connection.
  • Copy the domain from your Zoho CRM URL and paste it into the connection settings.
  • Accept all permissions requested by Pabbly to ensure safe data transfer.

Once connected, you can map the captured lead details to the corresponding fields in Zoho CRM. Remember to fill in required fields like last name and email address to complete the process.


5. Testing and Confirming the Integration

After mapping the fields, click ‘Save and Send Test Request’ to send the lead details to Zoho CRM. You will receive a confirmation that the details have been successfully added.

To verify, refresh your Zoho CRM contact list, and you should see the new lead entry reflecting the details you submitted earlier. This confirms that your integration between LinkedIn and Zoho CRM through Pabbly Connect is complete.


Conclusion

In this tutorial, we demonstrated how to automate your SaaS lead management using Pabbly Connect. By integrating LinkedIn with Zoho CRM, you can streamline your lead capture process effortlessly. Start using Pabbly Connect today to enhance your lead management workflow!

Ensure you check out Pabbly Connect to create business automation workflows and reduce manual tasks. Pabbly Connect currently offer integration with 2,000+ applications.