Automate Leave Management Requests with Pabbly Chatflow

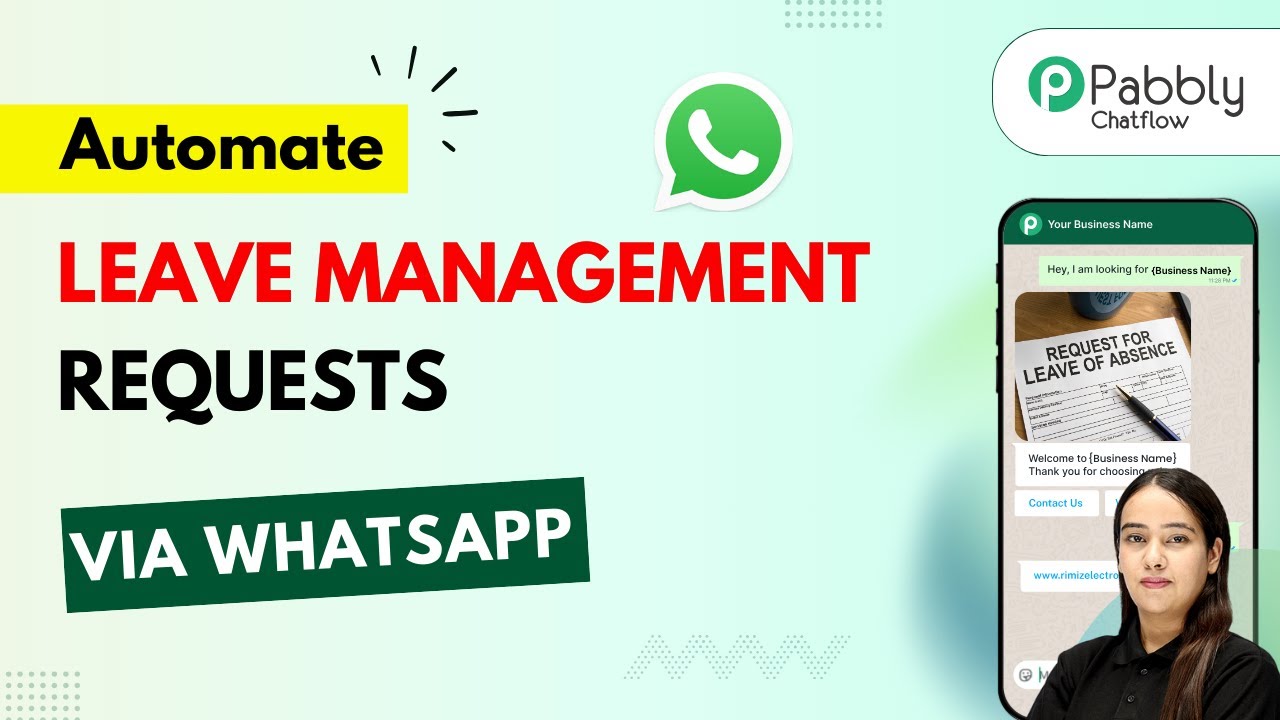
Learn how to automate leave management requests using Pabbly Chatflow and Pabbly Chatflow. Step-by-step instructions to streamline your workflow. Explore how leading businesses automate customer interactions with carefully designed chat sequences that feel natural and helpful.

Watch Step By Step Video Tutorial Below


1. Introduction to Pabbly Chatflow for Leave Management

Pabbly Chatflow is an essential tool for automating leave management requests efficiently. By using Pabbly Chatflow, you can streamline the process of handling leave requests from employees, making it less time-consuming and more organized. using Pabbly Connect

In this section, we will explore how to set up Pabbly Chatflow to manage leave requests. With Pabbly Chatflow, you will automate responses to leave requests and ensure all data is collected and stored systematically.


2. Setting Up Pabbly Chatflow for Leave Requests

To begin using Pabbly Chatflow for leave management requests, first, access the platform by navigating to Pabbly Chatflow on your web browser. After signing in, you will be directed to the dashboard where you can manage your WhatsApp numbers and chat flows.

  • Click on the ‘Add WhatsApp Number’ button to integrate your account.
  • Select the ‘Chat Flow’ feature to create a new flow for leave management.

Once you have set up your WhatsApp number, you can create a new chat flow specifically for leave management requests. This will involve naming your flow and defining the triggers that initiate the leave request process.


3. Creating the Chat Flow for Leave Management

In this section, we will detail how to create the actual chat flow using Pabbly Chatflow. Begin by clicking on the ‘Add Flow’ button in the dashboard. Name your flow something relevant, like ‘Automated Leave Management Request.’ This name will help you identify the flow easily.

Next, set up the triggers for your flow. Use keywords such as ‘leave request’ or ‘time off’ to initiate the conversation. This step is crucial as it defines how employees will start their requests through WhatsApp.

  • Add keywords in the trigger section to capture various leave requests.
  • Connect your welcome message to the trigger, guiding employees to select their leave type.

By implementing these triggers and messages, you create an interactive experience for employees submitting their leave requests.


4. Collecting Leave Details Through Pabbly Chatflow

Once the employee selects their leave type, Pabbly Chatflow will prompt them to provide further details such as start date, end date, and reason for leave. This process ensures that all necessary information is collected efficiently. using Pabbly Connect

In this phase, use the ‘Ask Question’ feature to inquire about the start date and end date. Ensure you specify the format in which the dates should be entered to avoid confusion.

Ask for the start date and end date using the ‘Ask Question’ feature. Collect the reason for leave as a text input to capture detailed responses.

These steps ensure that all required data is gathered before moving on to the next phase of the workflow.


5. Storing Leave Requests in Google Sheets

After collecting all necessary leave request details, the next step is to store this information in Google Sheets using Pabbly Connect. This integration allows for seamless data management and tracking of leave requests.

To do this, you will need to set up an API request in your chat flow that connects to your Google Sheets. You can achieve this by copying the webhook URL from Pabbly Connect and pasting it into the API request setup in Pabbly Chatflow.

Paste the webhook URL in the API request section of your chat flow. Map the collected data (start date, end date, reason) to the corresponding columns in your Google Sheets.

By following these steps, you ensure that every leave request is automatically logged and can be accessed easily in your Google Sheets for future reference.


Conclusion

In conclusion, automating leave management requests using Pabbly Chatflow and Pabbly Connect streamlines the entire process from request submission to data storage. This tutorial has guided you through the steps needed to set up an efficient workflow that saves time and enhances productivity.

Ensure you check out Pabbly Connect to create business automation workflows and reduce manual tasks. Pabbly Connect currently offer integration with 2,000+ applications.

By implementing these systems, you can focus on other important tasks while ensuring that leave requests are handled promptly and accurately. Start using Pabbly Chatflow today to transform your leave management process!

How to Notify Discord Channel on New Stripe Purchase Using Pabbly Connect

Learn how to integrate Stripe with Discord to notify your team on new purchases using Pabbly Connect. Step-by-step tutorial with detailed instructions. Eliminate manual repetitive tasks from your workflow. Discover proven automation methods with intuitive steps designed for efficiency-minded professionals.

Watch Step By Step Video Tutorial Below


1. Accessing Pabbly Connect for Integration

To notify your Discord channel on a new Stripe purchase, the first step is accessing Pabbly Connect. Open your browser and go to the Pabbly Connect landing page by typing Pabbly.com/connect.

Once on the landing page, you will see options to sign in or sign up. If you are new, click on the ‘Sign up for free’ button to create an account. Existing users can click ‘Sign in’ to access their accounts and start creating workflows.


2. Creating a New Workflow in Pabbly Connect

After signing in, the next step is to create a new workflow in Pabbly Connect. Click on the ‘Create Workflow’ button, which will prompt you to choose between the new or classic workflow builder. Select the new workflow builder for a modern interface.

  • Name your workflow: ‘Notify Discord Channel on Stripe Purchase’.
  • Choose a folder to save your workflow or create a new one.
  • Click ‘Create’ to open the workflow window.

This window is crucial as it contains the trigger and action settings that will dictate the workflow’s operation.


3. Setting Up the Trigger for Stripe

In this step, you will set up the trigger for the workflow using Pabbly Connect. Click on ‘Add Trigger’ and select Stripe as the application. For the trigger event, choose ‘New Charge’ and click ‘Connect’. This will generate a webhook URL.

Copy the webhook URL and navigate to your Stripe account. Go to the Developers page and select Webhooks. Click on ‘Add Endpoint’ to create a new webhook, pasting the copied URL in the designated field. Select the event as ‘Charge Succeeded’ to ensure notifications are sent only for successful transactions.


4. Testing the Integration with Stripe

After setting up the trigger, it’s essential to test the integration using Pabbly Connect. To do this, you need to perform a test purchase on Stripe. Navigate to the payment links section in your Stripe account and complete a purchase using test details.

  • Enter your payment details and complete the purchase.
  • Return to your Pabbly Connect workflow to check if it captured the response.
  • Verify that the purchase ID and other details are accurately recorded.

This ensures that Pabbly Connect is successfully receiving data from Stripe for every new purchase.


5. Sending Notifications to Discord

Finally, to notify your Discord channel, add an action step in Pabbly Connect. Search for Discord and select it as the action application. Choose ‘Send Channel Message (Markdown)’ as the event and click ‘Connect’.

Next, you will need to provide the webhook URL from your Discord server. Go to your Discord server settings, navigate to Integrations, and create a new webhook. Copy the URL and paste it into your Pabbly Connect workflow. Customize the message to include dynamic data from the Stripe purchase, ensuring your team receives all relevant information.


Conclusion

By following these steps, you can successfully integrate Stripe with Discord using Pabbly Connect. This automation allows your team to receive instant notifications for every new purchase, enhancing communication and efficiency.

Ensure you check out Pabbly Connect to create business automation workflows and reduce manual tasks. Pabbly Connect currently offer integration with 2,000+ applications.

Try this integration today to streamline your workflow and keep your team informed about sales in real-time.

Automate Recruitment & Interview Scheduling Using Pabbly Chatflow

Learn how to automate recruitment and interview scheduling using Pabbly Chatflow with this detailed step-by-step tutorial. Create intelligent chat experiences that delight users while collecting valuable information and moving prospects through your sales process.

Watch Step By Step Video Tutorial Below


1. Accessing Pabbly Chatflow for Recruitment Automation

To begin automating recruitment and interview scheduling, first access Pabbly Chatflow. Navigate to the Pabbly Chatflow homepage by searching for it in your browser. This platform serves as a comprehensive solution for creating WhatsApp chatbots.

Once on the homepage, you can either sign in if you’re an existing user or click on the ‘Sign Up Free’ button to create a new account. This will give you access to 100 free credits to explore the features of Pabbly Chatflow.


2. Creating a WhatsApp Chatbot Using Pabbly Chatflow

After signing into Pabbly Chatflow, you will see the dashboard. Here, click on the ‘Add Flow’ button to begin creating your WhatsApp chatbot for recruitment. Name your flow something like ‘Automate Recruitment and Interview Scheduling’ to keep it organized.

  • Click on the ‘Add Flow’ button.
  • Enter a name for your flow.
  • Set up the trigger for your chatbot.

For the trigger, select the option for a keyword. This will allow your chatbot to activate when specific keywords are sent by users. You can add keywords like ‘apply job’ or ‘interview’ to ensure the chatbot responds appropriately.


3. Setting Up Chatbot Questions in Pabbly Chatflow

Next, you will configure the questions your chatbot will ask. Start by adding a text message that welcomes users and asks them which position they are applying for. This is crucial for guiding the conversation.

  • Add a welcome message asking for the position.
  • Include buttons for different job positions.
  • Ensure responses lead to further questions.

Once users select a position, prompt them to enter their full name. This information is essential for the recruitment process and will be collected through a custom field in Pabbly Chatflow.


4. Collecting User Details for Recruitment

After collecting the user’s name, continue the process by asking for their email address and phone number. These details are vital for follow-up communication during the recruitment process. using Pabbly Connect

Utilize the media question type to request a resume upload. This allows candidates to submit their applications directly through WhatsApp, streamlining the hiring process.

Finally, ask for a convenient date for the interview. This ensures that scheduling is efficient and respects the candidate’s availability.


5. Finalizing the Chatbot Setup in Pabbly Chatflow

Once you have configured all the questions and responses in Pabbly Chatflow, save your flow. This step is crucial to ensure that all your settings are preserved and the chatbot is ready to operate.

To test the chatbot, send a message using the keywords you set up. This will allow you to see how the chatbot responds and ensure that the entire recruitment automation process works smoothly.

With the flow saved and tested, your WhatsApp chatbot is now fully operational for automating recruitment and interview scheduling. This setup not only enhances efficiency but also improves the candidate experience.


Conclusion

In this tutorial, we explored how to automate recruitment and interview scheduling using Pabbly Chatflow. By following the steps outlined, you can create an efficient WhatsApp chatbot that streamlines your hiring process.

Ensure you check out Pabbly Connect to create business automation workflows and reduce manual tasks. Pabbly Connect currently offer integration with 2,000+ applications.

With Pabbly Chatflow, you can easily manage candidate interactions and ensure a seamless recruitment experience. Start automating today to enhance your recruitment efforts!

How to Notify MS Teams When a Stripe Payment is Captured Using Pabbly Connect

Learn how to integrate Stripe with Microsoft Teams to send notifications using Pabbly Connect. Step-by-step guide for seamless automation. Build sophisticated automated workflows in less time than you think. This guide translates complex integrations into straightforward steps for immediate implementation.

Watch Step By Step Video Tutorial Below


1. Accessing Pabbly Connect for Integration

To begin the integration of Stripe with Microsoft Teams, you need to access Pabbly Connect. Start by opening a new tab and navigating to Pabbly.com/connect. This platform serves as the central hub for automating your workflows without coding.

Once you arrive at the Pabbly Connect page, you will see options to sign up or sign in. If you are a new user, click on the sign-up option to create an account and receive 100 free tasks to explore the software. Existing users should click on the sign-in button to access their dashboards.


2. Creating a New Workflow in Pabbly Connect

After signing in, you will find yourself on the Pabbly Connect dashboard. Here, click on the ‘+ Create Workflow’ button to initiate a new automation. You will be prompted to choose between the new beta workflow builder or the classic version. Select your preferred option. using Pabbly Connect

  • Name your workflow: ‘Notify MS Teams When a Stripe Payment is Captured’.
  • Select the folder where you want to save this workflow.
  • Click on the ‘Create’ button to finalize your workflow setup.

Your workflow is now created successfully, and you can proceed to set the trigger for your automation.


3. Setting Up the Trigger in Pabbly Connect

The next step is to set up the trigger for your workflow. In Pabbly Connect, triggers define the starting point of your automation. Select Stripe as your trigger application and choose the event ‘New Charge’. using Pabbly Connect

After selecting the trigger, click on the ‘Connect’ button. Pabbly Connect will generate a webhook URL that you need to copy. This URL will be used to connect your Stripe account to Pabbly Connect.

Next, navigate to your Stripe account. Go to the Developer section and find the Webhooks option. Click on ‘Add Destination’, choose the event ‘Charge Succeeded’, and paste the webhook URL you copied earlier. Click on ‘Create Destination’ to finalize the connection.


4. Configuring the Action to Notify Microsoft Teams

With the trigger set, it’s time to configure the action that will notify Microsoft Teams. In Pabbly Connect, click on the ‘+’ button to add a new action step. Search for Microsoft Teams and select it. using Pabbly Connect

  • Choose the event ‘Send Message in a Channel’.
  • Click on the ‘Connect’ button and choose to add a new connection or select an existing one.
  • Select the team and channel where you want to send the notification.

In the message field, compose your notification in HTML format, including dynamic data from the previous steps, such as customer name, email, amount, and transaction ID. Once your message is complete, click on ‘Save and Send Test Request’ to verify the setup.


5. Testing the Integration with Stripe Payments

To ensure everything is working correctly, it’s essential to test the integration. Make a test payment through your Stripe account. Once the payment is completed, return to Pabbly Connect to check if the webhook response is received. using Pabbly Connect

If the setup is correct, you should see a successful response from Stripe in Pabbly Connect. Now, check your Microsoft Teams channel to confirm that the notification with all the payment details has been sent successfully.

This integration allows you to automate notifications seamlessly. Whenever a payment is captured in Stripe, your Microsoft Teams channel will receive an update, ensuring your team stays informed in real-time.


Conclusion

In this tutorial, we explored how to use Pabbly Connect to automate notifications to Microsoft Teams whenever a Stripe payment is captured. By following these steps, you can streamline your workflow and keep your team updated effortlessly. Start using Pabbly Connect today to enhance your automation experience!

Ensure you check out Pabbly Connect to create business automation workflows and reduce manual tasks. Pabbly Connect currently offer integration with 2,000+ applications.

Automate Internal IT Asset Requests with Pabbly Chatflow

Learn to automate internal IT asset requests using Pabbly Chatflow. Follow our detailed tutorial to create a WhatsApp chatbot for efficient asset management. Master conversational marketing with practical techniques for creating chatbots that engage visitors at exactly the right moment in their journey.

Watch Step By Step Video Tutorial Below


1. Accessing Pabbly Chatflow for Automation

To automate internal IT asset requests, the first step is to access Pabbly Chatflow. You can do this by visiting the Pabbly Chatflow website at www.Pabbly.com/chatflow. This platform allows you to create a WhatsApp chatbot that automates responses to asset requests.

After navigating to the site, you need to sign in to your Pabbly Chatflow account. If you are new, you can sign up for free, which provides you with 100 credits monthly. Once signed in, you will be directed to the dashboard where you can manage your WhatsApp number and explore various features.


2. Creating the WhatsApp Chatbot Using Pabbly Chatflow

With Pabbly Chatflow, creating a WhatsApp chatbot for internal IT asset requests begins by clicking on the ‘Add Flow’ button in the dashboard. Name your flow appropriately, such as ‘Automate Internal IT Asset Request’ to keep it organized.

  • Click on the ‘Add Flow’ button.
  • Name your flow as ‘Automate Internal IT Asset Request’.
  • Select the trigger type as ‘Keyword Regex Match’.

Set a keyword, such as ‘request’, which will trigger the chatbot when a user sends a message containing this keyword. This ensures that the chatbot responds appropriately to asset requests.


3. Collecting User Information Through the Chatbot

Once the chatbot is triggered, the next step is to collect user information. Using Pabbly Chatflow, you can ask users for their full name, department, reason for the request, and the date they require the asset.

  • Ask for the user’s full name.
  • Request the department they belong to.
  • Inquire about the reason for the asset request.
  • Ask for the date the asset is needed.

Each response is captured using contact custom fields in Pabbly Chatflow, allowing for organized data collection that can later be used in Google Sheets or other applications.


4. Integrating Google Sheets with Pabbly Chatflow

After collecting user information, the next step is to integrate Google Sheets using Pabbly Chatflow. This allows you to store all asset request details in a structured format.

To set this up, navigate to the actions section and select the API request option. Here, choose the method as POST and connect it to your Google Sheets workflow. This is done by copying the webhook URL provided by Pabbly Chatflow and pasting it into your Google Sheets integration.

Select API request and set it to POST. Copy the webhook URL from Pabbly Chatflow. Paste it into your Google Sheets integration.

This integration ensures that every asset request is automatically logged in Google Sheets, making tracking and management easier.


5. Finalizing the Chatbot and Testing

The last step is to finalize your WhatsApp chatbot created in Pabbly Chatflow and test its functionality. Make sure to save your flow and toggle it on to activate the chatbot.

Test the chatbot by sending a message like ‘I want to request IT assets’. The chatbot should respond with a series of questions to gather information. After completing the request, verify that the information appears correctly in your Google Sheets.

By following these steps, you can create a fully functional WhatsApp chatbot that automates internal IT asset requests, enhancing efficiency and response times.


Conclusion

In this tutorial, we explored how to automate internal IT asset requests using Pabbly Chatflow. By creating a WhatsApp chatbot, you can streamline the process of handling asset requests, ensuring all information is efficiently collected and stored.

Ensure you check out Pabbly Connect to create business automation workflows and reduce manual tasks. Pabbly Connect currently offer integration with 2,000+ applications.

How to Auto Reply to YouTube Comments Using Pabbly Connect

Learn how to automate YouTube comment replies using Pabbly Connect and AI. Step-by-step guide to streamline your YouTube engagement. Develop expertise in application integration and learn how to design streamlined automation workflows using proven, simplified approaches.

Watch Step By Step Video Tutorial Below


1. Accessing Pabbly Connect for YouTube Integration

To automate replies to YouTube comments, start by accessing Pabbly Connect. Open a new tab and navigate to the Pabbly Connect landing page by typing Pabbly.com/connect in your browser. This platform is essential for integrating YouTube with various applications.

Once on the Pabbly Connect page, you can either sign in if you are an existing user or sign up for free if you are new. Signing up gives you access to 100 free tasks each month, allowing you to explore the capabilities of Pabbly Connect. After signing in, you will see the dashboard where you can start creating your workflow.


2. Creating a Workflow in Pabbly Connect

In the Pabbly Connect dashboard, click on the button labeled Create Workflow. You will be prompted to select between the new or classic workflow builder. Choose the new workflow builder for a more modern experience. Name your workflow ‘Auto Reply to YouTube Comments Using AI Agent’ and select the folder as Automations before clicking Create. using Pabbly Connect

  • Select the new workflow builder for a modern interface.
  • Name your workflow appropriately for easy identification.
  • Choose the correct folder for organization.

After creating the workflow, you will enter the workflow window where you can set up triggers and actions. Triggers start the automation process, while actions define what happens when the trigger occurs. Click on Add Trigger to begin.


3. Setting Up Your Trigger with YouTube

Select YouTube as your trigger application in Pabbly Connect. For the trigger event, choose New Comment on Channel and click Connect. You will need to create a connection between YouTube and Pabbly Connect by signing in with your Google account.

Once connected, select your YouTube channel from the dropdown menu. The maximum results parameter allows you to specify how many comments to capture at once. Set this to one for simplicity. After configuring your trigger, click on Save and Send Test Request to check if everything is working correctly.

  • Choose the correct trigger event for your workflow.
  • Connect your Google account to authorize the integration.
  • Test the trigger to ensure it captures comments correctly.

Keep in mind that YouTube operates on a polling basis, meaning it checks for new comments every ten minutes. Make sure to adjust this setting according to your needs.


4. Generating Automated Replies Using AI

After successfully capturing a comment, the next step is to generate a reply using an AI agent. Click on Add New Action Step and select OpenAI as the action application. Choose Chat GPT as the action event and connect it to your OpenAI account. using Pabbly Connect

To connect, you will need an API key from OpenAI. Follow the instructions to create a new secret key, copy it, and paste it into Pabbly Connect. Once connected, configure the model settings and input a prompt that describes how you want the AI to generate replies. Include details about your YouTube channel and examples of responses to guide the AI.

Select OpenAI and configure the action event for generating replies. Obtain and enter your OpenAI API key for the connection. Craft a detailed prompt to guide the AI in generating personalized replies.

After setting this up, click on Save and Send Test Request to generate a reply based on the captured comment. The AI will process your prompt and return a suitable response.


5. Posting the Generated Reply Back to YouTube

With the generated reply in hand, you need to post it back to the original comment on YouTube. Click on Add New Action Step again and select YouTube for the action application. Choose Reply to Comment as the action event and connect using the existing connection.

In the action configuration, map the reply text generated by the AI and the comment ID from the previous steps. Click on Save and Send Test Request to post the reply. Once the workflow is set up, every time a new comment is made, the process will automatically trigger, generating and posting replies without manual intervention.

After testing, refresh your YouTube channel to see the posted reply. You will notice that the reply is exactly what the AI generated, demonstrating the power of automation through Pabbly Connect.


Conclusion

In this tutorial, we explored how to automate replies to YouTube comments using Pabbly Connect and AI. By following these steps, you can enhance your YouTube engagement effortlessly. Set up your automation today and let Pabbly Connect handle your comment replies seamlessly!

Ensure you check out Pabbly Connect to create business automation workflows and reduce manual tasks. Pabbly Connect currently offer integration with 2,000+ applications.

Creating an AI Assistant for Product Support with Pabbly Chatflow

Learn how to create an AI assistant for product support using Pabbly Chatflow. This step-by-step guide covers integration with various applications for efficient customer support.

Watch Step By Step Video Tutorial Below


1. Accessing Pabbly Chatflow for AI Assistant Setup

To create an AI assistant for product support, start by accessing Pabbly Chatflow. Simply type the URL Pabbly.com/chatflow in your browser. Once the landing page appears, you will see options for signing in or signing up.

If you are a new user, click on the ‘Sign Up Free’ button. Existing users can click ‘Sign In’. After signing in, you will be directed to the Pabbly applications page, where you can access Pabbly Chatflow by clicking the ‘Access Now’ button. This will take you to the dashboard of Pabbly Chatflow.


2. Creating Your AI Assistant in Pabbly Chatflow

Once you are on the Pabbly Chatflow dashboard, you can start creating your AI assistant. Click on the ‘AI Assistant’ option in the sidebar. To add a new assistant, click the ‘Add AI Assistant’ button. A dialog box will appear asking for a name for your assistant. using Pabbly Connect

  • Provide a name for your assistant, such as ‘Proare Solutions’.
  • Click the ‘Add AI Assistant’ button to proceed.
  • You will be redirected to the AI Assistant page where you can configure its settings.

Now, you can select the instruction type for your AI assistant. Choose ‘AI Agent’ for product support functionalities. This setup allows your assistant to respond to customer queries effectively, utilizing the knowledge base you will create.


3. Configuring AI Assistant Settings in Pabbly Chatflow

After naming your assistant, the next step is to configure its settings. In the AI instruction section, you can set parameters such as temperature for creativity in responses. A temperature setting of 0.5 is recommended for balanced responses. using Pabbly Connect

Additionally, select the AI model to use, such as GPT-4 Mini. You will also need to enter your OpenAI API key, which you can obtain by visiting the OpenAI API key page and creating a new secret key.

  • Enable header and footer messages for your assistant.
  • Set a stop keyword to halt the assistant when needed.
  • Define retry attempts for fallback responses.

Completing these configurations ensures your AI assistant is ready to handle customer inquiries effectively.


4. Uploading Knowledge Base to Pabbly Chatflow

With your AI assistant configured, the next step is to upload your knowledge base. This file should contain all relevant information about your products and services. Ensure that the file is in either .txt or .pdf format, as these are the only accepted formats. using Pabbly Connect

To upload, click on the ‘Upload File’ button in the knowledge source section. Then, select the appropriate file from your device. Once uploaded, you will receive a confirmation message indicating successful processing of the file.

Make sure the knowledge base is comprehensive and updated. Verify the contents of the knowledge base to ensure accuracy. This knowledge base will be used by your AI assistant to answer queries.

Uploading the knowledge base is critical for your AI assistant to provide accurate and helpful information to customers.


5. Testing Your AI Assistant with Pabbly Chatflow

After successfully setting up your AI assistant and uploading the knowledge base, it’s time to test its functionality. Navigate to the inbox section in Pabbly Chatflow, where you can activate the AI assistant for your connected WhatsApp number. using Pabbly Connect

Choose the AI assistant you created and click the save button to activate it. Now, you can simulate customer queries by sending messages through WhatsApp to see how your AI assistant responds. For example, you can ask, ‘Hey, I need help’ and observe the assistant’s response.

Send various queries to test different functionalities. Evaluate the accuracy of the responses based on your knowledge base. Make adjustments to the AI settings as necessary for improved performance.

Testing ensures that your AI assistant is functioning correctly and providing valuable support to your customers.


Conclusion

In conclusion, creating an AI assistant for product support using Pabbly Chatflow allows businesses to automate customer service effectively. By following the steps outlined, you can set up a responsive assistant that enhances customer experience and streamlines support processes.

Ensure you check out Pabbly Connect to create business automation workflows and reduce manual tasks. Pabbly Connect currently offer integration with 2,000+ applications.

Automate Insurance Quote Collection Using Pabbly Chatflow

Learn how to automate insurance quote collection using Pabbly Chatflow. Step-by-step guide for integrating WhatsApp and YouTube for efficient communication. Explore how leading businesses automate customer interactions with carefully designed chat sequences that feel natural and helpful.

Watch Step By Step Video Tutorial Below


1. Accessing Pabbly Chatflow for Insurance Quote Collection

To automate insurance quote collection, first, access Pabbly Chatflow. This platform allows you to create an efficient WhatsApp chatbot tailored for your insurance business. Begin by visiting the official Pabbly website and signing in or registering for a new account.

Once logged in, navigate to the dashboard where you can see various applications. Select Pabbly Chatflow to start building your chatbot for insurance queries. This platform simplifies the process of integrating WhatsApp with your insurance services, making customer interactions seamless.


2. Creating a WhatsApp Chatbot Using Pabbly Chatflow

The next step is to create your WhatsApp chatbot using Pabbly Chatflow. Click on the ‘Add a Flow’ button to initiate the process. When prompted, name your flow, for example, ‘Automate Insurance Quote Collection.’ This name helps in identifying the flow later.

  • Select a trigger event for your chatbot, such as a keyword match.
  • Configure the trigger to respond to specific keywords related to insurance.
  • Add response messages that guide users through their queries.

With these initial settings in place, your WhatsApp chatbot is ready to interact with users seeking insurance quotes. This integration through Pabbly Chatflow ensures that your customers receive prompt responses to their inquiries.


3. Setting Up Questions for Insurance Quotes

Now, it’s time to set up the questions that your WhatsApp chatbot will ask potential clients. Using Pabbly Chatflow, you can define the sequence of questions that guide users through their insurance needs. Start by adding a message box that asks, ‘What kind of insurance are you looking for?’

  • Provide options like Life Insurance, Health Insurance, and Vehicle Insurance.
  • Ensure each option leads to the next relevant question.
  • Use quick reply buttons for user convenience.

This structured approach helps in collecting essential information from users effectively. By utilizing Pabbly Chatflow, you automate responses based on user selections, enhancing the overall customer experience.


4. Finalizing the Chatbot and Testing

After setting up the questions, finalize your WhatsApp chatbot in Pabbly Chatflow. Review all the messages and ensure that the flow is logical and user-friendly. You can add a thank you message at the end of the interaction, confirming that an agent will contact them shortly.

To test the chatbot, send a sample message to your WhatsApp number. This allows you to see how the chatbot responds to user inputs. Make sure the entire flow works seamlessly, from the initial greeting to the final confirmation message.


5. Conclusion: Automate Insurance Quote Collection with Pabbly Chatflow

In conclusion, automating insurance quote collection using Pabbly Chatflow is a straightforward process that enhances customer interaction. By following the steps outlined, you can create a functional WhatsApp chatbot that efficiently handles queries and provides necessary information to potential clients. This not only saves time but also improves the overall customer experience.

Ensure you check out Pabbly Connect to create business automation workflows and reduce manual tasks. Pabbly Connect currently offer integration with 2,000+ applications.

Utilizing Pabbly Chatflow for your insurance business ensures that you stay ahead in customer service, paving the way for increased client satisfaction and engagement.

Creating a WhatsApp AI Agent for Delivery and Logistics Support Using Pabbly Chatflow

Learn how to automate delivery and logistics support on WhatsApp using Pabbly Chatflow. Step-by-step tutorial to set up your AI agent. Learn step-by-step how to create, test, and optimize chatbots that enhance customer experience while reducing support workload.

Watch Step By Step Video Tutorial Below


1. Setting Up Pabbly Chatflow for WhatsApp Integration

To automate delivery and logistics support over WhatsApp, the first step is to access Pabbly Chatflow. This platform allows you to create an AI agent that handles user queries efficiently. Start by navigating to the Pabbly Chatflow landing page by typing Pabbly.com/chatflow in your browser.

Once on the landing page, you can either sign in if you’re an existing user or sign up for free to explore the features of Pabbly Chatflow. By signing up, you receive 100 free credits to start your automation journey. After logging in, you will be taken to the dashboard where you can begin setting up your WhatsApp integration.


2. Adding Your WhatsApp Number in Pabbly Chatflow

To create an AI agent within Pabbly Chatflow, you must first add your WhatsApp number. This can be done by clicking the ‘Add WhatsApp Number’ button on the dashboard. You have two methods for adding your number: WhatsApp Connect or Manual Token Connect.

  • Choose WhatsApp Connect for a seamless setup.
  • Select Manual Token Connect if you prefer entering a token.

Make sure to follow the prompts provided by Pabbly Chatflow for whichever method you choose. Once your WhatsApp number is successfully added, you can proceed to create your AI assistant.


3. Creating Your AI Assistant in Pabbly Chatflow

Now that your WhatsApp number is integrated, it’s time to create your AI assistant. In the Pabbly Chatflow dashboard, navigate to the AI Assistant feature. Click on ‘Add AI Assistant’ and name it something relevant, like ‘AI Agent for Delivery and Logistics Support’.

Upon clicking the ‘Add AI Assistant’ button, you will be prompted to select instructions for your assistant. You can choose from pre-built examples like ‘Customer Support Agent’ or enter custom prompts tailored to your business needs. After selecting the instructions, set the temperature for responses—lower values yield more focused answers.


4. Configuring AI Settings and Knowledge Source

In this section, you will configure the AI settings for your assistant within Pabbly Chatflow. You can specify fallback messages, retry attempts, and stop keywords that will allow users to request human assistance. Add keywords like ‘human’ to stop the AI from responding if necessary.

  • Set the fallback message for emergencies.
  • Determine the number of retry attempts for failed responses.

Next, upload a knowledge source that contains FAQs and other relevant information. This knowledge base is crucial for enabling your AI assistant to provide accurate and helpful responses. Use a text file format for best results and upload it to Pabbly Chatflow.


5. Testing Your WhatsApp AI Agent in Real Time

Once your AI assistant is fully configured, it’s time to test it. Activate your AI assistant in Pabbly Chatflow and send a message through WhatsApp to see how it responds. Start with a simple greeting like ‘Hey’ to initiate the conversation.

As you test, ask various questions to ensure the AI agent handles inquiries about delivery and logistics effectively. For example, you can ask about delivery times or product options. The AI should respond accurately based on the knowledge source you provided. This real-time interaction showcases the power of Pabbly Chatflow in automating customer support.


Conclusion

In conclusion, setting up a WhatsApp AI agent for delivery and logistics support using Pabbly Chatflow is a straightforward process. By following the steps outlined in this tutorial, you can automate responses to customer inquiries and enhance your business’s efficiency. With Pabbly Chatflow, you can create tailored solutions that meet your specific operational needs.

Ensure you check out Pabbly Connect to create business automation workflows and reduce manual tasks. Pabbly Connect currently offer integration with 2,000+ applications.

How to Send Thank You Emails Automatically After a Payment via Razorpay Using Pabbly Connect

Learn how to automate sending thank you emails after a payment via Razorpay using Pabbly Connect. Follow our step-by-step guide for seamless integration. Implement the precise methodologies leading organizations use to automate repetitive tasks, illustrated with practical examples designed for immediate application.

Watch Step By Step Video Tutorial Below


1. Accessing Pabbly Connect for Integration

To start automating thank you emails after payments via Razorpay, you need to access Pabbly Connect. First, open your browser and navigate to the Pabbly Connect landing page by entering ‘Pabbly.com/connect’. This will take you to the main interface where you can create your workflow.

Once on the landing page, existing users can click on the ‘Sign In’ button. If you are a new user, you can select ‘Sign Up for Free’ to get started. After signing in, click on ‘Access Now’ under Pabbly Connect to enter your dashboard and begin creating your automation.


2. Creating Your Workflow in Pabbly Connect

After accessing Pabbly Connect, you will need to create a new workflow. Click on the ‘Create Workflow’ button. You will be prompted to choose between the new workflow builder or the classic one. For this tutorial, select the new workflow builder for a modern interface.

Next, name your workflow as ‘Send Thank You Emails Automatically After a Payment via Razorpay’. You can categorize it under a folder named ‘Automations’. Once done, click on the ‘Create’ button to proceed to the workflow window where you will set up triggers and actions.

  • Choose a workflow name that is descriptive and relevant.
  • Select a folder to organize your workflows.
  • Click ‘Create’ to finalize your workflow setup.

Now that your workflow is created, you will see the main window with options to add a trigger and action. This is where you will define the workflow’s behavior.


3. Setting Up Trigger with Razorpay

To set up the trigger in Pabbly Connect, click on the ‘Add Trigger’ button. Search for ‘Razorpay’ in the application list and select it. For the trigger event, choose ‘Payment Captured’ and click on ‘Connect’. This will generate a webhook URL used to connect Razorpay with Pabbly Connect.

Copy the webhook URL and log in to your Razorpay account. Navigate to the ‘Developers’ section, then select ‘Webhooks’. Click on ‘Add New Webhook’ and paste the copied URL. For the active events, choose ‘Payment Captured’ and click ‘Create Webhook’. This establishes the connection between Razorpay and Pabbly Connect.

  • Access the Razorpay Developers section.
  • Paste the webhook URL in the designated field.
  • Select ‘Payment Captured’ as the active event.

After creating the webhook, Pabbly Connect will wait for a response, which you can test by making a sample payment through Razorpay.


4. Testing the Integration with a Sample Payment

To test the integration, complete a sample payment using Razorpay. Go back to your Razorpay dashboard, find the payment page for your product, and complete a transaction. Once the payment is successful, Pabbly Connect will capture the payment details, including customer information.

After the payment, return to your Pabbly Connect workflow, and you should see that the payment details have been captured. This includes the customer’s name, email, order ID, and other relevant information. Make sure to verify that the details are correct before moving to the next step.

Complete a test payment on Razorpay. Check that payment details are correctly captured in Pabbly Connect. Ensure customer information is accurate for email sending.

Once you confirm that the payment details are captured correctly, you can proceed to set up the email action.


5. Sending Thank You Emails via Gmail

Now it’s time to send a thank you email using Gmail through Pabbly Connect. Click on ‘Add New Action Step’ and select ‘Gmail’ as the application. For the action event, choose ‘Send Email’ and click on ‘Connect’. If you haven’t connected Gmail yet, you’ll need to add a new connection.

To establish the connection, click on ‘Sign in with Google’ and select the Gmail account you wish to use. Allow the necessary permissions for Pabbly Connect to access your Gmail account. After connecting, fill in the sender’s name and email address. For the recipient’s email, map it from the captured payment details.

Select Gmail as the action application. Map the recipient’s email from the payment data. Compose the email content and subject.

Finally, click on ‘Save and Send Test Request’ to send a test email. Check your Gmail inbox to ensure the thank you email is received successfully. With this, your automation is complete, and every time a payment is made via Razorpay, a thank you email will be sent automatically.


Conclusion

By following this tutorial, you can effectively use Pabbly Connect to automate thank you emails after payments via Razorpay. This integration not only saves time but also enhances customer communication, ensuring that your clients feel appreciated after their purchase. Try out this automation for your business today!

Ensure you check out Pabbly Connect to create business automation workflows and reduce manual tasks. Pabbly Connect currently offer integration with 2,000+ applications.