Generate & Send Business Reports Automatically (No Coding)

Watch Step By Step Video Tutorial Below


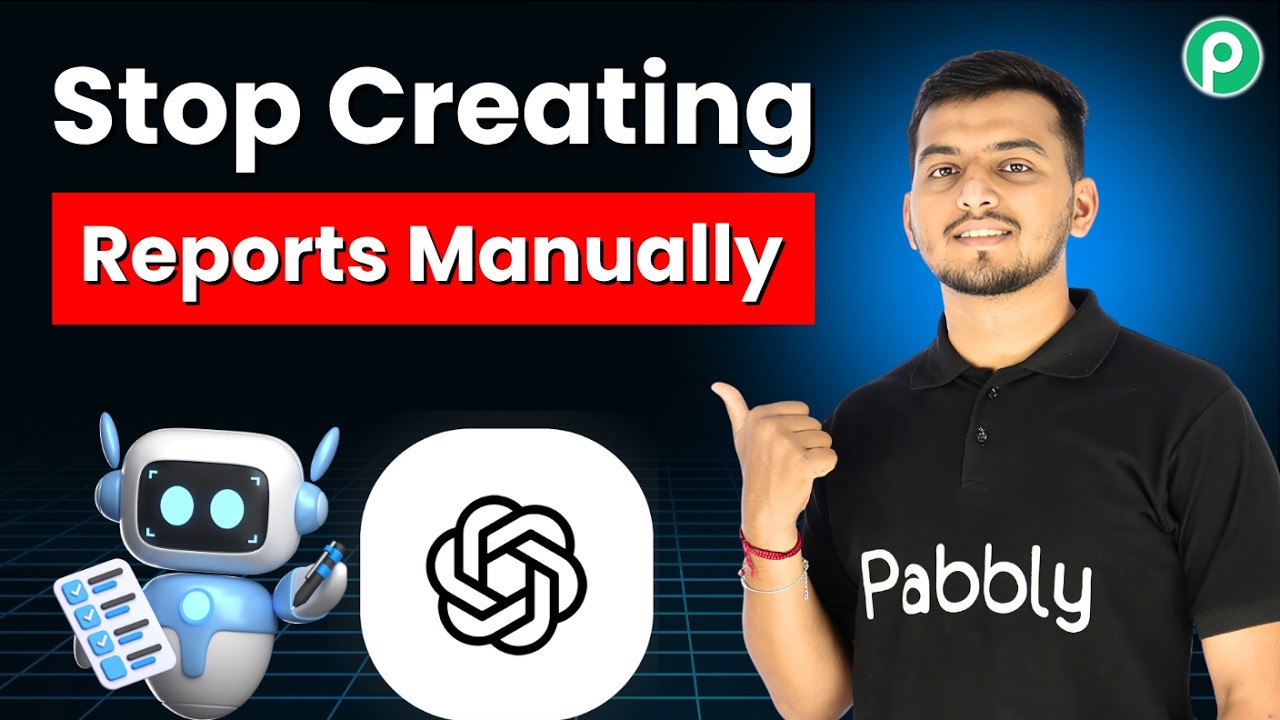
1. Setting Up Pabbly Connect for Automation

To start automating your reporting system, you need to access Pabbly Connect. First, open a new tab and search for pabbly.com/connect. You will be directed to the landing page of Pabbly Connect.

Here, you will find options to either sign in or sign up. If you are new, click on the “Sign Up Free” button to create your account. New users receive 100 free tasks per month, allowing you to explore Pabbly Connect’s capabilities without any cost.


2. Creating Your Workflow in Pabbly Connect

Once logged in, click on the “Access Now” button for Pabbly Connect. This will take you to the dashboard. From the dashboard, click on the “Create Workflow” button to start building your automation.

  • Select “Create Using AI” to utilize Pabbly Connect’s AI features.
  • Describe your workflow, such as “Generate and Send Business Report Automatically”.
  • Choose the trigger event as “New or Updated Spreadsheet Row” from Google Sheets.

After setting the trigger, approve and create the workflow. This step is crucial as it lays the foundation for the automation process using Pabbly Connect.


3. Integrating Google Sheets with Pabbly Connect

Next, you need to integrate Google Sheets with Pabbly Connect. Click on the Google Sheets application within your workflow. You will be prompted to connect your Google account.

  • Copy the webhook URL provided by Pabbly Connect.
  • Open Google Sheets, go to Extensions, then Add-ons, and select Get Add-ons.
  • Search for Pabbly Connect Webhook and install it.

After installation, set up the webhook by pasting the copied URL and selecting the last column as your trigger column. This setup ensures that any new data added to the Google Sheet will trigger the automation through Pabbly Connect.


4. Connecting OpenAI to Generate Reports

After Google Sheets, you will connect OpenAI to your workflow. Click on the OpenAI application in Pabbly Connect and select “Add New Connection”. You will need your OpenAI access token, which you can generate from the OpenAI platform.

  • Create a new secret key in OpenAI and copy it.
  • Paste the key into Pabbly Connect and save the connection.
  • Set the AI model to GPT 5.2 and enter your prompt for generating reports.

This integration allows Pabbly Connect to send data from Google Sheets to OpenAI, which will generate structured business reports based on the data received.


5. Sending the Generated Report via Gmail

The final step is to send the generated report through Gmail. Click on the Gmail application in your workflow and connect your account. Select “Add New Connection” and sign in using your Google account.

  • Fill in the sender name as “Daily Report Automation”.
  • Map the recipient’s email address to send the report.
  • Set the email subject and body, including the report generated by OpenAI.

After saving the email settings, the workflow is complete. Now, every time a new row is added in Google Sheets, Pabbly Connect will trigger the process, generate a report via OpenAI, and send it through Gmail, saving you valuable time.


Conclusion

By following this tutorial, you can automate your reporting process using Pabbly Connect, Google Sheets, OpenAI, and Gmail. This integration not only saves time but also ensures your team receives timely insights for better decision-making.

Automate Birthday Wishes on WhatsApp from Google Sheets (No Code + Bulk Sending 🎉)

Watch Step By Step Video Tutorial Below


1. Access Pabbly Connect for Integration

To begin automating birthday wishes, access Pabbly Connect by visiting pably.com. This platform is essential for integrating various applications, including Google Sheets and WhatsApp.

Once on the site, sign in to your existing account or create a new account to explore the features. Pabbly Connect allows you to create workflows that automate tasks seamlessly.


2. Create a New Workflow in Pabbly Connect

After logging into Pabbly Connect, you can create a new workflow by clicking on the “Create Workflow” button. This action will open the workflow builder, where you can choose between the new beta version or the classic version.

For this tutorial, select the new beta version and name your workflow “Automate Birthday Wishes on WhatsApp from Google Sheets.” Choose the appropriate folder for your workflow, such as “WhatsApp Automations.” Now, let’s set up the trigger application.


3. Set Up Trigger with Pabbly Connect

The next step is to set the trigger for your workflow. In this case, we will use the “Schedule by Pabbly” feature to run the workflow daily. This ensures that the workflow checks for employee birthdays every day automatically.

To set this up, select “Schedule Workflow” in the trigger event and connect it. Specify that the workflow should run every day at a chosen time, for example, 11 a.m. Make sure to save your settings to activate the trigger.

  • Select “Schedule by Pabbly” as the trigger application.
  • Set the trigger event to “Schedule Workflow”.
  • Choose the frequency to run the workflow daily.

Once the trigger is set, your workflow will automatically check for birthdays every day at the specified time.


4. Search for Employee Birthdays in Google Sheets

Now that your trigger is set, the next step is to search for employee birthdays stored in a Google Sheets spreadsheet. Use the “Google Sheets” action step to look up the relevant data.

To do this, select “Lookup Spreadsheet Rows” as your action event. Connect your Google account and choose the spreadsheet containing employee information. Map the necessary fields, such as the date of birth and phone number, to ensure accurate data retrieval.

  • Select your Google Sheets spreadsheet named “Employee Info”.
  • Map the date of birth column to search for matching records.
  • Ensure the lookup value is dynamic by using mapping instead of static values.

By completing these steps, your workflow will successfully retrieve employee birthdays from Google Sheets.


5. Send WhatsApp Messages Using Pabbly Chatflow

Finally, to send personalized birthday wishes, integrate Pabbly Chatflow with your workflow. Add a new action step and select “Send Template Message” as your action event.

Connect to Pabbly Chatflow by providing your API token, which can be found in the settings of Pabbly Chatflow. After connecting, enter the recipient’s phone number and select the template you created for birthday wishes.

  • Select the appropriate template that includes personalized variables.
  • Map the recipient’s phone number from the previous steps.
  • Test the message to ensure successful delivery.

By following these steps, your workflow will automatically send birthday wishes via WhatsApp to employees, making their day special.


Conclusion

In this tutorial, we explored how to automate birthday wishes using Pabbly Connect with Google Sheets and Pabbly Chatflow. By setting up a daily trigger, searching for birthdays, and sending personalized messages, you can enhance employee engagement effortlessly.

The Future of Customer Support: AI Chatbot in Action

Watch Step By Step Video Tutorial Below


1. Creating an AI Assistant Using Pabbly Connect

To create an AI assistant, you first need to access Pabbly Connect. This platform allows you to automate customer support seamlessly. Start by navigating to the Pabbly Chatflow homepage and either sign in or sign up for a free account.

Once logged in, you will have access to the AI assistant setup. Follow these steps to create your assistant:

  • Go to the AI assistant section in Pabbly Chatflow.
  • Click on “Create New Assistant” and provide a name.
  • Set the instruction type as “AI Agent”.

After naming your assistant, configure the settings to tailor its responses to customer queries. This is where Pabbly Connect shines, allowing you to customize your assistant’s behavior based on your business needs.


2. Integrating WhatsApp with Pabbly Connect

After setting up your AI assistant, the next step is to integrate WhatsApp using Pabbly Connect. This integration enables your assistant to interact with customers through WhatsApp, providing real-time support.

To integrate WhatsApp, follow these steps:

  • Navigate to the settings in Pabbly Chatflow.
  • Add your WhatsApp number to the integration settings.
  • Save the changes and confirm the connection.

This integration allows your AI assistant to receive and respond to customer inquiries via WhatsApp, enhancing customer engagement and support efficiency through Pabbly Connect.


3. Creating a Knowledge Base for Your AI Assistant

A knowledge base is crucial for your AI assistant to provide accurate responses. Using Pabbly Connect, you can upload essential business information that the assistant will use to answer customer queries effectively.

To create your knowledge base, follow these steps:

  • Compile documents detailing your services, products, and FAQs.
  • Upload the knowledge base file in TXT or PDF format to Pabbly Chatflow.
  • Ensure the content is clear and concise to avoid confusion.

Once your knowledge base is established, your AI assistant can leverage this information to provide accurate answers, making customer interactions smoother and more efficient through Pabbly Connect.


4. Configuring Your AI Assistant Settings

Configuring your AI assistant settings is essential for optimizing its performance. With Pabbly Connect, you can adjust various parameters to enhance the assistant’s capabilities.

Here’s how to configure the settings:

  • Set the temperature to control the creativity of responses.
  • Choose the appropriate AI model, such as GPT-4.1.
  • Add API keys for OpenAI to ensure proper functionality.

These configurations allow your AI assistant to respond accurately and efficiently, ensuring a high level of customer satisfaction through Pabbly Connect.


5. Enabling Your AI Assistant for Customer Interactions

Finally, enabling your AI assistant is crucial for it to start interacting with customers. Using Pabbly Connect, you can activate the assistant for all contacts or specific chats.

To enable your AI assistant, follow these steps:

  • Go to the inbox settings in Pabbly Chatflow.
  • Enable AI auto replies for your contact list.
  • Select the specific AI assistant you wish to activate.

After enabling the assistant, it will automatically respond to customer inquiries, providing support around the clock and freeing up your time to focus on other business aspects through Pabbly Connect.


Conclusion

In this tutorial, we’ve covered how to create an AI assistant using Pabbly Connect, integrate it with WhatsApp, and set up a knowledge base. This automation enhances customer support efficiency and satisfaction.

By leveraging Pabbly Connect, you can ensure that your AI assistant is always ready to assist customers, allowing your business to thrive.

How to Enroll Students in a Free Course Automatically

Watch Step By Step Video Tutorial Below


1. Accessing Pabbly Connect for Integration

To start the integration process, access Pabbly Connect by visiting the Pabbly website. If you’re a new user, sign up for a free account to explore its features.

Once logged in, you can navigate to the workflow builder. This is where you will create your automation to integrate Open and Let with the necessary applications.


2. Setting Up the Trigger in Pabbly Connect

In this step, you will configure a trigger in Pabbly Connect that initiates the automation process. Click on the “Add Trigger” button and select the application to trigger the workflow.

  • Choose the application type as Typeform.
  • Select the event as “New Entry” to capture form submissions.
  • Connect your Typeform account by clicking “Connect”.

After connecting, select the specific form you want to use for this integration. This is crucial for ensuring that the right data flows into your system.


3. Capturing the Webhook Response

After setting up the trigger, Pabbly Connect will wait for a webhook response. To capture this, fill out the Typeform you selected earlier. This step ensures that the data submitted is received by Pabbly.

Once the form is filled and submitted, return to Pabbly Connect to verify that the webhook response has been successfully captured. This confirms that the integration is working as intended.

  • Go to the Typeform share link and fill in the required fields.
  • Submit the form to generate a response.
  • Check Pabbly Connect for the captured response.

With the response captured, you can now proceed to grant course access to the new user.


4. Enrolling Students Using Pabbly Connect

Next, you’ll add an action step in Pabbly Connect to enroll the student in your course platform. Click on “Add New Action Step” and select your course management application.

For this example, we will use the Heights platform. Choose the event as “Enroll Student” and connect your Heights account by providing the necessary API token and subdomain.

  • Retrieve the API token from your Heights account settings.
  • Copy the subdomain from the Heights platform URL.
  • Map the student’s name and email to the corresponding fields in Pabbly Connect.

Once all fields are mapped correctly, save and send a test request to ensure that the integration works smoothly.


5. Verifying the Integration Process

After setting up the action step, it’s time to verify that the integration between Open and Let via Pabbly Connect is functioning correctly. Go to your Heights platform and check the student list.

If everything is set up correctly, you should see the new student added almost instantly after form submission. This confirms that the automation is working as intended, saving you time and effort.

By using Pabbly Connect, you can automate the entire process of enrolling students, ensuring efficient management of course registrations.


Conclusion

This tutorial has guided you through the process of integrating Open and Let using Pabbly Connect. With this setup, you can automate student enrollments efficiently, saving time and ensuring seamless course management.

How to Automatically Add Payment Details to Notion Database (Step-by-Step)

Watch Step By Step Video Tutorial Below


1. Accessing Pabbly Connect for Integration

To start integrating Pabbly, WBook, and Shopaiff, you first need to access Pabbly Connect. Open your browser and navigate to Pabbly.com/connect. This will take you to the Pabbly Connect homepage where you can sign in or create a free account.

New users can click on the ‘Sign Up Free’ button to get 300 free tasks every month. Existing users can simply sign in. Once you’re logged in, you will see all Pabbly applications, including Pabbly Connect. Click on ‘Access Now’ to enter the dashboard.


2. Creating a New Workflow in Pabbly Connect

After accessing Pabbly Connect, you will need to create a new workflow. Click on ‘Create from Scratch’ to start building your automation. You will be presented with options for workflow builders. Choose the Beta version for a modern experience.

  • Select a name for your workflow, such as “Automatically Add Payment Details to Notion”.
  • Choose the appropriate folder for your workflow.

Once your workflow is named, you will need to set up the trigger and action. The trigger will be when a new payment is received through your Shopify store, which will be connected via WBook.


3. Setting Up the Trigger with WBook

The next step in using Pabbly Connect is to set up the trigger for your workflow. Select ‘Shopify’ as the app and choose ‘New Order’ as the event. This indicates that every time a new order is placed, a trigger will initiate.

After selecting the event, you will receive a WBook URL. This URL is crucial as it connects your Shopify account to Pabbly Connect. Copy this URL and navigate to your Shopify account.

  • Go to Settings in Shopify, then Notifications.
  • Add a new Webhook using the copied WBook URL.

Configure the Webhook to trigger on order creation, ensuring it uses the JSON format. Save the settings to complete this step.


4. Testing the Connection with Pabbly Connect

To ensure everything is set up correctly, you need to test the connection using Pabbly Connect. Start by placing a test order on your Shopify store. This will generate a new order that should trigger the workflow.

Once the test order is placed, return to Pabbly Connect and check for a response. If everything is configured correctly, you should see the order details displayed in the response section of your workflow.

This confirms that the connection between Shopify and Pabbly Connect is successful, and the trigger is functioning as intended.


5. Adding Action Step to Store Payment Details

Now that the trigger has been successfully set, you will need to add an action step in Pabbly Connect. Choose Notion as the action application and select ‘Create Database Item’ as the event.

Map the fields from the order details to your Notion database. This includes order ID, customer email, product name, and total amount. This mapping ensures that every new order automatically updates your Notion database without manual entry.

  • Map the order ID to the corresponding field in Notion.
  • Add customer details such as name and email.

After mapping all necessary fields, save the action step. This completes the automation setup, allowing you to seamlessly manage orders from Shopify in your Notion database.


Conclusion

In this tutorial, we demonstrated how to integrate Pabbly, WBook, and Shopaiff using Pabbly Connect. By following these steps, you can automate the process of capturing payment details and storing them in Notion, enhancing your e-commerce efficiency.

How to Send Ads Leads to Salesforce Automatically

Watch Step By Step Video Tutorial Below


1. Accessing Pabbly Connect for Automation

To start integrating Google Ads with Salesforce, you first need to access Pabbly Connect. Open your browser and navigate to pabbl.com/connect. If you’re a new user, click on the “sign up for free” option in the top right corner.

Once registered, you will receive 100 free tasks every month, allowing you to test the capabilities of Pabbly Connect. This is an excellent opportunity to explore how to automate lead entry into Salesforce.


2. Setting Up the Trigger in Pabbly Connect

In Pabbly Connect, the trigger is essential for starting your automation. Click on “Add Trigger” and select Google Ads as your application. For the event, choose “New Lead Form Entry” and click on “Connect”.

  • Select Google Ads as the trigger application.
  • Choose the event “New Lead Form Entry”.
  • Connect to your Google Ads account.

After connecting, copy the Weber URL provided by Pabbly Connect. This URL will be used to link your Google Ads lead form with the automation.


3. Configuring Google Ads to Send Leads

Next, navigate to your Google Ads campaign and locate the lead delivery section. Paste the Weber URL you copied from Pabbly Connect into the designated field. This step ensures that lead data is sent to Pabbly Connect.

  • Open the lead delivery option in Google Ads.
  • Paste the Weber URL from Pabbly Connect.
  • Send test data to ensure the connection is working.

Once the test data is sent successfully, return to Pabbly Connect. You will see that it has captured the response, indicating that the integration is working correctly.


4. Setting Up the Action to Create Salesforce Contacts

Now, it’s time to set up the action in Pabbly Connect. Click on “Add New Action Step” and select Salesforce as the action application. Choose “Create Contact” as the event and click on “Connect”.

If you have previously connected Salesforce to Pabbly Connect, you can select the existing connection. Otherwise, create a new connection by logging into your Salesforce account and granting the necessary permissions.


5. Mapping Data for Dynamic Lead Entry

Mapping is a crucial step in Pabbly Connect that allows you to insert data from the previous step dynamically. When prompted, map the fields such as first name, last name, email, and phone number from the lead data.

To map the data, simply type a slash and search for the field you wish to map. This ensures that every new lead captured will automatically populate the Salesforce contact fields accurately.

After mapping the required fields, click on “Save and Send Test Request”. A positive response will confirm that the contact has been created in Salesforce. Refresh your Salesforce contact list to verify the new entry.


Conclusion

In this tutorial, we demonstrated how to use Pabbly Connect to automate the integration between Google Ads and Salesforce. By following these steps, you can seamlessly capture leads and create contacts in Salesforce automatically. Start using Pabbly Connect today to enhance your lead management process.

Automatically Create and Post on Social Media Every Day with AI

Watch Step By Step Video Tutorial Below


1. Accessing Pabbly Connect for Automation

To begin automating social media posts, you need to access Pabbly Connect. Start by navigating to pabbly.com/connect in your browser. Here, you will find options to either sign in or sign up for free. New users can create an account and receive 100 free tasks every month to explore the software.

Once signed in, you will see the Pabbly apps window. Click on the “Access Now” button for Pabbly Connect to enter the dashboard. Here, you can create a new workflow that connects various applications like Google AI, Facebook, and LinkedIn for seamless automation.


2. Creating a New Workflow in Pabbly Connect

To create a new workflow in Pabbly Connect, you will see two options: “Create from Scratch” and “Create Using AI”. Choose the option that suits your needs. For this tutorial, we will select “Create from Scratch” and then choose the “New Beta” version for a modern workflow experience.

  • Enter a workflow name, such as “Automatically Create and Post on Social Media Every Day with AI”.
  • Select a folder for your workflow, like “Automations”.
  • Click the “Create” button to finalize your new workflow.

After creating the workflow, you will set up a trigger. The trigger is essential as it defines when the automation will run. In this case, we will use the “Scheduled by Pabbly” feature to run the workflow daily at 11 a.m.


3. Setting Up the Trigger in Pabbly Connect

In Pabbly Connect, the trigger defines the start of your automation. Select the “Schedule Workflow” app event and click on “Connect”. You will be prompted to choose how often you want the workflow to run. Select “Every Day” and set the time to 11 a.m. After configuring these settings, click on “Save”.

Upon saving, you should receive a successful response indicating that your automation is scheduled. This means your workflow will now run daily at the specified time, generating new content for your social media platforms.

Now that the trigger is set, you can proceed to generate content using an AI tool. In this case, we will use Google AI (Gemini) to create the content that will be posted on Facebook and LinkedIn.


4. Generating Content with Google AI in Pabbly Connect

Next, you will add an action step to generate content using Google AI. In Pabbly Connect, select Gemini as your action application and choose the “Generate Content” app event. Click on “Connect” to build a new connection.

You will need to provide an API key to connect to Google AI. Click the provided hyperlink to access your Google AI Studio account and retrieve your API key. Paste the API key into Pabbly Connect and click “Save” to establish the connection.

  • Input a relevant prompt for the AI to generate social media post content.
  • Choose the model as “Gemini 2.5 Flash” and set the method to “Generate Content”.
  • Click “Save and Send Request” to receive the generated content.

Once the content is generated, you will receive a successful response, indicating that the AI has created a post ready for sharing on social media.


5. Posting on Facebook and LinkedIn with Pabbly Connect

Now that you have the content generated, it’s time to post it on your social media accounts. Start by adding an action step for Facebook. Select “Facebook Pages” as your action application and choose “Create Page Post” as your app event. Next, click on “Connect” to establish a new connection.

After connecting, select your desired Facebook account and the page you want to post to. For the message, instead of entering the content manually, map the data from the previous action step where the AI generated the content. This allows for dynamic posting of new content without manual input.

  • Click “Save and Send Request” to create the post on Facebook.
  • Check your Facebook page to confirm that the post has been shared successfully.

Repeat the process for LinkedIn by selecting it as your action application and choosing “Share Simple Text” as your event. Map the content generated by AI, and click “Save and Send Request”. After refreshing your LinkedIn account, you will see the new post shared successfully.


Conclusion

In this tutorial, we explored how to automate social media posting using Pabbly Connect, Google AI, Facebook, and LinkedIn. By following these steps, you can easily set up a workflow that generates and posts content daily, enhancing your social media presence effortlessly.

Top 5 Blog Automation Workflows using Pabbly Connect (Step-by-Step)

Watch Step By Step Video Tutorial Below


1. Automating WordPress Posts with Pabbly Connect

The first workflow involves using Pabbly Connect to write WordPress posts from Google Sheets. This process starts when keywords and blog details are entered into a Google Sheets spreadsheet.

To set this up, follow these steps:

  • Select Google Sheets as your trigger application.
  • Set the trigger event to ‘New Spreadsheet Row’.
  • Map the required fields such as title, keywords, target audience, tone, and word count.

After setting this up, whenever a new row is added, Pabbly Connect will trigger the automation.


2. Using OpenAI for Blog Content Generation

Next, we will utilize Pabbly Connect to connect Google Sheets with OpenAI. This allows for automatic blog generation based on the data captured from Google Sheets.

To integrate OpenAI, perform the following steps:

  • Select OpenAI as the action application.
  • Choose the action event as ‘Create Content’.
  • Map the fields from Google Sheets to the OpenAI prompt.

After saving the configuration, Pabbly Connect will generate the blog content automatically using the specified parameters.


3. Posting to WordPress via Pabbly Connect

Once the content is generated, the next step is to post it to WordPress using Pabbly Connect. This process ensures that the blog is published automatically.

Follow these steps to connect WordPress:

  • Select WordPress as the action application.
  • Choose ‘Create Post’ as the action event.
  • Map the title and content generated from OpenAI.

Once this setup is complete, Pabbly Connect will create a new post on your WordPress site automatically upon receiving the content from OpenAI.


4. Automating Blog Translation with Pabbly Connect

Another powerful feature of Pabbly Connect is automating blog translations. This can be accomplished by connecting Facebook Pages with OpenAI for translation tasks.

To set this up, begin by:

  • Select Facebook Pages as the trigger application.
  • Set the trigger event to ‘New Post’.
  • Capture the post content for translation.

After capturing the content, use Pabbly Connect to connect OpenAI for translating the content into the desired language.


5. Multi-Platform Content Sharing with Pabbly Connect

Finally, Pabbly Connect can be used to share your blog content across multiple social media platforms automatically. This workflow enhances visibility and engagement.

To implement this, follow these steps:

  • Set WordPress as the trigger application with the event ‘New Post’.
  • Connect to LinkedIn, Twitter, and Google Blogger as action applications.
  • Map the permalink and content from WordPress to share across platforms.

Once configured, Pabbly Connect will automatically share the new blog post on all selected platforms, maximizing reach.


Conclusion

In summary, using Pabbly Connect for blog automation workflows streamlines content creation and distribution. By integrating various applications, you can enhance productivity and reach more audiences effortlessly.

Post Job Descriptions on LinkedIn Automatically

Watch Step By Step Video Tutorial Below


1. Setting Up Pabbly Connect for Integration

To start automating job postings on LinkedIn using Google Sheets, first, access Pabbly Connect. If you’re new, visit pabbly.com/connect and click on “Sign Up for Free” in the top right corner. This will allow you to explore Pabbly Connect with 100 free tasks each month.

Once logged in, you will be directed to the workflow builder. Here, you can create a new workflow by clicking on the “Add Trigger” button. This step is crucial as it sets up the integration process.


2. Connecting Google Sheets to Pabbly Connect

In this step, you will link your Google Sheets to Pabbly Connect. Select Google Sheets as your trigger application and choose the event as “New or Updated Spreadsheet Row.” Click on “Connect” to generate a webhook URL.

  • Copy the webhook URL provided by Pabbly Connect.
  • Open your Google Sheets, go to Extensions, then Add-ons, and select “Get Add-ons”.
  • Search for “Pabbly Connect Webhooks” and install it.

Once installed, refresh your spreadsheet to see the new option under Extensions. Click on “Pabbly Connect Webhooks” and then “Initial Setup”. Here, paste the webhook URL and set your trigger column (e.g., column I). Click “Submit” to finalize the connection.


3. Generating Job Descriptions with Google Gemini

Next, you will set up the action to generate job descriptions using Google Gemini through Pabbly Connect. Click on “Add New Action Step” and select Google Gemini. Choose the event “Generate Content” and connect your Google AI Studio.

  • If you have a previous connection, select it; otherwise, create a new connection using your API key.
  • Enter the required prompt to generate job descriptions, mapping details from your Google Sheets.
  • Select the model (e.g., Gemini 2.5 Flash) and set the method to “Generate Content Only”.

After entering all details, click “Save and Send Test Request” to generate the job description. This content will be used in the next step to post on LinkedIn.


4. Posting Job Descriptions on LinkedIn

Now that you have the job description ready, it’s time to post it on LinkedIn using Pabbly Connect. Click on “Add New Action Step” and search for LinkedIn. Choose the event “Share Simple Text” and click on “Connect”.

  • If you already have a connection, select it; if not, log into your LinkedIn account to create a new connection.
  • Map the content generated by Gemini into the LinkedIn post.
  • Set visibility preferences for your post.

After setting everything, click “Save and Send Test Request”. You will receive a confirmation that your post has been shared successfully on LinkedIn, showcasing the job description generated earlier.


5. Enabling Real-Time Automation

To ensure your workflow runs in real-time, go back to your Google Sheets and navigate to Extensions. Open “Pabbly Connect Webhooks” and ensure the “Send on Event” button is switched on. This setting is crucial for the automation to function properly.

Now, whenever you enter job details into Google Sheets, Pabbly Connect will trigger the workflow, generating a job description and posting it on LinkedIn automatically. This seamless integration showcases the power of automation.

Test this by adding a new job entry in your spreadsheet. After refreshing LinkedIn, you should see the new post reflecting the details entered. This is no magic; this is the power of automation!


Conclusion

In this tutorial, we demonstrated how to integrate Google Sheets and LinkedIn using Pabbly Connect. By automating job postings, you can save time and enhance your productivity. Try this powerful automation today!

How AI-Powered Marketing Agencies Convert Leads on WhatsApp 24/7

Watch Step By Step Video Tutorial Below


1. Creating Your WhatsApp AI Assistant with Pabi Chartflow

For those looking to create a WhatsApp AI assistant, the first step is to log into Pabi Chartflow. This tool allows you to automate WhatsApp interactions effectively. After logging in, navigate to the AI assistant section and click on the “Add Assistant” button.

Next, you will need to name your assistant. For this tutorial, let’s call it “AI Powered Marketing Agency”. After naming, you will be directed to an interface where you can set various parameters for your assistant.


2. Configuring AI Instructions for Your Assistant

To configure the AI instructions, you will first select the instruction type. For this assistant, choose “AI Agent”. This selection will guide the roles and responsibilities of your assistant. You can customize this further based on your business needs.

  • Set the temperature to control the creativity of responses (0 for focused, 1 for creative).
  • Select “OpenAI” as the AI to use.
  • Choose the model, preferably “GPT5 Mini” for optimal performance.

Once these settings are configured, you will need an API key from your OpenAI account to connect it with Pabi Chartflow. After creating the key, copy it and paste it into the designated field in the assistant settings.


3. Adding a Knowledge Source for Your Assistant

To enhance the functionality of your assistant, you need to add a knowledge source. This is a document that trains your AI assistant about your business. You can upload a text or PDF document that contains relevant information about your agency.

Ensure your PDF contains only text or is limited to 10 pages if it includes images. Once uploaded, the knowledge base will be added automatically, and you will see a vector ID confirming its addition.


4. Customizing Your Assistant Interface

After adding the knowledge source, you can customize the assistant interface. This includes adding your brand name and any initial messages that users will see. You can also style the assistant by changing colors and other visual elements.

For instance, you can add a footer link or modify the greeting message. Make sure to save all changes to activate the assistant. Once done, toggle the button to enable the assistant for use.


5. Activating Auto-Reply Settings for WhatsApp

To ensure your assistant responds automatically to WhatsApp queries, navigate to the inbox settings. Here, scroll to the AI auto-reply settings and enable it. Select the contacts you want to auto-enable this feature for and save your rules.

If you wish to assign this assistant to a specific contact, you can do so in the inbox section by toggling the button and selecting the assistant from the dropdown menu.


Conclusion

In this tutorial, we covered how to integrate a WhatsApp AI assistant using Pabi Chartflow. By following these steps, you can automate responses and enhance customer engagement effectively. This integration not only streamlines communication but also ensures that your business remains responsive 24/7.