Never Miss a LinkedIn Lead: Instant Slack Alerts Setup with Pabbly Connect

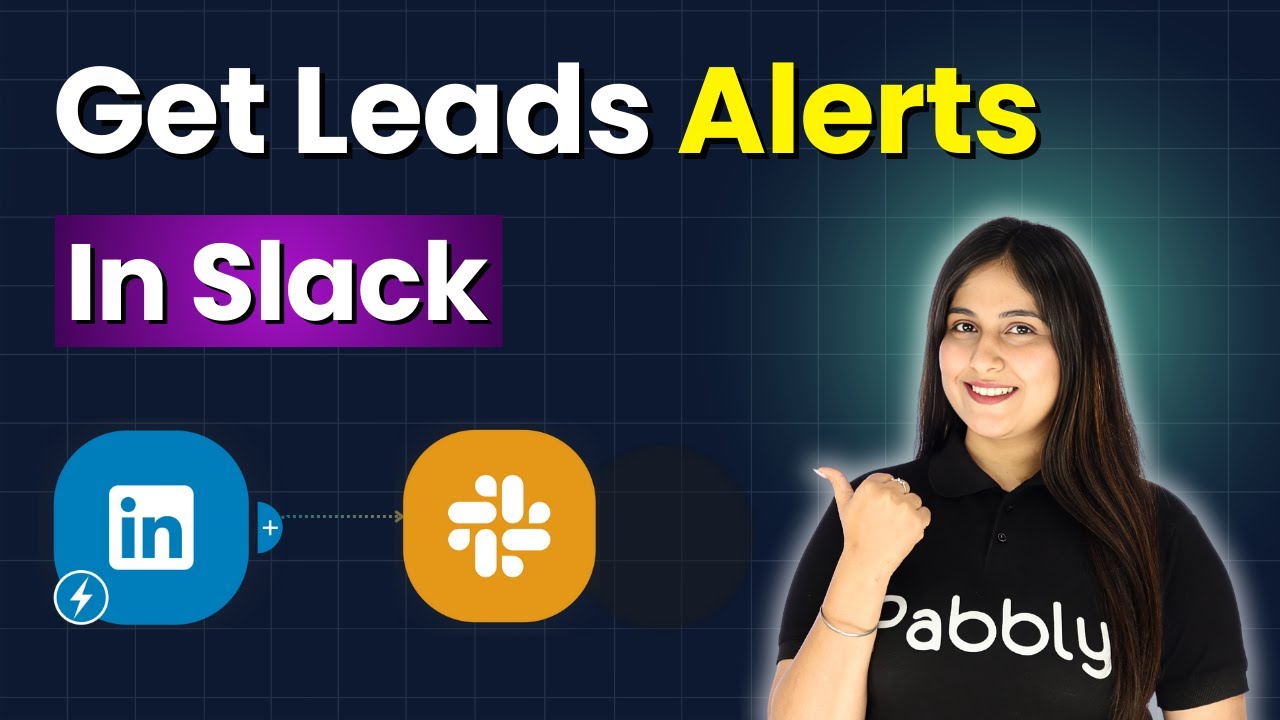
Learn how to set up instant Slack alerts for LinkedIn leads using Pabbly Connect in this detailed tutorial. Never miss a lead again! Transform complex automation concepts into accessible, actionable steps that eliminate unnecessary manual work while maximizing existing application capabilities.

Watch Step By Step Video Tutorial Below


1. Accessing Pabbly Connect for Integration

To set up instant Slack alerts for LinkedIn leads, you first need to access Pabbly Connect. Start by navigating to the Pabbly website and selecting the ‘Connect’ option. If you are a new user, click on ‘Sign Up Free’ to create an account and receive 100 free tasks every month. Existing users can simply sign in to their accounts.

Once signed in, you will be directed to the Pabbly apps window. Locate Pabbly Connect and click on ‘Access Now’ to enter the dashboard. Here, you can create a new workflow that will automate the process of sending Slack alerts whenever a new LinkedIn lead is generated.


2. Creating a Workflow in Pabbly Connect

In the Pabbly Connect dashboard, click on the ‘Create Workflow’ button located at the top right corner. You will be prompted to select a workflow builder; choose the ‘New Beta’ version for a more modern and flexible experience. After selecting, name your workflow something descriptive, such as ‘Never Miss a LinkedIn Lead Instant Slack Alert Setup.’ You can also choose a specific folder to save your workflow.

  • Click on the ‘Create’ button to finalize the workflow creation.
  • Understand the two principles of automation: Trigger and Action.
  • Set up a Trigger to initiate the workflow.

After naming your workflow, proceed to set up the trigger. Click on the ‘Add Trigger’ button and select ‘LinkedIn’ as the app and ‘Lead Notifications’ as the event. This is where Pabbly Connect begins to facilitate the integration between LinkedIn and Slack.


3. Connecting LinkedIn to Pabbly Connect

To connect your LinkedIn account, click on ‘Connect’ and choose ‘Add a New Connection.’ If your LinkedIn account is already linked, you can opt for the existing connection. Once you select ‘Connect with LinkedIn,’ ensure you are logged into your LinkedIn account in the same browser for a smooth connection process. using Pabbly Connect

Next, you will be prompted to select your sponsored account from LinkedIn. Choose the appropriate account from the dropdown menu and click on ‘Save and Send Test Request.’ This action will wait for a webhook response, which means you need to generate a test lead in your LinkedIn lead ad to proceed.


4. Generating a Test Lead in LinkedIn

To generate a test lead, navigate back to your LinkedIn Ads account and access your lead form. Click on ‘Apply Now’ and enter the required details such as email and phone number. Note that the first name, last name, and company name are static values for the test lead.

  • Enter a random email address and phone number.
  • Submit the form to send the information to Pabbly Connect.

Upon successful submission, return to your Pabbly Connect workflow where you will see a successful response containing the lead details. This confirms that the trigger setup is complete and ready to send alerts to Slack whenever a new lead is generated.


5. Sending Slack Alerts from Pabbly Connect

Now that your trigger is set, it’s time to add an action step to send Slack alerts. Select ‘Slack’ as the action application and choose ‘Send Channel Message’ as the app event. Again, click on ‘Connect’ to establish a connection with Slack via Pabbly Connect.

Provide the necessary token type (user or bot) and click ‘Save’. Make sure you are logged into your Slack account to facilitate the connection. Once connected, select the channel where you want to send alerts and customize your message by mapping data from the previous step.

Map the first name, last name, company, email, and phone number into the message. Click on ‘Save and Send Test Request’ to finalize the setup.

If everything is set up correctly, you will see a successful response indicating that the lead alert message has been sent to your Slack channel. This completes the integration process, allowing you to never miss a LinkedIn lead again with instant alerts via Pabbly Connect.


Conclusion

By following this tutorial, you have successfully set up instant Slack alerts for LinkedIn leads using Pabbly Connect. This integration ensures that you never miss important leads, helping your business stay connected and responsive. With these simple steps, you can streamline your lead management process effectively.

Ensure you check out Pabbly Connect to create business automation workflows and reduce manual tasks. Pabbly Connect currently offer integration with 2,000+ applications.

How to Add LinkedIn Lead Ads Leads Automatically to Mailchimp Using Pabbly Connect

Learn how to automate adding LinkedIn Lead Ads leads to Mailchimp using Pabbly Connect for effective email marketing automation. Follow this step-by-step guide! This comprehensive guide reveals exactly how to connect your applications and automate repetitive tasks — accessible for professionals of all technical backgrounds.

Watch Step By Step Video Tutorial Below


1. Accessing Pabbly Connect for Automation

To start automating the process of adding LinkedIn Lead Ads leads to Mailchimp, you first need to access Pabbly Connect. Visit the Pabbly website by typing ‘Pabbly.com’ in your browser. Once on the site, sign in to your existing Pabbly account or create a new one to access the automation features.

After logging in, you will be directed to the Pabbly dashboard. Here, you can manage your workflows and integrations. To create a new workflow, click on the ‘Create Workflow’ button. This is where you will set up the integration between LinkedIn Lead Ads and Mailchimp using Pabbly Connect.


2. Creating a Workflow in Pabbly Connect

In this section, you will create a workflow that connects your LinkedIn Lead Ads to Mailchimp. Start by selecting the ‘New Beta’ workflow builder and name your workflow something descriptive, like ‘Add LinkedIn Lead Ads Leads Automatically to Mailchimp’. Choose a folder for organization, such as ‘LinkedIn Automations’, and click ‘Create’.

  • Select LinkedIn as the trigger application.
  • Choose ‘Lead Notifications’ as the trigger event.
  • Connect your LinkedIn account to Pabbly Connect.

After setting up the trigger, you will need to test the connection. This involves generating a test lead from your LinkedIn account, which will allow Pabbly Connect to capture the lead data for the next steps.


3. Connecting Mailchimp to Pabbly Connect

Once the LinkedIn trigger is set, you need to add an action step to connect Mailchimp. In this step, search for Mailchimp as your action application and select ‘Add New Member with Custom Fields’ as the action event. This is where Pabbly Connect will help automate the addition of leads to your Mailchimp audience.

To establish this connection, you will need your Mailchimp API key and data center. Follow these steps:

  • Log in to your Mailchimp account and navigate to your profile settings.
  • Under ‘Extras’, select ‘API Keys’ to create a new key.
  • Copy the new API key and enter it into Pabbly Connect, along with your data center.

After entering this information, click ‘Save’ to connect Mailchimp to Pabbly Connect.


4. Mapping LinkedIn Lead Data to Mailchimp

Now that you have connected Mailchimp, the next step is to map the lead data from LinkedIn to the appropriate fields in Mailchimp. This is a crucial step where Pabbly Connect ensures that all the necessary information from LinkedIn is correctly transferred to Mailchimp.

In the mapping section, you will see fields for email, first name, last name, and company name. Make sure to:

Use the data received from LinkedIn to fill these fields dynamically. Ensure that the email address is mapped correctly to avoid duplicates.

Once you have mapped all the fields, click ‘Save and Send Test Request’. This will send a test lead to your Mailchimp account, confirming that the automation is functioning correctly through Pabbly Connect.


5. Testing and Verifying the Integration

After completing the setup, it’s important to test the entire workflow to ensure that everything is working as intended. Start by generating a lead through your LinkedIn Lead Ads and check if it appears in your Mailchimp account. This step verifies that Pabbly Connect is successfully capturing leads and transferring them to Mailchimp.

To verify, log into your Mailchimp account and navigate to the audience list you set up earlier. Look for the newly added subscriber with the details you entered during the test. If everything is set up correctly, you should see the lead listed with all the mapped information.

This final verification confirms that your integration is complete and that Pabbly Connect is working effectively to automate your email marketing process by adding LinkedIn leads directly to Mailchimp.


Conclusion

In this tutorial, we explored how to use Pabbly Connect to automate the addition of LinkedIn Lead Ads leads to Mailchimp for efficient email marketing. By following the steps outlined, you can streamline your lead management process and enhance your marketing efforts.

Ensure you check out Pabbly Connect to create business automation workflows and reduce manual tasks. Pabbly Connect currently offer integration with 2,000+ applications.

How to Log Failed Razorpay Payments in Google Sheets Using Pabbly Connect

Learn how to log failed Razorpay payments in Google Sheets using Pabbly Connect. This step-by-step tutorial guides you through the integration process. Eliminate manual repetitive tasks from your workflow. Discover proven automation methods with intuitive steps designed for efficiency-minded professionals.

Watch Step By Step Video Tutorial Below


1. Accessing Pabbly Connect for Integration

To log failed Razorpay payments in Google Sheets, we will use Pabbly Connect as the automation solution. Start by opening a new tab in your browser and navigate to Pabbly.com/connect. This will take you to the Pabbly Connect landing page, where you can either sign in or sign up for a free account.

If you are an existing user, click on the ‘Sign In’ button. For new users, you can create an account by clicking on ‘Sign Up for Free’. Pabbly Connect offers a generous number of tasks free each month, allowing you to explore its capabilities. Once logged in, navigate to the Pabbly Connect dashboard to begin setting up your workflow.


2. Creating a Workflow in Pabbly Connect

Now that you have accessed Pabbly Connect, the next step is to create a workflow. Click on the ‘Create Workflow’ button. You will be prompted to select between the new workflow builder and the classic one. Choose the new workflow builder for a modern experience.

  • Click on ‘Create Workflow’ to begin.
  • Select ‘New Workflow Builder’.
  • Name your workflow as ‘Log Failed Razor Payment in Google Sheets’.

After naming your workflow, click on ‘Create’. This opens the workflow window where you will set the trigger and action for your automation. The trigger indicates what event will start the workflow, while the action specifies what will happen as a result.


3. Configuring the Trigger with Razorpay

In the workflow window, click on the ‘Add Trigger’ button. Search for Razorpay and select it as your trigger application. For the trigger event, choose ‘Payment Failed’. This configuration allows Pabbly Connect to detect when a payment fails in Razorpay.

After selecting the trigger event, click on ‘Connect’. You will be provided with a webhook URL. Copy this URL as it will be used to connect Razorpay with Pabbly Connect. Now, go to your Razorpay dashboard, navigate to the ‘Developers’ section, and select ‘Webhooks’.

  • Click on ‘Add Webhook’.
  • Paste the copied webhook URL into the Webhook URL field.
  • Select ‘Payment Failed’ as the active event and click ‘Create Webhook’.

Once the webhook is created, you will see a message indicating that the webhook was saved successfully. This means that Razorpay is now configured to send payment failure notifications to Pabbly Connect.


4. Testing the Setup for Failed Payments

To ensure that everything is set up correctly, you need to perform a test submission. Go back to your payment page and attempt to make a payment that you know will fail. Use the same payment method and enter the necessary details, ensuring that you trigger a failure.

Once the payment fails, return to Pabbly Connect and check if it captures the webhook response. You should see the details of the failed payment, including the name, email, phone number, and the reason for failure. This confirms that Pabbly Connect is successfully receiving data from Razorpay.

Verify that the captured data includes all necessary fields. Ensure that you see the failure reason and payment method.

With this test, you confirm that the integration is working as expected, setting the stage for logging the payment details into Google Sheets.


5. Logging Failed Payments to Google Sheets

Now, it’s time to log the failed payment details into Google Sheets. In your Pabbly Connect workflow, click on ‘Add New Action Step’ and search for Google Sheets. Select it as your action application and choose the event as ‘Add New Row’.

Click on ‘Connect’ to establish a connection with your Google Sheets account. If you have not created a connection before, you will need to sign in with your Google account and grant the necessary permissions to Pabbly Connect.

Select your spreadsheet from the dropdown list. Choose the appropriate sheet where you want to log the data. Map the fields from Razorpay to the columns in Google Sheets.

After mapping the fields, click on ‘Save and Send Test Request’. This step will log the failed payment details into your specified Google Sheets. You will receive a confirmation message indicating that the data has been successfully added.


Conclusion

In this tutorial, we demonstrated how to log failed Razorpay payments in Google Sheets using Pabbly Connect. By following the steps outlined, you can automate the process of capturing payment failures and storing them in a structured format. This integration not only saves time but also ensures that you have a reliable record of failed transactions for further analysis.

Ensure you check out Pabbly Connect to create business automation workflows and reduce manual tasks. Pabbly Connect currently offer integration with 2,000+ applications.

Turn Every Lead Into a Conversation with AI Automations Using Pabbly Chatflow

Learn how to automate conversations and turn leads into clients using Pabbly Chatflow with this step-by-step tutorial. Discover the integration process today! Implement professional chat automation that answers common questions, qualifies leads, and books appointments without human intervention.

Watch Step By Step Video Tutorial Below


1. Accessing Pabbly Chatflow for AI Automation

To start automating your lead conversations, the first step is to access Pabbly Chatflow. Simply navigate to www.Pabbly.com/chatflow in your web browser. This platform is essential for creating your AI agent that will handle conversations automatically.

Once on the Pabbly Chatflow website, you will need to sign in to your account. If you are a new user, you can sign up for free, which includes 100 credits monthly. After signing in, you will be directed to the Pabbly applications page where you can select Pabbly Chatflow.


2. Creating Your AI Agent in Pabbly Chatflow

Within Pabbly Chatflow, creating your AI agent is straightforward. Click on the ‘AI Assistant’ option in the dashboard. Here, you will see the option to add a new AI assistant. Click on ‘Add AI Assistant’ to begin the setup process.

  • Name your AI assistant, for example, ‘AI Agent for Real Estate’.
  • Select the instruction type as ‘AI Agent’ from the dropdown menu.
  • Adjust the creativity level of the AI responses based on your preferences.

After configuring these settings, ensure you save your AI assistant. This process allows Pabbly Chatflow to effectively manage your automated responses based on the queries received from leads.


3. Uploading Knowledge Base for AI Responses

The next step involves uploading a knowledge base that your AI agent will use to respond to inquiries. In Pabbly Chatflow, navigate to the knowledge source section where you can upload your prepared document. This document should contain all relevant information your AI needs to assist users.

  • Include details like property types, pricing, and location preferences.
  • Ensure your knowledge base is comprehensive to cover various queries.

Once uploaded, Pabbly Chatflow will utilize this knowledge base to generate accurate replies to user queries, enhancing user experience and automating your lead management effectively.


4. Activating Your AI Assistant in Conversations

After setting up your AI assistant and uploading the knowledge base, the next critical step is to activate your AI assistant within conversations. In Pabbly Chatflow, go to the inbox section where you can manage conversations.

Select the conversation you want the AI assistant to handle, and choose your created AI agent from the options. This activation allows the AI to respond to incoming messages automatically, ensuring no lead goes unattended.

For broader application, you can enable AI auto replies for all chats in the settings. This allows Pabbly Chatflow to manage all incoming queries without needing to activate the AI assistant individually for each chat, streamlining your workflow.


5. Testing Your AI Agent’s Functionality

To ensure everything works as intended, send a test message through WhatsApp. For example, ask, ‘Do you help with home loans?’ After sending, observe how your AI agent responds. If set up correctly, it should provide relevant information based on your knowledge base.

This testing phase is crucial as it allows you to fine-tune responses and ensure that Pabbly Chatflow is effectively managing conversations. Adjust any settings or knowledge base entries based on the responses received during testing.

Once satisfied with the AI agent’s performance, you can confidently use Pabbly Chatflow to automate conversations with leads, turning inquiries into actionable insights seamlessly.


Conclusion

In conclusion, utilizing Pabbly Chatflow to automate lead conversations can significantly enhance your business efficiency. By following the steps outlined, you can create a responsive AI agent that engages leads effectively, ensuring timely and accurate communication.

Ensure you check out Pabbly Connect to create business automation workflows and reduce manual tasks. Pabbly Connect currently offer integration with 2,000+ applications.

How to Auto-Send Brochure via WhatsApp for LinkedIn Leads with Pabbly Connect

Learn how to automate sending brochures via WhatsApp for LinkedIn leads using Pabbly Connect. Step-by-step guide for seamless integration. Eliminate manual repetitive tasks from your workflow. Discover proven automation methods with intuitive steps designed for efficiency-minded professionals.

Watch Step By Step Video Tutorial Below


1. Accessing Pabbly Connect for Automation

To begin automating the process of sending brochures via WhatsApp for LinkedIn leads, you need to access Pabbly Connect. Visit the official Pabbly website and navigate to the Pabbly Connect section. If you are a new user, you can sign up for free and explore the features of Pabbly Connect with 100 free tasks every month.

Existing users can simply log in to their accounts. Once logged in, you will see the dashboard where all applications are listed. Click on the ‘Access Now’ button under the Pabbly Connect section to start creating your automation workflow.


2. Creating Your Workflow in Pabbly Connect

After accessing Pabbly Connect, click on the ‘Create Workflow’ button located at the top right corner. You will be prompted to name your workflow. For this tutorial, name it ‘Auto Send Brochure via WhatsApp for LinkedIn Leads’. Choose a suitable folder for your workflow and click the ‘Create’ button.

  • Name your workflow appropriately.
  • Select a folder to organize your workflows.
  • Click on the ‘Create’ button to finalize.

Your workflow is now created, and you will need to set up the trigger. In Pabbly Connect, triggers are the events that start your automation.


3. Setting Up the Trigger for LinkedIn Lead Ads

In this step, you need to set up the trigger that will initiate the workflow when a new lead is generated from LinkedIn. Select ‘LinkedIn Lead Ads’ as your trigger application. The event you want to capture is ‘Lead Notification’. Click the ‘Connect’ button to establish a connection. using Pabbly Connect

You can choose to add a new connection by clicking on the ‘Connect with LinkedIn’ button. Enter your LinkedIn account password when prompted and confirm the connection. After successfully connecting, select your sponsored account from the dropdown menu and click on the ‘Save and Send Test Request’ button to test the trigger.


4. Sending WhatsApp Messages via Pabbly Connect

Once the trigger is set up, the next step is to send a WhatsApp message using the WhatsApp Cloud API. In your workflow, add an action step by selecting ‘WhatsApp Cloud API’ as the action application. Choose the event ‘Send Template Message’ and click the ‘Connect’ button. using Pabbly Connect

  • Fill in the required fields such as token, phone number ID, and WhatsApp business account ID.
  • Map the phone number field to the lead’s phone number captured from the trigger.
  • Select the template you created for the WhatsApp message.

Ensure to include the media link for the brochure uploaded to your WordPress account. Once all fields are filled and data is mapped correctly, click on the ‘Save and Send Test Request’ button to send a test message.


5. Conclusion: Automate Your Leads with Pabbly Connect

In this tutorial, you learned how to automate the process of sending brochures via WhatsApp for LinkedIn leads using Pabbly Connect. By following the steps outlined, you can create a seamless workflow that enhances your lead engagement.

Ensure you check out Pabbly Connect to create business automation workflows and reduce manual tasks. Pabbly Connect currently offer integration with 2,000+ applications.

Utilizing Pabbly Connect not only simplifies this process but also allows you to integrate various applications effectively, ensuring that your marketing efforts are both efficient and effective. Start automating today with Pabbly Connect and watch your lead conversion rates increase.

How to Add WhatsApp Business Leads to Sendgrid List Using Pabbly Connect

Learn how to automate adding WhatsApp business leads to your Sendgrid list using Pabbly Connect with this detailed step-by-step tutorial. This comprehensive guide reveals exactly how to connect your applications and automate repetitive tasks — accessible for professionals of all technical backgrounds.

Watch Step By Step Video Tutorial Below


1. Accessing Pabbly Connect for Integration

To start integrating WhatsApp business leads with Sendgrid, first, you need to access Pabbly Connect. Begin by visiting the Pabbly Connect website at Pabbly.com/connect.

If you’re a new user, click on the ‘Sign Up Free’ button to create an account. Existing users should click on ‘Sign In’. Pabbly Connect offers 100 free credits monthly for new users to explore automation possibilities.


2. Creating a Workflow in Pabbly Connect

Once logged in, navigate to the dashboard of Pabbly Connect and click on the ‘Create Workflow’ button. This is where you will set up the automation for adding WhatsApp leads to your Sendgrid account.

  • Select the new beta version of the workflow builder for a modern experience.
  • Name your workflow, for example, ‘Add WhatsApp Business Leads to Sendgrid List’.
  • Choose a folder to save your workflow for better organization.

After setting this up, you will see the trigger and action buttons. The trigger will be WhatsApp Cloud API, and the action will be Sendgrid. This setup is crucial for the automation to function correctly.


3. Setting Up the Trigger with WhatsApp Cloud API

For the trigger, select the WhatsApp Cloud API from the application list in Pabbly Connect. Choose the trigger event as ‘Message Notification’ to activate the workflow when a new message is received on WhatsApp.

Click the ‘Connect’ button to generate a webhook URL. This URL will be used to connect your WhatsApp account with Pabbly Connect. Follow the instructions provided to set up the webhook in your WhatsApp Cloud API settings.


4. Configuring the Action Step with Sendgrid

After successfully setting up the trigger, it’s time to configure the action step. Select Sendgrid as your action application in Pabbly Connect. Choose the action event as ‘Add or Update a Contact’. This will allow you to add new contacts to your Sendgrid list whenever a message is received.

  • Connect your Sendgrid account by entering the API key obtained from your Sendgrid settings.
  • Fill in the required fields: email, first name, last name, and phone number.
  • Map the WhatsApp message sender’s details to these fields for seamless data transfer.

Once all fields are filled, click ‘Save and Send Test Request’ to verify that the integration works. You should see the contact added to your Sendgrid account.


5. Finalizing the Integration and Testing

With the action step configured, the last step is to test the entire integration. Send a message to your WhatsApp number to trigger the workflow. Check your Sendgrid account to confirm that the contact appears in your specified list. using Pabbly Connect

This integration will now automatically add any new WhatsApp inquiries as contacts in your Sendgrid list. This real-time automation saves you time and ensures you never miss a lead.


Conclusion

By following this tutorial, you have successfully learned how to use Pabbly Connect to add WhatsApp business leads to your Sendgrid list. This integration enables seamless communication and efficient lead management, enhancing your business automation capabilities.

Ensure you check out Pabbly Connect to create business automation workflows and reduce manual tasks. Pabbly Connect currently offer integration with 2,000+ applications.

Automate Product Update Emails for Google Lead Ads Leads Using Pabbly Connect and SendGrid

Learn how to automate product update emails for Google Lead Ads leads using Pabbly Connect and SendGrid with this detailed step-by-step tutorial. Discover how to seamlessly connect your essential tools through accessible instructions that make powerful automation available to professionals at every skill level.

Watch Step By Step Video Tutorial Below


1. Accessing Pabbly Connect for Automation

To automate sending product update emails for Google Lead Ads leads, first, access Pabbly Connect. Start by visiting the Pabbly website and signing in to your account. If you’re a new user, you can sign up for free to get started.

Once logged in, navigate to the Pabbly Connect dashboard. Here, you can create new workflows that will facilitate the integration between Google Ads and SendGrid. This is crucial for automating your email notifications to new leads captured through Google Ads.


2. Creating a New Workflow in Pabbly Connect

In the Pabbly Connect dashboard, you can create a new workflow by clicking on the ‘Create Workflow’ button. Name your workflow something descriptive, such as ‘Send Product Update Email Automatically for Google Leads Ads Leads Using SendGrid’. This will help you easily identify it later.

  • Click on the ‘Create Workflow’ button.
  • Select the trigger application, which will be Google Ads.
  • Choose ‘New Lead Form Entry’ as the trigger event.

After setting up the trigger, you will need to connect your Google Ads account to Pabbly Connect. This connection allows Pabbly Connect to receive data whenever a new lead is generated from your Google Ads campaigns.


3. Connecting Google Ads to Pabbly Connect

To connect Google Ads, you will need a webhook URL provided by Pabbly Connect. This URL acts as a bridge between Google Ads and Pabbly Connect, enabling the transfer of lead data. Copy the webhook URL and paste it into the lead delivery option in your Google Ads form settings.

Once you have set up the webhook, send a test lead from Google Ads to ensure the connection is working. If successful, you will see the test data appear in your Pabbly Connect workflow, confirming that the integration is set up correctly.


4. Sending Emails Using SendGrid

After successfully connecting Google Ads, it’s time to set up SendGrid as the action application in your workflow. In Pabbly Connect, select SendGrid and choose the action event as ‘Send Email’. This allows you to automate the email notifications that will be sent to your new leads. using Pabbly Connect

  • Connect your SendGrid account by entering the API key.
  • Map the email address from the Google Ads lead data to the ‘Send To Email’ field.
  • Customize the email subject and content, using dynamic fields to personalize the message.

This setup ensures that every time a new lead is captured, an email is automatically sent using SendGrid, enhancing your communication efficiency.


5. Testing and Verifying the Integration

Once your workflow is fully set up, it’s crucial to test the entire process. Send a test lead through Google Ads and check if the email is successfully sent via SendGrid. This step verifies that the integration between Google Ads and SendGrid through Pabbly Connect is functioning as intended.

If the test is successful, you can be confident that your automation is working. From now on, every new lead captured through Google Ads will automatically receive a product update email, saving you time and ensuring consistent communication with your leads.


Conclusion

In this tutorial, we explored how to automate sending product update emails for Google Lead Ads leads using Pabbly Connect and SendGrid. By following these steps, you can enhance your lead management process and improve communication efficiency.

Ensure you check out Pabbly Connect to create business automation workflows and reduce manual tasks. Pabbly Connect currently offer integration with 2,000+ applications.

How to Add LinkedIn Ads Leads to Apollo.io Using Pabbly Connect

Learn how to integrate LinkedIn Ads leads to Apollo.io seamlessly using Pabbly Connect. Follow this step-by-step tutorial for effective automation. Follow this definitive guide to creating powerful automated workflows with straightforward, efficiency-focused solutions that save valuable time.

Watch Step By Step Video Tutorial Below


1. Accessing Pabbly Connect for Integration

To add LinkedIn Ads leads to Apollo.io, the first step is to access Pabbly Connect. This platform allows users to automate workflows without needing programming skills. If you are a new user, visit the Pabbly Connect landing page and sign up for a free account to explore its features.

Once you have signed up, log in to your Pabbly Connect account and navigate to the workflow builder. This is where you will create the automation to link LinkedIn Ads leads with Apollo.io. The workflow builder is essential as it contains the trigger and action settings that will facilitate the integration.


2. Setting Up LinkedIn as a Trigger in Pabbly Connect

In the workflow builder of Pabbly Connect, you need to set LinkedIn as the trigger application. Click on the ‘Add Trigger’ button, then search for and select ‘LinkedIn’. For the event, choose ‘Lead Notifications’ and click on ‘Connect’.

  • Select ‘Add a New Connection’ if you haven’t connected LinkedIn yet.
  • Enter your LinkedIn credentials and sign in.
  • Choose your sponsored account and click ‘Save and Send Test Request’.

After saving, Pabbly Connect will wait for a webhook response, which you will generate by submitting a lead form on LinkedIn. This step is crucial to ensure that the integration captures the necessary data.


3. Performing a Test Submission to Capture Data

To test the integration, you need to perform a test submission through your LinkedIn ad. When you fill out the lead form with dummy details, Pabbly Connect will capture this data as a webhook response. Ensure that your LinkedIn ad is active for the test submission to work properly. using Pabbly Connect

Fill in the required fields, such as email address and phone number, in the lead form. Once submitted, Pabbly Connect will display a confirmation message indicating that the information has been sent successfully. You can then check the workflow to see if the response has been captured.


4. Creating a New Contact in Apollo.io

After capturing the lead details, the next step is to create a new contact in Apollo.io. In the Pabbly Connect workflow, click on ‘Add New Action Step’ and search for ‘Apollo’. Select it, then choose the event ‘Create Contact’ and click on ‘Connect’. using Pabbly Connect

  • If you have a pre-existing connection, select it; otherwise, create a new connection.
  • Navigate to Apollo’s admin settings and generate a new API key.
  • Map the required fields from the LinkedIn lead data to Apollo.

Once the mapping is complete, click on ‘Save and Send Test Request’. You should receive a confirmation that the contact has been successfully created in Apollo.io.


5. Conclusion: Automating Your Lead Process with Pabbly Connect

By following these steps, you can seamlessly integrate LinkedIn Ads leads into Apollo.io using Pabbly Connect. This automation ensures that every new lead captured from LinkedIn is instantly added to your Apollo contacts, saving you time and effort.

Ensure you check out Pabbly Connect to create business automation workflows and reduce manual tasks. Pabbly Connect currently offer integration with 2,000+ applications.

With Pabbly Connect, you can streamline your lead management process and focus on converting leads into customers. This powerful integration allows you to work more efficiently and effectively in your business operations.

Automate Law Firm Consultations via WhatsApp with Pabbly Chatflow

Learn how to automate law firm consultations via WhatsApp using Pabbly Chatflow and Pabbly Chatflow. Step-by-step tutorial with detailed instructions. Learn step-by-step how to create, test, and optimize chatbots that enhance customer experience while reducing support workload.

Watch Step By Step Video Tutorial Below


1. Introduction to Automating Consultations with Pabbly Chatflow

Automating law firm consultations via WhatsApp is made easy with Pabbly Chatflow. This platform allows you to create a WhatsApp chatbot that can automatically respond to client inquiries, saving time and enhancing efficiency. By streamlining communication, Pabbly Chatflow ensures that leads receive timely responses without manual intervention.

Using Pabbly Chatflow, you can set up a bot that collects essential information from clients and schedules consultations. This process involves integrating various applications like Google Sheets for data management, ensuring that all client information is recorded accurately and efficiently.


2. Setting Up Your Pabbly Chatflow Account

To begin, visit the Pabbly Chatflow website and sign up for an account. Once logged in, you will have access to the dashboard where you can create your WhatsApp chatbot. This step is crucial for automating your law firm consultations via WhatsApp.

  • Go to the Pabbly Chatflow homepage.
  • Click on ‘Sign Up’ to create a new account.
  • Log in to your account to access the dashboard.

Once in the dashboard, you can start creating your flow by selecting the ‘Flow’ section. This is where you will design your chatbot to handle client queries effectively.


3. Creating Your WhatsApp Chatbot with Pabbly Chatflow

To create your WhatsApp chatbot, navigate to the flow builder within Pabbly Chatflow. Click on the ‘Add Flow’ button to start a new project. Name your flow something descriptive, such as ‘Automate Law Firm Consultations via WhatsApp’. This helps in identifying the flow later.

Next, set up a trigger for your flow. You can choose from various options, but for this automation, select the ‘Keywords’ trigger. This allows the bot to activate when specific words are sent by a client. Enter keywords like ‘hello’ or ‘consultation’ to initiate the conversation.

  • Create a new flow in the Pabbly Chatflow dashboard.
  • Set the trigger as ‘Keywords’.
  • Enter relevant keywords to start the bot.

After setting the trigger, design the welcome message that the bot will send to clients. This message should include options for booking consultations or asking queries, guiding clients on how to proceed.


4. Collecting Client Information Using Pabbly Chatflow

Once the client interacts with your bot, you can collect essential information through a series of questions. Use the ‘Ask Question’ feature in Pabbly Chatflow to prompt clients for their full name, phone number, and preferred consultation date.

Make sure to create custom fields in Pabbly Chatflow to store the data collected from clients. This allows for easy management and retrieval of client information. After gathering the data, you can send it to Google Sheets for further processing.

Use the ‘Ask Question’ feature to collect data. Create custom fields for storing client information. Integrate with Google Sheets to manage collected data.

This setup ensures that all client information is captured accurately and can be used for scheduling consultations and follow-ups.


5. Finalizing the Integration with Pabbly Connect

To complete the automation process, integrate Pabbly Connect with your Pabbly Chatflow setup. This integration allows you to send collected data directly to Google Sheets. Start by creating a new workflow in Pabbly Connect and set the trigger as ‘New Message Received’ from Pabbly Chatflow.

Next, configure the action to add a new row in Google Sheets. Map the fields from your Pabbly Chatflow custom fields to the corresponding columns in Google Sheets. This ensures that every consultation request is recorded accurately and efficiently.

Create a workflow in Pabbly Connect. Set the trigger to ‘New Message Received’. Map fields to Google Sheets for data entry.

After testing the integration, your automated law firm consultation process via WhatsApp will be fully functional, providing a seamless experience for both you and your clients.


Conclusion

In conclusion, automating law firm consultations via WhatsApp using Pabbly Chatflow and Pabbly Connect streamlines communication and enhances efficiency. By following the steps outlined in this tutorial, you can create a fully functional chatbot that manages client inquiries and schedules consultations effortlessly. This automation not only saves time but also improves client satisfaction.

Ensure you check out Pabbly Connect to create business automation workflows and reduce manual tasks. Pabbly Connect currently offer integration with 2,000+ applications.

How to Automatically Send WhatsApp Product Information for Instagram Lead Ads with Pabbly Connect

Learn how to automate sending WhatsApp product information to leads from Instagram Lead Ads using Pabbly Connect. Step-by-step guide included. Navigate the automation landscape confidently with clear, structured guidance suitable for professionals regardless of prior technical experience.

Watch Step By Step Video Tutorial Below


1. Accessing Pabbly Connect to Start Integration

To begin automating the process of sending WhatsApp product information to leads from Instagram Lead Ads, first, you need to access Pabbly Connect. You can do this by visiting the Pabbly website and signing in or signing up for a new account. This platform is essential for creating the integration workflow.

Once logged in, navigate to the Pabbly Connect dashboard. Here, you can create a new workflow specifically for your Instagram Lead Ads integration. This is where you will set up the trigger and action that will allow you to send WhatsApp messages automatically.


2. Creating a New Workflow in Pabbly Connect

In the Pabbly Connect dashboard, click on the ‘Create Workflow’ button. You will be prompted to select the workflow builder. Choose the new beta version for a modern interface. Name your workflow something descriptive, like ‘Send WhatsApp Product Information Automatically for Instagram Lead Ads’. This will help you identify the workflow later. using Pabbly Connect

  • Select the folder where you want to save your workflow.
  • Confirm the workflow name and click on create.

After creating the workflow, you will see a prompt to set up the trigger application. In this case, select Instagram Lead Ads as your trigger. This is crucial because it indicates that the workflow will start whenever a new lead is captured from your ads.


3. Connecting Instagram Lead Ads to Pabbly Connect

Now that you have set up the workflow, the next step is to connect Instagram Lead Ads to Pabbly Connect. Choose the trigger event as ‘New Lead Instant’. You will need to connect your Instagram account through your Facebook account, as Instagram is managed through Facebook’s ad platform.

After clicking on ‘Connect’, if you already have a connection, you can save it. If not, select ‘Add New Connection’ and follow the prompts to log in to your Facebook account. Ensure that your Facebook page and Instagram account are linked correctly. Once connected, select the specific Facebook page and lead generation form you want to use.


4. Setting Up Action to Send WhatsApp Messages

With the trigger set, the next step is to configure the action that will send WhatsApp messages. For this action, select AI Sensei as your action application in Pabbly Connect. Choose the action event ‘Send Template Message’. This setup will allow you to send a pre-defined message to the leads captured.

  • Enter your API key from AI Sensei to establish a connection.
  • Select the campaign and template that you have created for sending messages.

Make sure to map the necessary fields such as the lead’s phone number and name from the Instagram Lead Ads response. This mapping ensures that each lead receives a personalized message based on the information they provided.


5. Testing and Launching the Workflow

After setting up both the trigger and action steps in Pabbly Connect, it’s time to test your workflow. Perform a test submission using the lead ad testing tool to ensure that the integration works as expected. Once you submit the test lead, check if the WhatsApp message is received correctly.

If everything works smoothly, finalize the workflow and make it live. Your integration is now set up to automatically send WhatsApp product information to any new leads generated from your Instagram Lead Ads campaigns. This automation will save you time and enhance your communication with potential customers.


Conclusion

In this tutorial, we explored how to use Pabbly Connect to automate the process of sending WhatsApp product information to leads generated from Instagram Lead Ads. By following the steps outlined, you can enhance your marketing efforts and ensure timely communication with your leads.

Ensure you check out Pabbly Connect to create business automation workflows and reduce manual tasks. Pabbly Connect currently offer integration with 2,000+ applications.