Automate Pet Grooming Appointments via WhatsApp with Pabbly Chatflow

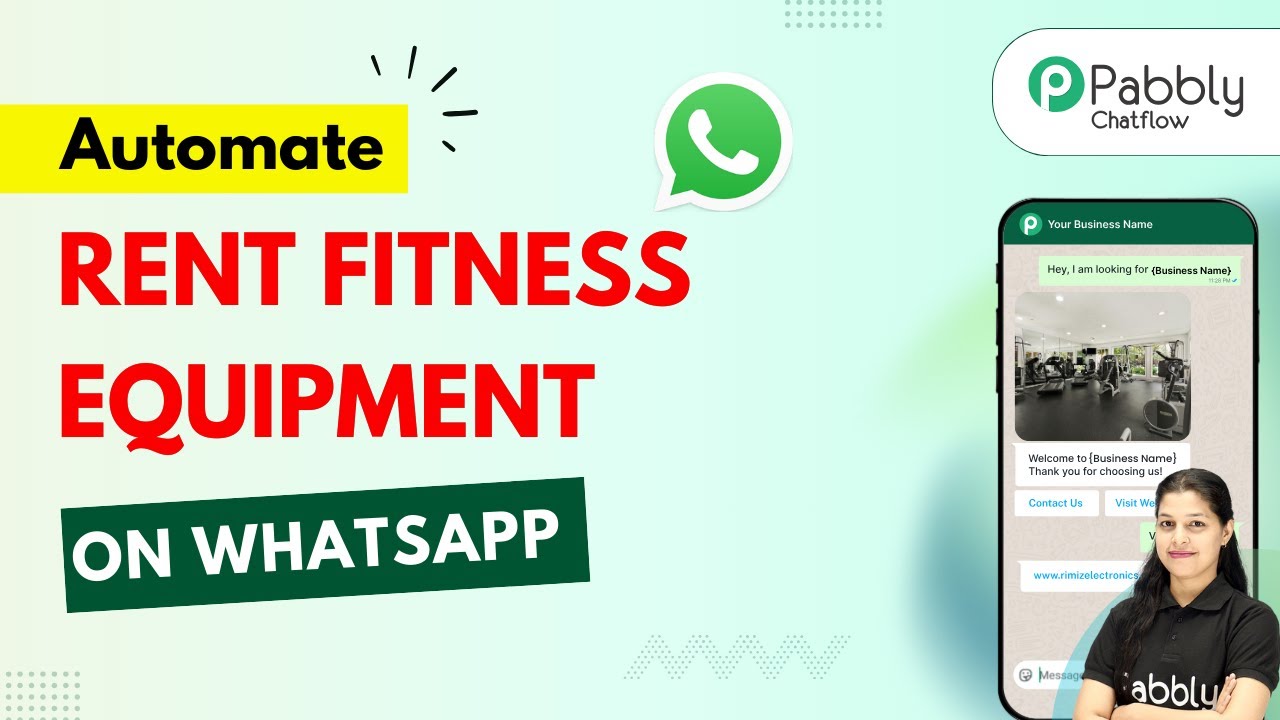
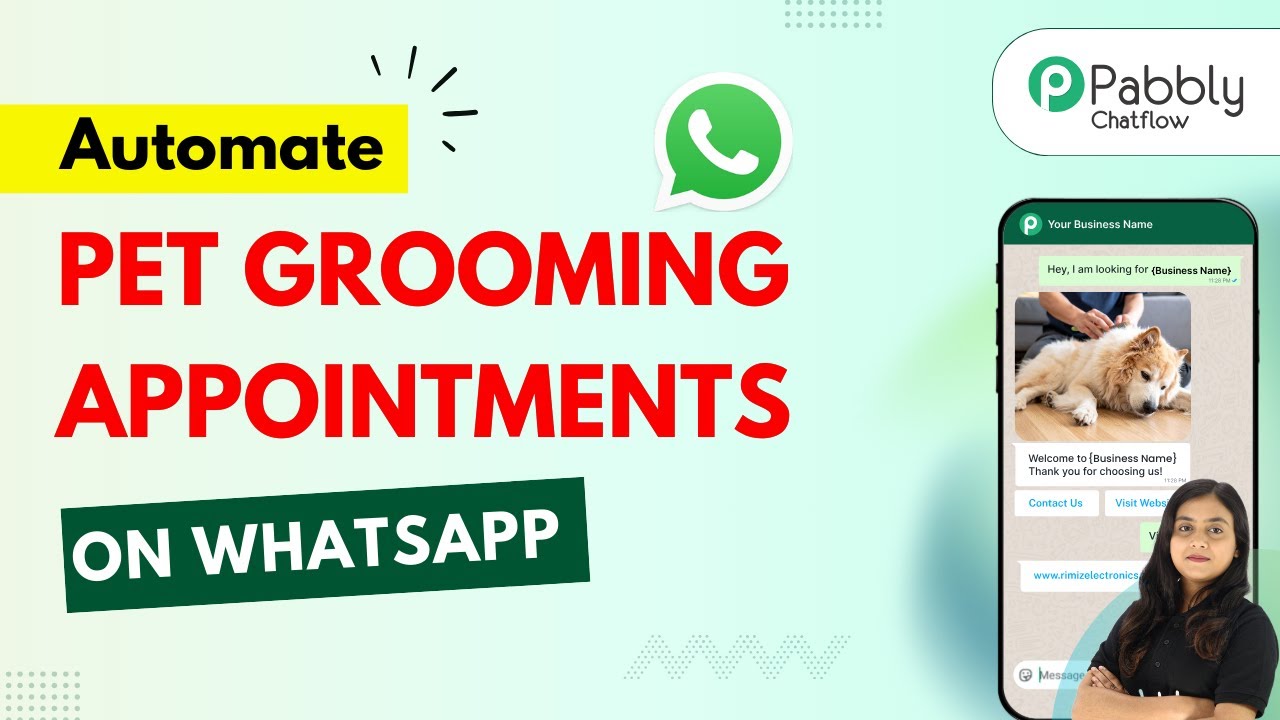
Learn how to automate pet grooming appointments using Pabbly Chatflow and Pabbly Chatflow. Follow our step-by-step guide to set up your WhatsApp chatbot. Explore how leading businesses automate customer interactions with carefully designed chat sequences that feel natural and helpful.

Watch Step By Step Video Tutorial Below


1. Setting Up Pabbly Chatflow for Pet Grooming Appointments

To automate pet grooming appointments via WhatsApp, the first step is to set up Pabbly Chatflow. This platform allows you to create a WhatsApp chatbot without any coding skills. Start by visiting the Pabbly Chatflow website and signing in to your account.

Once logged in, you will see the Pabbly Chatflow dashboard. Here, you can add your WhatsApp number by clicking on the ‘Add WhatsApp Number’ button. This is crucial as it enables the chatbot to send and receive messages on WhatsApp.


2. Creating the WhatsApp Chatbot with Pabbly Chatflow

After setting up your WhatsApp number, the next step is to create the WhatsApp chatbot using Pabbly Chatflow. Navigate to the ‘Flow’ section and click on the ‘Add Flow’ button. Name your bot, for instance, ‘Automate Pet Grooming Appointments via WhatsApp’.

  • Select a trigger event for your bot, such as ‘Keyword Match’.
  • Set up a welcome message to greet users when they initiate a chat.
  • Add buttons for users to view services offered.

This setup allows users to interact with your chatbot seamlessly, making it easy for them to book grooming appointments.


3. Collecting User Information through Pabbly Chatflow

Once your bot is created, the next step is to collect user information. This is essential for booking appointments. In Pabbly Chatflow, you can add questions to gather details like pet name, breed, and appointment date.

To do this, use the ‘Ask Question’ action to prompt users for their pet’s name, breed, and other relevant information. Make sure to set up custom fields to store this data effectively.

  • Question 1: What is your pet’s name?
  • Question 2: What breed is your pet?
  • Question 3: What date and time do you want to book?

This step ensures that all necessary information is collected for the grooming appointment.


4. Integrating Google Sheets Using Pabbly Connect

After collecting user data, you can integrate Google Sheets to store appointment details. This is where Pabbly Connect comes into play. Create a new workflow in Pabbly Connect and set the trigger to be a new message received from Pabbly Chatflow.

Next, set the action to add a new row in Google Sheets. This will help you maintain a record of all appointments made through your WhatsApp chatbot.

Select the Google Sheets account and allow access. Map the fields from the previous steps to the corresponding columns in Google Sheets. Test the integration to ensure data is captured correctly.

With this integration, every time a user books an appointment, their details will automatically populate your Google Sheets.


5. Testing Your WhatsApp Chatbot

The final step is to test your WhatsApp chatbot created with Pabbly Chatflow. Send a message to your bot and interact with it as a customer would. Ensure that it responds correctly and captures all necessary information.

After testing, check your Google Sheets to confirm that the appointment details have been logged accurately. This ensures that your automation is working flawlessly and ready for real-time customer interactions.

By following these steps, you will have successfully automated pet grooming appointments via WhatsApp using Pabbly Chatflow and Pabbly Connect.


Conclusion

In this tutorial, we explored how to automate pet grooming appointments using Pabbly Chatflow and Pabbly Connect. By setting up a WhatsApp chatbot, you can efficiently manage customer inquiries and bookings, streamlining your pet grooming business operations.

Ensure you check out Pabbly Connect to create business automation workflows and reduce manual tasks. Pabbly Connect currently offer integration with 2,000+ applications.

Integrate MagicBricks Leads with Salesforce Using Pabbly Connect

Learn how to integrate MagicBricks leads with Salesforce using Pabbly Connect. Follow this detailed tutorial for seamless automation. Revolutionize your productivity approach with just a few strategic clicks. Uncover professional methods for connecting applications and creating workflows that reclaim hours of your week.

Watch Step By Step Video Tutorial Below


1. Access Pabbly Connect to Start Integration

To begin integrating MagicBricks leads with Salesforce, you first need to access Pabbly Connect. If you are an existing user, simply log into your account and open the workflow builder. If you are new, visit the URL provided in the description to sign up for free. Pabbly Connect offers a free trial with hundreds of tasks each month to explore its features.

Once logged in, you will be directed to the workflow builder. This is where you will create your automation by setting up triggers and actions. The trigger signifies when an event occurs, while the action is the response to that event. This fundamental understanding is crucial as you proceed with the integration.


2. Set Up Trigger for MagicBricks in Pabbly Connect

The next step involves setting up the trigger for MagicBricks in Pabbly Connect. Click on the ‘Add Trigger’ button and search for MagicBricks. Select it and choose the event ‘New Leads’. This will initiate the process whenever new leads are generated in MagicBricks.

  • Click on ‘Connect’ to proceed.
  • Copy the webhook URL provided by Pabbly Connect.
  • Contact your MagicBricks account manager to add this webhook URL to your account.

After successfully adding the webhook URL, you will be able to capture the lead details. This information is crucial for creating new contacts in Salesforce, which we will set up in the next steps.


3. Create a Salesforce Contact Using Pabbly Connect

Now that you have captured the lead details from MagicBricks, it’s time to create a new contact in Salesforce using Pabbly Connect. Click on ‘Add New Action’ and search for Salesforce. Select it and choose the event ‘Create Contact’.

Next, you will need to connect your Salesforce account. If you have previously set up a connection, you can select it here. Otherwise, click on ‘Add New Connection’. You will be prompted to log into Salesforce and grant Pabbly Connect the necessary permissions. Click ‘Allow’ to complete the connection process.


4. Map Lead Details to Salesforce Contact Fields

After connecting to Salesforce, it’s essential to map the lead details captured from MagicBricks to the appropriate fields in Salesforce. In Pabbly Connect, mapping allows you to dynamically insert data from the previous step into the current step.

  • Map the lead’s last name (mandatory field).
  • Optionally, map additional details such as first name, email, and phone number.

Once you have completed mapping the required fields, click on ‘Save and Send Test Request’. This action will test the integration and create a new contact in Salesforce. You should receive a positive response indicating that the contact was successfully created.


5. Verify the New Contact in Salesforce

With the integration complete, it’s time to verify that the new contact has been created in Salesforce. Navigate to your Salesforce account and refresh the contacts section. You should see the newly created contact with the details you mapped from MagicBricks.

This integration means that every time a new lead is generated in MagicBricks, a corresponding contact will automatically be created in Salesforce through Pabbly Connect. This seamless automation saves time and ensures that no leads are missed.


Conclusion

In conclusion, integrating MagicBricks leads with Salesforce using Pabbly Connect streamlines your lead management process. By following the steps outlined in this tutorial, you can automate the creation of contacts in Salesforce, enhancing your efficiency and productivity.

Ensure you check out Pabbly Connect to create business automation workflows and reduce manual tasks. Pabbly Connect currently offer integration with 2,000+ applications.

How to Send Payment Receipts Automatically Using Stripe for E-Commerce Orders with Pabbly Connect

Learn how to automate sending payment receipts using Stripe for e-commerce orders with Pabbly Connect. Follow this step-by-step tutorial for seamless integration. Learn to create powerful connections between your critical applications without requiring specialized programming knowledge or extensive technical background.

Watch Step By Step Video Tutorial Below


1. Setting Up Pabbly Connect for Automation

To send payment receipts automatically using Stripe for e-commerce orders, you will first need to set up Pabbly Connect. Access Pabbly Connect by visiting Pabbly.com/connect. This platform allows you to automate workflows without any coding skills.

Once on the Pabbly Connect page, you can either sign in if you are an existing user or click on the ‘Sign Up Free’ option to create a new account. After signing in, navigate to the Pabbly Connect dashboard to begin creating your automation workflow.


2. Creating a New Workflow in Pabbly Connect

In the Pabbly Connect dashboard, click on the ‘Create Workflow’ button. You will be prompted to name your workflow. For this automation, name it ‘Send Payment Receipts Automatically Using Stripe for E-Commerce Orders’ and select a folder for your workflow. using Pabbly Connect

  • Click on the ‘Create’ button after naming your workflow.
  • Select the trigger app as Stripe.
  • Choose the event ‘New Charge’ as your trigger event.

After selecting your trigger, click on the ‘Connect’ button to link your Stripe account with Pabbly Connect. You will receive a webhook URL that you will later use to connect Stripe with Pabbly Connect.


3. Connecting Stripe to Pabbly Connect

To connect your Stripe account, go to your Stripe dashboard and click on the ‘Developers’ option. Then, select ‘Webhooks’ to set up a new webhook endpoint. Click on the ‘+ Add Destination’ button and choose ‘Webhook Endpoint’ as the destination type. using Pabbly Connect

  • Paste the webhook URL you copied from Pabbly Connect.
  • Select the event as ‘Charge Succeeded’ to trigger the automation.
  • Click ‘Create Destination’ to finalize the webhook setup.

After setting up the webhook, you can test the connection by making a test payment in Stripe. This will ensure that your automation is functioning correctly.


4. Using Number Formatter in Pabbly Connect

After successfully connecting Stripe, the next step is to use the Number Formatter in Pabbly Connect. This tool helps to format the payment amounts correctly. Click on the ‘+’ icon to add a new step and search for ‘Number Formatter’. using Pabbly Connect

Select the ‘Perform Math Operation’ event and click on the ‘Connect’ button. In the fields provided, you will need to map the payment amount from the Stripe response. To get the actual value, you will divide the amount by 100.

Enter the amount from Stripe response. Set the operation to ‘Divide’ and enter ‘100’ as the divisor.

Click on the ‘Save and Send Test Request’ button to see if the formatting is correct. This step is crucial for ensuring that the payment receipt reflects the correct amount.


5. Sending Email Receipts Using Gmail

The final step in this automation is to send the payment receipt via Gmail. Add another step to your workflow by clicking the ‘+’ icon and searching for ‘Gmail’. Choose the ‘Send Email’ event and click on the ‘Connect’ button. using Pabbly Connect

You will need to sign in to your Gmail account and grant permissions for Pabbly Connect to send emails on your behalf. After connecting, fill in the fields for the sender name, recipient email (mapped from the Stripe response), email subject, and email body.

Use HTML format for the email content to enhance presentation. Include dynamic data such as the user’s name and payment status.

After filling in all the necessary fields, click on the ‘Save and Send Test Request’ button. If everything is set up correctly, you will receive a payment receipt email in your Gmail account, confirming the automation is successful.


Conclusion

In this tutorial, we explored how to use Pabbly Connect to automate the process of sending payment receipts for e-commerce orders through Stripe. By following the steps outlined, you can streamline your workflow and enhance customer experience without manual effort.

Ensure you check out Pabbly Connect to create business automation workflows and reduce manual tasks. Pabbly Connect currently offer integration with 2,000+ applications.

Utilizing Pabbly Connect allows you to efficiently manage integrations between multiple applications, making it a powerful tool for any e-commerce business.

How to Rent Fitness Equipment via WhatsApp Chatbot Using Pabbly Chatflow

Learn how to rent fitness equipment via WhatsApp Chatbot using Pabbly Chatflow. This detailed tutorial covers each step for seamless integration. Master conversational marketing with practical techniques for creating chatbots that engage visitors at exactly the right moment in their journey.

Watch Step By Step Video Tutorial Below


1. Accessing Pabbly Chatflow for WhatsApp Integration

To start using Pabbly Chatflow for renting fitness equipment via WhatsApp, first access the platform by visiting the URL Pabbly.com/chatflow. Here, you will find options to either sign up for a new account or log in if you already have one.

If you are a new user, click on ‘Sign Up Free’ to create your account. Upon signing up, you will receive 100 free credits each month to practice building your chatbot. Existing users can simply log in to their accounts to begin.


2. Creating Your Flow in Pabbly Chatflow

Once logged into Pabbly Chatflow, navigate to the dashboard. From here, select the ‘Flows’ option from the sidebar and click on the ‘Add Flow’ button to create a new flow for your WhatsApp chatbot.

  • Provide a name for your flow, such as ‘Rent Fitness Equipment for WhatsApp Chatbot’.
  • Set the trigger event to ‘Keyword Regex Match’.
  • Enter the keyword ‘rent’ to initiate the chatbot when users send this message.

After setting the trigger, you can proceed to send a welcome message to users, enhancing their experience with your fitness equipment rental service.


3. Building Your Chatbot Flow in Pabbly Chatflow

Using Pabbly Chatflow, you can create a comprehensive flow for your WhatsApp chatbot. Start by dragging and dropping a ‘Text’ message node to send a welcome message to users when they initiate the chat.

Next, add buttons to the message for user interaction. For example, create a button labeled ‘View Equipment’. When users click this button, they will receive a list of available fitness equipment for rent. This list can include items like treadmills, exercise cycles, and weights.

  • Create a list node to display all equipment items.
  • Add items to the list with corresponding titles and details.
  • Connect user selections to actions that provide further information or booking options.

This structured approach ensures that users can navigate through your offerings seamlessly.


4. Collecting User Information via Pabbly Chatflow

After users select an item from the list, you can use Pabbly Chatflow to collect necessary information for the rental. For instance, when a user clicks the ‘Book Now’ button, prompt them to enter their rental duration, full name, and delivery address.

To do this, drag and drop a question node for each piece of information you need. Ensure that you set the correct contact custom fields for each response to capture user details accurately.

Ask for rental duration and set the response format. Request the user’s full name and store it in the appropriate custom field. Gather the delivery address with a similar approach.

Once all information is collected, send a confirmation message to the user, indicating that their rental is confirmed.


5. Testing Your Chatbot in Pabbly Chatflow

After creating your flow in Pabbly Chatflow, it’s essential to test it to ensure everything works as expected. Navigate to the ‘Inbox’ section from the sidebar, where you can see incoming messages from users.

Send a test message to your WhatsApp number connected through Pabbly Chatflow. Observe the automated replies and ensure that the chatbot responds accurately to user inputs, such as sending the welcome message and displaying the equipment list.

Make adjustments to your flow as needed based on the testing results. This iterative process helps refine the user experience and ensures that your WhatsApp chatbot effectively facilitates fitness equipment rentals.


Conclusion

In this tutorial, we explored how to rent fitness equipment via WhatsApp Chatbot using Pabbly Chatflow. By following the detailed steps, you can automate your rental process, enhance customer interaction, and streamline bookings. Start using Pabbly Chatflow today to create your own efficient WhatsApp chatbot!

Ensure you check out Pabbly Connect to create business automation workflows and reduce manual tasks. Pabbly Connect currently offer integration with 2,000+ applications.

Auto-Generate & Email Proposals for Every New Landingi Lead Using Pabbly Connect

Learn how to automate proposal generation and email sending for new leads from Landingi using Pabbly Connect in this step-by-step tutorial. Revolutionize your productivity approach with just a few strategic clicks. Uncover professional methods for connecting applications and creating workflows that reclaim hours of your week.

Watch Step By Step Video Tutorial Below


1. Accessing Pabbly Connect to Automate Proposal Generation

To automate proposal generation for every new lead from Landingi, you first need to access Pabbly Connect. Start by visiting the Pabbly Connect website and signing in or creating a new account if you are a first-time user. Pabbly Connect provides 100 free credits every month for new users, allowing you to set up your automation without any cost.

Once logged in, navigate to the dashboard where you can create a new workflow. Click on the ‘Create Workflow’ button, then choose the new beta version for a modern and faster experience. After naming your workflow, you will set up the trigger event that initiates the automation. Here, Pabbly Connect is essential as it serves as the intermediary for integrating Landingi with other applications.


2. Setting Up the Trigger with Landingi in Pabbly Connect

In this step, you will configure Landingi as the trigger application in Pabbly Connect. Search for Landingi in the trigger application section and select it. Choose the event ‘New Lead from Landing Page’ to ensure that the workflow is activated whenever a new lead is generated on your Landingi page.

  • Select ‘New Lead from Landing Page’ as the trigger event.
  • Click on the ‘Connect’ button to generate a webhook URL.
  • Copy the webhook URL for integration with Landingi.

After copying the webhook URL, you will need to set it up in your Landingi account. This involves pasting the URL into the webhook settings of your Landingi form. By doing this, you ensure that Pabbly Connect can receive data from Landingi each time a new lead is generated, making it a vital part of your automation process.


3. Creating the Proposal Document Using Google Docs

Now that you have set up the trigger, the next step involves creating the proposal document using Google Docs through Pabbly Connect. Add an action step by selecting Google Docs as the application. You will choose the action event ‘Create Document from Template’ to utilize a pre-designed template for your proposals.

To connect Google Docs with Pabbly Connect, click on the ‘Connect’ button. If you have not connected your Google Docs account before, you will need to sign in and grant necessary permissions. Once connected, select the template you created for your branding proposals. Ensure that your template has dynamic fields for details like name, email, and phone number, which will be populated automatically.

  • Select the appropriate Google Docs template.
  • Map the dynamic fields from the lead data received from Landingi.
  • Specify the document’s location in your Google Drive.

This step is crucial as it allows Pabbly Connect to create a personalized proposal document for each new lead based on the information they provide, showcasing the power of automation in your workflow.


4. Sending the Email via Gmail with Pabbly Connect

After creating the proposal document, the next action is to send it via email using Gmail through Pabbly Connect. Add another action step and select Gmail as the application. Choose the event ‘Send Email’ to configure the email settings for sending the proposal to the lead.

Just like with Google Docs, click on the ‘Connect’ button to link your Gmail account. After successful connection, fill in the required fields such as recipient’s email address, subject, and body of the email. You can personalize the email content by mapping the lead’s name and including the link to the proposal document as an attachment.

Map the recipient’s email from the lead data. Personalize the email subject and body with dynamic fields. Attach the proposal document link in the email.

This integration ensures that every new lead receives their personalized branding proposal promptly, enhancing your business’s responsiveness and professionalism. Pabbly Connect seamlessly facilitates this entire process.


5. Finalizing the Automation and Enabling the Workflow

Once you have set up all the necessary steps in Pabbly Connect, it’s time to finalize your automation. Review each step to ensure that all data is mapped correctly and that the workflow functions as intended. Finally, click on the ‘Save’ button to save your workflow.

After saving, enable the workflow by clicking on the ‘Enable Workflow’ button. This action activates your automation, allowing it to run each time a new lead is generated on your Landingi page. Pabbly Connect will now automatically create and send branding proposals without any manual intervention.

By setting up this automation, you not only save time but also streamline your lead management process, making it more efficient. With Pabbly Connect at the center of this integration, you can focus on growing your business while it handles repetitive tasks.


Conclusion

In this tutorial, we explored how to use Pabbly Connect to automate the generation and emailing of proposals for every new lead from Landingi. By integrating Google Docs and Gmail, you can streamline your workflow and enhance efficiency. This powerful automation saves time and ensures every lead receives a personalized proposal promptly.

Ensure you check out Pabbly Connect to create business automation workflows and reduce manual tasks. Pabbly Connect currently offer integration with 2,000+ applications.

How to Add Google Forms Webinar Registrations to Mailchimp Using Pabbly Connect

Learn how to automate adding Google Forms webinar registrations to Mailchimp using Pabbly Connect with this step-by-step tutorial. Discover how to seamlessly connect your essential tools through accessible instructions that make powerful automation available to professionals at every skill level.

Watch Step By Step Video Tutorial Below


1. Accessing Pabbly Connect for Integration

To start integrating Google Forms with Mailchimp, first, you need to access Pabbly Connect. If you’re a new user, visit the Pabbly Connect landing page and sign up for a free trial where you get 100 automated tasks each month.

After signing up, navigate to the dashboard and open the workflow builder. This is where you will set up your integration. The workflow consists of a trigger and an action, which are essential for automating the process.


2. Setting Up Google Forms as the Trigger

In this step, you will configure Google Forms as the trigger application in Pabbly Connect. Click on the ‘Add Trigger’ button and search for Google Forms. Select it and choose the event ‘New Response Received’, then click on ‘Connect’.

  • Click on the ‘Add Trigger’ button.
  • Search and select Google Forms.
  • Choose ‘New Response Received’ as the event.

Once connected, you will receive a webhook URL. Copy this URL and head over to your Google Form. Ensure that the last question in your form is marked as required. Then, link your form to Google Sheets to manage the responses efficiently.


3. Linking Google Sheets to Pabbly Connect

After linking your Google Form to Google Sheets, you need to install the Pabbly Connect Webhooks add-on. Go to Extensions, then Add-ons, and search for ‘Pabbly Connect Webhooks’. Install this add-on to proceed with the integration. using Pabbly Connect

Once installed, refresh your Google Sheet. Navigate to Extensions, find Pabbly Connect Webhooks, and click on ‘Initial Setup’. Paste the webhook URL you copied earlier and set the trigger column to the last column (e.g., G) to track new responses.

  • Go to Extensions > Add-ons > Get Add-ons.
  • Search and install Pabbly Connect Webhooks.
  • Refresh your sheet after installation.

Make sure to switch on the ‘Send on Event’ option in the Pabbly Connect Webhooks settings. This ensures that every new form submission will trigger the webhook automatically.


4. Adding Mailchimp as the Action

Now, let’s set up Mailchimp as the action application in Pabbly Connect. Click on ‘Add New Action Step’, search for Mailchimp, and select it. Choose the event ‘Add New Member with Custom Fields’ and click on ‘Connect’.

If you have an existing connection, select it; otherwise, create a new connection by entering your Mailchimp API key and data center. You can find your API key in your Mailchimp account under Profile > Extras > API Keys.

Search and select Mailchimp. Choose ‘Add New Member with Custom Fields’. Enter your Mailchimp API key and data center.

After connecting, you will need to map the fields from your Google Form responses to Mailchimp. This means linking the email address, first name, and last name from the Google Form directly into Mailchimp’s fields for new subscribers.


5. Testing the Integration

With everything set up, it’s time to test your integration. Fill out the Google Form with test data and submit it. This should trigger the workflow in Pabbly Connect and add the details to your Mailchimp audience.

Check your Mailchimp account to see if the new subscriber has been added. You should see the test submission reflected in your audience list. This confirms that the integration is working as intended, and any new registrations from your Google Forms will automatically be added to Mailchimp.

Submit a test response through Google Forms. Check Mailchimp for the new subscriber. Ensure all details match your submission.

Now, every time a new registration is received, it will automatically sync with Mailchimp without manual intervention, thanks to Pabbly Connect.


Conclusion

In this tutorial, we explored how to automate the process of adding Google Forms webinar registrations to Mailchimp using Pabbly Connect. By following these steps, you can streamline your registration process and enhance your email marketing efforts.

Ensure you check out Pabbly Connect to create business automation workflows and reduce manual tasks. Pabbly Connect currently offer integration with 2,000+ applications.

Utilizing Pabbly Connect for this integration not only saves time but also ensures that your audience is always updated with the latest information about your webinars.

How to Use Pabbly Connect for Free: Step-by-Step Guide

Learn how to use Pabbly Connect for free with this step-by-step guide. Integrate Google, Gmail, Google Sheets, and YouTube effortlessly. Explore systematic approaches to creating efficient automation solutions that convert technical concepts into practical, implementable instructions.

Watch Step By Step Video Tutorial Below


1. Accessing Pabbly Connect for Free

To start using Pabbly Connect for free, open a new tab in your browser and navigate to Pabbly.com/connect. This will take you to the landing page where you can sign up easily.

On the landing page, click on the option that says ‘Sign up for free.’ You will need to fill out your details, including your name, email address, password, and phone number. Make sure to create a strong password that includes uppercase letters, lowercase letters, numbers, and special characters.


2. Verifying Your Pabbly Connect Account

After filling in your details on Pabbly Connect, click on the ‘Create Account’ button. You will receive a verification email in your inbox. Open your Gmail and look for the confirmation link sent by Pabbly.

  • Click on the confirmation link in your email.
  • You will be redirected to a setup page.
  • Select how you heard about Pabbly, for example, ‘YouTube’.

Once you complete the verification process, your free account on Pabbly Connect is ready to use. You will receive 100 free tasks every month, allowing you to explore various automations.


3. Exploring the Pabbly Connect Dashboard

Upon logging into Pabbly Connect, you will find yourself on the dashboard. Here, you can view your total tasks, including how many have been consumed and how many are remaining. This helps you keep track of your usage effectively.

Understanding how tasks are counted is crucial. A task is counted each time an action step runs, such as sending an email through Gmail. However, filters, routers, and delays do not count as tasks. This knowledge allows you to plan your automations better.


4. Creating a Workflow in Pabbly Connect

In Pabbly Connect, everything starts with creating a workflow. To do this, click on the ‘Create Workflow’ button. You have the option to create folders for better organization. Enter a folder name if you choose to create one.

Once your folder is set, select the ‘New Workflow Builder’ for a modern interface. For the workflow name, you might choose something like ‘Testing’. Click on the ‘Create’ button to open the workflow window, where you will set up triggers and actions.

  • Triggers are events that start the automation, like a new form submission.
  • Actions are what happens after the trigger, such as sending data to Google Sheets.

This combination of triggers and actions is the essence of automation in Pabbly Connect.


5. Conclusion

In conclusion, using Pabbly Connect for free allows you to explore various integrations and automations seamlessly. With 100 free tasks monthly, you can efficiently connect applications like Google, Gmail, Google Sheets, and YouTube.

Ensure you check out Pabbly Connect to create business automation workflows and reduce manual tasks. Pabbly Connect currently offer integration with 2,000+ applications.

Check out Pabbly Connect – Automate your business workflows effortlessly! Sign Up Free – Start your journey with ease! 10,000+ Video Tutorials – Learn step by step! Join Pabbly Facebook Group – Connect with 21,000+ like minded people!

By following this step-by-step guide, you can easily set up your Pabbly Connect account, verify it, and start creating workflows. This powerful tool enables you to automate your business processes effectively.


Auto-Generate YouTube Titles, Hooks & SEO with Pabbly Connect and Google Sheets

Learn how to auto-generate YouTube titles, hooks, and SEO using Pabbly Connect and Google Sheets with this step-by-step tutorial. This comprehensive guide reveals exactly how to connect your applications and automate repetitive tasks — accessible for professionals of all technical backgrounds.

Watch Step By Step Video Tutorial Below


1. Setting Up Pabbly Connect for YouTube Title Generation

To start auto-generating YouTube titles, hooks, and SEO using Pabbly Connect, first, you need to access the platform. Go to Pabbly’s website and sign up for a free account. Once registered, log in to your dashboard.

After logging in, navigate to the Pabbly Connect section. Here, you will find options to create a new workflow. Click on the ‘Create Workflow’ button to begin the integration process.


2. Integrating Google Sheets with Pabbly Connect

For the next step, you will connect your Google Sheets to Pabbly Connect. This integration allows you to pull data from your Google Sheets automatically. Click on the ‘Add Trigger’ option and select Google Sheets as your application.

  • Select ‘New or Updated Spreadsheet Row’ as the event.
  • Connect your Google account to Pabbly Connect.
  • Choose the specific spreadsheet you want to use.

Once the connection is established, you will receive a webhook URL. This URL is crucial for sending data from your Google Sheets to Pabbly Connect. Copy this URL for the next steps.


3. Setting Up OpenAI Integration in Pabbly Connect

Next, you will integrate OpenAI with Pabbly Connect to generate titles and hooks. Click on ‘Add Action’ and select OpenAI as the application. Choose the event as ‘Start GPT’ to utilize the AI’s capabilities.

In this step, you will need to enter your OpenAI API key. To obtain this key, visit your OpenAI account and generate a new API key. Copy this key and paste it into the designated field in Pabbly Connect.

  • Select the AI model you want to use, such as GPT-3.
  • Map the input fields with relevant data from Google Sheets.

After setting up the mapping, click on ‘Save and Send Test Request’ to ensure that the integration works correctly. You should receive a response containing generated titles and hooks.


4. Updating Google Sheets with Generated Data

After generating titles and hooks, the next step is to update your Google Sheets with this information. Go back to your Pabbly Connect workflow and add another action step.

Select Google Sheets again and choose the event ‘Update Row’. Connect your Google account if prompted, and select the spreadsheet and specific row you want to update. Map the fields with the generated titles and hooks from OpenAI.

Ensure you select the correct row index for the updates. Confirm all fields are mapped accurately.

Once everything is set, click on ‘Save and Send Test Request’ to see if the data updates successfully in your Google Sheets. You should now see the generated titles and hooks reflected in the specified columns.


5. Finalizing the Integration Process

With everything set up, it’s time to finalize the workflow in Pabbly Connect. Review all the steps to ensure everything is connected properly. Test the entire workflow by adding a new entry in your Google Sheets.

Check if the integration works seamlessly by verifying that the titles, hooks, and SEO data are generated and updated automatically. This automation will save you time and streamline your YouTube content creation process.

Once confirmed, you can now use this workflow to generate YouTube titles and SEO hooks automatically whenever you add a new video idea to your Google Sheets. This integration showcases the power of Pabbly Connect in automating your tasks efficiently.


Conclusion

In this tutorial, we explored how to use Pabbly Connect to auto-generate YouTube titles, hooks, and SEO using Google Sheets and OpenAI. By setting up this automation, you can enhance your content creation process significantly.

Ensure you check out Pabbly Connect to create business automation workflows and reduce manual tasks. Pabbly Connect currently offer integration with 2,000+ applications.

Utilize Pabbly Connect to streamline your workflow and focus more on creating engaging videos for your audience. Start automating today for a more efficient YouTube channel management!

How to Add Housing.com Leads to Mailchimp Automatically Using Pabbly Connect

Learn how to integrate Housing.com leads with Mailchimp automatically using Pabbly Connect in this step-by-step tutorial. Implement the precise methodologies leading organizations use to automate repetitive tasks, illustrated with practical examples designed for immediate application.

Watch Step By Step Video Tutorial Below


1. Accessing Pabbly Connect for Integration

To start automating the addition of Housing.com leads to Mailchimp, we first need to access Pabbly Connect. Open a new tab in your browser and type Pabbly.com/connect to reach the Pabbly Connect landing page.

Once on the landing page, you will find options to either sign in or sign up for free. If you are a new user, click on sign up for free to get started. Existing users should click on sign in to access their dashboard. After signing in, navigate to the Pabbly Connect application and click on access to enter the dashboard.


2. Creating a Workflow in Pabbly Connect

Now that you are in the Pabbly Connect dashboard, the next step is to create a workflow. Click on the create workflow button. You will be prompted to choose between the new workflow builder and the classic one. Select the Pabbly Connect new workflow builder for a more modern interface.

  • Enter a name for your workflow.
  • Select a folder to save your workflow.
  • Click on create to open the workflow editor.

This will direct you to the workflow window, where you can set up triggers and actions. The trigger will initiate the workflow when a new lead is received from Housing.com.


3. Setting Up the Trigger with Housing.com

In the workflow window, click on the add trigger button. Search for Housing.com as your trigger application and select it. For the trigger event, choose new leads and click connect.

You will receive a webhook URL that needs to be added to your Housing.com account. Since the Housing.com portal does not allow users to add webhook URLs directly, contact your account manager and provide them with the webhook URL. Once they add it, Pabbly Connect will start capturing lead details automatically.


4. Adding Action to Mailchimp in Pabbly Connect

After setting up the trigger, click on the add new action step. Search for Mailchimp as your action application and select it. Choose the event add new member with custom fields and click connect.

  • Select add a new connection to create a new Mailchimp connection.
  • Log into your Mailchimp account and navigate to profile settings.
  • Generate a new API key under extras > API keys.

Copy the generated API key and paste it into Pabbly Connect. You will also need to enter your Mailchimp data center, which can be found in the URL of your Mailchimp account. After entering these details, click on save to connect Mailchimp with Pabbly Connect.


5. Finalizing the Integration and Testing

With Mailchimp connected, you need to select the audience list and map the required fields. For the email address, use the mapping feature to dynamically insert the email from the Housing.com lead. You can also add optional fields like first name and last name.

Once you have mapped the fields, click on save and send test request. If successful, you will see a confirmation message. Check your Mailchimp audience to verify that a new member has been added with the lead details.

This integration allows you to automatically add new leads from Housing.com to Mailchimp, enabling you to nurture your leads through email campaigns without manual effort. With Pabbly Connect, this entire process is seamless and efficient.


Conclusion

In this tutorial, we successfully demonstrated how to use Pabbly Connect to automatically add Housing.com leads to Mailchimp. Following these steps allows for effortless lead management and email marketing.

Ensure you check out Pabbly Connect to create business automation workflows and reduce manual tasks. Pabbly Connect currently offer integration with 2,000+ applications.

How to Seamlessly Add Google Ads Leads to Pabbly Email Marketing Using Pabbly Connect

Learn how to automate adding Google Ads leads to Pabbly Connect with Pabbly Connect. This detailed tutorial provides step-by-step instructions for seamless integration. Build sophisticated automated workflows in less time than you think. This guide translates complex integrations into straightforward steps for immediate implementation.

Watch Step By Step Video Tutorial Below


1. Accessing Pabbly Connect for Integration

To automate adding Google Ads leads to Pabbly Email Marketing, start by accessing Pabbly Connect. Open a new tab and type Pabbly.com/connect in your browser. This will take you to the Pabbly Connect landing page, where you can either sign in or sign up for a free account.

If you’re a new user, click on the ‘Sign up for free’ button to get started with hundreds of tasks for free each month. For existing users, click on ‘Sign in’ to access your dashboard. Once signed in, you will be directed to the Pabbly Connect dashboard, where you can create your workflow.


2. Creating a New Workflow in Pabbly Connect

After accessing the dashboard, click on the ‘Create Workflow’ button to start setting up your integration. You will be prompted to select either the new workflow builder or the classic one. Choose the new workflow builder for a modern interface, then enter a name for your workflow and select a folder to save it in. using Pabbly Connect

  • Click on the ‘Create’ button to open the workflow window.
  • This window will allow you to set triggers and actions for your workflow.

In this workflow window, you will first add a trigger. Click on the ‘Add Trigger’ button and search for ‘Google Ads’. Select it as your trigger application, and then choose the event ‘New Lead Form Entry’ to initiate the automation process.


3. Configuring Google Ads for Lead Capture

After selecting Google Ads as the trigger, click on the ‘Connect’ button to receive a webhook URL. Copy this URL, as it will be used in your Google Ads campaign to send lead information to Pabbly Connect.

In your Google Ads account, navigate to the campaign where you have set up your lead form. Paste the copied webhook URL into the lead delivery option and enter a key to complete the setup. After this, click on the ‘Send Test Data’ button to test the connection.

  • Ensure your lead form includes fields for first name, last name, email, phone number, and company name.
  • If the test data is sent successfully, you will see a confirmation message in Pabbly Connect.

With this setup, every time a new lead is captured in Google Ads, it will automatically trigger the workflow in Pabbly Connect.


4. Adding Subscribers to Pabbly Email Marketing

Next, you will need to create an action step in your workflow to add the new lead as a subscriber in Pabbly Email Marketing. Click on the ‘Add New Action Step’ and search for ‘Pabbly Email Marketing’. Select it, and choose the event ‘Add Subscribers’ for the action.

Click on the ‘Connect’ button to establish a connection between Pabbly Connect and Pabbly Email Marketing. If you haven’t created a connection before, you will need to get an API token. Click on the hyperlink provided to retrieve the bearer token and paste it into the connection setup.

Select the list name where the subscriber will be added. Map the fields from the Google Ads lead form to the corresponding fields in Pabbly Email Marketing.

After mapping the email address and name fields, click on ‘Save and Send Test Request’. Upon successful execution, you will receive a confirmation that the subscriber has been added to your list.


5. Finalizing the Integration and Testing

With the integration set up, it’s time to finalize everything. Refresh your subscribers’ list in Pabbly Email Marketing to see the new subscriber added from the test lead. This confirms that your automation is working correctly.

Now, every time a new lead is generated from your Google Ads campaign, a new subscriber will be automatically added to your Pabbly Email Marketing list. This automation allows you to nurture leads without manual input, saving you time and effort.

To test the entire process, you can run a live campaign and check if the leads are being captured correctly in Pabbly Connect and subsequently in Pabbly Email Marketing.


Conclusion

In this tutorial, we have explored how to seamlessly integrate Google Ads leads into Pabbly Email Marketing using Pabbly Connect. By following these steps, you can automate the process of adding leads, ensuring that you can focus on nurturing your leads effectively. Try this automation for your business and enhance your marketing efforts with ease.

Ensure you check out Pabbly Connect to create business automation workflows and reduce manual tasks. Pabbly Connect currently offer integration with 2,000+ applications.