Create an AI Calling Agent for Free

Learn how to create an AI Calling Agent for free using Pabbly Connect. Follow our detailed tutorial for seamless integration with Google Ads and Bolna AI.

Watch Step By Step Video Tutorial Below


1. Introduction to Pabbly Connect for AI Calling Agent

Pabbly Connect is the central platform that allows you to create an AI Calling Agent for your business seamlessly. To get started, you need to access Pabbly Connect by visiting Pabbly Connect’s website. If you are a new user, click on the ‘Sign Up for Free’ button in the top right corner to create an account and explore the platform with 100 free tasks monthly.

Once you have signed up, you will have access to the workflow builder. This is where you will set up your automation by defining triggers and actions. Triggers initiate the workflow, while actions are the tasks that follow. With Pabbly Connect, you can easily integrate various applications to automate your calling process.


2. Setting Up Your Workflow in Pabbly Connect

To create your AI Calling Agent, start by accessing the workflow builder in Pabbly Connect. Click on the ‘Add Trigger’ button to begin. For this integration, select Google Ads as your trigger application because it helps gather lead details effectively. Choose the ‘New Lead Form Entry’ event and click on ‘Connect’ to establish the connection.

  • Select Google Ads as the trigger application.
  • Choose the ‘New Lead Form Entry’ event.
  • Click on ‘Connect’ to set up the connection.

After connecting, you will receive a webhook URL. Copy this URL and paste it into your Google Ads lead form settings under the lead delivery option. Once done, send test data to ensure that Pabbly Connect captures the lead details accurately, confirming that your integration is set up correctly.


3. Configuring Bolna AI with Pabbly Connect

Next, you need to set up Bolna AI to make phone calls using the lead information captured by Pabbly Connect. Add a new action step in your workflow and search for Bolna AI. Select the ‘Make a Phone Call’ event and then click on ‘Connect’ to link your Bolna AI account to Pabbly Connect.

If you haven’t connected Bolna AI yet, you will need to create a new connection. To do this, obtain your API token from your Bolna AI account. Go to the providers section, connect your Twilio account, and generate a new API key. Copy this key and paste it into the connection setup in Pabbly Connect.


4. Scheduling the Call with Pabbly Connect

Once you have configured Bolna AI, it’s time to schedule the call. In your workflow, you will need to add a Date Time Formatter step from Pabbly Connect to set when the call should occur. Select ‘Modify Current Date’ as the event to add a delay of 10 minutes to the current date and time.

  • Add a Date Time Formatter action step.
  • Select ‘Modify Current Date’ and set the delay to 10 minutes.
  • Map the formatted date and time into the Bolna AI step for scheduling.

After setting up the Date Time Formatter, ensure to map the scheduled time into the call scheduling field in Bolna AI. This will allow your AI Calling Agent to make calls automatically after the specified delay, enhancing the overall efficiency of your lead follow-up process.


5. Testing and Activating Your AI Calling Agent

With your workflow fully set up in Pabbly Connect, it’s crucial to test the integration. Click on ‘Save and Send Test Request’ to initiate the process. This will trigger the workflow and schedule a call using the details you have mapped. You will see the confirmation message once the call is successfully scheduled.

After testing, you can monitor the call history and review the scheduled calls within your Bolna AI dashboard. This ensures that your AI Calling Agent is functioning correctly and effectively reaching out to leads without manual intervention. With Pabbly Connect, you have successfully automated your calling process.


Conclusion

In conclusion, using Pabbly Connect to create an AI Calling Agent is a game-changer for businesses looking to automate their lead follow-up process. By integrating Google Ads and Bolna AI, you can efficiently manage calls and streamline communication with potential clients. Start your free trial of Pabbly Connect today and experience the power of automation in your business.

Ensure you check out Pabbly Connect to create business automation workflows and reduce manual tasks. Pabbly Connect currently offer integration with 2,000+ applications.

Automatically Create ClickUp Tasks from Typeform Responses

Learn how to automatically create ClickUp tasks from Typeform responses using Pabbly Connect. Follow this detailed step-by-step tutorial for seamless integration. Master proven automation processes with practical implementation examples and strategic recommendations you can apply immediately in your workflow.

Watch Step By Step Video Tutorial Below


1. Accessing Pabbly Connect for Automation

To automatically create ClickUp tasks from Typeform responses, you first need to access Pabbly Connect. Start by opening a new tab and entering the URL Pabbly.com/connect.

Once on the Pabbly Connect homepage, you will see options to either sign in or sign up for free. If you are new, select the ‘Sign up free’ option to create an account. Existing users can simply click on ‘Sign in’ to access their account and begin creating automation.


2. Creating a New Workflow in Pabbly Connect

After signing in, you will be directed to the Pabbly apps page. Here, select Pabbly Connect to create a new workflow. Click on the ‘Create Workflow’ button, where you will choose to create from scratch.

In the workflow builder, you will need to name your workflow. For this tutorial, name it ‘Create ClickUp Task for Typeform Leads’. After naming, click the ‘Create’ button to proceed to the workflow interface.

  • Select the trigger app as Typeform.
  • Choose the event as New Entry.
  • Connect to your Typeform account.

By following these steps, you have successfully set up the trigger for your automation in Pabbly Connect.


3. Configuring the Typeform Trigger

With the trigger app selected, you will now configure the Typeform trigger in Pabbly Connect. First, select your specific Typeform from the dropdown list where you will receive the leads.

Next, set the response format to ‘Simple’ and click on ‘Save and Send Test Request’. This action prompts Pabbly Connect to wait for a webhook response, which requires you to submit a new entry in your Typeform.

  • Enter a first name, last name, email, and phone number in your Typeform.
  • Click the submit button to send the data.
  • Return to Pabbly Connect to verify the data has been fetched.

Once you have submitted the new entry, you will see the response details appear in Pabbly Connect, confirming that the trigger is configured correctly.


4. Setting Up ClickUp Action in Pabbly Connect

Now that the Typeform trigger is working, it’s time to set up the action app, which is ClickUp in this case. In Pabbly Connect, click on ‘Add New Action Step’ and search for ClickUp.

Select the action event as ‘Create Task’ and click on ‘Connect’. You will be prompted to enter your ClickUp API token, which can be found in your ClickUp account settings under the API section. Copy this token and paste it in Pabbly Connect.

Select your workspace, space, folder, and list in ClickUp. Map the task name using the lead’s first and last name from Typeform. Fill in the task description and other relevant fields.

After mapping the necessary fields, click on ‘Save and Send Test Request’ to send a test task to ClickUp. Verify the task has been created successfully in your ClickUp account.


5. Conclusion: Automate Your Workflow with Pabbly Connect

By following these steps, you can efficiently automate the process of creating ClickUp tasks from Typeform responses using Pabbly Connect. This integration not only saves time but also enhances productivity by eliminating manual entry.

Ensure you check out Pabbly Connect to create business automation workflows and reduce manual tasks. Pabbly Connect currently offer integration with 2,000+ applications.

Check out Pabbly Connect – Automate your business workflows effortlessly! Sign Up Free – Start your journey with ease! 10,000+ Video Tutorials – Learn step by step! Join Pabbly Facebook Group – Connect with 21,000+ like minded people!
Start using Pabbly Connect today to streamline your workflows and create more automations that fit your business needs. If you have any questions or need further assistance, feel free to reach out for support.

How to Add Facebook Leads as Subscribers in Pabbly Email Marketing

Learn how to seamlessly integrate Facebook leads into Pabbly Connect using Pabbly Connect. Follow this step-by-step tutorial for effective automation. Navigate the automation landscape confidently with clear, structured guidance suitable for professionals regardless of prior technical experience.

Watch Step By Step Video Tutorial Below


1. Accessing Pabbly Connect for Integration

To add Facebook leads as subscribers in Pabbly Connect, you first need to access the platform. If you are a new user, visit pabbl.com/connect in your browser. Click on the ‘Sign up for free’ button in the top right corner. This will allow you to explore Pabbly Connect with 100 free tasks each month.

Once you are signed up, log into your account and navigate to the workflow builder. This is where the integration process begins. You can automate the addition of Facebook leads to your Pabbly Email Marketing account using Pabbly Connect.


2. Setting Up the Trigger in Pabbly Connect

In the workflow builder of Pabbly Connect, click on the ‘Add Trigger’ button. Search for ‘Facebook Lead Ads’ and select it. For the event, choose ‘New Lead Instant’ and click on ‘Connect’. If you have already set up a connection, select it; otherwise, create a new connection by logging into your Facebook account.

  • Log into your Facebook account to establish the connection.
  • Select the Facebook page you want to connect to.
  • Choose the specific lead form you will use for this automation.

After selecting your page and form, click on ‘Save and Send Test Request’. This action will initiate the process and wait for a webhook response, which will be captured by Pabbly Connect.


3. Capturing Lead Data from Facebook

To capture the lead data, open a new tab and navigate to Meta for Developers. Go to ‘Resources’ and select ‘Developer Tools’. Scroll down to find the ‘Lead Ads Debug Tool’. Here, select the page and form you are using in your Pabbly Connect workflow.

Fill in the lead form with test details such as first name, last name, email, and company name. After submitting the form, return to your Pabbly Connect workflow. You should see that the response has been successfully captured, confirming that the integration is working as intended.


4. Adding Subscribers in Pabbly Email Marketing

Next, you will set up an action step to add the captured lead as a subscriber in Pabbly Email Marketing. Click on ‘Add New Action Step’ and search for ‘Pabbly Email Marketing’. Make sure to select ‘Pabbly Email Marketing V2’ and set the event to ‘Add Subscriber’.

  • If you have an existing connection, select it; otherwise, create a new connection.
  • Retrieve your API token from the API and Webhook section of your Pabbly Email Marketing dashboard.
  • Map the lead details to the corresponding fields in Pabbly Email Marketing.

After mapping the email, first name, last name, and any other required fields, click on ‘Save and Send Test Request’. You should receive a positive response indicating that the subscriber has been successfully added.


5. Verifying the Integration and Real-Time Automation

To verify the integration, check the subscriber list in Pabbly Email Marketing. You should see the new subscriber added with all the details captured from the lead form. This confirms that your automation is functioning correctly.

To test the real-time automation, delete the previous lead and refresh the page. Create a new lead using the Facebook form. Upon submission, the details should automatically appear in your Pabbly Email Marketing subscriber list, demonstrating the effectiveness of Pabbly Connect.


Conclusion

Integrating Facebook leads into Pabbly Email Marketing is seamless with Pabbly Connect. By following this tutorial, you can automate the process of adding new subscribers effortlessly. This integration not only saves time but also enhances your marketing efforts.

Ensure you check out Pabbly Connect to create business automation workflows and reduce manual tasks. Pabbly Connect currently offer integration with 2,000+ applications.

Instant Sales Alerts Using 2-Step Automation

Learn how to set up instant sales alerts using Pabbly Connect to automate notifications from LinkedIn to Slack. Follow our step-by-step tutorial for seamless integration.

Watch Step By Step Video Tutorial Below


1. Introduction to Pabbly Connect for Instant Sales Alerts

In this section, we will explore how to use Pabbly Connect to automate sales alerts. The goal is to notify your sales team whenever a new form submission is received through LinkedIn lead ads. This automation saves time and ensures that your team is promptly informed about leads.

To get started, head over to Pabbly Connect by visiting Pabbly.com/connect. If you are a new user, click on ‘Sign Up Free’ to create an account. Existing users can simply sign in. Once logged in, navigate to the ‘Pabbly Connect’ application to access the dashboard where you can create your automation workflows.


2. Creating a New Workflow in Pabbly Connect

To create a new workflow in Pabbly Connect, click on the ‘Create Workflow’ button. Select the option to create from scratch, and name your workflow ‘Instant Sales Alerts Using Two-Step Automation.’ This naming helps in identifying the workflow later.

  • Click on the ‘Create’ button to finalize your new workflow.
  • Ensure to select the new beta workflow builder for enhanced features.

After creating the workflow, the next step involves setting up the trigger. In Pabbly Connect, triggers are essential as they define when the automation starts. For this integration, select ‘LinkedIn’ as the trigger application, and choose the event ‘Lead Notification’ to proceed.


3. Connecting LinkedIn to Pabbly Connect

In this step, you will connect your LinkedIn account to Pabbly Connect. Click on the ‘Connect’ button, and select ‘Add New Connection.’ Then, click on ‘Connect with LinkedIn’ to initiate the connection process.

After signing in to LinkedIn, select your sponsored account, and choose the response format as ‘Simple’ for ease of use. Click on the ‘Save and Send Test Request’ button to test the connection. This action will prompt Pabbly Connect to wait for a webhook response from LinkedIn.

  • Ensure you have an active LinkedIn lead ad campaign running.
  • Fill out the form with test details to generate a response.

After submitting the form, check Pabbly Connect to see if the response has been captured. This confirms that your LinkedIn integration is correctly set up.


4. Setting Up Slack Integration with Pabbly Connect

Now, it’s time to set up Slack as the action application in Pabbly Connect. Click on the plus icon to add another application and search for ‘Slack.’ Select ‘Send Channel Message’ as the event to notify your sales team.

Click on the ‘Connect’ button and choose to add a new connection. Enter the token type as ‘Bot’ and click on the ‘Save’ button. Grant the necessary permissions for Pabbly Connect to access your Slack account.

Select the channel where you want to send notifications. Map the fields from LinkedIn responses to your Slack message.

In the message field, you can format your notification to include details such as email, name, phone, and company. This setup ensures that your sales team receives all relevant lead information instantly.


5. Finalizing Your Pabbly Connect Workflow

To finalize your workflow in Pabbly Connect, ensure that all fields are correctly mapped and that you have tested the integration. Click on the ‘Save and Send Test Request’ button to send a test notification to your Slack channel.

Check your Slack channel to confirm that the message has been sent successfully. If everything works as expected, make sure to enable the toggle for your workflow to ensure it runs automatically in the future.

Remember, once you enable the toggle, Pabbly Connect will handle all notifications without any manual effort. This automation not only saves time but also ensures your sales team is always updated on new leads.


Conclusion

In conclusion, using Pabbly Connect for instant sales alerts automates the process of notifying your sales team. By integrating LinkedIn and Slack, you can ensure timely updates without manual intervention. This setup enhances productivity and allows your team to focus on closing deals.

Ensure you check out Pabbly Connect to create business automation workflows and reduce manual tasks. Pabbly Connect currently offer integration with 2,000+ applications.

I Built a WhatsApp AI Support Assistant for My Business 🤯

Learn how to create a WhatsApp AI Support Assistant for your business using Pabbly Chatflow. Follow this detailed tutorial shows you how to build powerful chat automation that engages visitors and converts prospects—without any coding required.

Watch Step By Step Video Tutorial Below


1. Getting Started with Pabbly Chatflow

To create a WhatsApp AI Support Assistant, first, access Pabbly Chatflow by navigating to the Pabbly website. You can sign up for free to explore its features, which include 100 free credits monthly. This is essential for automating your WhatsApp inquiries without any coding skills.

Once on the Pabbly Chatflow landing page, you will see options to sign in or sign up. If you’re a new user, select the sign-up option. Existing users can easily log in to their accounts. After logging in, you will be directed to the Pabbly apps section where you can access Pabbly Chatflow.


2. Creating Your Support Assistant in Pabbly Chatflow

After accessing Pabbly Chatflow, click on the ‘Add Assistant’ button to start creating your WhatsApp AI Support Assistant. You will be prompted to name your assistant; for this tutorial, we will name it ‘Support AI’. This name will identify your assistant in the system. using Pabbly Connect

  • Click on the ‘Add Assistant’ button.
  • Enter the name of your assistant.
  • Proceed to set up the assistant’s features.

Once the assistant is created, you will need to configure its AI instructions. Select the instruction type as ‘Customer Support Agent’. This selection will automatically populate roles and responsibilities tailored for a support assistant.


3. Configuring AI Settings in Pabbly Chatflow

In this section, you will configure the AI settings for your assistant using Pabbly Chatflow. Start by setting the temperature, which determines the creativity of the responses. A value of 0.5 is recommended for balanced replies.

Next, you will need to select the AI to use. Currently, the only option available is OpenAI. Ensure you have a paid OpenAI account to proceed. After selecting the model, you will be prompted to enter your OpenAI API key. This key establishes the connection between OpenAI and Pabbly Chatflow.

  • Set the temperature to 0.5.
  • Choose OpenAI as the AI model.
  • Enter your OpenAI API key to connect.

Once you have configured these settings, save your changes to finalize the AI setup in Pabbly Chatflow.


4. Uploading Your Knowledge Base to Pabbly Chatflow

To enhance your assistant’s capabilities, upload a knowledge base that contains essential information about your business. This knowledge base will train the assistant to respond accurately to customer inquiries. Use PDF or TXT formats for your documentation.

For this tutorial, we will upload a PDF file that outlines the services and products of ‘Lush Berry’, our sample business. Ensure that your PDF does not contain images if you want to include more than 10 pages. After uploading, you will see a confirmation that the knowledge base has been successfully added.

Prepare your knowledge base in PDF or TXT format. Upload the document under the knowledge sources section. Confirm the upload to ensure it is linked to your assistant.

This step is crucial for ensuring that your assistant can provide informed responses to customer inquiries using Pabbly Chatflow.


5. Activating Your Assistant in Pabbly Chatflow

After completing the setup, it’s time to activate your assistant. In Pabbly Chatflow, toggle the activation button to enable your assistant. This will allow it to start responding to inquiries on WhatsApp.

To automate responses for all your WhatsApp contacts, navigate to the settings, select inbox settings, and enable the AI auto-reply feature. Choose the contact list you want to apply this to and save your settings. This ensures that your assistant is always ready to assist your customers.

Toggle the activation button to enable your assistant. Go to inbox settings to enable AI auto-reply. Select your contact list and save the settings.

With these steps completed, your WhatsApp AI Support Assistant is fully operational, ready to handle customer inquiries efficiently using Pabbly Chatflow.


Conclusion

In this tutorial, we explored how to create a WhatsApp AI Support Assistant using Pabbly Chatflow. By following these steps, you can automate your customer inquiries effectively and enhance your business’s responsiveness.

Ensure you check out Pabbly Connect to create business automation workflows and reduce manual tasks. Pabbly Connect currently offer integration with 2,000+ applications.

Utilizing Pabbly Chatflow allows you to streamline your support processes, ensuring that customers receive timely assistance 24/7. Start automating your WhatsApp conversations today!

Auto-Create Leads for Faster Follow-Ups | Magicbricks to Salesforce Integration

Learn how to seamlessly integrate Magic Bricks with Salesforce using Pabbly Connect to auto-create leads for faster follow-ups. Step-by-step tutorial included. Transform complex automation concepts into accessible, actionable steps that eliminate unnecessary manual work while maximizing existing application capabilities.

Watch Step By Step Video Tutorial Below


1. Accessing Pabbly Connect for Integration

To start the integration process, you need to access Pabbly Connect. Begin by visiting the Pabbly website at Pabbly.com and log in to your account. If you are a new user, you can sign up for free, which includes 100 tasks monthly to test the platform.

After logging in, navigate to the Pabbly Connect dashboard. Here, you will find options to create new workflows. Click on the ‘Create Workflow’ button to start setting up the integration between Magic Bricks and Salesforce.


2. Creating a New Workflow in Pabbly Connect

Once you are in the Pabbly Connect dashboard, select the option to create a new workflow. Choose the new beta workflow builder for a more modern experience. Name your workflow as ‘Auto-Create Leads for Faster Follow-Ups: Magic Bricks to Salesforce Integration’ and select a folder to organize your automation.

  • Click on the ‘Create’ button to finalize the workflow setup.
  • You will see a prompt to add a trigger application, which will initiate the workflow.

In this case, select Magic Bricks as your trigger application. This means that whenever a new lead is generated in Magic Bricks, it will trigger the workflow to create a lead in Salesforce using Pabbly Connect.


3. Setting Up the Trigger with Magic Bricks

After selecting Magic Bricks, choose the trigger event as ‘New Leads’. This event will activate the workflow whenever a new lead is captured. Click on the ‘Connect’ button to establish a connection between Magic Bricks and Pabbly Connect.

You will receive a webhook URL that acts as a bridge for the integration. Since Magic Bricks doesn’t allow users to input this URL directly, you must send it to your account manager at Magic Bricks for setup. Once the webhook is configured, click on ‘Capture Webhook Response’ to test the connection.

  • Ensure that the setup is functioning by checking for a positive response.
  • You will see lead details such as phone number, first name, last name, and email address.

Once you receive the lead details, it confirms that the connection is successfully established through Pabbly Connect.


4. Adding Salesforce as the Action Step

Now that the trigger is set up, it’s time to add the action step. Click on the ‘Add New Action’ button and select Salesforce as the action application. Choose the action event as ‘Create Contact’ and click on ‘Connect’ to link Salesforce with Pabbly Connect.

If you already have an existing connection, you can save it. Otherwise, create a new connection by logging into your Salesforce account and granting the necessary permissions. Once connected, you will be able to map the lead details from Magic Bricks to Salesforce fields.

Use the mapping feature to dynamically pull data from the Magic Bricks response. Enter the first name, last name, email, and phone number by selecting them from the previous response.

This mapping ensures that every new lead is correctly added to Salesforce, maintaining the integrity of your data through Pabbly Connect.


5. Finalizing the Integration and Testing

After mapping all necessary fields, click on ‘Save and Send Request’ to execute the workflow. A positive response will indicate that the lead has been successfully created in Salesforce. You can verify this by checking your Salesforce contacts.

In Salesforce, you should see the new lead added with all the details captured from Magic Bricks. This integration via Pabbly Connect allows you to automate your lead capturing process, ensuring you never miss a follow-up opportunity.

To summarize, you have successfully created an automation between Magic Bricks and Salesforce using Pabbly Connect. This integration allows for efficient lead management and faster follow-ups.


Conclusion

In this tutorial, we demonstrated how to use Pabbly Connect to seamlessly integrate Magic Bricks with Salesforce for automatic lead creation. This setup ensures that your leads are captured efficiently, enabling faster follow-ups and improved management.

Ensure you check out Pabbly Connect to create business automation workflows and reduce manual tasks. Pabbly Connect currently offer integration with 2,000+ applications.

Automate Your Entire Order Management System in Pabbly Connect

Learn how to automate your entire order management system using Pabbly Connect with Woo Commerce, Zoho CRM, and more. Streamline your workflow today! Transform complex automation concepts into accessible, actionable steps that eliminate unnecessary manual work while maximizing existing application capabilities.

Watch Step By Step Video Tutorial Below


1. Setting Up Pabbly Connect for Order Management

To automate your entire order management system, start by accessing Pabbly Connect. Navigate to the Pabbly Connect website. If you are a new user, you can sign up for a free account, which gives you access to 100 tasks every month.

After signing in, you will be directed to the dashboard. Here, click on the ‘Create Workflow’ button to begin setting up your automation. You can choose to create from scratch or utilize the AI feature for assistance in automation.


2. Connecting Woo Commerce to Pabbly Connect

Once you have created your workflow in Pabbly Connect, the next step is to connect Woo Commerce. Select Woo Commerce as your trigger app and choose the event ‘New Order Created’. This event will initiate the automation whenever a new order is placed.

  • Select the trigger event as ‘New Order Created’
  • Copy the provided webhook URL from Pabbly Connect
  • Paste the webhook URL in the Woo Commerce settings under the Webhook section

By doing this, you ensure that every new order placed in Woo Commerce is captured and sent to Pabbly Connect for further processing. This setup is crucial for automating your order management effectively.


3. Integrating Zoho CRM with Pabbly Connect

After connecting Woo Commerce, the next step is to set up Zoho CRM as your action app in Pabbly Connect. Choose ‘Create Contact’ as the action event. This will allow you to automatically add new customer details to your Zoho CRM whenever an order is placed.

To connect Zoho CRM, you need to provide your domain from Zoho. After entering the required details and saving your connection, you can map the fields from Woo Commerce to Zoho CRM. This includes customer name, email, and order details, ensuring that all relevant information is transferred seamlessly.


4. Sending Email Notifications through Pabbly Connect

Once the order details are in Zoho CRM, the next step is to send an email to the customer. For this, select Gmail as your next action app in Pabbly Connect. Choose ‘Send Email’ as the action event to notify customers about their order and provide personalized product recommendations.

  • Map the recipient’s email address from the Woo Commerce order data
  • Enter a subject line and personalized email content
  • Use dynamic fields to include customer names and product links

This email will not only confirm the order but also engage customers with product recommendations, enhancing their shopping experience and increasing the likelihood of repeat purchases.


5. Conclusion

Using Pabbly Connect to automate your order management system with Woo Commerce and Zoho CRM streamlines your workflow. This integration saves time and enhances customer engagement through personalized communication. Start automating today to improve your business efficiency!

Ensure you check out Pabbly Connect to create business automation workflows and reduce manual tasks. Pabbly Connect currently offer integration with 2,000+ applications.

Check out Pabbly Connect – Automate your business workflows effortlessly! Sign Up Free – Start your journey with ease! 10,000+ Video Tutorials – Learn step by step! Join Pabbly Facebook Group – Connect with 21,000+ like minded people!
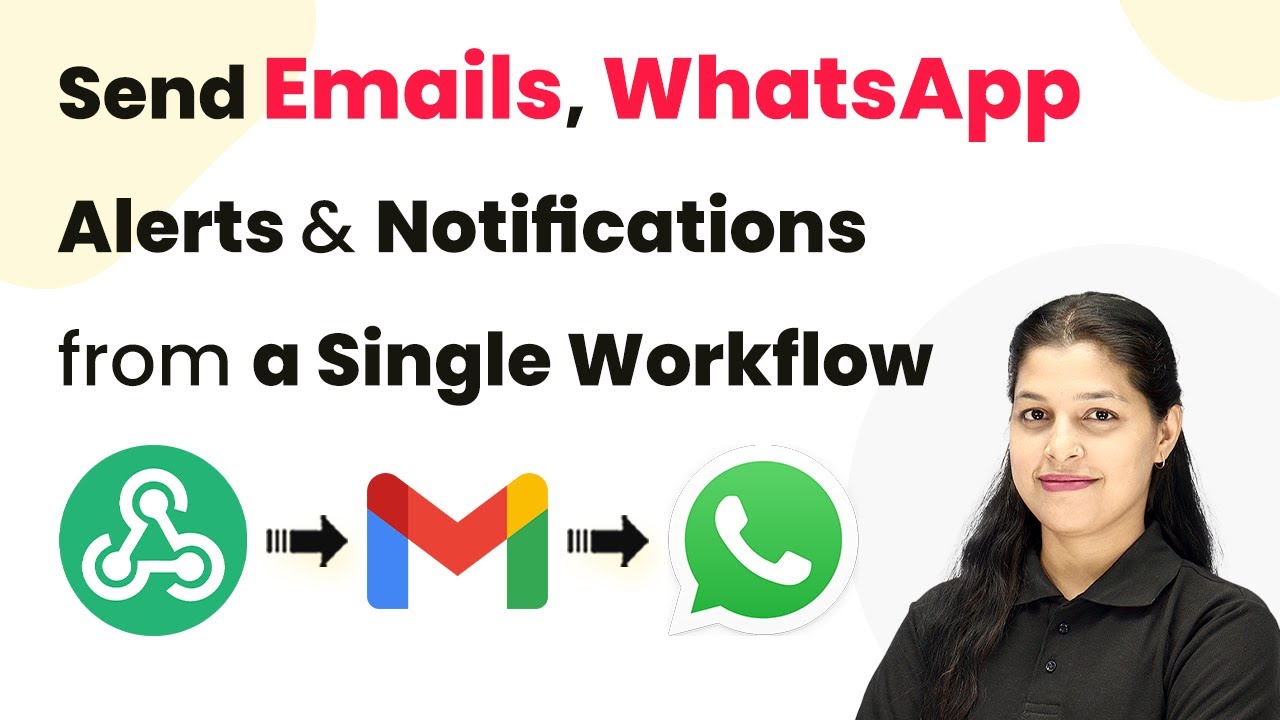
Send Emails, WhatsApp Alerts & Notifications from a Single Workflow

Learn how to send emails and WhatsApp alerts using Pabbly Connect in a single workflow. Follow this detailed tutorial for seamless integration. This comprehensive guide reveals exactly how to connect your applications and automate repetitive tasks — accessible for professionals of all technical backgrounds.

Watch Step By Step Video Tutorial Below


1. Accessing Pabbly Connect for Automation

To start sending emails and WhatsApp alerts, access Pabbly Connect by visiting Pabbly.com/connect. This platform enables seamless integration between various applications.

Once on the homepage, you can either sign in if you already have an account or select ‘Sign Up Free’ to create a new account. New users receive 100 free tasks every month for practicing. After logging in, you will land on the Pabbly apps page where you can select Pabbly Connect to begin your automation journey.


2. Creating a Workflow in Pabbly Connect

After accessing Pabbly Connect, you will see the dashboard where you can create a new workflow. Click on the ‘Create Workflow’ button. You will be presented with two options: ‘Create from Scratch’ or ‘Create using AI’. Select ‘Create from Scratch’ to build your workflow manually.

  • Choose the Beta workflow builder for a modern experience.
  • Name your workflow, for example, ‘Send Email and WhatsApp Alert’.
  • Select the folder where you want to save the workflow.

After naming and selecting the folder, click on the ‘Create’ button. You will see the option to add a trigger, which is essential for initiating your workflow.


3. Setting Up the Trigger in Pabbly Connect

In Pabbly Connect, the trigger is the event that starts your workflow. For this automation, we will use ‘Webhook by Pabbly’ as the trigger app. Click on ‘Add Trigger’ and select ‘Webhook by Pabbly’ from the list.

Choose the event ‘Catch Webhook’ and click on the ‘Connect’ button. You will receive a unique webhook URL. Copy this URL and integrate it into your website form code. This URL acts as a bridge between your website form and Pabbly Connect.

  • Paste the webhook URL in your website form code.
  • Save the changes in your website code.
  • Test the integration by submitting a test lead through your form.

After submitting the form, return to Pabbly Connect to verify that the data was received successfully.


4. Sending Emails via Gmail Integration

Once the trigger is successfully set up, the next step in Pabbly Connect is to send emails using Gmail. Click on ‘Add Action’ and select Gmail as the action app. Choose the event ‘Send Email’ and click ‘Connect’.

For the email setup, you will need to enter the sender’s name, sender’s email address, and the recipient’s email address. Use the mapping feature to dynamically insert the recipient’s email from the webhook response.

Enter a subject for the email. Compose the email body, mapping the lead’s name. Click ‘Save and Send Test Request’ to send the email.

Check your Gmail account to confirm that the email has been received with the correct details.


5. Sending WhatsApp Alerts Using Pabbly Connect

After successfully sending the email, the final step is to send WhatsApp alerts. In Pabbly Connect, add another action and select ‘WhatsApp Cloud API’. Choose the event ‘Send Template Message’ and click ‘Connect’.

You will need to input your WhatsApp API credentials, including the access token and phone number ID. After connecting, you can map the recipient’s phone number and select the template you previously created.

Enter the language code for the message. Map the lead’s name in the message template. Click ‘Save and Send Request’ to send the WhatsApp message.

Verify in your WhatsApp account to ensure the message was sent successfully, confirming that your automation works flawlessly.


Conclusion

In this tutorial, we demonstrated how to use Pabbly Connect to send emails and WhatsApp alerts from a single workflow. By following these steps, you can streamline your communication process and enhance your business efficiency.

Ensure you check out Pabbly Connect to create business automation workflows and reduce manual tasks. Pabbly Connect currently offer integration with 2,000+ applications.

Start using Pabbly Connect today to automate your workflows and improve your operational efficiency in sending notifications.

This Stripe Automation Email Customers Automatically

Learn how to automate customer email notifications using Pabbly Connect and Stripe in this detailed step-by-step tutorial. Explore efficient methods for automating routine tasks with clear, concise instructions suited for both newcomers and experienced professionals.

Watch Step By Step Video Tutorial Below


1. Accessing Pabbly Connect for Automation

To automate email notifications using Pabbly Connect, start by visiting the Pabbly website. You can access it by typing Pabbly.com in your browser. Once there, you’ll need to either sign in or sign up for a new account.

If you are an existing user, click on the ‘Sign In’ button located at the top right corner. New users can sign up for free and receive 100 tasks monthly to test the platform. After signing in, navigate to the Pabbly Connect application to initiate the automation process.


2. Creating a New Workflow in Pabbly Connect

After logging into Pabbly Connect, click on ‘Create Workflow’ to start setting up your automation. You will be prompted to select between the new beta version or the classic version of the workflow builder. Choose the new beta for a more modern experience.

  • Select the workflow name as ‘This Stripe Automation Email Customers Automatically’.
  • Choose a folder for the workflow, such as ‘All Automations’.
  • Click on ‘Create’ to finalize the setup.

Once the workflow is created, a box will appear asking for the trigger application. A trigger is an event that starts the automation. In this case, select Stripe as the trigger application.


3. Configuring the Stripe Trigger in Pabbly Connect

With Pabbly Connect, you need to set up Stripe as your trigger application. Select ‘New Charge’ as the trigger event and click on ‘Connect’. This will require you to link your Stripe account with Pabbly Connect.

To establish this connection, navigate to your Stripe account and access the Developers section. Here, you will need to add a webhook. Set the API version to the latest and select ‘Charge Succeeded’ as the event. Copy the webhook URL provided by Pabbly Connect and paste it into Stripe, adding a description like ‘Payment Successful’.


4. Testing the Webhook Response in Pabbly Connect

After adding the webhook, return to your Pabbly Connect workflow. You should see a message indicating that it is waiting for a webhook response. To test this, initiate a payment through Stripe to simulate a new charge. using Pabbly Connect

Once the payment is processed, check back in Pabbly Connect. The response should show the details of the transaction, including the customer’s name and email. This confirms that your Stripe and Pabbly Connect integration is functioning correctly.


5. Sending Email Notifications via Gmail

Now that your trigger is set up and tested, it’s time to send an email notification using Gmail through Pabbly Connect. Add a new action step and select Gmail as the action application. Choose ‘Send Email’ as the action event and click on ‘Connect’ to link your Gmail account.

In the email setup, fill in the sender name and use mapping to dynamically insert the recipient’s email address from the Stripe response. Compose your email content, including payment details, and finalize the setup. Once everything is configured, click on ‘Save and Send Test Request’ to send a test email.

Check your inbox to confirm that the email was received successfully, completing the automation process. You have now automated customer email notifications for Stripe payments using Pabbly Connect.


Conclusion

In this tutorial, we demonstrated how to automate email notifications for Stripe payments using Pabbly Connect. By following these steps, you can streamline your customer communication and enhance your business efficiency.

Ensure you check out Pabbly Connect to create business automation workflows and reduce manual tasks. Pabbly Connect currently offer integration with 2,000+ applications.

Design an Interactive WhatsApp Chatbot for Orders & Follow-ups

Learn how to create an interactive WhatsApp chatbot for orders and follow-ups using Pabbly Chatflow. Step-by-step tutorial for seamless integration. Master conversational marketing with practical techniques for creating chatbots that engage visitors at exactly the right moment in their journey.

Watch Step By Step Video Tutorial Below


1. Accessing Pabbly Chatflow for Your WhatsApp Chatbot

To design an interactive WhatsApp chatbot for orders and follow-ups, the first step is to access Pabbly Chatflow. Start by opening a new tab and entering the URL: Pabbly.com/chatflow. Once on the homepage, you’ll see options to sign in or sign up for free.

If you are a new user, select the ‘Sign Up Free’ option to create your account. This will grant you 100 free credits every month to practice using Pabbly Chatflow. Existing users can simply click ‘Sign In’ to access their accounts. After logging in, navigate to the dashboard where you can see all the Pabbly products available.


2. Creating Your WhatsApp Chatbot Using Pabbly Chatflow

Once you are on the Pabbly Chatflow dashboard, the next step is to create your WhatsApp chatbot. Click on the ‘Flows’ option in the sidebar, which will take you to the flow builder page. Here, you can see existing flows or create a new one by clicking the ‘Add Flow’ button.

  • Provide a name for your flow, such as ‘Design an Interactive WhatsApp Chatbot for Orders and Follow-ups’.
  • Set a trigger for your chatbot, such as a keyword match like ‘hello’ to initiate the conversation.
  • Drag and drop the message and action blocks to create your flow.

After setting up the flow name and trigger, you can begin designing the welcome message that your customers will see. This message can include buttons for various options like ordering flowers or gifts, enhancing user interaction through Pabbly Chatflow.


3. Implementing User Interaction with Pabbly Chatflow

To enhance user experience, you can implement buttons in your WhatsApp chatbot using Pabbly Chatflow. After creating the welcome message, add buttons such as ‘Order Flowers’ and ‘Order Gifts’. Each button will lead to a different flow where users can select specific products.

For instance, when a user clicks on ‘Order Flowers’, they will receive a list of available flowers. Each flower can have an image, a description, and a button to order. Similarly, the ‘Order Gifts’ button will provide a selection of gifts, also equipped with images and order buttons. This structured approach makes it easy for customers to navigate and place orders.


4. Confirming Orders Through Pabbly Chatflow

After users select their desired items, Pabbly Chatflow allows you to confirm the order by asking for additional details. For example, after selecting a product, the chatbot will ask for the quantity, a personal message, the user’s full name, and their delivery address.

To implement this, use the ‘Ask Question’ node in Pabbly Chatflow. This feature allows you to personalize the interaction by dynamically inserting the product name into the questions. Once all details are collected, a confirmation message will be sent to the user, summarizing their order.


5. Finalizing Your Chatbot and Sharing It

Once your flow is complete, don’t forget to save it in Pabbly Chatflow. After saving, you can share the flow with colleagues or friends by selecting the three dots next to your flow and choosing the ‘Share Flow’ option. This will generate a sharable link.

By following these steps, you have successfully created an interactive WhatsApp chatbot for orders and follow-ups using Pabbly Chatflow. This chatbot not only streamlines the ordering process but also keeps customers informed and engaged, enhancing their overall experience.


Conclusion

In conclusion, using Pabbly Chatflow to design an interactive WhatsApp chatbot for orders and follow-ups is a straightforward process. By following the outlined steps, you can create a personalized experience for your customers, allowing them to place orders seamlessly. Start utilizing Pabbly Chatflow today to enhance your business operations.

Ensure you check out Pabbly Connect to create business automation workflows and reduce manual tasks. Pabbly Connect currently offer integration with 2,000+ applications.