Forward WhatsApp Messages to Slack in Real Time

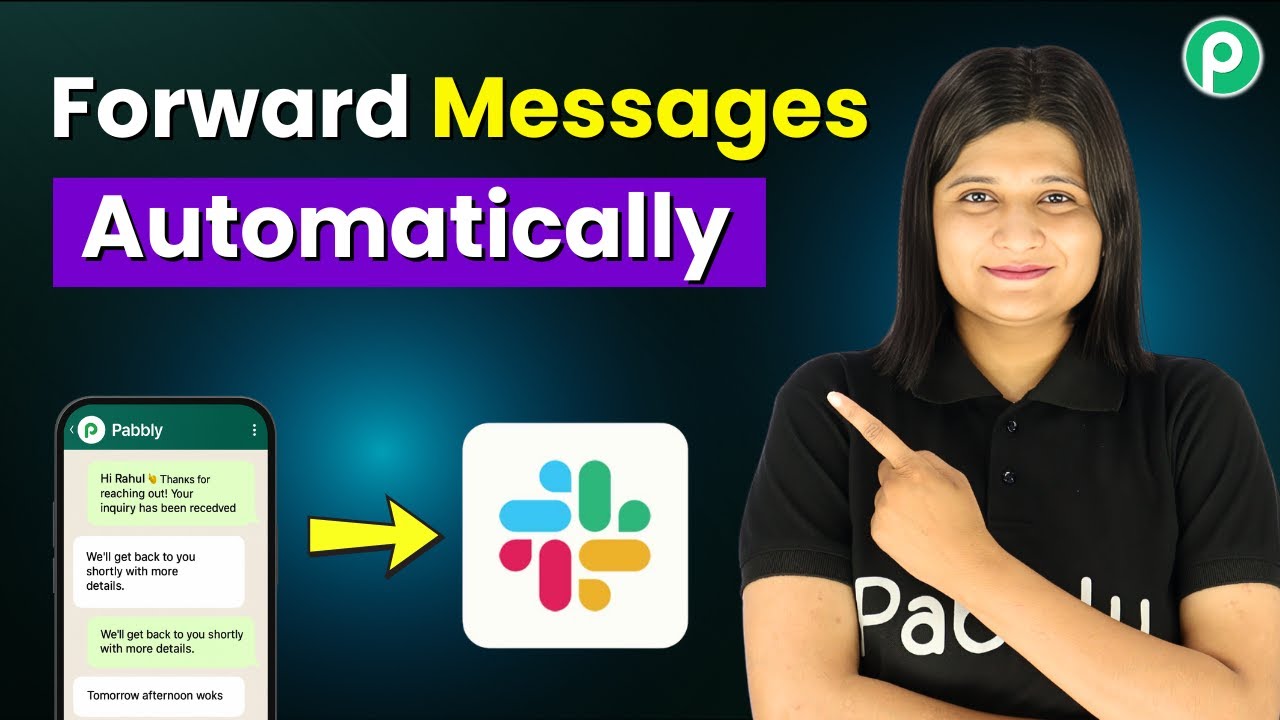
Learn how to forward WhatsApp messages to Slack in real time using Pabbly Connect. Step-by-step guide to automate your workflow seamlessly. This comprehensive guide reveals exactly how to connect your applications and automate repetitive tasks — accessible for professionals of all technical backgrounds.

Watch Step By Step Video Tutorial Below


1. Access Pabbly Connect to Set Up Integration

To start forwarding WhatsApp messages to Slack, first, access Pabbly Connect. Visit the Pabbly website and sign in to your account. If you are new, sign up for a free account, which provides 100 tasks monthly.

Once logged in, navigate to the Pabbly Connect dashboard. Here, you can manage your workflows and create new ones. Click on ‘Create Workflow’ to begin setting up the integration between WhatsApp and Slack.


2. Create a New Workflow in Pabbly Connect

In this step, you will create a new workflow in Pabbly Connect. Select the option for the new beta workflow builder. Name your workflow ‘Forward WhatsApp Messages to Slack in Real Time’ and choose a folder for organization.

  • Select the folder for your workflow.
  • Click on ‘Create’ to finalize the workflow setup.

After creating the workflow, you will need to set the trigger application. This will be WhatsApp Cloud API, which will initiate the workflow whenever a new message is received.


3. Configure WhatsApp as Trigger in Pabbly Connect

For the trigger setup, select WhatsApp Cloud API as the trigger application in Pabbly Connect. Choose ‘Message Notification’ as the trigger event and click on ‘Connect’. This step requires you to establish a connection using a webhook URL.

To connect, open the Meta for Developers page and log in to your Facebook account. Navigate to the app you created for WhatsApp and locate the configuration settings. Here, you will paste the webhook URL provided by Pabbly Connect and enter the verify token.

  • Paste the webhook URL in the appropriate field.
  • Enter the verify token and save the configuration.

After saving, toggle the message button on and hit the test option to ensure that the connection is successfully established. This will allow Pabbly Connect to capture messages sent to your WhatsApp number.


4. Set Up Slack as Action in Pabbly Connect

Next, you will set Slack as the action application in Pabbly Connect. Search for Slack in the action application list and select ‘Send Channel Message’. Click on ‘Connect’ to establish a connection between Slack and Pabbly Connect.

Authorize the connection by allowing Pabbly Connect access to your Slack account. Once connected, you will need to specify the channel ID where messages will be sent. Enter the channel ID and map the message content from the WhatsApp trigger.

Select the channel ID in Slack where messages will be forwarded. Map the message details from the WhatsApp response.

By mapping the details, you ensure that each new message from WhatsApp is dynamically sent to Slack, keeping your team updated in real time.


5. Test and Finalize the Workflow

With the workflows set up, it’s time to test the integration. Send a test message to your WhatsApp number. Pabbly Connect will capture this message and forward it to the designated Slack channel.

Check your Slack channel to see if the test message has been received. If successful, you will see a notification in your Slack channel indicating a new message has been received along with the sender’s name and query.

Finally, save the workflow in Pabbly Connect. This will ensure that all future WhatsApp messages are automatically forwarded to Slack without any manual intervention.


Conclusion

In conclusion, using Pabbly Connect allows you to efficiently forward WhatsApp messages to Slack in real time. This integration streamlines communication and enhances team collaboration by ensuring that all queries are promptly addressed.

Ensure you check out Pabbly Connect to create business automation workflows and reduce manual tasks. Pabbly Connect currently offer integration with 2,000+ applications.

Reply to Customer Feedback Based on Rating Using AI

Learn how to automate customer feedback replies based on ratings using Pabbly Connect. Step-by-step guide for integrating Google Forms, Gmail, and AI tools. Transform complex automation concepts into accessible, actionable steps that eliminate unnecessary manual work while maximizing existing application capabilities.

Watch Step By Step Video Tutorial Below


1. Accessing Pabbly Connect for Automation

To begin automating customer feedback replies, you need to access Pabbly Connect. Start by navigating to the Pabbly Connect website by entering ‘Pabbly.com/connect’ in your browser. This will take you to the Pabbly Connect homepage.

Once there, you will see options to either sign in or sign up for a free account. If you are a new user, click on ‘Sign Up Free’ to get started. This allows you to explore Pabbly Connect with 300 free tasks each month. If you already have an account, simply sign in. After logging in, you will be directed to the Pabbly Connect dashboard, where you can create new workflows.


2. Creating a New Workflow in Pabbly Connect

After accessing Pabbly Connect, the next step is to create a new workflow. Click on the ‘Access Now’ button and then select the ‘Beta’ version for a modern and flexible interface. In the workflow creation dialog, name your workflow, for instance, ‘Reply to Customer Feedback Based on Rating Using AI’.

  • Select your desired folder for organization.
  • Click on the ‘Create’ button to finalize your workflow setup.

With your workflow created, you will see the trigger and action setup interface. Remember, a trigger initiates the automation process, while actions are the responses to that trigger. For this setup, you will use Google Forms as your trigger.


3. Setting Up Google Forms as a Trigger

In Pabbly Connect, select Google Forms as your trigger application and choose the event ‘New Response Received’. Click on the ‘Connect’ button to establish the connection. You will receive a webhook URL, which is essential for linking Google Forms to Pabbly Connect.

Next, log in to your Google Forms account and select the feedback form you created. To store responses in a single database, link your Google Form to Google Sheets by clicking on ‘Responses’ and selecting ‘Link to Sheets’. Create a new spreadsheet to store the responses, ensuring that the fields match those in your form.


4. Testing the Connection Between Google Forms and Pabbly Connect

After linking Google Sheets, it’s time to test the connection. Make a test submission on your Google Form with dummy data, such as a product name, feedback, and a rating. After submitting, check your Google Sheets to confirm that the response appears correctly, indicating a successful connection. using Pabbly Connect

  • Copy the responder link for your form and ensure it is published.
  • Check Google Sheets for the new entry to verify that the integration is working.

Once verified, you will need to install the Pabbly Connect Webhooks add-on in Google Sheets. This allows the data from Google Sheets to be sent to Pabbly Connect automatically. After installation, refresh your Google Sheets and set up the initial configuration using the webhook URL provided by Pabbly Connect.


5. Integrating AI for Personalized Responses

With the trigger set up, the next step is to connect your AI tool to generate personalized replies. Select your AI application, such as Gemini, in Pabbly Connect and choose ‘Generate Content’ as the action event. Connect your account by providing the necessary API key from your AI service.

In the setup, map the fields from your Google Forms responses to the AI prompt. This includes the customer’s name, product, rating, and feedback. This dynamic mapping ensures the AI generates a personalized email reply based on the specific feedback received.

Finally, add Gmail as the next action step in Pabbly Connect to send the generated email to the customer. Configure the sender name, recipient email, and subject line. Use the content generated by your AI in the email body, ensuring that each customer receives a tailored response based on their feedback.


Conclusion

In this tutorial, we explored how to automate replies to customer feedback based on ratings using Pabbly Connect. By integrating Google Forms, AI tools, and Gmail, businesses can ensure timely and personalized responses to customer feedback, enhancing customer satisfaction and engagement.

Ensure you check out Pabbly Connect to create business automation workflows and reduce manual tasks. Pabbly Connect currently offer integration with 2,000+ applications.

I Sent Bulk Product Promotion Emails WITHOUT Getting Blocked 🤯

Learn how to send bulk product promotion emails without getting blocked using Pabbly Connect and Pabbly Connect. Follow our detailed guide for step-by-step instructions.

Watch Step By Step Video Tutorial Below


1. Accessing Pabbly Connect for Email Marketing

To send bulk product promotion emails without getting blocked, you first need to access Pabbly Connect. Open a new tab and visit Pabbly.com/email-marketing. This will direct you to the Pabbly Email Marketing landing page.

Once there, you have the option to sign in or sign up for free. If you’re a new user, click on the sign-up button to create your account. After signing in, navigate to the Pabbly app section and select Pabbly Email Marketing by clicking on the ‘Access Now’ button.


2. Creating Your Email Campaign Using Pabbly Connect

After logging into Pabbly Connect, go to the campaign section to create your email. Click on the ‘Create Email’ button to start setting up your bulk email campaign. This is where you will manage your promotional emails effectively.

  • Select the campaign type: Regular, API, or Workflow.
  • Enter the campaign name, e.g., ‘Natural Glow Product Launch Campaign’.
  • Provide the ‘From Name’ and the email subject.

After filling in these details, click on the ‘Continue’ button to proceed. You will then choose a template for your email campaign. You have the option to create your template from scratch or select a pre-existing one.


3. Designing Your Email Template with Pabbly Connect

In this step, you will design your email template using Pabbly Connect. Choose the email builder type, such as the Drag and Drop builder, to start customizing your email. Add elements like headers, images, text, and social media links to create a visually appealing email.

For example, you can add a header, title, product image, and a call-to-action button. Ensure that the image sizes are optimized (maximum 500 KB) for better performance. Once you have designed your email, preview it to see how it will appear to your recipients.

  • Add a logo and product image.
  • Insert a button linking to your product page.
  • Include links to your social media platforms.

After finalizing your design, click on the ‘Send’ button to proceed to the next step.


4. Sending Bulk Emails Using Pabbly Connect

Now that your email campaign is designed, it’s time to send it out using Pabbly Connect. First, confirm your campaign details, including the subject line and recipient list. You can select a pre-created subscriber list or add individual email addresses directly.

To send the email, choose the delivery server you have set up in Pabbly Connect. You can either send the email immediately or schedule it for later. If you choose to send it now, click the ‘Send Email’ button. This will initiate the sending process, and you will see the status update in real-time.


5. Verifying Email Delivery with Pabbly Connect

After sending your bulk promotional email, it’s important to verify its delivery. Check your Gmail account to see if the email has been received. You should see the email with all the details as designed in Pabbly Connect.

If the email appears correctly, you can refresh the campaigns page in Pabbly Connect to see the updated status of your campaign. This will confirm that your email has been successfully sent to all recipients.

Additionally, you can view reports and analytics on the performance of your email campaign directly from the Pabbly Connect dashboard.


Conclusion

In conclusion, using Pabbly Connect and Pabbly Email Marketing allows you to send bulk product promotion emails without getting blocked. By following the steps outlined in this tutorial, you can effectively manage your email marketing campaigns and reach your audience efficiently.

Ensure you check out Pabbly Connect to create business automation workflows and reduce manual tasks. Pabbly Connect currently offer integration with 2,000+ applications.

Let AI Handle Your Interview Questions

Learn how to automate interview question generation using Pabbly Connect, Google Sheets, and AI tools in this step-by-step tutorial. Discover hidden automation capabilities within your existing tools. This guide shows you how to connect your essential applications and permanently eliminate redundant manual processes.

Watch Step By Step Video Tutorial Below


1. Accessing Pabbly Connect for Interview Automation

To start automating your interview question process, you need to access Pabbly Connect. Open your browser and navigate to pav.com/connect. Here, you will find options to either sign in or sign up for a free account.

If you are a new user, click on ‘Sign Up Free’ to get 300 tasks every month. Existing users can sign in directly. Once logged in, you will be directed to the Pabbly apps window, where you can access Pabbly Connect by clicking on ‘Access Now’.


2. Creating a Workflow in Pabbly Connect

After accessing Pabbly Connect, click on the ‘Create Workflow’ button to start building your automation. You will be prompted to select a workflow builder; choose the beta version for a modern experience.

  • Click on the ‘Select’ button for the beta version.
  • Name your workflow ‘Let AI Handle Your Interview Questions’.
  • Select a folder for organization, like ‘Automations’.
  • Click on the ‘Create’ button to finalize the workflow.

Now that your workflow is created, it’s essential to set up a trigger. Triggers are events that initiate the automation. For this setup, you will be using Google Sheets as the trigger application.


3. Setting Up Google Sheets Trigger in Pabbly Connect

To configure the trigger, select Google Sheets as your application and choose the event ‘New or Updated Spreadsheet Row’. Click on ‘Connect’ to establish a connection with your Google Sheets account.

Once connected, you will receive a webhook URL. Copy this URL as it will be used to link your Google Sheets with Pabbly Connect.

  • Open Google Sheets and add a new detail to trigger the automation.
  • Install the ‘Pabbly Connect Webhooks’ add-on from the Google Workspace Marketplace.
  • In the add-on, enter the webhook URL and set the trigger column to the final data column (e.g., column E).

After configuring the webhook, refresh your Google Sheets to ensure the add-on is active. This connection allows Pabbly Connect to capture new data from your Google Sheets automatically.


4. Generating Interview Questions Using AI

With your trigger set up, the next step is to generate interview questions using an AI tool. In this case, we will use Gemini as the AI application. Add an action step in Pabbly Connect and select Gemini for generating content.

When prompted, you will need to connect your Gemini account by entering your API key. You can obtain this key from the Google AI Studio by selecting ‘Get API Key’ in the sidebar.

Input the relevant prompt for generating questions, detailing job title, department, experience, and skills. Map the data fields from your Google Sheets to ensure dynamic content generation. Select the model version from the dropdown (e.g., 2.5 flash) and click ‘Save and Send’.

After successfully generating the questions, you can proceed to update your Google Sheets with the new data.


5. Updating Google Sheets with Generated Questions

To finalize the automation, you need to update your Google Sheets with the generated interview questions. Add another action step in Pabbly Connect and select Google Sheets again, this time choosing the ‘Update Cell Value’ option.

Connect your Google Sheets account again, and specify the spreadsheet and sheet name. For the range, enter the column and row index where the questions will be updated.

Set the column to where questions will be inserted (e.g., column F). Map the row index dynamically to ensure it updates correctly. Click ‘Save and Send Test Request’ to confirm the update.

After executing this step, you will see the generated interview questions populated in your Google Sheets, completing the automation process using Pabbly Connect.


Conclusion

In this tutorial, we explored how to automate the generation of interview questions using Pabbly Connect, Google Sheets, and AI tools. By following these steps, you can streamline your interview process and save valuable time. Automating with Pabbly Connect not only simplifies your workflow but also enhances efficiency in your hiring process.

Ensure you check out Pabbly Connect to create business automation workflows and reduce manual tasks. Pabbly Connect currently offer integration with 2,000+ applications.

Smart System That Works on Customer Reviews ⭐

Learn how to automate customer reviews using Pabbly Connect to integrate Google, Slack, and more for efficient management. Learn to create powerful connections between your critical applications without requiring specialized programming knowledge or extensive technical background.

Watch Step By Step Video Tutorial Below


1. Accessing Pabbly Connect for Automation

To create a smart system for managing customer reviews, first, you need to access Pabbly Connect. Open a new tab and visit Pabbly.com/connect. This platform enables seamless integration between various applications like Google, Slack, and more.

If you are a new user, click on the ‘Sign Up Free’ option to create your account. Existing users can simply sign in. Once logged in, navigate to the Pabbly Connect dashboard to start building your automation workflows.


2. Creating a New Workflow in Pabbly Connect

After accessing Pabbly Connect, click on the ‘Create Workflow’ button to initiate a new automation process. You will be prompted to select the workflow builder. Choose the new beta version for the best experience.

  • Enter a name for your workflow, such as ‘Smart System That Works on Customer Reviews’.
  • Select a folder for your workflow, e.g., ‘Publicly Connect’.
  • Click on the ‘Create’ button to finalize the setup.

Your workflow is now created. The next step is to set up a trigger that will initiate the automation whenever a customer submits a review.


3. Setting the Trigger with Typeform

In this section, you will set the trigger for your workflow using Typeform. Select Typeform as your trigger application and choose the event as ‘New Entry’. This means that every time a new review is submitted, the automation will be activated. using Pabbly Connect

Next, click on the ‘Connect’ button and create a new connection with Typeform by allowing necessary permissions. Once connected, select the specific form you created for customer feedback. Ensure you choose the response format that suits your needs, such as ‘Simple’ for easy readability.


4. Routing Customer Reviews Based on Ratings

To manage customer reviews effectively, you will use a router in Pabbly Connect. This allows you to direct feedback based on the rating provided by the customer. Click on the ‘+’ icon to add a router action.

  • Set up Route 1 for ratings greater than 3, which will trigger a post on your Facebook page.
  • Set up Route 2 for ratings less than 3, which will send a notification to your sales team via Slack.

For Route 1, select Facebook as the action application and choose ‘Create Page Post’ to share positive reviews. For Route 2, select Slack and choose ‘Send Channel Message’ to alert your team about negative feedback.


5. Testing Your Automation Workflow

Once you have set up the routing, it’s time to test your automation. Fill out the Typeform with various ratings to see how Pabbly Connect handles the responses. For a rating above 3, check your Facebook page for the new post.

For ratings below 3, verify that a message is sent to your Slack channel with all relevant customer details. This confirms that your workflow is functioning correctly and automating the process as intended.


Conclusion

Using Pabbly Connect, you can create a smart system that automates the management of customer reviews effectively. This integration allows you to streamline feedback handling and improve customer engagement.

Ensure you check out Pabbly Connect to create business automation workflows and reduce manual tasks. Pabbly Connect currently offer integration with 2,000+ applications.

Keep Your Google Business Profile Active Using WordPress Automation

Learn how to automate your Google Business Profile updates using Pabbly Connect and WordPress. Step-by-step tutorial for seamless integration. Build sophisticated automated workflows in less time than you think. This guide translates complex integrations into straightforward steps for immediate implementation.

Watch Step By Step Video Tutorial Below


1. Accessing Pabbly Connect for Google Business Automation

To keep your Google Business Profile active using Pabbly Connect, start by accessing the platform. Open a new tab and enter the URL Pabbly Connect at Pabbly.com/connect. This will take you to the Pabbly homepage where you can either sign in or sign up for free.

If you are new, click on the ‘Sign Up Free’ button to create an account. As an existing user, simply click ‘Sign In’. Once logged in, you will see the dashboard where you can create your automation workflow.


2. Creating a Workflow in Pabbly Connect

After logging into Pabbly Connect, click on the ‘Create Workflow’ button to begin. You will have the option to create from scratch or use AI. For this tutorial, select ‘Create from Scratch’ to build your workflow manually.

  • Select the newly launched beta workflow builder for a modern experience.
  • Name your workflow, such as ‘Keep Your Google Business Profile Updated Using WordPress Posts’.
  • Choose the folder for better organization, if needed.

Click ‘Create’ to proceed to the workflow page where you will set up your trigger. Remember, the trigger is the event that starts the automation process using Pabbly Connect.


3. Setting Up the Trigger for WordPress Posts

In this step, you will set the trigger app as WordPress. Search for WordPress in the trigger app section of Pabbly Connect and select it. Next, choose the event as ‘New Post Published’. This event will activate the workflow whenever a new post is published on your WordPress site.

Click on ‘Connect’ to generate the webhook URL necessary for the integration. Copy this URL as it will serve as a bridge between WordPress and Pabbly Connect.


4. Configuring WordPress to Send Data

Now, navigate to your WordPress dashboard. Go to Plugins and add a new plugin called WP Webhooks. Install and activate it. After activation, find the WP Webhooks settings in the sidebar. Here, you will set up the webhook URL you copied earlier.

  • Select ‘Send Data’ to configure the webhook.
  • Add the webhook URL and name it, for example, ‘My Business Webhook’.
  • Ensure the trigger is set to ‘Post Created’ and save your settings.

With this setup, every time a new post is published, WordPress will send the data to Pabbly Connect, triggering the next action.


5. Adding Posts to Google Business Profile

After configuring WordPress, return to Pabbly Connect to add the next action. Click on ‘Add New Action Step’ and search for Google Business Profile. Select it and choose the event as ‘Create Call to Action Post’. This will allow you to post updates directly to your Google Business Profile.

Connect your Google account by clicking ‘Connect’. Once connected, map the fields from the previous WordPress step to the Google Business Profile fields. For instance, map the post title and URL to the corresponding fields in Google Business.

After mapping the fields, click ‘Save and Send Test Request’. You will receive a positive response indicating that your WordPress post has been successfully added to your Google Business Profile, demonstrating the power of automation through Pabbly Connect.


Conclusion

In this tutorial, we explored how to keep your Google Business Profile active using Pabbly Connect and WordPress automation. By following the steps outlined, you can streamline your posting process and enhance your online presence effortlessly. Start using Pabbly Connect today to automate your business operations!

Ensure you check out Pabbly Connect to create business automation workflows and reduce manual tasks. Pabbly Connect currently offer integration with 2,000+ applications.

AI Sales Chatbot That Boosts Conversions by 10X

Learn how to create an AI Sales Chatbot that boosts conversions by 10X using Pabbly Chatflow. Follow this step-by-step tutorial for seamless integration. Implement professional chat automation that answers common questions, qualifies leads, and books appointments without human intervention.

Watch Step By Step Video Tutorial Below


1. Accessing Pabbly Chatflow for Your AI Sales Chatbot

To create an AI Sales Chatbot that boosts conversions by 10X, begin by accessing Pabbly Chatflow. Open a new tab and navigate to Pabbly.com/chatflow. This platform is essential for automating your WhatsApp messages and responses, ensuring your business can interact with users 24/7.

If you are new to Pabbly Chatflow, click on the ‘Sign Up Free’ option to get started. Existing users should click on ‘Sign In’. Once logged in, navigate to the dashboard and click on the ‘Access Now’ button under the Pabbly Chatflow section to manage your WhatsApp numbers.


2. Setting Up Your WhatsApp Number in Pabbly Chatflow

After accessing Pabbly Chatflow, you need to set up your WhatsApp number. Click on the ‘Plus Add WhatsApp Number’ button. You will be presented with two options: WhatsApp Connect and Manual Token Connect. Choose the method that suits your needs best.

  • Select WhatsApp Connect for a seamless integration.
  • Use Manual Token Connect if you have a specific token.

Once your WhatsApp number is added, you can proceed to create your AI assistant. This setup is crucial for ensuring that your chatbot can respond accurately to user queries through WhatsApp.


3. Creating Your AI Sales Chatbot in Pabbly Chatflow

Now it’s time to create your AI Sales Chatbot. In Pabbly Chatflow, click on the ‘AI Assistant’ button. This will take you to the AI assistant page where you can train your chatbot. Click on the ‘Plus AI Assistant’ button to start creating your assistant.

Enter a name for your AI assistant, such as ‘AI Sales Chatbot That Boosts Conversions by 10X’. Select the instruction type as ‘AI Agent C’ to define how the AI should behave. Adjust the temperature setting to control the creativity of responses, and select OpenAI as the model provider with GPT-4 Mini for enhanced performance.


4. Configuring AI Assistant Settings in Pabbly Chatflow

In this section, you will configure the settings for your AI assistant within Pabbly Chatflow. Start by setting a header message, which serves as a welcome greeting for users. You can also add a footer message for closing interactions. These messages enhance user experience during conversations.

  • Enable the header message toggle to send greetings.
  • Add a footer message for closing remarks or contact information.

Additionally, you can set retry attempts for responses and define a fallback message for instances when the AI cannot provide an answer. This ensures that your AI assistant remains effective and user-friendly.


5. Testing Your AI Sales Chatbot

After configuring your AI Sales Chatbot in Pabbly Chatflow, it’s crucial to test its functionality. Send a message to your newly created AI assistant, such as ‘Hello’. The assistant should respond with a greeting, confirming that it is operational.

Continue testing by asking specific questions like ‘Share me the available jobs’. The AI should provide tailored responses based on the knowledge base you set up earlier. This testing phase is vital to ensure that your assistant can handle user queries effectively and boost conversions.


Conclusion

In this tutorial, we explored how to create an AI Sales Chatbot that boosts conversions by 10X using Pabbly Chatflow. By following the precise steps outlined, you can set up an effective automated assistant for your business. Start leveraging this powerful tool today!

Ensure you check out Pabbly Connect to create business automation workflows and reduce manual tasks. Pabbly Connect currently offer integration with 2,000+ applications.

AI Assistant for Businesses: Automate Sales, Support & Follow-ups

Learn how to automate sales, support, and follow-ups using Pabbly Chatflow. Step-by-step tutorial for creating an AI assistant for your business. Master conversational marketing with practical techniques for creating chatbots that engage visitors at exactly the right moment in their journey.

Watch Step By Step Video Tutorial Below


1. Accessing Pabbly Chatflow for Your AI Assistant

To create an AI assistant for automating sales, support, and follow-ups, you must first access Pabbly Chatflow. Start by opening a new tab and typing in the URL: pabyt.com/chatflow. This will take you to the Pabbly Chatflow homepage.

Once on the homepage, you will see options to either sign in or sign up for free. New users can click on ‘Sign Up Free’ to create an account, while existing users should click ‘Sign In’. Signing up gives you access to 100 free credits every month to practice using Pabbly Chatflow.


2. Creating Your AI Assistant in Pabbly Chatflow

After signing in, navigate to the Pabbly Chatflow dashboard. Here, you can add your WhatsApp number by clicking on the ‘Add WhatsApp Number’ button. Choose between WhatsApp connect or manual token connect to integrate your WhatsApp number with Pabbly Chatflow.

  • Click on ‘AI Assistant’ in the sidebar.
  • Select ‘Add AI Assistant’ to create a new assistant.
  • Enter a name for your assistant, such as ‘AI Assistant for Businesses’.

Once you have named your assistant, click the ‘Add AI Assistant’ button. You will then be taken to the AI instructions tab, where you can choose your instruction type. Select ‘AI agent’ from the dropdown menu to begin configuring your assistant in Pabbly Chatflow.


3. Configuring AI Settings in Pabbly Chatflow

In the AI configuration section, you will set the temperature for your assistant. This temperature controls how creative or focused the responses will be. A temperature of 0.5 is recommended for a balanced approach. Next, select the AI model from the dropdown; choose ‘GPT-4 Mini’ for optimal performance.

Enter your OpenAI API key in the designated field. If you don’t have one, you can generate it from the OpenAI API key page. After entering the key, click on the ‘Connect’ button to save your settings. You should see a confirmation message indicating that the OpenAI key has been saved successfully in Pabbly Chatflow.

  • Enable or disable header and footer messages.
  • Set the number of retry attempts for failed responses.
  • Configure fallback messages for unresponsive scenarios.

After configuring these settings, you can proceed to upload your knowledge base, which will contain the information your AI assistant uses to respond to customer queries.


4. Uploading Your Knowledge Base in Pabbly Chatflow

To ensure your assistant can answer customer inquiries accurately, you need to upload a knowledge base file. This file can be in either .txt or .pdf format. Navigate to the knowledge source section in Pabbly Chatflow and click on the ‘Choose a file’ button.

Locate your knowledge base file on your computer and upload it. Once successfully uploaded, you will see a confirmation popup indicating the file has been added. This knowledge base will allow your AI assistant to provide accurate information regarding your business, such as products, shipping charges, and refund policies.


5. Enabling Your AI Assistant for Customer Interactions

After setting up your AI assistant and uploading the knowledge base, you can enable it for customer interactions. Go to the settings section and find the option for inbox settings. Here, enable the AI auto replies feature for all contacts or select specific contacts.

To enable the assistant for individual chats, navigate to your inbox, select a chat, and choose the AI assistant you want to enable. Click the ‘Save’ button to apply these changes. Your AI assistant is now live and ready to assist customers through WhatsApp, ensuring no manual effort is required in responding to inquiries.

With these steps completed, you have successfully created and enabled an AI assistant using Pabbly Chatflow that can automate sales, support, and follow-ups, enhancing your business efficiency.


Conclusion

In this tutorial, we explored how to create an AI assistant using Pabbly Chatflow. By following the steps outlined, you can automate sales, support, and follow-ups effectively. Start using Pabbly Chatflow today to enhance your customer interactions and streamline your business operations.

Ensure you check out Pabbly Connect to create business automation workflows and reduce manual tasks. Pabbly Connect currently offer integration with 2,000+ applications.

From Inquiry to Booking — Fully Automated WhatsApp Bot

Learn how to create a fully automated WhatsApp bot using Pabbly Chatflow and Pabbly Chatflow. Follow this detailed tutorial for seamless integration. Implement professional chat automation that answers common questions, qualifies leads, and books appointments without human intervention.

Watch Step By Step Video Tutorial Below


1. Accessing Pabbly Chatflow to Create Your WhatsApp Bot

To create a fully automated WhatsApp bot, you first need to access Pabbly Chatflow. Open a new tab and navigate to the official Pabbly Chatflow website. If you’re new, click on the ‘Sign Up Free’ option to create an account and receive 100 free credits every month. Existing users should click ‘Sign In’ to enter their accounts.

Once logged in, you will see all Pabbly applications. Click on the ‘Access Now’ button for Pabbly Chatflow. This will take you to the dashboard where you can manage your WhatsApp numbers and start creating your chatbot. Ensure you have connected your WhatsApp number to your Pabbly account for seamless operation.


2. Creating Your WhatsApp Bot Flow in Pabbly Chatflow

In Pabbly Chatflow, click on the ‘Flows’ option to access the flow builder. Here, you can create your WhatsApp chatbot using a no-code drag-and-drop interface. Start by clicking the ‘Add Flow’ button and name your flow, such as ‘From Inquiry to Booking Fully Automated WhatsApp Bot’.

  • Select the trigger event as a keyword input.
  • Enter keywords like ‘hi’ and ‘hello’ to initiate the conversation.
  • Add a media button to include an image related to your business.

After setting the trigger, proceed to add a welcome message that greets users and asks how they may be assisted. Include buttons for options such as ‘Book Appointment’, ‘Doctor’s Availability’, and ‘Contact Clinic’. This structure will guide users through their inquiries efficiently.


3. User Interaction Steps with Pabbly Chatflow

Once your bot is set up, it’s essential to define how users will interact with it. When a user clicks the ‘Book Appointment’ button, the bot should prompt them to select a service type. You can add a list button that includes various services like general physician, dentist, and dermatology. using Pabbly Connect

  • Ask the user for their full name.
  • Request the desired appointment date and time.
  • Confirm if it’s their first visit with quick reply buttons for ‘Yes’ and ‘No’.

These interaction steps create a smooth flow, ensuring users provide all necessary information for booking appointments. Each response can dynamically include user details, making the interaction personalized and efficient.


4. Finalizing Your WhatsApp Bot in Pabbly Chatflow

After setting up the user interaction steps, you’ll need to finalize your bot by saving the flow. Ensure all nodes are connected correctly to maintain the conversation flow. For instance, if a user selects ‘No’ to their first visit, the bot should request feedback from their last visit.

Once all steps are configured, click the ‘Save’ button to update your flow. This will ensure that your bot is ready to handle inquiries and bookings seamlessly. Remember, the integration of Pabbly Connect can be used to store user data in Google Sheets or other applications for further management.


5. Testing and Using Your Automated WhatsApp Bot

With your bot fully set up in Pabbly Chatflow, it’s time to test its functionality. Send a simple ‘Hi’ message to your WhatsApp business account to see how the bot responds. It should greet you and present the options you configured.

Make sure to check all functionalities, such as booking an appointment, checking doctor availability, and contacting the clinic. Each option should lead to the appropriate responses, ensuring a smooth user experience. If you encounter any issues, revisit the flow to make necessary adjustments.


Conclusion

Creating a fully automated WhatsApp bot using Pabbly Chatflow allows businesses to streamline their inquiry and booking processes. By following the detailed steps outlined, you can set up a bot that responds instantly to user inquiries, enhancing customer satisfaction and operational efficiency.

Ensure you check out Pabbly Connect to create business automation workflows and reduce manual tasks. Pabbly Connect currently offer integration with 2,000+ applications.

I Stopped Adding Products Manually on My E-commerce Platform 😱

Learn how to automate adding products to your e-commerce platform using Pabbly Connect. Follow this step-by-step tutorial for seamless integration with Google Sheets and WooCommerce.

Watch Step By Step Video Tutorial Below


1. Introduction to Pabbly Connect Automation

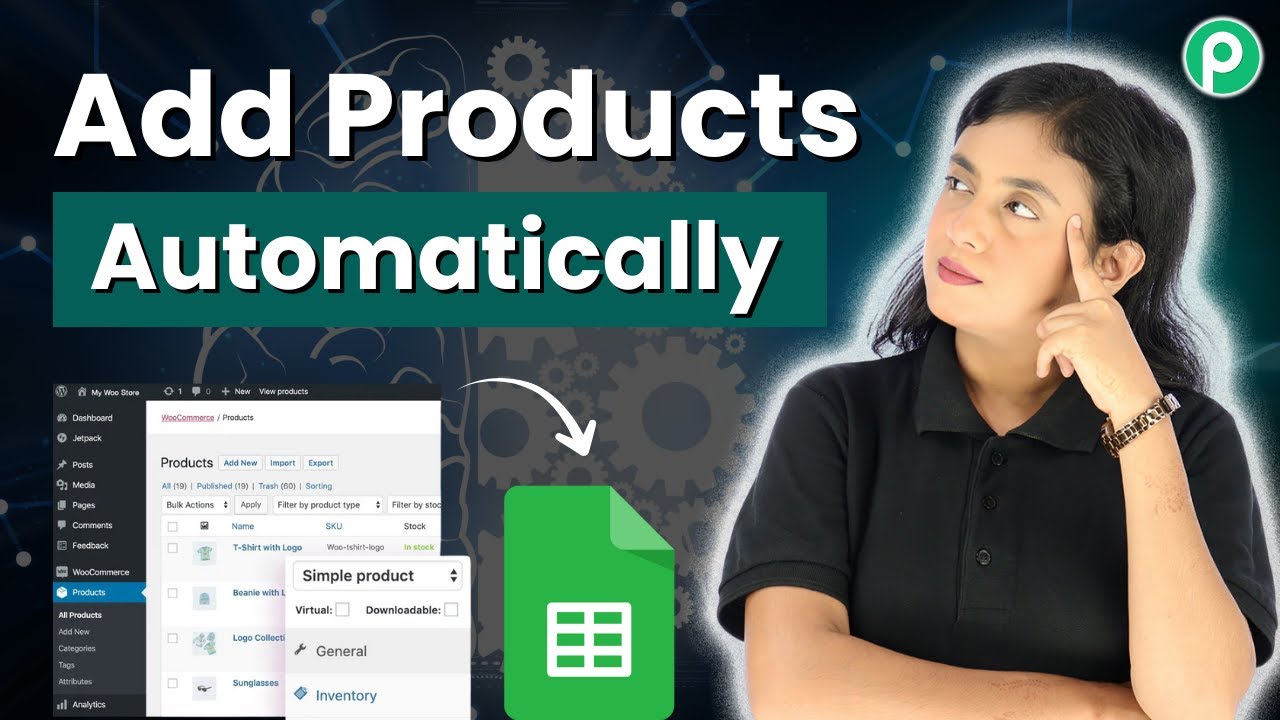
In this section, we introduce Pabbly Connect as the essential automation tool that simplifies the process of adding products to your e-commerce platform. By utilizing Pabbly Connect, you can eliminate the tedious manual entry of product details.

This automation connects Google Sheets, where all your product information is stored, to your e-commerce platform, enabling instant updates. With Pabbly Connect, you can set up workflows that automatically add products without any coding skills.


2. Setting Up Your Google Sheets for Automation

The first step in utilizing Pabbly Connect involves creating a Google Sheet that contains all your product details. This sheet will serve as the primary data source for your e-commerce platform. Ensure your sheet includes columns for product title, description, image URL, SKU, and pricing.

  • Product Title
  • Product Description
  • Image URL
  • SKU
  • Pricing Details

Once your Google Sheet is ready, you can proceed to connect it with Pabbly Connect, setting the stage for automated product addition to your e-commerce platform.


3. Connecting Google Sheets to Pabbly Connect

To establish a connection between Google Sheets and Pabbly Connect, sign in to your Pabbly Connect account and create a new workflow. Choose Google Sheets as the trigger app and select the event as ‘New Updated Spreadsheet Row’. This step enables Pabbly Connect to monitor your Google Sheet for any new product entries.

After selecting the trigger, Pabbly Connect will provide you with a webhook URL. Copy this URL and head back to your Google Sheet. Navigate to Extensions, then Add-ons, and search for ‘Pabbly Connect Webhooks’ to install it. This add-on allows your Google Sheets to communicate with Pabbly Connect.


4. Configuring the Webhook in Google Sheets

Once the Pabbly Connect Webhooks add-on is installed, refresh your Google Sheet and access the add-on from Extensions. Select ‘Pabbly Connect Webhooks’ and go to the initial setup. Here, paste the webhook URL you copied earlier and specify the trigger column, which is the final column where data is entered. using Pabbly Connect

After completing this setup, click the submit button. You will receive a confirmation that the setup was configured successfully. Make sure to enable the ‘Send on Event’ option in the Pabbly Connect Webhooks menu. This ensures that whenever you add a new product in your Google Sheet, it sends the data to Pabbly Connect automatically.


5. Adding Products to Your E-commerce Platform via Pabbly Connect

With the Google Sheets connected to Pabbly Connect, you can now add an action step to create a product in your e-commerce platform, such as WooCommerce. In your Pabbly Connect workflow, select WooCommerce as the action app and choose the event ‘Create Product’.

While configuring this action, you will need to map the product details from the previous steps, including the product title, SKU, and image URL. After mapping these details, click on the ‘Save and Send Test Request’ button to create the product. If successful, you will see the new product listed in your WooCommerce store.

This seamless integration between Google Sheets and your e-commerce platform using Pabbly Connect allows you to automate product additions efficiently, saving you time and effort.


Conclusion

In conclusion, using Pabbly Connect for automating product additions to your e-commerce platform significantly streamlines your workflow. By integrating Google Sheets with WooCommerce, you can easily manage your product listings without the hassle of manual data entry.

Ensure you check out Pabbly Connect to create business automation workflows and reduce manual tasks. Pabbly Connect currently offer integration with 2,000+ applications.