I Stopped Replying to Messages Forever (Here’s How)

Learn how to automate WhatsApp conversations using Pabbly Chatflow, Gmail, and YouTube with this detailed tutorial. Follow the steps to create your AI assistant. Discover how to design chat experiences that feel personal and responsive while handling customer inquiries automatically around the clock.

Watch Step By Step Video Tutorial Below


1. Accessing Pabbly Chatflow for Automation

To start automating your WhatsApp conversations, you first need to access Pabbly Chatflow. Open your browser and navigate to www.Pabbly.com/chatflow. If you’re a new user, click on ‘Sign up for free’ to get started with 100 tasks monthly.

Existing users can simply click on ‘Sign In’ located at the top right corner. After signing in, you will be directed to the Pabbly apps page. Click on the Pabbly Chatflow option to access your dashboard where you can manage your WhatsApp number and AI assistants.


2. Setting Up WhatsApp Integration with Pabbly Chatflow

Once you’re in the Pabbly Chatflow dashboard, the next step is to integrate your WhatsApp number. Click on the ‘Add WhatsApp Number’ button to connect your WhatsApp account. You can choose to connect using the preferred method or a manual token.

  • Click on ‘Connect’ to initiate the WhatsApp integration.
  • Follow the prompts to authenticate your WhatsApp account.
  • Ensure your WhatsApp number is successfully added to the Pabbly Chatflow account.

After successfully adding your WhatsApp number, you are ready to create your AI assistant that will handle conversations automatically.


3. Creating Your AI Assistant in Pabbly Chatflow

To create an AI assistant, click on the ‘AI Assistant’ option on the left sidebar of Pabbly Chatflow. Click on ‘Add AI Assistant’ and give it a name, such as ‘Herbal Business Assistant’. This assistant will respond to customer queries automatically.

In the setup form, select the instruction type as ‘AI agent’. You can customize the AI’s response style by adjusting the temperature setting; a lower value makes the AI more focused while a higher value allows for more creativity.

  • Set the AI model to GPT 5.2 and enter your OpenAI API key.
  • Add a fallback message to assist users when the AI cannot resolve their queries.
  • Upload a knowledge base document to guide the AI’s responses.

Once you have filled in all the necessary details, save your AI assistant settings to ensure it functions correctly.


4. Configuring AI Responses and Settings

Now that you have created your AI assistant in Pabbly Chatflow, the next step is to configure how it responds to user queries. Toggle the option to enable AI auto replies and select the assistant you created earlier.

You can also set specific keywords that will stop the AI from replying. This is useful for managing sensitive queries or when you want to pause the assistant’s responses.

Define a stop keyword that will halt the AI’s responses. Adjust retry attempts for API failures to ensure reliable communication. Customize the initial and footer messages to reflect your business identity.

After configuring these settings, save your changes to ensure your AI assistant operates as intended.


5. Testing Your AI Assistant on WhatsApp

With everything set up in Pabbly Chatflow, it’s time to test your AI assistant. Send a message through WhatsApp to see how the AI responds. For example, ask a question like, ‘Which product is best for improving immunity?’ and wait for the AI’s reply.

Monitor the responses to ensure that they are accurate and aligned with the knowledge base you provided. You can send multiple queries to evaluate the AI’s performance comprehensively.

Check if the AI provides consistent answers based on the knowledge base. Adjust the knowledge base if the responses are not satisfactory. Continuously refine the AI assistant for improved performance.

Once you are satisfied with the AI assistant’s performance, you can confidently use it for your business communications.


Conclusion

In this tutorial, we explored how to automate your WhatsApp conversations using Pabbly Chatflow. By creating an AI assistant, integrating WhatsApp, and configuring responses, you can enhance customer interaction and streamline your business operations.

Ensure you check out Pabbly Connect to create business automation workflows and reduce manual tasks. Pabbly Connect currently offer integration with 2,000+ applications.

NGOs Raising Donations Automatically with AI Assistant

Learn how to raise donations automatically for NGOs using Pabbly Chatflow and an AI assistant. Follow our detailed tutorial for seamless integration with YouTube and more.

Watch Step By Step Video Tutorial Below


1. Accessing Pabbly Chatflow for Your NGO

To raise donations automatically with Pabbly Chatflow, start by accessing the platform. Open a new tab and go to Pabbly Chatflow by entering Pabbly.com/chatflow. This automation tool is designed to facilitate seamless communication for NGOs.

Once on the Pabbly Chatflow page, you will see two options: ‘Sign In’ and ‘Sign Up Free’. If you are a new user, click on ‘Sign Up Free’ to create your account and receive 100 free credits each month. Existing users should click ‘Sign In’ to access their dashboard.


2. Creating Your AI Assistant in Pabbly Chatflow

After signing in, navigate to the Pabbly Chatflow dashboard and locate the ‘AI Assistant’ feature. Click on this feature to begin creating your automated assistant. This assistant will handle donor inquiries and provide instant responses. using Pabbly Connect

  • Click on the ‘+ Add AI Assistant’ button.
  • Enter a name for your assistant, such as ‘NGOs Raising Donations Automatically with AI Assistant’.
  • Select the instruction type as ‘AI Agent’.

Next, customize the assistant’s settings, including the temperature for creativity and the model provider as OpenAI. This setup is crucial for determining how the assistant will respond to donor inquiries.


3. Configuring AI Settings in Pabbly Chatflow

Once your AI assistant is created, you will need to configure several settings to ensure it operates effectively. The header message is the first interaction your users will have, so make it welcoming. For example, you can set the header message to ‘Welcome to Our Donation Assistant’. using Pabbly Connect

  • Add a footer message for closing interactions, such as ‘Thank you for your support!’.
  • Define stop keywords that will halt the AI’s responses when needed.
  • Upload a knowledge source file containing FAQs and donation information.

These configurations will help your AI assistant provide accurate and relevant responses to donor queries, improving the overall user experience.


4. Embedding Your AI Assistant in Pabbly Chatflow

After configuring your AI assistant, the next step is to embed it into your website or application. Click on the ‘Embed’ button to generate the code needed for integration. This code will allow your assistant to appear on your webpage, making it accessible to potential donors. using Pabbly Connect

Simply copy the generated code and paste it into the HTML of your website. This integration ensures that visitors can interact with your AI assistant directly, streamlining the donation process.


5. Finalizing Settings and Testing Your AI Assistant

To finalize your AI assistant setup, go to the ‘Settings’ option and enable the ‘AI Auto Reply’ feature. Select your contact list, ensuring that all contacts can access the assistant. Assign the assistant you created earlier to the contact list. using Pabbly Connect

Once everything is set up, test your AI assistant by sending a message to see how it responds. This testing phase is crucial to ensure that the assistant provides accurate information and improves donor engagement.


Conclusion

In conclusion, using Pabbly Chatflow to create an AI assistant can greatly enhance how NGOs raise donations automatically. By following these steps, you can ensure that your assistant is well-configured to provide instant replies to donor inquiries, making the donation process seamless and efficient.

Ensure you check out Pabbly Connect to create business automation workflows and reduce manual tasks. Pabbly Connect currently offer integration with 2,000+ applications.

How to Extract Key Data from Contracts Using AI

Learn how to extract key data from contracts using Pabbly Connect, Google Drive, and OpenAI, streamlining your contract management process efficiently. This comprehensive guide reveals exactly how to connect your applications and automate repetitive tasks — accessible for professionals of all technical backgrounds.

Watch Step By Step Video Tutorial Below


1. Setting Up Pabbly Connect for Contract Data Extraction

To start extracting key data from contracts using AI, you need to set up Pabbly Connect. First, log into your Pabbly Connect account or create a new account by visiting pabbl.com/connect. After signing up, you will have access to the workflow builder where you can create your automation.

Once on the dashboard, click on the ‘Create Workflow’ button. This action will take you to the workflow builder, which is essential for integrating various applications. Here, you will set up the trigger and action for the automation. The trigger will initiate the process when a new file is uploaded to a specific folder in Google Drive.


2. Triggering the Workflow with Google Drive

In the workflow builder of Pabbly Connect, the next step is to set up the trigger using Google Drive. Click on the ‘Add Trigger’ button and search for Google Drive. Select it and choose ‘New File in Specific Folder’ as the event. Then, click on ‘Connect’ to establish a connection between Google Drive and Pabbly Connect.

  • If you have an existing connection, select it; otherwise, create a new connection by signing in with your Google account.
  • Choose the folder where your contracts are stored, ensuring it is a sharable folder.
  • Set the polling time for checking new files; the default is 10 minutes.

After configuring these settings, click on ‘Save and Send Test Request’ to test the connection. This step will capture the most recent file uploaded in the specified folder, which is crucial for the next steps of your automation.


3. Extracting Data from Contracts Using OpenAI

After successfully setting up the trigger, the next step involves using OpenAI to extract key data from the uploaded contract. In Pabbly Connect, add a new action step and search for OpenAI. Select it and choose ‘Extract Content from PDF/Image’ as the event. Click ‘Connect’ to link OpenAI with Pabbly Connect.

To connect, you will need your OpenAI API key. If you don’t have one, you can create it from your OpenAI account. Once connected, you will need to input the URL of the uploaded contract. Use the mapping feature in Pabbly Connect to dynamically insert the URL from the previous step.

  • Enter a prompt to guide OpenAI on what data to extract, such as ‘Extract key contract details from a legal contract document.’
  • Make sure to choose the response format as advanced to capture structured data.

After setting this up, click on ‘Save and Send Test Request’ again to see if OpenAI successfully extracts the required details from the contract.


4. Adding Extracted Data to Google Sheets

The final step in this automation is to add the extracted data into Google Sheets. In your Pabbly Connect workflow, add another action step and search for Google Sheets. Select ‘Add New Row’ as the event and click ‘Connect’ to link Google Sheets with Pabbly Connect.

Once connected, select the spreadsheet where you want to store the extracted data. You will need to map the fields from the OpenAI response to the corresponding columns in your Google Sheets. Make sure to map each detail accurately to ensure the data is organized correctly.

Map fields such as contract type, parties involved, start date, and payment terms. After mapping, click on ‘Save and Send Test Request’ to confirm the data is added to your Google Sheets.

Check your Google Sheets to verify that the details have been added correctly. This integration will now run in the background, automatically updating your sheets whenever a new contract is uploaded to Google Drive.


5. Conclusion

By using Pabbly Connect, you can effortlessly automate the extraction of key data from contracts, saving time and reducing human error. This integration allows you to streamline your contract management process with minimal effort.

Ensure you check out Pabbly Connect to create business automation workflows and reduce manual tasks. Pabbly Connect currently offer integration with 2,000+ applications.

Now, with the steps outlined, you can implement this automation for your business, ensuring that all key contract data is captured and organized efficiently. Enjoy the benefits of automation with Pabbly Connect!

I Turned Pinterest Pins into Viral Facebook Posts (Automatically)

Learn how to automate the process of sharing Pinterest pins as Facebook posts using Pabbly Connect. Step-by-step guide with detailed instructions. Learn to create powerful connections between your critical applications without requiring specialized programming knowledge or extensive technical background.

Watch Step By Step Video Tutorial Below


1. Accessing Pabbly Connect for Automation

To automate the process of sharing Pinterest pins as Facebook posts, you first need to access Pabbly Connect. Simply visit the Pabbly website by typing pabby.com in your browser. If you are an existing user, click on the ‘Sign In’ button located at the top right corner. New users can sign up for free and get 100 tasks monthly to test the platform.

Once logged in, navigate to the dashboard where you can manage your workflows. Click on the Pabbly Connect application to begin setting up your automation. This platform allows you to integrate various applications seamlessly, enabling you to create workflows that connect Pinterest and Facebook.


2. Creating Your Workflow in Pabbly Connect

After accessing Pabbly Connect, click on the ‘Create Workflow’ button to start building your automation. Select the ‘New Beta’ workflow builder option for a more modern experience. Name your workflow, for example, ‘I Turned Pinterest Pins into Viral Facebook Posts Automatically’ and choose a folder to save it.

  • Select the trigger application as Pinterest.
  • Choose ‘New Pin’ as the trigger event.
  • Connect your Pinterest account to Pabbly Connect.

Once the connection is established, you can test the trigger by creating a new pin on Pinterest. This step is crucial as it enables Pabbly Connect to capture the necessary data for your Facebook post.


3. Setting Up Facebook Integration via Pabbly Connect

With your Pinterest trigger set, the next step is to connect Facebook to Pabbly Connect. Click on the ‘Add New Action Step’ and search for Facebook Pages. Select ‘Create Page Post’ as your action event. This will allow Pabbly Connect to post directly to your Facebook page whenever a new pin is created.

After connecting your Facebook account, choose the page where you want the posts to appear. You can map the content from your Pinterest pin, such as the title and description, directly into the Facebook post fields. This mapping ensures that each new pin will create a corresponding post on Facebook.


4. Testing and Finalizing Your Workflow

Once you have set up the connections, it’s time to test your workflow. Click on ‘Save and Send Test Request’ in Pabbly Connect. This action will simulate the process by taking the data from the new Pinterest pin and attempting to create a Facebook post with it. Check the Facebook page to confirm that the post has been created successfully.

If the test is successful and the post appears on Facebook, your workflow is complete. You can adjust the trigger settings to check for new pins at your preferred interval, such as every 90 minutes. This flexibility allows Pabbly Connect to efficiently monitor your Pinterest account for new content.


5. Conclusion: Automate with Pabbly Connect

By following these steps, you can successfully automate the sharing of Pinterest pins as Facebook posts using Pabbly Connect. This integration not only saves time but also ensures that your content reaches a wider audience across platforms. With Pabbly Connect, you can create powerful workflows that enhance your social media strategy effortlessly.

Ensure you check out Pabbly Connect to create business automation workflows and reduce manual tasks. Pabbly Connect currently offer integration with 2,000+ applications.

Start using Pabbly Connect today to streamline your social media automation and maximize your engagement on both Pinterest and Facebook.

How to Create Avaza Contacts from Facebook Leads

Learn how to automate the creation of Avaza contacts from Facebook Leads using Pabbly Connect. Follow this step-by-step tutorial for seamless integration. Implement the precise methodologies leading organizations use to automate repetitive tasks, illustrated with practical examples designed for immediate application.

Watch Step By Step Video Tutorial Below


1. Accessing Pabbly Connect for Integration

To create contacts in Avaza from Facebook Leads, you will first need to access Pabbly Connect. Start by visiting the Pabbly Connect website and logging in or signing up for a free account. Signing up grants you 100 free tasks, allowing you to test this automation seamlessly.

Once logged in, navigate to the Pabbly Connect dashboard. Here, you will find the option to create a new workflow. Click on the ‘Create Workflow’ button to initiate the integration process, setting the stage for your Facebook Leads to be captured automatically in Avaza.


2. Creating a Workflow to Capture Facebook Leads

In your Pabbly Connect dashboard, select the option to create a new workflow. Name your workflow something like ‘Create Avaza Contacts from Facebook Leads’ to keep it organized. This workflow will handle the automation of adding new leads from Facebook directly into your Avaza account.

  • Click on ‘Create Workflow’
  • Name your workflow
  • Select ‘Facebook Lead Ads’ as the trigger application
  • Choose ‘New Lead’ as the trigger event

After setting the trigger, you will be prompted to connect your Facebook account. This connection allows Pabbly Connect to monitor your Facebook Lead Ads for new leads, ensuring they are captured as soon as they are generated.


3. Configuring Facebook Leads in Pabbly Connect

Once your workflow is created, the next step is to configure the Facebook Leads integration. Click on the ‘Connect with Facebook Lead Ads’ button to authorize Pabbly Connect to access your Facebook account. This step is crucial as it allows the automation to function without manual input.

After authorization, select the Facebook page and the lead form you are using for your ads. This ensures that Pabbly Connect captures the correct data from your leads. Click ‘Save and Send Test Request’ to verify that the connection is successful and that the leads can be retrieved.


4. Creating Contacts in Avaza Through Pabbly Connect

With the Facebook Leads successfully configured, the next step is to create a contact in Avaza. Add an action step in your workflow and select Avaza as the action application. Choose the ‘Create Contact’ event to specify that you want to add new leads as contacts in your Avaza account.

To establish this connection, you will need to enter your Avaza access token. Navigate to your Avaza account settings, generate a new personal access token, and paste it into Pabbly Connect. This token allows Pabbly Connect to securely communicate with your Avaza account.

  • Enter the access token from Avaza
  • Map the lead’s first name, last name, email, and phone number to the respective fields
  • Choose to update existing contacts if the email already exists

After mapping the fields, test the action step to ensure that the contact is created successfully in Avaza. Refresh your Avaza contacts page to see the new lead added automatically.


5. Conclusion: Automate Your Leads with Pabbly Connect

By following these steps, you can easily automate the process of creating contacts in Avaza from Facebook Leads using Pabbly Connect. This automation saves time and eliminates manual data entry, allowing your team to focus on converting leads into customers.

Ensure you check out Pabbly Connect to create business automation workflows and reduce manual tasks. Pabbly Connect currently offer integration with 2,000+ applications.

Whenever a new lead is generated through Facebook, it will automatically be added as a contact in your Avaza account, streamlining your workflow and enhancing productivity. Start using Pabbly Connect today to simplify your integrations and automate your business processes!


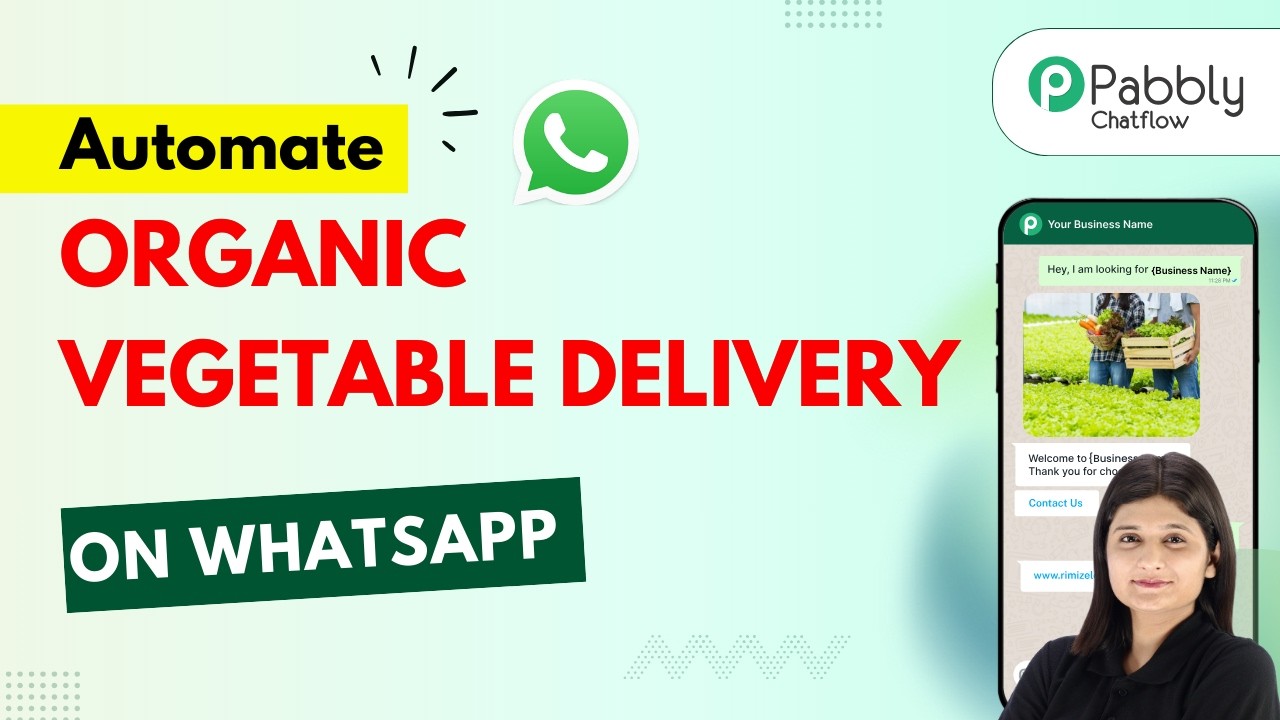
WhatsApp Chatbot for Organic Vegetable Delivery Business

Learn how to create a WhatsApp chatbot for your organic vegetable delivery business using Pabbly Chatflow. Follow this step-by-step guide to automate your customer interactions.

Watch Step By Step Video Tutorial Below


1. Accessing Pabbly Chatflow for Your WhatsApp Chatbot

To create a WhatsApp chatbot for your organic vegetable delivery business, you first need to access Pabbly Chatflow. Start by navigating to the Pabbly Chatflow website by entering www.Pabbly.com/chatflow in your browser. Once there, you can sign in or sign up for a free account to begin your journey.

If you are a new user, click on ‘Sign up for free’ to get started with 100 free tasks monthly. Existing users should click ‘Sign in’ to access their accounts. After logging in, you will be directed to the Pabbly applications dashboard where you can select Pabbly Chatflow to proceed.


2. Connecting Your WhatsApp to Pabbly Chatflow

After accessing Pabbly Chatflow, the next step is to connect your WhatsApp number. This is crucial for your chatbot to interact with customers. On the dashboard, you will see an option to ‘Add WhatsApp Number’. Click on this to initiate the connection.

  • Select ‘Connect to WhatsApp’ to link your WhatsApp account.
  • Alternatively, use a manual token if preferred.
  • Follow the detailed video instructions provided in the description for assistance.

Once your WhatsApp is connected through Pabbly Chatflow, you can begin creating your AI assistant that will manage customer queries seamlessly.


3. Creating Your AI Assistant in Pabbly Chatflow

To create an AI assistant for your organic vegetable delivery business, navigate to the AI Assistant section within Pabbly Chatflow. Click on ‘Create New AI Assistant’ and name it appropriately, such as ‘Organic Vegetable Delivery Assistant’. This will help in organizing your chatbot effectively.

Next, you will need to fill out various sections including AI instructions, knowledge sources, and assistant interface settings. The key here is to provide detailed knowledge about your business, including:

  • Farming and quality practices
  • Vegetable availability and pricing structure
  • Ordering process and delivery details

Once you have entered all necessary information, ensure to save your settings. This is how Pabbly Chatflow allows you to create a tailored experience for your customers through your AI assistant.


4. Assigning Your AI Assistant to WhatsApp Chats

After creating your AI assistant, the next step is to assign it to your WhatsApp chats. In Pabbly Chatflow, navigate to the inbox settings. Here, you can enable AI auto-replies for specific chats or groups.

To do this, toggle on the ‘Enable AI Auto Replies’ option and select the AI assistant you created. You can assign it to all contacts or specific groups. This feature automates responses, ensuring that customer inquiries are handled promptly and efficiently.

By utilizing Pabbly Chatflow, you streamline communication and enhance customer satisfaction, making it easier for your organic vegetable delivery business to manage interactions.


5. Testing Your WhatsApp Chatbot

Once you have set up your WhatsApp chatbot using Pabbly Chatflow, it is essential to test its functionality. Open your WhatsApp and send a message to your chatbot, such as asking if the vegetables are organic. If configured correctly, you should receive an automated response confirming the organic nature of the vegetables.

Continue testing by asking various questions related to your business, such as whether the vegetables are washed before delivery or their suitability for diabetic patients. The AI assistant should respond accurately based on the knowledge base you provided.

This testing phase is crucial to ensure that your AI assistant is functioning as intended within Pabbly Chatflow. Make adjustments as necessary to improve responses and enhance customer interaction.


Conclusion

In this tutorial, we explored how to create a WhatsApp chatbot for your organic vegetable delivery business using Pabbly Chatflow. By following the steps outlined, you can automate customer interactions, ensuring efficient communication and improved customer satisfaction in your business.

Ensure you check out Pabbly Connect to create business automation workflows and reduce manual tasks. Pabbly Connect currently offer integration with 2,000+ applications.

WhatsApp AI Assistant Ready in Minutes

Learn how to set up a WhatsApp AI Assistant using Pabbly Chatflow in just minutes. Follow this detailed step-by-step tutorial for seamless integration. Discover practical methods for designing chat sequences that capture leads, answer questions, and guide users to the next step in your funnel.

Watch Step By Step Video Tutorial Below


1. Accessing Pabbly Chatflow for WhatsApp Integration

To create your WhatsApp AI Assistant, the first step is to access Pabbly Chatflow. You can do this by searching for Pabbly.com in your browser. Once on the homepage, you will see options to either sign in or sign up for a free trial.

If you are a new user, click on the ‘Sign Up Free’ button. Existing users can simply sign in. After logging in, you will be directed to the dashboard where you can access all Pabbly applications.


2. Creating Your AI Assistant with Pabbly Chatflow

Once you are on the Pabbly Chatflow dashboard, the next step is to create your AI Assistant. Click on the ‘Create New Assistant’ button. You will need to provide a name for your assistant and select the type of assistant you want to create. using Pabbly Connect

  • Select ‘AI Agent’ for a fully automated response system.
  • Choose ‘Customer Support Agent’ for handling customer queries.
  • Opt for ‘Sales Agent’ if you’re looking to manage sales inquiries.

After selecting the type, click on the ‘Set’ button to proceed. This will direct you to the flow window where you can configure your assistant’s settings.


3. Configuring AI Settings in Pabbly Chatflow

In the flow window, you will find various settings to configure your AI Assistant. Start by selecting the instruction type from the dropdown menu. Choose ‘Custom Prompt’ to add your unique instructions. using Pabbly Connect

Next, you can adjust the AI temperature setting, which determines the creativity of the responses. A lower temperature will yield more focused answers, while a higher temperature allows for more creative responses. Set this according to your preference.

  • Set the temperature to 0.4 for focused answers.
  • Select your AI model, such as GPT-5 Mini, from the dropdown.

Finally, you will need to input your API key from your OpenAI account to enable the assistant to function properly. Click on the ‘Connect’ button to save your settings.


4. Finalizing Your WhatsApp AI Assistant

After configuring your assistant, it’s time to finalize it. You can add a header message that will greet users when they initiate a chat. Customize the initial message to guide users on how to interact with the assistant. using Pabbly Connect

You can also style your assistant by selecting different themes and colors to match your brand. Once you are satisfied with the setup, click on the ‘Save’ button to store all your configurations.

Ensure to enable the assistant by clicking the ‘Activate’ button. You can embed the assistant on your website using the provided code.

This will allow your assistant to start responding to queries on WhatsApp effectively.


5. Assigning Your Assistant to WhatsApp Chats

The final step in this process is to assign your AI Assistant to your WhatsApp chats. Navigate to the inbox settings within Pabbly Chatflow. Here, you can select the contacts or groups to which you want to assign the assistant. using Pabbly Connect

Once you’ve selected the desired contacts, click on the ‘Save’ button. Your assistant is now assigned and will automatically respond to messages sent to those contacts on WhatsApp.

Remember, you can also assign the assistant to individual chats by selecting the specific chat and enabling the assistant for that conversation.


Conclusion

Setting up a WhatsApp AI Assistant using Pabbly Chatflow is a straightforward process that can enhance your business communication. With just a few steps, you can automate responses and improve customer engagement.

Ensure you check out Pabbly Connect to create business automation workflows and reduce manual tasks. Pabbly Connect currently offer integration with 2,000+ applications.

How to Connect Facebook Lead Ads to Google Sheets Automatically

Learn how to automate the integration of Facebook Lead Ads with Google Sheets using Pabbly Connect. Follow this step-by-step tutorial for seamless data management. Eliminate manual repetitive tasks from your workflow. Discover proven automation methods with intuitive steps designed for efficiency-minded professionals.

Watch Step By Step Video Tutorial Below


1. Accessing Pabbly Connect for Automation

To connect Facebook Lead Ads to Google Sheets, you first need to access Pabbly Connect. If you are an existing user, simply open your workflow. New users should visit pabbl.com/connect to sign up for free. This allows you to explore Pabbly Connect with 100 free tasks monthly.

Once signed up, you can utilize the powerful automation features of Pabbly Connect. This is essential for ensuring that every lead generated through Facebook is efficiently captured in Google Sheets without manual intervention.


2. Creating Your Workflow in Pabbly Connect

After accessing Pabbly Connect, navigate to the workflow builder. Here, you will set up a trigger and an action. The trigger will be the event that starts the automation, while the action will define what happens next.

  • Click on the ‘Add Trigger’ button.
  • Search for ‘Facebook Lead Ads’ and select it.
  • Choose ‘New Lead Instant’ as the event and click ‘Connect’.

Once connected, ensure your Facebook account is logged in to facilitate the connection. This step is crucial as it allows Pabbly Connect to fetch leads directly from your Facebook Lead Ads.


3. Capturing Test Leads from Facebook

To test the integration, you will need to create a test lead using the Facebook Lead Ads testing tool. This tool allows you to simulate a lead submission to ensure that Pabbly Connect captures the data correctly.

  • Select your Facebook page and the lead form you are using.
  • Fill in the required details such as name, phone number, and email.
  • Submit the form to generate a test lead.

After submission, return to Pabbly Connect to see if the lead details have been captured. This confirms that your connection is functioning properly, and you can proceed to the next steps.


4. Adding Google Sheets as an Action Step

Next, you will add Google Sheets as the action step in your workflow. This is where the captured lead information will be stored. In Pabbly Connect, click on ‘Add New Action Step’ and select Google Sheets.

Choose ‘Add New Row’ as the event. Connect to your Google account by signing in. Select the spreadsheet and the specific sheet where you want to store the leads.

Mapping the lead details from Facebook to Google Sheets is essential. Use the mapping feature in Pabbly Connect to ensure that each lead’s information is dynamically inserted into the correct fields in your spreadsheet.


5. Finalizing and Testing Your Automation

After setting up the action step, it’s time to finalize your automation. Click on ‘Save and Send Test Request’ in Pabbly Connect to check if the lead details are successfully added to Google Sheets. This step is crucial to ensure everything works as intended.

If the test is successful, your automation is now ready to go live. From now on, every new lead generated from your Facebook ads will automatically populate in your Google Sheets, allowing for efficient data management and follow-up.

With this setup, Pabbly Connect streamlines your lead management process, ensuring that no leads are missed and all information is centralized for your team to access easily.


Conclusion

In this tutorial, we explored how to connect Facebook Lead Ads to Google Sheets automatically using Pabbly Connect. This integration allows for efficient lead management, ensuring that every new lead is captured seamlessly. By following these steps, you can enhance your business operations and focus on converting leads into clients.

Ensure you check out Pabbly Connect to create business automation workflows and reduce manual tasks. Pabbly Connect currently offer integration with 2,000+ applications.

Auto Send Confirmation Email on Form Submission (Step-by-Step Tutorial)

Learn how to automate sending confirmation emails upon form submission using Pabbly Connect in this step-by-step tutorial. Revolutionize your productivity approach with just a few strategic clicks. Uncover professional methods for connecting applications and creating workflows that reclaim hours of your week.

Watch Step By Step Video Tutorial Below


1. Setting Up Pabbly Connect for Email Automation

To automate the process of sending confirmation emails upon form submission, we will use Pabbly Connect. Start by visiting the Pabbly Connect website and signing up for a free account, which allows you to create workflows with up to 100 tasks per month. After signing up, log into your Pabbly Connect account.

Once logged in, you will see the dashboard where you can create new workflows. Click on the option to create a new workflow and select the modern version. Name your workflow as ‘Auto Send Email Confirmation on Form Submission’ to keep it organized.


2. Creating the Trigger with Google Forms

In this step, we will set up Google Forms as the trigger application using Pabbly Connect. A trigger is the event that starts the workflow, which in this case is a new response received from Google Forms. Select Google Forms as your trigger application and choose the event ‘New Response Received’.

  • Select Google Forms as the trigger application.
  • Choose the event ‘New Response Received’.
  • Connect your Google account to allow Pabbly Connect to access the form responses.

After connecting, you will be provided with a webhook URL. This URL will be used to send data from Google Forms to Pabbly Connect. Make sure to copy this URL for later use.


3. Configuring Google Forms for Webhook Integration

Next, we need to configure Google Forms to send responses to the webhook URL provided by Pabbly Connect. Open your Google Form and navigate to the ‘Responses’ section. Click on the ‘View in Sheets’ option to create a Google Sheet that will collect all form responses.

In the newly created Google Sheet, go to the ‘Extensions’ menu, select ‘Add-ons’, and search for ‘Pabbly Connect Webhooks’. Install it if you haven’t already. Once installed, go back to the Extensions menu, choose ‘Pabbly Connect Webhooks’, and select ‘Initial Setup’. Here, paste the webhook URL you copied earlier and set the trigger column to the last column of your Google Sheet.


4. Setting Up the Action to Send Emails via Gmail

Now that we have the trigger set up, we will proceed to set up the action using Gmail as the action application in Pabbly Connect. Select Gmail as your action app and choose the event ‘Send Email’. This action will send an email automatically whenever a new response is received.

  • Connect your Gmail account to Pabbly Connect.
  • Fill in the sender name and recipient’s email address, using mapping for dynamic fields.
  • Create the email subject and body, incorporating dynamic data from the form responses.

After mapping all the necessary fields, save the configuration and send a test email to ensure everything is working correctly. You should see the confirmation email arrive in the designated Gmail inbox.


5. Testing the Integration and Conclusion

To test the integration, go back to your Google Form and submit a test response. Once submitted, check your Gmail account to see if the confirmation email has been received. This step ensures that the entire workflow is functioning as intended through Pabbly Connect.

If the email is received successfully, congratulations! You have successfully set up an automated email confirmation system using Pabbly Connect. This not only saves time but also enhances customer experience by providing instant feedback on form submissions.


Conclusion

In this tutorial, we demonstrated how to use Pabbly Connect to automate the sending of confirmation emails upon form submission. This integration between Google Forms and Gmail streamlines the process, ensuring that customers receive immediate responses to their inquiries. By following these steps, you can enhance your business’s efficiency and improve customer satisfaction.

Ensure you check out Pabbly Connect to create business automation workflows and reduce manual tasks. Pabbly Connect currently offer integration with 2,000+ applications.

How to Auto-Generate Professional Posts Using an AI Agent

Learn how to use Pabbly Connect to automate the generation of professional LinkedIn posts using AI tools. Step-by-step tutorial for seamless integration. Discover how to seamlessly connect your essential tools through accessible instructions that make powerful automation available to professionals at every skill level.

Watch Step By Step Video Tutorial Below


1. Accessing Pabbly Connect for Automation

To start using Pabbly Connect for auto-generating professional posts, first, access the platform by visiting Pabbly Connect at Pabbly.com/connect. Here, you can either sign in or create a free account.

New users can click on the ‘Sign Up Free’ option to explore the software. Existing users should simply log in. Pabbly Connect allows you to automate tasks effectively, making it a powerful tool for your LinkedIn posting strategy.


2. Creating a New Workflow in Pabbly Connect

Once logged into Pabbly Connect, navigate to create a new workflow. Click on the ‘Create Workflow’ button, where you will be prompted to name your workflow. For this tutorial, name it ‘Auto Generate Professional Posts Using AI Agent’.

  • Select your desired folder for organization.
  • Choose between the Beta or Classic version for workflow creation.

After naming your workflow, click on the ‘Create’ button. This sets up the foundation for your automation process using Pabbly Connect.


3. Setting Up the Trigger for Daily Posts

The next step involves setting up a trigger. In Pabbly Connect, triggers initiate the automation process. For this task, select the ‘Schedule’ feature to run your automation daily at a specified time.

Configure the trigger by selecting the frequency (every day) and the specific time (12 PM). Click ‘Save’ to confirm the scheduled trigger. This will ensure your workflow runs at your desired time every day.


4. Generating Content Using AI Tools

After setting the trigger, the next action is to generate content using an AI tool. In your workflow, add an action step and select your AI application, such as Gemini or OpenAI, to generate professional content for LinkedIn posts.

  • Choose the ‘Generate Content’ action from the AI tool.
  • Input the prompt for the AI to generate relevant content.

Once the content is generated, you can proceed to share it on LinkedIn, thus completing the automation process facilitated by Pabbly Connect.


5. Posting Automatically on LinkedIn

The final action in your workflow is to post the generated content on LinkedIn. Add another action step in Pabbly Connect and select LinkedIn as your application.

Choose the action event as ‘Share Simple Text’, and map the generated content from the previous step. After setting up the connection with your LinkedIn account, click ‘Save’ to finalize the posting action. Your automation is now complete!


Conclusion

In this tutorial, we explored how to use Pabbly Connect to automate the generation and posting of professional content on LinkedIn. By following these steps, you can streamline your posting process and maintain consistency effortlessly.

Ensure you check out Pabbly Connect to create business automation workflows and reduce manual tasks. Pabbly Connect currently offer integration with 2,000+ applications.