Automate Customer Feedback Collection Using Pabbly Chatflow and WhatsApp

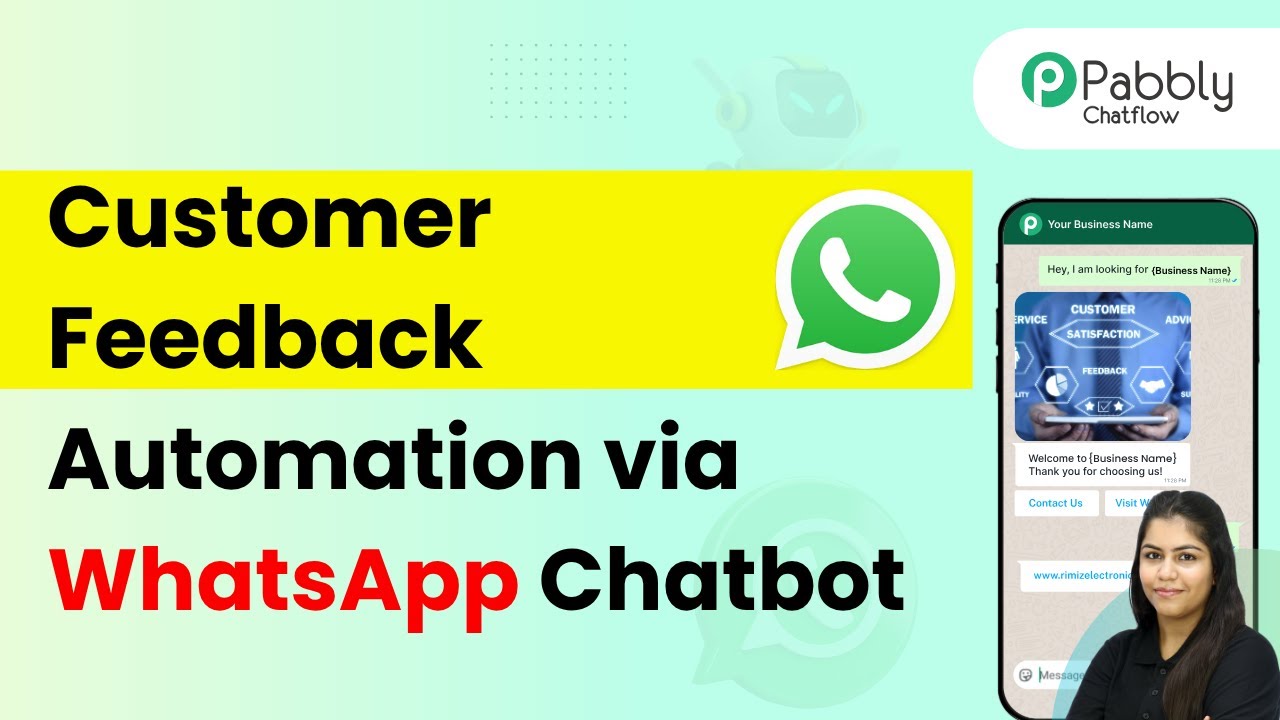
Learn how to automate customer feedback collection using Pabbly Chatflow and WhatsApp. Follow our step-by-step guide to streamline your feedback process. Explore how leading businesses automate customer interactions with carefully designed chat sequences that feel natural and helpful.

Watch Step By Step Video Tutorial Below


1. Introduction to Pabbly Chatflow for Feedback Collection

In this tutorial, we will explore how to use Pabbly Chatflow to automate customer feedback collection via WhatsApp. Manually collecting feedback can be tedious and time-consuming; thus, automating this process can save valuable time and resources. With Pabbly Chatflow, you can create a WhatsApp chatbot that gathers feedback efficiently.

To get started, you need to have a Pabbly Chatflow account. Once logged in, you can create a WhatsApp chatbot that interacts with your customers. This chatbot will send automated responses and collect feedback seamlessly. Let’s dive into the steps required to set this up.


2. Setting Up Your WhatsApp Chatbot with Pabbly Chatflow

The first step in creating your WhatsApp chatbot is to add your WhatsApp number to Pabbly Chatflow. Navigate to the dashboard and look for the ‘Add WhatsApp Number’ button. You will have two options: WhatsApp Connect and Manual Token Connect. Select your preferred method to integrate your WhatsApp account.

After adding your WhatsApp number, follow these steps to create your chatbot:

  • Access the Flow Builder in Pabbly Chatflow.
  • Click on ‘Add Flow’ and name it as ‘WhatsApp Chatbot for Feedback Collection’.
  • Select the trigger event as ‘Keyword/Regex Match’ and set your keywords (e.g., ‘review feedback’).

With these steps completed, you have set the foundation for your WhatsApp chatbot using Pabbly Chatflow. Next, you will define the actions that the bot will take when a user sends a keyword.


3. Defining Actions for Customer Feedback Collection

Once the trigger is set, the next step is to define how the chatbot will interact with the user. You will need to ask for the customer’s full name, rating, and additional comments. To do this, drag the ‘Ask Question’ action into your flow.

Here’s how to set up the actions in Pabbly Chatflow:

  • First, ask for the full name and store it in a contact custom field.
  • Next, ask for the customer’s overall experience rating (e.g., good, average, poor).
  • Finally, request additional comments from the user.

By structuring these questions, your WhatsApp chatbot will effectively gather customer feedback. Each response will be saved in the respective fields, allowing for easy access and analysis later on.


4. Integrating Google Sheets with Pabbly Connect

To store the feedback collected through your WhatsApp chatbot, you will integrate Pabbly Connect with Google Sheets. This integration will automate the process of adding feedback to your spreadsheet in real-time.

Follow these steps to set up the integration:

In Pabbly Chatflow, add an API request after the feedback collection steps. Select ‘POST’ as the request type and enter the webhook URL provided by Pabbly Connect. Map the fields (name, rating, comments) to their respective contact custom fields.

This integration ensures that every piece of feedback is automatically logged into your Google Sheets, making it easy for your team to review and analyze customer responses.


5. Testing and Launching Your WhatsApp Chatbot

After setting up the chatbot and integrating it with Google Sheets, it’s time to test the entire flow. Send a message with the keyword you defined earlier (e.g., ‘review’) to your WhatsApp number. The chatbot should respond by asking for the customer’s name, rating, and comments.

Once the feedback is collected, check your Google Sheets to confirm that the details were added successfully. This testing phase is crucial to ensure that your Pabbly Chatflow setup is functioning as intended.

Finally, once testing is complete and everything is working smoothly, you can officially launch your WhatsApp chatbot for customer feedback collection. This automation will save you time and enhance your customer interaction experience.


Conclusion

In conclusion, using Pabbly Chatflow to automate customer feedback collection via WhatsApp streamlines the process significantly. By implementing the steps outlined in this tutorial, you can enhance customer engagement and efficiently gather valuable insights. Start using Pabbly Connect and Pabbly Chatflow today to transform your feedback collection process!

Ensure you check out Pabbly Connect to create business automation workflows and reduce manual tasks. Pabbly Connect currently offer integration with 2,000+ applications.

How to Notify Admin via Gmail When Facebook Lead Fills Form Using Pabbly Connect

Learn how to integrate Gmail and Facebook Lead Ads using Pabbly Connect to notify admins whenever a new lead is received. Follow our step-by-step guide!

Watch Step By Step Video Tutorial Below


1. Accessing Pabbly Connect for Integration

To notify your admin via Gmail when a Facebook lead fills out a form, you first need to access Pabbly Connect. Open your browser and go to Pabbly.com/connect. This tool allows you to automate tasks without coding.

Once on the Pabbly Connect landing page, you can either sign in if you’re an existing user or sign up for free to explore its features. After signing in, navigate to the Pabbly Connect dashboard to begin creating your workflow.


2. Creating a New Workflow in Pabbly Connect

In the Pabbly Connect dashboard, click on the ‘Create Workflow’ button to start. You will be prompted to choose between the new or classic workflow builder. Select the new one for a more modern experience. using Pabbly Connect

  • Click on ‘Create’ after naming your workflow.
  • This opens the workflow window where you can set up triggers and actions.
  • Make sure to select ‘Facebook Lead Ads’ as your trigger application.

After setting up the workflow, you will need to define the trigger event. This is crucial as it determines when your workflow will activate. In this case, select ‘New Lead Instant’ as the trigger event.


3. Connecting Facebook Lead Ads with Pabbly Connect

To connect Facebook Lead Ads with Pabbly Connect, click on ‘Add New Connection’. You will be prompted to select your Facebook account. Ensure you grant the necessary permissions for the connection to work effectively.

Next, select the specific Facebook page and lead form you want to track. This is essential to ensure that the workflow only triggers for the relevant leads. After making these selections, click on ‘Save and Send Test Request’ to capture the lead details.


4. Setting Up Gmail Notification for New Leads

Now, after successfully capturing the lead details, the next step is to notify your admin via Gmail. Click on ‘Add New Action Step’ and select Gmail as your action application. Choose ‘Send Email V1’ as the action event. using Pabbly Connect

  • Connect your Gmail account by clicking on ‘Add a New Connection’.
  • Select your Gmail account and grant the required permissions.
  • Enter the recipient’s email address, which will be your admin’s email.

After entering the required information, map the lead details from the previous step into the email content. This ensures that each email sent contains the latest lead information dynamically.


5. Finalizing the Workflow and Testing

Once you have set up the email content, click on ‘Save and Send Test Request’ to verify that everything is working correctly. Check your Gmail inbox to confirm that the notification has been received.

If the test is successful, your workflow is now complete! From now on, whenever a new lead is captured via Facebook Lead Ads, your admin will receive an email notification automatically through Pabbly Connect.

This automation not only saves time but also ensures that your team stays informed about new leads promptly.


Conclusion

Using Pabbly Connect, you can easily set up an automated workflow to notify your admin via Gmail whenever a new Facebook lead fills out a form. This integration streamlines communication and enhances lead management.

Ensure you check out Pabbly Connect to create business automation workflows and reduce manual tasks. Pabbly Connect currently offer integration with 2,000+ applications.

How to Share Menu and Take Orders Automatically for Cloud Kitchens on WhatsApp Using Pabbly Chatflow

Learn how to automate sharing menus and taking orders for cloud kitchens on WhatsApp using Pabbly Chatflow. Step-by-step tutorial included. Explore how leading businesses automate customer interactions with carefully designed chat sequences that feel natural and helpful.

Watch Step By Step Video Tutorial Below


1. Accessing Pabbly Chatflow for Cloud Kitchens

To start sharing your menu and taking orders automatically for cloud kitchens on WhatsApp, you need to access Pabbly Chatflow. Open a new tab and navigate to Pabbly.com/chatflow. This platform is designed to help automate WhatsApp communications for businesses.

Once on the Pabbly Chatflow page, you can either sign in if you already have an account or sign up as a new user. After logging in, you will be taken to the dashboard where you can manage your WhatsApp business account effectively.


2. Creating Your WhatsApp Chatbot with Pabbly Chatflow

After accessing Pabbly Chatflow, the next step is to create your WhatsApp chatbot. Click on the ‘Access Now’ button to enter the flow builder. This is where you will design the chatbot that can respond to customer inquiries automatically.

  • Click on the ‘Add Flow’ button to start a new flow.
  • Name your flow to indicate it’s for your cloud kitchen.
  • Choose a trigger event, such as keywords that users might send to initiate the chatbot.

By connecting these elements, you will set up the initial interaction for users who message your WhatsApp account. Ensure that the chatbot is designed to provide quick responses to common inquiries, enhancing user experience.


3. Setting Up Menu Options in Pabbly Chatflow

Next, you will configure the menu options that your chatbot will present to users. Using Pabbly Chatflow, you can create a dynamic menu that users can interact with. Start by adding a list button to your flow.

  • Set the header of the list to ‘Menu Categories’.
  • Provide a message prompting users to select a category from the menu.
  • Add sections for different types of dishes, such as starters, main courses, and desserts.

This structured approach allows customers to easily navigate through your menu and select their desired items, making the ordering process smooth and efficient.


4. Automating Order Processing with Pabbly Chatflow

To automate the order processing, you will need to set up a series of questions that the chatbot will ask the user. Using Pabbly Chatflow, create a flow that captures essential order details.

For example, once a user decides to place an order, the chatbot should ask for their full name, contact details, and delivery address. Each question should be connected in the flow, ensuring a seamless transition between questions.

Use the ‘Ask a Question’ feature to prompt users for their name. Follow up with a request for contact information. Finally, ask for the delivery address, confirming all details provided.

This automated order processing not only saves time but also improves customer satisfaction by providing instant feedback and confirmation.


5. Finalizing Your WhatsApp Chatbot in Pabbly Chatflow

The last step involves reviewing your flow and ensuring all components are correctly connected. With Pabbly Chatflow, it’s crucial to save your flow after making any adjustments. Click on the ‘Save’ button to ensure your chatbot is ready for use.

Once saved, your WhatsApp chatbot will be fully functional and capable of sharing menus and taking orders automatically. Users will receive instant responses that enhance their interaction with your cloud kitchen.

Make sure to test the chatbot by sending messages to your WhatsApp business account to see how it responds. This will help you identify any areas for improvement before going live.


Conclusion

In summary, utilizing Pabbly Chatflow allows cloud kitchens to automate the process of sharing menus and taking orders through WhatsApp effectively. By following the steps outlined, you can create a seamless experience for your customers, enhancing their satisfaction and streamlining your operations.

Ensure you check out Pabbly Connect to create business automation workflows and reduce manual tasks. Pabbly Connect currently offer integration with 2,000+ applications.

How to Alert Your Team on MS Teams When Razorpay Payment Fails Using Pabbly Connect

Learn how to set up alerts for failed Razorpay payments on MS Teams using Pabbly Connect. Step-by-step tutorial with detailed integration instructions. Implement the precise methodologies leading organizations use to automate repetitive tasks, illustrated with practical examples designed for immediate application.

Watch Step By Step Video Tutorial Below


1. Accessing Pabbly Connect for Integration

To alert your team on MS Teams when a Razorpay payment fails, you first need to access Pabbly Connect. Open your browser and navigate to the Pabbly Connect landing page by searching for ‘Pabbly.com/connect’. This platform allows users to create automated workflows without any coding knowledge.

Once on the Pabbly Connect page, you will see options to either sign in or sign up. If you are a new user, click on ‘Sign up for free’ to create an account. Existing users can click on ‘Sign in’ to access their accounts. After signing in, click on ‘Access Now’ to enter your Pabbly Connect dashboard, where you can start creating your workflow.


2. Creating a Workflow in Pabbly Connect

In your Pabbly Connect dashboard, click on the ‘Create Workflow’ button. You will be prompted to select a workflow builder. Choose the ‘New Workflow Builder’ for a modern interface. Next, you need to name your workflow and select a folder to save it in.

  • Click on ‘Create’ after naming your workflow.
  • This action opens the workflow window where you will set up triggers and actions.

In this window, the first step is to add a trigger. Click on the ‘Add Trigger’ button to select Razorpay as your trigger application. Choose the event as ‘Payment Failed’ to set up the conditions for your alert.


3. Setting Up Razorpay Trigger in Pabbly Connect

After selecting Razorpay as the trigger application in Pabbly Connect, you will need to specify the trigger event. Choose ‘Payment Failed’ from the available options. Click on ‘Connect’ to proceed, and a webhook URL will be generated for you.

Copy this webhook URL and go to your Razorpay dashboard. Navigate to the ‘Developers’ section on the left side, and select ‘Webhooks’. Click on ‘Add New Webhook’ and paste the copied URL into the designated field. For the active event, select ‘Payment Failed’ and click on ‘Create Webhook’. This step ensures that any failed payments will trigger the webhook to send data to Pabbly Connect.


4. Adding Microsoft Teams Action Step

Now that the trigger is set, it’s time to add the action step for Microsoft Teams. In your Pabbly Connect workflow, click on ‘Add New Action Step’ and select Microsoft Teams as your action application. For the event, choose ‘Send Message in a Channel’ and click on ‘Connect’.

  • Select your team in Microsoft Teams where you want to send the notification.
  • Choose the specific channel for alerts about payment failures.

Map the message content dynamically by inserting the details from the Razorpay trigger. This includes the customer’s name, email, and reason for the payment failure. After setting up the message, click on ‘Save and Send Test Request’ to ensure everything is functioning correctly.


5. Testing the Workflow and Finalizing

To test your workflow, initiate a failed payment on Razorpay. This can be done by attempting a purchase with invalid payment details. Once the payment fails, go back to your Pabbly Connect workflow and observe if the webhook has captured the response.

If successful, you will see the details of the failed payment in your workflow. This indicates that the trigger is working correctly. Now, check your Microsoft Teams channel to confirm that the alert message has been sent. The message should include the customer’s details and the reason for the payment failure, ensuring your team is promptly informed.


Conclusion

By following these steps, you can efficiently alert your team on MS Teams whenever a Razorpay payment fails using Pabbly Connect. This automation streamlines communication and helps convert potential customers into actual sales. Start using Pabbly Connect today to enhance your business workflows.

Ensure you check out Pabbly Connect to create business automation workflows and reduce manual tasks. Pabbly Connect currently offer integration with 2,000+ applications.

How to Automatically Post New Product Listings from Shopify to Instagram Using Pabbly Connect

Learn how to use Pabbly Connect to automate posting new product listings from Shopify to Instagram effortlessly. Follow this step-by-step guide. Transform complex automation concepts into accessible, actionable steps that eliminate unnecessary manual work while maximizing existing application capabilities.

Watch Step By Step Video Tutorial Below


1. Introduction to Pabbly Connect for Shopify and Instagram Integration

In this section, we will explore how to use Pabbly Connect to automate posting new product listings from Shopify to Instagram. This process eliminates the need for manual posting, saving you valuable time and effort.

To start, you need to have a Shopify store set up along with an Instagram account. With Pabbly Connect, you can easily connect these two platforms without any coding skills required. This automation allows you to share product details with your audience instantly.


2. Accessing Pabbly Connect

To begin the integration, navigate to the Pabbly Connect website at www.Pabbly.com/connect. Here, you will find options to sign in or sign up for free. If you are a new user, you can register for a free account to get started.

After logging in, you will see the dashboard, where you can access all available applications. Click on the Pabbly Connect option to proceed with creating your workflow. Follow these steps:

  • Visit the Pabbly Connect landing page.
  • Sign in or create a new account.
  • Access the Pabbly Connect dashboard.

Once you are in the dashboard, you are ready to create your workflow that will connect Shopify and Instagram using Pabbly Connect.


3. Creating the Workflow in Pabbly Connect

In this section, we will create a new workflow in Pabbly Connect. Click on the Create Workflow button located at the top right corner of your dashboard. You can choose between the new beta method or the classic method; select the classic method for this tutorial.

Rename your workflow to something descriptive, such as ‘Post New Product Listings from Shopify to Instagram Automatically.’ Next, select a folder for your workflow and click on the Create button. You will see two windows appear: one for the trigger and another for the action.

  • Click on the Create Workflow button.
  • Select the classic method.
  • Name your workflow and choose a folder.

Your workflow is now set up, and you can proceed to define the trigger and action for the automation using Pabbly Connect.


4. Setting Up Trigger and Action Steps

Now it’s time to set up the trigger in your Pabbly Connect workflow. For the trigger application, select Shopify and choose the trigger event as New Product. This means that every time you add a new product in Shopify, it will trigger the workflow.

Pabbly Connect will provide you with a unique webhook URL. Copy this URL and log into your Shopify account. Navigate to the Settings option, select Notifications, and then click on Webhooks. Create a new webhook by pasting the copied URL and selecting JSON as the format. Save the webhook to establish the connection.

Select Shopify as the trigger application. Choose New Product as the trigger event. Copy the webhook URL and create a new webhook in Shopify.

Once the webhook is successfully created, Pabbly Connect will wait for a response from Shopify. This step is crucial for the automation to function correctly.


5. Publishing New Product Listings to Instagram

After setting up the trigger, it’s time to configure the action step in your Pabbly Connect workflow. Select Instagram for Business as the action application and choose the action event as Publish Photo. Click the connect button to establish a connection with your Instagram account.

Once connected, you will be prompted to select the Instagram account you wish to use. Map the photo URL and caption from the previous Shopify step. The caption can include dynamic fields such as the product name. After configuring these fields, click on the Save and Send Test Request button to test your setup.

Select Instagram for Business as the action application. Choose Publish Photo as the action event. Map the photo URL and caption from Shopify.

After a successful test, visit your Instagram profile to confirm that the new post has been created automatically. This demonstrates how effectively Pabbly Connect facilitates the integration between Shopify and Instagram.


Conclusion

In this tutorial, we explored how to use Pabbly Connect to automate posting new product listings from Shopify to Instagram seamlessly. By following the steps outlined, you can save time and ensure your audience is always updated with your latest products. This integration enhances your marketing efforts and keeps your social media presence active.

Ensure you check out Pabbly Connect to create business automation workflows and reduce manual tasks. Pabbly Connect currently offer integration with 2,000+ applications.

Leveraging AI Integration in Pabbly Chatflow for Automated Responses

Learn how to use Pabbly Chatflow for AI integration, enabling automated responses for WhatsApp and other platforms. Step-by-step guide included. Discover practical methods for designing chat sequences that capture leads, answer questions, and guide users to the next step in your funnel.

Watch Step By Step Video Tutorial Below


1. Accessing Pabbly Chatflow for AI Integration

To leverage AI integration in Pabbly Chatflow, start by visiting the Pabbly Chatflow website. You can do this by entering www.Pabbly.com/chatflow in your browser. Once on the site, you will see options to either sign in or sign up for free.

If you are an existing user, simply click on the ‘Sign In’ button located at the top right corner. For new users, click on ‘Sign Up for Free’ to create an account. After signing in, you will be directed to the Pabbly apps page where you can access Pabbly Chatflow.


2. Creating an AI Agent in Pabbly Chatflow

Once you are in Pabbly Chatflow, the next step is to create an AI agent for automated responses. Navigate to the left sidebar and click on the ‘AI Assistant’ option. Here, you will see options for active and inactive AI assistants. To create a new one, click on ‘Add AI Assistant’.

  • Name your AI assistant, for example, ‘Sound Electronics’.
  • Set the AI instructions, knowledge base, and assistant interface.
  • Adjust the temperature setting to control creativity; a value of 0.7 is recommended.

After configuring these settings, you can save your AI assistant. This AI agent will now be capable of responding to customer queries automatically using Pabbly Chatflow.


3. Uploading a Knowledge Base for Your AI Assistant

To enhance the responses of your AI assistant, you need to upload a knowledge base. This can be done in the knowledge source section of Pabbly Chatflow. Click on the upload file option and select your prepared knowledge base in TXT format.

Your knowledge base should contain detailed information about your products, services, and frequently asked questions. Make sure it includes:

  • Product details including features and prices.
  • Company information such as contact details and social media links.
  • Warranty and return policies.

Once uploaded, this knowledge base will allow your AI assistant to provide accurate and helpful responses to customer inquiries via WhatsApp.


4. Configuring AI Assistant Settings in Pabbly Chatflow

After uploading the knowledge base, configure the AI assistant settings in Pabbly Chatflow. This includes setting up the assistant interface, where you can specify the brand name and initial messages. You can also customize the styling options, such as light or dark mode.

Ensure that your AI assistant has a clear header message, like ‘We are online and happy to assist you.’ Additionally, you can set up footer messages and privacy policy links to establish trust with your customers.

Enable the powered by Pabbly option for branding. Upload profile pictures for the assistant to enhance visual appeal. Set up fallback messages for unrecognized queries.

Once all settings are configured, save your AI assistant to finalize the setup.


5. Activating AI Auto Reply in Pabbly Chatflow

The final step is to activate the AI auto reply feature in Pabbly Chatflow. Navigate to the inbox settings and enable the AI auto reply option. You can assign your AI assistant to specific contact lists or all contacts for broader coverage.

After selecting the appropriate contact list, save the settings. This will ensure that your AI assistant is ready to respond to customer queries effectively. Test the setup by sending a message through WhatsApp to see if your AI assistant is functioning as intended.

For example, if you send a message asking about product details, the AI assistant will reply with accurate information based on the knowledge base you uploaded. This ensures that customers receive timely and relevant responses.


Conclusion

In conclusion, leveraging AI integration in Pabbly Chatflow allows businesses to automate responses efficiently. By following the steps outlined, you can create an AI assistant that enhances customer interaction on platforms like WhatsApp. This automated approach saves time and improves customer satisfaction.

Ensure you check out Pabbly Connect to create business automation workflows and reduce manual tasks. Pabbly Connect currently offer integration with 2,000+ applications.

How to Send Webinar Invitations Automatically via SendGrid for Google Lead Ads Leads Using Pabbly Connect

Learn how to automate sending webinar invitations using Pabbly Connect with Google Lead Ads and SendGrid in this detailed step-by-step tutorial. Discover hidden automation capabilities within your existing tools. This guide shows you how to connect your essential applications and permanently eliminate redundant manual processes.

Watch Step By Step Video Tutorial Below


1. Accessing Pabbly Connect for Automation

To begin automating the process of sending webinar invitations, access Pabbly Connect. This platform allows you to integrate various applications seamlessly without any coding skills required. Start by visiting the official Pabbly website and signing in to your account.

Once logged in, navigate to the Pabbly Connect dashboard where you can create a new workflow. This workflow will facilitate the connection between Google Lead Ads and SendGrid, enabling the automatic sending of webinar invitations as soon as a new lead is captured.


2. Creating a New Workflow in Pabbly Connect

In this section, you will create a new workflow within Pabbly Connect. Click on the ‘Create Workflow’ button and give your workflow a name such as ‘Send Webinar Invitations Automatically via SendGrid for Google Lead Ads Leads’. Selecting a suitable folder for organizing your workflows is also recommended.

  • Click on the ‘Create Workflow’ button.
  • Name your workflow appropriately.
  • Select a folder for organization.

After creating the workflow, you will need to set a trigger. This is the event that starts the automation process, which in this case will be receiving a new lead from Google Lead Ads.


3. Setting Up Google Lead Ads as the Trigger

To set up Google Lead Ads as your trigger in Pabbly Connect, select it from the list of applications. Choose the event type as ‘New Lead Form Entry’. This will ensure that every time a new lead is generated, the workflow will be activated.

Next, you will connect your Google Lead Ads account by providing the necessary authentication details. This will include generating a webhook URL from Pabbly Connect that you will need to paste into your Google Ads lead form settings.

  • Select ‘Google Lead Ads’ as the trigger application.
  • Choose ‘New Lead Form Entry’ as the trigger event.
  • Connect your Google Ads account using the webhook URL provided by Pabbly Connect.

Once the connection is established, you can test the integration to ensure that new leads are being captured correctly. This step is crucial to verify that your automation setup is functioning as intended.


4. Configuring SendGrid to Send Invitations

After successfully capturing leads from Google Ads, the next step is to configure SendGrid in Pabbly Connect. Choose SendGrid as the action application and select the event ‘Send Email’. This action will allow you to send the webinar invitations automatically.

To connect SendGrid, you will need your API key from the SendGrid account. Once connected, you can customize the email fields such as the recipient’s email address, subject, and body of the email. Make sure to map the email address from the lead form to ensure that the invitation is sent to the correct recipient.

Select SendGrid as the action application. Choose ‘Send Email’ as the action event. Map the lead’s email address to the recipient field.

Finally, enter the email subject and body content, which should include the details of the webinar. Once everything is set up, save your workflow in Pabbly Connect and activate it to start sending invitations automatically.


5. Testing the Automation Workflow

With both Google Lead Ads and SendGrid configured in Pabbly Connect, it’s time to test the entire automation workflow. This testing phase is crucial to ensure that the integration works seamlessly and that the webinar invitations are sent as expected.

Create a test lead in your Google Ads account to trigger the workflow. After submitting the lead form, check your email to confirm that the invitation has been received. This step will validate that your automation setup is functioning correctly.

If the email is received successfully, congratulations! Your automation process is now complete, allowing you to send webinar invitations automatically whenever a new lead is generated via Google Lead Ads. This efficient process saves time and ensures that no lead misses out on your webinar.


Conclusion

In this tutorial, we explored how to use Pabbly Connect to automate sending webinar invitations via SendGrid for Google Lead Ads leads. By following the outlined steps, you can streamline your lead management process and enhance your marketing efforts effectively.

Ensure you check out Pabbly Connect to create business automation workflows and reduce manual tasks. Pabbly Connect currently offer integration with 2,000+ applications.

How to Auto-Create Salesforce Tasks from JustDial Leads Using Pabbly Connect

Learn how to automate the creation of Salesforce tasks from JustDial leads using Pabbly Connect with this step-by-step tutorial. Eliminate manual repetitive tasks from your workflow. Discover proven automation methods with intuitive steps designed for efficiency-minded professionals.

Watch Step By Step Video Tutorial Below


1. Accessing Pabbly Connect for Integration

To automate the creation of Salesforce tasks from JustDial leads, you need to access Pabbly Connect. Start by visiting the Pabbly website and navigating to the Pabbly Connect section.

Once you’re on the homepage, you can either sign up for a new account or log in if you already have one. After logging in, you will see a dashboard that allows you to create workflows for automating various tasks.


2. Creating a Workflow in Pabbly Connect

To set up your integration, you must create a new workflow in Pabbly Connect. Click on the ‘Create Workflow’ button located on the top right corner of the dashboard. You will be prompted to name your workflow; you can name it something like ‘Auto Salesforce Task from JustDial Leads’.

  • Select the folder where you want to save your workflow.
  • Choose the trigger application, which in this case is JustDial.
  • Set the trigger event to ‘New Leads’.

Once the workflow is created, you’ll be able to configure the trigger settings. This will allow Pabbly Connect to automatically capture new leads from JustDial.


3. Setting Up the Trigger for JustDial Leads

With the workflow created, the next step is to set up the trigger. In Pabbly Connect, select JustDial as the trigger application and choose the event as ‘New Leads’. This allows Pabbly to listen for new leads coming from your JustDial account.

You will receive a webhook URL from Pabbly Connect. Copy this URL and configure it in your JustDial account settings to send lead data to Pabbly. Make sure to test the connection to ensure everything is working correctly.


4. Creating a Salesforce Task from the Lead

After setting up the trigger, the next step is to create a task in Salesforce. In your workflow, add an action step and select Salesforce as the application. Choose the event as ‘Create Task’.

  • Map the fields from the JustDial lead to the Salesforce task fields.
  • Set the task subject, due date, and any other relevant details.
  • Save the action to create the task in Salesforce.

This integration allows Pabbly Connect to automatically create a task in Salesforce whenever a new lead is received from JustDial, streamlining your workflow.


5. Testing the Integration

Once everything is set up, it’s crucial to test the integration. Send a test lead from JustDial and check if a task is created in Salesforce. This step ensures that your automation is functioning correctly.

If the task appears in Salesforce as expected, your integration is successful. If not, review your settings in Pabbly Connect and make necessary adjustments to ensure smooth operation.


Conclusion

In this tutorial, we explored how to use Pabbly Connect to automate the creation of Salesforce tasks from JustDial leads. By following these steps, you can streamline your lead management process and enhance productivity.

Ensure you check out Pabbly Connect to create business automation workflows and reduce manual tasks. Pabbly Connect currently offer integration with 2,000+ applications.

How to Add Housing.com Buyer Leads to Pipedrive Deal Pipeline with Pabbly Connect

Learn how to integrate Housing.com buyer leads into Pipedrive Deal Pipeline using Pabbly Connect with this step-by-step guide. Master proven automation processes with practical implementation examples and strategic recommendations you can apply immediately in your workflow.

Watch Step By Step Video Tutorial Below


1. Access Pabbly Connect to Begin Integration

To start integrating Housing.com buyer leads into Pipedrive Deal Pipeline, you need to access Pabbly Connect. First, open your browser and navigate to the Pabbly Connect landing page by entering ‘Pabbly.com/connect’. This platform will serve as the central hub for your integration process.

Once on the Pabbly Connect page, you will see options to either sign in or sign up for free. If you’re new to Pabbly Connect, click on ‘Sign Up for Free’ to create an account and receive hundreds of free tasks monthly. If you’re an existing user, simply click ‘Sign In’ to access your account.


2. Create a Workflow in Pabbly Connect

After signing into your Pabbly Connect account, you’ll be directed to your dashboard. To create a new workflow, click on the ‘Create Workflow’ button. This action will prompt you to select between the new workflow builder and the classic one; choose the new one for a modern interface.

Next, enter a name for your workflow and select a folder to save it. You can create a new folder if necessary. Once you’ve set this up, click the ‘Create’ button to proceed. This will open the workflow window where you’ll set up the trigger and action for your integration.


3. Set Up the Trigger with Housing.com

In the workflow window, you will set up the trigger for your integration. Click on the ‘Add Trigger’ button and select ‘Housing.com’ as your application. For the trigger event, choose ‘New Leads’ and click ‘Connect’. This will generate a webhook URL that you need to configure in your Housing.com account. using Pabbly Connect

  • Copy the generated webhook URL.
  • Contact your Housing.com account manager to add the webhook URL.
  • Once added, you will receive lead details in your Pabbly Connect account.

After configuring the webhook, return to Pabbly Connect and click on ‘Capture Webhook Response’ to test the integration. You should see the lead details, including first name, last name, phone number, email address, and area, confirming that the trigger is functioning correctly.


4. Set Up the Action to Create a Person in Pipedrive

Now that the trigger is set up, it’s time to create a person in Pipedrive. Click on ‘Add Action’ and select ‘Pipedrive’ as your application. For the action event, choose ‘Create Person’ and click ‘Connect’. You will need to authenticate your Pipedrive account by adding your API key. using Pabbly Connect

To find your API key, go to your Pipedrive account, click on your profile picture, and navigate to ‘Personal Preferences’. Under the API section, copy your API key and paste it into Pabbly Connect. Once connected, map the required fields such as name, phone number, and email address using the data captured from the Housing.com lead.


5. Create a Deal in Pipedrive

After successfully creating a person in Pipedrive, the next step is to create a deal using the same details. Add another action step, select ‘Pipedrive’ again, and this time choose ‘Create Deal’ as the action event. Click ‘Connect’ and select your existing connection. using Pabbly Connect

In the setup, provide a title for the deal, such as ‘Follow Up with’, and map the lead’s name and person ID from the previous step. Once all required fields are filled, click ‘Save and Send Test Request’. You should receive a positive response indicating that the deal has been successfully created in Pipedrive.


Conclusion

Using Pabbly Connect, you can seamlessly integrate Housing.com buyer leads into your Pipedrive Deal Pipeline. This automation allows for efficient lead management without manual intervention, enhancing your real estate business operations. Try this automation today to streamline your workflow and increase productivity.

Ensure you check out Pabbly Connect to create business automation workflows and reduce manual tasks. Pabbly Connect currently offer integration with 2,000+ applications.

How to Send Automated Event Reminders to Attendees from Google Sheets Using Pabbly Connect

Learn how to send automated event reminders from Google Sheets using Pabbly Connect. This step-by-step guide covers everything you need to know. Discover hidden automation capabilities within your existing tools. This guide shows you how to connect your essential applications and permanently eliminate redundant manual processes.

Watch Step By Step Video Tutorial Below


1. Accessing Pabbly Connect for Automation

Pabbly Connect is the automation tool that enables you to send automated event reminders to attendees from Google Sheets. To start, open your browser and navigate to Pabbly Connect by typing Pabbly.com/connect. This action takes you to the official Pabbly Connect page, where you can sign up or log in if you are an existing user.

Once logged in, you will be presented with the Pabbly Connect dashboard. Here, you can create workflows that connect various applications, including Google Sheets and Gmail. To begin creating your automation, click on the ‘Access Now’ button under the Pabbly Connect section. This will allow you to set up your first workflow.


2. Creating a Workflow in Pabbly Connect

To create a workflow for sending automated event reminders, click on the ‘Create Workflow’ button. In the popup, enter a name for your workflow, such as ‘Send Event Reminders from Google Sheets.’ Select a folder for organization, then click on the ‘Create’ button to proceed. using Pabbly Connect

  • Enter a name for your workflow.
  • Select a folder to save your workflow.
  • Click the ‘Create’ button.

After creating the workflow, you will need to set the trigger for your automation. Click on the ‘Trigger’ application option and select Google Sheets as your trigger app. Choose the event type ‘New or Updated Spreadsheet Row’ to ensure that the workflow triggers when a new row is added in your Google Sheet.


3. Connecting Google Sheets with Pabbly Connect

After selecting Google Sheets, click on the ‘Connect’ button to generate a webhook URL. This URL is essential as it allows Pabbly Connect to receive data from your Google Sheet. Copy this webhook URL and head to your Google Sheet where you have the event details. using Pabbly Connect

In your Google Sheet, navigate to the Extensions menu, select Pabbly Connect Webhooks, and click on the ‘Initial Setup’ option. Paste the copied webhook URL into the provided field and specify the trigger column, which should be the final data column where the event details are entered. Once done, click the ‘Send Test’ button to verify the connection.


4. Setting Up Gmail for Sending Reminders

Once your Google Sheet is successfully connected to Pabbly Connect, it’s time to set up Gmail for sending the event reminders. Click on the plus icon to add an action step and select Gmail as your action application. Then, choose the event type ‘Send Email V1’ to configure the email that will be sent to attendees.

  • Select Gmail as your action app.
  • Choose the event type ‘Send Email V1’.
  • Connect your Gmail account.

After connecting your Gmail account, you will need to fill in the recipient’s email address, which you can map from the data received from Google Sheets. Additionally, provide a subject for the email, such as ‘Reminder: Upcoming Event on [Event Date].’ Be sure to map the event date into the email content to personalize the message for each attendee.


5. Testing and Saving the Workflow

With your Gmail setup complete, click on the ‘Save and Send Test Request’ to test the workflow. This action will send a test email to the recipient to ensure everything is functioning correctly. Check your Gmail account to verify that you received the event reminder.

If the test is successful, click the ‘Save’ button to finalize your workflow. Now, every time you add a new row with user details in your Google Sheet, an automated event reminder will be sent to their Gmail account without requiring any coding skills, all thanks to Pabbly Connect.


Conclusion

In this tutorial, we demonstrated how to use Pabbly Connect to automate sending event reminders from Google Sheets to Gmail. By following these steps, you can streamline your event communication and ensure attendees are well-informed about upcoming events.

Ensure you check out Pabbly Connect to create business automation workflows and reduce manual tasks. Pabbly Connect currently offer integration with 2,000+ applications.