How to Automate SaaS Support With WhatsApp Chatbot

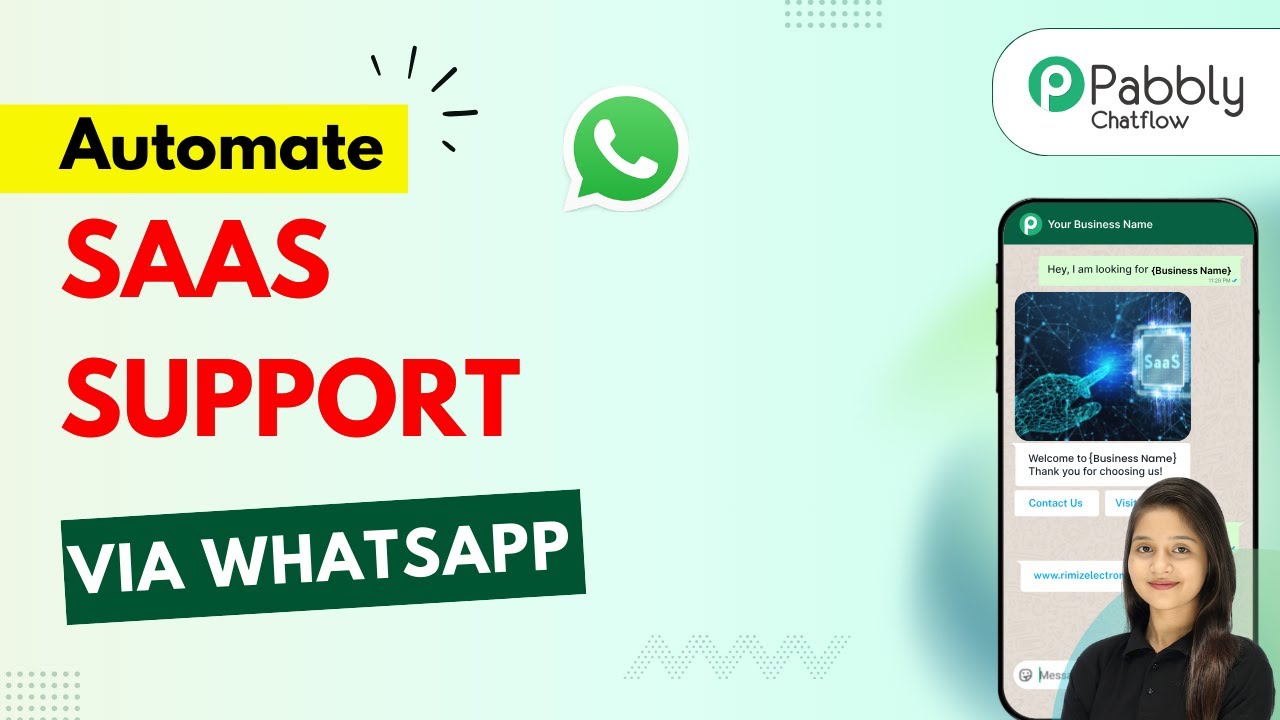
Learn how to automate SaaS support with a WhatsApp chatbot using Pabbly Chatflow. Follow our step-by-step tutorial for seamless integration. Discover practical methods for designing chat sequences that capture leads, answer questions, and guide users to the next step in your funnel.

Watch Step By Step Video Tutorial Below


1. Introduction to Pabbly Chatflow for WhatsApp Automation

To automate SaaS support with a WhatsApp chatbot, the first step is to access Pabbly Chatflow. This platform enables seamless integration with WhatsApp, allowing businesses to respond to user queries automatically. By using Pabbly Chatflow, you can create a chatbot that handles multiple messages simultaneously, relieving the pressure of manual responses.

To get started, simply visit Pabbly.com/chatflow. Here, you will find options to sign up for a free account or log in if you’re an existing user. Once logged in, you will be directed to the Pabbly Chatflow dashboard where you can manage your WhatsApp numbers.


2. Setting Up Your WhatsApp Chatbot in Pabbly Chatflow

After accessing the dashboard of Pabbly Chatflow, you need to add your WhatsApp number. Click on the ‘+ Add WhatsApp Number’ button to begin the setup process. You will be presented with two options: WhatsApp Connect and Manual Token Connect. Choose the method that suits your setup best.

  • Select WhatsApp Connect for automatic integration.
  • Use Manual Token Connect for a more customized setup.

Once your WhatsApp number is added, you can create a flow for your chatbot. Click on the ‘Flows’ option on the left sidebar and then select the ‘+ Add Flow’ button. Name your flow something descriptive, such as ‘Automate SaaS Support with WhatsApp Chatbot’. This will be the foundation of your automated responses.


3. Creating the Chatbot Flow with Pabbly Chatflow

In this section, you will design the flow of your WhatsApp chatbot using Pabbly Chatflow. Start by selecting a trigger event. For this automation, choose the ‘Keyword/Regex Match’ trigger. Enter keywords like ‘help’, ‘issue’, and ‘support’ that will activate your bot when users send these messages.

Next, drag and drop a list button into your flow. This list will present users with various issue types such as:

  • Account Issues
  • Billing and Payments
  • Technical Support
  • General Inquiry

After setting up the list, connect it to the trigger. When users select an issue type, the bot will prompt them to describe their issue in detail, allowing for a more personalized interaction.


4. Utilizing Custom Fields for User Input in Pabbly Chatflow

To enhance the user experience, you can utilize custom fields within Pabbly Chatflow. After users select an issue type, the bot should ask for more details. You can set up a custom field for user queries and another for their full name and contact number. This allows the bot to gather essential information efficiently.

For every question you add, specify the format (text or number) and the number of attempts allowed for responses. This ensures that users provide their information accurately. After gathering all necessary information, the bot will send a customized response to the user, confirming receipt of their query.

Link all these components together in your flow. This ensures that once a user provides their details, they receive a tailored message that includes their name and the issue type they selected. This dynamic response feature is crucial for effective communication.


5. Finalizing Your WhatsApp Chatbot with Pabbly Chatflow

Once you have designed your entire flow in Pabbly Chatflow, the final step is to save your work. Click on the save button to ensure that all changes are recorded. This will make your automated WhatsApp chatbot live, enabling it to respond to users without any manual intervention.

After saving, you can test your chatbot by sending messages to your WhatsApp business account. The bot should respond with the appropriate messages based on the user’s input. If you encounter any issues, you can return to the flow and make necessary adjustments.

With your WhatsApp chatbot fully operational, you can now provide instant support to your SaaS users. This automation not only saves time but also improves user satisfaction by offering quick responses to their inquiries.


Conclusion

In this tutorial, we explored how to automate SaaS support using a WhatsApp chatbot with Pabbly Chatflow. By following the step-by-step instructions, you can create a responsive chatbot that enhances user interaction and support efficiency. Embrace automation to streamline your customer service today!

Ensure you check out Pabbly Connect to create business automation workflows and reduce manual tasks. Pabbly Connect currently offer integration with 2,000+ applications.

Automated Weekly Business Update WhatsApp Broadcast

Learn how to automate weekly business updates via WhatsApp using Pabbly Chatflow. Step-by-step guide for seamless integration with YouTube. This detailed guide shows you how to build powerful chat automation that engages visitors and converts prospects—without any coding required.

Watch Step By Step Video Tutorial Below


1. Accessing Pabbly Chatflow for WhatsApp Broadcast

To automate your weekly business updates via WhatsApp, you need to access Pabbly Chatflow. Start by visiting the Pabbly Chatflow website. Here, you can either sign up for a new account or log in if you’re an existing user. Once logged in, you will be directed to the dashboard.

On the dashboard, locate the option to add your WhatsApp number. You can do this through either the WhatsApp connect method or the manual token connect method. This step is crucial as it enables Pabbly Chatflow to send messages to your contacts.


2. Creating a Broadcast in Pabbly Chatflow

After setting up your WhatsApp number, you can create a broadcast. Click on the broadcast option on the left sidebar of Pabbly Chatflow. You will see all the scheduled broadcasts. To create a new one, click on the ‘Add’ button.

  • Select ‘Broadcast Campaign’ from the dropdown menu.
  • Name your broadcast, for example, ‘Weekly Business Updates’.
  • Choose the contact list you want to send the broadcast to.

After naming your broadcast and selecting the contact list, you can proceed to choose the message type. This is where you can select a pre-approved template message or a regular message. Using a pre-approved template allows you to send messages without restrictions, making it ideal for weekly updates.


3. Scheduling the Broadcast in Pabbly Chatflow

Once you have selected your message type, it’s time to schedule the broadcast. In Pabbly Chatflow, you can choose to send the broadcast immediately or schedule it for later. If you opt to schedule, select the date and time from the calendar interface.

For instance, if you wish to schedule the broadcast for December 31st at 1:00 PM, select that date and time and confirm. After scheduling, click on the ‘Add Broadcast’ button to finalize your broadcast setup.


4. Creating Contact Lists in Pabbly Chatflow

To effectively manage your broadcasts, you need to create contact lists in Pabbly Chatflow. Navigate to the contacts section and click on the button to add new contacts. You can add contacts individually or upload a CSV file for bulk additions.

  • Click on the ‘Add Contacts’ button.
  • Choose between adding single contacts or bulk uploading via CSV.
  • Create a contact list by clicking the plus button and naming your list.

This structured approach allows you to manage your audience effectively, ensuring that your broadcasts reach the right people every time.


5. Creating Message Templates in Pabbly Chatflow

Lastly, to send messages, you need to create templates in Pabbly Chatflow. Go to the templates section and click on the ‘Add Template’ button. Here, you can define the category of the template, such as marketing or authentication.

While creating a template, ensure that you follow the naming conventions and provide all necessary details like header, body, and footer. After completing the template, submit it for approval by Meta. Once approved, you can use this template in your broadcasts.


Conclusion

Using Pabbly Chatflow, automating your weekly business updates via WhatsApp is straightforward. By following the steps outlined above, you can effectively engage with your customers without manual effort. This process not only saves time but also ensures consistent communication with your audience.

Ensure you check out Pabbly Connect to create business automation workflows and reduce manual tasks. Pabbly Connect currently offer integration with 2,000+ applications.

How to Add Real Estate Leads to Zoho Sheet Automatically

Learn how to automate adding real estate leads to Zoho Sheet using Pabbly Connect. Follow this detailed tutorial for step-by-step guidance. Master proven automation processes with practical implementation examples and strategic recommendations you can apply immediately in your workflow.

Watch Step By Step Video Tutorial Below


1. Accessing Pabbly Connect for Automation

To start automating the addition of real estate leads to your Zoho Sheet, you’ll first need to access Pabbly Connect. Begin by navigating to Pabbly.com/connect in your web browser. Once there, you will see options to either sign in or sign up for a free account.

If you’re a new user, click on ‘Sign Up Free’ to create an account and receive 100 free tasks per month. For existing users, simply sign in to your account. Once logged in, you can access the Pabbly Connect dashboard, which is essential for creating your automation.


2. Creating a Workflow in Pabbly Connect

After accessing Pabbly Connect, the next step is to create a new workflow. Click on the ‘Create Workflow’ button. You will be prompted to choose between the new beta version or the classic version. For this tutorial, select the beta version for its modern features.

  • Click on ‘Select’ to open the workflow creation dialog.
  • Name your workflow as ‘Add Real Estate Leads to Zoho Sheet Automatically’.
  • Choose your desired folder, for example, ‘Automations’.

Once you have set the name and folder, click on the ‘Create’ button to finalize your workflow setup in Pabbly Connect.


3. Setting Up the Trigger for New Leads

The next step is to set up a trigger that will initiate the workflow whenever a new real estate lead is received. For this, select ’99 Acres’ as your trigger application and choose ‘New Leads’ as the event. Click on ‘Connect’ to generate a webhook URL.

This webhook URL is crucial as it will link your 99 Acres account to Pabbly Connect. Copy this URL and send it to your 99 Acres account manager to enable the webhook integration. Once activated, you will start receiving lead details in your Pabbly Connect workflow.


4. Adding Action to Create Rows in Zoho Sheet

After successfully setting up the trigger, you will need to add an action to create a new record in Zoho Sheet. Choose ‘Zoho Sheet’ as your action application and select ‘Create Row’ as the event. Click on ‘Connect’ to link your Zoho Sheet account with Pabbly Connect.

  • Enter your Zoho domain, for example, ‘zoho.in’.
  • Grant access to Pabbly Connect to manage your Zoho Sheet data.
  • Select the workbook and worksheet where the data will be added.

Map the lead details such as first name, last name, email, and phone number from the trigger response to the corresponding fields in Zoho Sheet. This mapping ensures that every new lead is accurately recorded in your Zoho Sheet.


5. Testing the Automation Workflow

Once you’ve mapped all the required fields, click on ‘Save and Send Test Request’ to ensure that the integration works correctly. If successful, you will receive a confirmation response indicating that a new lead has been added to your Zoho Sheet.

To verify, refresh your Zoho Sheet, and you should see the new lead details populated in the specified columns. This confirms that your automation is now fully operational and that Pabbly Connect is effectively managing the integration between 99 Acres and Zoho Sheet.


Conclusion

In this tutorial, we explored how to automate adding real estate leads to Zoho Sheet using Pabbly Connect. By following these steps, you can streamline your lead management process efficiently. Automating this workflow not only saves time but also ensures accuracy in your records.

Ensure you check out Pabbly Connect to create business automation workflows and reduce manual tasks. Pabbly Connect currently offer integration with 2,000+ applications.

Google Ads → Zoho CRM Integration (No Manual Work)

Learn how to integrate Google Ads with Zoho CRM seamlessly using Pabbly Connect. Follow this step-by-step tutorial to automate lead management without manual work. Build sophisticated automated workflows in less time than you think. This guide translates complex integrations into straightforward steps for immediate implementation.

Watch Step By Step Video Tutorial Below


1. Accessing Pabbly Connect for Integration

To begin the integration of Google Ads with Zoho CRM, you need to access Pabbly Connect. Start by opening a new tab and navigating to pabbl.com/connect. This is the central platform that will enable the automation of your lead management process.

If you are a new user, click on the ‘Sign Up for Free’ button to create an account. Pabbly Connect offers hundreds of free tasks every month, allowing you to explore its features without any cost. Existing users can log in directly to access their workflow builder.


2. Setting Up Google Ads Trigger in Pabbly Connect

Once you are logged into Pabbly Connect, you need to set up the trigger for Google Ads. Click on the ‘Add Trigger’ button and search for Google Ads. Select the event as ‘New Lead Form Entry’ and click on the connect button to generate a webhook URL.

  • Copy the generated webhook URL.
  • Open your Google Ads campaign where the lead form is set up.
  • Scroll to the lead delivery option and paste the webhook URL.

After pasting the URL, enter the key as required and click on the ‘Send Test Data’ button. You will see a confirmation that the test data has been sent, indicating that Pabbly Connect is ready to capture leads from Google Ads.


3. Configuring Zoho CRM Action in Pabbly Connect

Next, you need to add an action step to create a new contact in Zoho CRM. In your Pabbly Connect workflow, click on the ‘Add New Action Step’ button and search for Zoho CRM. Select the event as ‘Create Contact’ and click on the connect button.

If you have previously connected Zoho CRM, select the existing connection; otherwise, click on ‘Add a New Connection’. You will be prompted to enter your Zoho CRM domain, which can be found in the URL of your Zoho account. After entering the domain, click on save.


4. Mapping Lead Details from Google Ads to Zoho CRM

After establishing the connection between Pabbly Connect and Zoho CRM, you will need to map the lead details. The lead source should be set as Google, and then you can map the fields from the Google Ads lead form to the corresponding fields in Zoho CRM.

  • Map the first name, last name, and email fields.
  • Fill in any other required details as necessary.

Once you have mapped all the required fields, click on the ‘Save and Send Test Request’ button. A positive response will indicate that a new contact has been successfully created in Zoho CRM, confirming that the integration is working as intended.


5. Conclusion: Automating Your Lead Management

With the integration of Google Ads and Zoho CRM through Pabbly Connect, you can automate your lead management process efficiently. Each time a new lead is generated from Google Ads, it will automatically be added to Zoho CRM without any manual intervention.

Ensure you check out Pabbly Connect to create business automation workflows and reduce manual tasks. Pabbly Connect currently offer integration with 2,000+ applications.

Check out Pabbly Connect – Automate your business workflows effortlessly! Sign Up Free – Start your journey with ease! 10,000+ Video Tutorials – Learn step by step! Join Pabbly Facebook Group – Connect with 21,000+ like minded people!

This automation not only saves time but also ensures that you can follow up with leads promptly. Try out Pabbly Connect today to streamline your business processes and enhance your lead management efficiency!

Build a Lead Tracking Sheet for Your Social Media Marketing Agency

Learn how to build a lead tracking sheet for your social media marketing agency using Pabbly Connect to integrate Google Sheets with LinkedIn, Gmail, and more.

Watch Step By Step Video Tutorial Below


1. Accessing Pabbly Connect for Lead Tracking

To start building your lead tracking sheet, first access Pabbly Connect. If you’re a new user, visit the Pabbly website and navigate to the Pabbly Connect section. Click on ‘Sign up for free’ to create an account and explore the platform with hundreds of free tasks each month.

Once logged in, open the workflow builder. In this window, you will set up triggers and actions. The trigger initiates the workflow, while the action is the result of that trigger. This setup will allow you to automate lead tracking seamlessly.


2. Setting Up LinkedIn Trigger in Pabbly Connect

Next, you will set up the LinkedIn trigger in Pabbly Connect. Click on the ‘Add Trigger’ button and search for LinkedIn. Select ‘Lead Notifications’ as the event. Then, click on ‘Connect’ to establish a connection.

  • Choose to add a new connection if you haven’t done so before.
  • Log into your LinkedIn account when prompted.
  • Select your sponsored account and refresh fields if necessary.

After connecting, click on ‘Save and Send Test Request’ to capture the webhook response from LinkedIn. This step is crucial as it allows Pabbly Connect to receive lead details automatically whenever a lead fills out your LinkedIn lead form.


3. Capturing Lead Details from LinkedIn

Once the LinkedIn trigger is set, you can capture lead details using Pabbly Connect. After submitting a test lead via your LinkedIn ad, the webhook response will display the details you entered, such as email and phone number.

This captured information is essential for updating your lead tracking sheet. You can choose to use either test leads or real leads for this automation. Using test leads is a good practice for ensuring everything functions correctly before going live.

  • Ensure you have all necessary fields filled in the lead form.
  • Check that Pabbly Connect is receiving the correct webhook response.

With the lead details captured, you are now ready to add this information to your Google Sheets, creating a seamless lead tracking process.


4. Adding Leads to Google Sheets via Pabbly Connect

The next step involves adding the captured lead details to Google Sheets using Pabbly Connect. For this, click on ‘Add New Action Step’ and select Google Sheets as the application. Choose ‘Add New Row’ as the event and click ‘Connect’.

If you have already created a connection with Google Sheets, select the existing connection. If not, create a new connection by signing in with your Google account and granting the necessary permissions.

Select the specific spreadsheet and sheet where you want to store lead details. Map the lead details from the previous step into the appropriate columns.

Mapping allows Pabbly Connect to dynamically insert data into your Google Sheets, ensuring that each new lead is automatically updated in your tracking sheet.


5. Testing and Saving the Integration

After mapping the lead details, click on ‘Save and Send Test Request’ to verify that the integration works correctly. Once you receive a positive response, check your Google Sheets to confirm that the lead information has been added successfully.

This final step ensures that your lead tracking sheet is fully functional and updates automatically whenever a new lead is generated through LinkedIn or other platforms connected via Pabbly Connect.

With this setup, your social media marketing agency can efficiently track leads without manual input, streamlining your workflow and improving productivity. Explore more possibilities with Pabbly Connect to enhance your business operations.


Conclusion

In this tutorial, we demonstrated how to build a lead tracking sheet for your social media marketing agency using Pabbly Connect. By integrating LinkedIn with Google Sheets, you can automate lead collection and management, saving time and improving efficiency.

Ensure you check out Pabbly Connect to create business automation workflows and reduce manual tasks. Pabbly Connect currently offer integration with 2,000+ applications.

Utilizing Pabbly Connect for these integrations allows you to focus on growing your business while ensuring that no lead goes untracked. Start automating today for better lead management!

Google AI Replies to Your Facebook Comments Automatically — Step-by-Step Guide

Learn how to automate replies to Facebook comments using Google AI with Pabbly Connect in this detailed step-by-step guide. Navigate the automation landscape confidently with clear, structured guidance suitable for professionals regardless of prior technical experience.

Watch Step By Step Video Tutorial Below


1. Accessing Pabbly Connect for Automation

To automate Facebook comment replies using Google AI, start by accessing Pabbly Connect. Navigate to Pabbly.com and log in to your existing account or sign up for free to get started. Pabbly Connect allows you to create automated workflows without any coding skills.

Once logged in, you’ll be directed to the Pabbly dashboard. From here, click on the Pabbly Connect app to begin setting up your automation. This platform serves as the central hub for integrating various applications like Facebook and Google Gemini.


2. Creating a New Workflow in Pabbly Connect

After accessing Pabbly Connect, create a new workflow by clicking on the ‘Create Workflow’ button. You will be prompted to name your workflow—something like ‘Google AI Replies to Your Facebook Comments Automatically’. Select an appropriate folder for organization purposes.

  • Click on ‘Create’ to initialize your workflow.
  • Choose ‘Facebook Pages’ as your trigger application.
  • Set the trigger event to ‘New Comment’ and connect your Facebook account.

By utilizing Pabbly Connect, you can easily link your Facebook page to automate the response process. This ensures that every new comment triggers the subsequent actions in your workflow.


3. Setting Up the Trigger for New Comments

In the trigger setup, select your Facebook page where comments will be monitored. After selecting the page, click on ‘Save and Send Test Request’ to capture a sample comment. This step confirms that your integration is functioning correctly with Pabbly Connect.

To test the trigger, post a comment on your Facebook page from another account. You should see the comment captured in your Pabbly Connect workflow shortly after posting. This real-time capture is crucial for the automation process.


4. Generating Replies Using Google Gemini

Once the trigger is set, the next step is to generate a reply using Google Gemini. Add a new action step in your workflow and select Google Gemini as the action application. Choose the action event as ‘Generate Content’ and connect your Google Gemini account.

  • Enter your API key to authorize the connection.
  • Create a prompt to guide the AI in generating a relevant reply.
  • Use mapping to dynamically include the comment from the trigger step.

This integration with Pabbly Connect allows for personalized and contextually relevant responses to comments, enhancing engagement on your Facebook posts.


5. Posting Replies Back to Facebook Comments

After generating the reply, the final step is to post it back to the original comment on Facebook. Add another action step and select ‘Facebook Comments’ as the action application. Choose the action event ‘Reply Comment on Page Post’ and connect your Facebook account.

Map the necessary fields, including the post ID and the comment ID, to ensure the reply is posted correctly. Finally, click ‘Save and Send Test Request’ to execute the reply posting. You will see the generated reply appear under the original comment on your Facebook page.

This seamless integration showcases the power of Pabbly Connect in automating social media interactions, allowing businesses to maintain engagement without manual effort.


Conclusion

In this tutorial, we explored how to automate replies to Facebook comments using Google AI and Pabbly Connect. By setting up triggers and actions, businesses can efficiently engage with their audience, saving time and enhancing communication.

Ensure you check out Pabbly Connect to create business automation workflows and reduce manual tasks. Pabbly Connect currently offer integration with 2,000+ applications.

I Automated EVERYTHING Using Google Gemini… Insane Results!

Learn how to automate Instagram posts using Pabbly Connect and Google Gemini. Follow this step-by-step tutorial for seamless integration. Discover how to seamlessly connect your essential tools through accessible instructions that make powerful automation available to professionals at every skill level.

Watch Step By Step Video Tutorial Below


1. Accessing Pabbly Connect for Automation

To start automating your Instagram posts using Pabbly Connect, navigate to the Pabbly Connect landing page. You can do this by entering www.Pabbly.com/connect in your browser. Here, you will find options to sign in or sign up for free, allowing you to explore automation features.

If you’re a new user, signing up gives you access to 100 free tasks every month. Existing users can log in directly. Once logged in, you will see the Pabbly Connect dashboard, where you can create your automation workflows.


2. Creating Your Automation Workflow

After accessing Pabbly Connect, the next step is to create a new workflow. Click on the button to create a new workflow and select the new beta method for a modern experience. Name your workflow, for example, ‘Google Gemini Automation,’ and choose a folder for organization. using Pabbly Connect

  • Click on the create button to set up the workflow.
  • Understand that there are two main steps: trigger and action.
  • Set up your trigger step first, which will capture new data from Google Sheets.

This step is crucial as it ensures that your automation captures new Instagram post details automatically whenever they are entered into your Google Sheets.


3. Setting Up the Trigger with Google Sheets

In your workflow, select Google Sheets as your trigger application and choose the event as ‘New or Updated Spreadsheet Row.’ This action will monitor your Google Sheets for any new entries, such as an Instagram post idea and media link.

After selecting the trigger, click on the connect button to obtain the webhook URL. This URL will be used to connect Google Sheets with Pabbly Connect. Copy the URL and proceed to your Google Sheets.

  • Go to Extensions > Add-ons > Get Add-ons in Google Sheets.
  • Search for Pabbly Connect Webhooks and install it.
  • Refresh your Google Sheets to activate the add-on.

After installation, go back to Extensions, select Pabbly Connect Webhooks, and click on ‘Initial Setup’ to paste the webhook URL and set the trigger column. Once configured, your Google Sheets will be connected to Pabbly Connect.


4. Generating Captions Using Google Gemini

With your trigger set up, the next step is to generate Instagram captions using Google Gemini. In your Pabbly Connect workflow, add an action step and select Google Gemini as the application. Choose the event ‘Generate Content’ to create captions based on the ideas you enter.

For the connection, you will need to provide the API key from Google AI Studio. Create an API key and paste it into the connection field in Pabbly Connect. Next, you will need to set up the prompt for generating the caption.

Write a prompt that instructs Gemini to create an Instagram caption. Map the data from the previous step to include the idea and content type. Ensure your prompt is clear and concise to get the best results.

Once you have configured the action step, click on ‘Save and Send Test Request’ to generate the caption. This automation will help streamline your Instagram content creation process.


5. Posting to Instagram via Pabbly Connect

After generating the caption, the next step is to post it on Instagram. Add another action step in your workflow and select Instagram for Business as the application. Choose the event ‘Create, Upload, Publish Post’ to automate the posting process.

Connect your Instagram account to Pabbly Connect and map the file URL and generated caption to the corresponding fields. This ensures that the post is created with the correct media and caption.

Select the account where you want to post. Map the media URL and caption generated from the previous steps. Click on ‘Save and Send Test Request’ to create the post.

Upon successful execution, you will see the new post appear on your Instagram profile with the caption generated by Google Gemini, showcasing the power of Pabbly Connect in automating social media tasks.


Conclusion

In this tutorial, we explored how to automate Instagram posts using Pabbly Connect and Google Gemini. By following these steps, you can streamline your content creation process, allowing for efficient posting without manual intervention. Enjoy the benefits of automation and enhance your social media strategy today!

Ensure you check out Pabbly Connect to create business automation workflows and reduce manual tasks. Pabbly Connect currently offer integration with 2,000+ applications.

Never Miss a WhatsApp Message Again — Auto-Reply Instantly!

Learn how to set up an automatic WhatsApp reply system using Pabbly Chatflow to never miss a message again. Step-by-step tutorial included. Implement professional chat automation that answers common questions, qualifies leads, and books appointments without human intervention.

Watch Step By Step Video Tutorial Below


1. Access Pabbly Chatflow for Your WhatsApp Assistant

To create an automatic WhatsApp assistant, start by accessing Pabbly Chatflow. Open a new browser tab and navigate to the Pabbly Chatflow landing page at www.Pabbly.com/chatflow. This platform is essential for setting up your WhatsApp AI assistant.

If you are a new user, sign up for free to receive 100 free tasks and 100 credits each month. Existing users can log in directly to their accounts. Once logged in, you will see the Pabbly Chatflow dashboard where you can begin your setup.


2. Create Your WhatsApp Assistant in Pabbly Chatflow

Next, you will create your WhatsApp assistant within Pabbly Chatflow. Click on the ‘Assistant’ section and then tap on the ‘Add Assistant’ button. Name your assistant, for example, ‘Never Miss WhatsApp Message Again’, and click to add it.

  • Navigate to the Assistant section.
  • Click on the ‘Add Assistant’ button.
  • Enter a name for your assistant.

After naming your assistant, you need to set up the AI instructions. Select the instruction type as ‘AI Agent’. You can customize the responsibilities based on your business needs. This setup is crucial for ensuring your assistant responds accurately to customer inquiries.


3. Configure AI Settings in Pabbly Chatflow

In this step, you will configure the AI settings for your assistant in Pabbly Chatflow. Set the temperature for replies, which determines the creativity of responses. A temperature of 0.5 is recommended for a balance of focus and creativity.

Next, select the AI model to use. For this setup, choose the ‘GPT-4 Mini’. You will also need to provide your OpenAI API key, which is essential for the AI to function. Ensure you have a paid OpenAI account to generate this key.

  • Set the AI temperature to 0.5.
  • Select ‘GPT-4 Mini’ as the AI model.
  • Input your OpenAI API key.

After entering the API key, click the ‘Connect’ button to save your settings. This will link your assistant to the OpenAI model, enabling it to generate responses for customer inquiries.


4. Add Knowledge Source to Your Assistant

To enhance your assistant’s responses, you need to upload a knowledge base document in Pabbly Chatflow. This document should contain information about your business, including FAQs, services, and policies. This knowledge base allows the AI to reply accurately based on the information provided.

Click on the ‘Knowledge Source’ section and upload your document. Once uploaded, you will see a vector ID indicating that the knowledge base is successfully integrated. This step is crucial for your assistant to understand and provide relevant answers to customer questions.

Prepare a comprehensive knowledge base document. Upload the document in the Knowledge Source section. Verify the upload by checking for the vector ID.

With the knowledge base in place, your assistant is now equipped to provide informed responses, improving customer interaction significantly.


5. Test Your WhatsApp Assistant

After setting up your assistant, it’s time to test its functionality using Pabbly Chatflow. You can do this by sending a message through WhatsApp to see how the assistant replies. For example, asking about ongoing offers will prompt the assistant to provide relevant information based on your setup.

Once you send your question, wait for a response. The assistant should reply promptly, demonstrating its capability to handle customer inquiries effectively. This testing phase is crucial to ensure everything is working as intended before fully deploying your assistant.

To finalize your setup, make sure to enable the assistant in the settings section. Toggle the assistant activation button on and save your settings. This will ensure that your assistant is ready to respond to customer messages.


Conclusion

By following these steps in Pabbly Chatflow, you can create an effective WhatsApp assistant that never misses a message. This automation will enhance your customer service and improve response times significantly. Start using Pabbly Chatflow today to streamline your communication!

Ensure you check out Pabbly Connect to create business automation workflows and reduce manual tasks. Pabbly Connect currently offer integration with 2,000+ applications.

How to Add LinkedIn Leads to Zoho Sheets Automatically

Learn how to use Pabbly Connect to automatically add LinkedIn leads to Zoho Sheets without manual intervention. Step-by-step tutorial included. Build sophisticated automated workflows in less time than you think. This guide translates complex integrations into straightforward steps for immediate implementation.

Watch Step By Step Video Tutorial Below


1. Accessing Pabbly Connect for LinkedIn and Zoho Integration

To start adding LinkedIn leads to Zoho Sheets automatically, you first need to access Pabbly Connect. If you’re an existing user, simply log in to your account and open the workflow builder. New users can visit pabbl.com/connect to sign up for free, which grants you hundreds of tasks every month to explore the features of Pabbly Connect.

Once logged in, you will find the workflow builder, the core interface for automation. In this section, you will set up triggers and actions to automate the process of capturing LinkedIn leads and adding them to Zoho Sheets. This is essential for streamlining your lead management process.


2. Setting Up the Trigger for LinkedIn Leads

The next step involves setting up the trigger in Pabbly Connect. Click on the ‘Add Trigger’ button and search for LinkedIn. Select LinkedIn as your trigger application and choose the event as ‘Lead Notifications’. This step is crucial as it indicates that every time a lead is generated on LinkedIn, it will trigger the automation.

  • Search for LinkedIn in the trigger application.
  • Select ‘Lead Notifications’ as the event.
  • Click ‘Connect’ to establish a connection.

After selecting the event, if you have already connected LinkedIn with Pabbly Connect, you can select the existing connection. Otherwise, create a new connection by entering your LinkedIn account credentials. This connection is vital for pulling lead data into your automation workflow.


3. Capturing Lead Data from LinkedIn

Once the connection is established, you will be prompted to select your sponsored account. If no options are found, refresh the page to see your accounts. After selecting the account, click on ‘Save and Send Test Request’. This action will wait for a webhook response, which means Pabbly Connect is ready to receive lead data.

To test this, create a demo lead on LinkedIn by filling out the lead form associated with your ad. Although you might only be able to enter limited information (such as email and phone number) while in draft mode, this is sufficient for testing the automation. After submitting the lead form, Pabbly Connect will capture the webhook response.

  • Create a demo lead on LinkedIn.
  • Fill out the lead form and submit it.
  • Wait for Pabbly Connect to capture the lead details.

Once the lead data is captured, you will see all relevant details such as email, phone number, first name, last name, and company name displayed in Pabbly Connect. This confirms that the integration is functioning correctly.


4. Adding LinkedIn Lead Data to Zoho Sheets

With the lead data captured, the next step is to add this information to Zoho Sheets. In Pabbly Connect, click on ‘Add New Action Step’ and search for Zoho Sheets. Select it as your action application and choose ‘Create Row’ as the event. This sets up the action that will add the captured lead data to your specified Zoho Sheet.

Click ‘Connect’ to establish a connection with Zoho Sheets. If you do not have an existing connection, you will need to create one. This requires you to provide your Zoho domain, which can be found in the URL of your Zoho Sheets account. After entering the domain, grant the necessary permissions for Pabbly Connect to access your Zoho account.

Select ‘Create Row’ in Zoho Sheets. Enter your Zoho domain from the URL. Grant permissions to Pabbly Connect.

Once the connection is established, select the workbook and worksheet where you want to store the lead details. Use the mapping feature in Pabbly Connect to dynamically insert the lead data into the appropriate fields. This ensures that every new lead is automatically added to Zoho Sheets without manual input.


5. Finalizing the Automation Process

After mapping all lead details, click on ‘Save and Send Test Request’ to test the automation. If successful, you will receive a confirmation message indicating that the lead details have been added to your Zoho Sheet. This means that Pabbly Connect is successfully automating the process of adding leads from LinkedIn to Zoho Sheets.

From now on, every time a new lead is generated on LinkedIn, the details will automatically be added to your Zoho Sheets. This automation saves time and ensures that you never miss a lead. You can now focus on converting these leads into customers without worrying about manual data entry.

To summarize, using Pabbly Connect allows you to seamlessly integrate LinkedIn and Zoho Sheets, automating your lead management process effectively. This is a powerful tool that can enhance your business operations significantly.


Conclusion

In this tutorial, we explored how to use Pabbly Connect to automatically add LinkedIn leads to Zoho Sheets. By following the steps outlined, you can streamline your lead management process and improve efficiency in your business. Start automating today with Pabbly Connect for better productivity!

Ensure you check out Pabbly Connect to create business automation workflows and reduce manual tasks. Pabbly Connect currently offer integration with 2,000+ applications.

Get Instant Google Chat Alerts for New Google Ads Leads — Respond Faster & Close More!

Learn how to get instant Google Chat alerts for new Google Ads leads using Pabbly Connect. Follow our step-by-step tutorial to automate your lead notifications.

Watch Step By Step Video Tutorial Below


1. Access Pabbly Connect for Google Ads and Google Chat Integration

To get started with automating your Google Ads lead notifications, you need to access Pabbly Connect. Simply visit the Pabbly website and sign in to your account. If you are new, you can sign up for free to get started. This platform allows you to create workflows that integrate various applications seamlessly.

Once logged in, navigate to the Pabbly Connect dashboard. From here, you can create a new workflow. Click on the ‘Create Workflow’ button, and select the new beta workflow builder for a modern experience. Name your workflow as ‘Get Instant Google Chat Alerts for New Google Ads Leads’ and select an appropriate folder to save it.


2. Setting Up Google Ads as the Trigger in Pabbly Connect

In this step, you will set up Google Ads as the trigger application within the Pabbly Connect workflow. The trigger is the event that starts the automation process. Select Google Ads and choose the event as ‘New Lead Form Entry’ to capture new leads automatically.

  • Select ‘Google Ads’ as the trigger application.
  • Choose the trigger event: ‘New Lead Form Entry’.
  • Connect your Google Ads account by providing the required permissions.

After this, Pabbly Connect will provide you with a webhook URL. This URL acts as a bridge to connect Google Ads with Pabbly Connect. Copy this URL and paste it into your Google Ads lead form settings under the lead delivery option.


3. Sending Test Data from Google Ads to Pabbly Connect

Now that you have set up the trigger, it’s time to send test data to ensure the connection works correctly. In your Google Ads account, navigate to the lead form settings and paste the webhook URL you copied earlier. Click the option to send test data.

  • Open your Google Ads account and find your test campaign.
  • Paste the webhook URL in the lead delivery settings.
  • Click on ‘Send Test Data’ to verify the connection.

Once you send the test data, return to Pabbly Connect to check if the response has been captured successfully. If everything is set up correctly, you will see the test lead details reflected in your Pabbly Connect workflow.


4. Configuring Google Chat Hangout as the Action Step

After successfully capturing the test data, the next step is to configure Google Chat Hangout as the action application in Pabbly Connect. This is where you will send notifications about new leads. Select Google Chat Hangout and choose the action event as ‘Create Message’.

To set this up, you will need to enter the Google Chat webhook URL. In your Google Chat Hangout, create a new space and access the space settings to add a webhook. Copy the webhook URL and paste it into the required field in Pabbly Connect.

Now, you can customize the message that will be sent to your team. Use mapping to dynamically insert details from the Google Ads lead, ensuring that every new lead’s information is included in the notification sent to Google Chat.


5. Testing the Integration and Finalizing the Workflow

With Google Ads and Google Chat Hangout configured in Pabbly Connect, it’s time to test the entire workflow. Click on ‘Save and Send Test Request’ to send a message to your Google Chat space. If everything is set up correctly, you should see the notification appear in your chat.

This confirms that your automation is working. You will now receive alerts in Google Chat whenever a new lead comes in through Google Ads, allowing your team to respond faster and close more leads.

To summarize, you have set up an automated workflow using Pabbly Connect that connects Google Ads and Google Chat Hangout. This integration ensures that your team is notified instantly about new leads, enhancing your response time and improving your sales process.


Conclusion

In conclusion, using Pabbly Connect to integrate Google Ads with Google Chat Hangout allows for instant alerts on new leads. This automation helps teams respond faster and close more deals effectively.

Ensure you check out Pabbly Connect to create business automation workflows and reduce manual tasks. Pabbly Connect currently offer integration with 2,000+ applications.