Automate Car Rental Bookings via WhatsApp with Pabbly Chatflow

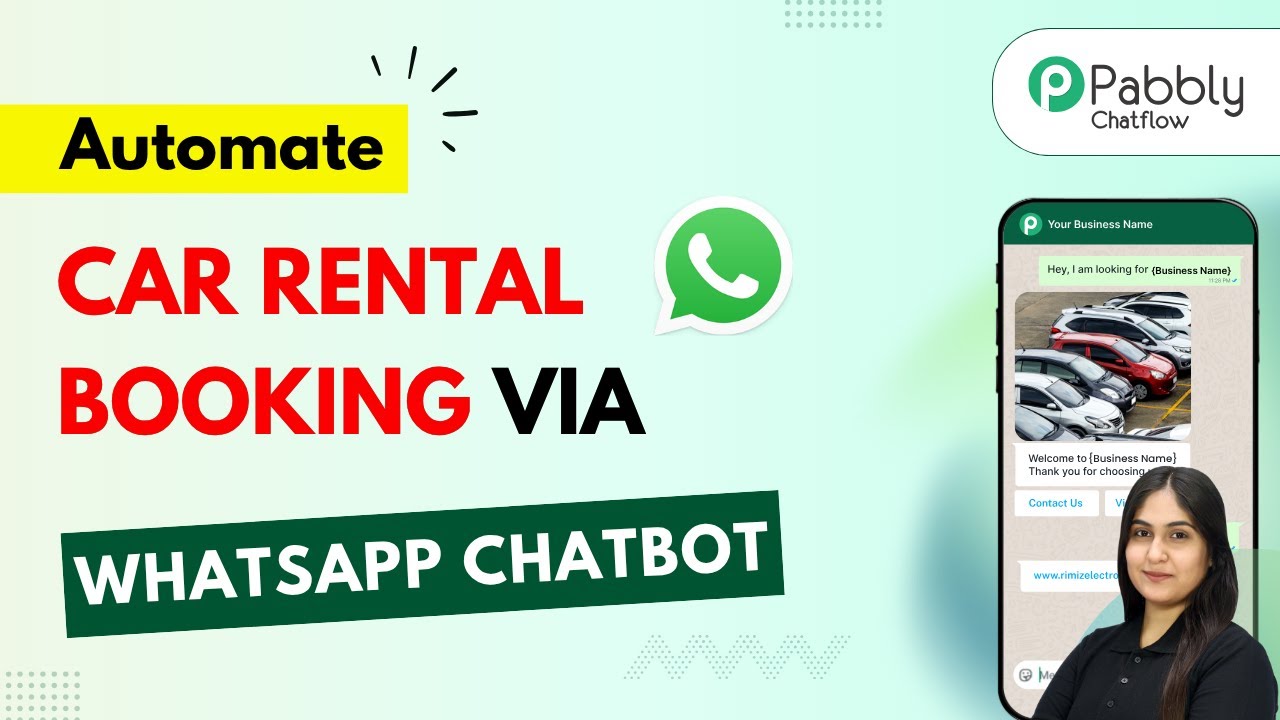
Learn how to automate car rental bookings using Pabbly Chatflow and Pabbly Chatflow for seamless integration with WhatsApp, Google Sheets, and more. Explore how leading businesses automate customer interactions with carefully designed chat sequences that feel natural and helpful.

Watch Step By Step Video Tutorial Below


1. Accessing Pabbly Chatflow for Car Rental Automation

To automate bookings for car rental services via WhatsApp, you first need to access Pabbly Chatflow. Open your browser and search for Pabbly Chatflow. This platform provides an all-in-one solution for managing WhatsApp communications effectively.

Once on the Pabbly Chatflow homepage, you can either sign in if you are an existing user or click on ‘Sign Up Free’ to create a new account. After logging in, you will be greeted by the dashboard where you can start creating your WhatsApp chatbot.


2. Creating Your WhatsApp Chatbot with Pabbly Chatflow

In this step, you will create a WhatsApp chatbot specifically for your car rental services using Pabbly Chatflow. Begin by clicking on the ‘Create New Flow’ button on your dashboard. This will allow you to set up a new automation flow for your WhatsApp interactions.

  • Click on ‘Create New Flow’.
  • Name your flow, e.g., ‘Car Rental Booking Bot’.
  • Select the trigger event that starts the flow.

Once the flow is created, set up the trigger event to respond when a user sends a specific message, like ‘Book Car’. This will initiate the booking process automatically whenever a potential customer reaches out via WhatsApp.


3. Adding Car Options in Pabbly Chatflow

Now that your WhatsApp chatbot is created, the next step is to add the available car options for users to choose from. In this section, you will configure the chatbot to present a list of car types available for rental.

  • Use the ‘List Message’ feature to display options.
  • Add header text like ‘Available Cars’.
  • Include types like Sedan, SUV, Luxury, etc.

After listing the car types, ensure you allow users to select their preferred option. This selection will trigger the next part of the booking process in your Pabbly Chatflow setup.


4. Capturing User Details for Bookings

The next step involves capturing essential user details for the booking process. In your Pabbly Chatflow, you can set up questions to gather information such as rental dates, user names, and contact numbers.

To do this, add message boxes that prompt users for their full name and contact number. This information is crucial for confirming their bookings and ensuring a smooth rental experience.

After collecting the details, ensure that they are stored appropriately. You can use Pabbly Hook to send this information to your Google Sheets for record-keeping, which will help streamline your operations.


5. Finalizing Bookings and Integrating with Google Sheets

Finally, it’s time to finalize the bookings and automate the integration with Google Sheets. In this step, you will configure your Pabbly Chatflow to send the collected user details to a Google Sheet as a new row.

Set up an action step in your Pabbly Chatflow that connects to Google Sheets. Select the event to add a new row, and map the fields from your previous steps to the corresponding columns in the Google Sheet.

Once this is set up, every time a booking is made through your WhatsApp chatbot, the user’s details will be automatically recorded in your Google Sheets, ensuring you have all necessary information at your fingertips for future reference.


Conclusion

By following these steps, you can effectively automate car rental bookings via WhatsApp using Pabbly Chatflow. This integration not only streamlines the booking process but also enhances customer experience by providing instant responses and organized record-keeping through Google Sheets.

Ensure you check out Pabbly Connect to create business automation workflows and reduce manual tasks. Pabbly Connect currently offer integration with 2,000+ applications.

Automate Event Registration for Conferences via WhatsApp with Pabbly Chatflow

Learn how to automate event registration for conferences via WhatsApp using Pabbly Chatflow. Follow our step-by-step tutorial to streamline your registration process. This detailed guide shows you how to build powerful chat automation that engages visitors and converts prospects—without any coding required.

Watch Step By Step Video Tutorial Below


1. Setting Up Pabbly Chatflow for Event Registration

To automate event registration for conferences via WhatsApp, the first step is to set up Pabbly Chatflow. This platform allows you to create a WhatsApp chatbot that handles registrations effortlessly. Start by visiting the Pabbly Chatflow landing page and sign in or create a new account.

Once logged in, navigate to the dashboard where you can access all tools. You need to add your WhatsApp number to begin the setup process. Select either WhatsApp connect or manual token connect to integrate your WhatsApp account into Pabbly Chatflow.


2. Creating the WhatsApp Chatbot in Pabbly Chatflow

Now that your WhatsApp number is added, you can create a chatbot specifically for event registrations. In Pabbly Chatflow, go to the flow section and click on the ‘Add Flow’ button. Name your flow something like ‘Chatbot for Event Registrations’ to keep it organized.

  • Select the trigger event as ‘Keyword/Reaction Match’.
  • Enter keywords like ‘register’ and ‘Tech X’ to initiate the chatbot flow.
  • Configure the first message to greet users and provide options to learn more or register.

After setting these options, your WhatsApp chatbot is ready to respond to user inquiries about event registration. Make sure to test the flow to ensure it works as expected.


3. Collecting User Information via the Chatbot

As users interact with your WhatsApp chatbot, Pabbly Chatflow will facilitate the collection of essential information such as full names and email addresses. After the user clicks on the ‘Register Now’ button, your chatbot should prompt them to share their full name.

Follow these steps to collect user information effectively:

  • Use the ‘Ask Question’ feature to request the user’s full name.
  • Set up a validation message to ensure the user inputs the information correctly.
  • Repeat the process for collecting the email address.

This structured approach ensures that all necessary details are captured accurately and efficiently through Pabbly Chatflow.


4. Integrating Google Sheets with Pabbly Chatflow

Once the user information is collected, the next step involves integrating Google Sheets to store the registration data. Pabbly Chatflow allows you to set up an API request to send the collected information directly into a Google Sheet.

To accomplish this, follow these steps:

Create a workflow in Pabbly Connect and set the trigger application as Pabbly Chatflow. Select the action application as Google Sheets and choose the ‘Add Row’ event. Map the fields for name, email, and mobile number to ensure data accuracy.

After setting up this integration, every time a user registers, their details will be automatically added to your Google Sheets, simplifying your data management.


5. Finalizing and Testing the Chatbot

After completing the setup, it’s crucial to finalize your WhatsApp chatbot in Pabbly Chatflow. Save all changes and test the entire flow to ensure everything works seamlessly from start to finish.

To test, clear previous conversations and initiate a new session by sending the keyword you set up earlier, such as ‘Tech X’. The chatbot should respond with the registration options, and you can proceed to register as a user.

As you register, the chatbot will collect your information and send a thank you message confirming your registration. Additionally, check your Google Sheets to verify that the data has been recorded correctly.


Conclusion

By following this tutorial, you can successfully automate event registration for conferences via WhatsApp using Pabbly Chatflow. This integration not only streamlines your registration process but also enhances user engagement through automated responses. Start exploring the benefits of Pabbly Chatflow for your business today!

Ensure you check out Pabbly Connect to create business automation workflows and reduce manual tasks. Pabbly Connect currently offer integration with 2,000+ applications.

How to Send WhatsApp Session Reminders for Calendly Appointments Using Pabbly Connect

Learn how to send WhatsApp session reminders for Calendly appointments using Pabbly Connect. Step-by-step tutorial for seamless integration. Transform complex automation concepts into accessible, actionable steps that eliminate unnecessary manual work while maximizing existing application capabilities.

Watch Step By Step Video Tutorial Below


1. Accessing Pabbly Connect for Integration

To start sending WhatsApp session reminders for Calendly appointments, first access Pabbly Connect. This platform allows seamless integration between different applications, including Calendly and WhatsApp. Go to the Pabbly Connect website and either sign in or create a new account if you are a first-time user.

Once logged in, navigate to the dashboard of Pabbly Connect. Here, you can begin creating your workflow to automate sending reminders. This process will involve setting up triggers and actions that respond to new appointments scheduled in Calendly.


2. Creating a Workflow in Pabbly Connect

After accessing your Pabbly Connect dashboard, click on the ‘Create Workflow’ button. Name your workflow something meaningful, such as ‘Send WhatsApp Session Reminders for Calendly Appointments’. This helps keep your integrations organized.

  • Select the trigger application as Calendly.
  • Choose the trigger event as ‘Invitee Created’.
  • Connect your Calendly account to Pabbly Connect.

This setup ensures that every time a new invitee schedules an appointment, Pabbly Connect captures the necessary details automatically.


3. Testing the Integration with Calendly

To verify that your integration is working, schedule a test appointment in your Calendly account. Copy the link for a meeting you have created and open it in a new tab. Fill in the required details, such as name, email, and mobile number, and then schedule the event.

Once the appointment is scheduled, return to your Pabbly Connect dashboard. You should see that the workflow has captured the details of the new appointment, including the invitee’s information. This confirms that the trigger from Calendly is functioning correctly.


4. Setting Up WhatsApp Cloud API in Pabbly Connect

The next step is to connect the WhatsApp Cloud API to your workflow in Pabbly Connect. Click on the action button and select WhatsApp as your action application. Choose the action event as ‘Send Template Message’.

  • Add a new connection to WhatsApp Cloud API.
  • Input your Access Token, Phone Number ID, and WhatsApp Business Account ID.
  • Map the necessary fields from the Calendly trigger.

This setup allows Pabbly Connect to send automated WhatsApp messages to users one hour before their scheduled appointments, ensuring they receive timely reminders.


5. Finalizing Your Automation Workflow

After configuring the WhatsApp API, finalize your workflow by mapping the required fields. This includes the invitee’s phone number, the template ID for the message, and the meeting time. Ensure you select the correct time zone for accurate reminders.

Once all fields are filled, click on the ‘Save and Send Test Request’ button. This action will send a test message through WhatsApp to verify that everything is working correctly. If successful, you will see a confirmation in your WhatsApp account.

With this setup, Pabbly Connect automates the sending of WhatsApp reminders for all future Calendly appointments, enhancing your client communication and ensuring no appointments are missed.


Conclusion

In conclusion, using Pabbly Connect to integrate Calendly with WhatsApp allows for efficient appointment reminders. This automation not only saves time but also helps keep your clients informed about their scheduled sessions. Start using Pabbly Connect today to streamline your appointment management!

Ensure you check out Pabbly Connect to create business automation workflows and reduce manual tasks. Pabbly Connect currently offer integration with 2,000+ applications.

Automatically Post New Products to Pinterest from WooCommerce Using Pabbly Connect

Learn how to automatically post new products from WooCommerce to Pinterest using Pabbly Connect. Step-by-step tutorial with detailed instructions. Explore efficient methods for automating routine tasks with clear, concise instructions suited for both newcomers and experienced professionals.

Watch Step By Step Video Tutorial Below


1. Accessing Pabbly Connect for Integration

To automatically post new products to Pinterest from WooCommerce, we will use Pabbly Connect. First, open a new tab and go to the Pabbly Connect website by entering ‘Pabbly.com/connect’ in the search bar. This platform allows you to create automated workflows seamlessly.

Once on the Pabbly Connect homepage, you can either sign up for a new account or log in if you already have one. After signing in, you will land on the dashboard where you can manage your automation workflows. Click on the ‘Create Workflow’ button to begin setting up your integration.


2. Creating a New Workflow in Pabbly Connect

After clicking the ‘Create Workflow’ button, you will need to select the new version of the workflow builder for a more efficient setup. Enter the workflow name, ‘Automatically Post New Products to Pinterest from WooCommerce,’ and select a folder to organize your workflow. Click the ‘Create’ button to proceed. using Pabbly Connect

  • Choose a name that reflects the automation purpose.
  • Select a folder to keep your workflows organized.
  • Click on the ‘Create’ button to set up the workflow.

Now you will see the workflow builder interface. Here, toggle the button on to activate your workflow. The next step is to set up a trigger, which will start the automation process whenever a new product is created in WooCommerce.


3. Setting Up the Trigger for WooCommerce

In the workflow builder, click on the plus icon to add a trigger. Search for ‘WooCommerce’ and select it as your trigger app. Choose the event ‘New Order Created’ to ensure that the workflow is activated every time a new product is added to your WooCommerce store.

Next, click on the ‘Connect’ button. You will receive a webhook URL from Pabbly Connect, which acts as a bridge between your WooCommerce account and the automation platform. Copy this URL, as you will need to add it to your WooCommerce settings.

  • Select ‘WooCommerce’ as the trigger app.
  • Choose ‘New Order Created’ as the trigger event.
  • Copy the webhook URL for use in WooCommerce settings.

After copying the URL, log in to your WordPress account and navigate to the WooCommerce settings. Under the ‘Advanced’ tab, find the ‘Webhooks’ option and paste the copied URL into the delivery URL field. This setup will ensure that every new product triggers a pin creation in Pinterest.


4. Creating a New Product in WooCommerce

Now that you have set up the trigger, it’s time to create a new product in WooCommerce. Go to the ‘Products’ section and click on ‘Add New Product.’ Here, you can fill in the product details such as name, description, and images.

For example, let’s create a product named ‘Summer Dress’. Enter a description, set the regular price, and upload a product image. After filling in all the necessary details, click on the ‘Publish’ button to make the product live. This action will trigger the webhook you set up earlier.

Go to the ‘Products’ section in WooCommerce. Click on ‘Add New Product’ to enter product details. Fill in the product name, description, and images before publishing.

Once the product is published, return to your Pabbly Connect dashboard. You should see a response indicating that the webhook has received the product details, confirming that the trigger is functioning correctly.


5. Creating a Pin in Pinterest Using Pabbly Connect

With the product created, the next step is to create a pin in Pinterest. In your workflow on Pabbly Connect, add an action step and select ‘Pinterest’ as the action app. Choose the event ‘Create a Pin’ to proceed with generating a new pin for the product.

Click on the ‘Connect’ button to link your Pinterest account. Ensure that you have your Pinterest account open in another tab to facilitate the connection. Once connected, you will need to specify the board where the pin will be posted, along with the image URL, title, and description that you mapped from the WooCommerce product data.

Select ‘Pinterest’ as the action app. Choose ‘Create a Pin’ as the action event. Map the product details such as title, description, and image URL.

Finally, click on the ‘Save and Send Test Request’ button to create the pin. Upon successful creation, you can check your Pinterest account to see the new pin reflecting the product details. This integration allows you to automatically post new products to Pinterest, enhancing your online visibility and driving traffic to your store.


Conclusion

In this tutorial, we explored how to use Pabbly Connect to automatically post new products from WooCommerce to Pinterest. By following the steps outlined, you can streamline your product promotion and enhance your online sales effortlessly. Automating this process not only saves time but also increases your reach and engagement with potential customers.

Ensure you check out Pabbly Connect to create business automation workflows and reduce manual tasks. Pabbly Connect currently offer integration with 2,000+ applications.

How to Sync New Shopify Orders to Google Sheets with Pabbly Connect

Learn how to sync new Shopify orders to Google Sheets using Pabbly Connect for efficient order tracking and management. Follow our step-by-step tutorial! Implement the precise methodologies leading organizations use to automate repetitive tasks, illustrated with practical examples designed for immediate application.

Watch Step By Step Video Tutorial Below


1. Accessing Pabbly Connect for Shopify Orders

To sync new Shopify orders to Google Sheets, you first need to access Pabbly Connect. Start by opening a new tab and going to the Pabbly Connect website.

Once there, you can sign up for a free account or log in if you already have one. After logging in, you will reach the dashboard where you can create and manage your automation workflows.


2. Creating a New Workflow in Pabbly Connect

To create a new workflow in Pabbly Connect, click on the ‘Create Workflow’ button in the dashboard. Here, you will choose between the new version or the classic version of the workflow builder.

For this tutorial, select the new version for its faster and more flexible interface. Name your workflow ‘Sync New Shopify Orders to Google Sheets for Better Tracking’ and choose a folder to organize your workflow.

  • Click on ‘Create’ to finalize your workflow.
  • Toggle the button to activate your workflow.
  • Click on the ‘Add Trigger’ option to proceed.

Now you are ready to set up the trigger for your workflow.


3. Setting Up Shopify as the Trigger in Pabbly Connect

For this integration, select Shopify as your trigger application in Pabbly Connect. Choose ‘New Order’ as the event that will trigger the workflow. This means every time a new order is placed in Shopify, it will initiate the workflow.

After selecting the trigger, you will receive a webhook URL that acts as a bridge between Shopify and Pabbly Connect. Copy this URL and log in to your Shopify account.

  • Go to the ‘Settings’ section in Shopify.
  • Navigate to ‘Notifications’ and then click on ‘Create Webhook’.
  • Select ‘Order Creation’ as the event and paste the webhook URL.

After saving the webhook, return to Pabbly Connect to wait for the webhook response.


4. Testing the Integration with a Sample Order

To test the integration, create a sample order in your Shopify store. This will trigger the webhook you set up in Pabbly Connect. Go back to Shopify, select a product, and complete the checkout process.

Once the order is placed, return to Pabbly Connect to see the webhook response. This response will include all order details such as customer name, email, order item, amount, and more.

Check if all details are correctly received in Pabbly Connect. If everything looks good, proceed to the next step.

Now you are ready to set up the action to send this data to Google Sheets.


5. Adding New Rows to Google Sheets via Pabbly Connect

Next, select Google Sheets as your action application in Pabbly Connect. Choose the ‘Add New Row’ action event to store the order details in your Google Sheets.

Connect your Google account by clicking on ‘Sign in with Google’ and authorizing Pabbly Connect to access your Google Sheets. After connecting, select the spreadsheet you created for Shopify order details.

Map the fields from the webhook response to the corresponding columns in your Google Sheet. Ensure that all fields like name, email, order item, amount, and city are properly linked.

Save your settings and send a test request to verify that the data is correctly added to your Google Sheets. Once confirmed, your automation is complete!


Conclusion

By following this tutorial, you have successfully learned how to sync new Shopify orders to Google Sheets using Pabbly Connect. This integration streamlines order tracking and enhances your inventory management. Now you can efficiently manage your sales data without manual entry!

Ensure you check out Pabbly Connect to create business automation workflows and reduce manual tasks. Pabbly Connect currently offer integration with 2,000+ applications.

Track New Sales Orders from Stripe to Google Sheets Using Pabbly Connect

Learn how to track new sales orders from Stripe to Google Sheets using Pabbly Connect. Follow this step-by-step tutorial for seamless integration. Build sophisticated automated workflows in less time than you think. This guide translates complex integrations into straightforward steps for immediate implementation.

Watch Step By Step Video Tutorial Below


1. Accessing Pabbly Connect for Integration

To track new sales orders from Stripe to Google Sheets, you need to access Pabbly Connect. Start by visiting the Pabbly website and navigating to the Connect section. Here, you will find options to either sign in or create a new account if you are a first-time user.

Once you have logged into your Pabbly Connect account, you will see the dashboard, which includes various applications available for integration. To begin the process, click on the ‘Create Workflow’ button located in the top right corner of the dashboard.


2. Creating a Workflow in Pabbly Connect

In this step, you will create a workflow that connects Stripe and Google Sheets using Pabbly Connect. After clicking on ‘Create Workflow’, you will be prompted to name your workflow. For this integration, name it ‘Track New Sales Orders from Stripe to Google Sheets’.

  • Select the folder where you want to save this workflow.
  • Choose the ‘Stripe’ application as your trigger.
  • Set the trigger event to ‘New Charge’ to capture new sales orders.

After selecting these options, click on the ‘Connect’ button. This will generate a webhook URL that you will use to connect your Stripe account with Pabbly Connect. Make sure to copy this URL as it will be needed in the following steps.


3. Setting Up Stripe for Webhooks

The next step involves setting up your Stripe account to send data to the webhook URL generated by Pabbly Connect. Log in to your Stripe account and navigate to the Developers section in the sidebar. Here, click on ‘Webhooks’ to add a new webhook.

  • Click on ‘Add endpoint’ and paste the copied webhook URL from Pabbly Connect.
  • Select the event type as ‘charge.succeeded’ to ensure you capture successful transactions.
  • Save the webhook settings.

With the webhook set up, any new sales orders processed through Stripe will trigger data to be sent to Pabbly Connect, allowing you to automate the data entry into Google Sheets.


4. Configuring Google Sheets for Data Entry

Now that you have set up your Stripe account, it’s time to configure Google Sheets to receive the data. In your Pabbly Connect workflow, add a new action step and select ‘Google Sheets’ as the application.

Choose the action event as ‘Add Row’ and connect your Google Sheets account by clicking on ‘Sign in with Google’. Select the spreadsheet where you want the sales order details to be stored. Map the fields from the Stripe data to the corresponding columns in your Google Sheets, such as Name, Email, Amount, and Payment Method.


5. Testing the Integration

With everything set up, it’s crucial to test the integration to ensure data flows correctly from Stripe to Google Sheets via Pabbly Connect. Go back to your Stripe account and make a test payment using the test mode.

After completing the test payment, check your Google Sheets to see if the new row with the order details has been added successfully. If the integration is working correctly, you will see the name, email, amount, and payment method populated in the sheet.


Conclusion

In this tutorial, we demonstrated how to track new sales orders from Stripe to Google Sheets using Pabbly Connect. By following these steps, you can automate the process of recording sales orders efficiently. This integration not only saves time but also ensures that your sales data is organized and easily accessible.

Ensure you check out Pabbly Connect to create business automation workflows and reduce manual tasks. Pabbly Connect currently offer integration with 2,000+ applications.

How to Automatically Post New Content to Instagram from WordPress Using Pabbly Connect

Learn how to use Pabbly Connect to automatically post new content from WordPress to Instagram with this step-by-step tutorial. Master proven automation processes with practical implementation examples and strategic recommendations you can apply immediately in your workflow.

Watch Step By Step Video Tutorial Below


1. Accessing Pabbly Connect for Integration

To begin, access Pabbly Connect by visiting its official URL at www.Pabbly.com/connect. This platform is essential for automating the posting of new WordPress content to Instagram.

Once on the Pabbly Connect page, you can either sign in if you are an existing user or click on ‘Sign Up Free’ to create a new account. After signing in, you will be directed to the Pabbly Connect dashboard where you can manage your workflows.


2. Creating a New Workflow in Pabbly Connect

After logging into Pabbly Connect, click on the ‘Create Workflow’ button. You will be prompted to select between the new beta workflow builder and the classic version. Choose the new beta builder for a modern experience.

  • Select a name for your workflow, such as ‘WordPress to Instagram’.
  • Choose the folder where you want to save this workflow.

After naming your workflow and selecting a folder, click on the ‘Create’ button. This will set up your workflow where you can add triggers and actions.


3. Setting Up the Trigger for WordPress

The next step involves setting up the trigger for your workflow. In Pabbly Connect, click on ‘Add Trigger’ to select WordPress as the application that will initiate the workflow.

Choose the event ‘New Post Published’ as your trigger event. Once selected, click on the ‘Connect’ button to establish a connection between Pabbly Connect and your WordPress account. You will need to paste a webhook URL into your WordPress settings to complete this connection.


4. Configuring WordPress to Use the Webhook

To configure WordPress, navigate to the plugins section and search for the ‘WP Webhooks’ plugin. If it’s not installed, install it first. Once installed, go to the settings of the WP Webhooks plugin. using Pabbly Connect

  • Select ‘Send Data’ and then add the webhook URL you copied from Pabbly Connect.
  • Name your webhook (e.g., ‘My Insta Webhook’) and set the trigger to ‘Post Created’.

After saving the settings, ensure that the webhook is successfully linked. This setup will allow Pabbly Connect to receive data whenever a new post is published on your WordPress site.


5. Finalizing the Action to Post on Instagram

With the trigger set, it’s time to configure the action. Click on ‘Add Action Step’ in Pabbly Connect and select ‘Instagram for Business’ as the action app. Choose the event ‘Publish Photo’.

Connect your Instagram account by following the prompts. Once connected, map the photo URL and caption from your WordPress post to the corresponding fields in the Instagram action setup. Finally, click ‘Save and Send Test Request’ to verify that everything is working correctly.


Conclusion

Using Pabbly Connect, you can seamlessly automate the process of posting new content from WordPress to Instagram. This integration not only saves time but also enhances your online presence by driving traffic to your WordPress site.

Ensure you check out Pabbly Connect to create business automation workflows and reduce manual tasks. Pabbly Connect currently offer integration with 2,000+ applications.

How to Create Discord Alert on New Lead from Instagram Ads Using Pabbly Connect

Learn how to set up alerts on Discord for new leads from Instagram Ads using Pabbly Connect with this detailed step-by-step tutorial. Explore systematic approaches to creating efficient automation solutions that convert technical concepts into practical, implementable instructions.

Watch Step By Step Video Tutorial Below


1. Accessing Pabbly Connect for Integration

To create a Discord alert on new leads from Instagram Ads, the first step is to access Pabbly Connect. You can do this by visiting the official website and signing in or signing up for a free account.

Once logged in, you will be directed to the Pabbly Connect dashboard. From here, you can create a new workflow that will facilitate the integration between Instagram Ads and Discord. This powerful automation tool allows you to connect multiple applications seamlessly.


2. Setting Up the Trigger for New Leads

In this section, we will set up the trigger to detect new leads from Instagram Ads using Pabbly Connect. Click on the ‘Create Workflow’ button and name your workflow, such as ‘New Instagram Lead Alert’. Next, select Instagram Lead Ads as your trigger app.

  • Choose ‘New Lead’ as the trigger event.
  • Connect your Instagram account to Pabbly Connect.
  • Select the appropriate page and lead form from your account.

After setting up the trigger, click on ‘Save and Send Test Request’. This will prepare Pabbly Connect to receive data from Instagram Ads whenever a new lead is created. Make sure to perform a test submission to ensure everything is working correctly.


3. Configuring Discord Action to Send Alerts

Now that the trigger is set up, the next step is configuring the action in Discord using Pabbly Connect. Click on ‘Add New Action Step’ and select Discord as your action app. Choose the action event as ‘Send Channel Message’.

To connect Discord with Pabbly Connect, you will need to provide the webhook URL from your Discord channel. Follow these steps:

  • Open your Discord channel settings and navigate to Integrations.
  • Create a new webhook and copy the webhook URL.
  • Paste the webhook URL into Pabbly Connect.

After pasting the webhook URL, you can map the fields for the message you want to send. Include details like the lead’s name, email, and phone number. This mapping ensures that every time a new lead is created, the relevant information is sent as an alert to your Discord channel.


4. Testing the Integration Workflow

With both the trigger and action set up in Pabbly Connect, it’s time to test the integration. Go back to the Instagram Lead Ads testing tool and submit a new lead form. Ensure that you fill out all required fields and submit the form.

After submitting the form, return to Pabbly Connect and check if the data has been received. You should see the details of the new lead appear in the Pabbly Connect interface. If everything is set up correctly, the alert should also appear in your designated Discord channel.

This testing phase is crucial to confirm that your automation is working as intended. If you encounter any issues, double-check your settings in both Pabbly Connect and Discord to ensure everything is configured correctly.


5. Finalizing and Activating the Workflow

Once testing is complete and successful, the final step is to finalize and activate your workflow in Pabbly Connect. Ensure that all configurations are correct and that the mapping of fields is accurate.

After reviewing your settings, click on the ‘Save’ button to save your workflow. You can then activate it to start receiving alerts on Discord whenever a new lead is generated from Instagram Ads.

With the workflow activated, you can now focus on your business while Pabbly Connect handles the automation of alerts. This integration not only saves time but also ensures that your team is promptly informed about new leads, allowing for quick follow-ups and better engagement.


Conclusion

In this tutorial, we explored how to create a Discord alert for new leads from Instagram Ads using Pabbly Connect. By following the steps outlined, you can effectively automate your lead notifications and enhance your team’s responsiveness to new inquiries.

Ensure you check out Pabbly Connect to create business automation workflows and reduce manual tasks. Pabbly Connect currently offer integration with 2,000+ applications.

Utilizing Pabbly Connect for this integration streamlines your workflow and improves communication, ensuring you never miss an opportunity. Start leveraging this powerful tool today to optimize your business processes.

How to Create Leads in Privyr from Google Forms Submissions Using Pabbly Connect

Learn how to integrate Google Forms with Privyr using Pabbly Connect to automate lead creation seamlessly. Follow our detailed step-by-step tutorial. Explore systematic approaches to creating efficient automation solutions that convert technical concepts into practical, implementable instructions.

Watch Step By Step Video Tutorial Below


1. Setting Up Pabbly Connect for Google Forms Integration

To create leads in Privyr from Google Forms submissions, start by accessing Pabbly Connect. This platform is essential for building connections between various applications without the need for coding. First, navigate to the Pabbly Connect website and sign in or sign up for a free account.

Once logged in, you will be directed to the Pabbly Connect dashboard. Here, you can create a new workflow that will facilitate the integration process. Click on the ‘Create Workflow’ button, where you will be prompted to name your workflow. For this integration, name it ‘Create Leads in Privyr from Google Forms Submission’.


2. Creating the Trigger in Pabbly Connect

In this step, you will set up the trigger that captures new submissions from Google Forms. In the Pabbly Connect dashboard, select Google Forms as your trigger application. The trigger event will be ‘New Response Received’. This setup ensures that every time a form is submitted, the data is captured by Pabbly Connect.

  • Select Google Forms as the trigger application.
  • Choose ‘New Response Received’ as the trigger event.
  • Copy the webhook URL provided by Pabbly Connect.

After copying the webhook URL, go to your Google Forms and open the form you want to connect. In the responses section, click on ‘Link to Sheets’ and create a new spreadsheet. This spreadsheet will automatically collect the responses from your Google Form, which will then be sent to Pabbly Connect.


3. Connecting Google Sheets to Pabbly Connect

To complete the connection between Google Sheets and Pabbly Connect, you will need to install the Pabbly Connect Webhooks add-on. Go to the Extensions menu in Google Sheets, select Add-ons, and then click on Get Add-ons. Search for Pabbly Connect Webhooks and install it.

Once installed, refresh your Google Sheets. Go back to Extensions, select Pabbly Connect Webhooks, and click on Initial Setup. Here, paste the webhook URL you copied earlier and set the trigger column to the last column where data will be entered. This setup ensures that every new form submission will trigger the webhook to send data to Pabbly Connect.

  • Select the trigger column in your spreadsheet.
  • Click on ‘Send on Event’ to ensure data is sent to Pabbly Connect.

After completing these steps, you will have successfully connected Google Sheets to Pabbly Connect, which will capture all new submissions from your Google Form.


4. Setting Up the Action in Privyr

Now that the trigger is set, it’s time to configure the action that adds the new lead to Privyr. In Pabbly Connect, select Privyr as your action application. The action event will be ‘Create Client’. This step is critical as it determines how the data captured from Google Forms will be utilized. using Pabbly Connect

To connect Privyr, you will need to enter your Privyr authentication token. Log in to your Privyr account, navigate to the integrations section, and find the Pabbly Connect option. Copy the authentication token and paste it into the corresponding field in Pabbly Connect.

Select ‘Create Client’ as the action event. Paste the Privyr authentication token in Pabbly Connect. Map the lead’s details from the previous step.

By mapping the lead’s first name, last name, email, and phone number from the Google Forms submission, Pabbly Connect ensures that all relevant data is sent to Privyr, creating a new client entry seamlessly.


5. Testing the Integration

With everything set up, it’s time to test the integration. Go back to your Google Form and submit a test response. Fill in the required fields and hit the submit button. This action should trigger the workflow in Pabbly Connect and send the data to Privyr.

After submitting the form, check your Google Sheets to confirm that the response has been recorded. Then, refresh your Privyr account to see if the new client has been added successfully. If everything is set up correctly, you should see the new lead listed in your Privyr client section.

This testing phase is crucial as it verifies that the integration between Google Forms, Google Sheets, and Privyr via Pabbly Connect is functioning as intended. If any issues arise, review the steps and ensure all mappings and connections are correct.


Conclusion

In this tutorial, we explored how to create leads in Privyr from Google Forms submissions using Pabbly Connect. By automating the process, you can save time and ensure that leads are captured efficiently. This integration allows you to focus more on your business while Pabbly Connect handles the data flow seamlessly.

Ensure you check out Pabbly Connect to create business automation workflows and reduce manual tasks. Pabbly Connect currently offer integration with 2,000+ applications.

Integrating Salesforce with Typeform Using Pabbly Connect: A Step-by-Step Guide

Learn how to create leads in Salesforce from Typeform submissions using Pabbly Connect. Follow this detailed tutorial for seamless integration. Follow this definitive guide to creating powerful automated workflows with straightforward, efficiency-focused solutions that save valuable time.

Watch Step By Step Video Tutorial Below


1. Accessing Pabbly Connect for Integration

To create leads in Salesforce from Typeform submissions, you will first need to access Pabbly Connect. Start by visiting the Pabbly Connect website at www.Pabbly.com/connect. If you are a new user, click on the ‘Sign Up Free’ button. Existing users can simply click on ‘Sign In’.

Once logged in, you will be directed to the Pabbly dashboard. From here, click on the ‘Access Now’ button under Pabbly Connect. This will take you to the workflow page where you can create your automation to connect Typeform with Salesforce.


2. Creating a New Workflow in Pabbly Connect

After accessing Pabbly Connect, you can create a new workflow. Click on the ‘Create Workflow’ button, and you will be prompted to select a workflow builder. Choose the ‘New Workflow Builder Beta’ for a more modern experience.

Next, provide a name for your workflow, such as ‘New Lead from Typeform to Salesforce’. You can also select a folder to save your workflow. Click on ‘Create’ to finalize the setup.

  • Click ‘Create Workflow’
  • Select ‘New Workflow Builder Beta’
  • Name your workflow
  • Choose a folder to save the workflow

Once your workflow is created, you will see options to add a trigger, which is essential for starting your automation process.


3. Setting Up the Trigger with Typeform

In this step, you will set Typeform as the trigger application in your Pabbly Connect workflow. Click on ‘Add Trigger’ and search for Typeform. Select it as your trigger app.

Next, choose the event that will initiate your workflow. For this integration, select the ‘New Entry’ event. Click on ‘Connect’ to establish a connection between Pabbly Connect and Typeform. If you don’t have an existing connection, select ‘Add New Connection’ and follow the prompts to authorize Pabbly Connect to access your Typeform account.

  • Select Typeform as the trigger app
  • Choose ‘New Entry’ as the event
  • Connect Typeform to Pabbly Connect

After completing these steps, you will be able to test the connection and ensure that Pabbly Connect is receiving responses from Typeform.


4. Configuring the Action Step in Salesforce

Now that the trigger is set up, it’s time to configure the action step in Salesforce using Pabbly Connect. Click on the Typeform trigger and select ‘Add Action Step’. Search for Salesforce and select it as your action app.

Choose the event ‘Create Lead’ to specify that you want to generate a lead in Salesforce. Just like with Typeform, click ‘Connect’ to set up the connection with your Salesforce account. You will need to log into Salesforce and grant access to Pabbly Connect.

Select Salesforce as the action app Choose ‘Create Lead’ as the action event Connect to your Salesforce account

Once connected, you will need to map the fields from Typeform to Salesforce to ensure that the correct information is transferred when a new lead is created.


5. Mapping Fields and Testing the Integration

The final step in this integration process involves mapping the fields from your Typeform submission to the appropriate fields in Salesforce through Pabbly Connect. This ensures that the data is accurately transferred.

Map the fields such as first name, last name, email, and company name from the Typeform response to the corresponding fields in Salesforce. After mapping the fields, click on ‘Save and Send Test Request’ to test the entire workflow.

Map first name to Salesforce Map last name accordingly Map email and company name

Once the test request is sent, navigate to your Salesforce dashboard to verify that the lead has been created successfully. You should see the new lead appear with the details you submitted through Typeform.


Conclusion

By following this guide, you have successfully integrated Salesforce with Typeform using Pabbly Connect. This automation allows you to create leads in Salesforce automatically whenever a new Typeform submission is received, streamlining your workflow and enhancing productivity.

Ensure you check out Pabbly Connect to create business automation workflows and reduce manual tasks. Pabbly Connect currently offer integration with 2,000+ applications.

Utilizing Pabbly Connect not only simplifies the integration process but also ensures that your data flows seamlessly between applications. Start automating your workflows today with Pabbly Connect!