Automate Client Information Collection for Law Firms via WhatsApp with Pabbly Chatflow

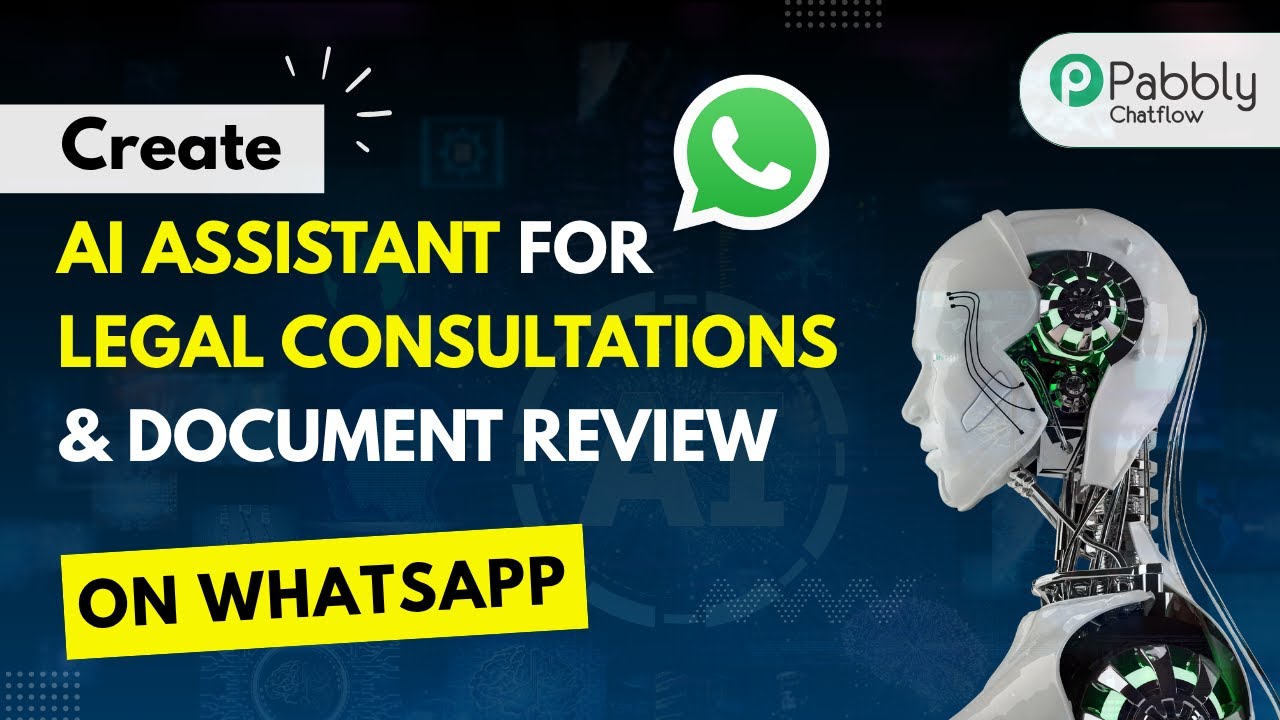
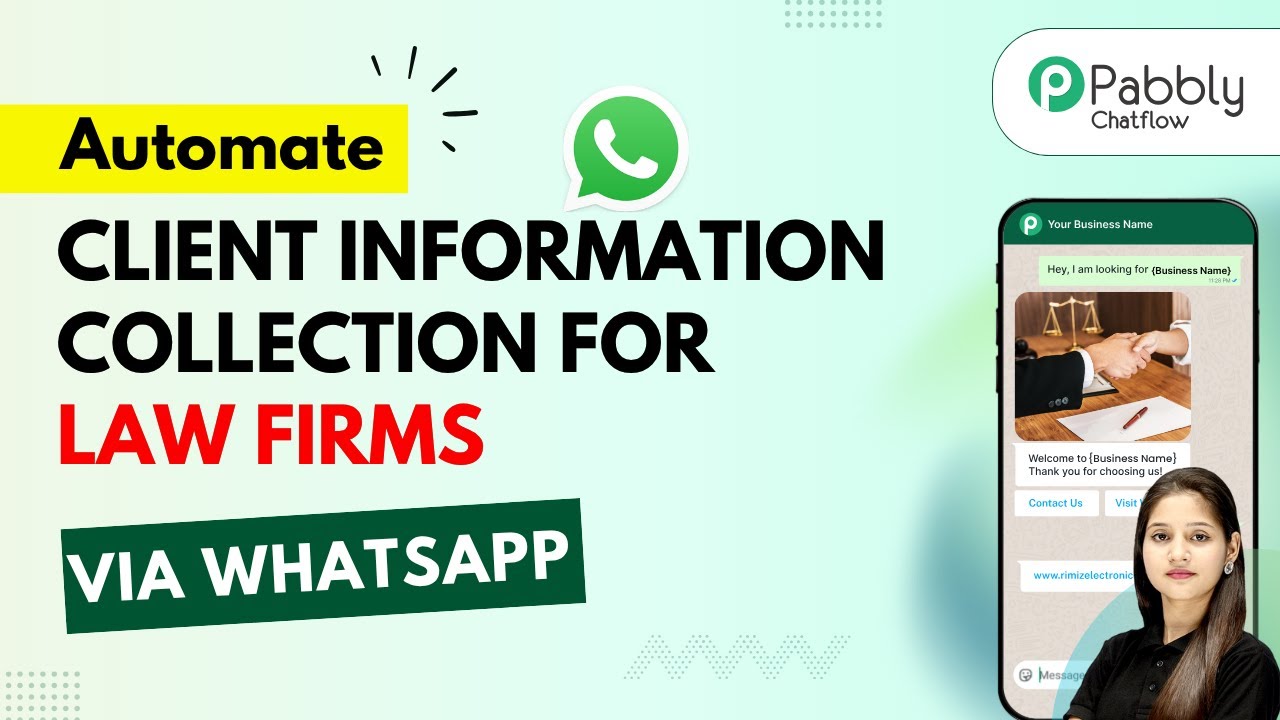
Learn how to automate client information collection for law firms via WhatsApp using Pabbly Chatflow. Step-by-step guide to streamline your legal services. Master conversational marketing with practical techniques for creating chatbots that engage visitors at exactly the right moment in their journey.

Watch Step By Step Video Tutorial Below


1. Accessing Pabbly Chatflow for WhatsApp Automation

To automate client information collection for law firms via WhatsApp, the first step is to access Pabbly Chatflow. Open a new tab and navigate to pave.com/chatflow. This platform is designed to streamline WhatsApp messaging and automate responses.

Once on the Pabbly Chatflow page, you can either sign up for a new account or log in if you are an existing user. After signing in, you will be directed to the dashboard where you can manage your WhatsApp numbers and set up chat flows for your law firm.


2. Creating Your WhatsApp Chatbot with Pabbly Chatflow

In this section, we will create a WhatsApp chatbot that collects client information efficiently. Start by clicking on the Pabbly Chatflow box and then select the flow option to begin creating your chatbot. This involves using the no-code flow builder to set up automated responses.

  • Click on the plus add flow button to create a new flow.
  • Name your flow, for example, ‘Automate Client Information Collection for Law Firms via WhatsApp.’
  • Select the trigger event, such as keyword/reaction.

Now that the flow is created, you will set up keywords that trigger the bot. Enter keywords like ‘legal consultation’ and ‘lawyer inquiry’. This setup allows your bot to respond automatically when users send these keywords to your WhatsApp business account.


3. Setting Up Automated Responses in Pabbly Chatflow

Next, we will configure the automated responses that the chatbot will provide when triggered. Using Pabbly Chatflow, drag a list button into the flow to present options to the users. The bot will ask users to select the legal service they need.

  • Set the body of the message to ‘Please select the legal service you need.’
  • Add items such as ‘Family Law’, ‘Criminal Law’, and ‘Real Estate Law’ for users to choose from.

Once the options are set, connect the selected service to the next step in the flow where the bot will ask for the user’s full name. This ensures that the bot captures essential client information automatically.


4. Collecting Client Information via Pabbly Chatflow

In this section, we will focus on how Pabbly Chatflow helps in collecting client information through automated questions. After a user selects a legal service, the bot will ask for their full name and contact number.

To do this, utilize the ask a question button. Set the question to ‘What’s your full name?’ and connect it to the next question, which will be about their contact number. This method allows the chatbot to gather necessary information seamlessly.

After collecting the information, use the add tag feature to categorize the user based on the service they selected. For example, tag users with ‘legal consultation’ to track their inquiries effectively. This segmentation helps in managing client interactions better.


5. Finalizing Your WhatsApp Chatbot with Pabbly Chatflow

To finalize your WhatsApp chatbot, review the entire flow in Pabbly Chatflow. Ensure that all connections between different nodes are correctly set up. This includes the flow from greeting the user to collecting their information and confirming their consultation.

Once everything is set, click on the save button to update your flow. This action ensures that your automated WhatsApp chatbot is live and ready to respond to client inquiries.

Your bot will now automatically respond to users, collect their information, and guide them through the consultation process without any manual input. This setup saves time and enhances client interaction for law firms.


Conclusion

In conclusion, using Pabbly Chatflow to automate client information collection for law firms via WhatsApp streamlines the entire process. By following the steps outlined, you can create an efficient chatbot that enhances client communication and saves valuable time.

Ensure you check out Pabbly Connect to create business automation workflows and reduce manual tasks. Pabbly Connect currently offer integration with 2,000+ applications.

How to Add Webinar Registrants from Webhook Response to WebinarJam Using Pabbly Connect

Learn how to seamlessly add webinar registrants from webhook responses to WebinarJam using Pabbly Connect. Step-by-step guide included! Revolutionize your productivity approach with just a few strategic clicks. Uncover professional methods for connecting applications and creating workflows that reclaim hours of your week.

Watch Step By Step Video Tutorial Below


1. Accessing Pabbly Connect for Webinar Registration Integration

To add webinar registrants from webhook responses to WebinarJam, you need to access Pabbly Connect. This powerful tool allows you to automate various tasks without any coding knowledge. Start by visiting the Pabbly Connect website and logging into your account.

If you are a new user, you can sign up for free and explore the capabilities of Pabbly Connect. Once logged in, you will see the dashboard where you can create new workflows to connect different applications.


2. Creating a Workflow in Pabbly Connect

After logging into Pabbly Connect, click on the ‘Create Workflow’ button. You will be prompted to choose between the new workflow builder and the classic one. For this integration, select the new workflow builder for its modern interface.

  • Click on ‘Create Workflow’
  • Choose the new workflow builder
  • Enter a name for your workflow

Once you have named your workflow, you will enter the workflow window where you can set up triggers and actions. This is where the automation magic happens using Pabbly Connect.


3. Setting Up the Trigger with Webhook by Pabbly

In the workflow window, click on the ‘Add Trigger’ button and select ‘Webhook by Pabbly’ as your trigger application. This allows you to connect applications that are not already integrated with Pabbly Connect.

Choose the trigger event as ‘Catch Webhook’ and click on ‘Connect’. This will generate a unique webhook URL that you will use to capture data from the application you are integrating with.

  • Select ‘Webhook by Pabbly’
  • Choose ‘Catch Webhook’ as the event
  • Copy the generated webhook URL

Now, you will need to paste this URL into the application you are using to collect registration details, like JotForm. This step is crucial as it establishes the connection between your form and Pabbly Connect.


4. Testing the Integration with Test Submission

After setting up the webhook URL in your form application, you need to perform a test submission. Fill out the registration form with sample data and submit it. This action will send the data to the webhook URL you created in Pabbly Connect.

Once the submission is successful, return to your Pabbly Connect workflow. You should see the captured data from your test submission, confirming that the webhook is receiving data correctly.


5. Adding Action to Register a Person in WebinarJam

Now that your trigger is set up and tested, it’s time to add the action step. Click on ‘Add New Action Step’ and select ‘WebinarJam’ as your action application. Choose the action event ‘Register a Person to Webinar’ to register attendees automatically.

You will need to connect your WebinarJam account by providing the API key from your WebinarJam dashboard. Once connected, you can map the fields from the webhook response to the corresponding fields in WebinarJam, ensuring that the correct data is sent.

Select ‘WebinarJam’ as the action application Choose ‘Register a Person to Webinar’ Map the fields from the webhook response

After mapping the fields, click on ‘Save and Send Test Request’ to finalize the integration. Check your WebinarJam account to confirm that the new registrant has been added successfully, completing the automation process with Pabbly Connect.


Conclusion

By following this detailed tutorial, you can successfully add webinar registrants from webhook responses to WebinarJam using Pabbly Connect. This automation streamlines your registration process, ensuring that new attendees are automatically added to your webinars.

Ensure you check out Pabbly Connect to create business automation workflows and reduce manual tasks. Pabbly Connect currently offer integration with 2,000+ applications.

How to Send Webinar Invitations via Gmail for Google Form Responses Using Pabbly Connect

Learn how to automate sending webinar invitations via Gmail for Google Form responses using Pabbly Connect. Step-by-step tutorial included. Follow this definitive guide to creating powerful automated workflows with straightforward, efficiency-focused solutions that save valuable time.

Watch Step By Step Video Tutorial Below


1. Accessing Pabbly Connect for Automating Webinar Invitations

To send webinar invitations via Gmail for Google Form responses, you need to access Pabbly Connect. This powerful automation tool allows you to connect various applications seamlessly.

Start by visiting the Pabbly Connect homepage. If you are a new user, click on ‘Sign Up Free’ to create an account. For existing users, simply log in to your account. Once logged in, you will see all the applications available for integration.


2. Creating a Workflow in Pabbly Connect

After accessing Pabbly Connect, the next step is to create a new workflow. Click on the ‘Create Workflow’ button located at the top right corner of the dashboard.

  • Choose a name for your workflow, such as ‘Send Webinar Invitations via Gmail for Google Form Responses.’
  • Select the folder where you want to save this workflow.
  • Click on ‘Create’ to proceed.

Once the workflow is created, you will see the option to set up a trigger and action. This is where Pabbly Connect shines by allowing you to automate your tasks effectively.


3. Setting Up Google Forms Trigger in Pabbly Connect

To begin automating the process, you need to set up a trigger in Pabbly Connect. Select Google Forms as the trigger application. Then, choose the event as ‘New Response Received.’

After selecting the trigger event, connect your Google Forms account with Pabbly Connect. You will be prompted to authorize the connection. Once connected, you can proceed to select the specific Google Form you want to use for webinar registrations.


4. Linking Google Sheets with Pabbly Connect

Next, you will link Google Sheets to capture the responses from your Google Form. In Pabbly Connect, select Google Sheets as the action application. Choose the action event as ‘Add Row.’

Connect your Google Sheets account and select the spreadsheet where you want to store the form responses. Map the fields from your Google Form to the corresponding columns in Google Sheets. This step ensures that all data is organized properly.


5. Sending Email Invitations via Gmail

Finally, to send out email invitations, you will set up Gmail as the action application in Pabbly Connect. Select the action event as ‘Send Email.’

Fill in the required fields, including the recipient’s email address, subject, and body of the email. You can personalize the email by mapping the first name from the Google Form responses. After setting up all the details, click on ‘Save and Send Test Request’ to ensure that everything works perfectly.


Conclusion

In this tutorial, we learned how to automate sending webinar invitations via Gmail for Google Form responses using Pabbly Connect. By following the steps outlined, you can streamline your webinar registration process and enhance attendee engagement.

Ensure you check out Pabbly Connect to create business automation workflows and reduce manual tasks. Pabbly Connect currently offer integration with 2,000+ applications.

How to Build an AI Assistant for Legal Consultation Services Using Pabbly Chatflow

Learn how to create an AI assistant for legal consultation services using Pabbly Chatflow. Step-by-step guide to automate responses via WhatsApp. This detailed guide shows you how to build powerful chat automation that engages visitors and converts prospects—without any coding required.

Watch Step By Step Video Tutorial Below


1. Accessing Pabbly Chatflow for Legal Consultation Services

To build an AI assistant for legal consultation services, start by accessing Pabbly Chatflow. This platform allows you to create automated responses efficiently. Open your browser and search for ‘Pabbly Chatflow’, then navigate to the home page.

Once on the home page, you’ll find options to either sign in or sign up. If you are a new user, click on ‘Sign Up Free’ to create an account and receive free credits to explore the features of Pabbly Chatflow. Existing users can simply sign in to their accounts.


2. Setting Up WhatsApp Integration in Pabbly Chatflow

After signing into Pabbly Chatflow, the next step is to integrate your WhatsApp account. This is crucial for receiving and responding to messages automatically. Click on the WhatsApp number button on the dashboard to start the integration process.

  • Select the WhatsApp Connect option for integration.
  • Follow the prompts to connect your WhatsApp account to Pabbly Chatflow.
  • Ensure you have the necessary permissions for seamless communication.

Once the integration is complete, you can start receiving WhatsApp messages, which will trigger your AI assistant to respond automatically. This setup is essential for providing timely legal consultation services.


3. Creating Your AI Assistant in Pabbly Chatflow

Now that your WhatsApp account is integrated, it’s time to create your AI assistant using Pabbly Chatflow. Click on the ‘Add AI Assistant’ button on your dashboard. You will need to provide a name for your assistant, such as ‘Legal Assistant’.

Next, select the type of AI agent you want to create. For legal consultation, choose the option labeled ‘AI Agent’. This will set the foundation for how your assistant will interact with users seeking legal advice.

  • Define the assistant’s purpose clearly to ensure relevant responses.
  • Customize the assistant’s responses based on common legal queries.
  • Test the assistant to ensure it provides accurate information.

After configuring these settings, save your AI assistant. This will enable it to start interacting with clients via WhatsApp, streamlining your legal consultation process.


4. Configuring AI Assistant Settings in Pabbly Chatflow

To optimize your AI assistant, you need to configure its settings in Pabbly Chatflow. This includes setting up response templates, header messages, and footer messages. These elements will guide how your assistant communicates with users.

For instance, you can set a header message that introduces your services and a footer message that provides contact information. Additionally, configure retry attempts and fallback messages to enhance user experience.

Here are some settings you should adjust:

Header Message: Introduce the assistant and its purpose. Footer Message: Provide contact details for further assistance. Retry Attempts: Specify how many times the assistant should try to respond.

Once these settings are configured, your AI assistant will be ready to provide instant responses to legal inquiries, enhancing your service efficiency.


5. Testing and Implementing Your AI Assistant

After setting up your AI assistant in Pabbly Chatflow, it’s crucial to test its functionality. Send a test message from your WhatsApp to ensure the assistant responds appropriately. This will help you identify any necessary adjustments before going live.

During testing, check the accuracy of the responses and the overall flow of conversation. Make sure the assistant addresses common queries effectively, as this will determine user satisfaction.

Once testing is complete, implement your AI assistant by enabling it for all WhatsApp chats. This can be done in the settings under ‘Inbox Settings’. Ensure that the AI auto-replies are activated for all incoming messages.

With successful implementation, your AI assistant will engage users instantly, providing them with the legal consultation services they need without delay. This automation not only saves time but also improves client satisfaction.


Conclusion

In conclusion, using Pabbly Chatflow to create an AI assistant for legal consultation services streamlines communication and enhances client interaction. Follow the steps outlined to set up and optimize your assistant for effective legal support.

Ensure you check out Pabbly Connect to create business automation workflows and reduce manual tasks. Pabbly Connect currently offer integration with 2,000+ applications.

Upload Zoom Recordings to YouTube Automatically with Pabbly Connect

Learn how to automatically upload Zoom recordings to YouTube using Pabbly Connect. Follow this detailed tutorial for seamless integration steps. Build sophisticated automated workflows in less time than you think. This guide translates complex integrations into straightforward steps for immediate implementation.

Watch Step By Step Video Tutorial Below


1. Access Pabbly Connect for Automation

To automate the process of uploading Zoom recordings to YouTube, you need to access Pabbly Connect. Start by visiting the Pabbly Connect landing page by entering ‘Pabbly.com/connect’ in your browser.

Once there, you will see options to either sign in or sign up. If you are a new user, click on ‘sign up for free’ to get started with a free trial. Existing users can click on ‘sign in’ to access their accounts. After signing in, navigate to the dashboard and select ‘Create Workflow’ to begin the setup.


2. Creating a Workflow in Pabbly Connect

In this section, you will create a workflow that integrates Zoom and YouTube using Pabbly Connect. After clicking ‘Create Workflow’, you will be prompted to choose between the new and classic workflow builders. Select the new workflow builder for a modern interface.

  • Name your workflow as ‘Upload Zoom Recordings to YouTube Automatically’.
  • Choose a folder to save your workflow.
  • Click on ‘Create’ to finalize the workflow setup.

Upon creating the workflow, you will see the main workflow window where you will set up the trigger and action for your automation. The trigger will be set to Zoom to initiate the process whenever a new recording is made.


3. Setting Up the Trigger with Zoom

To set up the trigger in Pabbly Connect, click on the ‘Add Trigger’ button and select Zoom as your application. Choose the event as ‘New Recording’ to capture new recordings automatically.

Next, you need to configure the webhook by adding a new connection. This requires a token from your Zoom account. Open your Zoom account, navigate to the App Marketplace, and create a new app. Name it ‘Zoom to YouTube’ and input the redirect URL provided in your Pabbly workflow.

  • Go to Zoom’s App Marketplace and select ‘Develop’.
  • Create a new app and fill in the necessary details.
  • Copy the secret token and paste it in your Pabbly Connect workflow.

After saving the connection, you will need to add the webhook URL in your Zoom account to capture recording notifications. This step is crucial for ensuring that Pabbly Connect receives the recording data.


4. Adding Action Step to Upload to YouTube

Once the trigger is set up, it’s time to add the action step in Pabbly Connect. Click on ‘Add Action Step’ and select YouTube as your application. Choose the action event as ‘Upload Video’ to automate the video upload process.

To connect to YouTube, you will need to sign in with your Google account. Select your account and grant the necessary permissions. Once connected, you will be prompted to fill in details like the video title, description, and video URL. Use mapping to dynamically insert data from the Zoom recording.

Map the video title to the topic of your Zoom meeting. Set the description to include relevant details about the meeting. Use the file download URL from the Zoom recording for the video URL.

After filling in the required fields, save the action step. You will then receive a confirmation that the video has been successfully uploaded to your YouTube channel.


5. Testing the Automation

After setting up your workflow with Pabbly Connect, it’s important to test it to ensure everything works smoothly. Start a meeting in Zoom and record it to trigger the automation.

Once the meeting is recorded, check your Zoom account for the recording status. After processing, Pabbly Connect should capture the recording details. You can verify this in your workflow dashboard to ensure that the trigger was successful.

If everything is set up correctly, you will see the new video uploaded to your YouTube channel with the title and description you configured earlier. This automation allows you to efficiently manage your recordings without manual intervention.


Conclusion

Using Pabbly Connect, you can effortlessly automate the process of uploading Zoom recordings to YouTube. This integration not only saves time but also ensures that your audience has access to your meetings immediately after they are recorded. Try this automation today!

Ensure you check out Pabbly Connect to create business automation workflows and reduce manual tasks. Pabbly Connect currently offer integration with 2,000+ applications.

Automate Webinar Invites and Capture Typeform Leads in Airtable with Pabbly Connect

Learn how to automate webinar invites and capture Typeform leads in Airtable using Pabbly Connect. Follow our detailed step-by-step tutorial. Revolutionize your productivity approach with just a few strategic clicks. Uncover professional methods for connecting applications and creating workflows that reclaim hours of your week.

Watch Step By Step Video Tutorial Below


1. Accessing Pabbly Connect for Automation

To start automating webinar invites and capturing Typeform leads in Airtable, you first need to access Pabbly Connect. Go to the Pabbly website and sign in to your account. If you are a new user, you can sign up for free and start with 100 tasks monthly.

Once logged in, navigate to the Pabbly Connect dashboard. Here you can view all your workflows and create new ones. Click on the ‘Create Workflow’ button to begin setting up your automation process. This is where the integration between Typeform, Gmail, and Airtable will be established using Pabbly Connect.


2. Creating Your Workflow in Pabbly Connect

In this step, you will create a workflow named ‘Automate Webinar Invites and Capture Typeform Leads in Airtable’. Select the classic workflow builder for a stable experience. After naming your workflow, you will see two boxes: one for the trigger and one for the action.

  • Click on ‘Trigger’ and select Typeform.
  • Choose the trigger event as ‘New Entry’.
  • Connect your Typeform account to Pabbly Connect.

Once connected, select the form you want to use for capturing leads. After saving this setup, you will be prompted to send a test request to confirm the connection. This step is crucial as it allows Pabbly Connect to capture responses from Typeform.


3. Sending Webinar Invites via Gmail

After successfully capturing Typeform submissions, the next step is to send out webinar invites using Gmail. In the action section of your workflow, select Gmail as the action application.

  • Choose the action event as ‘Send Email v1’.
  • Connect your Gmail account to Pabbly Connect.
  • Fill in the recipient’s email using the mapped data from Typeform responses.

Ensure to personalize the email content by mapping the lead’s name and other relevant details. After configuring the email settings, click on ‘Save and Send Test Request’ to verify that the email is sent successfully. This integration ensures that every new lead receives an invite promptly, facilitated by Pabbly Connect.


4. Logging Lead Details in Airtable

Now that the webinar invites are being sent, the next task is to log the lead details in Airtable. Again, navigate to the action section of your workflow and select Airtable as the application.

Choose the action event as ‘Create Record’. Connect your Airtable account to Pabbly Connect. Select the base and table where you want to log the details.

Map the fields from the Typeform response to the corresponding Airtable fields such as name, email, phone, city, and company. After entering all details, click on ‘Save and Send Test Request’ to confirm that the data is logged successfully in Airtable. This final step ensures that you have a complete record of all leads captured through Pabbly Connect.


5. Conclusion: Automate Your Webinars Effectively

In conclusion, using Pabbly Connect to automate webinar invites and capture Typeform leads in Airtable streamlines your workflow significantly. By following the steps outlined in this tutorial, you can efficiently manage your webinar registrations and ensure timely communication with your leads.

Ensure you check out Pabbly Connect to create business automation workflows and reduce manual tasks. Pabbly Connect currently offer integration with 2,000+ applications.

Check out Pabbly Connect – Automate your business workflows effortlessly! Sign Up Free – Start your journey with ease! 10,000+ Video Tutorials – Learn step by step! Join Pabbly Facebook Group – Connect with 21,000+ like minded people!

This automation not only saves you time but also enhances your engagement with potential attendees. Start leveraging Pabbly Connect today to simplify your webinar management and improve your overall productivity.

Automate Pipedrive Deals from Google Form Submissions Using Pabbly Connect

Learn how to automate creating deals in Pipedrive from Google Form submissions using Pabbly Connect. Follow our detailed step-by-step tutorial. Discover how to seamlessly connect your essential tools through accessible instructions that make powerful automation available to professionals at every skill level.

Watch Step By Step Video Tutorial Below


1. Setting Up Pabbly Connect for Automation

To automate creating deals in Pipedrive from Google Form submissions, we will use Pabbly Connect. Start by accessing Pabbly Connect via Pabbly.com/connect. Once there, sign in with your credentials or create a new account if you are a first-time user.

After logging in, you will see the Pabbly Connect dashboard. Here, you can create workflows that will help you integrate Google Forms with Pipedrive. Click on the Create Workflow button at the top right corner and select the beta version for a more modern experience.


2. Creating a Workflow for Google Forms and Pipedrive

With Pabbly Connect set up, it’s time to create a workflow. Name your workflow something like ‘Create Deals in Pipedrive from Google Form Submission’. Select the appropriate folder to organize your workflow.

  • Click on the Add Trigger button.
  • Choose Google Forms as the trigger application.
  • Select the event as New Response Received.

After setting up the trigger, you will receive a webhook URL. This URL will be used to connect Google Forms to Pabbly Connect. Copy this URL for the next step.


3. Connecting Google Forms to Pabbly Connect

Next, navigate to your Google Form where you want to capture submissions. Click on the Responses tab, then select Link to Sheets to create a new Google Sheet that will store all form responses.

Once your Google Sheet is created, you need to install the Pabbly Connect Webhooks add-on. Go to Extensions > Add-ons > Get Add-ons and search for Pabbly Connect Webhooks. Install it and refresh your Google Sheet.

  • Click on Extensions > Pabbly Connect Webhooks > Initial Setup.
  • Paste the webhook URL you copied earlier.
  • Set the trigger column to the final data column (e.g., Column E).

After configuring the settings, click Submit to finalize the setup. Now, every new response will be sent to Pabbly Connect automatically.


4. Creating a Person and Deal in Pipedrive

After setting up the Google Forms integration, it’s time to create a person in Pipedrive. In your Pabbly Connect workflow, add an action step and select Pipedrive as the application.

Select the event as Create Person and connect your Pipedrive account using the API token from your Pipedrive settings. Map the necessary fields such as first name and last name from the Google Form submission to create the person.

Map the first name and last name from the Google Form response. Set the label to Hot Lead. Save the action to create the person in Pipedrive.

Once the person is created, you will see a successful response in Pabbly Connect, confirming the action.


5. Finalizing the Deal Creation in Pipedrive

Next, add another action step in your Pabbly Connect workflow to create a deal. Again, select Pipedrive as the application and choose Create Deal as the event.

Connect using the existing connection and map the necessary fields like title, person ID, and status for the deal. For the title, you can use a format like ‘Follow Up with [Lead Name]’ by mapping the lead’s first and last name.

Set the status to Open. Map the person ID from the previous step. Save the deal to finalize the action.

After saving, you will receive confirmation that the deal has been successfully created in Pipedrive, completing your automation process.


Conclusion

In this tutorial, we demonstrated how to automate the creation of deals in Pipedrive from Google Form submissions using Pabbly Connect. By following these steps, you can streamline your workflow and enhance your productivity.

Ensure you check out Pabbly Connect to create business automation workflows and reduce manual tasks. Pabbly Connect currently offer integration with 2,000+ applications.

How to Setup Webhook in Zoom Using Pabbly Connect

Learn how to integrate Zoom with Webhook using Pabbly Connect. This step-by-step tutorial guides you through the setup process. Learn to create powerful connections between your critical applications without requiring specialized programming knowledge or extensive technical background.

Watch Step By Step Video Tutorial Below


1. Accessing Pabbly Connect for Zoom Integration

To set up a webhook in Zoom, you first need to access Pabbly Connect. Start by navigating to Pabbly’s official website and signing up or logging in if you already have an account.

Once logged in, you will be directed to the Pabbly Connect dashboard. This is where you can manage all your integrations. Here, you can easily create a workflow that connects Zoom with your desired webhook.


2. Creating a New Workflow in Pabbly Connect

After accessing the dashboard, the next step is to create a new workflow. To do this, click on the ‘Create Workflow’ button at the top right corner of the Pabbly Connect dashboard. using Pabbly Connect

  • Select the workflow builder option.
  • Name your workflow, for example, ‘Setup Webhook in Zoom’.
  • Choose the appropriate folder to save your workflow.

Once you have filled in these details, click on the ‘Create’ button. This will set up a new workflow where you can define triggers and actions that involve Zoom and your webhook.


3. Setting Up Zoom as the Trigger Application

In this step, you will select Zoom as the trigger application in your workflow. Click on the trigger application option and choose Zoom from the list of available apps.

Next, you will need to select the trigger event. Choose ‘New Meeting Created’ as the event that will initiate the workflow. This means every time a new meeting is created in Zoom, it will trigger the webhook through Pabbly Connect.


4. Connecting Zoom with the Webhook

To connect Zoom with the webhook, you will need to enter the secret token provided by Zoom into Pabbly Connect. This token is essential for authentication and allows Pabbly Connect to communicate with your Zoom account. using Pabbly Connect

  • Navigate to the Zoom app marketplace and create a new app.
  • Copy the redirect URL provided by Pabbly Connect and paste it into the Zoom app settings.
  • Save the settings and retrieve the secret token.

Once you have the secret token, return to Pabbly Connect and input the token to establish the connection. This process ensures that your Zoom account is securely linked to Pabbly Connect, allowing for seamless data transfer.


5. Testing the Integration

After setting up the webhook, it is crucial to test the integration to ensure everything works as expected. Go back to your Zoom account and create a new meeting. using Pabbly Connect

Once the meeting is created, return to Pabbly Connect and check if the webhook has received the data from Zoom. You should see the details of the meeting displayed in the Pabbly Connect dashboard, confirming that the integration is successful.


Conclusion

In this tutorial, we covered how to set up a webhook in Zoom using Pabbly Connect. By following these steps, you can automate your workflows and enhance productivity. With Pabbly Connect, integrating Zoom with various applications becomes seamless and efficient.

Ensure you check out Pabbly Connect to create business automation workflows and reduce manual tasks. Pabbly Connect currently offer integration with 2,000+ applications.

How to Register LinkedIn Leads for WebinarJam Sessions Using Pabbly Connect

Learn how to seamlessly register LinkedIn leads for WebinarJam sessions using Pabbly Connect. This detailed tutorial guides you through the setup process step-by-step. Discover hidden automation capabilities within your existing tools. This guide shows you how to connect your essential applications and permanently eliminate redundant manual processes.

Watch Step By Step Video Tutorial Below


1. Accessing Pabbly Connect for LinkedIn and WebinarJam Integration

To register LinkedIn leads for WebinarJam sessions, start by accessing Pabbly Connect. This powerful automation tool allows you to connect multiple applications without any programming knowledge.

Open a new tab in your browser and search for Pabbly Connect by entering ‘Pabbly.com/connect’. Once on the landing page, you can either sign in if you’re an existing user or click on ‘Sign up for free’ to create a new account. This free trial gives you 100 tasks per month to explore the application.


2. Creating a New Workflow in Pabbly Connect

After signing in, navigate to the Pabbly Connect dashboard and click on the ‘Create Workflow’ button. This is where you will set up the connection between LinkedIn and WebinarJam using Pabbly Connect.

  • Choose the new workflow builder for a modern interface.
  • Name your workflow as ‘Register LinkedIn Leads for WebinarJam Sessions’.
  • Select a folder to save your workflow.

Once you’ve named your workflow and selected a folder, click on ‘Create’ to open the workflow window. This window is crucial as it contains the trigger and action settings necessary for your automation.


3. Setting Up the Trigger with LinkedIn in Pabbly Connect

To set up the trigger, click on the ‘Add Trigger’ button. Search for LinkedIn and select it as your trigger application. Then, choose the trigger event as ‘Lead Notifications’ and click on ‘Connect’. using Pabbly Connect

If you haven’t connected your LinkedIn account yet, click on ‘Add a New Connection’. Enter your LinkedIn credentials and sign in. After connecting, select your sponsor’s ad account and proceed to save and send a test request. This will await a webhook response from LinkedIn.


4. Testing the LinkedIn to WebinarJam Integration

To capture the webhook response, perform a test submission by opening your LinkedIn campaign. Fill in the required fields, such as email address and phone number, and submit the form. Once submitted, Pabbly Connect will capture the response, which includes all lead details. using Pabbly Connect

  • Check that Pabbly Connect receives the lead details successfully.
  • Verify the captured details like first name, last name, email, and phone number.

Once the trigger step is successfully set up, your workflow will automatically trigger every time a new lead is generated from LinkedIn.


5. Finalizing the Registration in WebinarJam via Pabbly Connect

Next, you will add an action step to register the lead in WebinarJam. Click on the ‘Add New Action Step’ and select WebinarJam as your action application. Choose the action event as ‘Register a Person to Webinar’ and click on ‘Connect’. using Pabbly Connect

If you have not connected your WebinarJam account yet, click on ‘Add a New Connection’. You will need to enter your API key from your WebinarJam account under the API custom integration settings. Once connected, select the specific webinar for which you want to register leads.

Map the lead details from the previous step to the registration fields in WebinarJam. This ensures that every new lead is automatically registered with their details. After completing the mapping, click on ‘Save and Send Test Request’ to finalize the setup.


Conclusion

By following these steps, you can effectively register LinkedIn leads for your WebinarJam sessions using Pabbly Connect. This integration automates the process, ensuring no lead is missed while saving you time and effort.

Ensure you check out Pabbly Connect to create business automation workflows and reduce manual tasks. Pabbly Connect currently offer integration with 2,000+ applications.

How to Create Contact in GoHighLevel from Instagram Lead Ads Using Pabbly Connect

Learn how to create contacts in GoHighLevel from Instagram Lead Ads using Pabbly Connect. Follow our step-by-step tutorial for seamless integration. Discover how to seamlessly connect your essential tools through accessible instructions that make powerful automation available to professionals at every skill level.

Watch Step By Step Video Tutorial Below


1. Accessing Pabbly Connect for Integration

To create contacts in GoHighLevel from Instagram Lead Ads, start by accessing Pabbly Connect. Open a new tab and search for the Pabbly Connect landing page by entering ‘Pabbly.com/connect’ in your browser.

Once on the Pabbly Connect page, you will see options to either sign in or sign up. If you’re a new user, click on the ‘Sign Up for Free’ button to get started. Existing users should click on ‘Sign In’ to access their accounts.


2. Creating a New Workflow in Pabbly Connect

After signing in, navigate to your dashboard and click on the ‘Create Workflow’ button. This is where you will set up the integration workflow. Choose between the new workflow builder or the classic one; the new builder is recommended for its modern interface. using Pabbly Connect

  • Select the new workflow builder for a better experience.
  • Enter a name for your workflow and choose a folder to save it.
  • Click on the ‘Create’ button to proceed.

Once created, you will be directed to the workflow window, which is crucial for setting up triggers and actions. Here, you will define how the workflow operates using specific applications.


3. Setting Up Instagram Lead Ads as Trigger in Pabbly Connect

In the workflow window, select Instagram Lead Ads as the trigger application. This step is essential as it tells Pabbly Connect to initiate actions based on new leads generated from your Instagram ads.

Choose the trigger event as ‘New Lead Instant’ and click on ‘Connect’. You will then need to create a new connection with your Instagram Lead Ads account. This connection is facilitated through your linked Facebook account.

  • Click on ‘Add a New Connection’ to link your Instagram account.
  • Select your Facebook account to establish the connection.
  • Once connected, select the Facebook page associated with your Instagram ad.

After successful connection, proceed to select the lead ads form that you are using for your campaign. If the form does not appear, click on ‘Refresh Fields’ to load it.


4. Adding Action Step to Create Contact in GoHighLevel

Now that you have set up the trigger, the next step is to add an action step to create a contact in GoHighLevel. Click on ‘Add New Action Step’ and select ‘Lead Connector V2’ as your action application.

For the action event, choose ‘Create or Update a Contact’ and click on ‘Connect’. You will be prompted to establish a connection with your GoHighLevel account using Pabbly Connect.

Select ‘Add a New Connection’ to link your GoHighLevel account. Grant the necessary permissions for data access. Map the fields from the previous step to ensure data is transferred correctly.

After mapping the required fields, click on ‘Save and Send Test Request’ to check if the integration works as expected. This will create a contact in your GoHighLevel account using the lead data captured from Instagram.


5. Testing the Integration in Real-Time

To ensure everything is functioning correctly, conduct a real-time test of your workflow. Open your lead ads testing tool and submit a new lead using the form linked to your Instagram ad.

Once the form is submitted, return to your GoHighLevel account and refresh the contact list. With Pabbly Connect, the new contact should appear instantly, reflecting the details submitted in the lead form.

This real-time integration showcases the power of automation, allowing you to capture leads efficiently without manual intervention. If successful, you should see the contact details that match the information filled out in the lead form.


Conclusion

In this tutorial, we explored how to create contacts in GoHighLevel from Instagram Lead Ads using Pabbly Connect. By following these steps, you can automate your lead management process effectively. This seamless integration not only saves time but enhances your business’s operational efficiency.

Ensure you check out Pabbly Connect to create business automation workflows and reduce manual tasks. Pabbly Connect currently offer integration with 2,000+ applications.