How to Save All Your Leads to Google Sheets in Real Time

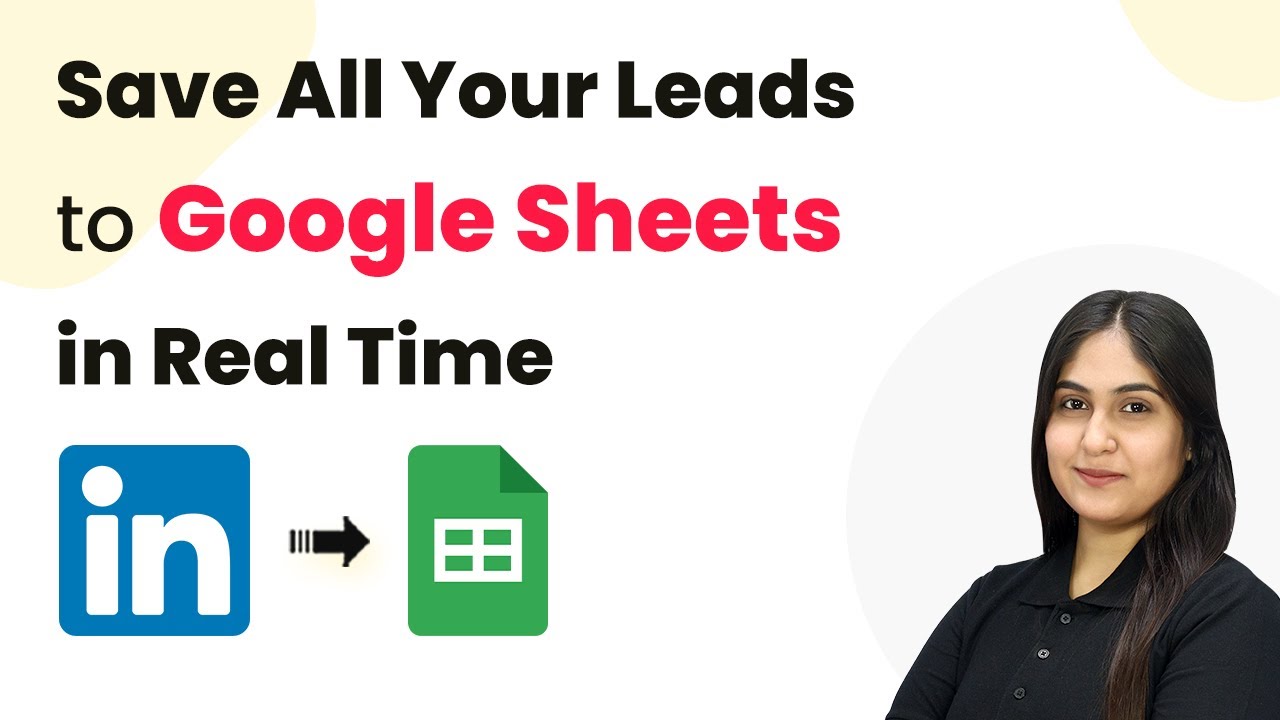
Learn how to use Pabbly Connect to save all your leads to Google Sheets in real-time with this step-by-step tutorial. Streamline your lead management process today!

Watch Step By Step Video Tutorial Below


1. Accessing Pabbly Connect to Start Automation

To save all your leads to Google Sheets in real time, you first need to access Pabbly Connect. Begin by navigating to the Pabbly Connect homepage by entering Pabbly.com/connect in your browser.

If you’re new to Pabbly Connect, click on the ‘Sign Up Free’ option to create an account and receive 100 free tasks monthly. Existing users can simply sign in. Once logged in, click on ‘Access Now’ to enter the Pabbly Connect dashboard.


2. Creating a New Workflow in Pabbly Connect

To set up your lead management automation, you need to create a new workflow in Pabbly Connect. Click on the ‘Create Workflow’ button, which will prompt you to select a workflow builder. Choose the ‘Beta’ version for a more modern experience.

  • Click ‘Create’ after naming your workflow as ‘How to Save All Your Leads to Google Sheets in Real Time’.
  • Select the folder as ‘Automations’ from the dropdown.

After creating the workflow, you’ll see a window where you can set up triggers and actions. Remember, triggers initiate the workflow while actions are the responses to those triggers.


3. Setting Up the Trigger with LinkedIn Ads

To begin the automation process in Pabbly Connect, select LinkedIn as your trigger application. For the app event, choose ‘Lead Notifications’. This will allow Pabbly Connect to recognize when a new lead comes in through your LinkedIn ads.

Click on ‘Connect’ to establish a new connection with LinkedIn. You will need to log into your LinkedIn account if you haven’t already. Once connected, select your sponsored account from the drop-down menu and click on ‘Save and Send Test Request’ to ensure everything is working correctly.


4. Adding Google Sheets as an Action Step

After successfully setting up the trigger, it’s time to add an action step in Pabbly Connect. Select Google Sheets as your action application and choose the event ‘Add a New Row’. This action will automatically add lead details to your Google Sheets whenever a new lead is captured.

  • Connect your Google account by clicking ‘Sign in with Google’.
  • Select the spreadsheet named ‘Leads’ and the sheet named ‘Sheet1’.

Next, you’ll map the fields from your LinkedIn lead to the corresponding columns in Google Sheets, ensuring that every new lead is logged correctly. After mapping, click ‘Save and Send Test Request’ to finalize the setup.


5. Testing Your Automation in Real Time

With your automation set up in Pabbly Connect, it’s crucial to test the entire process. Generate a test lead using your LinkedIn lead ad. Fill in the required fields and submit the form. Once submitted, Pabbly Connect will receive the lead details in real time.

Check your Google Sheets to confirm that the new lead appears as a new row with the correct details. This validation ensures that your integration works seamlessly, allowing you to manage leads effectively.


Conclusion

In this tutorial, we explored how to use Pabbly Connect to save all your leads to Google Sheets in real time. By following the specific steps outlined, you can automate your lead management process efficiently. Start using Pabbly Connect today to streamline your workflows and enhance your business productivity!

Ensure you check out Pabbly Connect to create business automation workflows and reduce manual tasks. Pabbly Connect currently offer integration with 2,000+ applications.

AI Event Management Chatbot — Get Instant Event Quotes, Registration & Support on WhatsApp

Learn how to integrate an AI Event Management Chatbot with Pabbly Chatflow for instant event quotes and support on WhatsApp. Step-by-step tutorial included. This detailed guide shows you how to build powerful chat automation that engages visitors and converts prospects—without any coding required.

Watch Step By Step Video Tutorial Below


1. Accessing Pabbly Chatflow for Your Event Management Chatbot

To create an AI Event Management Chatbot, first, access Pabbly Chatflow by visiting www.Pabbly.com/chatflow. This platform is essential for automating your WhatsApp conversations regarding event management.

Once on the site, sign into your account. If you are new, you can sign up for free and receive 100 credits monthly. After logging in, navigate to the Pabbly Chatflow dashboard to start creating your chatbot.


2. Setting Up WhatsApp Connection in Pabbly Chatflow

Integrating WhatsApp with Pabbly Chatflow is crucial for your chatbot’s functionality. You can add your WhatsApp number by clicking on the ‘Add WhatsApp Number’ option on the dashboard. Choose between connecting via WhatsApp Connect or using a manual token.

  • Click the ‘Add WhatsApp Number’ button.
  • Select your preferred connection method.
  • Follow the on-screen instructions to complete the connection.

Once connected, your WhatsApp will be ready to interact with users through the AI chatbot created in Pabbly Chatflow.


3. Creating Your AI Agent in Pabbly Chatflow

To create the AI agent, go to the ‘AI Assistant’ section in Pabbly Chatflow. Click on ‘Add Assistant’ and name your AI agent, such as ‘AI Event Management Chatbot’. This agent will handle all event-related queries on WhatsApp.

After naming the assistant, configure the AI settings. Set the instruction type to AI agent, choose the AI model (GPT-4 Mini), and enter your OpenAI API key. This key is necessary for the AI to function properly.

  • Select the AI instruction type as ‘AI Agent’.
  • Set the temperature for creative responses.
  • Paste your OpenAI API key and click ‘Connect’.

These steps ensure that your AI agent is well-configured to respond accurately to queries about event management.


4. Adding Knowledge Source for Your AI Agent

The knowledge source is critical for the AI agent’s responses. In Pabbly Chatflow, you can upload a file containing detailed information about your event management services. This knowledge base allows the AI to provide tailored responses to user inquiries.

Upload your knowledge source by selecting the option to upload a file. Ensure that this document includes all relevant details, such as event types, pricing, and services offered. The AI will reference this knowledge base when replying to users.

Prepare a comprehensive knowledge document. Upload the file in the AI Assistant settings. Confirm the upload and save your settings.

With this knowledge base, your AI agent will be equipped to handle various queries effectively.


5. Testing Your AI Chatbot on WhatsApp

After setting up your AI agent using Pabbly Chatflow, it’s time to test its functionality. Send a message to your WhatsApp number and observe how the AI responds. For instance, you might ask about event types or request a quote.

The AI should reply based on the knowledge source you provided. This interaction will demonstrate whether the chatbot is functioning correctly and providing the information users need.

Send a test message to your WhatsApp. Check the AI’s response for accuracy. Make adjustments to the knowledge base if necessary.

This testing phase is vital to ensure your AI chatbot is ready to assist users in real-time.


Conclusion

Integrating an AI Event Management Chatbot with Pabbly Chatflow allows businesses to automate event inquiries efficiently. By following the steps outlined, you can provide instant quotes and support through WhatsApp, enhancing customer interaction and satisfaction.

Ensure you check out Pabbly Connect to create business automation workflows and reduce manual tasks. Pabbly Connect currently offer integration with 2,000+ applications.

Send Instant WhatsApp Messages to New Leads

Learn how to send instant WhatsApp messages to new leads using Pabbly Connect. Follow this step-by-step tutorial for seamless integration with Google Ads and WhatsApp.

Watch Step By Step Video Tutorial Below


1. Accessing Pabbly Connect for WhatsApp Integration

To send instant WhatsApp messages to new leads, you first need to access Pabbly Connect. Begin by searching for Pabbly Connect in your browser, which will direct you to its homepage. Here, you have two options: either sign in if you’re an existing user or click on ‘Sign Up Free’ to create a new account.

If you are a new user, signing up allows you to explore the software with 100 free tasks per month. Existing users can simply sign in. After signing in, navigate to the Pabbly Connect dashboard where you can create your automation workflow.


2. Creating a Workflow in Pabbly Connect

Once you are on the Pabbly Connect dashboard, you need to create a workflow that will facilitate sending WhatsApp messages. Click on the ‘Create Workflow’ button to begin. A dialog box will appear asking you to name your workflow. Name it something relevant, like ‘Send Instant WhatsApp Messages to New Leads’.

Next, you’ll see an option to choose a folder for your workflow. Select the folder named ‘Automations’ or create a new one as per your requirements. After naming your workflow and selecting a folder, click on the ‘Create’ button to proceed.

  • Select the ‘Google Ads’ application as your trigger.
  • Choose the event ‘New Lead’ for the trigger.
  • Click on ‘Connect’ to link your Google Ads account with Pabbly Connect.

After setting up the trigger, you will receive a webhook URL. This URL is essential for connecting your Google Ads to Pabbly Connect. Copy this URL for the next steps in the integration process.


3. Setting Up Google Ads for Lead Generation

Now that you have your webhook URL from Pabbly Connect, log into your Google Ads account. Here, you will set up a lead form that will send data to the webhook URL. Create a new campaign and add a lead form to collect the necessary information from potential leads.

Within the lead form settings, look for the option to set up lead delivery via webhook. Paste the webhook URL you copied earlier into the designated field. This step is crucial as it enables Google Ads to send lead data directly to Pabbly Connect.

  • Ensure that the lead form captures necessary details like name, email, and phone number.
  • Preview your form to ensure everything is set up correctly.
  • Test the lead form to confirm that data is being sent to Pabbly Connect.

After testing, you should see the data being received in your Pabbly Connect workflow, indicating that the integration is functioning correctly.


4. Integrating WhatsApp with Pabbly Connect

In this step, you will integrate WhatsApp using Pabbly Connect. Select ‘Pabbly Chatflow’ as your action application. This is where you will configure the WhatsApp messages that will be sent to your leads.

Once you select Pabbly Chatflow, choose the action event as ‘Send Template Message’. You will then be prompted to connect your Chatflow account. If you have already connected it, select the existing connection; otherwise, create a new one by entering your API token from Chatflow.

Enter the recipient’s mobile number, which should be dynamically mapped from the previous Google Ads step. Select the WhatsApp template you wish to use for the message. Map any required fields, such as the lead’s name, to personalize the message.

After completing the setup, click on ‘Save and Send Test Request’ to ensure that everything is functioning correctly. You should receive a test WhatsApp message sent to the specified number.


5. Finalizing Your Automation with Pabbly Connect

After successfully sending a test message, your automation is almost complete. Review all the steps in your Pabbly Connect workflow to ensure everything is configured correctly. Make any necessary adjustments to the mapping or settings as needed.

Once you are satisfied with your workflow, click on ‘Save’ to finalize your automation. From now on, every time a new lead is generated through your Google Ads, an instant WhatsApp message will be sent automatically via Pabbly Connect.

This automation not only streamlines your communication process but also ensures that your leads receive timely and personalized messages, enhancing your engagement strategy.


Conclusion

In this tutorial, we explored how to use Pabbly Connect to send instant WhatsApp messages to new leads generated through Google Ads. By following these steps, you can automate your communication and improve your lead engagement effectively.

Ensure you check out Pabbly Connect to create business automation workflows and reduce manual tasks. Pabbly Connect currently offer integration with 2,000+ applications.

Automatically Create ClickUp Tasks from Contact Form 7 Submissions

Learn how to automatically create ClickUp tasks from Contact Form 7 submissions using Pabbly Connect. Step-by-step tutorial for seamless integration. Discover how to seamlessly connect your essential tools through accessible instructions that make powerful automation available to professionals at every skill level.

Watch Step By Step Video Tutorial Below


1. Accessing Pabbly Connect for Integration

To begin the process of automatically creating ClickUp tasks from Contact Form 7 submissions, you first need to access Pabbly Connect. Start by entering the URL Pabbly.com/connect in your browser. This will take you to the Pabbly Connect landing page.

On this page, you will see options to either sign in or sign up. If you are a new user, click on Sign Up Free to create your account. Existing users should click on Sign In. Signing up provides you with 100 free tasks every month to practice using Pabbly Connect.


2. Creating a Workflow in Pabbly Connect

Once you are logged into Pabbly Connect, navigate to the dashboard where you can create a new workflow. Click on the Create Workflow button. You will be prompted to select a workflow builder. Choose the Beta Workflow Builder for a modern experience.

  • Click on Select.
  • Enter a name for your workflow, e.g., Create ClickUp Task for Contact Form Leads.
  • Select your folder and click Create.

This step sets up the foundation for your automation, connecting Contact Form 7 submissions to ClickUp tasks through Pabbly Connect.


3. Setting Up the Trigger with Contact Form 7

To automate the task creation, you need to set up a trigger in Pabbly Connect. Click on the Add Trigger button and search for Contact Form 7. Select it and choose the event as New Form Submission.

Click on Connect to generate a webhook URL. Copy this webhook URL, as it will connect Pabbly Connect with your Contact Form 7. Now, move to your WordPress account where you have Contact Form 7 installed.

  • Go to the Contact Forms section in WordPress.
  • Edit your desired form and paste the webhook URL in the designated area.
  • Enable Send to Webhook and save the form.

This setup ensures that every time a form is submitted, the details are sent to Pabbly Connect, triggering the subsequent action.


4. Creating a ClickUp Task from Form Submissions

With your trigger set, it’s time to add the action step to create a task in ClickUp. In Pabbly Connect, click on Add New Action Step and search for ClickUp. Select it and choose Create Task as the action event.

Next, click on Connect and create a new connection by entering your ClickUp API token. To obtain this token, go to your ClickUp account settings and navigate to the API section. Copy the API token and paste it into Pabbly Connect.

Select your workspace and space where the task should be created. Choose the folder and list where the task will reside. Map the task name and other details using data from the contact form submission.

This step allows you to dynamically create tasks in ClickUp based on the information submitted through your Contact Form 7, utilizing the capabilities of Pabbly Connect.


5. Testing the Integration

After setting up the ClickUp task creation, it’s essential to test the integration. Click on Save and Send Test Request in Pabbly Connect. This action will send a test submission from Contact Form 7 to ClickUp.

Check your ClickUp account to see if the task has been created successfully. You should see a new task with the details you mapped earlier. This confirms that your integration is working flawlessly and tasks are being created automatically from form submissions.

By following these steps, you can streamline your workflow and ensure that no lead is missed. With Pabbly Connect, automating tasks has never been easier.


Conclusion

In this tutorial, we explored how to automatically create ClickUp tasks from Contact Form 7 submissions using Pabbly Connect. By setting up triggers and actions, you can enhance your workflow efficiency and manage leads effectively. Start using Pabbly Connect today to automate your tasks seamlessly.

Ensure you check out Pabbly Connect to create business automation workflows and reduce manual tasks. Pabbly Connect currently offer integration with 2,000+ applications.

Send Christmas Discount Codes to Facebook Leads via WhatsApp (Automated)

Learn how to automate sending Christmas discount codes to Facebook leads via WhatsApp using Pabbly Connect in this step-by-step tutorial. Build sophisticated automated workflows in less time than you think. This guide translates complex integrations into straightforward steps for immediate implementation.

Watch Step By Step Video Tutorial Below


1. Accessing Pabbly Connect for Automation

To start sending Christmas discount codes to your leads, first, you need to access Pabbly Connect. Simply visit the Pabbly website and sign in or sign up for a free account.

Once logged in, navigate to the Pabbly Connect dashboard. Here, you can create a new workflow by clicking on the ‘Create Workflow’ button. This is where you will set up the integration between Facebook lead ads and WhatsApp.


2. Creating the Automation Workflow in Pabbly Connect

In this step, you’ll create a workflow specifically designed to send discount codes to leads captured from Facebook. Click on the ‘Create Workflow’ button and select the new beta workflow builder. using Pabbly Connect

  • Name your workflow as ‘Send Christmas Discount Codes to Facebook Leads via WhatsApp’.
  • Select the folder where you want to save this workflow.
  • Click on ‘Create’ to finalize the workflow setup.

After the workflow is created, you will need to set a trigger. Choose Facebook Lead Ads as your trigger application and select the trigger event as ‘New Lead Instant’. This setup will ensure that every new lead captured triggers the automation.


3. Connecting Facebook Lead Ads to Pabbly Connect

To connect Facebook Lead Ads to Pabbly Connect, click on the ‘Connect’ button. If you don’t have an existing connection, select ‘Add New Connection’ and log in to your Facebook account.

Once connected, select the Facebook page and the lead form you want to use. Ensure you have the correct page selected, such as ‘Digital Dynamics’, and choose the appropriate lead form for capturing leads.


4. Sending WhatsApp Messages via Pabbly Chatflow

After setting up the trigger with Facebook Lead Ads, the next step is to send a WhatsApp message using Pabbly Chatflow. Click on ‘Add Action Step’ and select Pabbly Chatflow as the action application.

  • Choose the action event as ‘Send Template Message’.
  • Connect to Pabbly Chatflow using your API token.
  • Map the recipient’s mobile number using the lead’s phone number from the previous step.

Make sure to format the phone number correctly, removing any plus signs as required. After mapping, select the template you created for sending the discount message.


5. Testing the Workflow

Once your workflow is set up, it’s time to test it. Generate a lead using the Facebook Lead Ads testing tool. Submit the lead form with the necessary details such as name and email address.

After submission, check your WhatsApp to verify if you received the discount code message. The message should be personalized, including the lead’s name and the discount code. This confirms that your Pabbly Connect workflow is functioning correctly.


Conclusion

This tutorial demonstrated how to automate sending Christmas discount codes to Facebook leads via WhatsApp using Pabbly Connect. By following the steps outlined, you can efficiently manage your lead communications during the holiday season.

Ensure you check out Pabbly Connect to create business automation workflows and reduce manual tasks. Pabbly Connect currently offer integration with 2,000+ applications.

How to Create Salesmate Contacts from Facebook Leads

Learn how to automate the creation of Salesmate contacts from Facebook leads using Pabbly Connect in this step-by-step tutorial. Implement the precise methodologies leading organizations use to automate repetitive tasks, illustrated with practical examples designed for immediate application.

Watch Step By Step Video Tutorial Below


1. Accessing Pabbly Connect for Integration

To create Salesmate contacts from Facebook leads, start by accessing Pabbly Connect. Visit the Pabbly Connect website and log in to your account. If you are a new user, you can sign up for free. After logging in, you will reach the Pabbly Connect dashboard, where you can begin setting up your workflow.

Once on the dashboard, click on the ‘Create Workflow’ button. Choose the new beta method for a more modern approach, and name your workflow as ‘Create Salesmate Contact from Facebook Leads’. This sets the stage for automating the integration between Facebook leads and Salesmate through Pabbly Connect.


2. Setting Up the Trigger in Pabbly Connect

In this step, you will set up the trigger for your workflow using Pabbly Connect. Select ‘Facebook Lead Ads’ as your trigger application. Choose the event as ‘New Lead Instant’. Click on the ‘Connect’ button to proceed with establishing the connection.

  • Select the Facebook account associated with your lead ads.
  • Choose the Facebook page used for your ads.
  • Select the lead form you are using to collect leads.

After saving the settings, generate a test lead through your Facebook lead form. Refresh the Pabbly Connect dashboard to ensure that the new lead details are captured. This confirms that your trigger is working correctly with Pabbly Connect.


3. Mapping Data to Salesmate in Pabbly Connect

With the trigger set up, the next step involves mapping the lead data to create a new contact in Salesmate. In this part of the workflow, select ‘Salesmate’ as the action application and choose the event ‘Create Contact’. Click ‘Continue’ to proceed.

To connect to your Salesmate account, you will need to provide the account URL and session token. The account URL is derived from your Salesmate login URL, while the session token can be found in your Salesmate profile settings. This step is crucial for Pabbly Connect to successfully send data to Salesmate.

  • Map the first name, last name, email, and phone number from the Facebook lead data.
  • Specify additional details such as company name and lead type.

Once all necessary fields are mapped, click on the ‘Save and Send Test Request’ button. This action will create a new contact in Salesmate, confirming that Pabbly Connect has successfully integrated the two platforms.


4. Testing the Integration between Facebook Leads and Salesmate

After mapping the data, it’s essential to test the integration to ensure everything is functioning as expected. Generate a test lead again using your Facebook lead form. This time, check the Salesmate contacts page to verify that the new contact has been added.

Refresh the contacts page in Salesmate, and you should see the newly created contact with the details you entered in the lead form. This successful creation indicates that Pabbly Connect has effectively captured the lead data from Facebook and created a contact in Salesmate.


5. Conclusion: Automating Your Salesmate Contacts with Pabbly Connect

In conclusion, using Pabbly Connect to automate the creation of Salesmate contacts from Facebook leads streamlines your lead management process. By following the steps outlined above, you can ensure that every lead generated through Facebook is automatically added to your Salesmate account.

Ensure you check out Pabbly Connect to create business automation workflows and reduce manual tasks. Pabbly Connect currently offer integration with 2,000+ applications.

Check out Pabbly Connect – Automate your business workflows effortlessly! Sign Up Free – Start your journey with ease! 10,000+ Video Tutorials – Learn step by step! Join Pabbly Facebook Group – Connect with 21,000+ like minded people!

This automation not only saves time but also enhances your ability to manage leads effectively. With Pabbly Connect, you can focus on converting leads into customers without the hassle of manual data entry.


How to Send Bulk Christmas Wishes via SMS (Fast & Easy!)

Learn how to send bulk Christmas wishes via SMS using Pabbly Connect. This step-by-step tutorial guides you through the integration with Google Sheets and Twilio.

Watch Step By Step Video Tutorial Below


1. Accessing Pabbly Connect for Sending Bulk SMS Wishes

To send bulk Christmas wishes via SMS, the first step is to access Pabbly Connect. Open your browser and navigate to pabby.com/connect. This will direct you to the Pabbly Connect homepage, where you have options to sign in or sign up for free.

If you’re a new user, select the ‘Sign up free’ option to create an account and receive 100 free tasks each month. Existing users can simply sign in to their accounts. Once signed in, click on ‘Access Now’ to reach the Pabbly Connect dashboard.


2. Creating a Workflow in Pabbly Connect

After accessing Pabbly Connect, the next step is to create a new workflow to automate sending SMS wishes. Click on the ‘Create Workflow’ button, which prompts you to choose between the new beta and classic versions. For this tutorial, select the beta version for a faster experience.

  • Click on the ‘Select’ button to proceed.
  • Name your workflow ‘Send Bulk Christmas Wishes via SMS’.
  • Choose a folder for your workflow, such as ‘Automations’.

Finally, click on the ‘Create’ button to finalize the setup of your workflow in Pabbly Connect.


3. Setting Up the Trigger with Google Sheets

The next step involves setting up a trigger in your newly created workflow. Since your customer data is stored in Google Sheets, select Google Sheets as the trigger app and choose the event ‘New or Updated Spreadsheet Row’. Click on ‘Connect’ to establish a connection.

You will receive a webhook URL, which is essential for connecting Google Sheets with Pabbly Connect. Copy this URL and head over to your Google Sheets. In Google Sheets, install the Pabbly Connect Webhooks add-on by navigating to Extensions > Add-ons > Get Add-ons and searching for ‘Pabbly Connect Webhooks’.


4. Configuring Google Sheets to Work with Pabbly Connect

After installing the Pabbly Connect Webhooks add-on, refresh your Google Sheets to see the new options. Click on Extensions > Pabbly Connect Webhooks > Initial Setup. Here, you will paste the webhook URL you copied earlier and specify the trigger column, which should be the final data column (e.g., Column C).

Once you have configured the settings, click on ‘Submit’. You will see a confirmation message indicating that the setup was successful. To test the connection, click on the ‘Send Test’ button, which will send data from your Google Sheets to Pabbly Connect.

  • Ensure to turn on the ‘Send on Event’ option to capture new data automatically.
  • Check the workflow in Pabbly Connect to confirm the successful data receipt.

With this setup, Pabbly Connect will now automatically capture any new rows added to your Google Sheets.


5. Sending SMS Wishes via Twilio through Pabbly Connect

The final step involves sending the SMS wishes to your customers using Twilio. In your Pabbly Connect workflow, add a new action step and select Twilio as the action app. Choose the event ‘Send SMS Message’ and click on ‘Connect’ to build the connection.

Provide the required details such as Account SID, Authorization Token, and your Twilio phone number. After entering these details, click ‘Save’. Next, input the SMS body, which can be personalized, and map the recipient’s number from the data received in the previous steps.

Finally, click on ‘Save and Send Test Request’. If successful, you’ll receive a confirmation message, and the SMS will be sent to the specified number. To send the same SMS to all customers, go back to your Google Sheets, click on Extensions > Pabbly Connect Webhooks, and select ‘Send All Data’. This will automate the process through Pabbly Connect.


Conclusion

In this tutorial, we explored how to send bulk Christmas wishes via SMS using Pabbly Connect. By following these steps, you can seamlessly integrate Google Sheets and Twilio to automate your festive greetings efficiently.

Ensure you check out Pabbly Connect to create business automation workflows and reduce manual tasks. Pabbly Connect currently offer integration with 2,000+ applications.

Auto-Create Asana Tasks from Calendar Events

Learn how to auto-create Asana tasks from Google Calendar events using Pabbly Connect in this detailed step-by-step tutorial. Learn to create powerful connections between your critical applications without requiring specialized programming knowledge or extensive technical background.

Watch Step By Step Video Tutorial Below


1. Accessing Pabbly Connect for Automation

To automatically create Asana tasks from Google Calendar events, first, you need to access Pabbly Connect. Begin by typing the URL Pabbly.com/connect into your browser’s address bar. This will take you to the Pabbly Connect landing page.

On this page, you will see options to either sign in or sign up for free. If you’re a new user, click on ‘Sign Up Free’ to create an account. Existing users can simply click on ‘Sign In’. Remember, signing up gives you 100 free tasks every month to practice using Pabbly Connect.


2. Creating a Workflow in Pabbly Connect

Once logged into Pabbly Connect, you will land on the dashboard. Here, you can create a new workflow by clicking on the ‘Create Workflow’ button. You will be prompted to select a workflow builder. Choose the ‘Beta’ workflow builder for a modern approach.

  • Click on ‘Select’ to proceed to the dialog box.
  • Enter a name for your workflow, such as ‘Create Asana Task for Google Calendar Events’.
  • Select a folder for your workflow, if desired.

After setting the name and folder, click on the ‘Create’ button. You will see a confirmation pop-up indicating that your workflow was created successfully. Now, it’s time to add a trigger to your workflow.


3. Setting Up Google Calendar as the Trigger

In this step, you will configure Google Calendar as the trigger app for your workflow. Click on the ‘Add Trigger’ button and search for ‘Google Calendar’. Select it as your trigger application. using Pabbly Connect

Next, choose the event type as ‘New and Updated Event’. Click on the ‘Connect’ button to establish a connection with your Google account. You can either create a new connection or use an existing one. Once connected, select the specific calendar you want to monitor for events.

After selecting the calendar, click on the ‘Save and Send Test Request’ button. This action will set the workflow to wait for a response from the Google Calendar whenever a new event is created. You can now move on to the next step.


4. Adding Asana as the Action Application

Now that the trigger is set up, it’s time to add Asana as the action application. Click on the ‘Add New Action Step’ button and search for ‘Asana’. Select it as your action app. using Pabbly Connect

  • Choose the action event as ‘Create a Task’.
  • Click on the ‘Connect’ button to link your Asana account.
  • Select your workspace and project ID from the dropdown menus.

After connecting, you will see fields to map your task details. For the task name, enter a dynamic name that includes the event title from Google Calendar. This mapping will allow the task name to change based on the event created.


5. Testing the Integration and Finalizing

Finally, after configuring the fields in Asana, click on the ‘Save and Send Test Request’ button. This will send a test request to Asana to create a task based on the event you created in Google Calendar.

Check your Asana account to confirm that the task has been created successfully. You should see the task with the title and description matching the Google Calendar event you set up.

This integration allows you to automate the process of creating tasks in Asana directly from Google Calendar events, streamlining your workflow significantly with the help of Pabbly Connect.


Conclusion

This tutorial has shown you how to use Pabbly Connect to auto-create Asana tasks from Google Calendar events. By following these steps, you can enhance your productivity and ensure that no tasks are missed.

Ensure you check out Pabbly Connect to create business automation workflows and reduce manual tasks. Pabbly Connect currently offer integration with 2,000+ applications.

Instant SMS Follow-Up for Real Estate Leads

Learn how to set up instant SMS follow-ups for real estate leads using Pabbly Connect. This step-by-step guide covers integration with Google Ads and Twilio.

Watch Step By Step Video Tutorial Below


1. Accessing Pabbly Connect for Automation

To set up instant SMS follow-ups for your real estate leads, first, access Pabbly Connect. Go to Pabbly.com/connect in your browser. Here, you will find options to either sign in or sign up for a free account.

If you are a new user, click on ‘Sign Up Free’ to get 100 free tasks each month. Existing users can simply sign in. After signing in, you will see the Pabbly apps window. Click on ‘Access Now’ under Pabbly Connect to enter the dashboard and start creating your automation.


2. Creating Your Workflow in Pabbly Connect

Once you are in Pabbly Connect, create a new workflow by clicking on the ‘Create Workflow’ button. You will be prompted to choose between the new beta version or the classic version. Select the beta version for a more modern experience.

  • Click ‘Create Workflow’.
  • Name your workflow ‘Instant SMS Follow-Up for Real Estate Leads’.
  • Select ‘Automations’ as the folder for your workflow.

After setting up the workflow name and folder, click ‘Create’. You will now see a new workflow window where you can begin to set up your trigger and action steps.


3. Setting Up the Trigger with Google Ads

In this section, you will set up the trigger for your workflow in Pabbly Connect. Since you are receiving leads through Google Ads, select Google Ads as your trigger app and choose ‘New Lead Form Entry’ as the event.

Click on ‘Connect’ to generate a webhook URL. This URL will be used to connect Google Ads with Pabbly Connect. Copy the webhook URL and navigate to your Google Ads account where you have created a test lead form.

  • Scroll down to the lead delivery section.
  • Paste the webhook URL in the integration settings.
  • Send test data to confirm the connection.

After sending the test data, check your Pabbly Connect workflow to ensure you received a successful response with the lead’s details.


4. Adding the Action Step to Send SMS via Twilio

The next step is to add an action step in Pabbly Connect to send an SMS using Twilio. Search for Twilio in the action app list and select ‘Send SMS Message’ as the event.

Click on ‘Connect’ and choose to add a new connection. You will need to input your Twilio account SID and authorization token, which you can find in your Twilio console. After entering these details, click ‘Save’.

Enter the SMS body, including dynamic fields. Map the lead’s first name into the SMS body. Add your Twilio phone number as the sender.

Finally, for the recipient number, map the lead’s phone number. After filling in all the required fields, click on ‘Save and Send Test Request’ to send the SMS.


5. Testing Your Integration to Ensure Functionality

In this final step, you will test your integration in Pabbly Connect. After clicking ‘Save and Send Test Request’, you should receive a successful response indicating that the SMS has been sent.

Check your phone for the SMS message, which should include the lead’s name and a thank you note. This confirms that your instant SMS follow-up for real estate leads is working effectively.

With this setup, you have automated your lead follow-up process, ensuring that you can respond to potential buyers instantly. This automation not only saves time but also builds trust with your leads.


Conclusion

By following these steps, you can successfully set up an instant SMS follow-up system for your real estate leads using Pabbly Connect. This automation enhances your responsiveness and helps in building strong client relationships.

Ensure you check out Pabbly Connect to create business automation workflows and reduce manual tasks. Pabbly Connect currently offer integration with 2,000+ applications.

How to Send Emails Automatically After Event Registration

Learn how to send automated emails after event registration using Pabbly Connect. Follow our step-by-step guide to streamline your event communications. Implement the precise methodologies leading organizations use to automate repetitive tasks, illustrated with practical examples designed for immediate application.

Watch Step By Step Video Tutorial Below


1. Accessing Pabbly Connect for Email Automation

To send emails automatically after event registration, the first step is to access Pabbly Connect. If you are a new user, visit pabbl.com/connect in your browser. Click on the ‘Sign Up for Free’ option in the top right corner to create an account.

Once signed up, you will have access to 100 tasks free every month to explore Pabbly Connect. This allows you to send up to 100 emails automatically, making it a perfect solution for event registrations.


2. Creating a Workflow in Pabbly Connect

After logging into Pabbly Connect, navigate to the workflow builder. This is where you will set up your automation. Click on the ‘Add Trigger’ button to start creating your workflow.

For the trigger application, search for ‘Jotform’ and select it. Choose the event as ‘New Response’ and click on the ‘Connect’ button. You will receive a webhook URL that needs to be copied to integrate with Jotform.

  • Search for Jotform and select it as the trigger application.
  • Choose ‘New Response’ as the event.
  • Copy the webhook URL provided.

Now, head to your Jotform settings, navigate to the integrations section, and select Webhooks. Paste the copied webhook URL and complete the integration. This connects Jotform with Pabbly Connect to capture registration details.


3. Capturing Registration Data

To capture the registration data, you need to perform a test submission on your Jotform. Fill in the required fields with dummy data, such as name, email, and phone number, and submit the form.

Once the form is submitted, return to Pabbly Connect. You will see that it has captured the response from your test submission. This step is crucial as it allows Pabbly Connect to recognize the data structure for future registrations.

  • Perform a test submission on Jotform.
  • Return to Pabbly Connect to see captured data.
  • Ensure the data is structured correctly for email sending.

With the data captured, you can now proceed to set up the email action step to automate the email notifications.


4. Setting Up Email Notifications with Pabbly Connect

Next, you will add an action step in Pabbly Connect to send an email. Click on the ‘Add New Action Step’ button and search for ‘Gmail’. Select it as the action application.

Choose the event as ‘Send Email’ and connect your Gmail account. If you haven’t connected it before, you will need to sign in and allow permissions for Pabbly Connect to access your Gmail account. Once connected, proceed to set up the email details.

Select ‘Gmail’ as the action application. Choose ‘Send Email’ as the event. Connect your Gmail account and allow necessary permissions.

Enter the sender’s name and email address, and map the recipient’s email address from the captured registration data. This is crucial for personalizing the emails sent to each registrant.


5. Finalizing Email Content and Sending

Now that you have set up the email action, you need to finalize the email content. Enter a subject line such as ‘Your Registration is Confirmed’ and personalize it by mapping the registrant’s name.

For the email body, you can use HTML content to enhance the visual appeal of the emails. Map additional details like the city and country of the registrant to personalize the message further. Finally, select the content type as HTML and click on ‘Save and Send Test Request’ to test the setup.

Once the test email is sent, check your Gmail account to confirm that the email has been received successfully. This verifies that your automation is working correctly. With Pabbly Connect, you can now send automated emails after event registrations seamlessly.


Conclusion

In this tutorial, we demonstrated how to use Pabbly Connect to send automated emails after event registrations. By following the steps outlined, you can streamline your event communication process effectively.

Ensure you check out Pabbly Connect to create business automation workflows and reduce manual tasks. Pabbly Connect currently offer integration with 2,000+ applications.

Utilizing Pabbly Connect not only saves time but also enhances the experience for your registrants. Start automating your email notifications today!