Auto-Create Asana Tasks from Calendar Events

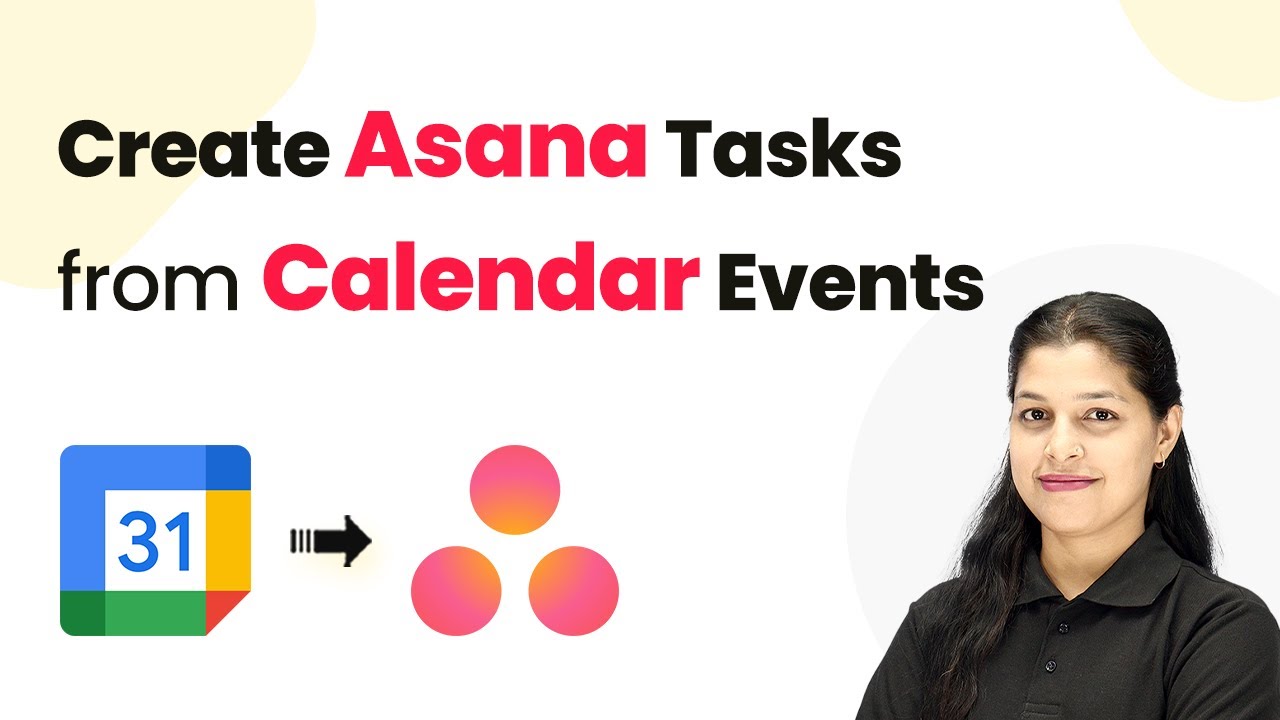
Learn how to automatically create Asana tasks from Google Calendar events using Pabbly Connect. This step-by-step guide simplifies your workflow integration. Implement the precise methodologies leading organizations use to automate repetitive tasks, illustrated with practical examples designed for immediate application.

Watch Step By Step Video Tutorial Below


1. Access Pabbly Connect to Set Up Integration

To auto-create Asana tasks from Google Calendar events, you first need to access Pabbly Connect. Open your browser and type in the URL Pabbly.com/connect to reach the Pabbly Connect landing page.

On this page, you will see options to either sign in or sign up for free. If you are new, click on the ‘Sign Up Free’ button. Existing users can simply sign in. By signing up, you receive 100 free tasks each month to practice using Pabbly Connect.


2. Create a Workflow in Pabbly Connect

After signing into Pabbly Connect, you will land on the dashboard. Here, you can create a new workflow by clicking the ‘Create Workflow’ button. This will allow you to set up the integration for auto-creating tasks in Asana from Google Calendar events.

Choose the workflow builder. You can opt for the ‘Beta’ version for a modern approach or the classic version. For this tutorial, we will select the Beta version. Name your workflow something like ‘Create Asana Task for Google Calendar Events’ and click the ‘Create’ button.

  • Click on the ‘Create Workflow’ button.
  • Select the Beta workflow builder.
  • Name your workflow and click ‘Create’.

Your workflow will be created, and you will be prompted to add a trigger. This is where you will set the event that initiates the workflow.


3. Set Up Google Calendar as the Trigger App

In this step, you will set Google Calendar as the trigger app in Pabbly Connect. Click on the ‘Add Trigger’ button and search for Google Calendar. Select it as your trigger app.

Next, choose the event type as ‘New and Updated Event’. Click on the ‘Connect’ button to link your Google account. If you already have a connection, select it; otherwise, create a new one. After successful connection, select the calendar you want to monitor for new events.

  • Click on ‘Add Trigger’ and select Google Calendar.
  • Choose ‘New and Updated Event’ as the event type.
  • Connect your Google account and select the calendar.

Once you save this setup, you will be ready to test if the trigger is working correctly.


4. Add Asana as the Action App

Now that you have set Google Calendar as the trigger, the next step is to add Asana as the action app in Pabbly Connect. Click on the ‘Add New Action Step’ button and search for Asana.

Select Asana and choose the action event as ‘Create Task’. Click the ‘Connect’ button to link your Asana account. You can select an existing connection or create a new one. After connecting, you will need to fill in the required fields for the task.

Select Asana and choose ‘Create Task’ as the action event. Connect your Asana account. Fill in the task details including workspace and project ID.

Make sure to map the event details from Google Calendar to the task fields in Asana. This ensures that every new event creates a corresponding task automatically.


5. Test the Integration

With both Google Calendar and Asana set up in Pabbly Connect, it’s time to test the integration. Save your action step and click on the ‘Save and Send Test Request’ button. This will send a test request to Asana to create a task based on the event details from Google Calendar.

After executing the test, check your Asana account to ensure that the task has been created successfully. You should see the task titled as per the event name you set in Google Calendar, along with the description and other details.

If everything works as expected, congratulations! You have successfully set up an automation that creates Asana tasks from Google Calendar events using Pabbly Connect.


Conclusion

In this tutorial, we demonstrated how to use Pabbly Connect to automate the creation of Asana tasks from Google Calendar events. This integration streamlines your workflow and ensures you never miss adding tasks for your scheduled events. Start using Pabbly Connect today to enhance your productivity!

Ensure you check out Pabbly Connect to create business automation workflows and reduce manual tasks. Pabbly Connect currently offer integration with 2,000+ applications.

Your Website Form Leads Turn Into Instant WhatsApp Chats (No Manual Follow-Ups)

Learn how to integrate your website form leads with WhatsApp using Pabbly Connect for instant chat automation. Follow this step-by-step guide! Revolutionize your productivity approach with just a few strategic clicks. Uncover professional methods for connecting applications and creating workflows that reclaim hours of your week.

Watch Step By Step Video Tutorial Below


1. Accessing Pabbly Connect for Automation

To automate your website form leads into instant WhatsApp chats, you need to access Pabbly Connect. Start by visiting the Pabbly website and signing in or signing up for a free account. This will give you access to the automation tools you need.

Once logged in, navigate to the Pabbly Connect dashboard. From here, you can create a new workflow that will connect your website form to WhatsApp. This integration will allow you to send automated messages to leads as soon as they submit their information.


2. Creating a Workflow in Pabbly Connect

Next, you will create a new workflow in Pabbly Connect. Click on the ‘Create Workflow’ button, and select the new beta workflow builder. Name your workflow something descriptive, like ‘Website Form Leads to WhatsApp Chats’. After naming, choose your folder for organization.

  • Select a trigger application (Webhook by Pabbly).
  • Set the trigger event to ‘Catch Webhook’.
  • Connect your webhook to your website form.

After setting up the trigger, you will receive a unique webhook URL. This URL is crucial as it will bridge your website form and Pabbly Connect, allowing for data transfer whenever a lead is submitted.


3. Setting Up the Webhook in Your Website Form

To connect your website form to Pabbly Connect, you need to insert the webhook URL into the form’s code. Open your form’s HTML code and replace the existing webhook URL with the one provided by Pabbly Connect. Save the changes to ensure the connection is established.

Once the webhook URL is updated, it’s time to test the connection. Submit a test entry in your website form. You should see the data captured in your Pabbly Connect workflow. This confirms that the integration is working, and leads will be sent to your WhatsApp automatically.


4. Sending WhatsApp Messages Using Pabbly Connect

After successfully capturing the lead data, the next step is to send a WhatsApp message. In your workflow, add a new action step and select Pabbly Chatflow as the action application. Choose the action event as ‘Send Template Message’ and connect your Pabbly Chatflow account.

  • Map the recipient mobile number from the webhook response.
  • Select the WhatsApp message template you created.
  • Ensure all required fields are filled out correctly.

By mapping the phone number and using your template, Pabbly Connect will send personalized WhatsApp messages to every new lead captured through your website form.


5. Testing and Finalizing Your Integration

With everything set up, it’s time to test the entire workflow. Submit another test entry in your website form and check your WhatsApp for the automated message. This message should include the personalized details you set up in your template.

If the message is received successfully, your integration is complete. You can now rely on Pabbly Connect to handle all future leads from your website form, sending them instant WhatsApp messages without any manual follow-ups.


Conclusion

Using Pabbly Connect, you can seamlessly automate your website form leads into instant WhatsApp chats. This integration saves time and ensures timely communication with your leads, enhancing your business efficiency.

Ensure you check out Pabbly Connect to create business automation workflows and reduce manual tasks. Pabbly Connect currently offer integration with 2,000+ applications.

Loan Application Leads to Google Sheets Automatically

Learn how to automatically add loan application leads to Google Sheets using Pabbly Connect. Follow our step-by-step tutorial for seamless integration! Eliminate manual repetitive tasks from your workflow. Discover proven automation methods with intuitive steps designed for efficiency-minded professionals.

Watch Step By Step Video Tutorial Below


1. Setting Up Pabbly Connect for Automation

To automate loan application leads to Google Sheets, you first need to access Pabbly Connect. If you are a new user, search for pabbl.com/connect in your browser. Click on the ‘Sign Up for Free’ option in the top right corner to create your account.

Once signed up, you will receive 100 free monthly tasks to explore Pabbly Connect. This allows you to add up to 100 lead details into your Google Sheets without any cost. After exploring, you may consider purchasing a subscription plan for additional features.


2. Creating Your Workflow in Pabbly Connect

After logging into Pabbly Connect, navigate to the workflow builder. This is where you will set up the automation process. Click on the ‘Add Trigger’ button to begin your workflow.

  • Choose Google Ads as the trigger application.
  • Select ‘New Lead Form Entry’ as the event.
  • Click on ‘Connect’ to receive a webhook URL.

Copy the webhook URL provided by Pabbly Connect. This URL will be used to connect your Google Ads lead form with Pabbly Connect, allowing you to capture lead data automatically.


Now, open your Google Ads campaign where you have set up the lead form. Locate the lead delivery settings and paste the webhook URL from Pabbly Connect into the designated field. Enter the key as required and click on ‘Send Test Data’.

Once the test data is sent, return to your Pabbly Connect workflow. Wait for a few seconds to capture the webhook response, which will contain the lead details. This step is crucial for ensuring that your automation works correctly.


4. Integrating Google Sheets with Pabbly Connect

After capturing the test data, it’s time to add the lead details to Google Sheets automatically. Click on the ‘Add New Action Step’ in your Pabbly Connect workflow and select Google Sheets as the action application.

  • Choose ‘Add New Row’ as the action event.
  • Connect your Google account by clicking on ‘Sign In with Google’.
  • Select the spreadsheet and sheet where you want to add the lead details.

Map the lead data fields from the previous step to the corresponding columns in Google Sheets. This dynamic mapping ensures that every new lead entry is recorded accurately in your spreadsheet.


5. Testing Your Automation Setup

Once you have mapped all the lead details, click on ‘Save and Send Test Request’ in Pabbly Connect. This action will send the test data to your Google Sheets, allowing you to verify that everything is working correctly.

Open your Google Sheets and refresh the page to see the newly added lead details, including first name, last name, email, phone number, and city. With this setup, every new lead from your Google Ads campaign will automatically populate in your Google Sheets without any additional effort.


Conclusion

By using Pabbly Connect, you can seamlessly automate the process of adding loan application leads to Google Sheets. This integration not only saves time but also ensures that your sales team has immediate access to new leads. Start using Pabbly Connect today to enhance your business automation!

Ensure you check out Pabbly Connect to create business automation workflows and reduce manual tasks. Pabbly Connect currently offer integration with 2,000+ applications.

AI Agent for Research & Consulting Services Business

Learn how to create an AI agent for your research and consulting services business using Pabbly Chatflow. Step-by-step guide to automate WhatsApp conversations. Master conversational marketing with practical techniques for creating chatbots that engage visitors at exactly the right moment in their journey.

Watch Step By Step Video Tutorial Below


1. Accessing Pabbly Chatflow for Your AI Agent

To create an AI agent for your research and consulting services business, start by accessing Pabbly Chatflow. Simply navigate to www.Pabbly.com/chatflow in your browser. If you are an existing user, click on the ‘Sign In’ button located at the top right corner. New users can click on ‘Sign Up for Free’ to create an account and receive 100 free tasks monthly.

Once signed in, you will see the Pabbly apps page. Click on ‘Pabbly Chatflow’ to access the WhatsApp dashboard. Here, you can manage your WhatsApp number and view your credits. To connect your WhatsApp account, click on ‘Add WhatsApp Number’ and follow the instructions provided. This integration is crucial for automating your WhatsApp conversations through Pabbly Chatflow.


2. Creating Your AI Agent in Pabbly Chatflow

After accessing Pabbly Chatflow, the next step is to create your AI agent. Click on the ‘AI Assistant’ option on the left sidebar. To add a new AI assistant, click on ‘Add Assistant’ and name it according to your business needs, such as ‘AI Agent for Research and Consulting Service Business’.

  • Select the instruction type as ‘AI Agent’ from the dropdown menu.
  • Set the temperature for AI responses, where 0 means focused and 1 means creative. A good setting is around 0.7.
  • Choose ‘Open AI’ as the AI to use and select the model ‘GPT 4 Mini’.

After configuring these settings, you will need to enter your OpenAI API key. Ensure that you have a paid OpenAI account to generate this key. Click on ‘Create New Secret Key’ and follow the prompts to generate and copy your API key into Pabbly Chatflow. This key is essential for your AI agent to function properly.


3. Configuring Your AI Assistant in Pabbly Chatflow

Once your AI agent is created, you need to configure it effectively in Pabbly Chatflow. This includes setting up the AI assistant settings. You can toggle options for sending header and footer messages, as well as defining a stop keyword that users can send to halt responses.

  • Define a fallback message for situations when the AI cannot respond.
  • Set retry attempts for the AI to respond if it fails initially.
  • Upload a knowledge source file that contains all necessary information about your consulting services.

Make sure to provide detailed information in the knowledge source to train your AI agent effectively. This will enhance its ability to respond accurately to user queries, making Pabbly Chatflow a powerful tool for your consulting services business.


4. Deploying Your AI Agent to WhatsApp

After configuring your AI assistant, it’s time to deploy it to your WhatsApp account through Pabbly Chatflow. Navigate to the ‘Inbox’ section on the left sidebar. Here, you can assign your AI assistant to specific chats or groups. Toggle the button to select the AI assistant you created.

For broader deployment, go to the ‘Inbox Settings’ and enable AI auto replies. Here, you can assign the AI assistant to all contacts or specific groups. This will allow your AI agent to automatically respond to queries received through WhatsApp, enhancing your customer service capabilities.


5. Testing Your AI Agent in Pabbly Chatflow

With your AI agent deployed, it’s crucial to test its functionality. Send a message through WhatsApp, such as ‘What can your business help me with?’ and observe the automated response generated by your AI agent. The replies should be relevant and informative, showcasing the capabilities of your consulting services. using Pabbly Connect

For example, if you inquire about a specific area like ‘SAS and technology,’ the AI agent should respond with tailored information about market analysis, feasibility studies, and competitive observation. This testing phase ensures that your AI agent is effectively trained and ready to assist customers.


Conclusion

In conclusion, using Pabbly Chatflow to create an AI agent for your research and consulting services business can significantly enhance customer interactions. By automating WhatsApp conversations, you can provide timely and relevant responses to your clients, ultimately improving your service quality.

Ensure you check out Pabbly Connect to create business automation workflows and reduce manual tasks. Pabbly Connect currently offer integration with 2,000+ applications.

Send Emails to TikTok Leads Automatically

Learn how to send automated emails to TikTok leads using Pabbly Connect. This step-by-step tutorial covers everything you need to know. This comprehensive guide reveals exactly how to connect your applications and automate repetitive tasks — accessible for professionals of all technical backgrounds.

Watch Step By Step Video Tutorial Below


1. Setting Up Pabbly Connect for TikTok Leads

To send automated emails to TikTok leads, you need to set up Pabbly Connect. First, open your browser and navigate to pabbl.com/connect. If you are a new user, click on the ‘Sign Up for Free’ button in the top right corner. This allows you to explore Pabbly Connect with 100 free tasks per month, which is perfect for sending emails to your TikTok leads.

Existing users can directly access the workflow builder in Pabbly Connect. If you enjoy using the platform, consider subscribing for additional features and tasks. Now, let’s create the automation!


2. Creating a New Workflow in Pabbly Connect

Once you are in the workflow builder of Pabbly Connect, you will see options for setting up triggers and actions. To begin, click on the ‘Add Trigger’ button. Here, you need to select TikTok as your trigger application.

  • Search for ‘TikTok Lead Generation’ in the trigger application.
  • Choose the event ‘New Lead’ and click on ‘Connect’.
  • If you have an existing connection, select it; otherwise, create a new connection by logging into your TikTok account.

After successfully connecting your TikTok account, select the appropriate advertiser ID and form ID for the leads you want to capture. This step is crucial for ensuring that the correct leads are processed through Pabbly Connect.


3. Capturing Test Leads in Pabbly Connect

After setting up the trigger, you need to test the connection by capturing a lead. Click on ‘Save and Send Test Request’. At this point, Pabbly Connect will wait for a webhook response, which means you should generate a test lead.

  • You can either wait for a real lead to come in or generate a test lead yourself.
  • Follow the documentation provided by Pabbly Connect to generate a test lead.
  • Once the test lead is generated, you will see the details captured in Pabbly Connect.

These details include the first name, last name, email, and phone number, which will be used for sending automated emails to your TikTok leads.


4. Setting Up Gmail to Send Emails

Next, you will set up the action step in Pabbly Connect to send an email via Gmail. Click on ‘Add New Action Step’ and search for Gmail. Select Gmail as your action application.

Choose the event ‘Send Email’ and click on ‘Connect’. If you have an existing connection, select it; otherwise, create a new connection by signing in with your Google account. Grant all necessary permissions to Pabbly Connect for seamless integration.

Once connected, you will need to fill in the sender’s name and email address. For the recipient’s email address, map the email field from the test lead captured earlier. This dynamic mapping ensures that each email sent is personalized for every lead.


5. Finalizing the Email Content

Now it’s time to finalize the email content you want to send to your TikTok leads. Fill in the subject line and email body, ensuring to include personalized elements using the mapped fields from the lead data. using Pabbly Connect

Set the email content type to HTML for a richer format. You can use tools like ChatGPT to generate appealing email content. Map the lead’s name in the email body for personalization.

After completing the email setup, you will receive a confirmation that the email has been sent successfully. You can check your Gmail inbox to verify that the automated email was sent to your TikTok lead.


Conclusion

In this tutorial, we explored how to use Pabbly Connect to send automated emails to TikTok leads effectively. By following these steps, you can streamline your lead management process and enhance your marketing efforts. Start using Pabbly Connect today to automate your email communications and boost your business productivity.

Ensure you check out Pabbly Connect to create business automation workflows and reduce manual tasks. Pabbly Connect currently offer integration with 2,000+ applications.

End 90% of Repetitive Queries Overnight with this Chatbot

Learn how to create a WhatsApp chatbot using Pabbly Chatflow to automate responses and end repetitive queries effectively. Learn step-by-step how to create, test, and optimize chatbots that enhance customer experience while reducing support workload.

Watch Step By Step Video Tutorial Below


1. Accessing Pabbly Chatflow for Your WhatsApp Chatbot

To create a WhatsApp chatbot that answers repetitive queries, start by accessing Pabbly Chatflow. Open a new tab and go to Pabbly.com/chatflow to reach the Pabbly Chatflow landing page.

On the page, you will find options to sign in or sign up. If you are new, click on ‘Sign Up Free’ to create an account and receive 100 free credits monthly. If you already have an account, simply click ‘Sign In’ to proceed to your dashboard.


2. Creating Your WhatsApp Chatbot Flow in Pabbly Chatflow

Once logged into Pabbly Chatflow, navigate to the dashboard where you can manage your flows. Click on the ‘Flows’ option and then on the ‘Add Flow’ button to start creating your WhatsApp chatbot.

In the flow builder, you will need to set up a trigger event. Select ‘Keyword or Reject Match’ as your trigger event. Enter the keywords that will activate your chatbot, such as ‘hello’ and ‘support’. Press the ‘Enter’ key after each keyword to ensure they are saved.

  • Access the Flows section in Pabbly Chatflow.
  • Click ‘Add Flow’ to create a new chatbot.
  • Select ‘Keyword or Reject Match’ as your trigger event.
  • Enter your keywords and press ‘Enter’ after each.

After setting up the trigger, you can proceed to configure the action step for your WhatsApp chatbot.


3. Configuring Action Steps in Pabbly Chatflow

In Pabbly Chatflow, after setting the trigger, you will need to define the action that occurs when a keyword is received. Drag the ‘Text’ action button into the flow to send a welcome message to users who trigger the chatbot.

Connect the trigger to the text action, then enter your welcome message. For example, you might say, ‘Hi, welcome to Shift Care support! I can help you with order status, pricing, delivery, refunds, and store information.’ After the welcome message, add a list for users to choose from.

  • Drag ‘Text’ to send a welcome message.
  • Connect the trigger to the text action.
  • Enter your welcome message.
  • Add a list for users to select options.

After configuring these actions, you can set up the options that users can select from the list.


4. Setting Up User Selection Options in Pabbly Chatflow

To enhance your Pabbly Chatflow WhatsApp chatbot, you’ll need to create options for the users. After the welcome message, drag the ‘List’ action into your flow. Define the header, body, and footer of the list.

Next, click on ‘Add Section’ to create a section within the list. For each option, click ‘Add Items’ to specify the choices available to users. You might include options like ‘Product Pricing’, ‘Delivery and Shipping’, ‘Return and Refund Policy’, and more.

Drag ‘List’ action into the flow. Define the header, body, and footer of your list. Click ‘Add Section’ and then ‘Add Items’ for options. Include various options for users to select.

After setting up these options, ensure to connect them back to the flow for seamless user experience.


5. Testing Your WhatsApp Chatbot in Pabbly Chatflow

Once your WhatsApp chatbot is fully configured in Pabbly Chatflow, it’s time to test its functionality. Save the flow to ensure all configurations are applied. Open your WhatsApp and send the keyword ‘hello’ to check if the chatbot responds correctly.

You should receive the welcome message followed by the list of options you set up. This confirms that your WhatsApp chatbot is working properly and ready to handle repetitive queries from users effectively.

By following these steps, you can create a robust WhatsApp chatbot using Pabbly Chatflow that automates responses and enhances customer support.


Conclusion

In this tutorial, we learned how to create a WhatsApp chatbot using Pabbly Chatflow. By following each step, you can automate responses to repetitive queries and improve customer support efficiency.

Ensure you check out Pabbly Connect to create business automation workflows and reduce manual tasks. Pabbly Connect currently offer integration with 2,000+ applications.

Auto Send Gaming Tips & Tricks on Discord Daily

Learn how to automate sending gaming tips daily on Discord using Pabbly Connect, Google Gemini, and more. Follow this step-by-step guide. This comprehensive guide reveals exactly how to connect your applications and automate repetitive tasks — accessible for professionals of all technical backgrounds.

Watch Step By Step Video Tutorial Below


1. Accessing Pabbly Connect for Automation

To automate sending gaming tips on Discord, start by accessing Pabbly Connect. If you’re a new user, visit Pabbly.com/connect and sign up for free. This allows you to explore the platform with up to 100 tasks monthly, making it an excellent way to test out the automation features.

Once signed up, navigate to the workflow builder in Pabbly Connect. This is where you’ll create the automation that connects Discord and Google Gemini. The workflow builder allows you to set triggers and actions that will facilitate the automated messaging process.


2. Setting Up the Trigger in Pabbly Connect

In the workflow builder, the first step is to set up a trigger. Click on the ‘Add Trigger’ button and search for ‘Scheduled by Pabbly’. This will allow you to schedule your workflow to run at specific intervals. using Pabbly Connect

  • Select ‘Scheduled Workflow’ as the event.
  • Choose the frequency as ‘Every Day’.
  • Set the time to your preferred hour, such as 9:00 AM.

After configuring these settings, click ‘Save’. Your trigger is now set up to run daily, initiating the automation process to send gaming tips to your Discord server.


3. Generating Gaming Tips Using Google Gemini

Next, you need to generate the content for your gaming tips. Click on ‘Add New Action Step’ and search for ‘Google Gemini’. Select ‘Google AI Studio’ for the action event. using Pabbly Connect

After connecting to Google Gemini, you will need to generate content. Enter your API key from Google AI Studio to establish a connection. Here’s how to find your API key:

  • Open Google AI Studio and navigate to the API key section.
  • Click on ‘Create API Key’ and fill in the required details.
  • Copy the generated key and paste it into Pabbly Connect.

Once connected, set the prompt to generate your gaming tips and select the model (e.g., Gemini 2.5 flash). Click ‘Save and Send Test Request’ to generate the content. This content will be used in the next step to send messages to Discord.


4. Sending Generated Tips to Discord

After generating the tips, it’s time to send them to your Discord channel. Click on ‘Add New Action Step’ and search for ‘Discord’. Choose ‘Send Channel Message’ as the event. using Pabbly Connect

To connect Discord, you will need to use a webhook URL. Here’s how to get it:

Open Discord and go to your server settings. Navigate to ‘Integrations’ and click on ‘New Webhook’. Choose the channel for the message and copy the webhook URL.

Paste the webhook URL into Pabbly Connect, and map the message field to the content generated from Google Gemini. Click ‘Save and Send Test Request’ to confirm that the message is sent successfully to your Discord channel.


5. Automating the Process for Daily Updates

With everything set up, your automation is now complete. The workflow in Pabbly Connect will run daily at the scheduled time, generating new gaming tips and sending them to your Discord server without any manual input.

This automation streamlines your communication with your gaming community, ensuring that they receive fresh content every day. You can monitor the workflow in Pabbly Connect to ensure everything runs smoothly and make adjustments as needed.

By utilizing Pabbly Connect, you can not only automate this process but also explore numerous other integrations to enhance your Discord server or any other applications you use. Start automating today!


Conclusion

In this tutorial, we explored how to automate sending gaming tips daily on Discord using Pabbly Connect and Google Gemini. This integration allows for seamless updates to your community without manual effort, enhancing engagement and interaction.

Ensure you check out Pabbly Connect to create business automation workflows and reduce manual tasks. Pabbly Connect currently offer integration with 2,000+ applications.

Reduce Support Tickets by 70%! (Automate Order Tracking on WhatsApp)

Learn how to reduce support tickets by 70% by automating order tracking on WhatsApp using Pabbly Chatflow and Pabbly Chatflow. Follow this detailed tutorial shows you how to build powerful chat automation that engages visitors and converts prospects—without any coding required.

Watch Step By Step Video Tutorial Below


1. Access Pabbly Chatflow to Create Your WhatsApp Chatbot

To automate order tracking on WhatsApp, start by accessing Pabbly Chatflow. Open a new tab and navigate to Pabbly.com/chatflow. Here, you can sign in or sign up for a free account. If you are a new user, you will receive 100 free credits every month, which is perfect for exploring the platform.

After logging in, you will see your dashboard. Ensure that you add your WhatsApp number by selecting either the WhatsApp connect method or the manual token connect method. This setup is essential for the chatbot to function effectively.


2. Create Your WhatsApp Chatbot in Pabbly Chatflow

Once you are on the dashboard of Pabbly Chatflow, navigate to the flows section. Here, you can create a new flow for your WhatsApp chatbot. Click on the ‘Add Flow’ button and name your chatbot, for example, ‘Automate Order Tracking on WhatsApp’.

  • Click on the trigger button to select the event that will start your chatbot.
  • Choose the ‘Keyword’ trigger event and enter keywords like ‘help’ and ‘hello’ to initiate the chatbot.
  • Connect the trigger to the action step where you will send a welcome message to the user.

After setting the trigger, drag in the text button to send a welcome message. You can personalize the message by including the customer’s name using the contact custom field. This initial setup is crucial for engaging users effectively.


3. Collect Order ID from Users Using Pabbly Chatflow

Following the welcome message, your Pabbly Chatflow bot should ask users for their order ID. Use the ‘Ask Question’ feature to prompt users for this information. Make sure to set the response format to accept both letters and numbers, as order IDs often contain a mix.

  • Drag the ‘Ask Question’ button into your flow and enter a prompt asking for the order ID.
  • Connect this step to the API request action where you will send the order ID to Pabbly Connect.
  • Ensure that the order ID is captured correctly to process the next steps.

This setup allows your chatbot to gather essential data from customers, which is necessary for the order tracking process. Ensure that each step is connected properly to maintain the flow.


4. Integrate Pabbly Connect for Order Tracking

The next step involves integrating Pabbly Connect to process the order ID received from users. Here, you will create a workflow that checks the order ID against your Google Sheets where order details are stored. In Pabbly Connect, click on ‘Create Workflow’ and select the webhook option as your trigger.

Copy the webhook URL generated by Pabbly Connect and paste it into the API request in your Pabbly Chatflow. Map the parameters such as name, phone number, and order ID to be sent to Pabbly Connect. Test the API request to ensure data is sent correctly.

This integration allows you to fetch order details dynamically based on the order ID provided by customers, significantly reducing the need for support tickets.


5. Send Order Status to Users via WhatsApp

After validating the order ID in your Google Sheets, the next action in Pabbly Chatflow is to send the order status back to the user. You can set up conditional responses using the router feature based on whether the order ID exists in your sheet.

If the order ID exists, send a detailed message including product, status, and expected delivery date. If the order ID does not exist, inform the user that the ID is incorrect. Connect these responses back to the WhatsApp messaging feature in Pabbly Chatflow.

By implementing this final step, you ensure that customers receive timely updates about their orders directly on WhatsApp, enhancing their experience and significantly reducing support tickets.


Conclusion

In conclusion, using Pabbly Chatflow in conjunction with Pabbly Connect allows businesses to automate order tracking on WhatsApp effectively. By following the steps outlined in this tutorial, you can reduce support tickets by 70% while enhancing customer satisfaction.

Ensure you check out Pabbly Connect to create business automation workflows and reduce manual tasks. Pabbly Connect currently offer integration with 2,000+ applications.

Add Leads to Zoho CRM in Minutes (Automatic & No-Code)

Learn how to automate lead addition to Zoho CRM using Pabbly Connect in this detailed step-by-step tutorial. Explore efficient methods for automating routine tasks with clear, concise instructions suited for both newcomers and experienced professionals.

Watch Step By Step Video Tutorial Below


1. Accessing Pabbly Connect for Automation

To automate lead addition to Zoho CRM, you first need to access Pabbly Connect. Start by visiting the Pabbly website and navigating to the Pabbly Connect page.

Click on the ‘Sign Up Free’ button if you are a new user, or ‘Sign In’ if you already have an account. After signing in, you will be directed to your Pabbly apps window where you can access Pabbly Connect by clicking on ‘Access Now’.


2. Creating a New Workflow in Pabbly Connect

Once inside Pabbly Connect, the next step is to create a new workflow. Click on the ‘Create Workflow’ button to begin. You will be prompted to choose between the new beta and classic versions; select the beta version for a more modern experience.

  • Click on ‘Create Workflow’.
  • Name your workflow, for example, ‘Add Leads to Zoho CRM in Minutes’.
  • Choose a folder for your workflow, such as ‘Contacts’.

After naming your workflow and selecting the folder, click on the ‘Create’ button to finalize the setup of your new workflow.


3. Setting Up the Trigger in Pabbly Connect

In this section, you will set up the trigger that initiates the workflow in Pabbly Connect. Select ‘Google Ads’ as your trigger application and choose ‘New Lead Form Entry’ as the event.

Upon clicking ‘Connect’, a webhook URL will be generated. Copy this URL as you will need to paste it into your Google Ads account to connect it with Pabbly Connect.

  • Log into your Google Ads account.
  • Navigate to your lead form settings and find the webhook integration option.
  • Paste the copied webhook URL from Pabbly Connect.

After setting up the webhook, send test data to ensure that Pabbly Connect receives the lead information correctly.


4. Adding an Action Step to Create Contacts in Zoho CRM

Now that your trigger is set, it’s time to add an action step in Pabbly Connect. Select ‘Zoho CRM’ as the action application and choose ‘Create Contact’ as the action event.

To connect to Zoho CRM, click on ‘Connect’ and then ‘Add a New Connection’. You will need to provide your Zoho domain (for example, zoho.in) to establish the connection.

Select ‘Connect with Zoho CRM’. Authorize Pabbly Connect to access your Zoho CRM data. Map the lead’s details such as first name, last name, and phone number from the trigger step.

After mapping the required fields, click on ‘Save and Send Test Request’ to ensure that a new contact is created successfully in your Zoho CRM account.


5. Conclusion: Effortless Lead Management with Pabbly Connect

By following these steps, you can automate the process of adding leads to Zoho CRM using Pabbly Connect. This integration saves time and ensures that no leads are missed, helping you manage your contacts efficiently.

Ensure you check out Pabbly Connect to create business automation workflows and reduce manual tasks. Pabbly Connect currently offer integration with 2,000+ applications.

Check out Pabbly Connect – Automate your business workflows effortlessly! Sign Up Free – Start your journey with ease! 10,000+ Video Tutorials – Learn step by step! Join Pabbly Facebook Group – Connect with 21,000+ like minded people!

Utilizing Pabbly Connect for this automation allows for seamless data transfer between Google Ads and Zoho CRM, enhancing your lead management capabilities.

With just a few clicks, you can set up this powerful integration and focus on growing your business while Pabbly Connect handles the rest.


Auto-Add LinkedIn Leads to FluentCRM (Step-by-Step Automation Guide)

Learn how to automate the process of adding LinkedIn leads to FluentCRM using Pabbly Connect. Follow this detailed step-by-step guide for seamless integration. Follow this definitive guide to creating powerful automated workflows with straightforward, efficiency-focused solutions that save valuable time.

Watch Step By Step Video Tutorial Below


1. Setting Up Pabbly Connect for LinkedIn and Fluent CRM Integration

To auto-add LinkedIn leads to Fluent CRM, you need to set up Pabbly Connect. Start by visiting the Pabbly Connect website and signing in or signing up for a free account. This platform allows you to automate tasks without any coding knowledge.

Once logged in, navigate to the Pabbly Connect dashboard where you can create new workflows. Click on ‘Create Workflow’ and name it ‘Auto Add LinkedIn Leads to Fluent CRM’. This step is crucial as it sets the foundation for your automation process.


2. Creating the Workflow in Pabbly Connect

After naming your workflow, the next step involves defining the trigger application. In this case, select LinkedIn as your trigger application within Pabbly Connect. This action will initiate the workflow whenever a new lead is captured.

  • Choose the trigger event as ‘New Notification’.
  • Connect your LinkedIn account by entering your credentials.
  • Select the sponsored account you want to use.

Once you’ve set up the trigger, click on ‘Save and Send Test Request’. This allows Pabbly Connect to capture the webhook response, which is essential for the next steps in your automation.


3. Testing the Lead Generation from LinkedIn

To ensure everything is working correctly, you need to generate a test lead in LinkedIn. Open your LinkedIn lead generation form and fill in the necessary details. It’s important to use realistic data to test the integration thoroughly.

After submitting the form, return to Pabbly Connect and check if the response from LinkedIn has been captured correctly. This will confirm that the connection between LinkedIn and Pabbly Connect is functioning as expected.


4. Adding the LinkedIn Lead to Fluent CRM

With the LinkedIn lead captured, the next step is to add this lead to Fluent CRM. In your Pabbly Connect workflow, select Fluent CRM as the action application. Choose the action event as ‘Create Contact’. This step ensures that the lead information is transferred to your CRM.

  • Connect your Fluent CRM account by entering your WordPress site URL and credentials.
  • Map the fields from LinkedIn to Fluent CRM, ensuring all necessary information is included.
  • Set the status of the contact to ‘Subscribed’.

After completing these steps, click ‘Save and Send Request’ to finalize the process. This will add the new lead to your Fluent CRM, automating your lead management effectively.


5. Final Verification of the Automation Process

To conclude, verify that the lead has been successfully added to Fluent CRM. Navigate to your Fluent CRM dashboard and check the contacts section. You should see the new lead listed there, confirming that the automation via Pabbly Connect worked flawlessly.

This entire workflow illustrates the power of Pabbly Connect in automating lead management between LinkedIn and Fluent CRM, saving you time and ensuring no leads are missed.


Conclusion

In this tutorial, we explored how to use Pabbly Connect to automate the process of adding LinkedIn leads to Fluent CRM. By following these steps, you can streamline your lead management and enhance your business efficiency. Start using Pabbly Connect today to simplify your workflows.

Ensure you check out Pabbly Connect to create business automation workflows and reduce manual tasks. Pabbly Connect currently offer integration with 2,000+ applications.