Automate Service Inquiries for Car Dealerships via WhatsApp with Pabbly Chatflow

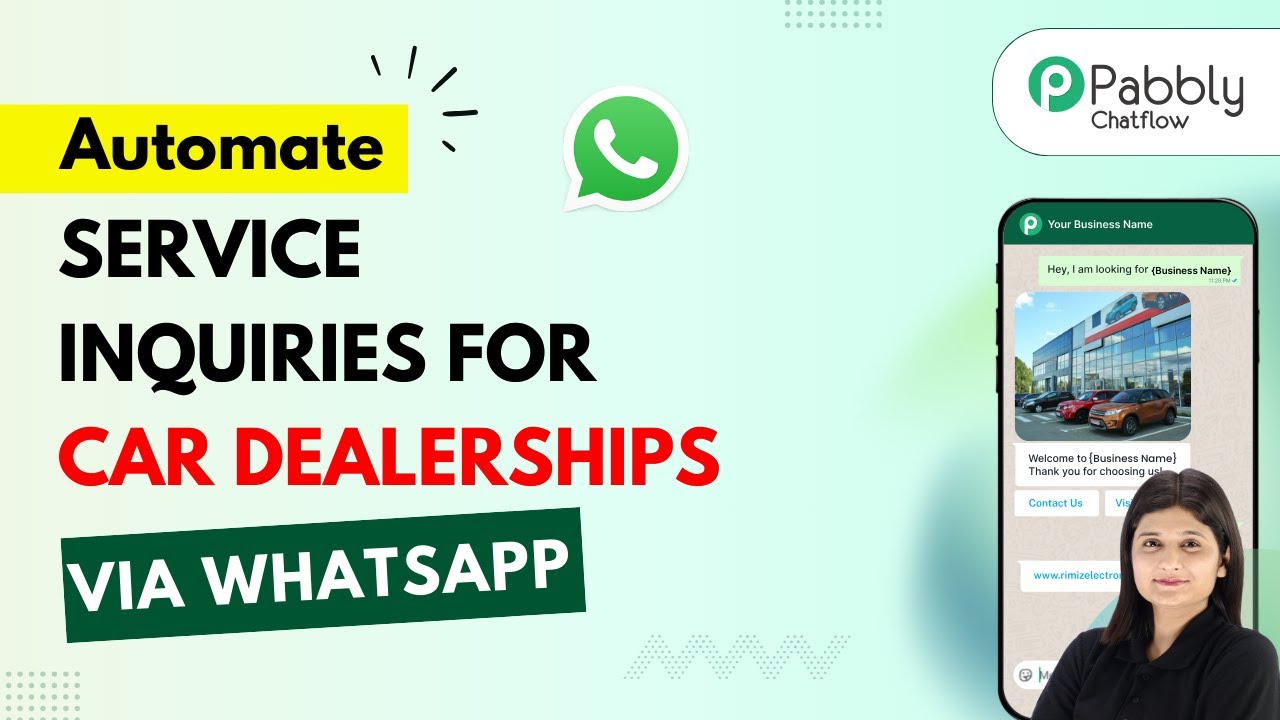
Learn how to automate service inquiries for car dealerships using Pabbly Chatflow and WhatsApp. Step-by-step tutorial for effective integration. Discover how to design chat experiences that feel personal and responsive while handling customer inquiries automatically around the clock.

Watch Step By Step Video Tutorial Below


1. Accessing Pabbly Chatflow for WhatsApp Integration

To automate service inquiries for car dealerships via WhatsApp, start by accessing Pabbly Chatflow. Open your web browser and navigate to www.Pabbly.com/chatflow. This platform is essential for creating a WhatsApp chatbot that will handle customer queries efficiently.

Once on the Pabbly Chatflow page, sign in to your account. If you’re a new user, click on ‘Sign Up for Free’ to create an account and receive 100 free credits monthly. After logging in, you will be directed to the dashboard where you can manage your WhatsApp integration.


2. Creating Your WhatsApp Chatbot with Pabbly Chatflow

After logging in to Pabbly Chatflow, the next step is to create a new flow for your WhatsApp chatbot. Click on the ‘Flows’ option in the left sidebar and then select ‘Add Flow’. This will allow you to start building your chatbot specifically for handling service inquiries.

  • Name your flow as ‘Automate Service Inquiries for Car Dealerships via WhatsApp’.
  • Set the trigger for your chatbot using ‘Keyword Regex Match’.
  • Input keywords such as ‘car’ and ‘service’ to activate the flow.

With these settings, your WhatsApp chatbot will respond whenever users send messages containing these keywords. This step is crucial for ensuring that inquiries are directed to your automated system.


3. Designing Responses in Pabbly Chatflow

Now that your chatbot is set up to trigger based on specific keywords, you need to design the responses. In your flow, drag and drop the ‘Choose Content Type’ option and select ‘Text Plus Button’. This allows you to create interactive responses for users. using Pabbly Connect

For the welcome message, you can type: ‘Welcome to CarEase! I can help you with car service information and booking appointments.’ To enhance user interaction, add buttons such as ‘Service Pricing’ and ‘Book Service’. This setup encourages users to engage further with your chatbot.

  • For the ‘Service Pricing’ button, prepare a list of services like oil change, tire replacement, and full service.
  • For the ‘Book Service’ button, ask users for their name, car model, and preferred service date.

This structured approach helps in guiding users through their inquiries seamlessly, making the process efficient for both the dealership and the customers.


4. Implementing User Questions in Pabbly Chatflow

To further enhance user interaction, you can implement a question-asking feature within your chatbot. After the user clicks ‘Book Service’, drag and drop the ‘Ask Question’ action from the left sidebar into your flow. This will prompt the user for their name, car model, and service date. using Pabbly Connect

Make sure to create custom fields for these inputs. For example, select ‘Full Name’ as a contact custom field and set the format as text. This allows you to capture the details provided by the user and personalize future interactions.

Ask for the user’s name first and save it using the custom field. Next, inquire about the car model and preferred date, saving these details in their respective custom fields.

By capturing this information, you can send personalized messages like, ‘Thank you for sharing your details, [User’s Name]. Our team will reach out to confirm your booking.’ This adds a personal touch to your automated responses.


5. Finalizing and Testing Your Chatbot on Pabbly Chatflow

Once you have designed the chatbot flow, it’s essential to save your work. Click on the ‘Save’ button to ensure all your configurations are stored. After saving, you can test your chatbot by sending a message via WhatsApp to check if the flow is functioning as intended.

For testing, send a message like ‘I want to book a car service.’ If everything is set up correctly, you should receive the welcome message followed by the options for service pricing and booking. Ensure that your flow is active to receive messages from users.

Check that the welcome message is displayed correctly. Verify that buttons lead to the appropriate responses.

By following these steps, you will have successfully automated service inquiries for your car dealership via WhatsApp using Pabbly Chatflow. This automation will save time and improve customer satisfaction.


Conclusion

In conclusion, automating service inquiries for car dealerships via WhatsApp using Pabbly Chatflow streamlines customer interactions and enhances efficiency. By following the detailed steps outlined, you can create a functional and engaging chatbot that meets your business needs.

Ensure you check out Pabbly Connect to create business automation workflows and reduce manual tasks. Pabbly Connect currently offer integration with 2,000+ applications.

Automate Your Lead Management: Push Kit Leads to GoHighLevel with Pabbly Connect

Learn how to automatically push Kit leads to GoHighLevel using Pabbly Connect. This step-by-step guide simplifies your lead management process. Navigate the automation landscape confidently with clear, structured guidance suitable for professionals regardless of prior technical experience.

Watch Step By Step Video Tutorial Below


1. Accessing Pabbly Connect for Automation

To push Kit leads to GoHighLevel automatically, the first step is accessing Pabbly Connect. You can do this by entering the URL Pabbly.com/connect in your browser. This platform will facilitate the integration process between Kit and GoHighLevel.

Once you reach the Pabbly Connect landing page, you’ll see two options: ‘Sign In’ and ‘Sign Up Free’. If you are a new user, click on ‘Sign Up Free’ to create an account and receive 100 free tasks. If you already have an account, simply log in.


2. Creating Your Workflow in Pabbly Connect

After logging in to Pabbly Connect, you will be directed to the dashboard. Here, you can create a new workflow to integrate Kit and GoHighLevel. Click on the ‘Create Workflow’ button to initiate the setup.

  • Select the ‘Beta’ workflow builder for a modern experience.
  • Name your workflow, e.g., ‘PushKit Subscribers to GoHighLevel’.
  • Choose a folder to save your workflow, then click ‘Create’.

Once your workflow is created, you will see an option to add a trigger. In this case, the trigger will be set to Kit, which will initiate the workflow whenever a new subscriber is added.


3. Setting Up the Trigger for Kit

In Pabbly Connect, after clicking the ‘Add Trigger’ button, search for and select ‘Kit’. Choose the event as ‘New Subscriber’ to set the trigger. This means that every time a new subscriber is added in Kit, it will trigger the workflow.

Next, you will need to connect your Kit account. Click on the ‘Connect’ button and either select an existing connection or create a new one by clicking ‘Add New Connection’. You will be prompted to enter your API key and secret from your Kit account.

  • Navigate to your Kit account and find the ‘Developer’ section in account settings.
  • Copy the API key and secret, then paste them into Pabbly Connect.

After saving the connection, click ‘Save and Send Test Request’ to ensure the trigger is functioning correctly. This step is crucial as it verifies that Pabbly Connect is receiving data from Kit.


4. Setting Up the Action for GoHighLevel

Once the trigger is confirmed, the next step in Pabbly Connect is to set up the action app, which will be GoHighLevel. Click on ‘Add New Action Step’ and search for ‘Lead Connector White Label’—this is the API version of GoHighLevel.

Select the action event as ‘Create Contact’. Similar to the trigger setup, you will need to connect your Lead Connector account. Click on the ‘Connect’ button and allow access to your GoHighLevel account.

Choose the correct account to connect with. Map the fields from the Kit trigger to the GoHighLevel action fields.

This mapping ensures that the data from Kit (like first name, last name, email, and phone number) is correctly inserted into the new contact created in GoHighLevel. Finally, click ‘Save and Send Test Request’ to confirm that the integration is working as expected.


5. Verifying Your Integration

To verify the successful integration using Pabbly Connect, check your GoHighLevel account for the new contact created from the test submission. Navigate to the ‘Contacts’ section to see if the subscriber appears with the details you provided.

If everything is set up correctly, you should see the new contact reflecting the information from the Kit subscriber form. This confirms that your automation is functioning as intended, allowing you to push Kit leads to GoHighLevel seamlessly.

By following these steps, you can automate the process of adding subscribers to GoHighLevel, reducing manual work and enhancing efficiency in managing your leads.


Conclusion

In this tutorial, we explored how to use Pabbly Connect to automatically push Kit leads to GoHighLevel. By following the detailed steps outlined, you can streamline your lead management process and enhance your business operations.

Ensure you check out Pabbly Connect to create business automation workflows and reduce manual tasks. Pabbly Connect currently offer integration with 2,000+ applications.

Automate Facebook & Instagram Posts with Pabbly Connect in Minutes

Learn how to automate your Facebook and Instagram posts using Pabbly Connect with this step-by-step tutorial. Integrate Google Sheets and OpenAI seamlessly. Build sophisticated automated workflows in less time than you think. This guide translates complex integrations into straightforward steps for immediate implementation.

Watch Step By Step Video Tutorial Below


1. Accessing Pabbly Connect for Automation

To automate your Facebook and Instagram posts, you need to access Pabbly Connect. Start by visiting the Pabbly website and signing in or signing up for a free account. This platform allows you to create workflows that integrate various applications seamlessly.

Once logged in, navigate to the Pabbly Connect dashboard. Here, you will find options to create new workflows. Click on the ‘Create Workflow’ button to begin setting up your automation process.


2. Creating a Workflow for Google Sheets Integration

After accessing Pabbly Connect, you need to create a workflow that connects Google Sheets with your social media accounts. Select the option to create a new workflow and give it a descriptive name, such as ‘Automate Facebook and Instagram Posts with AI’.

Next, choose Google Sheets as your trigger application and select the event as ‘New or Updated Spreadsheet Row’. This action will trigger the workflow whenever new data is added to your Google Sheet. Follow these steps:

  • Select Google Sheets as the trigger app.
  • Choose the specific event for triggering.
  • Connect your Google Sheets account to Pabbly Connect.

Once connected, you will see a webhook URL generated by Pabbly Connect. Copy this URL and follow the instructions to set it up in your Google Sheets account.


3. Setting Up the Webhook in Google Sheets

Now that you have the webhook URL from Pabbly Connect, you need to set it up in your Google Sheets. Open your Google Sheets document and install the Pabbly Connect add-on. This allows you to send data from your sheet to Pabbly.

After installing, navigate to the add-ons menu and select Pabbly Connect. Set up the webhook by pasting the URL you copied earlier. Make sure to configure the trigger column so that new data entries will send their information to Pabbly Connect.

  • Open Google Sheets and go to Add-ons.
  • Select Pabbly Connect and configure the webhook.
  • Map the trigger column correctly.

After this setup, every time you add a new post idea in your Google Sheet, it will automatically trigger the workflow in Pabbly Connect.


4. Integrating OpenAI for Content Generation

The next step involves using OpenAI within Pabbly Connect to generate captions and images for your posts. Add an action step in your workflow and select OpenAI as the application. Choose the event as ‘Generate Text’.

Connect your OpenAI account by entering the API key. Then, provide the necessary prompts for generating relevant content based on the data from your Google Sheet. Ensure you map the fields from your trigger step to the action fields in OpenAI.

Select OpenAI as the action application. Enter your OpenAI API key for authentication. Map the data fields from Google Sheets to OpenAI prompts.

This integration allows you to automatically generate engaging captions and images for your social media posts based on the content you provide.


5. Posting to Facebook and Instagram

Finally, you will set up actions to post the generated content to both Facebook and Instagram using Pabbly Connect. First, add an action step for Facebook and select the event ‘Create Photo Post’. Connect your Facebook account and choose the page where you want to post.

Map the data from the OpenAI action to the Facebook post fields, including the image URL and caption. Repeat this process for Instagram by adding another action step for Instagram and selecting the same fields to map.

Add Facebook as an action application. Map the image and caption fields properly. Repeat the process for Instagram.

Once this is set up, every time you add a new post idea in Google Sheets, it will trigger the workflow to create posts on both Facebook and Instagram automatically.


Conclusion

By following this detailed tutorial, you can automate your Facebook and Instagram posts using Pabbly Connect effectively. This integration not only saves time but also enhances your social media presence with AI-generated content.

Ensure you check out Pabbly Connect to create business automation workflows and reduce manual tasks. Pabbly Connect currently offer integration with 2,000+ applications.

Automate E-book Delivery with Pabbly Connect and Razorpay

Learn how to automate e-book delivery using Pabbly Connect with Razorpay payments. Follow this step-by-step tutorial for seamless integration. Explore efficient methods for automating routine tasks with clear, concise instructions suited for both newcomers and experienced professionals.

Watch Step By Step Video Tutorial Below


1. Accessing Pabbly Connect to Start Automation

To automate e-book delivery after a Razorpay payment, the first step is to access Pabbly Connect. Visit the Pabbly Connect landing page through the link provided in the video description. You’ll find options to either sign in or sign up for free.

New users can click on ‘Sign up for free’ and receive 100 hours of free usage each month. Existing users should click on ‘Sign in’ to access their dashboard. Once logged in, you will be ready to create your workflow for automating e-book delivery.


2. Creating a Workflow in Pabbly Connect

After accessing the dashboard of Pabbly Connect, the next step is to create a new workflow. Click on ‘Create Workflow’ and choose the ‘New Workflow Builder’ for a modern interface. Name your workflow and select a folder to save it in.

  • Click on ‘Create’ to open the workflow window.
  • This window contains the trigger and action sections essential for automation.

In the workflow window, you will set up triggers that initiate the process and actions that execute results. This is where Pabbly Connect truly shines, allowing seamless integration between Razorpay and your e-book delivery system.


3. Setting Up Razorpay as a Trigger in Pabbly Connect

To set up Razorpay as the trigger application, click on ‘Add Trigger’ and search for Razorpay. Select it and choose ‘Payment Captured’ as the trigger event. Click on ‘Connect’ to create a connection between Razorpay and Pabbly Connect.

You will receive a webhook URL from Pabbly Connect. Copy this URL and navigate to your Razorpay account. Go to the ‘Developers’ section and select ‘Webhooks’. Click on ‘Add New Webhook’ and paste the copied URL. For active events, select ‘Payment Captured’ to match the trigger event.


4. Adding Filtering Conditions in Pabbly Connect

After successfully connecting Razorpay, the next step in Pabbly Connect is to add filtering conditions. This ensures that the e-book is only sent for specific courses. Click on ‘Add New Action Step’ and select ‘Filter’ from the action applications.

  • Set the filter type to ‘Equals to’ and specify the course name.
  • Click ‘Save and Send Test Request’ to confirm the filter condition.

If the condition is true, the workflow proceeds to send the e-book. This feature of Pabbly Connect allows for precise automation tailored to your business needs.


5. Sending the E-book via Gmail in Pabbly Connect

Once the filter condition is met, the final step is to send the e-book via Gmail. Select ‘Gmail’ as the action application and choose ‘Send Email’ as the action event. Click on ‘Connect’ and sign in with your Google account to establish a connection with Pabbly Connect.

Fill in the required fields, including the sender’s name and email address. For the recipient’s email, use the mapping feature to dynamically insert the customer’s email address. Finally, add the e-book URL and any desired email content. Click ‘Save and Send Test Request’ to complete the setup.


Conclusion

By following this tutorial, you can successfully automate e-book delivery through Pabbly Connect and Razorpay. This integration not only streamlines your operations but also enhances customer satisfaction by delivering e-books instantly upon payment. Start using Pabbly Connect today to simplify your e-commerce processes.

Ensure you check out Pabbly Connect to create business automation workflows and reduce manual tasks. Pabbly Connect currently offer integration with 2,000+ applications.

How to Send Customer Feedback Surveys After Payment via Insta Mojo Using Pabbly Connect

Learn how to automate sending customer feedback surveys after payments via Insta Mojo using Pabbly Connect. Step-by-step guide with clear instructions. Revolutionize your productivity approach with just a few strategic clicks. Uncover professional methods for connecting applications and creating workflows that reclaim hours of your week.

Watch Step By Step Video Tutorial Below


1. Accessing Pabbly Connect for Automation

To automate the process of sending customer feedback surveys after payments via Insta Mojo, you need to access Pabbly Connect. Start by visiting the Pabbly Connect website and signing in or creating a new account. This will allow you to manage your automation workflows efficiently.

Once logged in, navigate to the dashboard where you can create new workflows. Click on the ‘Create Workflow’ button to begin setting up your automation. Ensure you provide a meaningful name for your workflow, such as ‘Customer Feedback Survey After Payment via Insta Mojo’. This helps in organizing your tasks effectively.


2. Setting Up Insta Mojo Trigger in Pabbly Connect

In this step, you will set up the trigger for your workflow using Pabbly Connect. Choose Insta Mojo as your trigger application and select the event as ‘Successful Payment’. This event will initiate the workflow whenever a new payment is received.

  • Select ‘Insta Mojo’ as your trigger application.
  • Choose the event type as ‘Successful Payment’.
  • Copy the generated webhook URL for the next step.

After copying the webhook URL, you need to paste it into your Insta Mojo dashboard. This connects your Insta Mojo account with Pabbly Connect, allowing it to receive payment notifications automatically.


3. Configuring Insta Mojo with Webhook

Now that you have the webhook URL from Pabbly Connect, it’s time to configure your Insta Mojo account. Go to the dashboard and select the ‘Smart Page’ option under the manage section. Here, you can edit the product page where you want to integrate the webhook.

  • Select the product page you want to edit.
  • Go to ‘Page Settings’ and find the Webhook option.
  • Paste the copied webhook URL and save the changes.

After saving the settings, your Insta Mojo account is now connected to Pabbly Connect. This means that whenever a payment is made, the details will be sent to Pabbly Connect, triggering the next action in your workflow.


4. Sending Feedback Survey Email via Gmail

After the payment is confirmed, the next step is to send a feedback survey email to the customer using Gmail integrated with Pabbly Connect. In the action setup, select Gmail as your action application and choose the event ‘Send Email’.

Connect your Gmail account to Pabbly Connect. Map the email fields, including recipient email and subject. Draft the email content inviting customers to fill out the feedback survey.

Make sure to include a link to the feedback survey created using Google Forms. This ensures that customers can easily access the survey and provide their valuable feedback after their purchase.


5. Testing and Finalizing Your Workflow

Once you have set up the action for sending an email, it’s crucial to test your workflow in Pabbly Connect. Click on the ‘Save and Send Test Request’ button to verify that everything is working as expected. This will simulate the process and check if the email is sent correctly.

After testing, you should receive a confirmation email at the specified recipient’s address. This email will include the feedback survey link, confirming that your automation is working flawlessly. If everything is successful, you can finalize and activate your workflow in Pabbly Connect.


Conclusion

In conclusion, using Pabbly Connect to automate sending customer feedback surveys after payments via Insta Mojo is a powerful way to enhance customer engagement. By following the steps outlined in this tutorial, you can streamline the feedback collection process and ensure valuable insights from your customers.

Ensure you check out Pabbly Connect to create business automation workflows and reduce manual tasks. Pabbly Connect currently offer integration with 2,000+ applications.

How to Trigger Gmail Notifications from Ninja Forms Submissions Using Pabbly Connect

Learn how to automate Gmail notifications for Ninja Forms submissions using Pabbly Connect. Step-by-step guide for seamless integration. Explore systematic approaches to creating efficient automation solutions that convert technical concepts into practical, implementable instructions.

Watch Step By Step Video Tutorial Below


1. Access Pabbly Connect for Integration

To trigger Gmail notifications from Ninja Forms submissions, start by accessing Pabbly Connect. This platform allows you to automate workflows effortlessly. Navigate to the Pabbly Connect website and sign up or log in to your account.

Once you are on the dashboard, you can create a new workflow. Click on the ‘Create Workflow’ button, then select the new beta builder. Name your workflow something meaningful, like ‘Gmail Notification from Ninja Form Submission’. Finally, click on ‘Create’ to proceed with the setup.


2. Set Up Trigger for Ninja Forms Submissions

In this step, you will set up the trigger for your Ninja Forms submissions using Pabbly Connect. Click on ‘Add Trigger’ and choose Ninja Forms as your application. Then, select the event as ‘New Form Submission’ to capture the leads effectively.

  • Select ‘Ninja Forms’ as the app.
  • Choose ‘New Form Submission’ as the event.
  • Copy the webhook URL generated by Pabbly Connect.

Next, you will need to connect this webhook URL to your Ninja Forms setup in WordPress. This allows Pabbly Connect to receive data whenever a form is submitted. Go to the Ninja Forms dashboard in your WordPress account and paste the webhook URL into the appropriate field.


3. Configure Ninja Forms with Webhook URL

After setting up the webhook, return to your Ninja Forms dashboard. Here, you need to edit the form you want to connect. In the form settings, look for the action settings and add a new action.

  • Select ‘Webhook’ as the action type.
  • Paste the copied webhook URL in the URL field.
  • Set the method to POST.

Make sure to map the necessary fields such as name, email address, phone number, inquiry type, and best time to call. This ensures that all relevant data is sent to Pabbly Connect for processing.


4. Set Up Gmail Action for Notifications

With the Ninja Forms submissions connected, it’s time to set up the action that will send notifications through Gmail using Pabbly Connect. Click on ‘Add Action Step’ and select Gmail as your application. Choose the event as ‘Send Email’ to configure the email notification.

Connect your Gmail account by selecting ‘Add New Connection’. Once connected, you will need to map the fields from the previous step. For example, map the recipient email address to the email captured from the form submission. You can customize the email subject and content to include relevant details from the submission.


5. Test and Finalize Your Workflow

After configuring the Gmail action, it’s essential to test the workflow to ensure everything is working correctly with Pabbly Connect. Submit a test entry through your Ninja Form and check if the email notification is sent to the designated email address.

If everything is set up correctly, you should receive a personalized email notification containing the lead’s details. This confirms that your integration is successful, allowing you to automate notifications without manual effort.


Conclusion

By following these steps, you can seamlessly trigger Gmail notifications from Ninja Forms submissions using Pabbly Connect. This automation saves time and ensures prompt responses to new inquiries, enhancing your workflow efficiency.

Ensure you check out Pabbly Connect to create business automation workflows and reduce manual tasks. Pabbly Connect currently offer integration with 2,000+ applications.

How to Send Property Listings Automatically to Housing.com Leads via WhatsApp Using Pabbly Connect

Learn how to automate sending property listings to Housing.com leads via WhatsApp using Pabbly Connect. Follow our step-by-step tutorial for seamless integration. Discover hidden automation capabilities within your existing tools. This guide shows you how to connect your essential applications and permanently eliminate redundant manual processes.

Watch Step By Step Video Tutorial Below


1. Accessing Pabbly Connect for Automation

To send property listings automatically to Housing.com leads via WhatsApp, you first need to access Pabbly Connect. Start by navigating to the Pabbly website by typing pabby.com into your browser.

Once on the site, sign in to your Pabbly account. If you’re a new user, you can sign up for free to get started. After logging in, you will reach the Pabbly dashboard where you can access all applications including Pabbly Connect.


2. Creating a New Workflow in Pabbly Connect

In this section, we will create a workflow to automate sending property listings. Click on the ‘Create Workflow’ button in Pabbly Connect. You will be prompted to name your workflow. For this integration, name it ‘Send Property Listings Automatically to Housing.com Leads via WhatsApp’.

  • Select the folder for your workflow, such as ‘WhatsApp Automation’.
  • Choose the new beta workflow builder for a more flexible experience.

After creating your workflow, you will need to set up the trigger application. This will be Housing.com, which will initiate the workflow whenever a new lead is captured.


3. Setting Housing.com as the Trigger Application

To set Housing.com as the trigger application in Pabbly Connect, select it from the options provided. The trigger event you need to choose is ‘New Leads’. This event will activate the workflow each time a new lead is generated from Housing.com.

Next, you will receive a webhook URL that acts as a bridge between Housing.com and Pabbly Connect. Make sure to copy this URL and configure it in your Housing.com account. You may need to contact your Housing.com account manager to activate this integration.


4. Setting Up WhatsApp Cloud API as the Action Application

Now that your trigger is set, the next step is to configure the action application, which will be the WhatsApp Cloud API. In Pabbly Connect, click on ‘Add New Action Step’ and search for WhatsApp Cloud API. Select it and choose the action event ‘Send Template Message’.

  • Connect your WhatsApp Cloud API by entering your token, phone number ID, and WhatsApp business account ID.
  • Use the mapping feature to dynamically pull in the lead’s phone number and name from the previous response.

After entering all necessary details, save and test the connection to ensure everything works correctly.


5. Executing the Workflow and Sending Messages

Once your action application is configured, it’s time to execute the workflow. Click on ‘Save and Send Test Request’ to initiate the process. If everything is set up correctly, you will receive a WhatsApp message on the specified number with the property listing details.

This message will include custom variables such as the name of the lead, ensuring a personalized touch. This entire process demonstrates how effectively Pabbly Connect automates sending property listings to leads captured from Housing.com via WhatsApp.


Conclusion

This tutorial showcased how to use Pabbly Connect to automate sending property listings to Housing.com leads via WhatsApp. By following the steps outlined, you can streamline your lead communication process efficiently.

Ensure you check out Pabbly Connect to create business automation workflows and reduce manual tasks. Pabbly Connect currently offer integration with 2,000+ applications.

Automate WhatsApp Product Recommendations for Typeform Leads Using Pabbly Connect

Learn how to automate sending WhatsApp product recommendations for Typeform leads using Pabbly Connect with this step-by-step tutorial. Explore systematic approaches to creating efficient automation solutions that convert technical concepts into practical, implementable instructions.

Watch Step By Step Video Tutorial Below


1. Accessing Pabbly Connect for Automation

To begin automating WhatsApp product recommendations for Typeform leads, you first need to access Pabbly Connect. Start by visiting the Pabbly website and logging into your account. If you don’t have an account, you can sign up for free, which gives you access to 100 tasks monthly.

Once logged in, navigate to the dashboard where you can create new workflows. Click on the ‘Create Workflow’ button, select the new beta workflow builder, and name your workflow as ‘Send WhatsApp Product Recommendations Automatically for Typeform Leads’. This sets the stage for your automation process.


2. Setting Up Typeform as the Trigger in Pabbly Connect

In this step, you will configure Typeform as the trigger application in Pabbly Connect. Choose Typeform from the list of applications and select the trigger event as ‘New Entry’. This means that every time a new lead fills out your Typeform, the workflow will be triggered to send a WhatsApp message.

  • Select Typeform as the trigger application.
  • Choose the ‘New Entry’ trigger event.
  • Connect your Typeform account by granting necessary permissions.

After connecting Typeform, select the form you created for capturing leads. This ensures that every lead submitted through this form will trigger the WhatsApp message via Pabbly Connect.


3. Configuring WhatsApp Cloud API as the Action Application

Next, you will set up WhatsApp Cloud API as the action application in your workflow. In Pabbly Connect, select WhatsApp Cloud API and choose the action event as ‘Send Template Message’. This action will send a predefined message to the lead captured from Typeform.

To connect WhatsApp Cloud API, you will need to enter the access token, phone number ID, and WhatsApp business account ID. These details can be obtained from your WhatsApp developer account. Make sure to follow the instructions provided in Pabbly Connect to retrieve these details accurately.

  • Enter your WhatsApp Cloud API access token.
  • Provide the phone number ID and WhatsApp business account ID.
  • Save the connection to finalize the setup.

With WhatsApp Cloud API connected, you are now ready to send messages to your leads automatically through Pabbly Connect.


4. Mapping Data for the WhatsApp Message Template

Now, it’s time to create and map the WhatsApp message template. In Pabbly Connect, you must specify the receiver’s phone number and the template ID. Use the mapping feature to pull the phone number directly from the Typeform response, ensuring that each message sent is personalized.

To create the message template, navigate to your WhatsApp API settings and define the template you want to use. This template should include variables for personalization, such as the lead’s name. For example, your message could start with ‘Hello {{name}}, thank you for sharing your details. Here are some product recommendations…’. Make sure to save this template in your WhatsApp API settings.


5. Testing and Verifying the Integration

Finally, you need to test the integration to ensure everything is working correctly. In Pabbly Connect, submit a test entry in your Typeform. Check your WhatsApp account for the message that should be sent automatically. If the message appears with the correct details, your integration is successful.

To summarize, you have set up a seamless workflow where Typeform captures leads and Pabbly Connect automates sending personalized WhatsApp messages with product recommendations. This integration not only saves time but also enhances customer engagement.


Conclusion

In this tutorial, you learned how to automate sending WhatsApp product recommendations for Typeform leads using Pabbly Connect. By following these detailed steps, you can streamline your communication process and improve lead engagement effectively.

Ensure you check out Pabbly Connect to create business automation workflows and reduce manual tasks. Pabbly Connect currently offer integration with 2,000+ applications.

Automatically Share Instagram Posts on LinkedIn Using Pabbly Connect

Learn how to automatically share Instagram posts on LinkedIn using Pabbly Connect. Follow this detailed tutorial for seamless integration. Master proven automation processes with practical implementation examples and strategic recommendations you can apply immediately in your workflow.

Watch Step By Step Video Tutorial Below


1. Accessing Pabbly Connect to Start the Integration

To automatically share Instagram posts on LinkedIn, you first need to access Pabbly Connect. Start by searching for Pabbly.com in your browser and navigate to the Pabbly Connect homepage.

Once there, you will see options to sign in or sign up. If you are a new user, click on ‘Sign Up Free’ to create an account. Existing users can simply log in. After signing in, you will be directed to the dashboard of Pabbly Connect, where you can create a new workflow for your automation.


2. Creating a New Workflow in Pabbly Connect

After accessing your Pabbly Connect dashboard, the next step is to create a new workflow. Click on the ‘Create New Workflow’ button. This will open a new window where you can name your workflow, such as ‘Automatically Share Instagram Posts on LinkedIn.’ This naming is essential for easy identification later.

  • Click on ‘Create’ to proceed.
  • You will see two main sections: Trigger and Action.
  • Select Instagram as your Trigger application.

Now, choose the event as ‘New Media Posted’ in your Instagram account. This step is crucial as it sets up the trigger that will initiate the automation whenever you post something new on Instagram.


3. Connecting Instagram and LinkedIn through Pabbly Connect

The next step involves connecting your Instagram account to Pabbly Connect. Click on ‘Connect’ and select the option to create a new connection. You will be prompted to log into your Instagram account if you haven’t already done so.

Once connected, you need to select the specific Instagram account you want to use. After selecting your account, click on ‘Save and Send Test Request’ to confirm the connection. At this point, Pabbly Connect will fetch the latest post details from your Instagram account.


4. Adding Action Steps to Share on LinkedIn

Now it’s time to set up the action step to share the Instagram post on LinkedIn. In the Action section of Pabbly Connect, select LinkedIn as your action application. Choose the event as ‘Share Text with Image’ to ensure that the post is shared correctly.

  • Click on ‘Connect’ and create a new connection for LinkedIn.
  • Log in to your LinkedIn account when prompted.
  • Select the Author and the relevant group for sharing the post.

After establishing the connection, you will need to map the data fields from your Instagram post to LinkedIn. This includes the image URL and the caption from your Instagram post. By doing this, you ensure that the content shared on LinkedIn mirrors your Instagram post.


5. Finalizing the Integration and Testing

With all connections established, it’s time to finalize the integration. Click on ‘Save and Send Test Request’ to check if everything is working as intended. Pabbly Connect will send a test post to your LinkedIn account using the mapped data from Instagram.

Once you receive a successful response, you can check your LinkedIn profile to see if the post appears as expected. This confirms that your automation is set up correctly and working seamlessly. Now, every time you post on Instagram, it will automatically share on LinkedIn as well!


Conclusion

In this tutorial, we explored how to automatically share Instagram posts on LinkedIn using Pabbly Connect. By following these steps, you can streamline your social media management and ensure consistent posting across platforms. Enjoy the benefits of automation!

Ensure you check out Pabbly Connect to create business automation workflows and reduce manual tasks. Pabbly Connect currently offer integration with 2,000+ applications.

How to Automatically Add LinkedIn Leads to Mailchimp Using Pabbly Connect

Learn how to seamlessly integrate LinkedIn leads with Mailchimp using Pabbly Connect. Follow our step-by-step tutorial for automated lead management. Develop expertise in application integration and learn how to design streamlined automation workflows using proven, simplified approaches.

Watch Step By Step Video Tutorial Below


1. Accessing Pabbly Connect for LinkedIn and Mailchimp Integration

To start integrating LinkedIn leads with Mailchimp, you must first access Pabbly Connect. Open your browser and navigate to the Pabbly Connect landing page by typing ‘Pabbly.com/connect’. This platform is designed to facilitate seamless automation between various applications.

Once on the landing page, you can either sign in if you’re an existing user or sign up for free to explore the features. Signing up grants you 100 free tasks each month to test the application.


2. Creating a Workflow in Pabbly Connect

After signing in to Pabbly Connect, click on the ‘Create Workflow’ button to begin. You will be prompted to select the workflow builder. Opt for the new workflow builder for a more modern interface. Name your workflow ‘Add LinkedIn Leads Automatically to Mailchimp’ and choose a folder for organization.

  • Click on ‘Create’ to open the workflow window.
  • This window is crucial as it contains the trigger and action setup.

In this window, you will set up triggers and actions that will automate the process of adding leads from LinkedIn to Mailchimp.


3. Setting Up LinkedIn as the Trigger in Pabbly Connect

To start the automation, click on the ‘Add Trigger’ button and search for LinkedIn. Select LinkedIn as the trigger application and choose ‘Lead Notifications’ as the trigger event. Click ‘Connect’ to establish a connection between LinkedIn and Pabbly Connect.

You will have two options: add a new connection or select an existing one. If this is your first time, click on ‘Add a New Connection’ and sign in with your LinkedIn credentials. After successfully connecting, select your sponsored account and click ‘Save and Send Test Request’.


4. Capturing Leads from LinkedIn

After sending a test request from LinkedIn, you need to capture the webhook response in Pabbly Connect. To do this, go to your LinkedIn campaign and simulate a lead submission by filling in the form with the email and phone number.

  • Ensure you submit the form to capture the lead details.
  • Pabbly Connect will capture the response, including first name, last name, email, and phone number.

Once the webhook response is captured, you can proceed to create a new subscriber in Mailchimp using these lead details.


5. Adding the Lead to Mailchimp via Pabbly Connect

Now that you have captured the lead details, click on ‘Add New Action Step’ in Pabbly Connect and select Mailchimp as the action application. Choose ‘Add New Member with Custom Fields’ as the action event and click ‘Connect’.

To connect Mailchimp, you will need to provide an API key and data center information. Follow the instructions in Pabbly Connect to retrieve this information from your Mailchimp account. Once connected, map the lead details from the previous step to the appropriate fields in Mailchimp.

Finally, click ‘Save and Send Test Request’ to confirm that the lead has been successfully added to your Mailchimp audience. You will receive a confirmation message, and you can check your Mailchimp account to verify the new subscriber’s details.


Conclusion

Using Pabbly Connect, you can easily automate the process of adding LinkedIn leads to Mailchimp. This integration allows for efficient lead management and enhances your marketing automation efforts. Try this setup today for seamless lead generation!

Ensure you check out Pabbly Connect to create business automation workflows and reduce manual tasks. Pabbly Connect currently offer integration with 2,000+ applications.