Turn 99acres Inquiries into Notion Records Instantly with Pabbly Connect

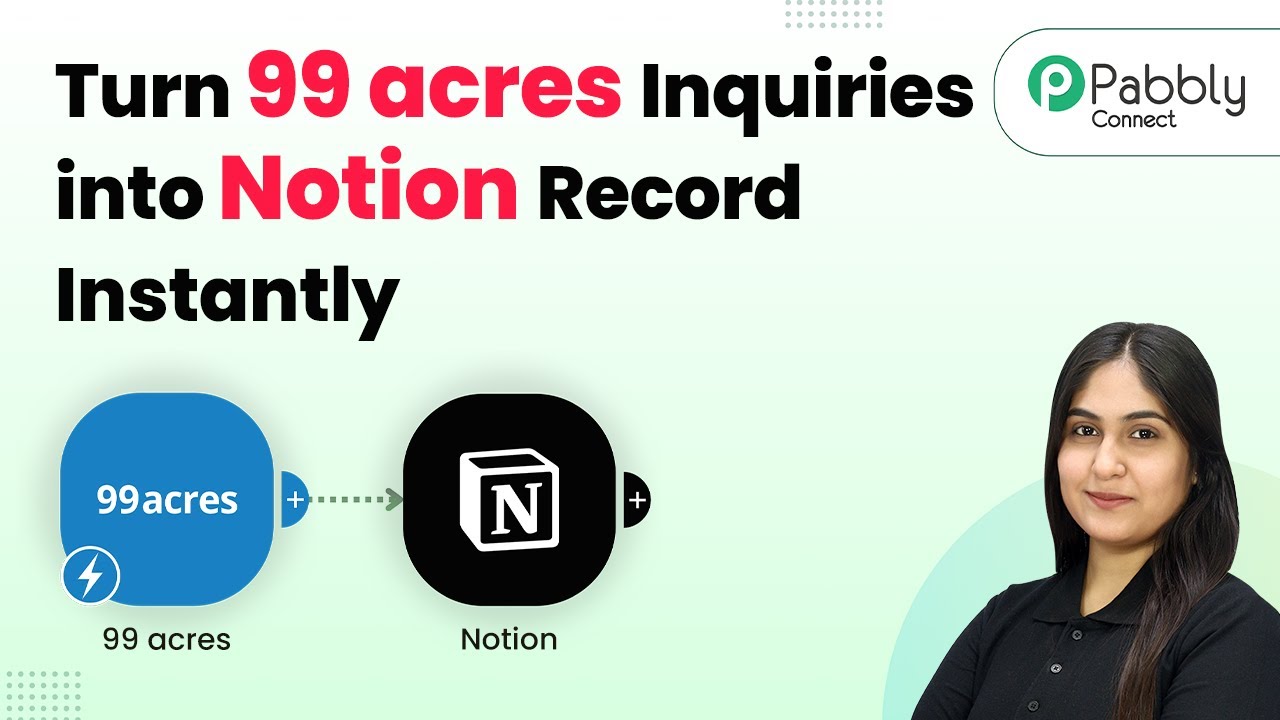
Learn how to use Pabbly Connect to automate the integration of 99acres inquiries into Notion records instantly. Step-by-step tutorial included. Eliminate manual repetitive tasks from your workflow. Discover proven automation methods with intuitive steps designed for efficiency-minded professionals.

Watch Step By Step Video Tutorial Below


1. Accessing Pabbly Connect for Integration

To automate the process of turning 99acres inquiries into Notion records, you need to access Pabbly Connect. Start by searching for Pabbly.com in your browser, which will take you to the homepage of Pabbly Connect.

Once on the homepage, you will see two options: ‘Sign In’ and ‘Sign Up Free.’ If you are a new user, click on ‘Sign Up Free’ to create an account and receive 100 free tasks every month. Existing users can simply click on ‘Sign In’ to access their accounts.


2. Creating a Workflow in Pabbly Connect

After signing in to Pabbly Connect, navigate to the dashboard. Here, you will need to create a new workflow to set up the integration between 99acres and Notion. Click on the ‘Create Workflow’ button located at the top right corner of the dashboard.

  • Select the workflow builder: choose between the new beta version or classic.
  • Name your workflow as ‘Turn 99acres Inquiries into Notion Records Instantly’.
  • Select a folder to save your workflow, such as ‘Automations’.

This step sets the foundation for your automation process. Once your workflow is created, you can start configuring the trigger and action steps.


3. Setting Up the Trigger for 99acres

In this section, you will set up the trigger that captures new inquiries from your 99acres account using Pabbly Connect. Click on the ‘Add Trigger’ button and select 99acres as your trigger application, then choose ‘New Leads’ as the event.

After selecting the trigger, you will be provided with a Webhook URL. This URL needs to be copied and configured in your 99acres account. Reach out to your account manager at 99acres to activate this integration, and they will assist you in setting it up.


4. Adding Action to Create Records in Notion

Once you have set up the trigger, you will now create an action step that sends the captured data to Notion using Pabbly Connect. Click on ‘Add Action’ and select Notion as your action application, then choose ‘Create Database Item’ as the event.

  • Connect your Notion account to Pabbly Connect.
  • Select the database where you want to add the lead details.
  • Map the fields from the 99acres inquiry to the corresponding fields in your Notion database.

By completing this step, every new inquiry from 99acres will automatically create a new record in your Notion database, ensuring no lead is missed.


5. Testing and Verifying the Integration

After setting up both the trigger and action, it’s essential to test the integration to ensure everything is functioning correctly. Use the test functionality in Pabbly Connect to send a test lead from 99acres and verify that it appears in your Notion database.

Once the test is successful, you will receive confirmation that the data has been transferred correctly. You can now confidently automate the process of turning 99acres inquiries into Notion records instantly, streamlining your workflow and enhancing productivity.


Conclusion

In this tutorial, we demonstrated how to use Pabbly Connect to automate the integration of 99acres inquiries into Notion records instantly. By following these steps, you can ensure that every lead is captured efficiently, saving time and improving your workflow.

Ensure you check out Pabbly Connect to create business automation workflows and reduce manual tasks. Pabbly Connect currently offer integration with 2,000+ applications.

Integrate Razorpay Subscription Purchases to Google Sheets Using Pabbly Connect

Learn how to integrate Razorpay subscription purchases into Google Sheets using Pabbly Connect. Follow our step-by-step tutorial for seamless automation. Follow this definitive guide to creating powerful automated workflows with straightforward, efficiency-focused solutions that save valuable time.

Watch Step By Step Video Tutorial Below


1. Overview of Pabbly Connect for Razorpay Integration

To automate the process of adding Razorpay subscription purchases to Google Sheets, we will utilize Pabbly Connect. This powerful integration platform allows seamless connections between various applications without needing coding skills.

With Pabbly Connect, you can set up workflows that automatically capture payment details from Razorpay and log them into Google Sheets. This ensures that all subscription purchases are recorded in real-time, enhancing your business’s efficiency.


2. Setting Up Pabbly Connect for Razorpay and Google Sheets

First, navigate to the Pabbly Connect website and log in to your account. If you are a new user, you can sign up for free to explore the platform. Once logged in, click on the Pabbly Connect application to start creating your workflow.

  • Click on Create Workflow.
  • Choose the new workflow builder for a modern interface.
  • Enter a name for your workflow and select a folder to save it in.

After creating the workflow, you will be directed to the main automation window where you can add your trigger and action steps. This window is essential for defining how your automation will function with Pabbly Connect.


3. Configuring the Trigger with Razorpay

To set up the trigger, click on the Add Trigger button and search for Razorpay. Select Razorpay as your trigger application and choose Payment Captured as the event.

Next, connect your Razorpay account by copying the webhook URL provided by Pabbly Connect. Go to your Razorpay dashboard, navigate to the developers section, and add a webhook using the copied URL. This establishes the connection between Razorpay and Pabbly Connect.


4. Adding a Filter Condition to the Workflow

After setting up the trigger, you can refine your automation by adding a filter condition. Click on Add New Action Step and select Filter as your action application.

  • Set the filter type to Equals.
  • Enter the specific account name you want to track, such as Papcoin.
  • Save the filter condition to ensure only relevant purchases trigger the action.

This filter ensures that only designated purchases are logged into Google Sheets, maintaining organization and accuracy in your records using Pabbly Connect.


5. Adding Subscription Details to Google Sheets

To log the payment details into Google Sheets, add a new action step and select Google Sheets as the application. Choose Add New Row as the event and connect your Google account.

Next, select the spreadsheet and specific sheet where you want to store the data. Use the mapping feature in Pabbly Connect to dynamically insert payment details such as order ID, name, email, and payment method into the respective fields in your Google Sheet.


Conclusion

Integrating Razorpay subscription purchases into Google Sheets using Pabbly Connect streamlines your payment tracking process. By following this detailed tutorial, you can automate the logging of purchase details, ensuring accuracy and efficiency in your business operations.

Ensure you check out Pabbly Connect to create business automation workflows and reduce manual tasks. Pabbly Connect currently offer integration with 2,000+ applications.

How to Create Google Ads Leads as Apollo.io Contact Using Pabbly Connect

Learn how to integrate Google Ads with Apollo.io to create leads using Pabbly Connect. Follow this step-by-step tutorial for seamless automation. Learn to create powerful connections between your critical applications without requiring specialized programming knowledge or extensive technical background.

Watch Step By Step Video Tutorial Below


1. Accessing Pabbly Connect for Google Ads and Apollo.io Integration

To create Google Ads leads as Apollo.io contacts, you first need to access Pabbly Connect. Open your browser and navigate to the Pabbly Connect landing page by typing in ‘Pabbly.com/connect’. This platform provides the automation needed for seamless integration between Google Ads and Apollo.io.

Once on the Pabbly Connect page, you will see options to either sign in or sign up for free. If you are a new user, click on the ‘Sign up for free’ button to get started with a hundred free tasks each month. For existing users, click ‘Sign in’ to access your account and navigate to the dashboard where you can create workflows.


2. Creating a Workflow in Pabbly Connect

After signing into Pabbly Connect, the next step is to create a workflow that will automate the process. Click on the ‘Create Workflow’ button, and you will be prompted to select a workflow builder. Choose the new workflow builder for a modern interface and better flexibility.

  • Enter a name for your workflow.
  • Select a folder to save your workflow.
  • Click on the ‘Create’ button to proceed.

Once the workflow window opens, you will see options for adding triggers and actions. Triggers are events that start the automation process, while actions are the results of those triggers. Click on the ‘Add Trigger’ button to start setting up your Google Ads integration.


3. Setting Up Google Ads Trigger in Pabbly Connect

In this step, you will configure the Google Ads trigger in your Pabbly Connect workflow. Search for ‘Google Ads’ as the trigger application and select it. Choose the trigger event as ‘New Lead Form Entry’ and click on ‘Connect’. This step is crucial as it establishes the connection between Google Ads and Pabbly Connect.

After connecting, a webhook URL will be generated. Copy this URL and proceed to your Google Ads account. In your lead form settings, navigate to the lead delivery option and paste the webhook URL. Enter the necessary key and click on ‘Send Test Data’. This action will send test lead data to Pabbly Connect, confirming the connection is successful.


4. Creating a Contact in Apollo.io

Now that the trigger is set, the next step is to create a contact in Apollo.io using the lead details received from Google Ads. In your Pabbly Connect workflow, click on ‘Add New Action Step’. Search for ‘Apollo.io’ and select it. Choose the action event as ‘Create Contact’ and click on ‘Connect’.

  • If you have an existing connection, select it. Otherwise, click on ‘Add New Connection’.
  • You will need the API key from your Apollo account. Go to ‘Admin Settings’, then ‘Integrations’, and find the API section.
  • Create a new API key, name it, and copy it back to Pabbly Connect.

After entering the API key in Pabbly Connect, proceed to map the lead details such as first name, last name, and email. Once all required fields are filled, click on ‘Save and Send Test Request’. This will create a new contact in Apollo.io using the lead details from Google Ads.


5. Finalizing the Google Ads and Apollo.io Integration

With the contact creation step completed, your Pabbly Connect workflow is now set up to automatically create Apollo.io contacts whenever a new lead is generated in Google Ads. To finalize, check your Apollo.io account under the ‘People’ section to confirm that the new contact has been created successfully.

Now you have a fully automated process where every new lead from Google Ads will be seamlessly added to Apollo.io without any manual intervention. This integration allows you to focus on other aspects of your business while ensuring that your leads are managed effectively.


Conclusion

In this tutorial, you learned how to use Pabbly Connect to integrate Google Ads with Apollo.io for automatic lead management. By following these steps, you can streamline your workflow and enhance your lead generation process. Start automating today for greater efficiency in your business!

Ensure you check out Pabbly Connect to create business automation workflows and reduce manual tasks. Pabbly Connect currently offer integration with 2,000+ applications.

Automate Appointment Scheduling for Salons via WhatsApp with Pabbly Chatflow

Learn how to automate appointment scheduling for salons via WhatsApp using Pabbly Chatflow. Step-by-step guide to create your own WhatsApp chatbot. This detailed guide shows you how to build powerful chat automation that engages visitors and converts prospects—without any coding required.

Watch Step By Step Video Tutorial Below


1. Accessing Pabbly Chatflow for WhatsApp Automation

To automate appointment scheduling for salons via WhatsApp, the first step is to access Pabbly Chatflow. Start by navigating to the Pabbly Chatflow website and signing in or creating a new account. If you are a new user, click on the ‘Sign Up Free’ button to create your account and get 100 free credits each month.

Once logged in, you will be directed to the dashboard. Here, you can see various applications offered by Pabbly. Click on the ‘Access Now’ button under the Pabbly Chatflow box to proceed. This is where you will create your WhatsApp chatbot for appointment scheduling.


2. Creating Your WhatsApp Chatbot with Pabbly Chatflow

After accessing Pabbly Chatflow, the next step is to add your WhatsApp number. Click on the ‘Add WhatsApp Number’ button on the dashboard. You can choose between different connection methods to integrate your WhatsApp account with Pabbly Chatflow.

  • Select the WhatsApp connection method that suits your needs.
  • Follow the prompts to complete the integration process.

Once your WhatsApp number is connected, go to the ‘Flows’ feature and click on ‘Add Flow’ to start creating your WhatsApp chatbot. Give your flow a meaningful name, like ‘Appointment Scheduling Bot for Salons’. This will help you identify the chatbot’s purpose in the future.


3. Setting Up Keyword Triggers in Pabbly Chatflow

To ensure your WhatsApp chatbot responds to user messages, set up a keyword trigger. In the flow builder, select the trigger event that will initiate the chatbot. For this example, choose the ‘Keyword or Reject Match’ trigger event. Enter the keywords like ‘salon’ and ‘haircut’ in the designated box. using Pabbly Connect

After entering the keywords, you can also set up rejection keywords if needed. This allows the chatbot to filter out irrelevant messages. Once the trigger is configured, proceed to set up the action steps that will follow when a user sends a message containing these keywords.


4. Defining Action Steps for the WhatsApp Chatbot

Now that the trigger is set, it’s time to define the action steps in your Pabbly Chatflow. Start by dragging the ‘Text’ action from the left panel to the flow area. In the message box, enter a welcome message, such as ‘Welcome to Headspace Salon. I can help you book your next appointment with us.’ Add a button labeled ‘Book Appointment’ below this message.

  • Create a list of services offered by the salon.
  • Use the ‘List’ action to present these services to the user.

For each service, you can add items like ‘Haircut’, ‘Body Massage’, and ‘Facial’. This allows users to select the service they want when booking an appointment. After the user selects a service, set up a custom field to store their selection for future reference.


5. Finalizing the Appointment with Pabbly Chatflow

Once the user has selected their desired service, the next step is to ask for their preferred appointment time. Use the ‘Text’ action again to prompt the user with a message like ‘Great choice! Choose from below when would you like to come in?’ Provide options for different time slots. using Pabbly Connect

After the user selects a time, ask for their name and email address. Use the ‘Ask Question’ action to gather this information. Make sure to store these responses in custom fields so that they can be referenced later in the confirmation message.

Finally, create a concluding message that confirms the appointment details. Use placeholders to insert the user’s name, selected service, and appointment time into the message. This will provide a personalized touch and confirm that their booking was successful.


Conclusion

By following these steps, you can successfully automate appointment scheduling for salons via WhatsApp using Pabbly Chatflow. This integration allows for a seamless booking experience, enhancing customer satisfaction and streamlining salon operations. Start creating your own WhatsApp chatbot today with Pabbly Chatflow to simplify your appointment scheduling process.

Ensure you check out Pabbly Connect to create business automation workflows and reduce manual tasks. Pabbly Connect currently offer integration with 2,000+ applications.

Automate Employee Leave Requests and Approvals via WhatsApp with Pabbly Chatflow

Learn how to automate employee leave requests and approvals via WhatsApp using Pabbly Chatflow and Pabbly Chatflow in this detailed tutorial. Discover practical methods for designing chat sequences that capture leads, answer questions, and guide users to the next step in your funnel.

Watch Step By Step Video Tutorial Below


1. Introduction to Pabbly Chatflow for Leave Automation

Pabbly Chatflow is a powerful tool that allows you to automate employee leave requests and approvals via WhatsApp. This integration streamlines communication and reduces manual effort for HR departments. By using Pabbly Chatflow, you can create a WhatsApp chatbot that automatically responds to employee queries regarding leave requests.

To get started, navigate to Pabbly Chatflow by visiting Pabbly.com/chatflow. Here, you can sign up for an account or log in if you are an existing user. Once logged in, you will access the dashboard where you can manage your WhatsApp numbers and create chatbots for various functions.


2. Creating the WhatsApp Bot with Pabbly Chatflow

To create a WhatsApp bot using Pabbly Chatflow, click on the ‘Add Flow’ button in your dashboard. This action will allow you to define the flow of the conversation your bot will have with employees. Start by naming your flow, such as ‘Automate Employee Leave Requests and Approvals via WhatsApp.’ This name will help you identify the purpose of the bot easily.

  • Select a trigger event, such as keywords that will activate the bot.
  • Add response options for different types of leave requests (e.g., sick leave, vacation leave).
  • Connect your responses to the appropriate actions in the flow.

After setting up the initial flow, ensure you save your progress to avoid losing any configurations. This step is crucial as you build out the bot’s functionality.


3. Configuring Employee Data Collection

Once your bot is set up to respond to leave requests, it’s time to configure how it collects employee data. Using Pabbly Chatflow, you can seamlessly gather information such as the employee’s full name, email address, leave start date, and reason for leave. Each question can be configured as an ‘ask question’ action in your flow.

  • Ask for the employee’s full name using a text input field.
  • Request the email address in a similar manner to ensure proper communication.
  • Collect leave start and end dates, as well as the reason for the leave.

Each response will be stored in the respective custom fields you create in Pabbly Chatflow. This structured data collection is vital for efficient processing of leave requests.


4. Integrating Google Sheets with Pabbly Connect

To store the collected employee data, you will need to integrate Google Sheets using Pabbly Connect. This step allows you to save all leave request details automatically without manual entry. First, create a new workflow in Pabbly Connect and select Pabbly Chatflow as the trigger application.

Next, set the action application to Google Sheets. You will need to map the fields from your Pabbly Chatflow bot to the corresponding columns in your Google Sheet. Ensure you have created a Google Sheet with columns for employee name, email, leave start date, end date, and reason for leave.

Copy the webhook URL from Pabbly Connect and paste it into your Pabbly Chatflow API request. Test the API request to ensure data is being sent correctly. Check your Google Sheet to confirm that data is being added as expected.

This integration ensures that all leave requests are logged systematically, making it easier for HR to track and manage employee leave.


5. Finalizing the WhatsApp Bot Flow

After successfully integrating Google Sheets with Pabbly Chatflow, finalize your WhatsApp bot flow by adding a thank you message. This message should acknowledge the employee’s leave request and inform them that their request is being reviewed.

Connect this final message to the last action in your flow, ensuring that it is the last interaction the employee has with the bot. Save your flow one last time to ensure all changes are updated. You can also share your flow with colleagues or friends by providing them with a share link.

With everything set up, your WhatsApp bot is ready to automate employee leave requests and approvals efficiently. This process not only saves time but also enhances the employee experience by providing immediate responses.


Conclusion

In conclusion, using Pabbly Chatflow for automating employee leave requests via WhatsApp streamlines HR processes significantly. By integrating with Google Sheets through Pabbly Connect, all employee data is collected and stored efficiently. This automation reduces manual work and improves communication between HR and employees.

Ensure you check out Pabbly Connect to create business automation workflows and reduce manual tasks. Pabbly Connect currently offer integration with 2,000+ applications.

How to Use Pabbly Chatflow for Customer Queries in E-commerce

Learn how to use Pabbly Chatflow to automate customer queries for your e-commerce business effectively. Step-by-step guide included. Discover practical methods for designing chat sequences that capture leads, answer questions, and guide users to the next step in your funnel.

Watch Step By Step Video Tutorial Below


1. Accessing Pabbly Chatflow for Customer Queries

To automate customer queries for your e-commerce business, the first step is to access Pabbly Chatflow. Start by visiting the official website at www.Pabbly.com/chatflow. Once there, you can either sign in to your existing account or create a new one. New users can sign up for free and receive 100 credits monthly.

After logging in, you will be directed to the Pabbly apps page. From here, click on the Pabbly Chatflow option to access the dashboard where you can manage your integrations and settings. Once on the dashboard, you will see options to connect your WhatsApp number, which is crucial for handling customer queries.


2. Creating an AI Assistant in Pabbly Chatflow

To create an AI assistant for handling customer queries, navigate to the AI Assistant option on the left sidebar of Pabbly Chatflow. Click on the Add AI Assistant button to initiate the setup process. You will need to name your assistant; for example, ‘AI Assistant for Customer Queries’. After naming, click on Add AI Assistant to proceed.

  • Select AI instructions from the dropdown menu.
  • Set the AI configuration for creativity (0-1 scale).
  • Enter your OpenAI API key for authentication.

After completing these steps, ensure to save your settings. This AI assistant will now be equipped to respond to customer queries automatically, streamlining your e-commerce operations.


3. Uploading Knowledge Base to Pabbly Chatflow

Once your AI assistant is created, the next step is to upload a knowledge base to enhance its functionality. In Pabbly Chatflow, navigate to the Knowledge Source section. Here, you can upload a file containing all relevant product information and FAQs that your AI assistant will use to respond to customer inquiries.

  • Prepare your knowledge base in a .txt or .pdf format.
  • Include details like product names, prices, sizes, and return policies.
  • Upload the file by clicking on the upload button in Pabbly Chatflow.

After uploading, ensure the AI assistant can access this knowledge base to provide accurate and timely responses to customer queries. This is a critical step in ensuring your AI assistant is well-equipped to handle inquiries effectively.


4. Testing Your AI Assistant on WhatsApp

After setting up your AI assistant and uploading the knowledge base, it’s time to test its functionality. Go back to the dashboard in Pabbly Chatflow and ensure your WhatsApp number is connected. Then, send a test message via WhatsApp to see how the AI assistant responds.

For example, you can ask, ‘Could you please send me the details of the classic white t-shirt?’ The AI assistant should reply with the product details, including price, sizes, and availability. If it responds accurately, you can continue to test various queries to ensure it handles all customer inquiries effectively.


5. Finalizing Settings and Activating Your AI Assistant

Once you have tested your AI assistant and confirmed it works as expected, it’s essential to finalize the settings. In Pabbly Chatflow, navigate to the inbox settings to enable AI auto-replies. This ensures that your assistant can respond to all incoming messages automatically.

Additionally, you can assign specific AI assistants to different contact lists. This flexibility allows you to tailor responses based on customer segments. Remember to save all changes to ensure your AI assistant is fully operational and ready to assist customers on WhatsApp.


Conclusion

In conclusion, using Pabbly Chatflow to automate customer queries can significantly enhance your e-commerce operations. By creating an AI assistant, uploading a knowledge base, and finalizing settings, you can provide efficient customer service. This not only saves time but also improves customer satisfaction.

Ensure you check out Pabbly Connect to create business automation workflows and reduce manual tasks. Pabbly Connect currently offer integration with 2,000+ applications.

How to Automate Lead Assignment in Zoho CRM and Notify Sales Teams via Slack Using Pabbly Connect

Learn how to automate lead assignment in Zoho CRM and notify sales teams via Slack using Pabbly Connect. Follow our detailed step-by-step tutorial. Develop expertise in application integration and learn how to design streamlined automation workflows using proven, simplified approaches.

Watch Step By Step Video Tutorial Below


1. Accessing Pabbly Connect for Automation

To automate lead assignment in Zoho CRM and notify sales teams via Slack, start by accessing Pabbly Connect. Open your browser and go to Pabbly.com/connect. Here, you will find options to sign in or sign up.

If you are new, click on ‘Sign Up Free’ to get 300 tasks every month. Existing users can simply sign in. Once logged in, select Pabbly Connect from the Pabbly apps window to access the dashboard.


2. Creating a Workflow in Pabbly Connect

After accessing Pabbly Connect, the next step is to create a workflow. Click on the ‘Create Workflow’ button at the top right corner of the dashboard. You will be prompted to choose between the new beta version or classic. For this tutorial, select the beta version for a modern experience.

  • Click on ‘Create Workflow’ in the dashboard.
  • Choose the beta version for a faster setup.
  • Name your workflow, e.g., ‘Automate Lead Assignment in Zoho CRM and Notify Sales Team via Slack’.

After naming, select a folder to save your workflow, such as ‘Facebook Lead Ads’. This organization will help you manage multiple workflows effectively.


3. Setting Up the Trigger in Pabbly Connect

To initiate the automation process, set up the trigger in Pabbly Connect. Click on the ‘Add Trigger’ button and select ‘Facebook Lead Ads’ as the application and ‘New Lead Instant’ as the event. This will allow Pabbly Connect to capture new leads from your Facebook lead ads.

After selecting the trigger, connect your Facebook account. If already logged in, simply select your account. Otherwise, log in to allow Pabbly Connect to access your leads. Choose the relevant page and lead form you wish to automate.

  • Select ‘Facebook Lead Ads’ as the trigger application.
  • Choose ‘New Lead Instant’ as the event.
  • Connect your Facebook account and select the correct page and form.

Once set up, you can test the trigger by generating a test lead to ensure everything is functioning correctly.


4. Adding Action Steps in Pabbly Connect

With the trigger successfully set, it’s time to add action steps. The first action will be to create a contact in Zoho CRM. Select ‘Zoho CRM’ as the action application and ‘Create a Contact’ as the event. This allows Pabbly Connect to automatically add leads to your CRM.

Connect your Zoho CRM account by entering your domain and granting necessary permissions. After connecting, map the lead details from the trigger to the corresponding fields in Zoho CRM, such as first name, last name, and email. This ensures that every new lead is accurately recorded.

Select ‘Zoho CRM’ for the action application. Choose ‘Create a Contact’ as the action event. Map the lead details accurately from Facebook to Zoho CRM.

After successfully creating the contact, you can add another action step to notify your sales team via Slack.


5. Notifying Sales Team via Slack

To notify your sales team, add another action in Pabbly Connect. Select ‘Slack’ as the action application and ‘Send Channel Message’ as the event. This allows you to send an alert to your team whenever a new lead is added.

Connect to your Slack account by providing the necessary token type and selecting the channel where you want to send the message. Customize the message to include essential lead details, ensuring your team is informed promptly.

Select ‘Slack’ as the action application. Choose ‘Send Channel Message’ as the action event. Map the message to include lead details like name, email, and phone number.

Once everything is configured, test the setup to ensure that notifications are sent correctly to your Slack channel whenever a new lead is created in Zoho CRM.


Conclusion

In this tutorial, we explored how to automate lead assignment in Zoho CRM and notify sales teams via Slack using Pabbly Connect. By following the steps outlined, you can streamline your lead management process and enhance team communication effectively. Automating these tasks not only saves time but also ensures that your sales team is always updated with the latest leads.

Ensure you check out Pabbly Connect to create business automation workflows and reduce manual tasks. Pabbly Connect currently offer integration with 2,000+ applications.

Automatically Send Product Demo Invitations to Facebook Leads with Pabbly Connect

Learn how to automatically send product demo invitations to Facebook leads using Pabbly Connect. Follow our step-by-step tutorial for seamless integration. Discover hidden automation capabilities within your existing tools. This guide shows you how to connect your essential applications and permanently eliminate redundant manual processes.

Watch Step By Step Video Tutorial Below


1. Accessing Pabbly Connect for Integration

To automatically send product demo invitations to Facebook leads, you first need to access Pabbly Connect. Start by visiting the Pabbly Connect website at Pabbly.com/connect. Here, you will find options to sign in or sign up for a free account.

If you are a new user, click on the ‘Sign Up Free’ button. Existing users can simply log in. Signing up provides you with 100 free tasks every month, allowing you to practice using Pabbly Connect effectively.


2. Creating a Workflow in Pabbly Connect

Once you are logged into Pabbly Connect, navigate to the dashboard. Click on the ‘Create Workflow’ button to initiate the setup. This action will prompt you to choose between the modern workflow builder and the classic one; select the modern builder for enhanced features.

  • Click on ‘Create Workflow’.
  • Choose a name for your workflow, such as ‘Send Demo Invitation Email by SendGrid to Facebook Leads’.
  • Select a folder to organize your workflow.

After naming your workflow, click on the ‘Create’ button. You will see a confirmation pop-up indicating that your workflow has been created successfully. This is the first step in automating your email invitations through Pabbly Connect.


3. Setting Up the Trigger with Facebook Lead Ads

The next step in your automation process is to set up the trigger. This trigger will initiate the workflow whenever a new lead is captured through Facebook Lead Ads. Click on the ‘Add Trigger’ button to proceed.

Search for ‘Facebook Lead Ads’ in the trigger setup page and select it. Choose the event ‘New Lead Instant’ to ensure that your workflow activates immediately when a new lead is generated. Now, click on ‘Connect’ to build the connection between Pabbly Connect and Facebook.

  • Select your Facebook page from the dropdown.
  • Choose the lead generation form you want to use.
  • Enable the response settings for the form.

After setting up your trigger, click ‘Save and Send Test Request’. This will prepare your workflow to receive data from Facebook Lead Ads through Pabbly Connect.


4. Configuring the Action Step with SendGrid

With the trigger set, you now need to configure the action step for sending emails via SendGrid. Click on the ‘Add New Action Step’ button and search for SendGrid in the action setup page. Select it and choose the event ‘Send an Email’.

Click on ‘Connect’ to establish a connection with SendGrid. If you do not have an existing connection, click on ‘Add New Connection’. You will need to provide your API key from your SendGrid account, which you can find under the settings menu.

Log into your SendGrid account. Navigate to ‘Settings’ and then ‘API Keys’. Create a new API key with full access permissions.

After pasting the API key into Pabbly Connect, click ‘Save’. Your connection will now be established, allowing you to send emails automatically.


5. Mapping Email Fields for Automation

Now that your action step is configured, the next task is to map the email fields. This involves linking the data from the Facebook lead ads to the email you will send through SendGrid. Start by mapping the recipient’s email address from the lead data.

In the SendGrid action setup, fill in the subject line and the content of the email. You can use static text for the subject and dynamic fields for the email body, such as the name of the lead. This ensures that each email is personalized based on the lead’s information.

Enter a static subject line like ‘Demo Invitation’. Map the lead’s name to personalize the email content. Set the content type to ‘Plain Text’ or ‘HTML’ as preferred.

Finally, click on ‘Save and Send Test Request’ to send a test email. Check your Gmail account to confirm that the email has been received. This completes the setup for automatically sending product demo invitations to Facebook leads using Pabbly Connect.


Conclusion

In this tutorial, we demonstrated how to automatically send product demo invitations to Facebook leads using Pabbly Connect. By following the exact steps outlined, you can streamline your lead management process and enhance your marketing efforts effectively.

Ensure you check out Pabbly Connect to create business automation workflows and reduce manual tasks. Pabbly Connect currently offer integration with 2,000+ applications.

Automate Special Offer Emails Using Pabbly Connect with Gmail and Facebook Lead Ads

Learn how to automate sending special offer emails using Pabbly Connect to integrate Gmail and Facebook Lead Ads. Step-by-step guide included! Discover how to seamlessly connect your essential tools through accessible instructions that make powerful automation available to professionals at every skill level.

Watch Step By Step Video Tutorial Below


1. Accessing Pabbly Connect for Automation

To automate sending special offer emails, the first step is to access Pabbly Connect. This platform allows you to create integrations between different applications without any coding knowledge. Begin by visiting the Pabbly website and signing into your account.

Once logged in, navigate to the Pabbly Connect dashboard. Here, you can manage your workflows and integrations. The user-friendly interface makes it easy to set up automation for sending emails through Gmail whenever a new lead is generated from Facebook Lead Ads.


2. Creating a Workflow in Pabbly Connect

After accessing Pabbly Connect, the next step is to create a new workflow. Click on the ‘Create Workflow’ button, and select the new beta workflow builder for a modern experience. Name your workflow something descriptive, such as ‘Send Special Offer Emails Automatically Using Gmail for Facebook Lead Ads Leads’.

  • Select the folder for your workflow.
  • Choose the trigger application, which in this case is Facebook Lead Ads.
  • Set the trigger event to ‘New Lead Instant’.

Once these details are filled in, click on ‘Create’. This sets up the initial framework of your automation, linking Facebook Lead Ads to Gmail through Pabbly Connect.


3. Connecting Facebook Lead Ads to Pabbly Connect

In this section, you will connect your Facebook Lead Ads account to Pabbly Connect. You will be prompted to add a new connection. Click on the ‘Connect with Facebook Lead Ads’ button. Ensure you are logged into your Facebook account to facilitate this connection.

Once connected, select the page associated with your lead ads, such as ‘Digital Dynamics’. Then, choose the lead generation form you wish to use. This is crucial for capturing lead information correctly. After selecting the form, click on ‘Save and Send Test Request’ to verify the connection.


4. Setting Up Gmail Integration for Emails

Next, you will set up the Gmail integration using Pabbly Connect. Click on ‘Add New Action Step’ and select Gmail as the action application. Choose the action event as ‘Send Email’. Connect your Gmail account by clicking on the ‘Sign in with Google’ option.

  • Enter the sender name (e.g., Pabbly).
  • Use mapping to dynamically insert the recipient’s email from the lead data.
  • Compose your email subject and content, including the special offer details.

After entering all necessary fields, click on ‘Save and Send Test Request’. This will send a test email to ensure everything is functioning correctly. Check your Gmail inbox to confirm receipt of the email.


5. Confirming the Workflow Functionality

Finally, to confirm that your workflow is set up correctly, you will need to test it. Generate a new lead using the Facebook Lead Ads testing tool. Fill out the lead form with dummy data and submit it. This should trigger the automation you created in Pabbly Connect.

Check your Gmail inbox for the special offer email. If you receive it, your workflow is successfully set up. This automation saves time and ensures that every new lead receives immediate attention with a special offer email.


Conclusion

In conclusion, using Pabbly Connect to automate sending special offer emails from Gmail for leads generated through Facebook Lead Ads is a straightforward process. By following the steps outlined in this tutorial, you can efficiently manage your leads and enhance your marketing efforts.

Ensure you check out Pabbly Connect to create business automation workflows and reduce manual tasks. Pabbly Connect currently offer integration with 2,000+ applications.

How to Add Landing Page Leads to Google Sheets & Create Salesforce Contacts Using Pabbly Connect

Learn how to seamlessly integrate landing page leads into Google Sheets and create Salesforce contacts using Pabbly Connect with this step-by-step tutorial. Discover how to seamlessly connect your essential tools through accessible instructions that make powerful automation available to professionals at every skill level.

Watch Step By Step Video Tutorial Below


1. Accessing Pabbly Connect for Integration

To start integrating landing page leads into Google Sheets and creating Salesforce contacts, you need to access Pabbly Connect. Open your browser and go to pav.com/connect to reach the Pabbly Connect homepage.

Once you are on the homepage, you will see options to either sign in or sign up. If you are a new user, click on ‘Sign Up Free’ to create an account. Existing users can simply sign in. After signing in, you will have access to all Pabbly apps, including Pabbly Connect.


2. Creating a Workflow in Pabbly Connect

After signing in, navigate to the dashboard of Pabbly Connect. To create a workflow, click on the ‘Create Workflow’ button located at the top right corner. You will then be prompted to choose the workflow builder, where you should select the beta version for a modern experience.

  • Name your workflow as ‘Add Landing Page Leads to Google Sheets & Create Salesforce Contacts’.
  • Select an appropriate folder to save your workflow.
  • Click on the ‘Create’ button to finalize your workflow setup.

With your workflow created, you will now set up the trigger and actions that define how Pabbly Connect will operate. The trigger is what initiates the workflow, and in this case, it will be the form submission from your landing page.


3. Setting Up the Trigger for Form Submissions

To set up the trigger, click on the ‘Add Trigger’ button within your workflow in Pabbly Connect. Select your application, which in this case is the Elementor form. For the app event, choose ‘New Form Submission’.

Once you select this, Pabbly Connect will provide you with a webhook URL. Copy this URL as you will need it to connect your Elementor form to Pabbly Connect. In your WordPress dashboard, edit the form using Elementor and navigate to the ‘Actions After Submit’ section.

  • Select ‘Webhook’ as the action.
  • Paste the copied webhook URL into the designated field.
  • Click ‘Publish’ to save your changes.

With the webhook set up, you can now test the integration by making a test submission through your form. This will allow Pabbly Connect to receive the data and confirm that the trigger is functioning correctly.


4. Adding Google Sheets Action to the Workflow

After confirming that the trigger works, you will need to add an action step to your workflow. This action will be to add a new row in Google Sheets with the lead details captured from your form.

In your workflow, click on ‘Add Action’ and select Google Sheets as your application. Choose ‘Add a New Row’ as the app event. You will then be prompted to connect your Google Sheets account to Pabbly Connect. If this is your first connection, click on ‘Add a New Connection’ and follow the prompts to sign in with your Google account.

Select the spreadsheet you want to use (e.g., ‘Landing Page Leads’). Choose the specific sheet (e.g., ‘Sheet1’). Map the fields such as first name, last name, email, phone number, city, and type of apartment from the trigger response.

Once all the details are mapped correctly, click on ‘Save and Send Test Request’ to ensure the data is added successfully to your Google Sheets.


5. Creating Contacts in Salesforce

With the Google Sheets action successfully set up, the final step is to create a new contact in Salesforce using the same lead details. Add another action step in your workflow and select Salesforce as your application. Choose ‘Create a Contact’ as the app event.

Connect your Salesforce account to Pabbly Connect by clicking on ‘Add a New Connection’. Grant the necessary permissions to allow Pabbly Connect to access your Salesforce account. After connecting, you will need to map the contact fields similarly to how you did with Google Sheets.

Map the first name and last name from the lead details. Include the email address and phone number. Select the lead source as ‘Web Only’.

Once all required fields are mapped, click on ‘Save and Send Test Request’ to create the contact in Salesforce. You can check your Salesforce account to confirm that the contact has been created successfully.


Conclusion

In this tutorial, we explored how to use Pabbly Connect to add landing page leads to Google Sheets and create contacts in Salesforce. By following these steps, you can automate lead management seamlessly, ensuring that all lead information is captured accurately and efficiently. This integration simplifies your workflow and enhances productivity.

Ensure you check out Pabbly Connect to create business automation workflows and reduce manual tasks. Pabbly Connect currently offer integration with 2,000+ applications.