How to Notify MS Teams When WhatsApp Media Is Submitted Using Pabbly Connect

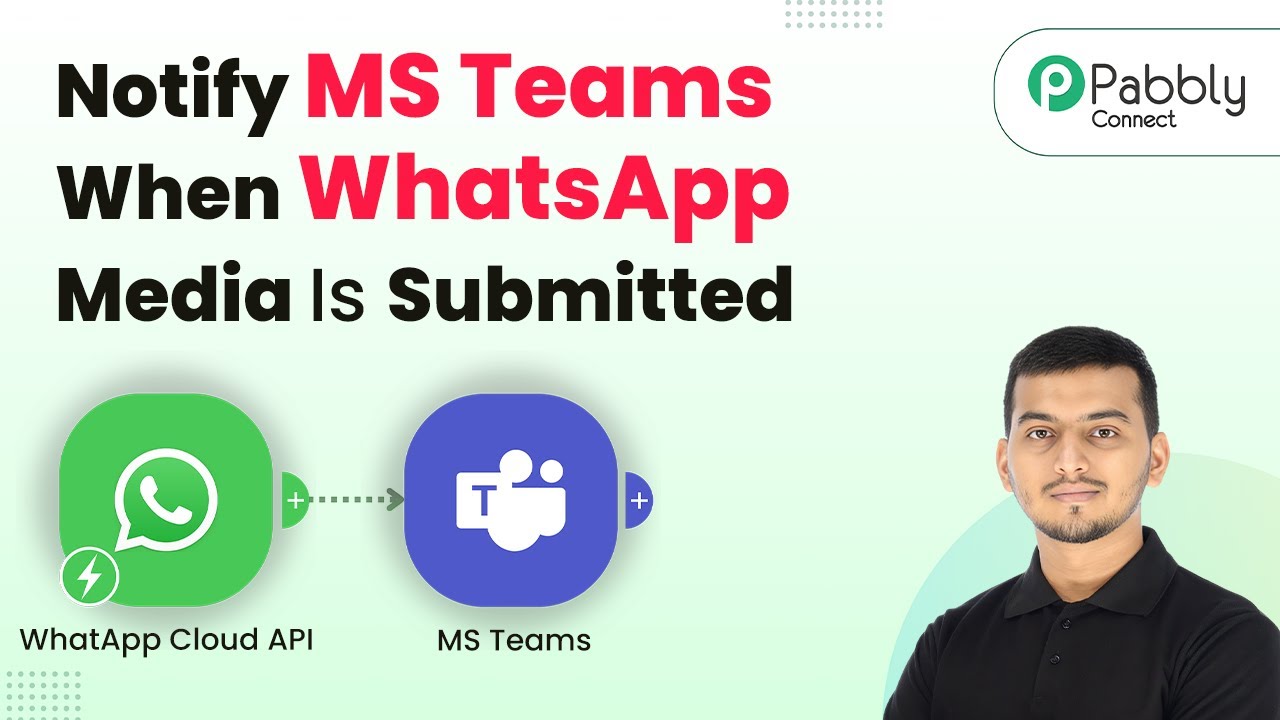
Learn how to integrate WhatsApp and Microsoft Teams using Pabbly Connect to automatically notify your team when media is submitted on WhatsApp. Eliminate manual repetitive tasks from your workflow. Discover proven automation methods with intuitive steps designed for efficiency-minded professionals.

Watch Step By Step Video Tutorial Below


1. Accessing Pabbly Connect for Integration

To initiate the integration process, you need to access Pabbly Connect. Start by visiting the Pabbly Connect website at Pabbly.com/connect. This platform allows you to automate tasks between different applications seamlessly.

Once on the Pabbly Connect homepage, you have options to either sign in if you are an existing user or sign up for a free account if you are new. New users receive 100 free tasks each month, making it easy to experiment with integrations.


2. Creating a Workflow in Pabbly Connect

After signing into Pabbly Connect, click on the Create Workflow button. This will direct you to a new screen where you can create your automated workflow. Name your workflow something meaningful, like ‘Notify MS Teams When Media is Submitted’.

  • Click on the Create button to proceed.
  • Select the new version of the workflow builder for a modern experience.
  • You will be directed to the trigger setup window.

In this section, you will set up the trigger, which is the event that starts your automation. This involves selecting the WhatsApp Cloud API as your trigger application.


3. Setting Up the Trigger with WhatsApp Cloud API

In the trigger setup, select WhatsApp Cloud API as your application and choose Message Notification as the trigger event. This will allow your workflow to activate whenever a new message is received on WhatsApp.

Click on the Connect button to establish a connection between WhatsApp and Pabbly Connect. You will be provided with a webhook URL, which you need to copy and paste into your WhatsApp Cloud API settings to complete the connection.


4. Configuring Action Step to Notify MS Teams

Once your trigger is set up, you need to configure the action step. For this, select Microsoft Teams as your action application and choose the Send Message in a Channel event. This action will send a message to your specified channel in Teams whenever a new image is submitted via WhatsApp.

  • Connect to your Microsoft Teams account by clicking on Add New Connection.
  • Select the correct team and channel where you want to send the notifications.
  • Map the message field to include the media URL and any accompanying text.

This setup ensures that each time a media file is submitted on WhatsApp, a notification will be sent to the specified Microsoft Teams channel, streamlining communication within your team.


5. Finalizing the Integration and Testing

After configuring the action step, it’s crucial to test your integration. Send a media message through your WhatsApp account to see if it triggers the action in Microsoft Teams. Make sure to include a caption with the image to verify that both the media and the text appear correctly in Teams.

Once you confirm that the integration works as intended, you can finalize the workflow by saving all settings in Pabbly Connect. This automation will now run seamlessly in the background, notifying your team each time a media file is received.


Conclusion

Using Pabbly Connect, you can effortlessly automate notifications from WhatsApp to Microsoft Teams. This integration not only saves time but also enhances team collaboration by ensuring that all relevant media is shared promptly. Start creating your workflows today to optimize your business processes.

Ensure you check out Pabbly Connect to create business automation workflows and reduce manual tasks. Pabbly Connect currently offer integration with 2,000+ applications.

How to Integrate LinkedIn Lead Ads with Pipedrive CRM Using Pabbly Connect

Learn how to automatically add leads from LinkedIn Lead Ads to Pipedrive CRM using Pabbly Connect with this step-by-step tutorial. Explore efficient methods for automating routine tasks with clear, concise instructions suited for both newcomers and experienced professionals.

Watch Step By Step Video Tutorial Below


1. Accessing Pabbly Connect for Integration

To start integrating LinkedIn Lead Ads with Pipedrive CRM, first, you need to access Pabbly Connect. Open a new tab in your browser and type Pabbly.com/connect to reach the landing page of Pabbly Connect.

Once on the landing page, you’ll see options to either sign in or sign up for free. If you are a new user, click on sign up for free to create an account. Existing users should click on sign in to access their dashboard. After signing in, navigate to the Pabbly Connect application to begin creating your workflow.


2. Creating a New Workflow in Pabbly Connect

After accessing Pabbly Connect, the next step is to create a new workflow. Click on the create a workflow button. You will be prompted to select a workflow builder; choose the new workflow builder for a modern interface.

  • Name your workflow as Add leads from LinkedIn Lead Ads to Pipedrive CRM automatically.
  • Select the folder as automations, or create a new folder if needed.
  • Click on the create button to finalize the setup.

Once created, you will enter the workflow window where you can set triggers and actions. This is crucial for the automation process, as triggers initiate actions when a new lead is received from LinkedIn.


3. Setting Up the Trigger for LinkedIn Lead Ads

The next step in using Pabbly Connect is to set up the trigger. Click on the add trigger button and search for LinkedIn. Select it and choose the event as lead notifications.

After connecting, if you have existing connections, select select existing connection. If not, click on add a new connection and authenticate your LinkedIn account by entering your credentials. Once connected, refresh the fields to select your sponsored account.

  • Click on save and send test request.
  • Perform a test submission through your LinkedIn lead ad.
  • Wait for Pabbly Connect to capture the response.

Once the test submission is completed, Pabbly Connect captures the lead details which will be used in the next steps for integration with Pipedrive.


4. Adding Action Step to Create a Person in Pipedrive

After successfully capturing the lead details, the next step is to add an action step using Pabbly Connect. Click on add new action step and select Pipedrive as your action application. Choose the event as create a person.

If you have an existing connection to Pipedrive, select select existing connection. Otherwise, click on add a new connection and input your Pipedrive API key. You can find this key by going to your Pipedrive account, clicking on the profile icon, and navigating to personal preferences and then API.

Copy your API token from Pipedrive. Paste it into the Pabbly Connect action step. Click save to establish the connection.

Now you will see fields to map the lead details captured from LinkedIn to the corresponding fields in Pipedrive. This mapping ensures that every new lead is dynamically added to your Pipedrive CRM.


5. Testing the Integration and Finalizing Setup

After setting up the action step, it’s time to test the integration. Using Pabbly Connect, click on save and send test request to confirm that the lead details are correctly sent to Pipedrive.

Once the test request is successful, check your Pipedrive account to ensure that the new contact has been created with the details you mapped earlier. You should see the name, email, and phone number corresponding to the lead submitted from LinkedIn.

Navigate to the contacts section in Pipedrive. Verify that the new lead appears with the correct information. If everything is accurate, your setup is complete!

With this successful integration, every time a new lead is generated from LinkedIn Lead Ads, it will automatically be added to your Pipedrive CRM, streamlining your lead management process.


Conclusion

In this tutorial, we explored how to use Pabbly Connect to seamlessly integrate LinkedIn Lead Ads with Pipedrive CRM. By following the step-by-step process outlined above, you can automate lead management and enhance your business efficiency.

Ensure you check out Pabbly Connect to create business automation workflows and reduce manual tasks. Pabbly Connect currently offer integration with 2,000+ applications.

With Pabbly Connect, you can ensure that every lead from LinkedIn is captured and added to your CRM without manual intervention, saving you time and effort. Try this integration today to streamline your lead generation process!

Automate Property Inquiries for Real Estate on WhatsApp Using Pabbly Chatflow

Learn how to automate property inquiries for real estate on WhatsApp using Pabbly Chatflow. Follow our step-by-step tutorial for seamless integration. Learn step-by-step how to create, test, and optimize chatbots that enhance customer experience while reducing support workload.

Watch Step By Step Video Tutorial Below


1. Accessing Pabbly Chatflow for WhatsApp Automation

To automate property inquiries for real estate on WhatsApp, the first step is to access Pabbly Chatflow. Open your browser and navigate to Pabbly.com/chatflow. This platform provides a comprehensive automation solution for WhatsApp messaging.

Once on the Pabbly Chatflow homepage, you can either sign in if you are an existing user or click on the ‘Sign Up Free’ option to create a new account. New users receive 100 free credits to explore the software’s features, including creating WhatsApp chatbots.


2. Creating Your WhatsApp Chatbot with Pabbly Chatflow

After logging into Pabbly Chatflow, you will be directed to the dashboard where you can manage your WhatsApp numbers. Click on ‘Access Now’ under the Pabbly Chatflow box to start building your chatbot.

  • Select the ‘Flows’ option from the left-hand menu.
  • Click on the ‘+ Add Flow’ button to start a new flow.
  • Name your flow, for example, ‘Automate Property Inquiries for Real Estate on WhatsApp’.

Now, you can choose your trigger event. For this integration, select the ‘Keyword’ option, which allows the bot to respond based on specific keywords sent by users, such as ‘property inquiry’ or ‘available properties’.


3. Designing the Chatflow for Property Inquiries

With Pabbly Chatflow, designing your chatbot involves creating a flow that guides users through their inquiries. Start by adding a text message that welcomes users and asks how they would like to proceed with their property inquiries.

  • Add buttons for options like ‘Browse Properties’ and ‘Schedule Viewing’.
  • Connect the welcome message to the options using the flow builder.
  • For ‘Browse Properties’, create a list message that allows users to select property types.

Each selection should trigger further questions, capturing user details such as their full name, contact number, and preferred viewing date and time. This structured approach ensures a seamless interaction for users seeking property information.


4. Finalizing Your WhatsApp Chatbot Setup

Once the flow is designed, it’s crucial to save your progress in Pabbly Chatflow. Click the ‘Save’ button to ensure all your changes are recorded. Additionally, make sure to enable the toggle to activate your chatbot.

To enhance user experience, customize the final message that summarizes the user’s booking details, including property type, name, contact number, viewing date, and time. This message should also include options for confirming or changing the booking, guiding users through the next steps.


5. Testing and Utilizing Your Automated Chatbot

After successfully setting up your WhatsApp chatbot using Pabbly Chatflow, it’s time to test the functionality. Send a message to your WhatsApp number to see how the bot responds to inquiries.

Monitor the interactions to ensure that users receive accurate and timely responses. If adjustments are needed, return to Pabbly Chatflow to modify the flow accordingly. This automation will help you manage property inquiries effectively, ensuring no potential buyers are missed.


Conclusion

In conclusion, automating property inquiries for real estate on WhatsApp using Pabbly Chatflow streamlines communication and enhances user experience. By following the steps outlined in this tutorial, you can create a responsive chatbot that operates 24/7, ensuring that all inquiries are handled efficiently.

Ensure you check out Pabbly Connect to create business automation workflows and reduce manual tasks. Pabbly Connect currently offer integration with 2,000+ applications.

Scale Your Business Fast: Automate Lead Capture, Notifications & Follow-Ups with Pabbly Connect

Learn how to automate lead capture, notifications, and follow-ups using Pabbly Connect with Google, Salesforce, Slack, and more. Scale your business effortlessly! Build sophisticated automated workflows in less time than you think. This guide translates complex integrations into straightforward steps for immediate implementation.

Watch Step By Step Video Tutorial Below


1. Accessing Pabbly Connect for Automation

To scale your business fast, you first need to access Pabbly Connect by visiting Pabbly.com in your browser. This platform is essential for automating lead capture, notifications, and follow-ups.

Once on the Pabbly website, sign in to your account. If you are a new user, you can sign up for free and get started with 100 tasks monthly. After logging in, navigate to the Pabbly Connect dashboard to create your first automation workflow.


2. Creating Your First Workflow in Pabbly Connect

In the Pabbly Connect dashboard, click on ‘Create Workflow’. Name your workflow as ‘Automate Lead Capture, Notification, and Follow-Ups with Pabbly’. Choose a folder to save your workflow, and then click ‘Create’. This sets up the foundation for your automation. using Pabbly Connect

  • Click on ‘Create Workflow’
  • Name your workflow
  • Select a folder
  • Click ‘Create’

After creating the workflow, you will need to set a trigger application. For this automation, select Facebook Lead Ads as the trigger application. This will initiate the workflow whenever a new lead is captured.


3. Setting Up the Trigger with Facebook Lead Ads

To set up the trigger, select Facebook Lead Ads and choose the trigger event as ‘New Lead Instant’. Click on ‘Connect’ to link your Facebook account with Pabbly Connect. Make sure your Facebook account is logged in for easy authorization.

Next, you will need to select your Facebook page and the lead form. Use the Meta for Developers tool to find your lead form. Once selected, click ‘Save and Send Test Request’ to confirm the connection between Facebook Lead Ads and Pabbly Connect.

  • Select Facebook Lead Ads as the trigger
  • Choose ‘New Lead Instant’ as the trigger event
  • Connect your Facebook account
  • Select page and lead form

After the test request, you will see a confirmation that the connection is successful, indicating that Pabbly Connect is ready to capture leads from your Facebook ads.


4. Adding Action Steps to Google Sheets, Slack, and Salesforce

After setting up the trigger, the next step is to add the lead details to Google Sheets. Select Google Sheets as the action application and choose ‘Add New Row’ as the action event. Connect your Google account and grant permissions. using Pabbly Connect

Next, select the spreadsheet where you want to store the lead details. Use the mapping feature to ensure the lead’s first name, last name, email, and phone number are dynamically added to the spreadsheet. After mapping the fields, click ‘Save and Send Test Request’ to confirm that the lead details are added successfully.

Select Google Sheets as the action application Choose ‘Add New Row’ as the action event Connect your Google account Map the lead details to the spreadsheet

Once confirmed, you can proceed to notify your team on Slack by selecting Slack as the next action application. Choose ‘Send Channel Message’ and connect your Slack account to send a message with the lead details.


5. Sending Confirmation and Follow-Up Emails Using Gmail

After notifying your team, you can set up email notifications using Gmail. First, select Gmail as the action application and choose ‘Send Email’ as the action event. Connect your Gmail account and fill in the details for the confirmation email, including the recipient’s email address and content.

For personalization, map the recipient’s name in the email content. After setting this up, click ‘Save and Send Test Request’ to ensure the email is sent successfully. To automate follow-ups, add a delay step, and then repeat the process to send a follow-up email after a specified period.

Select Gmail as the action application Choose ‘Send Email’ as the action event Map the recipient’s email and name Add a delay step for follow-up emails

Once all steps are completed, your workflow will automatically handle lead capture, notifications, and follow-ups, allowing you to scale your business efficiently with Pabbly Connect.


Conclusion

With Pabbly Connect, you can effortlessly automate lead capture, notifications, and follow-ups using applications like Google Sheets, Salesforce, Slack, and Gmail. This seamless integration enhances your business efficiency and allows for rapid scaling.

Ensure you check out Pabbly Connect to create business automation workflows and reduce manual tasks. Pabbly Connect currently offer integration with 2,000+ applications.

Automate Pet Care Bookings on WhatsApp with Pabbly Chatflow

Learn how to automate pet care bookings on WhatsApp using Pabbly Chatflow. Follow this detailed tutorial for seamless integration and enhanced customer service. Create intelligent chat experiences that delight users while collecting valuable information and moving prospects through your sales process.

Watch Step By Step Video Tutorial Below


1. Accessing Pabbly Chatflow for Pet Care Bookings

To automate pet care bookings on WhatsApp, the first step is to access Pabbly Chatflow. This platform allows you to create a WhatsApp chatbot that can handle customer inquiries automatically.

To get started, visit the Pabbly Chatflow website at Pabbly.com/chatflow. You will find options to sign up or log in. New users can create a free account and receive 100 free credits monthly to experiment with the chatbot features.


2. Creating a WhatsApp Chatbot Using Pabbly Chatflow

Once you have logged into Pabbly Chatflow, the next step is to create your WhatsApp chatbot. Click on the ‘Add Flow’ button to initiate the process. Here, you will provide a name for your flow, such as ‘Automate Pet Care Bookings on WhatsApp’.

  • Enter the flow name in the designated field.
  • Select the trigger event as ‘Keyword Regex Match’.
  • Set up the keyword that will trigger the chatbot.

After setting up the trigger, you will need to configure the chatbot to respond to customer messages. This involves creating a list message that welcomes users and presents them with service options.


3. Configuring Service Options in Pabbly Chatflow

In this step, you will configure the services that your chatbot offers. Within the list message, add a header and body text, and then create a list of services such as vaccination, grooming, and health consultation. using Pabbly Connect

  • Click on ‘Add Section’ to create a new list section.
  • Enter the title for your services list.
  • Add items to your list with detailed service descriptions.

Once you have added the services, you can set up custom fields to save the responses from users. This ensures that when a user selects a service, their choice is recorded for future reference.


4. Saving Responses to Google Sheets via Pabbly Chatflow

After configuring the services, the next crucial step is to save the user responses into Google Sheets. This is done by connecting Pabbly Chatflow to Pabbly Connect, which facilitates the data transfer.

To set this up, you will create an API request action within your flow. Here are the steps:

Navigate to the actions menu and select ‘API Request’. Paste the webhook URL provided by Pabbly Connect. Map the response fields from Pabbly Chatflow to the corresponding columns in Google Sheets.

Once the mapping is complete, test the API request to ensure that data is being saved correctly in your Google Sheets.


5. Testing the Chatbot and Confirmation Messages

With everything set up, it’s time to test your WhatsApp chatbot. Send a message to the WhatsApp number connected to your Pabbly Chatflow account and check if you receive the automated responses as expected.

After selecting services and providing required details, your chatbot should confirm the appointment and save all responses in Google Sheets. You can verify this by checking the Google Sheets for the entries.

To finalize your flow, add a status fallback message that thanks users for their inquiries. This message will be sent once all information is collected. Make sure to save your flow after making these changes.


Conclusion

In this tutorial, we explored how to automate pet care bookings on WhatsApp using Pabbly Chatflow. By setting up a WhatsApp chatbot, you can streamline customer interactions and maintain records efficiently. Start using Pabbly Chatflow today to enhance your pet care service!

Ensure you check out Pabbly Connect to create business automation workflows and reduce manual tasks. Pabbly Connect currently offer integration with 2,000+ applications.

How to Add Google Forms Leads into Salesforce Automatically Using Pabbly Connect

Learn how to automatically add Google Forms leads into Salesforce using Pabbly Connect. Follow our step-by-step tutorial for seamless integration. Discover hidden automation capabilities within your existing tools. This guide shows you how to connect your essential applications and permanently eliminate redundant manual processes.

Watch Step By Step Video Tutorial Below


1. Accessing Pabbly Connect for Google Forms and Salesforce Integration

To start integrating Google Forms with Salesforce automatically, you need to access Pabbly Connect. First, go to Pabbly.com/connect in your browser. This will take you to the Pabbly Connect homepage where you can either sign in or sign up for a free account.

If you are new, click on ‘sign up free’ to get 300 tasks every month. Existing users can simply sign in. Once logged in, click on ‘Access Now’ to enter the Pabbly Connect dashboard. This platform serves as the central hub for automating tasks between Google Forms and Salesforce.


2. Creating a Workflow in Pabbly Connect

After accessing Pabbly Connect, the next step is to create a new workflow. Click on the ‘Create Workflow’ button. You will see options for the workflow builder; select the beta version for a faster and more flexible experience.

  • Click on ‘Create Workflow’.
  • Name your workflow, e.g., ‘Add Google Form Leads into Salesforce Automatically’.
  • Select a folder to save your workflow, such as ‘Automations’.

After naming your workflow and selecting a folder, click on the ‘Create’ button. This will set up your workflow to begin integrating Google Forms with Salesforce using Pabbly Connect.


3. Setting Up the Trigger with Google Forms

In this section, you will set up the trigger for your workflow. Click on the ‘Add Trigger’ button and select Google Forms as the trigger application. Choose the event ‘New Response Received’. This event will trigger the automation every time a new form submission is made.

Next, you will receive a webhook URL from Pabbly Connect. Copy this URL as you will need it to connect Google Forms to Pabbly Connect. Now, log into your Google Forms account and navigate to the form you created for workshop registrations.

  • Go to the ‘Responses’ section in Google Forms.
  • Click on ‘Link to Sheets’ to create a new Google Sheet for storing responses.
  • Make a test submission to ensure the connection works.

By following these steps, you will successfully set up the trigger that captures responses from Google Forms using Pabbly Connect.


4. Connecting Google Sheets to Pabbly Connect

To further automate the process, you need to connect Google Sheets with Pabbly Connect. First, install the ‘Pabbly Connect Webhooks’ add-on in your Google Sheets account. Go to ‘Extensions’, then ‘Add-ons’, and select ‘Get Add-ons’. Search for ‘Pabbly Connect Webhooks’ and install it.

Once installed, refresh your Google Sheets. Click on ‘Extensions’, select ‘Pabbly Connect Webhooks’, and then ‘Initial Setup’. Here, paste the webhook URL you copied earlier and set the trigger column to the final data column of your Google Sheet.

Set the trigger column to the last column where data will be entered. Click ‘Submit’ to save the setup. Enable ‘Send on Event’ to capture data automatically.

After completing these steps, your Google Sheets will be successfully connected to Pabbly Connect, allowing you to capture responses seamlessly.


5. Adding Action to Create Contacts in Salesforce

Now that you have set up the trigger, it’s time to add the action that will create new contacts in Salesforce. Click on ‘Add Action’ and select Salesforce as the action application. Choose the event ‘Create Contact’ to automate the addition of new leads into your Salesforce account.

To connect Salesforce, select ‘Add a New Connection’. If you are already logged into Salesforce, the connection will be established easily. Otherwise, enter your Salesforce credentials when prompted.

Map the fields such as first name, last name, email, and phone number from the Google Forms response. Click ‘Save and Send Request’ to create the contact. Check your Salesforce account to verify the new contact was created successfully.

By following these steps, you will have automated the process of adding Google Forms leads into Salesforce using Pabbly Connect, ensuring that every new lead is captured efficiently.


Conclusion

In this tutorial, we explored how to use Pabbly Connect to automatically add Google Forms leads into Salesforce. By setting up triggers and actions, you can streamline your lead management process and ensure that no lead is missed. This integration not only saves time but also enhances your overall productivity.

Ensure you check out Pabbly Connect to create business automation workflows and reduce manual tasks. Pabbly Connect currently offer integration with 2,000+ applications.

Automate Home Cleaning Service Bookings Using Pabbly Chatflow

Learn how to automate home cleaning service bookings with Pabbly Chatflow and Pabbly Chatflow. Step-by-step tutorial for seamless integration. Learn how to create intelligent chat workflows that provide instant customer support while qualifying leads 24/7 without human intervention.

Watch Step By Step Video Tutorial Below


1. Accessing Pabbly Chatflow for Automation

The first step in automating home cleaning service bookings is to access Pabbly Chatflow. To do this, simply navigate to the Pabbly Chatflow website and log in using your credentials. If you are a new user, you can sign up for a free account, which provides you with 100 free credits every month to practice building your chatbot.

Once logged in, you will see the dashboard of Pabbly Chatflow where you can manage your WhatsApp numbers. This is essential for receiving client messages and sending automated responses. Click on the ‘Add WhatsApp Number’ button to integrate your WhatsApp account with Pabbly Chatflow.


2. Creating Your Chatbot in Pabbly Chatflow

After accessing Pabbly Chatflow, the next step is to create a chatbot specifically for home cleaning service bookings. Click on the ‘Flows’ option in the sidebar to start building your chatbot. Here, you can create a new flow by clicking on the ‘Add Flow’ button.

  • Enter a name for your flow, such as ‘Automate Home Cleaning Service Booking’.
  • Set the trigger for your chatbot, which can be a keyword that initiates the conversation.
  • Design the welcome message and buttons for user interaction.

Ensure to add buttons for options like ‘Book Cleaning’ and ‘View Services’. This will guide users through the booking process effectively using Pabbly Chatflow.


3. Integrating Google Sheets with Pabbly Connect

To maintain a record of bookings, you need to integrate Google Sheets with Pabbly Chatflow using Pabbly Connect. This integration allows you to automatically save customer responses into a Google Sheet. Start by creating a new workflow in Pabbly Connect and select the trigger as ‘New Message Received’ from Pabbly Chatflow.

After setting up the trigger, you will get a webhook URL that you need to paste in Pabbly Chatflow under the API request action. This will link the two applications and allow data to flow seamlessly.


4. Finalizing Your Chatbot Setup

Once the Google Sheets integration is complete, return to Pabbly Chatflow to finalize your chatbot setup. You will need to set up actions for the buttons created earlier. For example, when the ‘Book Cleaning’ button is clicked, the bot should ask for user details like address, date, and time.

After collecting this information, you can send a confirmation message to the user and save the data in Google Sheets through the API request action. Make sure to test the flow to ensure it works as expected before going live.


5. Testing and Launching Your Chatbot

Testing your chatbot is crucial to ensure everything functions correctly. Send test messages through WhatsApp to see if the automated responses from Pabbly Chatflow are working as intended. Check if the data is being saved correctly in your Google Sheets.

Once testing is complete, you can officially launch your chatbot for your home cleaning service. This automation will significantly reduce manual workload and improve customer experience by providing instant responses and booking capabilities.


Conclusion

By following this tutorial, you can effectively automate home cleaning service bookings using Pabbly Chatflow and Pabbly Connect. This integration not only streamlines the booking process but also enhances customer interaction through automated responses. Start using Pabbly Chatflow to transform your home cleaning service today!

Ensure you check out Pabbly Connect to create business automation workflows and reduce manual tasks. Pabbly Connect currently offer integration with 2,000+ applications.

How to Take Flower & Gift Orders on WhatsApp Automatically Using Pabbly Chatflow

Learn how to automate flower and gift orders on WhatsApp using Pabbly Chatflow. Step-by-step guide to creating a WhatsApp chatbot for your business. This detailed guide shows you how to build powerful chat automation that engages visitors and converts prospects—without any coding required.

Watch Step By Step Video Tutorial Below


1. Create a WhatsApp Chatbot Using Pabbly Chatflow

To take flower and gift orders on WhatsApp automatically, you need to create a WhatsApp chatbot using Pabbly Chatflow. This chatbot will respond to customer queries 24/7, even when you are busy. Start by accessing Pabbly Chatflow by entering the URL in your browser.

Once on the Pabbly Chatflow landing page, sign in or sign up for a free account. New users will receive 100 free credits each month to practice building chatbots. After logging in, you will be directed to the dashboard where you can begin creating your chatbot.


2. Setting Up the Chatbot Flow in Pabbly Chatflow

In this section, you will set up the flow for your chatbot in Pabbly Chatflow. Click on the ‘Flows’ option in the sidebar to access the flow builder. Here, you can create a new flow by clicking the ‘Add Flow’ button. Name your flow ‘Take Flower and Gift Orders on WhatsApp Automatically’ and select the trigger event.

  • Choose the trigger event as ‘Keyword’ and specify the keywords that will initiate the chatbot, such as ‘order’.
  • Drag and drop a text button node to send a welcome message to users when they initiate the chat.

After setting the keywords, add buttons for user interaction, such as ‘View Catalog’ and ‘Place Order’. Each button will lead to different actions in the chatbot, enhancing the user experience.


3. Adding Product List and Order Collection in Pabbly Chatflow

Next, you will enhance your chatbot to provide a product list and collect orders using Pabbly Chatflow. When a user selects the ‘View Catalog’ button, you can create a list of products using the list node. Provide a header, body, and footer for the list.

  • Include items such as flowers, cakes, and personalized gifts in the catalog.
  • For the ‘Place Order’ button, prompt users to enter their product choice, quantity, name, and delivery address.

Once all the information is collected, confirm the order with a message indicating that the order has been received and that a delivery update will follow shortly. This interaction streamlines the ordering process for your customers.


4. Integrating Google Sheets with Pabbly Chatflow

To maintain a record of orders, you will integrate Google Sheets with Pabbly Chatflow. After collecting user responses, use the API request node to send this data to Google Sheets. Start by creating a workflow in Pabbly Connect, which links Pabbly Chatflow and Google Sheets.

In Pabbly Connect, select the trigger as ‘New Message Received’ from Pabbly Chatflow. Copy the webhook URL generated and paste it into the API request action in Pabbly Chatflow. Map the fields such as full name, address, product, and quantity to the corresponding fields in your Google Sheet.

Once set up, test the connection to ensure that data flows correctly from Pabbly Chatflow to Google Sheets. This integration allows you to keep track of all orders while automating the process.


5. Finalizing the Chatbot Flow in Pabbly Chatflow

After integrating Google Sheets, finalize your chatbot flow in Pabbly Chatflow. Add a final message that confirms the order to the customer, thanking them for their purchase. Save your flow to ensure all changes are recorded.

To test your chatbot, send a message to your WhatsApp number linked with Pabbly Chatflow. Observe how the chatbot responds, providing catalog options and collecting order details seamlessly. This testing phase is crucial to ensure everything functions as expected.

Once satisfied with the performance, your WhatsApp chatbot is ready to take flower and gift orders automatically, enhancing your business operations and customer experience.


Conclusion

Using Pabbly Chatflow, you can automate flower and gift orders on WhatsApp effectively. This tutorial has guided you through creating a chatbot that interacts with customers, collects orders, and maintains records in Google Sheets, streamlining your business operations.

Ensure you check out Pabbly Connect to create business automation workflows and reduce manual tasks. Pabbly Connect currently offer integration with 2,000+ applications.

Save Facebook Leads to Google Sheets Automatically Using Pabbly Connect

Learn how to automatically save Facebook leads to Google Sheets using Pabbly Connect with this detailed step-by-step tutorial. This comprehensive guide reveals exactly how to connect your applications and automate repetitive tasks — accessible for professionals of all technical backgrounds.

Watch Step By Step Video Tutorial Below


1. Accessing Pabbly Connect for Automation

To save Facebook leads to Google Sheets automatically, first, access Pabbly Connect. Open a new tab and navigate to the Pabbly Connect website at www.Pabbly.com/connect. This platform will facilitate the integration between Facebook and Google Sheets.

Once on the Pabbly Connect landing page, you will see options to sign in or sign up. If you’re an existing user, simply sign in. If you are new, you can create a free account, which offers 100 free tasks every month. After signing in, you will be directed to the Pabbly Connect dashboard.


2. Creating a New Workflow in Pabbly Connect

After accessing the dashboard, the next step is to create a new workflow in Pabbly Connect. Click on the ‘Create Workflow’ button. You can choose between the new beta method for a modern approach or the classic method for a familiar interface. For this tutorial, select the new beta method.

  • Click on ‘Create Workflow’.
  • Name your workflow as ‘Save Facebook Leads to Google Sheets Automatically’.
  • Select a folder for organization.

Once you have named your workflow, click on the ‘Create’ button. This will set up the framework for your automation, consisting of a trigger and an action step.


3. Setting Up the Trigger with Facebook Lead Ads

In this section, you will set up the trigger for the workflow using Pabbly Connect. Select Facebook Lead Ads as the trigger application. The event you want to capture is ‘New Lead Instant’. This will ensure that every time a new lead is generated, the trigger activates.

Click on the ‘Connect’ button to establish a connection with Facebook Lead Ads. If you have an existing connection, you can select it; otherwise, click on ‘Connect with Facebook Lead Ads’. Allow the necessary permissions to complete the connection.


4. Testing the Trigger and Capturing Lead Data

Once the connection is established, you will need to test the trigger to ensure it captures lead data correctly. Use the Meta’s lead ads testing tool to generate a test lead. Fill in the required fields such as skin type, first name, last name, email, and phone number.

  • Select the Facebook page associated with your ads.
  • Choose the lead generation form you created.
  • Submit the test lead.

After submitting, return to Pabbly Connect and wait for the response. You should see the lead data captured, confirming that the connection is successful.


5. Setting Up the Action to Google Sheets

Now that the trigger is working, it’s time to set up the action in Pabbly Connect to send the captured lead data to Google Sheets. Select Google Sheets as the action application and choose the event ‘Add New Row’. Click on the ‘Connect’ button to establish the connection.

Sign in with your Google account and allow the necessary permissions. Select the spreadsheet named ‘Leads Details’ and the specific sheet where you want the data to be added. Map the lead data fields such as name, email, phone number, and skin type to the corresponding columns in your Google Sheets.

After mapping the data, click on ‘Save and Send Test Request’. If you receive a positive response with the spreadsheet ID, it confirms that the data has been successfully added to your Google Sheets.


Conclusion

By following these steps, you have successfully set up an automation using Pabbly Connect to save Facebook leads directly to Google Sheets. This process eliminates the need for coding and allows for seamless data management in your business.

Ensure you check out Pabbly Connect to create business automation workflows and reduce manual tasks. Pabbly Connect currently offer integration with 2,000+ applications.

With Pabbly Connect, you can easily integrate various applications and automate your workflows, enhancing efficiency and productivity. Start utilizing this powerful tool today to streamline your lead management process.

Automate Car Rentals via WhatsApp with Pabbly Chatflow

Learn how to automate car rentals via WhatsApp using Pabbly Chatflow. Follow our step-by-step guide for seamless integration and enhanced customer communication. Learn how to create intelligent chat workflows that provide instant customer support while qualifying leads 24/7 without human intervention.

Watch Step By Step Video Tutorial Below


1. Accessing Pabbly Chatflow for Car Rentals Automation

To automate car rentals via WhatsApp, you first need to access Pabbly Chatflow. Simply visit www.Pabbly.com/chatflow in your browser. This platform is essential for creating your WhatsApp chatbot to handle customer queries efficiently.

Once on the Pabbly Chatflow website, sign in to your account. If you are a new user, click on the ‘Sign Up for Free’ option to create an account and receive 100 credits monthly. If you already have an account, click on the ‘Sign In’ button at the top right corner.


2. Setting Up WhatsApp Integration in Pabbly Chatflow

After signing in, you will see all Pabbly applications. Click on Pabbly Chatflow to access the dashboard. Here, you can manage your WhatsApp number and other settings. To connect your WhatsApp account, click on the ‘Add WhatsApp Number’ option.

  • Choose to connect via WhatsApp Connect or use a manual token.
  • Follow the prompts to complete the integration.
  • Ensure your WhatsApp number is verified for the chatbot to function.

By successfully setting up WhatsApp integration, you enable Pabbly Chatflow to send and receive messages, making it easier to manage customer inquiries automatically.


3. Creating the WhatsApp Chatbot Flow in Pabbly Chatflow

Now, it’s time to create the flow for your WhatsApp chatbot. In Pabbly Chatflow, navigate to the ‘Flows’ section and click on ‘Add Flow’. Name your flow ‘Automate Car Rentals via WhatsApp’ and select the trigger event.

For the trigger, choose ‘Keyword Regex Match’ and enter keywords like ‘car’, ‘rent’, ‘help’, and ‘hey’. This allows the chatbot to activate when users send messages containing these keywords. Additionally, set up a Regex pattern to capture variations in user messages, enhancing the chatbot’s responsiveness.


4. Building the Conversation Flow with Pabbly Chatflow

After setting up the trigger, you can start building the conversation. Use the drag-and-drop interface in Pabbly Chatflow to add text and button replies. For instance, send a welcome message asking users what type of car they would like (e.g., sedan, SUV, hatchback).

  • Add buttons for users to select their car type.
  • Follow up with questions about rental dates and user details.
  • Include an option for users to upload their driver’s license.

This structured flow ensures that your chatbot can gather all necessary information from customers efficiently. Remember to save your flow regularly to avoid losing any progress.


5. Testing and Launching the Car Rental Chatbot

Once your flow is complete, it’s crucial to test the chatbot to ensure everything works as intended. Use your WhatsApp to send a message to your chatbot and verify that you receive the correct responses based on your setup in Pabbly Chatflow.

After confirming that the flow operates correctly, activate your chatbot. This allows it to respond to customer inquiries automatically, significantly reducing manual response time and improving customer satisfaction.


Conclusion

In conclusion, automating car rentals via WhatsApp using Pabbly Chatflow enhances customer interaction and streamlines your operations. By following the steps outlined, you can create an effective chatbot that handles inquiries efficiently, allowing you to focus on growing your business.

Ensure you check out Pabbly Connect to create business automation workflows and reduce manual tasks. Pabbly Connect currently offer integration with 2,000+ applications.