How to Send WhatsApp Broadcast Messages Automatically

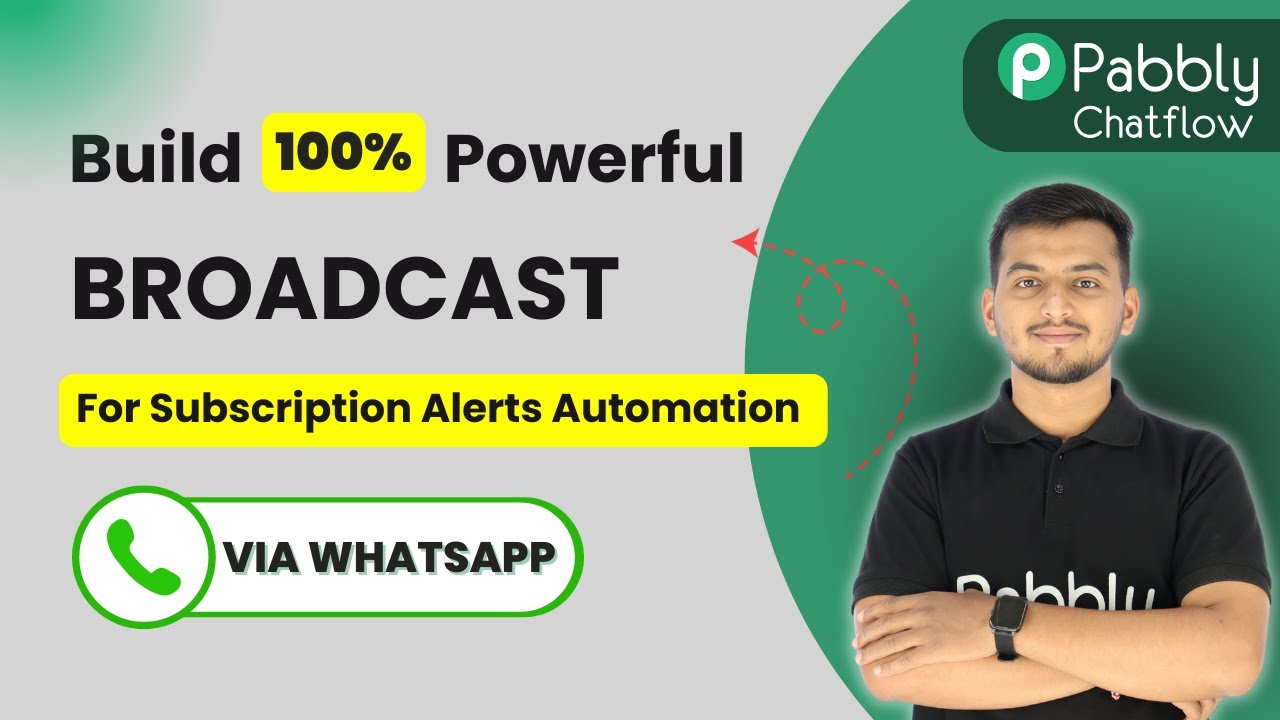
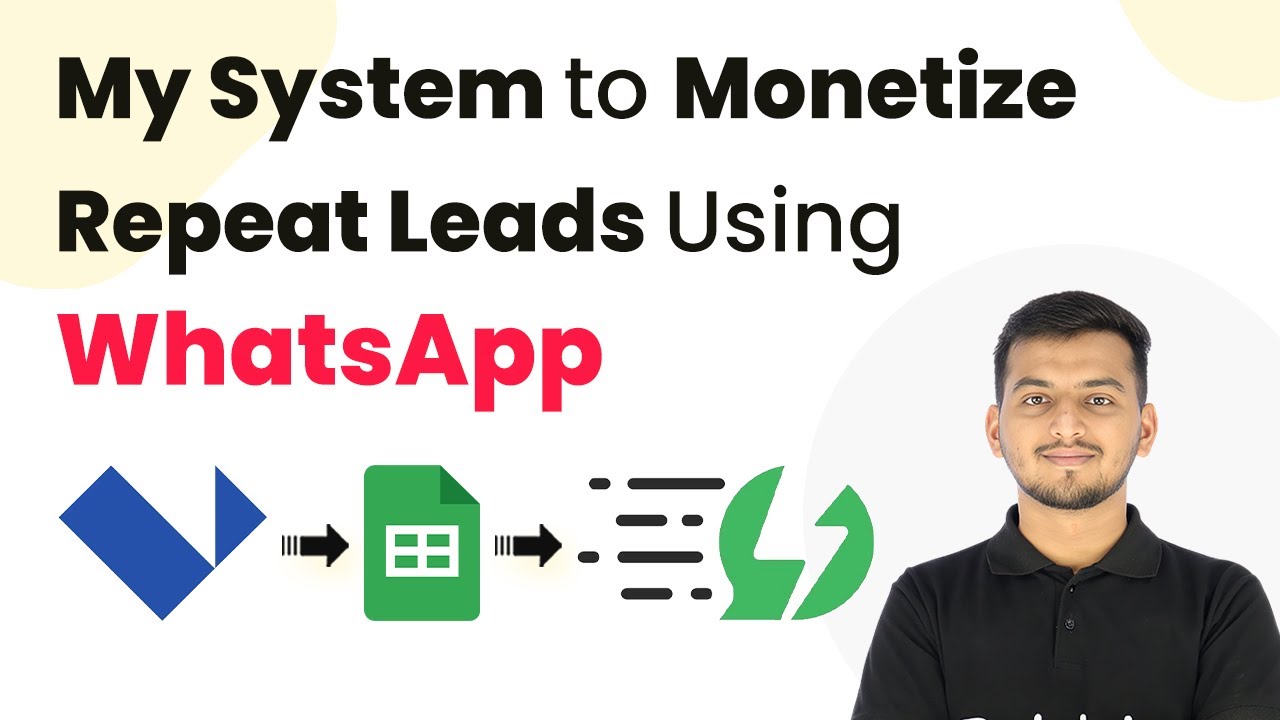
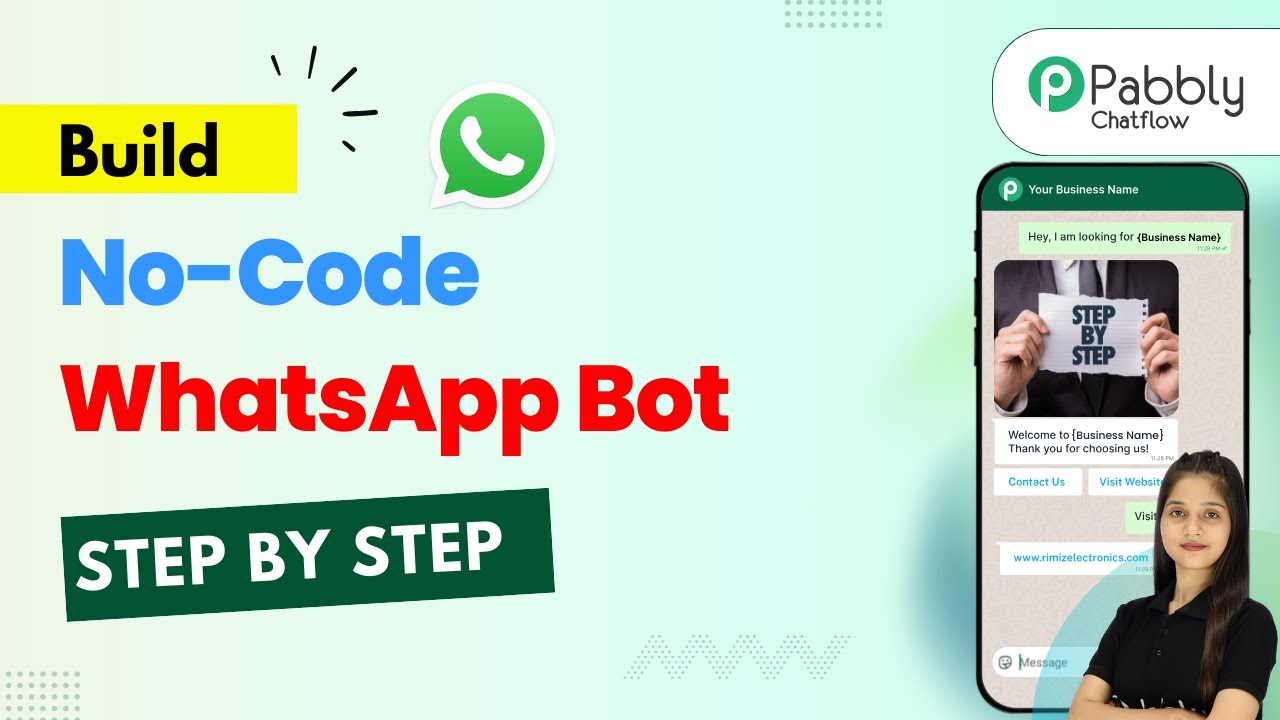
Learn how to send WhatsApp broadcast messages automatically using Pabbly Chatflow. This tutorial covers step-by-step instructions for seamless integration with Google Sheets and more. Learn step-by-step how to create, test, and optimize chatbots that enhance customer experience while reducing support workload.

Watch Step By Step Video Tutorial Below


1. Accessing Pabbly Chatflow for WhatsApp Broadcast

To send WhatsApp broadcast messages automatically, you first need to access Pabbly Chatflow. Start by navigating to the Pabbly Chatflow homepage by typing Pabbly.com/chatflow in your browser’s address bar.

Once on the homepage, you will see two options: ‘Sign In’ and ‘Sign Up Free.’ If you are a new user, click on ‘Sign Up Free’ to create an account. Existing users can simply click ‘Sign In’ to access their accounts. After logging in, you will be taken to the Pabbly apps window where you can find and access Pabbly Chatflow.


2. Connecting Your WhatsApp Number in Pabbly Chatflow

After accessing Pabbly Chatflow, the next step is to connect your WhatsApp number. Click on the ‘Add WhatsApp Number’ button to begin the connection process. You will see two options: ‘WhatsApp Connect’ and ‘Manual Token Connect.’ Choose the method that suits you best.

  • Click on ‘Add WhatsApp Number’.
  • Select either ‘WhatsApp Connect’ or ‘Manual Token Connect’.
  • Follow the prompts to connect your WhatsApp account.

Once your WhatsApp number is connected, you are ready to utilize the broadcasting features available within Pabbly Chatflow.


3. Creating a Template Message for WhatsApp Broadcast

In this section, you will learn how to create a template message that can be used for your WhatsApp broadcasts. To do this, navigate to the ‘Template’ section within Pabbly Chatflow. Here, you can view existing templates and their approval status.

To create a new template, click on the ‘Set Template’ button. Fill in the required details, ensuring that your template message is approved by Meta before use. This step is crucial as only approved templates can be sent to your contacts.

  • Navigate to the ‘Template’ section.
  • Click on ‘Set Template’ to create a new message.
  • Ensure your template is approved by Meta.

With your template created, you can now proceed to set up your broadcast using Pabbly Chatflow.


4. Setting Up WhatsApp Broadcast in Pabbly Chatflow

To set up your WhatsApp broadcast, go to the ‘Broadcast’ feature in Pabbly Chatflow. Click on the ‘Add Broadcast’ button to start creating a new broadcast campaign. You will be prompted to name your broadcast, for example, ‘New Leads,’ and select a contact list.

To add contacts, you can import them from a Google Sheet or add them manually. If you choose to import, ensure your contacts are in CSV format. After selecting your contact list, pick the message type: either a pre-approved template message or a regular message. This choice determines how your broadcast will be sent.

Select ‘Add Broadcast’ to create a new broadcast. Choose a name for your broadcast and select a contact list. Decide on the message type: pre-approved template or regular message.

This setup allows you to send personalized messages to your WhatsApp contacts efficiently using Pabbly Chatflow.


5. Testing and Scheduling Your WhatsApp Broadcast

After setting up your broadcast, it’s essential to test the message before sending it out to your contacts. In Pabbly Chatflow, you can preview the message by sending a test to your own number. Enter your name and phone number, then click ‘Send Test Message’ to see how it appears.

If the test is successful, you can then schedule your broadcast. Choose whether to send it immediately or at a later date and time. Make sure to select a future date to ensure proper scheduling. Click on the ‘Add Broadcast’ button to finalize your settings.

Send a test message to preview how it looks. Choose to send immediately or schedule for later. Finalize your broadcast settings by clicking ‘Add Broadcast’.

With these steps, you can successfully schedule and send WhatsApp broadcast messages to your contacts using Pabbly Chatflow.


Conclusion

In conclusion, using Pabbly Chatflow for sending WhatsApp broadcast messages allows for personalization and scheduling, making it an effective communication tool for businesses. By following the steps outlined, you can automate your messaging process efficiently.

Ensure you check out Pabbly Connect to create business automation workflows and reduce manual tasks. Pabbly Connect currently offer integration with 2,000+ applications.

Add Real Estate Lead Details to Your Database

Learn how to add real estate lead details to your database seamlessly with Pabbly Connect. Step-by-step guide on integrating Google Sheets and Gmail. Discover how to seamlessly connect your essential tools through accessible instructions that make powerful automation available to professionals at every skill level.

Watch Step By Step Video Tutorial Below


1. Accessing Pabbly Connect for Real Estate Integration

To add your real estate lead details to your database, you first need to access Pabbly Connect. Open your web browser and navigate to pabbl.com/connect to reach the Pabbly Connect landing page.

If you are a new user, click on the ‘Sign up for free’ button in the top right corner. This allows you to explore Pabbly Connect with 100 free tasks per month, perfect for adding up to 100 details to your database without any cost.


2. Creating a Workflow in Pabbly Connect

Once you are logged into Pabbly Connect, you will be directed to the workflow builder. This is where you will set up the automation for capturing lead details. Click on the ‘Add Trigger’ button to start the process.

  • Select ’99 Acres’ as the trigger application.
  • Choose the event as ‘New Lead’.
  • Click on ‘Connect’ to generate a webhook URL.

After generating the webhook URL, you will need to configure it in your 99 Acres account. Contact your account manager to add this URL, as the platform does not allow direct user interface updates. Once activated, any new lead details will be sent to Pabbly Connect.


3. Capturing Lead Details with Pabbly Connect

After configuring the webhook, Pabbly Connect will automatically capture lead details such as first name, last name, phone number, email, and area. You can view these details as the webhook response in your workflow.

Next, you will want to add these captured details to your Google Sheets. Click on ‘Add New Action Step’ and select ‘Google Sheets’ as the action application. For the event, choose ‘Add New Row’ and click on ‘Connect’.


4. Connecting Google Sheets to Pabbly Connect

To establish a connection between Google Sheets and Pabbly Connect, you will need to sign in with your Google account. If you have already created a connection, simply select it from the existing connections.

  • Select your Google account and grant the necessary permissions.
  • Choose the spreadsheet named ‘Lead Details’.
  • Select the sheet named ‘Details’.

After selecting your spreadsheet and sheet, the columns will appear. You can now map the lead details from the previous step to the respective columns in Google Sheets, making the data dynamic and automatically updated with each new lead.


5. Finalizing and Testing Your Setup

Once you have mapped all the lead details, click on ‘Save and Send Test Request’. This action will send a test entry to your Google Sheets. You should receive a positive response indicating successful data addition.

After testing, open your Google Sheets to verify that the lead details have been accurately added. With this setup, every new lead captured from 99 Acres will automatically populate your Google Sheets, streamlining your lead management process through Pabbly Connect.


Conclusion

In conclusion, using Pabbly Connect to add real estate lead details to your database is an efficient way to manage leads. This tutorial walks you through accessing Pabbly Connect, creating workflows, and integrating Google Sheets to automate your lead management.

Ensure you check out Pabbly Connect to create business automation workflows and reduce manual tasks. Pabbly Connect currently offer integration with 2,000+ applications.

Create an AI Agent for Tech Code Business – Automate Debugging, Fixing & Running Code

Learn how to create an AI agent for tech code business using Pabbly Connect and Pabbly Connect to automate debugging and running code efficiently. Develop expertise in application integration and learn how to design streamlined automation workflows using proven, simplified approaches.

Watch Step By Step Video Tutorial Below


1. Accessing Pabbly Connect to Create Your AI Agent

To create an AI agent for your tech code business, the first step is to access Pabbly Connect. You can do this by visiting the Pabbly website and navigating to the Pabbly Connect section. This automation platform is essential for integrating various applications, including WhatsApp and Google services.

Once on the Pabbly Connect page, you can sign in or sign up for a new account. Existing users should click ‘Sign In’, while new users can click ‘Sign Up for Free’ to get started. After signing in, you will have access to all the features needed to automate your processes effectively.


2. Setting Up Pabbly Chatflow for WhatsApp Automation

After accessing Pabbly Connect, the next step is to set up Pabbly Chatflow for automating your WhatsApp communications. Navigate to the Chatflow section and add your WhatsApp number by clicking on ‘Add WhatsApp Number’. This step is crucial for linking your WhatsApp account with the automation tools provided by Pabbly.

  • Click on ‘Connect WhatsApp’ to initiate the integration.
  • Follow the instructions to link your WhatsApp account using a manual token.
  • Ensure that your WhatsApp is properly connected to utilize the automation features.

Once your WhatsApp is connected, you can begin creating your AI agent. This integration allows you to automate responses to queries received on WhatsApp, significantly reducing manual effort and improving response time.


3. Creating Your AI Agent in Pabbly Chatflow

To create your AI agent, return to the Pabbly Chatflow dashboard and navigate to the AI Assistant section. Here, click on ‘Add Assistant’ and name your AI agent, for example, ‘Tech Code AI’. This step is critical as it sets the foundation for automating responses to customer queries. using Pabbly Connect

Next, configure your AI agent by selecting the instruction type as ‘AI Agent’. You can enhance the default instructions to meet your specific business needs. Set the creativity level of responses by adjusting the temperature parameter, with a value of 0.7 for balanced responses. This customization is vital for ensuring that your AI agent communicates effectively.

  • Upload your OpenAI API key to enable advanced AI capabilities.
  • Add a fallback message for situations when the AI cannot respond appropriately.
  • Configure the AI assistant settings, including header and footer messages.

This configuration is essential for your AI agent to function correctly, providing users with accurate and helpful responses based on their queries.


4. Configuring Knowledge Source for Your AI Agent

To ensure your AI agent provides relevant answers, you need to configure its knowledge source. This can be done by uploading a file that contains the information your AI agent will use to respond to queries. Navigate to the knowledge source section in Pabbly Connect and select ‘Upload File’.

Prepare a document containing all necessary information about your business and the types of queries your AI can handle. This document should include:

Business identity and positioning. Types of queries the AI can handle. Mandatory response frameworks for the AI agent.

Once the document is uploaded, your AI agent will be better equipped to provide accurate responses, enhancing user experience and satisfaction.


5. Testing and Activating Your AI Agent

With your AI agent configured and its knowledge source set, the final step is to test and activate the agent. Send a test message via WhatsApp to see how the AI agent responds. For example, you could ask, ‘What could be the possible reason for this code throwing an exception?’.

If the AI agent is functioning correctly, it should prompt you for additional details to help narrow down the issue. This interaction verifies that your AI agent can handle queries effectively without human intervention. Once testing is complete, toggle the activation button for your AI agent in Pabbly Connect.

After activation, you can assign the AI agent to specific contact groups or to all contacts through the inbox settings. This step ensures that your AI agent is ready to assist customers efficiently, automating responses and improving service delivery.


Conclusion

In conclusion, using Pabbly Connect and Pabbly Chatflow allows you to create an AI agent that automates debugging and running code queries effectively. By following the steps outlined, you can enhance your tech code business’s efficiency and customer satisfaction.

Ensure you check out Pabbly Connect to create business automation workflows and reduce manual tasks. Pabbly Connect currently offer integration with 2,000+ applications.

How to Send Real-Time Notifications Automatically

Learn how to send real-time notifications automatically using Pabbly Connect to integrate Google Ads and Slack effectively. Follow this definitive guide to creating powerful automated workflows with straightforward, efficiency-focused solutions that save valuable time.

Watch Step By Step Video Tutorial Below


1. Accessing Pabbly Connect for Automation

To start sending real-time notifications automatically, you need to access Pabbly Connect. Open your browser and navigate to Pabbly.com/connect. This will take you to the Pabbly Connect homepage, where you can either sign in or sign up for a free account.

If you are new to Pabbly Connect, click on the ‘Sign Up Free’ button to create your account. This gives you access to 100 free tasks every month. Existing users can simply sign in to their accounts. Once logged in, you will see the Pabbly apps window; click on ‘Access Now’ to enter the Pabbly Connect dashboard.


2. Creating a Workflow in Pabbly Connect

After accessing Pabbly Connect, the next step is to create a workflow. Click on the ‘Create Workflow’ button. You will then be prompted to select between the new beta version and the classic version of the workflow builder. For this tutorial, we will use the beta version.

  • Click on ‘Select’ to proceed with the beta version.
  • In the dialog box that appears, name your workflow, ‘Send Real-Time Notifications Automatically’.
  • Choose the appropriate folder from the dropdown menu, like ‘Automations’.

Click on the ‘Create’ button to finalize your workflow setup. You have now established a basic framework that will handle your automation.


3. Setting Up the Trigger with Google Ads

The next step in using Pabbly Connect is to set up the trigger. For this automation, the trigger will be Google Ads, specifically a new lead form entry. Select Google Ads as your trigger application.

Once selected, you will need to choose the event as ‘New Lead Form Entry’. Click on the ‘Connect’ button to generate a webhook URL. This URL is crucial for linking Google Ads to your Pabbly Connect workflow.

  • Copy the webhook URL provided by Pabbly Connect.
  • Log in to your Google Ads account and navigate to your lead form settings.
  • Under Lead Delivery, paste the copied webhook URL and set the key as ‘test’.

After setting the webhook, send test data to ensure the connection works. You should see the details appear in your Pabbly Connect workflow, confirming successful setup.


4. Adding Action Step to Send Notifications via Slack

With the trigger set, the next step in your Pabbly Connect workflow is to add an action step. Here, you will select Slack as the action application and choose ‘Send Channel Message’ as the event.

Click on ‘Connect’ and select to add a new connection. You will need to authorize Pabbly Connect to access your Slack account. Choose the token type as ‘User’ and click on ‘Save’ to connect successfully.

Select the channel where you want to send notifications, e.g., ‘Sales Team’. Compose the message you want to send, including dynamic fields like name, email, and phone number. Map the relevant data from the trigger step to personalize the message.

Once the message is set up, click on ‘Save and Send Test Request’. You should see a successful response indicating that the notification has been sent to your Slack channel.


5. Finalizing Your Automation Workflow

Now that you have set up both the trigger and action steps in Pabbly Connect, it’s time to finalize your automation. You can review the entire workflow to ensure everything is configured correctly.

To summarize, you have configured Google Ads as the trigger and Slack as the action application. Whenever a new lead is generated through Google Ads, a notification is automatically sent to your Slack channel with all relevant lead details.

Test your workflow by submitting a new lead through Google Ads. Check your Slack channel to confirm that the notification appears as expected. This ensures that your setup is functioning properly and you can receive real-time notifications automatically.


Conclusion

In this tutorial, we demonstrated how to send real-time notifications automatically using Pabbly Connect to integrate Google Ads and Slack. By following the steps outlined, you can ensure your team is promptly notified of new leads, enhancing your response efficiency.

Ensure you check out Pabbly Connect to create business automation workflows and reduce manual tasks. Pabbly Connect currently offer integration with 2,000+ applications.

Utilizing Pabbly Connect streamlines this process, allowing for seamless communication and lead management. Start automating your notifications today to improve your business operations!

Broadcast WhatsApp Alerts to Reduce Customer Churn in Subscriptions

Learn how to use Pabbly Chatflow to broadcast WhatsApp alerts, reducing customer churn in subscriptions with this detailed step-by-step tutorial. Master conversational marketing with practical techniques for creating chatbots that engage visitors at exactly the right moment in their journey.

Watch Step By Step Video Tutorial Below


1. Accessing Pabbly Chatflow for WhatsApp Broadcasts

To start broadcasting WhatsApp alerts to reduce customer churn, you need to access Pabbly Chatflow. First, open a new tab and navigate to Pabbly.com/chatflow. This will take you to the Pabbly Chatflow landing page.

On the landing page, you will find options to either sign in or sign up. If you are a new user, click on the sign up free button to create your account. Once registered, you will receive 100 free credits monthly to explore the features of Pabbly Chatflow. Existing users should simply click on the sign in button to access their dashboard.


2. Adding Your WhatsApp Number in Pabbly Chatflow

After accessing your Pabbly Chatflow dashboard, the next step is to add your WhatsApp number. This is essential for sending broadcast messages. Click on the button that allows you to add your WhatsApp number and choose between the WhatsApp connect method or the manual token connect method.

  • Select the WhatsApp connect method for a seamless integration.
  • Alternatively, use the manual token method if you prefer.

Once your WhatsApp number is added successfully, you can proceed to create your broadcast. This is done by selecting the broadcast option from the left sidebar in Pabbly Chatflow.


3. Creating a WhatsApp Broadcast in Pabbly Chatflow

To create a WhatsApp broadcast, click on the add broadcast button located at the top right corner of the broadcast page in Pabbly Chatflow. Here, you will define your broadcast type, name, and select the contact list to which you want to send the alerts.

  • Choose the broadcast type, such as a broadcast campaign.
  • Enter a name for your broadcast, such as ‘Broadcast Alert to Reduce Customer Churn’.
  • Select the appropriate contact list for your broadcast.

Once you have filled in these details, you can proceed to select the message type for your broadcast. This could be a pre-approved template message or a regular message, depending on your needs.


4. Selecting Message Template for Your Broadcast

When creating your broadcast in Pabbly Chatflow, you will need to select a message template. You can opt for a pre-approved template, which requires prior approval from Meta, or you can use a regular message option. The regular message can only be sent to users who have interacted with you in the last 24 hours.

For this tutorial, let’s assume you have already created and approved your template. Click on the button to select your pre-approved template. Ensure that you use dynamic fields in your message to personalize the alerts sent to your users, such as including their names or specific plan details.


5. Scheduling and Sending Your WhatsApp Broadcast

After finalizing your message template in Pabbly Chatflow, you have the option to send the broadcast immediately or schedule it for later. If you choose to schedule it, select the desired date and time from the calendar interface provided.

Once you’ve set the schedule, click on the add broadcast button to confirm your broadcast schedule. Your WhatsApp alert will then be queued for sending at the specified time, helping to reduce customer churn effectively.


Conclusion

Using Pabbly Chatflow to broadcast WhatsApp alerts can significantly reduce customer churn in subscription businesses. By following the steps outlined in this tutorial, you can effectively engage your users and remind them of renewals and benefits.

Ensure you check out Pabbly Connect to create business automation workflows and reduce manual tasks. Pabbly Connect currently offer integration with 2,000+ applications.

Automate Customer Communication Using WhatsApp

Learn how to automate customer communication on WhatsApp using Pabbly Chatflow. Step-by-step tutorial for seamless integration with YouTube and Google. Explore how leading businesses automate customer interactions with carefully designed chat sequences that feel natural and helpful.

Watch Step By Step Video Tutorial Below


1. Accessing Pabbly Chatflow for WhatsApp Automation

To automate customer communication using WhatsApp, you need to access Pabbly Chatflow. Start by visiting the Pabbly website and signing in or signing up for a free account. This platform is designed to streamline your communication processes.

Once you are logged in, navigate to the Pabbly Chatflow dashboard. From here, you can start creating your WhatsApp communication agent. This agent will help you manage customer inquiries efficiently without coding.


2. Connecting Your WhatsApp Number in Pabbly Chatflow

After accessing Pabbly Chatflow, the next step is to connect your WhatsApp number. Click on the ‘Add WhatsApp Number’ option on the dashboard. You will see two options: WhatsApp Connect and Manual Token Connect.

  • Choose WhatsApp Connect for easier integration.
  • Follow the prompts to link your WhatsApp account securely.
  • Ensure you have your WhatsApp Business number ready for this process.

Once your number is connected, Pabbly Chatflow allows you to set up various automation features that will enhance your customer communication experience.


3. Creating Your WhatsApp Communication Agent

With your WhatsApp number connected, you can now create a WhatsApp communication agent using Pabbly Chatflow. Click on the ‘Add’ button to start the process. You will need to name your assistant and select the type of agent you want to create.

For this tutorial, select the AI Agent option. This will enable your assistant to respond to customer queries automatically. After naming your agent, click on the ‘Add’ button to proceed to the flow window, where you can configure your agent’s responses.


4. Configuring Your AI Assistant with Pabbly Chatflow

In the flow window of Pabbly Chatflow, configure your AI assistant’s settings. Start by selecting the instruction type from the dropdown menu. Choose ‘Custom Prompt’ to set specific responses for different customer queries.

  • Set the temperature for response creativity.
  • Add your OpenAI API key to facilitate AI responses.
  • Define the header and footer messages to personalize customer interaction.

After configuring these settings, remember to save your changes. This setup will ensure that your WhatsApp agent can handle customer inquiries effectively.


5. Activating Your WhatsApp Agent in Pabbly Chatflow

To finalize your setup, you must activate your WhatsApp agent. In Pabbly Chatflow, enable the agent by clicking the activation button. After activation, your agent will be ready to respond to customer messages on WhatsApp.

Additionally, you can assign this agent to multiple WhatsApp contacts or specific chats. This feature allows for a more personalized customer service experience. Make sure to save your settings to ensure everything is configured properly.


Conclusion

Automating customer communication using WhatsApp with Pabbly Chatflow is a straightforward process. By following these steps, you can create an efficient communication system that enhances customer interactions. Start automating today to improve your business communications.

Ensure you check out Pabbly Connect to create business automation workflows and reduce manual tasks. Pabbly Connect currently offer integration with 2,000+ applications.

My System to Monetize Repeat Leads Using WhatsApp

Learn how to monetize repeat leads using Pabbly Connect and WhatsApp with this step-by-step tutorial. Build sophisticated automated workflows in less time than you think. This guide translates complex integrations into straightforward steps for immediate implementation.

Watch Step By Step Video Tutorial Below


1. Accessing Pabbly Connect for Automation

To start automating your lead management, first, access Pabbly Connect by navigating to pabby.com/connect. This platform allows you to create workflows that integrate various applications seamlessly.

If you are new to Pabbly Connect, click on the ‘Sign Up Free’ button to create your account. Existing users can simply log in. Once logged in, you will have access to a dashboard where you can create your workflows.


2. Creating Your Workflow in Pabbly Connect

After accessing your Pabbly Connect dashboard, click on the ‘Create Workflow’ button. You will be prompted to choose between the new beta version and the classic version of the workflow builder. Select the new beta version for a more modern experience.

  • Enter a meaningful name for your workflow, such as ‘WhatsApp Custom Offers for Repeat Leads’.
  • Choose a folder to save your workflow for better organization.
  • Click the ‘Create’ button to finalize your workflow setup.

Now you can start adding triggers and actions to your workflow using Pabbly Connect. This is where the automation magic begins.


3. Setting Up Triggers for New Leads

In this step, you will set up a trigger to capture new leads. Select the application that will trigger the workflow when a new lead is added, such as your landing page form. Choose the ‘New Lead from Landing Page’ event from the dropdown menu.

Next, connect your landing page application to Pabbly Connect by following the instructions to set up a webhook. Copy the webhook URL provided and paste it into your landing page settings to ensure that new leads trigger the workflow.


4. Action Steps Integration with Google Sheets and WhatsApp

Once your trigger is set up, the next step involves integrating Google Sheets to check for existing leads. In the action steps, select Google Sheets and choose the ‘Lookup Spreadsheet Rows’ event to verify if the lead is already in your database.

  • Connect your Google Sheets account to Pabbly Connect.
  • Map the phone number field to check for existing records.
  • Save and test the connection to ensure it works correctly.

If the lead exists, proceed to send a customized WhatsApp message using the WhatsApp integration within Pabbly Connect. If the lead is new, add their details to Google Sheets and send a welcome message.


5. Finalizing Your Workflow

After setting up all the necessary actions, review your workflow in Pabbly Connect. Ensure that the routing conditions are correctly configured to handle both new and repeat leads effectively.

Once everything is in place, test the entire workflow by submitting a lead through your landing page. Verify that the appropriate messages are sent via WhatsApp and that the lead details are stored correctly in Google Sheets.


Conclusion

Using Pabbly Connect, you can easily automate your lead management process and enhance customer engagement through WhatsApp. This tutorial has guided you through the steps to set up your own automated workflow, ensuring you never miss an opportunity with your leads.

Ensure you check out Pabbly Connect to create business automation workflows and reduce manual tasks. Pabbly Connect currently offer integration with 2,000+ applications.

How to Automate Repetitive Tasks & Save Hours Daily

Learn how to automate repetitive tasks and save hours daily using Pabbly Connect. Step-by-step guide to integrate LinkedIn and Google Sheets. Explore efficient methods for automating routine tasks with clear, concise instructions suited for both newcomers and experienced professionals.

Watch Step By Step Video Tutorial Below


1. Accessing Pabbly Connect for Automation

To automate repetitive tasks and save hours daily, the first step is to access Pabbly Connect. Open your browser and navigate to Pabbly.com/connect. This will take you to the Pabbly Connect homepage where you can either sign in or sign up for free.

If you are a new user, click on the ‘Sign Up Free’ button to create an account and receive 100 free tasks each month. Existing users can simply sign in. Once logged in, you will find all Pabbly applications. Click on ‘Access Now’ to enter the Pabbly Connect dashboard.


2. Creating a Workflow in Pabbly Connect

Once you’re in the Pabbly Connect dashboard, the next step is to create a workflow. Click on the ‘Create Workflow’ button. Here, you will have options for the workflow builder, including a new beta version and classic version. For this tutorial, select the beta version for a more modern experience. using Pabbly Connect

  • Click on ‘Select’ to proceed with the beta version.
  • Name your workflow, for example, ‘Automate Repetitive Tasks and Save Hours Daily’.
  • Choose a folder for your workflow, like ‘Automations’.

Finally, click the ‘Create’ button to finalize your workflow setup. You will now see your workflow ready for the next steps, where you will set up triggers and actions.


3. Setting Up Triggers in Pabbly Connect

The automation process in Pabbly Connect relies on triggers and actions. For this integration, select LinkedIn as your trigger application and specify the event as ‘Lead Notifications’. Click on ‘Connect’ to build a new connection.

When prompted, select ‘Add a New Connection’ and sign in to your LinkedIn account. Make sure to allow Pabbly Connect access to your LinkedIn account. After connection, choose your sponsored account from the drop-down menu and click ‘Save and Send Test Request’.

  • Generate a test lead using your LinkedIn lead ad campaign.
  • Submit the test lead form with necessary details.

Once the test lead is generated, you will receive a successful response in Pabbly Connect, confirming that your trigger is set up correctly.


4. Adding Actions in Pabbly Connect

After successfully setting up your trigger, it’s time to add an action in Pabbly Connect. Select Google Sheets as your action application and choose the event ‘Add a New Row’. Click on ‘Connect’ to proceed with the setup.

Similar to the trigger setup, select ‘Add a New Connection’ and sign in with your Google account. Allow Pabbly Connect to access your Google Sheets. Once connected, select your spreadsheet named ‘Leads’ and the specific sheet where you want the data to be added.

Map the fields from the LinkedIn lead to your Google Sheets. Include name, email, phone number, and company name in the mapping.

After mapping the required fields, click ‘Save and Send Test Request’. Check your Google Sheets to confirm that the new lead details have been successfully added as a new row.


5. Finalizing the Automation Process

With the trigger and action set up, you have successfully automated the process of adding new leads from LinkedIn to Google Sheets using Pabbly Connect. This integration will save you hours daily by eliminating manual data entry.

To summarize the steps: you selected LinkedIn as the trigger application and Google Sheets as the action application. When a new lead is received through LinkedIn ads, the lead details are automatically added to Google Sheets as a new row.

Now you can replicate this process to automate other repetitive tasks and save time in your daily operations. Explore more features of Pabbly Connect to enhance your business automation.


Conclusion

In this tutorial, we explored how to automate repetitive tasks and save hours daily using Pabbly Connect. By integrating LinkedIn and Google Sheets, you can streamline your lead management process efficiently. Start utilizing Pabbly Connect today to enhance your productivity and automate your workflows.

Ensure you check out Pabbly Connect to create business automation workflows and reduce manual tasks. Pabbly Connect currently offer integration with 2,000+ applications.

Automated Follow-Up Chatbot That Recover 30% More Unpaid Invoices

Learn how to create an automated follow-up chatbot with Pabbly Chatflow to recover 30% more unpaid invoices. Step-by-step tutorial included. Learn how to create intelligent chat workflows that provide instant customer support while qualifying leads 24/7 without human intervention.

Watch Step By Step Video Tutorial Below


1. Accessing Pabbly Chatflow for Your Chatbot

To create an automated follow-up chatbot that recovers unpaid invoices, you first need to access Pabbly Chatflow. Visit the official website and click on the ‘Sign Up Free’ button if you are a new user, or ‘Sign In’ if you already have an account.

Once logged in, navigate to the dashboard where you can access all Pabbly applications. Click on the ‘Access Now’ button under Pabbly Chatflow to start creating your chatbot for invoice follow-ups.


2. Creating Your Chatbot Flow in Pabbly Chatflow

Inside Pabbly Chatflow, you’ll need to create a new flow for your WhatsApp chatbot. Click on the ‘Add Flow’ button and name your chatbot, such as ‘Invoice Payment Response Bot’. This name will help you identify your flow later.

  • Select a trigger event for your chatbot.
  • Choose ‘WhatsApp Template Delivered’ as the trigger.
  • Select the specific template you created for payment reminders.

After setting up the trigger, you can start adding actions that will follow the template delivery. This is crucial for automating the follow-up process with your customers.


3. Setting Up Reminder Templates in Pabbly Chatflow

In this step, you will configure the reminder messages that will be sent to customers who have not paid their invoices. Using Pabbly Chatflow, you can add a delay of 3 days after the initial template is sent.

  • Drag the delay action into your flow and set it to 3 days.
  • Add the second reminder template, ensuring it is dynamic and includes the customer’s name and invoice link.

After the second reminder, you can set another delay of 1 day before sending a final notice. This structured approach ensures that customers receive timely reminders without feeling overwhelmed.


4. Testing Your Automated Follow-Up Chatbot

Once you have configured your chatbot flow in Pabbly Chatflow, it’s essential to test its functionality. Start by sending the initial template to your WhatsApp account and monitor the responses.

Check if the follow-up messages are sent according to the delays you set. For instance, if you configured a 3-day delay, ensure that the second reminder arrives as expected. This testing phase is critical to confirm that your chatbot is functioning correctly.


5. Conclusion

By following these steps, you can effectively set up an automated follow-up chatbot using Pabbly Chatflow to recover unpaid invoices. This system not only saves time but also enhances your business’s cash flow by ensuring timely reminders are sent to customers.

Ensure you check out Pabbly Connect to create business automation workflows and reduce manual tasks. Pabbly Connect currently offer integration with 2,000+ applications.

Implementing this chatbot will help you recover more unpaid invoices while providing a seamless experience for your customers. Start automating today with Pabbly Chatflow and see the difference it makes in your invoicing process.


Build a No-Code WhatsApp Bot Step by Step

Learn how to build a no-code WhatsApp bot step by step using Pabbly Connect and Pabbly Connect. Automate your business communication effectively. Master proven automation processes with practical implementation examples and strategic recommendations you can apply immediately in your workflow.

Watch Step By Step Video Tutorial Below


1. Introduction to Pabbly Connect and Chatflow

Pabbly Connect is a powerful automation tool that simplifies the process of creating a no-code WhatsApp bot. In this section, we will explore how to access Pabbly Connect and set up your account to begin building your WhatsApp bot. Start by visiting the Pabbly Connect website and signing up for a free account to get started.

Once you have created your account, navigate to the Pabbly Chatflow section. This is where you will manage your WhatsApp automation. Pabbly Chatflow allows you to create automated responses, manage user interactions, and streamline your business communication. With its user-friendly interface, you can easily set up your WhatsApp bot without any coding experience.


2. Creating Your WhatsApp Bot Using Pabbly Connect

To create your WhatsApp bot, log in to your Pabbly Connect account and access the Pabbly Chatflow dashboard. From here, you can add your WhatsApp number by clicking the ‘Add WhatsApp Number’ button. This integration is essential for ensuring that your bot can send and receive messages through WhatsApp. using Pabbly Connect

  • Click on the ‘Add WhatsApp Number’ button.
  • Follow the prompts to verify your WhatsApp account.
  • Once verified, your WhatsApp number will be linked to Pabbly Chatflow.

After adding your WhatsApp number, you can start creating your bot flow. Use the ‘Create Flow’ button to begin designing your bot’s responses and actions. This is where you will define how your bot interacts with users based on their messages, ensuring a seamless communication experience.


3. Configuring Your Bot Flow with Pabbly Connect

Now that your WhatsApp number is integrated, it’s time to configure the bot flow using Pabbly Connect. Begin by naming your flow, such as ‘WhatsApp Business Automation’. This name will help you identify your flow later. Next, select the trigger for your bot, which is typically a keyword that users will send to initiate the conversation.

For instance, you can set the trigger keywords as ‘hi’ and ‘hello’. These keywords will activate the bot whenever they are sent by a user. After setting the keywords, create a welcome message that the bot will send in response. This message could be something like, ‘Hello, welcome to Cloud Nova SAS Solutions! How may I assist you today?’

  • Create a welcome message for the user.
  • Add quick reply buttons for options like ‘View Services’ and ‘Contact Support’.
  • Link the trigger to the welcome message.

By following these steps, you ensure that your bot is ready to engage users effectively right from their first interaction. The automation provided by Pabbly Connect allows for a smooth user experience, enhancing customer satisfaction.


4. Dynamic Responses and User Input with Pabbly Connect

Once your bot flow is set up, the next step is to configure dynamic responses based on user input. This is where Pabbly Connect shines by allowing you to collect and utilize user data effectively. For example, when a user selects a service type, you can ask them for their full name and project details.

Add input fields to capture this information. For instance, prompt the user with, ‘May I know your full name, please?’ and store this input in a custom field. This customization makes your bot responses more personal and relevant. You can also set up additional questions to gather project information and service needs.

Ask users for their project name and service requirements. Store responses in custom fields for dynamic replies. Ensure the bot confirms receipt of their inquiry with personalized messages.

This approach not only automates responses but also builds a connection with users, making them feel valued. The integration of Pabbly Connect allows for these personalized interactions seamlessly.


5. Finalizing Your WhatsApp Bot with Pabbly Connect

After configuring all the necessary flows and responses, it’s crucial to finalize your WhatsApp bot setup. Review all the elements of your flow in Pabbly Connect to ensure everything is functioning as intended. Make sure to save your flow to avoid losing any progress.

Once saved, test your bot by sending the trigger keywords from your WhatsApp account. The bot should respond according to the configurations you’ve set, providing a seamless user experience. If any adjustments are needed, revisit the flow in Pabbly Chatflow and make the necessary changes.

With your WhatsApp bot fully operational, you can now automate customer interactions effectively. This setup not only saves time but also enhances customer engagement and satisfaction.


Conclusion

Building a no-code WhatsApp bot using Pabbly Connect and Pabbly Chatflow is a straightforward process that can significantly improve your business communication. By following the steps outlined in this tutorial, you can create a dynamic, responsive bot that engages customers and automates interactions effectively.

Ensure you check out Pabbly Connect to create business automation workflows and reduce manual tasks. Pabbly Connect currently offer integration with 2,000+ applications.