Gemini AI Created My Food Blog Content in Minutes!

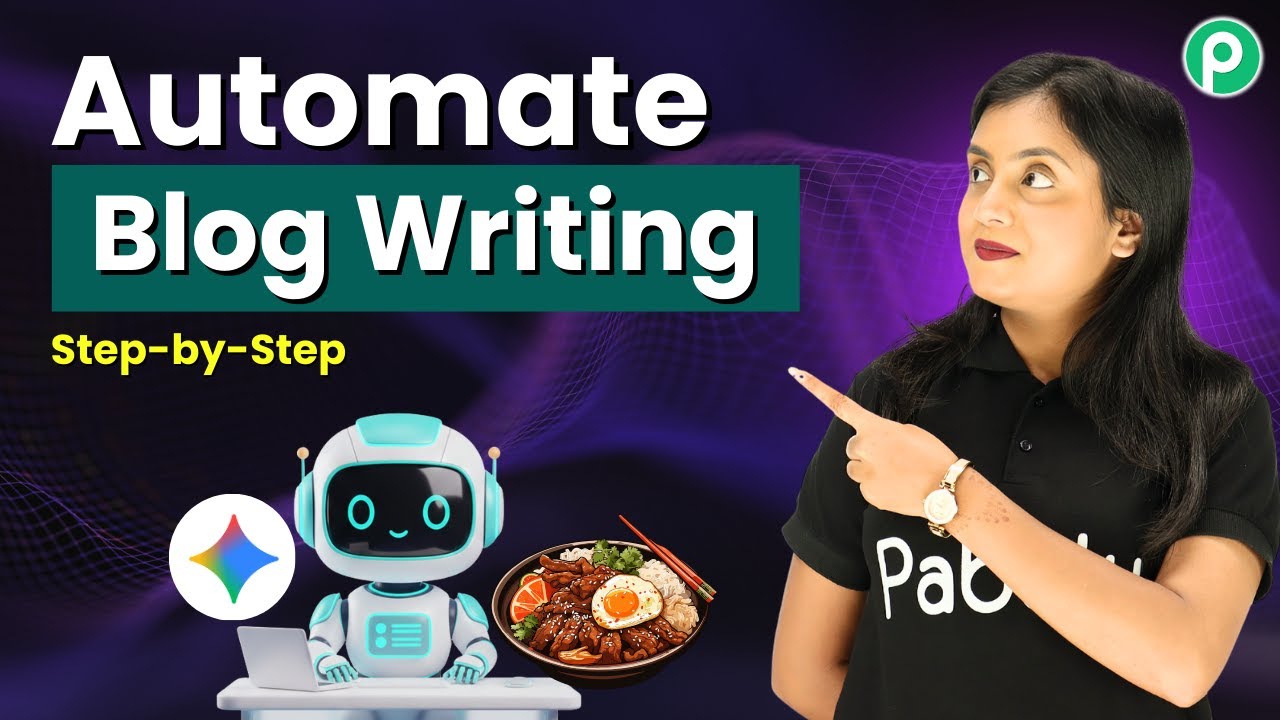
Learn how to automate your food blog content creation using Pabbly Connect with Google Sheets and Google Blogger in this detailed tutorial. Follow this definitive guide to creating powerful automated workflows with straightforward, efficiency-focused solutions that save valuable time.

Watch Step By Step Video Tutorial Below


1. Accessing Pabbly Connect for Your Food Blog

To start automating your food blog content, first, access Pabbly Connect. This platform is essential for integrating various applications like Google Sheets and Google Blogger.

Visit the Pabbly Connect website and sign in or sign up for a free account. New users can enjoy 100 free tasks every month, allowing you to explore the features of Pabbly Connect without any cost.


2. Setting Up Google Sheets with Pabbly Connect

After signing into Pabbly Connect, create a new workflow. The first step is to set up Google Sheets as your trigger application. This means that whenever you add a new recipe ID to your spreadsheet, it will automatically trigger actions in other apps.

  • Select Google Sheets as your trigger application.
  • Choose the event as ‘New or Updated Spreadsheet Row’.
  • Click on the connect button to generate a webhook URL.

Copy the webhook URL and set it up in your Google Sheets by using the Pabbly Connect add-on. This will allow the data from your Google Sheets to be sent to Pabbly Connect whenever a new recipe is added.


3. Generating Content Using Google Gemini

Once the Google Sheets integration is complete, the next step is to generate content using Google Gemini through Pabbly Connect. This involves setting up Google AI Studio as the action application.

To do this, add a new action step and select Google AI Studio. You will need to connect this application to Pabbly Connect by providing your API key. Follow the prompts to create or use an existing API key from Google AI Studio.

  • Set the event to ‘Generate Content’.
  • Input a prompt that specifies the type of content you want Gemini to generate.
  • Map the data from the previous step to personalize the content.

Once configured, this setup allows you to generate a structured food blog post based on the recipe details provided in Google Sheets, all thanks to Pabbly Connect.


4. Creating a Blog Post in Google Blogger

With the content generated, the next step is to create a blog post in Google Blogger using Pabbly Connect. Add another action step and select Google Blogger as your application.

Connect your Google Blogger account to Pabbly Connect by signing in and granting necessary permissions. Select the blog ID where you want to publish the content, and map the title and content generated by Google Gemini to the respective fields.

Set the status of the post to ‘Draft’ for review before publishing. Click on the send test request button to create the draft post.

This integration ensures that your food blog content is automatically published as a draft in Google Blogger, ready for your review, thanks to the seamless functionality of Pabbly Connect.


5. Updating Google Sheets with the Post Status

After successfully creating a blog post, it’s important to update your Google Sheets to reflect the new status of the blog post. This can be done by adding another action step in your Pabbly Connect workflow.

Select Google Sheets again and set the event to ‘Update Row’. Map the necessary fields to ensure that the status of the blog post is updated to ‘Published’ or ‘Draft’ as per your preference.

By implementing this last step, you maintain an organized workflow and keep track of your content status directly in Google Sheets. The entire process demonstrates the power of Pabbly Connect in automating your food blog creation.


Conclusion

By following these steps, you can automate the process of creating food blog content using Pabbly Connect, Google Sheets, and Google Blogger. This integration not only saves time but also enhances your content creation efficiency, allowing you to focus on what you love most—cooking and sharing recipes!

Ensure you check out Pabbly Connect to create business automation workflows and reduce manual tasks. Pabbly Connect currently offer integration with 2,000+ applications.

Smart WhatsApp Order Assistant for Restaurants That Predicts What Customers Want

Learn how to build a Smart WhatsApp Order Assistant for Restaurants using Pabbly Chatflow. Step-by-step guide to integrate and optimize your order process. Implement professional chat automation that answers common questions, qualifies leads, and books appointments without human intervention.

Watch Step By Step Video Tutorial Below


1. Accessing Pabbly Chatflow to Create Your Assistant

To create a Smart WhatsApp Order Assistant for restaurants, first, you need to access Pabbly Chatflow. Open a new tab and navigate to Pabbly.com/chatflow. This will direct you to the Pabbly Chatflow landing page.

On the top right corner, you will see options to ‘Sign In’ or ‘Sign Up Free.’ If you are a new user, click on ‘Sign Up Free’ to create your account. With your account, you will receive 100 free credits monthly to explore Pabbly Chatflow.


2. Setting Up Your WhatsApp Number in Pabbly Chatflow

After logging into Pabbly Chatflow, the next step is to add your WhatsApp number. Click on the ‘Add WhatsApp Number’ button located on the right side of the dashboard. You have two methods to add your number.

  • Select your preferred method for adding your WhatsApp number.
  • Ensure your number is verified for seamless integration.

Once added, you can proceed to create your AI assistant by clicking on the ‘AI Assistant’ feature from the left column of the dashboard. This allows you to manage and configure your assistant settings.


3. Creating Your Smart WhatsApp Order Assistant

To create your Smart WhatsApp Order Assistant, click on the ‘Add Assistant’ button. Name your assistant, for example, ‘Smart WhatsApp Order Assistant,’ and then click on ‘Add Assistant’ to begin. using Pabbly Connect

Now, you will work through four simple steps: AI Instructions, Knowledge Source, Assistant Interface, and Styling. Start with AI Instructions by selecting ‘AI Agent’ from the dropdown menu. Here, you can customize the assistant’s response style and parameters.

  • Set the temperature for creativity, default is 0.5.
  • Select the AI model, such as GPT 5.2.
  • Enter your OpenAI API key to connect.

After configuring these settings, you can proceed to the next steps of uploading your knowledge base and designing the assistant interface.


4. Integrating WhatsApp Chatbot with Pabbly Chatflow

To integrate your WhatsApp chatbot, navigate to the ‘Flows’ section within Pabbly Chatflow. Click on ‘Add Flow’ to create your WhatsApp chatbot. Name it appropriately, such as ‘Smart WhatsApp Order Assistant for Restaurants.’

For the trigger event, select ‘Keyword Match’ and enter the keyword ‘hungry’. Press enter to confirm. This keyword will trigger the chatbot when a customer sends it via WhatsApp.

Add an action step to assign the AI assistant. Select the AI assistant you created earlier. Choose to send a welcome message to customers.

After setting up these actions, save your chatbot to ensure it functions correctly. You can now test the chatbot by sending the keyword ‘hungry’ in WhatsApp.


5. Testing Your Smart WhatsApp Order Assistant

To test your Smart WhatsApp Order Assistant, open your WhatsApp account and send the keyword ‘hungry.’ The chatbot should be triggered instantly, sending a welcome message to your chat.

This confirms that your AI assistant is functioning properly. Customers will now receive guided assistance in selecting their food orders based on their preferences.

With Pabbly Chatflow, you have successfully created an efficient Smart WhatsApp Order Assistant, enhancing customer experience in your restaurant.


Conclusion

In conclusion, using Pabbly Chatflow, you can create a Smart WhatsApp Order Assistant that significantly improves the ordering process for restaurants. This tutorial has guided you through each step, ensuring an effective setup.

Ensure you check out Pabbly Connect to create business automation workflows and reduce manual tasks. Pabbly Connect currently offer integration with 2,000+ applications.

How to Create WhatsApp AI Agent for Grocery & Hyperlocal Delivery

Learn how to create a WhatsApp AI agent for grocery and hyperlocal delivery using Pabbly Chatflow. Step-by-step guide to setup and integration. Discover practical methods for designing chat sequences that capture leads, answer questions, and guide users to the next step in your funnel.

Watch Step By Step Video Tutorial Below


1. Accessing Pabbly Chatflow for Integration

To create a WhatsApp AI agent for grocery and hyperlocal delivery, start by accessing Pabbly Chatflow. Open your browser and navigate to www.Pabbly.com/chatflow. Once there, sign in to your account. If you are a new user, click on the ‘Sign up for free’ option to receive 100 free credits each month, allowing you to explore the platform.

After logging in, you will see the Pabbly applications dashboard. Click on Pabbly Chatflow to access the main interface. Here, you can manage your WhatsApp number and start creating your AI agent. Make sure to connect your WhatsApp number by selecting the ‘Add WhatsApp Number’ option, which is crucial for facilitating communication through the AI agent.


2. Creating Your AI Agent in Pabbly Chatflow

Next, you will create your AI agent using Pabbly Chatflow. On the left sidebar, find the option labeled ‘AI Assistant’ and click on it. To begin, click on the button to create a new AI assistant. Name your assistant, for instance, ‘AI Agent for Grocery and Hyperlocal Delivery’ to keep it relevant.

  • Select the instruction type as ‘AI Agent’.
  • Set the AI configuration temperature to 0.7 for balanced creativity.
  • Choose OpenAI as the AI to use, with the model set to GPT-4 mini.

Ensure you enter your OpenAI API key, which can be generated by following the provided hyperlink in the help section. Once your API key is entered, click on ‘Connect’ to finalize the setup. This integration with Pabbly Chatflow allows your AI agent to utilize advanced AI capabilities in responding to customer queries.


3. Configuring Your AI Assistant Settings

Once your AI agent is created, you need to configure its settings in Pabbly Chatflow. Scroll down to find the AI assistant settings. Here, you can set a header message and a footer message that will appear in conversations. You can also define a stop keyword, which users can send to halt interactions with the AI.

  • Set a fallback message for instances when the AI cannot respond.
  • Upload a knowledge base document in txt or PDF format to guide the AI’s responses.
  • Toggle on the option to display the powered by Pabbly message.

These configurations are critical as they help shape how your AI agent interacts with users. The knowledge base is particularly important as it trains the AI to respond accurately based on the product information and delivery capabilities you provide.


4. Assigning AI Agent to WhatsApp Chats

After setting up your AI agent, the next step is to assign it to your WhatsApp chats through Pabbly Chatflow. Navigate to the ‘Inbox’ section on the left sidebar. Here, you can select specific chats or groups to which you want to assign your AI assistant. Make sure to toggle on the option to choose your AI assistant and save the changes.

If you want to apply the AI assistant to multiple contacts, go to the settings under ‘Inbox Settings’. Here, you can enable AI order replies and assign the assistant to a contact list. This allows for a streamlined approach where your AI can handle multiple customer inquiries simultaneously, enhancing efficiency in your grocery delivery operations.


5. Testing Your WhatsApp AI Agent

Finally, it’s time to test your WhatsApp AI agent. Send a message through WhatsApp to check if the AI agent responds correctly. For instance, ask about the availability of specific products. If configured correctly, the AI agent will ask for your delivery code and provide information about product availability based on your location.

By testing your AI agent, you can ensure it operates as intended. If it successfully provides responses and engages users, you have effectively utilized Pabbly Chatflow to create a functional AI agent for your grocery and hyperlocal delivery service.


Conclusion

In this tutorial, we explored how to create a WhatsApp AI agent for grocery and hyperlocal delivery using Pabbly Chatflow. By following the steps outlined, you can efficiently set up an AI agent that enhances customer interaction and streamlines your delivery process.

Ensure you check out Pabbly Connect to create business automation workflows and reduce manual tasks. Pabbly Connect currently offer integration with 2,000+ applications.

Real-Time Google Ads Lead Automation for Businesses

Learn how to automate Google Ads leads in real-time using Pabbly Connect. Step-by-step tutorial to streamline your lead management process. Discover how to seamlessly connect your essential tools through accessible instructions that make powerful automation available to professionals at every skill level.

Watch Step By Step Video Tutorial Below


1. Accessing Pabbly Connect for Google Ads Lead Automation

To start automating Google Ads leads, first access Pabbly Connect by searching for it in your browser. This powerful automation platform allows you to integrate various applications seamlessly. On the Pabbly Connect homepage, you will see options to sign in or sign up for free.

If you are a new user, click on ‘Sign Up Free’ to create an account and explore the capabilities of Pabbly Connect. Existing users can simply sign in to continue. Once logged in, navigate to the dashboard where you can access all applications, including the vital Pabbly Connect integration tool.


2. Creating a Workflow in Pabbly Connect

To create a new workflow in Pabbly Connect, click on the ‘Create Workflow’ button. You will be prompted to give your workflow a name. For this tutorial, name it ‘Real-Time Google Ads Lead Automation for Businesses’. This will help you identify the workflow later.

  • Select the Beta version for a modern interface.
  • Choose a folder for your workflow, such as ‘Automations’.
  • Click on the ‘Create’ button to proceed.

After creating the workflow, you will see two main components: Trigger and Action. The Trigger is what starts the automation process, and the Action is what happens as a result. In this case, the trigger will be set to Google Ads.


3. Setting Up Google Ads as the Trigger in Pabbly Connect

To set Google Ads as your trigger, select it from the list of applications in Pabbly Connect. Choose the event as ‘New Lead Form Entry’. This means that whenever a new lead is generated through Google Ads, it will trigger the workflow.

Next, click on the ‘Connect’ button. You will receive a webhook URL that needs to be integrated into your Google Ads account. Copy this URL and proceed to your Google Ads account where you will set up the webhook in your lead form settings.

  • Navigate to your lead form in Google Ads.
  • Select the option for ‘Lead Delivery’.
  • Paste the copied webhook URL into the designated field.

After configuring the webhook, test it by sending a test lead from Google Ads to ensure that the connection with Pabbly Connect is successful.


4. Adding Google Sheets as the Action Step

Now that your trigger is set, it’s time to add the action step. In Pabbly Connect, select Google Sheets as your action application. Choose the event ‘Add a New Row’. This action will allow the details of the new lead to be automatically added to a specified Google Sheet.

Click on ‘Connect’ to link your Google Sheets account with Pabbly Connect. If your account is not already connected, you will be prompted to sign in and grant the necessary permissions. Once connected, select the specific spreadsheet and the sheet where the lead data will be stored.

Map the fields from the trigger to the corresponding columns in Google Sheets. Ensure all required fields are correctly matched. Click on ‘Save & Send Test Request’ to verify the setup.

If everything is set up correctly, you will see a new row added to your Google Sheet with the test lead details, confirming that Pabbly Connect is successfully automating your lead data management.


5. Finalizing Your Google Ads Lead Automation

After testing your action step, your automation is almost complete. Review the entire workflow in Pabbly Connect to ensure all steps are set up correctly. You can now enable the workflow to start receiving leads in real-time.

With this automation, every time a new lead is generated through Google Ads, their details will be automatically added to your Google Sheets without any manual effort. This not only saves time but also keeps your lead data organized and secure.

In summary, you have successfully set up a real-time Google Ads lead automation using Pabbly Connect. This integration allows for efficient lead management and ensures that you never miss a lead from your advertising efforts.


Conclusion

In conclusion, using Pabbly Connect for real-time Google Ads lead automation streamlines your lead management process. By following these steps, you can ensure that your leads are automatically captured and organized in Google Sheets, enhancing your business efficiency.

Ensure you check out Pabbly Connect to create business automation workflows and reduce manual tasks. Pabbly Connect currently offer integration with 2,000+ applications.

Automatically Share YouTube Videos on All Social Media Using Pabbly Connect

Learn how to automatically share YouTube videos on social media using Pabbly Connect with this step-by-step tutorial. Simplify your content sharing process today! This comprehensive guide reveals exactly how to connect your applications and automate repetitive tasks — accessible for professionals of all technical backgrounds.

Watch Step By Step Video Tutorial Below


1. Accessing Pabbly Connect to Automate Sharing

To automatically share your YouTube videos on social media, you first need to access Pabbly Connect. Start by opening a new tab in your browser and entering the URL Pabbly.com/connect. This will take you to the Pabbly Connect homepage.

On the homepage, you will see two options: ‘Sign In’ and ‘Sign Up Free.’ If you are new to Pabbly, click on ‘Sign Up Free’ to create an account. New users receive 100 free tasks every month for practice. If you already have an account, simply click on ‘Sign In’ to access your dashboard.


2. Creating a Workflow in Pabbly Connect

After logging into Pabbly Connect, you’ll land on the ‘All Pabbly Apps’ page. Here, click on the ‘Access Now’ button under Pabbly Connect. You will be taken to the dashboard, where you can organize your workflows.

To create a new workflow, click on the ‘Create Workflow’ button. You will be prompted to choose between the modern and classic workflow builders. Select the modern workflow builder by clicking the ‘Select’ button. Next, enter a name for your workflow, such as ‘Share YouTube Videos on Social Media,’ and choose a folder for better organization.

  • Click on the ‘Create’ button to finalize your workflow creation.
  • You will see a notification confirming that your workflow has been created successfully.

Now, you can start adding triggers to your workflow. A trigger is the event that will initiate your workflow. In this case, select YouTube as your trigger application.


3. Setting Up the YouTube Trigger

In the workflow page, click on the ‘Add Trigger’ button to set up your YouTube trigger. Select YouTube as your trigger app and choose the event ‘New Video in Channel with Video URL.’ This event will trigger the workflow whenever a new video is uploaded to your channel. using Pabbly Connect

Next, click the ‘Connect’ button to create a connection with your YouTube account. You will be prompted to sign in with your Google account. Select your account and allow the necessary permissions for Pabbly Connect to access your YouTube data.

  • Choose your YouTube channel ID from the dropdown menu.
  • Select the response format, keeping it as simple for easy data retrieval.

Once the connection is established, click on the ‘Save and Send Test Request’ button to fetch the latest video details from your YouTube channel.


4. Adding Facebook and Twitter Actions

Now that your YouTube trigger is set up, it’s time to add action steps for Facebook and Twitter. Start by clicking on the ‘Add New Action Step’ button and select Facebook Pages as your action app. Choose the event ‘Create Page Post’ to post your video on Facebook. using Pabbly Connect

Click on the ‘Connect’ button to establish a connection with your Facebook account. You will need to select your Facebook page where you want to share the video. After connecting, you can enter a message for your post, such as ‘Check out our latest video!’ and map the video title and URL from the YouTube trigger response.

Map the title and URL fields to dynamically include the latest video information. Click ‘Save and Send Test Request’ to test the Facebook post action.

After confirming the Facebook post was successful, repeat the process for Twitter by selecting Twitter as your action app and choosing the event ‘Create Tweet.’ Connect your Twitter account and map the message with the video title and URL.


5. Conclusion: Automate Your Social Media Sharing with Pabbly Connect

Using Pabbly Connect, you can effortlessly automate the process of sharing your YouTube videos across multiple social media platforms. By setting up triggers and actions, you can save time and ensure your content reaches a wider audience without manual effort.

Ensure you check out Pabbly Connect to create business automation workflows and reduce manual tasks. Pabbly Connect currently offer integration with 2,000+ applications.

Start using Pabbly Connect today to streamline your social media sharing process and enhance your online presence. With just a few simple steps, you can connect YouTube, Facebook, and Twitter, allowing your videos to gain more visibility and engagement.

For more information, visit the Pabbly website and explore the various automation possibilities available to you. Automate your workflow and simplify your business operations with Pabbly Connect.

Smart Service Automation Using WhatsApp Chatbot

Learn how to automate your business with a WhatsApp chatbot using Pabbly Chatflow. Step-by-step tutorial for seamless integration. Build conversational workflows that guide visitors toward conversion with dynamic, branching dialogs that respond intelligently to user input.

Watch Step By Step Video Tutorial Below


1. Accessing Pabbly Chatflow for WhatsApp Automation

To create an automated WhatsApp chatbot, the first step is to access Pabbly Chatflow. Open a new browser tab and go to bably.com/chatflow. This platform is essential for automating WhatsApp messages and managing user interactions effectively.

Once on the Pabbly Chatflow page, you’ll see options to sign in or sign up. New users can click on the ‘Sign Up Free’ option to get 100 free credits every month. Existing users should sign in to access their dashboard. After signing in, navigate to the Pabbly Chatflow by clicking on the ‘Access Now’ button.


2. Creating Your WhatsApp Chatbot Flow

With Pabbly Chatflow open, you can start creating your WhatsApp chatbot. Click on the ‘Flows’ option on the left sidebar to begin. This feature allows you to create and manage various chatbot flows using a user-friendly drag-and-drop interface.

  • Click on the ‘Plus Add Flow’ button to create a new flow.
  • Name your flow, for example, ‘Smart Service Automation Using WhatsApp Chatbot’.
  • Select your trigger event, such as keywords that users might send.

After setting up the initial parameters, you can start defining how your chatbot will interact with users. This setup is crucial as it determines how the chatbot will respond to user inputs.


3. Defining User Interactions with Pabbly Chatflow

In this step, you will define how the chatbot interacts with users based on the keywords they send. For instance, you can set keywords like ‘hi’ or ‘hello’ to trigger a welcome message. This is done by adding a media button that sends an image along with the greeting.

To enhance user interaction, you can create quick reply buttons such as:

  • AI Services
  • Book Services
  • Talk to Expert

These buttons not only make the chatbot interactive but also guide users through their options effectively. This setup is a fundamental part of how Pabbly Chatflow enhances user engagement.


4. Collecting User Information via Pabbly Chatflow

Once users select an option, the next step is to collect their information. You can set up questions to gather details such as their full name, company name, and project start date. Each question can be linked to a custom field in Pabbly Chatflow to ensure that the data is captured accurately.

For example, you can ask:

May I have your full name? What is your company’s name? When would you like to start the project?

By linking these questions to custom fields, Pabbly Chatflow dynamically captures user responses, allowing for personalized follow-up messages. This feature is essential for providing a tailored user experience.


5. Finalizing Your WhatsApp Chatbot Setup

After collecting user information, it’s time to finalize your chatbot setup. You can create a customized message that includes the user’s responses and your contact details. This message will be sent automatically once the user has provided all required information. using Pabbly Connect

For instance, you can set a message like:

AI Service Request Receipt Thank you for reaching out, [User’s Name].

This final message not only thanks the user but also confirms the details they provided. Once you finish setting up your flow, make sure to save it. Testing your chatbot is crucial to ensure it works as intended.


Conclusion

In this tutorial, we explored how to create an automated WhatsApp chatbot using Pabbly Chatflow. By following the steps outlined, you can streamline your business operations and enhance customer engagement effectively. Start automating your services today!

Ensure you check out Pabbly Connect to create business automation workflows and reduce manual tasks. Pabbly Connect currently offer integration with 2,000+ applications.

Turn WhatsApp Into a 24/7 AI Customer Success Rep (No Humans Needed)

Learn how to create a 24/7 AI customer success representative on WhatsApp using Pabbly Chatflow with this detailed step-by-step tutorial. Learn step-by-step how to create, test, and optimize chatbots that enhance customer experience while reducing support workload.

Watch Step By Step Video Tutorial Below


1. Accessing Pabbly Chatflow to Create Your AI Assistant

To create a 24/7 AI customer success representative, you need to access Pabbly Chatflow. Begin by visiting the Pabbly Chatflow website. If you are a new user, click on the ‘Sign Up Free’ button to create your account. You will receive 100 free credits every month to explore the application.

If you already have an account, click the ‘Sign In’ button to log in. After logging in, you will see the dashboard where you can start creating your AI assistant. Make sure to add your WhatsApp number to utilize the features of Pabbly Chatflow.


2. Creating Your AI Assistant in Pabbly Chatflow

Once you are in the Pabbly Chatflow dashboard, click on the ‘AI Assistant’ option. To start creating your AI assistant, click on the ‘Add AI Assistant’ button. Name your assistant, for example, ’24×7 AI Customer Success Agent,’ and press the ‘Add Assistant’ button.

  • Select AI instructions for your assistant.
  • Define the knowledge source for your assistant.
  • Design the assistant interface.
  • Style your assistant for a personalized look.

After naming your assistant, follow the four steps to configure it properly. This process will ensure your AI assistant can effectively interact with customers using WhatsApp.


3. Configuring AI Instructions in Pabbly Chatflow

In the configuration section of Pabbly Chatflow, select the AI agent type. The default instructions will guide how your AI assistant responds to users. You can customize the instructions if needed, but the default settings are often sufficient for most businesses.

Set the temperature parameter, which determines the creativity level of responses. A temperature of 0.5 is a balanced choice. You can also select the AI model from the available options; for instance, choose the latest GPT model for optimal performance.

  • Enter your OpenAI API key to connect.
  • Configure the assistant settings, including header and footer messages.
  • Define a stop keyword to halt the conversation if needed.

Completing these settings will ensure that your AI assistant is well-prepared to handle customer queries effectively.


4. Uploading Knowledge Source for Your AI Assistant

To enhance the effectiveness of your AI assistant, you need to upload a knowledge source. This document should contain FAQs, company background, and other critical information. Use a PDF or plain text format to ensure compatibility with Pabbly Chatflow.

For instance, create a knowledge base in Google Docs and download it as a PDF. After downloading, drag and drop the file into the designated area in Pabbly Chatflow. Ensure the file size is under 90 MB and follows the format guidelines.

Once uploaded, your AI assistant will leverage this knowledge source to provide accurate responses to customer inquiries, making it a reliable resource for your business.


5. Testing Your AI Assistant on WhatsApp

After setting up your AI assistant in Pabbly Chatflow, it’s time to test its functionality. Open WhatsApp and send a keyword, such as ‘I need help.’ Your AI assistant should respond instantly with a welcome message, indicating that it is operational.

To further test, ask specific questions related to your services. For example, inquire about subscription upgrades. The AI assistant should provide detailed instructions based on the keywords you inputted, such as options for upgrading via Google Play or direct website purchases.

This testing phase is crucial to ensure that your AI assistant is effectively set up and ready to assist customers 24/7 without human intervention.


Conclusion

Creating a 24/7 AI customer success representative using Pabbly Chatflow is a powerful way to enhance customer service. By following the steps outlined, you can set up an AI assistant that responds instantly to customer queries. This integration not only saves time but also improves customer satisfaction.

Ensure you check out Pabbly Connect to create business automation workflows and reduce manual tasks. Pabbly Connect currently offer integration with 2,000+ applications.

Automate Appointments on WhatsApp 24/7 ⏰

Learn how to automate appointments on WhatsApp using Pabbly Chatflow. Step-by-step tutorial for creating a WhatsApp chatbot for your business. Implement professional chat automation that answers common questions, qualifies leads, and books appointments without human intervention.

Watch Step By Step Video Tutorial Below


1. Access Pabbly Chatflow to Automate WhatsApp

To begin automating appointments on WhatsApp, you need to access Pabbly Chatflow. Open a new tab and visit the Pabbly website, specifically the Chatflow section. This platform is designed to help you automate WhatsApp messages and responses for your business.

If you are new to Pabbly, click on the ‘Sign Up Free’ option to create your account. Existing users can simply sign in. Once logged in, navigate to the Pabbly Chatflow dashboard to manage your WhatsApp numbers effectively.


2. Creating Your WhatsApp Chatbot Using Pabbly Chatflow

After accessing Pabbly Chatflow, click on the ‘Flows’ option on the left-hand side to start creating your WhatsApp chatbot. This is where you can design your automated responses using a user-friendly drag-and-drop interface.

To create a new flow, click on the ‘+ Add Flow’ button. Name your flow, for example, ‘Automate Appointments on WhatsApp 24/7’. Ensure that your flow is active by toggling the active/inactive switch.

  • Click on the ‘+ Add Flow’ button.
  • Name your flow appropriately.
  • Toggle the active/inactive switch to activate your flow.

Now, select your trigger event. For this flow, you will choose keywords that users might send, such as ‘hi’ or ‘hello’. This setup will enable your chatbot to respond automatically when these keywords are detected.


3. Setting Up Automated Responses in Pabbly Chatflow

With your keywords set, it’s time to configure the automated responses in Pabbly Chatflow. Add a text button to create a welcome message for your users. For instance, you can say, ‘Hello! Welcome to Healthy Life Homeopathy Clinic. How may we assist you today?’

Next, incorporate quick reply buttons for options like booking an appointment, clinic location, and contact us. This allows users to navigate through your chatbot easily. Link these buttons to their respective responses to create a seamless experience.

  • Add a text button for the welcome message.
  • Create quick reply buttons for user options.
  • Link buttons to their corresponding responses.

Once linked, your chatbot will automatically respond with the relevant information when users click these buttons.


4. Collecting User Information Through Pabbly Chatflow

After setting up initial responses, you can enhance your chatbot by collecting user information using Pabbly Chatflow. When a user books an appointment, your bot should ask for their name, age, symptoms, and preferred appointment date.

To do this, add questions using the ask question button. For each question, select the appropriate contact custom field to store the user’s responses. This will allow for personalized follow-ups later.

Add questions for user details like name and age. Select contact custom fields for storing responses. Ensure all questions are linked properly for a smooth flow.

By effectively collecting this information, your chatbot can provide tailored responses and improve user engagement.


5. Finalizing Your WhatsApp Chatbot on Pabbly Chatflow

Now that you have set up the flow and collected user information, it’s time to finalize your WhatsApp chatbot using Pabbly Chatflow. Ensure all components are correctly linked and functioning as intended.

After confirming everything is in order, click the save button to update your flow. This will activate your automated WhatsApp chatbot, allowing it to respond to users 24/7 without manual input.

To test the bot, send a keyword like ‘hi’ to your WhatsApp account. The bot should respond immediately with the welcome message and options for further interaction, demonstrating the seamless automation you have created.


Conclusion

In this tutorial, we explored how to automate appointments on WhatsApp using Pabbly Chatflow. By following the steps outlined, you can create a fully functional chatbot that enhances user engagement and streamlines appointment bookings.

Ensure you check out Pabbly Connect to create business automation workflows and reduce manual tasks. Pabbly Connect currently offer integration with 2,000+ applications.

Utilizing Pabbly Chatflow allows for efficient communication and management of user queries, making it an essential tool for businesses looking to automate their WhatsApp interactions.

Send Bulk WhatsApp Messages with High Delivery Rate

Learn how to send bulk WhatsApp messages with high delivery rates using Pabbly Chatflow in this step-by-step tutorial. Build conversational workflows that guide visitors toward conversion with dynamic, branching dialogs that respond intelligently to user input.

Watch Step By Step Video Tutorial Below


1. Accessing Pabbly Chatflow for WhatsApp Messaging

To send bulk WhatsApp messages with high delivery rates, start by accessing Pabbly Chatflow. Open your browser and visit Pabbly.com/f to reach the homepage of Pabbly. Here, you will see options to either sign in or sign up for free. If you are a new user, click on the ‘Sign Up Free’ button to create your account.

Once you have signed in, you will be directed to the Pabbly Chatflow dashboard. Here, you can manage all your WhatsApp messaging tasks efficiently. If you are already a user, simply sign in to access your existing account and features.


2. Connecting WhatsApp with Pabbly Chatflow

To send messages through WhatsApp, you need to connect your WhatsApp number within Pabbly Chatflow. Click on the ‘Add WhatsApp Number’ button on the dashboard. You will see two options: WhatsApp Connect and Manual Token Connect. Choose the method that suits you best for connecting your WhatsApp account.

  • Select WhatsApp Connect for a straightforward setup.
  • Use Manual Token Connect if you prefer a more customized connection.

After connecting your WhatsApp, you will be able to access various features within Pabbly Chatflow. This connection allows you to automate your messaging process effectively.


3. Creating Your WhatsApp Message Template

Next, you need to create a message template in Pabbly Chatflow. Navigate to the Template section from the left sidebar. Here, you can see existing templates or create a new one. Click on the ‘Add Template’ button to start creating your message template.

Fill in the required details for your template, such as the name and content of the message. Once you have drafted your message, click on the ‘Submit’ button to save it. Remember, only approved templates can be used for broadcasting messages to your contacts.


4. Setting Up Bulk Messaging in Pabbly Chatflow

To send bulk messages, you will need to set up a broadcast in Pabbly Chatflow. Access the Broadcast section from the left sidebar. Click on the ‘Add Broadcast’ button to create a new broadcast campaign. You will need to select the type as ‘Broadcast Campaign’ and name it appropriately, such as ‘Free Trial Offer’.

Next, choose the contact list to whom you want to send the messages. You can add contacts in bulk by uploading a CSV file containing your leads’ data. After uploading, select the approved message template you created earlier for your broadcast.

  • Select your contact list for the broadcast.
  • Choose the approved template for your message.

Once everything is set, you can either send the broadcast immediately or schedule it for a later time. This flexibility allows you to manage your messaging campaigns effectively.


5. Tracking Delivery Rates of Your Messages

After sending your bulk WhatsApp messages through Pabbly Chatflow, you can track the delivery rates. Click on the broadcast you created, and you will see the delivery statistics. This includes the number of messages sent, delivered, and any failures.

By analyzing these statistics, you can optimize your future campaigns for better performance. High delivery rates ensure that your messages reach your audience effectively, enhancing your business communication.


Conclusion

In this tutorial, we explored how to use Pabbly Chatflow to send bulk WhatsApp messages with high delivery rates. By following these steps, you can efficiently engage with your customers and improve your business communication strategies.

Ensure you check out Pabbly Connect to create business automation workflows and reduce manual tasks. Pabbly Connect currently offer integration with 2,000+ applications.

Don't Waste Your OpenAI Credits! Switch to gpt-image-1 Now

Learn how to integrate Pabbly Connect with GPT Image 1 to optimize your OpenAI credits and improve your image generation quality. Follow our step-by-step tutorial.

Watch Step By Step Video Tutorial Below


1. Accessing Pabbly Connect for OpenAI Integration

To maximize your OpenAI credits, the first step is accessing Pabbly Connect. If you’re an existing user, simply log in to your Pabbly Connect account. For new users, navigate to pabbl.com/connect and click on ‘Sign Up for Free’ in the top right corner.

After signing up, you will receive 100 free tasks each month to explore the features of Pabbly Connect. This allows you to generate up to 100 images at no cost, making it easier to test the integration with OpenAI.


2. Setting Up Your Workflow in Pabbly Connect

Once logged into Pabbly Connect, open your workflow builder to create a new workflow. The workflow will be based on a trigger-action principle, where a trigger initiates the process, and actions are the results.

For this integration, select ‘Schedule by Pabbly’ as your trigger application. Set the frequency to daily and choose 12:00 PM as the time to run the workflow. This setup allows you to automate your Facebook posts daily.

  • Select the trigger application: Schedule by Pabbly.
  • Set the frequency to daily.
  • Choose 12:00 PM as the time to run the workflow.

After setting up the trigger, add an action application. Choose ‘Chat GPT’ and select ‘Generate Image Daily’ as the event. Fill in the required fields such as model, prompt, number of images, size, and quality to generate an image.


3. Switching to GPT Image 1 in Pabbly Connect

To enhance image quality and optimize your OpenAI credits, switch to GPT Image 1 through Pabbly Connect. In your workflow, change the action application from Chat GPT to OpenAI and select ‘GPT Image 1’ as the event.

Once you select GPT Image 1, connect your OpenAI account with Pabbly Connect. Enter the same prompt you used previously and configure settings such as the number of samples, size, moderation, quality, and output format (JPG, PNG, or WebP).

  • Select GPT Image 1 as the event in OpenAI.
  • Connect your OpenAI account with Pabbly Connect.
  • Configure settings for image generation.

After entering all necessary details, click on ‘Save and Send Test Request’ to generate an image using the new model.


4. Generating High-Quality Images with GPT Image 1

Upon clicking ‘Save and Send Test Request’, Pabbly Connect will initiate the image generation process with GPT Image 1. This model produces high-definition images compared to previous models, ensuring better quality for your Facebook posts.

Once the image is generated, you’ll receive a file URL. Copy this URL and open it in a new tab to view the high-quality image. This process demonstrates the effectiveness of using Pabbly Connect to enhance your image generation capabilities.

By leveraging GPT Image 1, you can now create more engaging visual content for your social media platforms, ultimately optimizing your OpenAI credits.


5. Connecting OpenAI with Pabbly Connect

To finalize the integration, you need to connect your OpenAI account with Pabbly Connect. Click on ‘Connect’ in the action application settings. If you have previously created a connection, select it; otherwise, click ‘Add a New Connection’.

To create a new connection, visit your OpenAI API key page and generate a new secret key. Copy this key and paste it into Pabbly Connect to establish the connection. This straightforward process ensures that you can efficiently utilize OpenAI’s capabilities through Pabbly Connect.

After successfully connecting, you can now utilize the GPT Image 1 model for generating images, enhancing your content quality while managing your OpenAI credits effectively.


Conclusion

In conclusion, integrating Pabbly Connect with GPT Image 1 allows you to maximize your OpenAI credits while improving the quality of your images. By following the steps outlined in this tutorial, you can automate your image generation process and create stunning visuals for your social media.

Ensure you check out Pabbly Connect to create business automation workflows and reduce manual tasks. Pabbly Connect currently offer integration with 2,000+ applications.