Are you looking for a way to add QuestionScout submissions to Google Sheets automatically? If yes, then follow the step by step procedure to automate this task.
Significantly, Pabbly Connect is an integration and automation software that grants you to automatically transfer data from one application to another in real-time.

Pabbly Connect is the best and affordable tool for automation as it makes every automation task very easy that even a non-programmer can create a workflow in a couple of minutes.
Why Choose This Method Of Integration?
In contrast with other integration services-
- Pabbly Connect does not charge you for its in-built apps like filters, Iterator, Router, Data transformer and more
- Create “Unlimited Workflows” and smoothly define multiple tasks for each action
- As compared to other services which offer 750 tasks at $24.99, Pabbly Connect offers 50000 tasks in the starter plan of $29 itself
- Unlike Zapier, there’s no restriction on features. Get access to advanced features even in the basic plan
- Try before you buy! Before spending your money, you can actually signup & try out the working of Pabbly Connect for FREE
But before we begin the integration process, let us get a bit information about both the software.
QuestionScout is an online form builder tool that enables you to create beautifully designed responsive forms, questionnaires and surveys that are easy to use. Whereas, Google Sheets is a free web-based application for creating spreadsheets.
With Google Sheets and QuestionScout integration, you can automatically add submitted form data as new rows in Google Sheets in real-time. You can watch the video below to understand the use of Pabbly Connect.
Moreover, we’ve connected a template for this integration to assist you. Just simply click on the ‘Use Workflow’ button below to start the workflow. Besides, you can also visit the Marketplace and look for more apps/integrations.

So, without taking any more of your time, let’s get started with the step-by-step process to integrate QuestionScout and Google Sheets.
Step 1: Sign Up to Pabbly Connect

Initiate the process of adding rows in Google Sheets from new QuestionScout submissions by clicking the ‘Sign Up Free’ button on the ‘Pabbly Connect’ dashboard. Afterward, either fill-up all the details manually or sign up using the Google account.
Step 2: Access Pabbly Connect

After logging in to your account, you will be redirected to “All Apps” section. Here, you have to select Connect application and click on ‘Access Now’.
Step 3: Workflow for QuestionScout with Google Sheets Integration
(a) Start with a New Workflow

Start with creating a workflow for your integration by clicking on the “Create Workflow” button.
(b) Name the Workflow
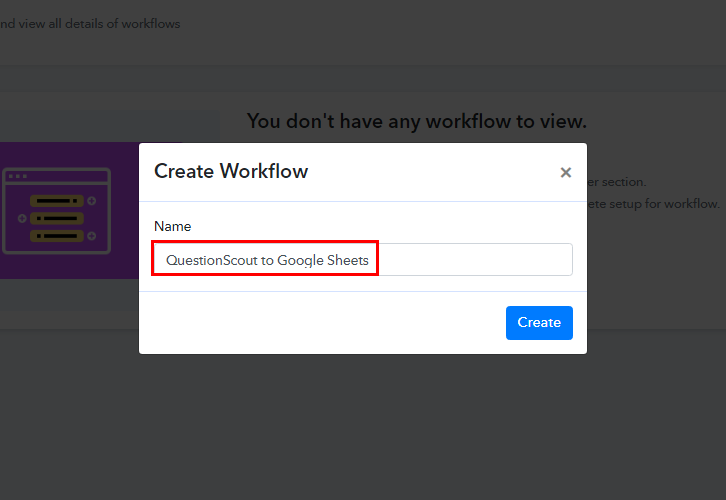
Now, it’s time to name the workflow as per the integration or use-case. In this case, I have to integrate QuestionScout and Google Sheets. Hence, I name the workflow as ‘QuestionScout to Google Sheets’.
Step 4: Setting Trigger for QuestionScout to Google Sheets Integration
As soon as you finish naming the workflow, now it’s time to select an application you want to integrate. Pabbly Connect allows you to connect unlimited premium apps, so create your free account now.
(a) Select Application you want to Integrate
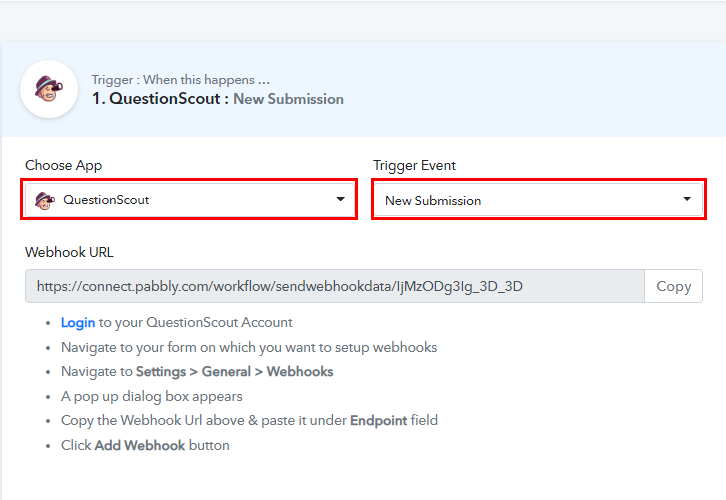
After you click on the create button, a trigger window appears. From the ‘Choose App’ drop down option, select “QuestionScout” and select method as ‘New Submission’.
(b) Copy the Webhook URL
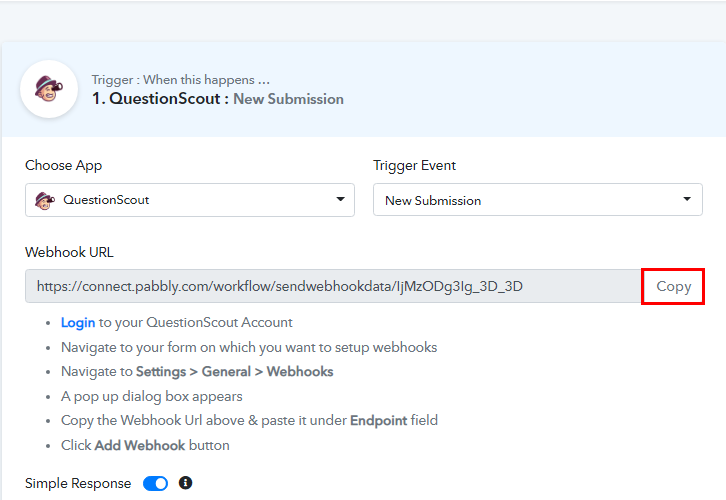
Next step is to copy the ‘Webhook URL’ and after that follow below mention steps to paste it in ‘QuestionScout’.
Step 5: Connecting QuestionScout to Pabbly Connect
To join QuestionScout and Pabbly Connect, you have to paste the copied Webhook URL in QuestionScout. Therefore, you have to log in to your QuestionScout account.
(a) Login to QuestionScout
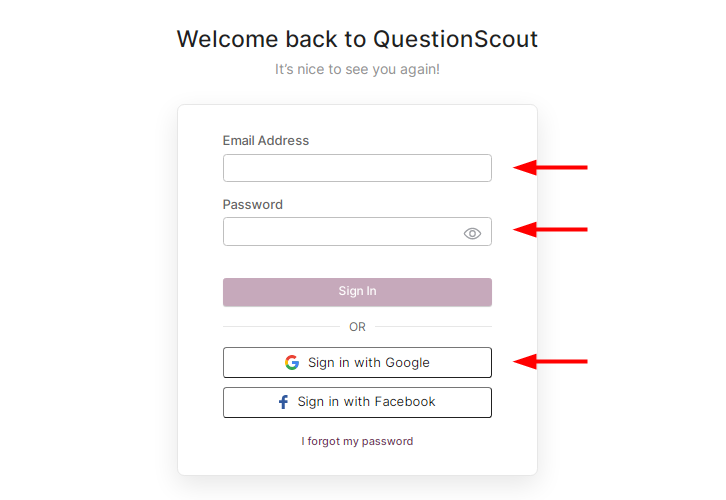
Now, log in to your QuestionScout account to create/open the form and paste Webhook URL.
(b) Open the Form
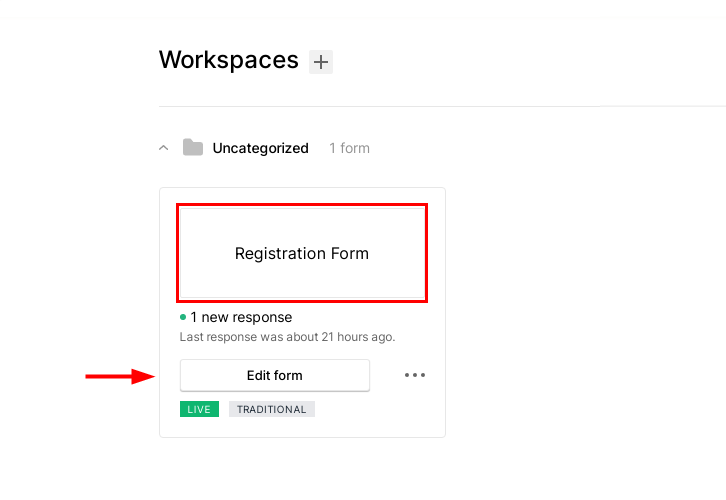
After login into your QuestionScout account, navigate to your form, from which you want submissions, and then click on the ‘Edit Form’ button. For instance, we have created a “Registration Form”.
(c) Go to Settings
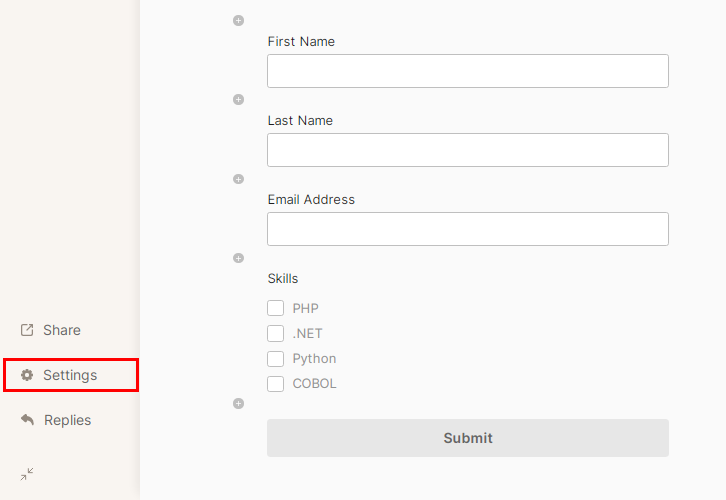
When a form is open for editing, you will see the Settings option click on it.
(d) Search for Webhook Option
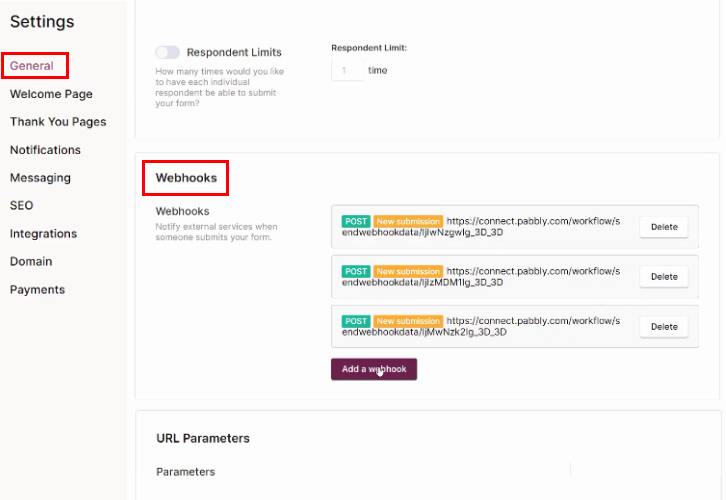
From Settings, select sub-menu as General, and you will see a Webhook option by scrolling down and then click on the ‘Add a Webhook’ button.
(e) Paste the Webhook URL
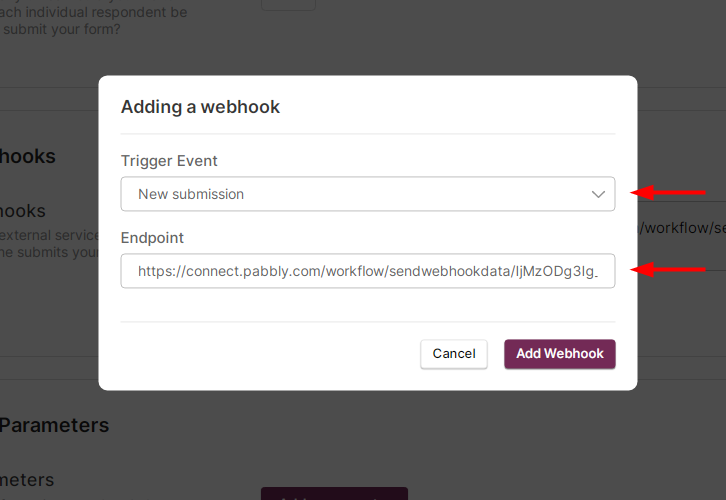
After clicking on the “Add a Webhook” button, a window appears. Subsequently, set Trigger Event as “New Submission” and paste Webhook URL in the ‘Endpoint’ field .
(f) Add Webhook
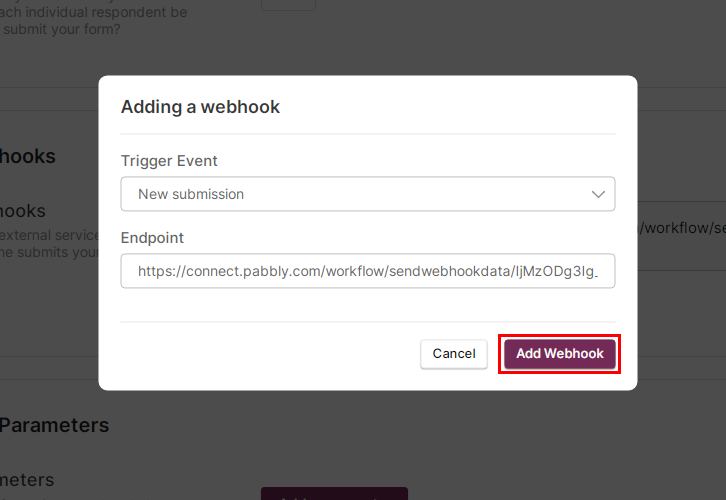
After pasting the Webhook URL, click on the ‘Add Webhook’ button to add it.
Step 6: Test the Response in Pabbly Connect Dashboard
We have finished setting up the trigger for this integration. Now, let’s test the trigger settings by creating a new form submission at QuestionScout.
(a) Capture Webhook Response
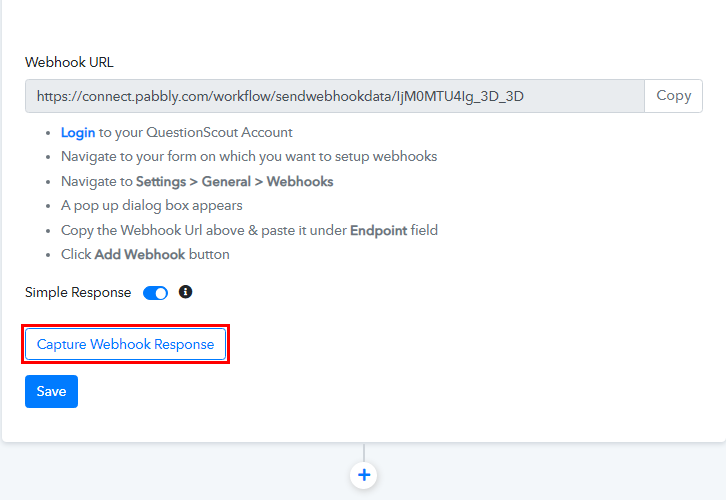
Click on the ‘Capture Webhook Response’ button to test trigger settings in the Pabbly Connect trigger window.
(b) Make a Test Submission
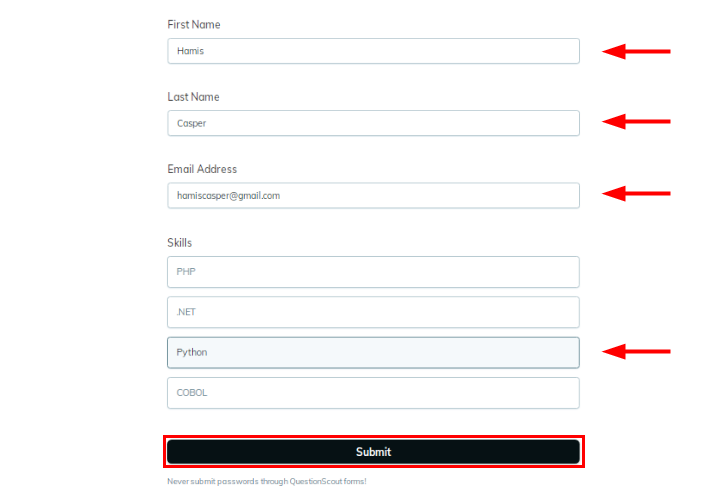 Now, to make a test submission, go back to the ‘QuestionScout Registration Form’ submission window and start entering details. After that, click on the ‘Submit’ button to submit it.
(c) Check & Save the Webhook Response
After hitting on the ‘Submit’ button, head back to the Pabbly Connect window, and you will see that response is already being captured. Click on the ‘Save’ button to save the test response.
Step 7: Setting Action for QuestionScout to Google Sheets Integration
Our first step of integration is done. Now it’s time to update this response data as an action so that a new row is automatically created in Google Sheets after every QuestionScout form submission.
(a) Select Application you want to Integrate
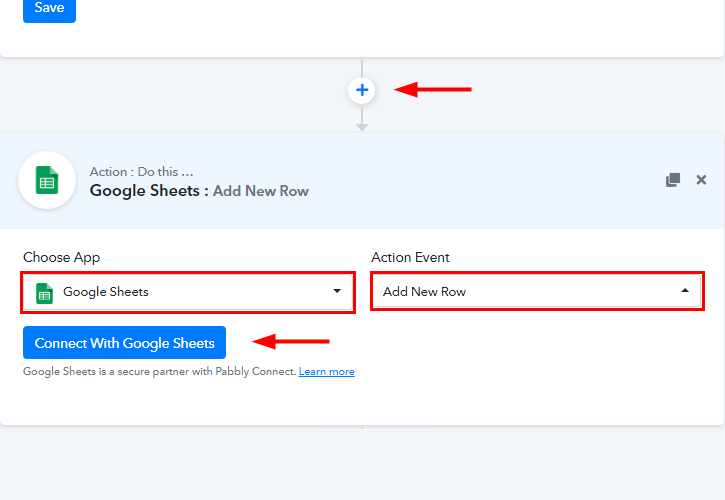
After that, click on the plus (+) icon and you will see an action window appear.
Here, select the “Google Sheets” from Choose App drop down option and “Add New Row” from Action Event. Then, click on the “Connect With Google Sheets” button to connect it to your Google account.
(b) Click the Connect Button
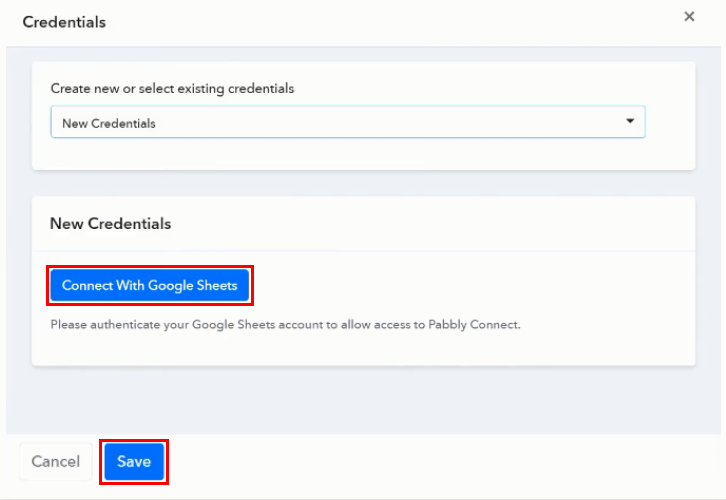
Once you click on the “Connect With Google Sheets” button, a window will pop up, so that you can login and authorize your Google account.
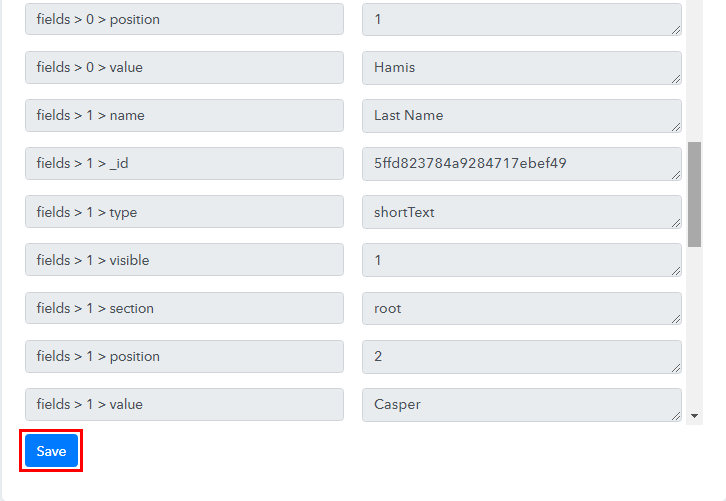
(c) Map the Field
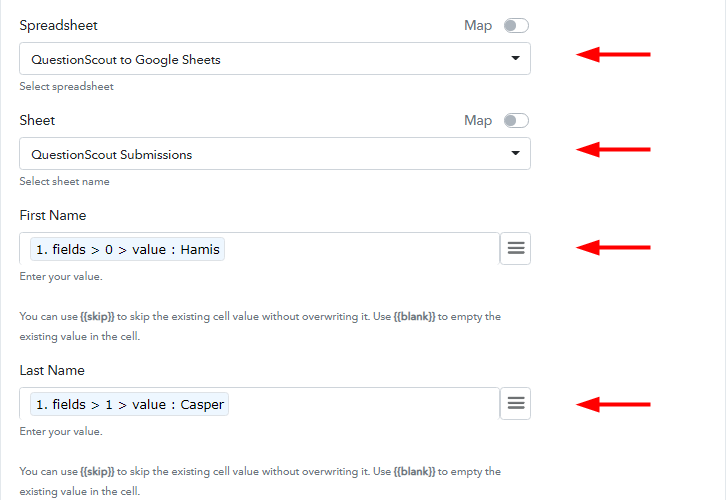
Subsequently, now it is time to map the requisite fields by selecting data like first name, last name, email, and skills in their respective fields.
(d) Test the Submission and Save
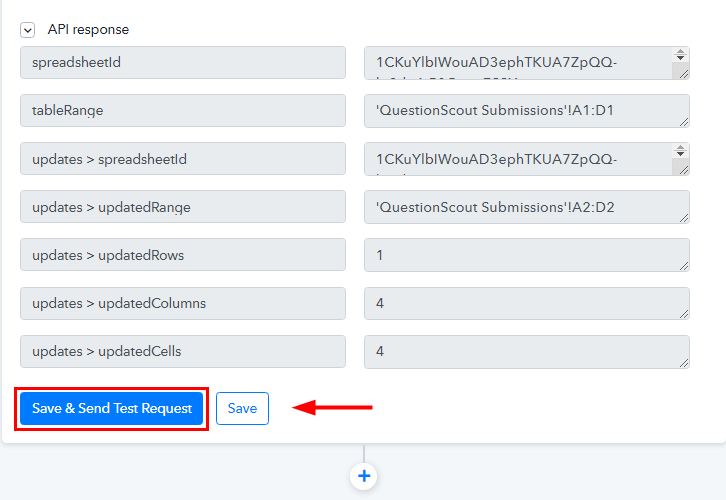
Finally, after mapping all data, click on Save & Send Test Request and you will see that all data is sent to Google Sheets Row. Merely, click on the ‘Save’ button to save the entire workflow.
Step 8: Check Response in Google Sheets
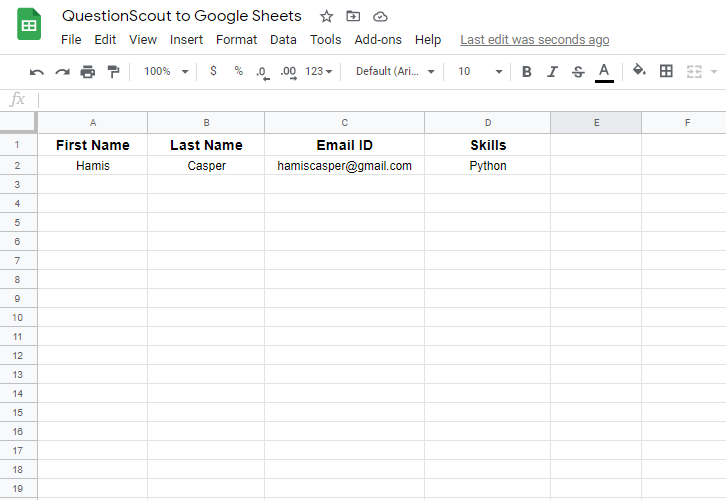
In the end, when you check Google Sheets, registered details get auto-populated in the sheet.
Now, every time whenever there is new form submission in QuestionScout, a row gets automatically created in Google Sheets.
Conclusion-
So this was the simplest and quickest method that you could use to integrate QuestionScout to Google Sheets. As a result, after completing the step by step approach, you will wind up auto-creating Google Sheets Row for every QuestionScout Form Submission.
Grab, Pabbly Connect for FREE with all its premium features.
Also, do comment your feedback below about this integration.


