Wondering about how to add new ClickUp tasks to Google Sheets as rows? If so, then here we are suggesting a way to integrate ClickUp and Google Sheets using Pabbly Connect.
Now the question must be why there is a need for integrating ClickUp and Google Sheets. Basically, ClickUp is a one-stop destination to manage all your teamwork such as tasks, docs, chats, goals, and much more. Whereas Google Sheets is a free online spreadsheet for personal or business use.
By connecting ClickUp with Google Sheets, you can add all your tasks and activity automatically without any trouble. And for doing this we have such an amazing tool named Pabbly Connect.
Why Choose This Method Of Integration?
In contrast with other integration services-
- Pabbly Connect does not charge you for its in-built apps like filters, Iterator, Router, Data transformer, and more
- Create “Unlimited Workflows” and smoothly define multiple tasks for each action
- As compared to other services which offer 750 tasks at $24.99, Pabbly Connect proffers 50000 tasks in the starter plan of $29 itself
- Unlike Zapier, there’s no restriction on features. Get access to advanced features even in the basic plan
- Try before you buy! Before spending your money, you can actually signup & try out the working of Pabbly Connect for FREE
Pabbly Connect lets you connect different applications for data transmission without using a single line of code. In a few minutes, you can create automated workflows and transfer the data between your favorite apps and services without any manual efforts.
Also, the only automation tool that offers unlimited workflows, actions, triggers, and much more even in its free plan.
Here, in this article, we will understand how to add new ClickUp tasks to Google Sheets in real-time.
So, let’s headstart the process.
Step 1: Sign up to Pabbly Connect

Intiate the process of connecting ClickUp to Google Sheets by clicking on the “Sign Up Free” icon on the Pabbly Connect dashboard. Subsequently, either fill-up the details manually or sign up using Gmail credentials.
Try Pabbly Connect for FREE
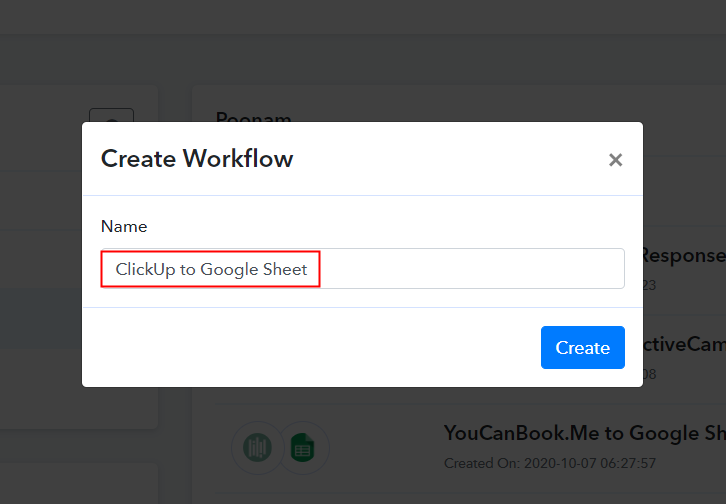
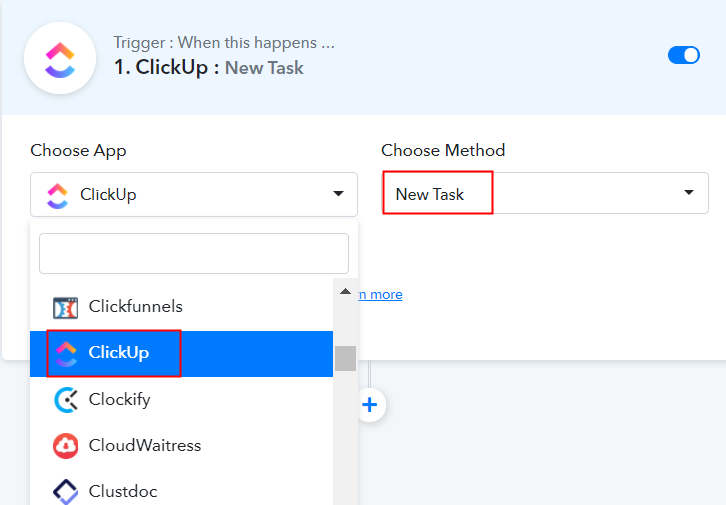
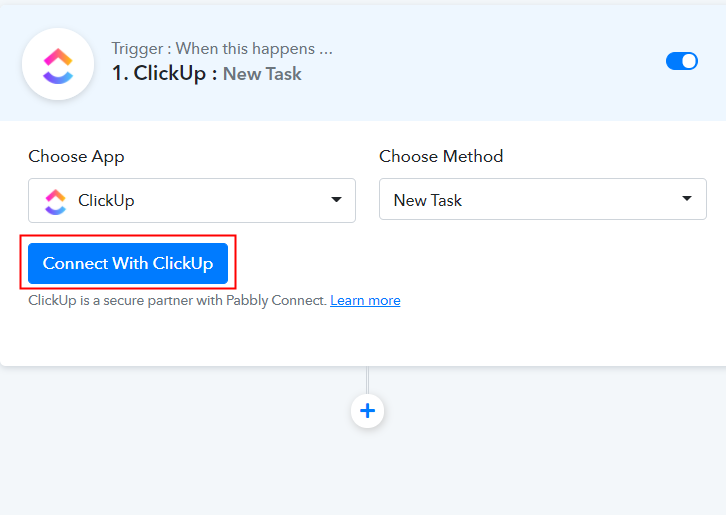
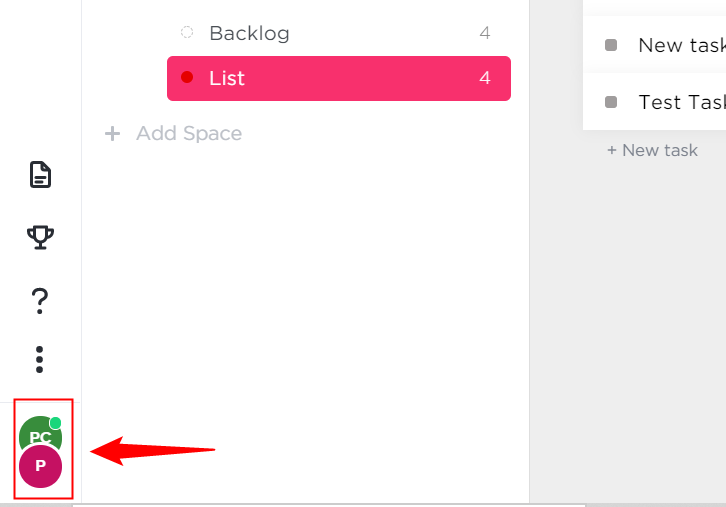
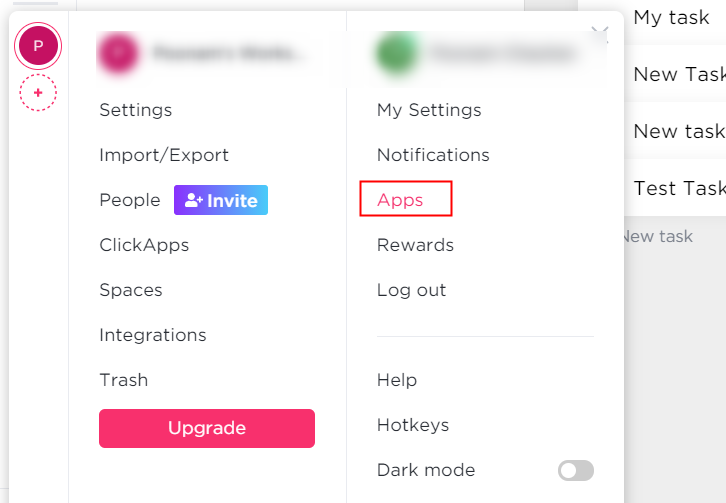
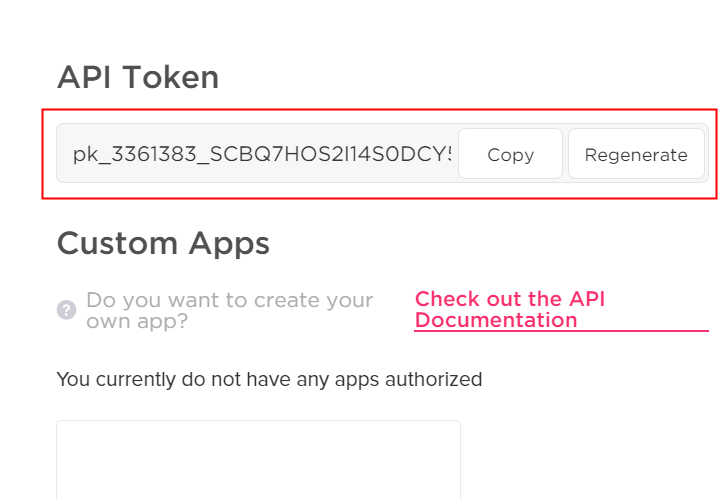
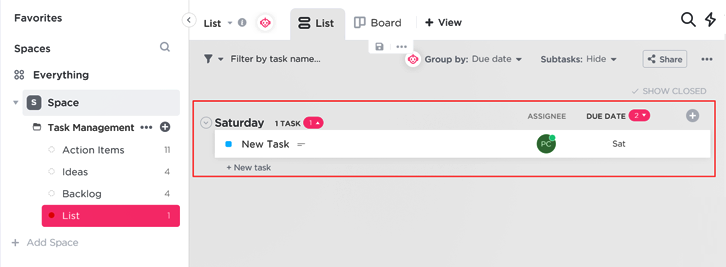
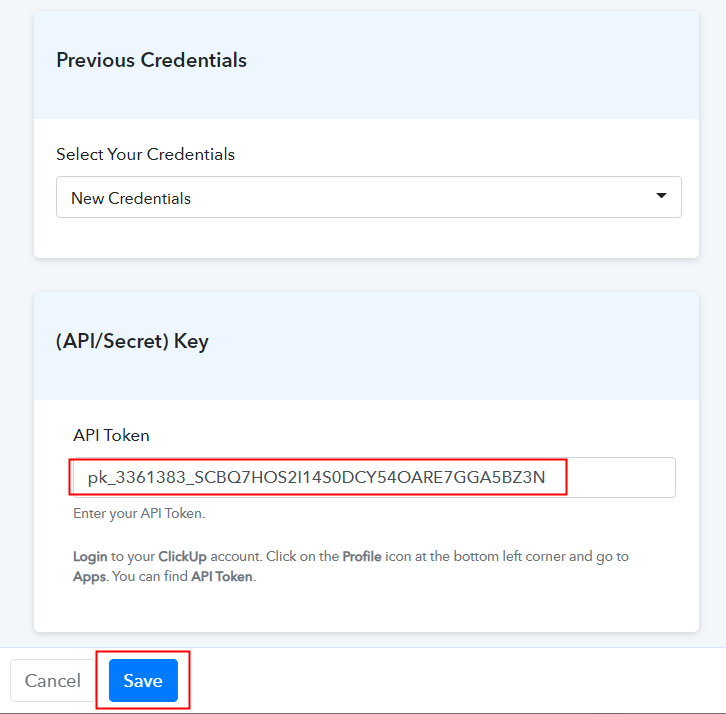
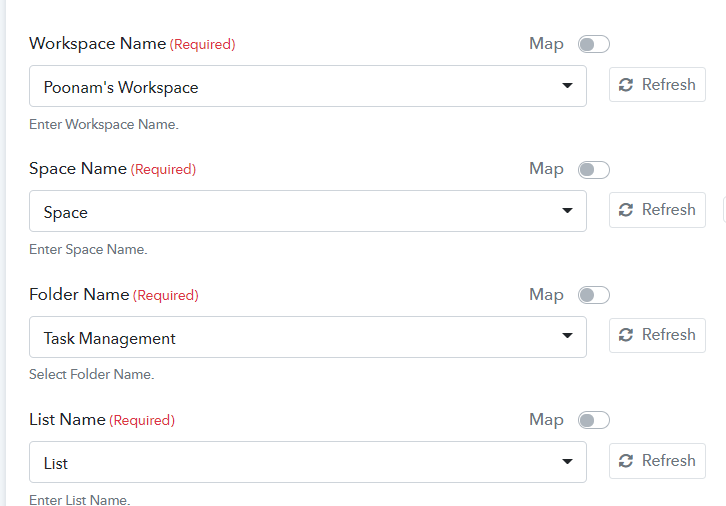
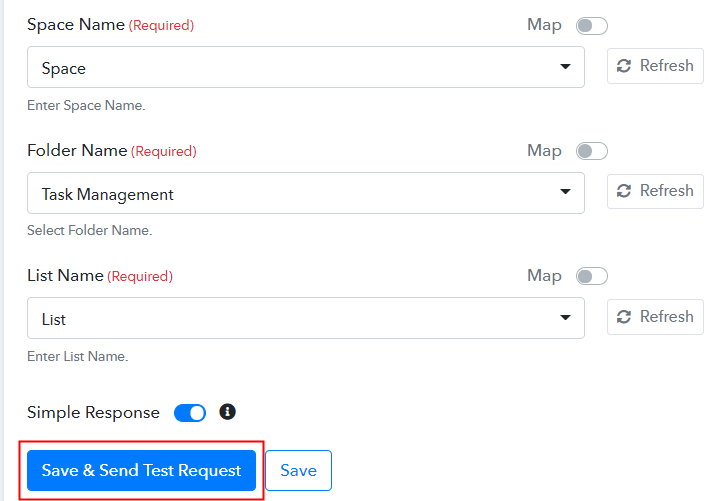
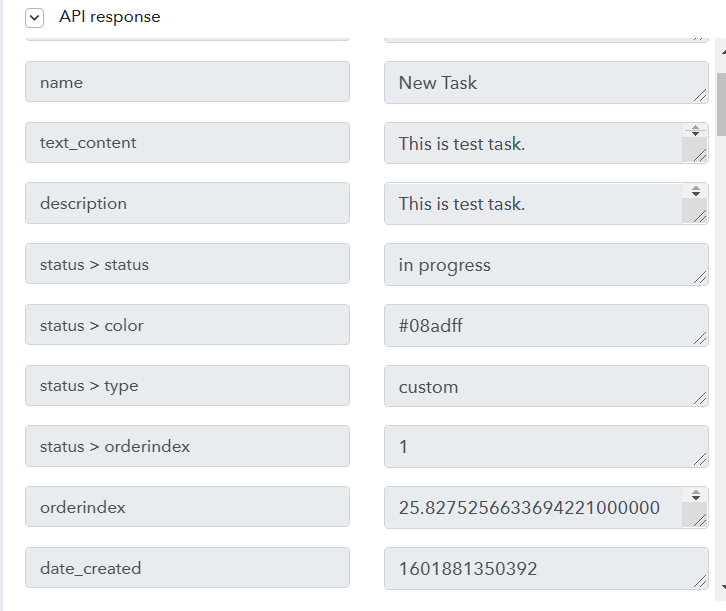
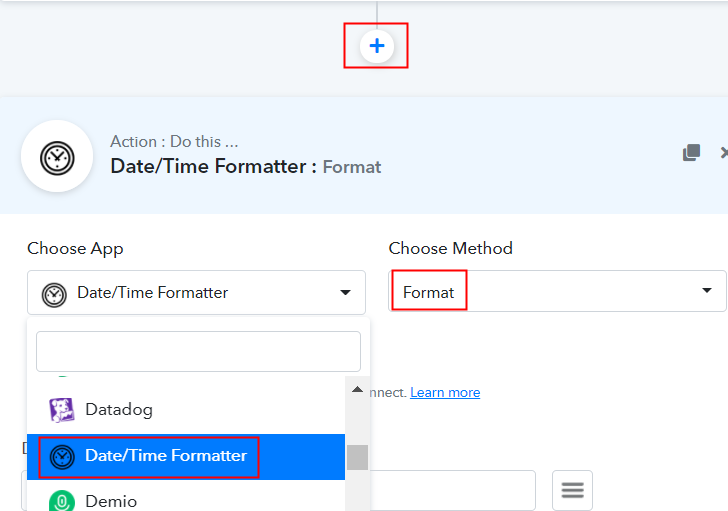
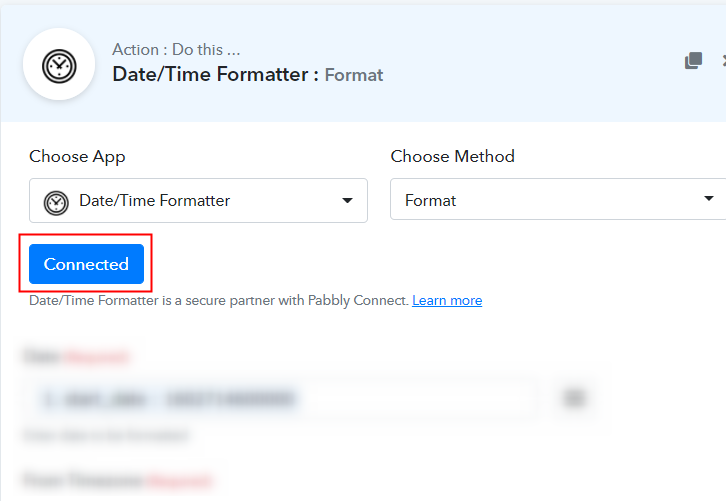
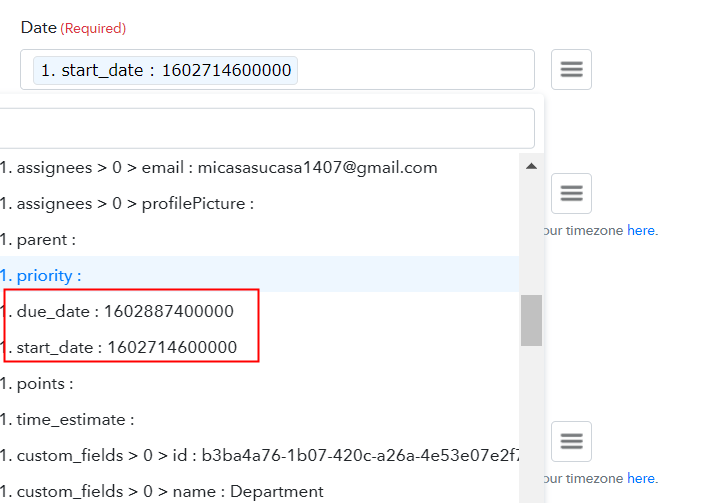
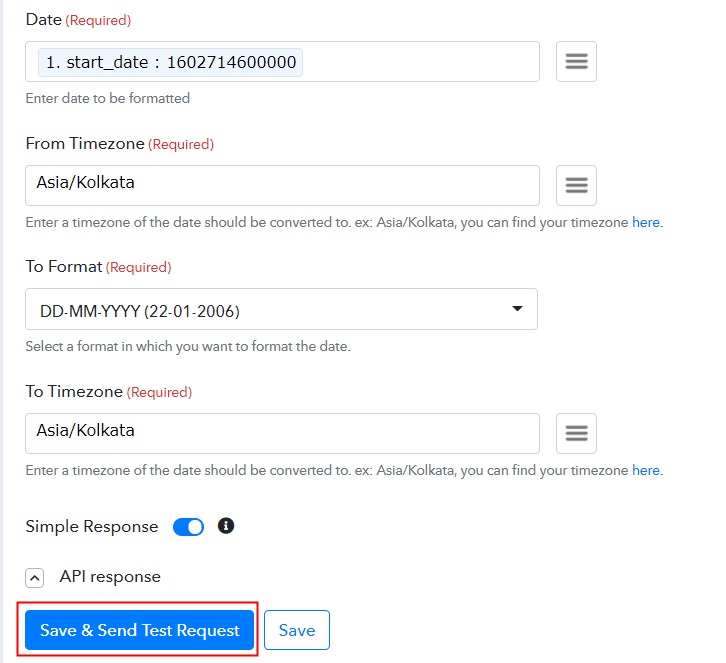
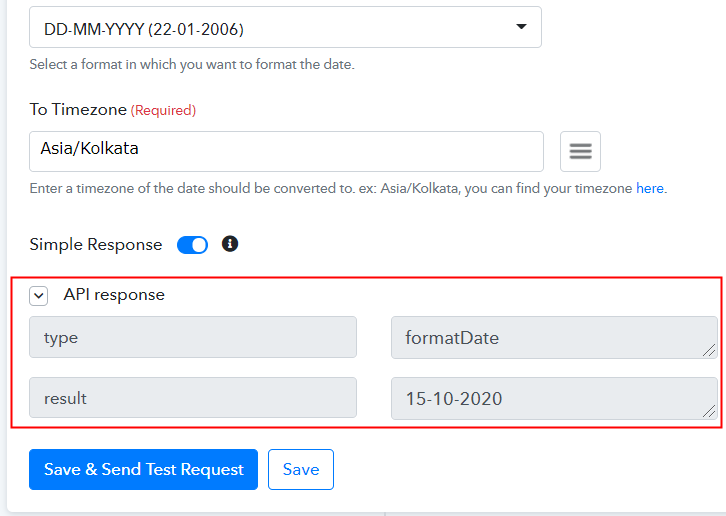
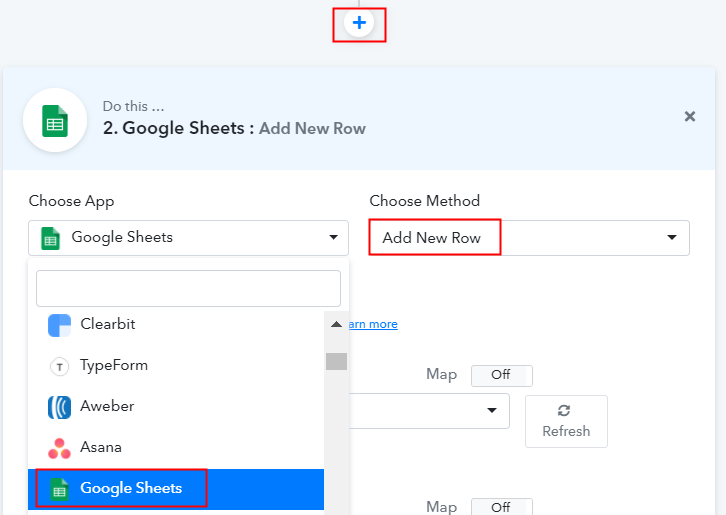
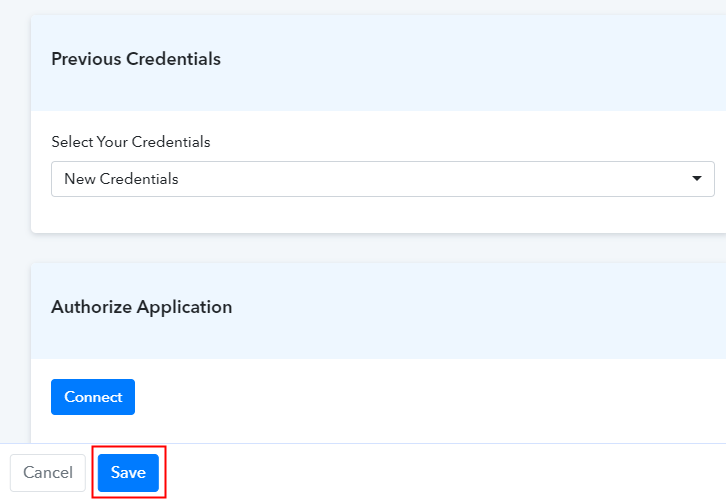
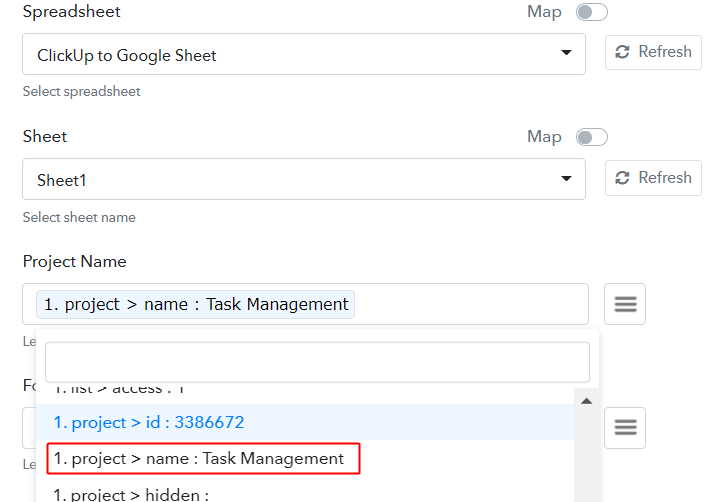
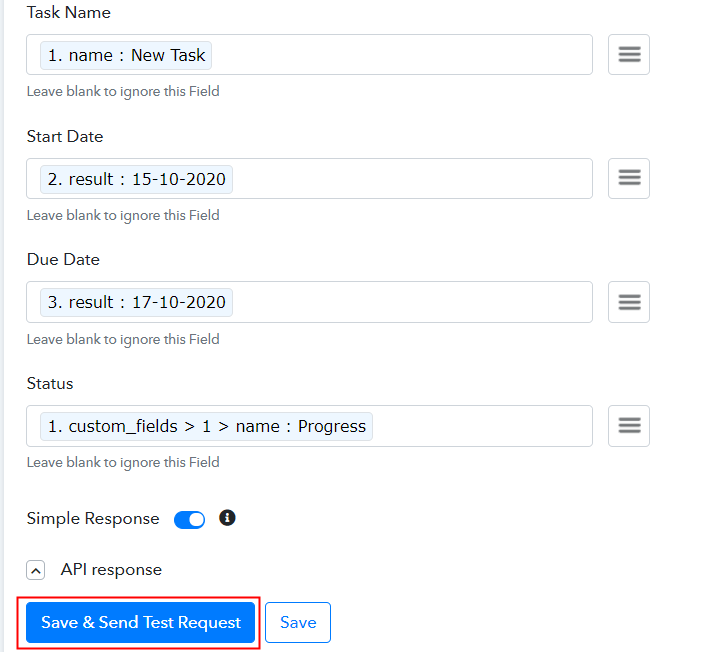
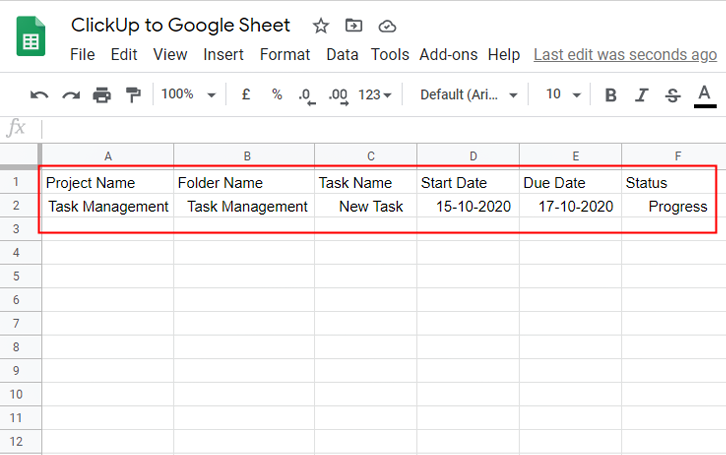
Further, after logging into the account, click on the “Access Now” button as shown in the above image. Start the process of building a workflow for integration by clicking on the “Create New Workflow” button. Moreover, add the name of workflow which in our case is “ClickUp to Google Sheets”. Nevertheless, you can always name the workflow according to your requirements. Next, after building a workflow, you have to choose the integration app to add ClickUp tasks to Google Sheets. Pabbly Connect lets you create unlimited workflows within minutes, click here to sign up for unlimited integrations for free. The following step is to select “ClickUp” from the dropdown, then choose the “New task” option to append data from the ClickUp to Google Sheets. The following step is to click on the “Connected with ClickUp” button. Now as soon as you click on the “Connected with ClickUp” button, it will ask for an API token, for which you have to log in to your ClickUp account. At the bottom of the ClickUp dashboard, you will see the Profile option, simply click on it. When you click on the profile option, it will open up different options, choose “Apps” from it. Simply copy the “API Token” appearing on the dashboard. Now before heading back to the Pabbly Connect dashboard to paste the API key, simply create a task by clicking on the “+” icon on the bottom of the dashboard and assign the starting and due date to it. Now after creating a task in ClickUp, move to the Pabbly Connect dashboard to paste the copied API key. Just paste the copied API token and hit the “Save” button. When you hit the save button, the software will automatically map all the fields such as workspace name, space name, and much more. Further, to test the trigger set, click on “Save and Send Test Request”, it will automatically fetch the details of the task created in ClickUp. As soon as we click on the “Save and Send Test Request” button, the API response will get captured including the task name, date of creation, due date, and much more. Now as you can see the date captured is not in the required format. For that, we are going to use the Date/Time Formatter feature of Pabbly Connect. Now to change the start and due date of the task we are going to use Date/Time Formatter. In addition, press the + icon to add a date formatter. Here we can pick “Date/Time Formatter” from the drop-down. Then choose the method “Format”. To proceed, click on the “Connected” button. Just select the date whose format you want to change from the dropdown in the Date section. Next, select the From Timezone which in our case is “Asia/Kolkata”. Now in “To Format” we have to pick the format from the dropdown in which we want our date. Here also we have to select the timezone which in our case is “Asia/Kolkata”. After mapping all the fields, click on “Save and Send Test Request”. As soon as click on the “Save and Send Test Request”, we will get the response in the required format. In the same way, we create an integration for the due date. To make Google Sheets and ClickUp integration work, you have to choose the action for your trigger. In addition, press the + icon to add an action to the trigger. Here we can pick “Google Sheet” from the drop-down. Then choose the method “Add New Row”. Further, click on the “Connected with Google Sheets” button. It will ask for authorization for which you have to log in to your Google account. It will ask for authorization for which you have to click on the “Connect” button to give allow access of your Google Sheets. As you see, the software has already fetched the spreadsheet which is “ClickUp to Google Sheets”. After that, map the fields such as for project name use the project name option and so. After successfully mapping all the fields, hit “Save and Send Test Request”. Lastly, when you check the Google Sheets, the entered task gets auto-populated in a sheet. This is a one time process after that, all the ClickUp will automatically get updated in Google Sheet. Hopefully, now we have cleared all the air about the automation process to add new ClickUp tasks to Google Sheets as rows. All you have to do is follow all the above-mentioned steps and you can easily connect ClickUp to Google Sheets. With the help of automation, one can easily avoid manual hard work. And in such cases, software like Pabbly Connect is a real savior that lets you connect unlimited premium apps. So, don’t wait anymore. Go and try Pabbly Connect for Free.Step 2: Access Pabbly Connect

Step 3: Workflow for ClickUp to Google Sheets Integration
(a) Start with a New Workflow

(b) Name the Workflow
Step 4: Setting Trigger for ClickUp to Google Sheets Integration
(a) Select Application you Want to Integrate
(b) Click on Connect Button
Step 5: Connecting ClickUp with Pabbly Connect
(a) Head to ClickUp Profile Option
(b) Click on Apps Option
(c) Copy the API Token
(d) Create a Task
Step 6: Paste API Key in Pabbly Connect Dashboard
(a) Fill API Key
(b) Map Field Data
(c) Save and Send Test Request
(d) Test the Response
Step 7: Setting Date/Time Formatter to Change Date Format
(a) Select Application you Want to Integrate
(b) Click the Connect Button
(c) Map Field Data
(d) Save and Send Test Request
(e) Test the Response
Step 8: Setting Action for ClickUp and Google Sheets Integration
(a) Select Application you Want to Integrate
(b) Click the Connect Button
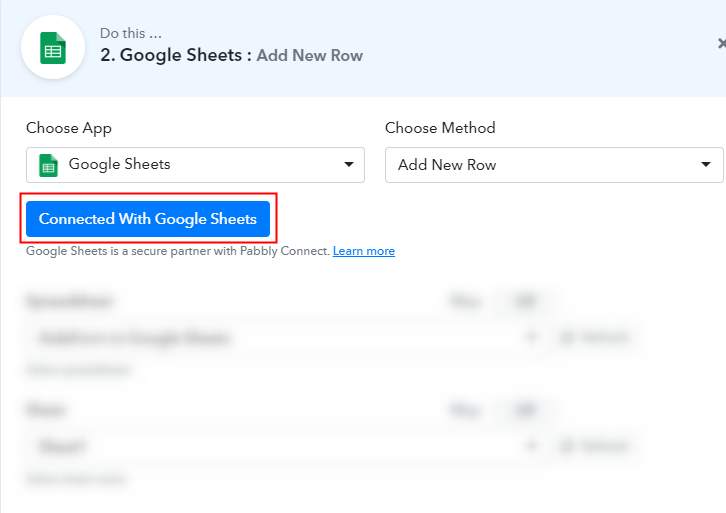
(c) Allow Authorization of Google Sheet
(d) Map Field Data
(e) Save and Send Test Request
Step 9: Check Response in Google Sheets
Conclusion –
You May Also Like To Read –


