In this blog, we are going to demonstrate you a quick way to add Facebook lead ads to Google Sheets and send mail via Gmail automatically using Pabbly Connect.
Pabbly Connect is an awesome and the most affordable integration and automation tool in the market which will help you to set up the integration and automate multiple apps just like a piece of cake.
But before moving forward, let’s know a wee bit about the services & why there is a need to integrate Facebook, Google Sheets, and Gmail. As you are aware, that Facebook is a social media platform that allows the user all over the world to connect and interact. Google Sheets is an online spreadsheet app and Gmail is a free email service powered by Google.
Why Choose This Method Of Integration?
In contrast with other integration services-
- Pabbly Connect does not charge you for its in-built apps like filters, Iterator, Router, Data transformer, and more
- Create “Unlimited Workflows” and smoothly define multiple tasks for each action
- As compared to other services which offer 750 tasks at $24.99, Pabbly Connect offers 50000 tasks in the starter plan of $29 itself
- Unlike Zapier, there’s no restriction on features. Get access to advanced features even in the basic plan
- Try before you buy! Before spending your money, you can actually signup & try out the working of Pabbly Connect for FREE
Of course, there is a sort of integration between these softwares but that is kinda limited. That’s why, we are using Pabbly Connect to integrate the software such that whenever a new lead takes place through Facebook Lead Ads, the data will auto-populated in Google Sheets, and at the same time a mail has been sent via Gmail automatically.
Besides this procedure, we have also enclosed a video to support you more in this integration.
Apart from that, we also have a template for this integration that can assist you further. Simply tap on the ‘Use Workflow’ button below to get started. Moreover, you can visit Marketplace to look for more ready-made template of the workflow.

So, let’s start the blog to integrate Facebook and Google Sheets along with Gmail using Pabbly Connect.
Step 1: Sign up to Pabbly Connect

Start the process to add Facebook lead ads to Google Sheets and send mail via Gmail by pressing the ‘Sign Up Free‘ button on the Pabbly Connect home page. Following that, either manually fill-up all the details or sign up using your Gmail account.
Try Pabbly Connect for FREE
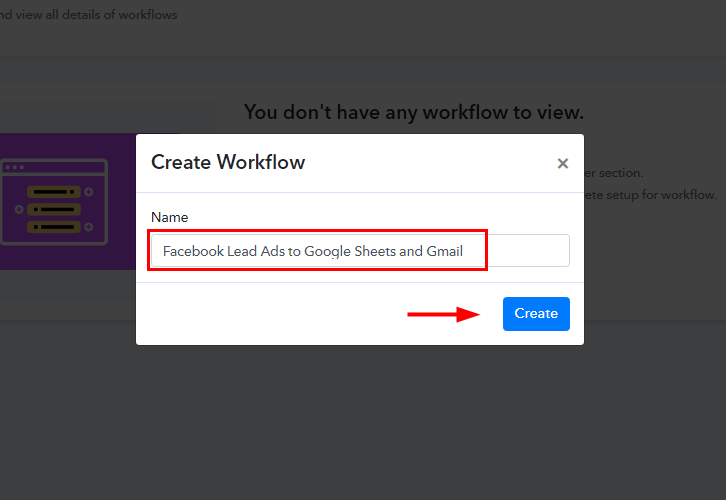
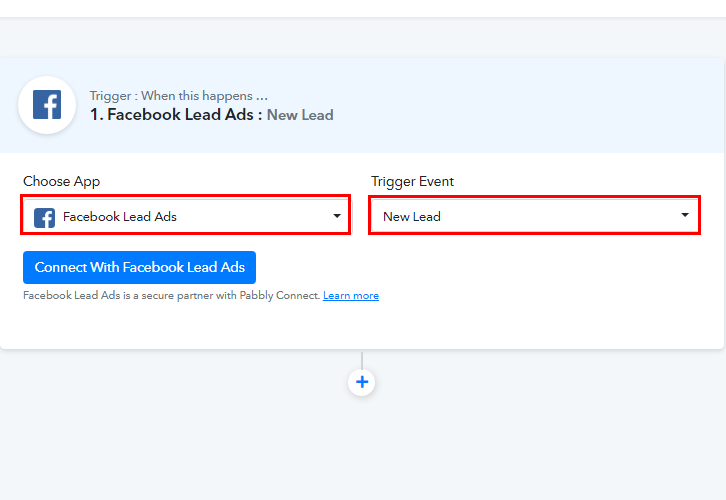
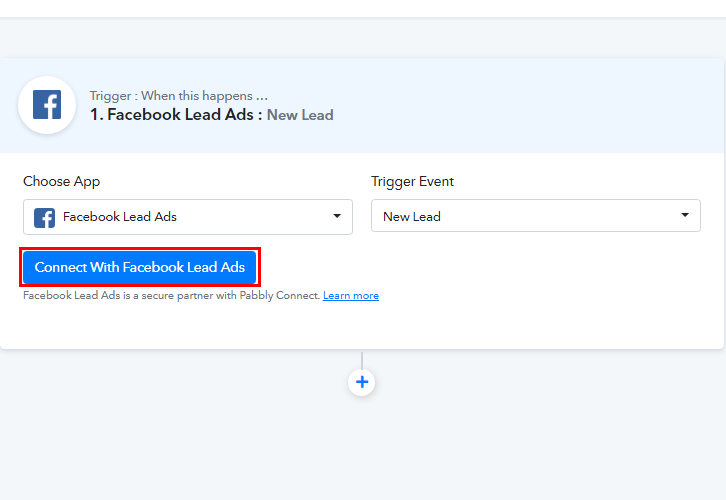
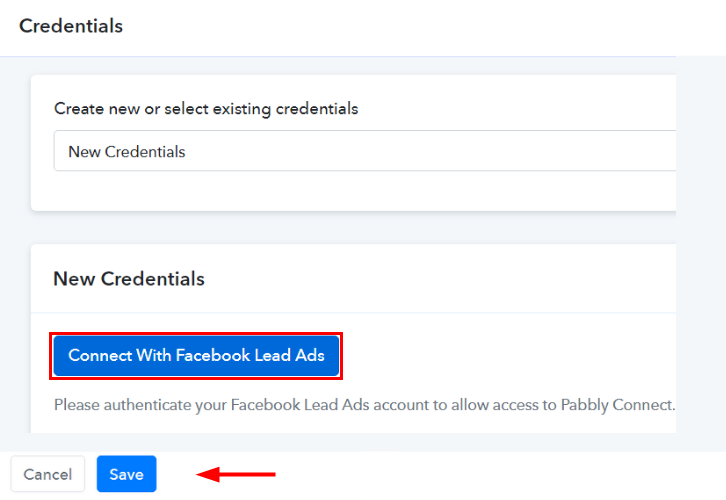
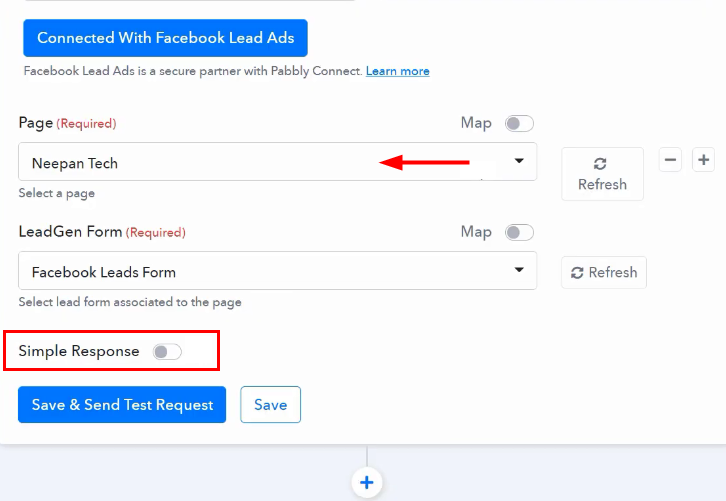
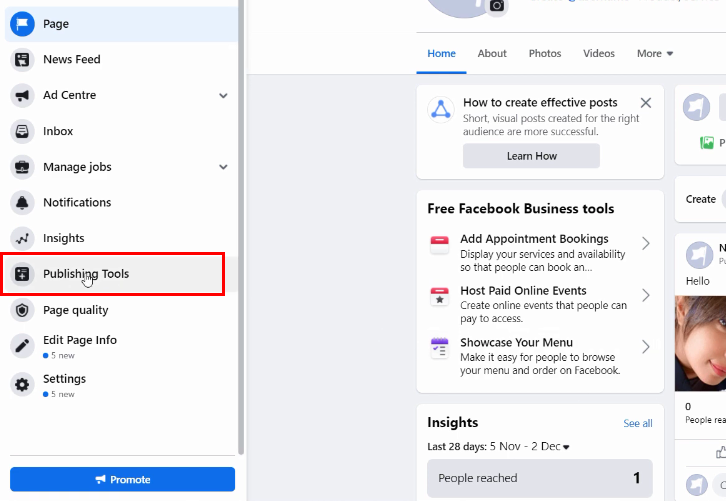
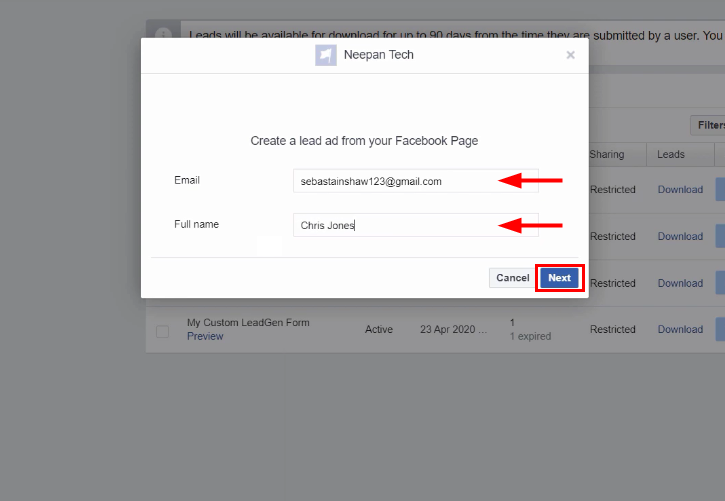
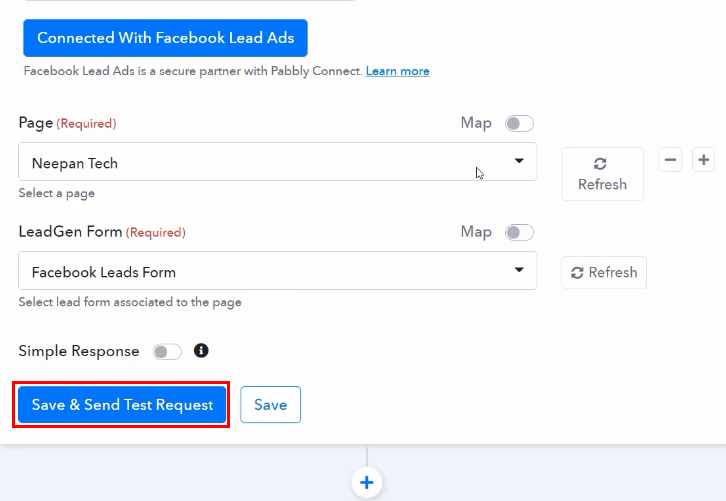
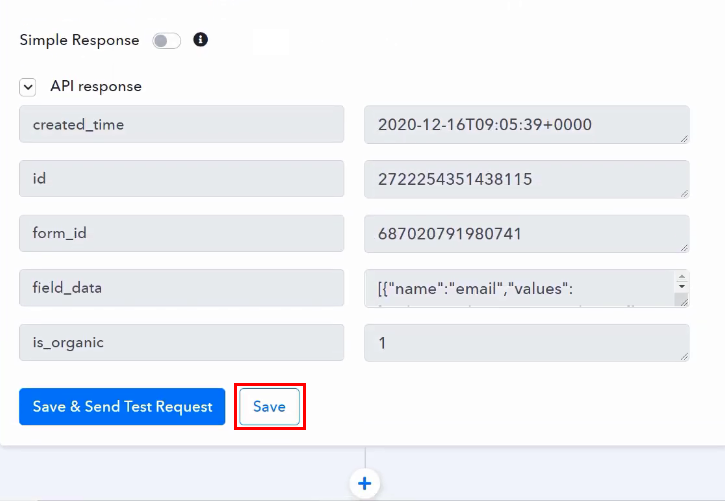
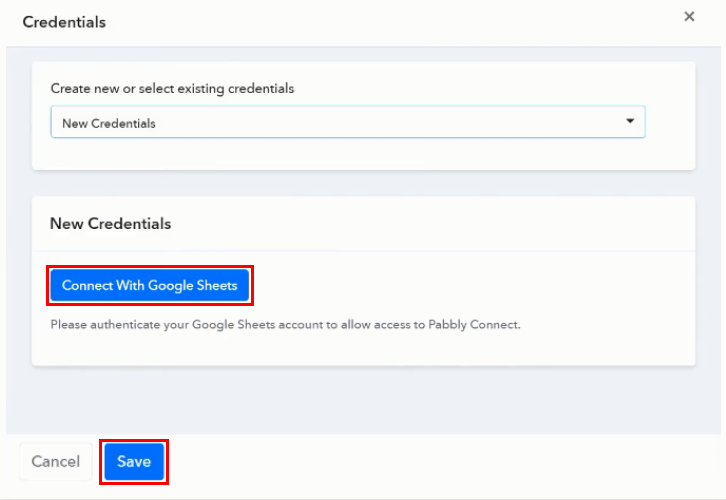
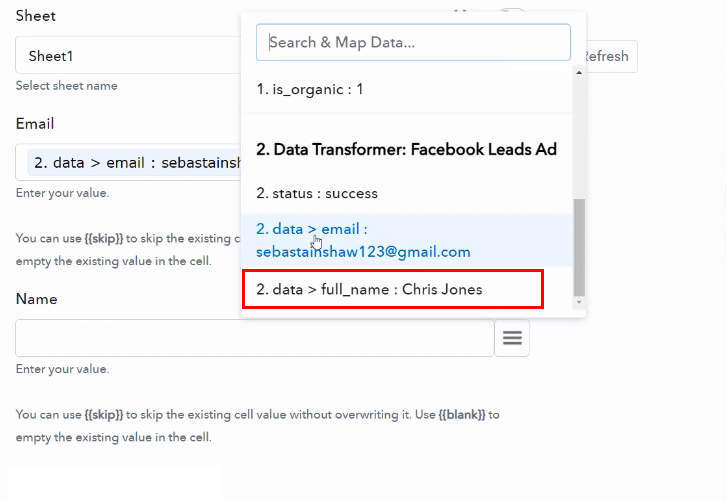
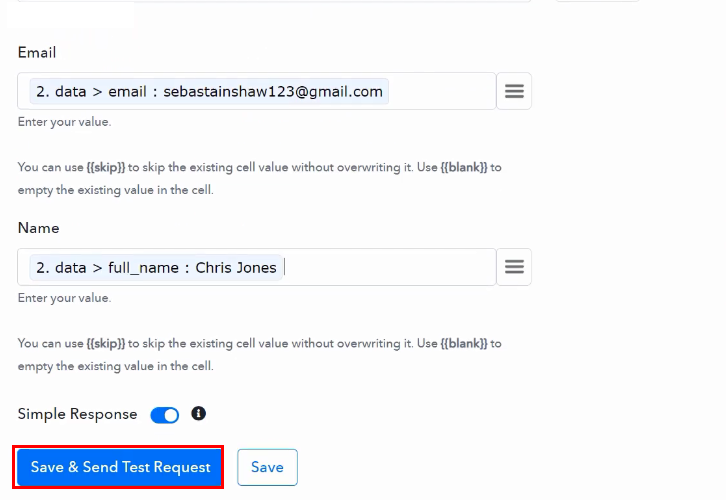
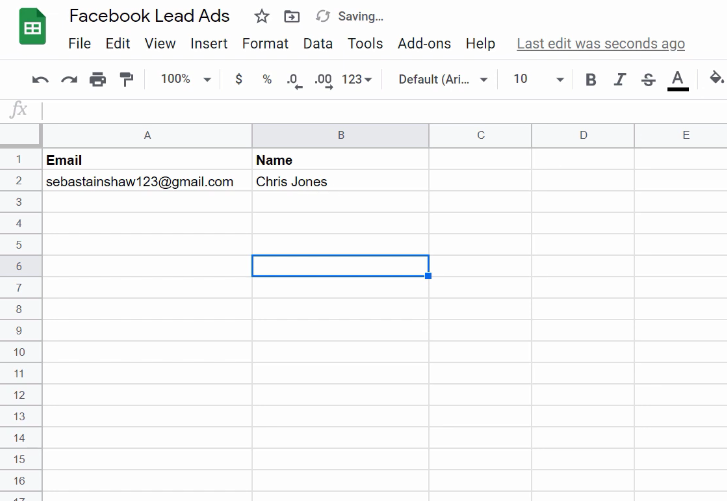
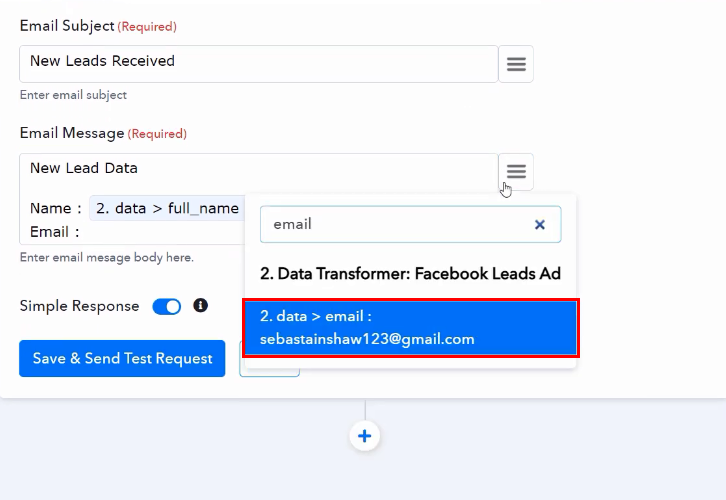
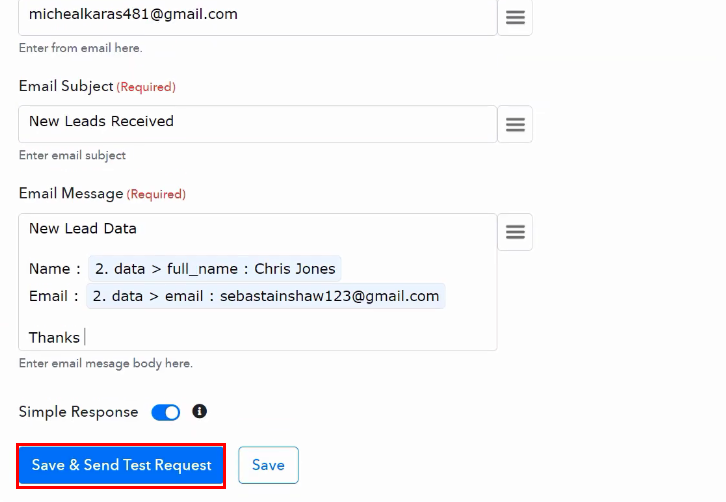
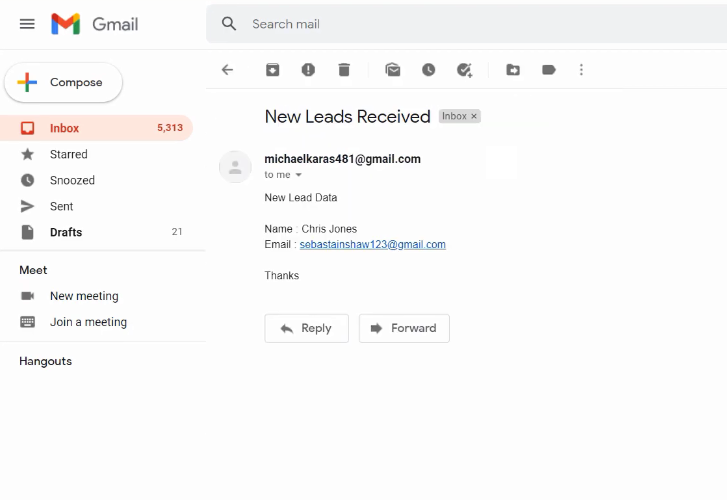
Now, after logging into the account, hit the ‘Access Now’ button of the Connect section in the dashboard. Start the process of creating a workflow for integration by pressing the ‘Create Workflow’ button. Moreover, add the name of workflow i.e, ‘Facebook Lead Ads to Google Sheets and Gmail’. Although, you can always change the name of the workflow as per your needs. Following that, after creating a workflow, choose the integration app to create a workflow to add Facebook lead ads to Google Sheets and send mail via Gmail. Using Pabbly Connect you can avail unlimited actions and triggers, tap here to sign up for unlimited workflows for free. Now, select the application that you want to integrate. Here, we are choosing ‘Facebook Lead Ads’ for integration & in the method section, select ‘New Lead’. After choosing the application, click on the ‘Connect with Facebook Lead Ads’ button to move forward. Next, a window will pop up, here click on the ‘Connect With Facebook Lead Ads’ button and authorize your Facebook account. At last click on the ‘Save’ button. Subsequently, Pabbly Connect fetches all the pages and forms available on that account. Simply, select the page and forms from which you want to get the leads. And along with this, switch off the ‘Simple Response’ section (to get the data in the correct format). To create a new lead or to check whether the integration process is working or not, go to your Facebook account. Open up the same Facebook page which you have selected above, i.e. ‘Neepan Tech’. After that, go to the Publishing Tool from the left sidebar and click on it. On the left sidebar, under the ‘Lead Ads Forms’ section, click on the ‘Form Library’ option. And then you see all the lead forms, click on ‘Preview’ of your form, i.e. ‘FB Leads Form’. After clicking on Preview, a window will open up, enter the email ID and full name of the new lead and then click on the ‘Save’ button. And at last click on ‘Submit’. Once you are done creation of a new lead, head back to the Pabbly Connect window, and click on the ‘Save and Sent Request’ button to get the API response. After this, you will get the API response. Finally, click on the ‘Save’ button. As the fields and values are not showing properly, so we have to add the ‘Data Transformer’ as an action step. To add the Data Transformer, click on the plus (+) button. An action window appears, select ‘Data Transformer’ from the choose app drop-down and select method ‘Facebook Lead Ad’. After selecting the application, click on ‘Connect With Data Transformer’ button. Now, it’s time to map the field data. Simply click on the map button and select the ‘field_data’ which you received through Facebook Lead Ads trigger. Further, click on the ‘Save and Sent Test Request’ button to get the API response. Now we get the response in the correct format, click on the ‘Save’ button. Now that, we have collected all the information in the correct format. It’s time to create a row in Google Sheets from Facebook response by setting up an action. After that, click on the plus (+) icon and you will see an action window appear. Here, select the ‘Google Sheets’ from Choose App drop-down option and ‘Add New Row’ from Action Event. Then, click on the ‘Connect With Google Sheets’ button to connect it to your Google account. Once you click on the ‘Connect With Google Sheets’ button, a window will pop up, so that you can log in and authorize your Google account. At last, click on the ‘Save’ button. Subsequently, Pabbly Connect automatically fetches the worksheet from Google. Now it is time to map the requisite fields by selecting data like email and name. Click on the ‘Save & Send Test Request’ button, after mapping all the pieces of information. It will send the data to Google Sheets. Click the ‘Save’ button to save the whole workflow. Head to the Google Sheets and you’ll see all the information is successfully filled in their respective columns. Next, we have to send this data to Gmail and for that, we have to add another action step to our workflow. After a row has been added in Google Sheets, now we have to send an email via Gmail and for that, we have to add another action step in our integration. Now in this step, click on the + button below and choose the application that you want to integrate. Here we will choose ‘Gmail’ to integrate and in the method section select ‘Send an Email’. After choosing the application click on the ‘Connect with Gmail’ button to move forward. Next, to authorize your Gmail account, you need to click on the ‘Connect’ button and then select your Google account through which you want to login. Further, map all the fields quickly like name, email, etc by clicking on the map button given at the side of every field. Once you are done mapping up all field data click on the ‘Save & Send Test Request’ button. Here, you can see that integration was successful and the email has been delivered via Gmail about the new lead created in Facebook Lead Ads. Now, after this integration, whenever there will be any new lead created in Facebook, first a row is added in Google Sheets and then a mail has been sent via Gmail. Conclusively, now you know ‘How to Add Facebook Lead Ads to Google Sheets & Send Mail via Gmail’. This is a one-time process, now all your manual work will be done by the online business automation & integration tool i.e Pabbly Connect. Just follow this step by step procedure mentioned above & your Facebook to Google Sheets and Gmail integration is all set. So, what are you waiting for? Go ahead & catch your deal by signing up for a free account.Step 2: Access Pabbly Connect

Step 3: Workflow for Facebook, Google Sheets, and Gmail Integration
(a) Start with a New Workflow

(b) Name the Workflow
Step 4: Setting Trigger for Facebook to Google Sheets and Gmail Integration
(a) Select Application you Want to Integrate
(b) Connect with Facebook Lead Ads
(c) Authorize Facebook
(d) Map the fields
Step 5: Create a New Lead
(a) Open Facebook Page

(b) Go to Publishing Tool
(c) Select Form Library
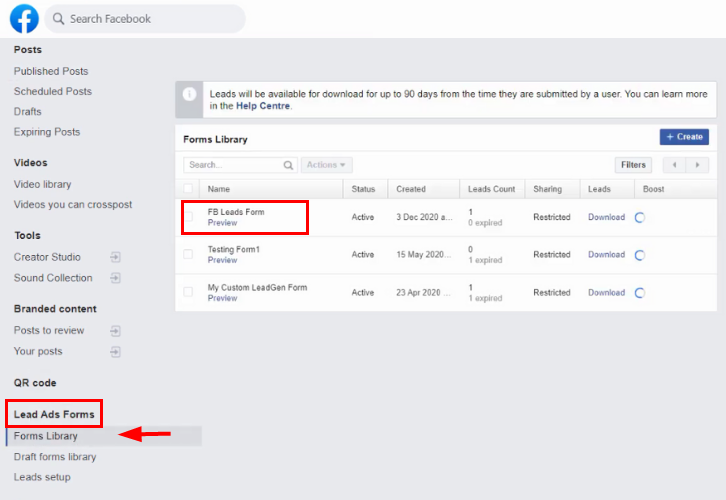
(d) Add Lead Details
(e) Save and Sent Test Request
(f) Check & Save Response
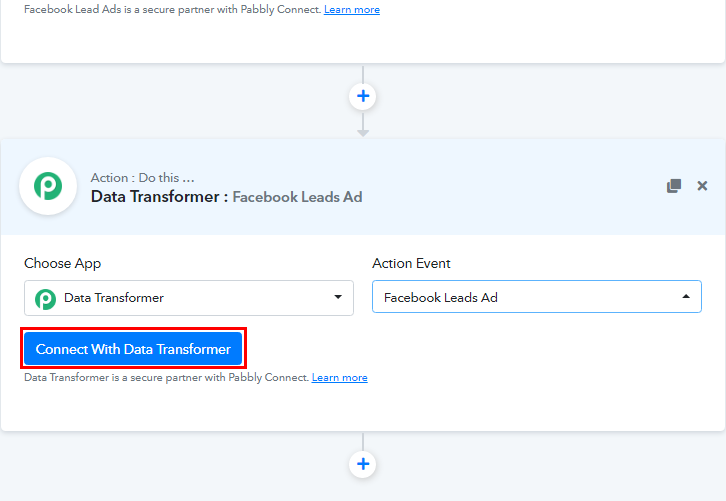
Step 6: Setting Action for Data Transformer
(a) Select Application
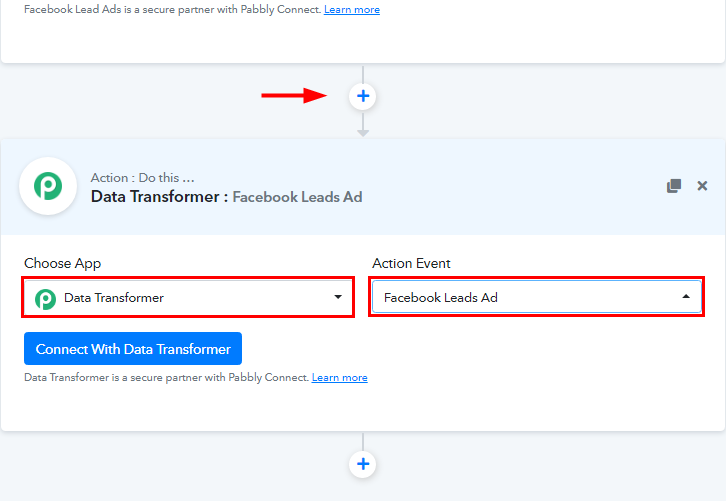
(b) Connect with Data Transformer
(c) Map the Field Data
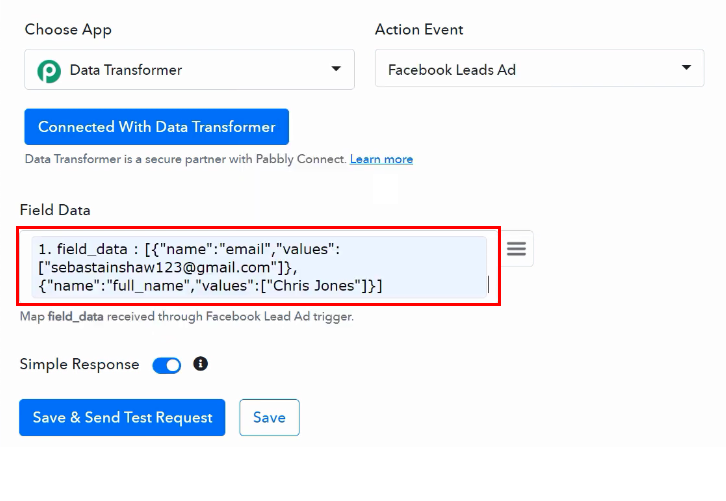
(d) Save and Sent Test Request

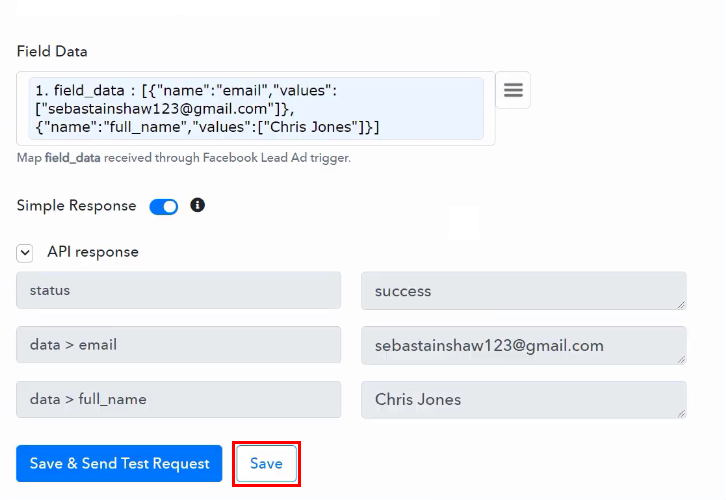
(e) Check & Save Response
Step 7: Setting Action for Google Sheets Integration
(a) Select Application you want to Integrate
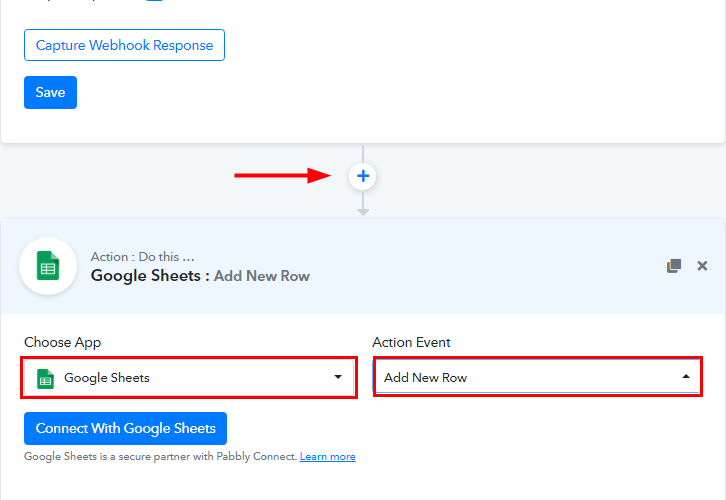
(b) Connect with Google Sheets

(c) Authorize Google Sheets
(d) Map the Field
(e) Save & Send Test Request
Step 8: Check Response in Google Sheets
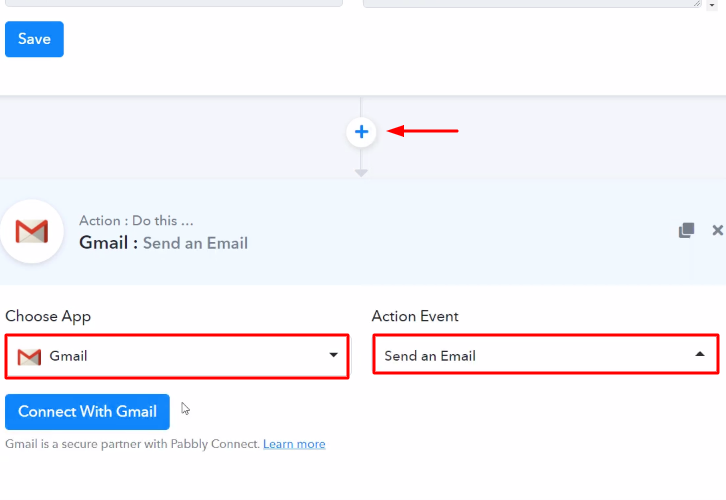
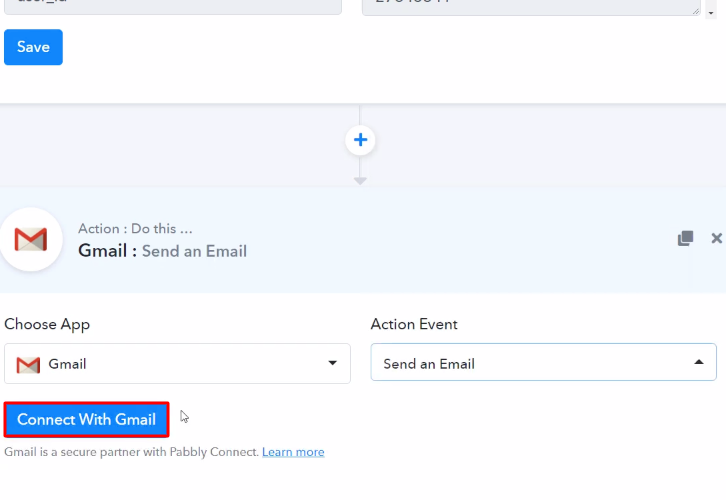
Step 9: Setting Action for Gmail Integration
(a) Select Application you Want to Integrate
(b) Click the Connect Button
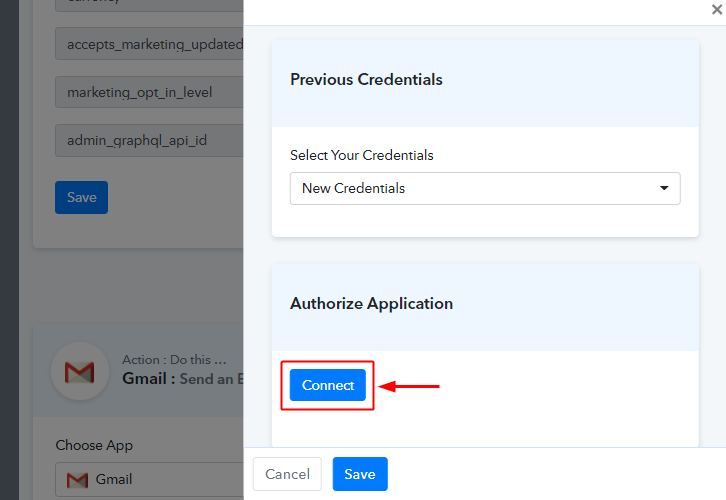
(c) Authorize Application
(d) Map the Fields
(e) Send Test Request
Step 10: Check Response in Gmail Dashboard
Conclusion –
You May Also Like To Read –


