What is a License?
The license refers to a specific code that you can share with your customer after the purchase to provide them plan wise product access, cashback, offers, etc.
For example: If you are selling an online product and want to offer any specific product feature to the users who buy a higher plan. You can do this by sharing a unique code (license) through email or invoice using the License feature of Pabbly Subscription Billing.
How to Setup a License in Pabbly Subscription Billing
Adding a License to your plan is quite easy.
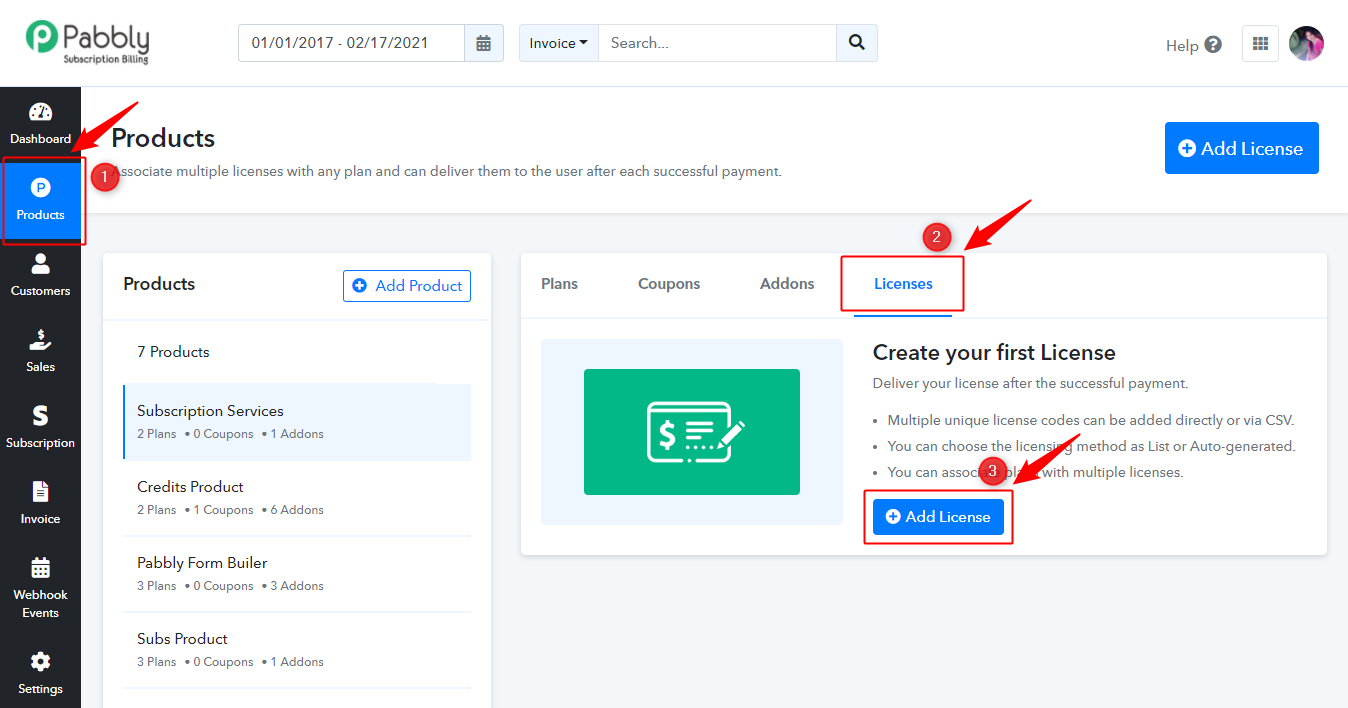
Just go to the License option and click on the “Add License” button.
To set up a license for your plans, click on the ‘Add License’ button and fill up a few details like License Name, Licensing Method, Licensing Status, etc.
Now select the plan to which you want to apply for the License and finally click on the “Save” button and your license will be ready to share.
How to fill up the details
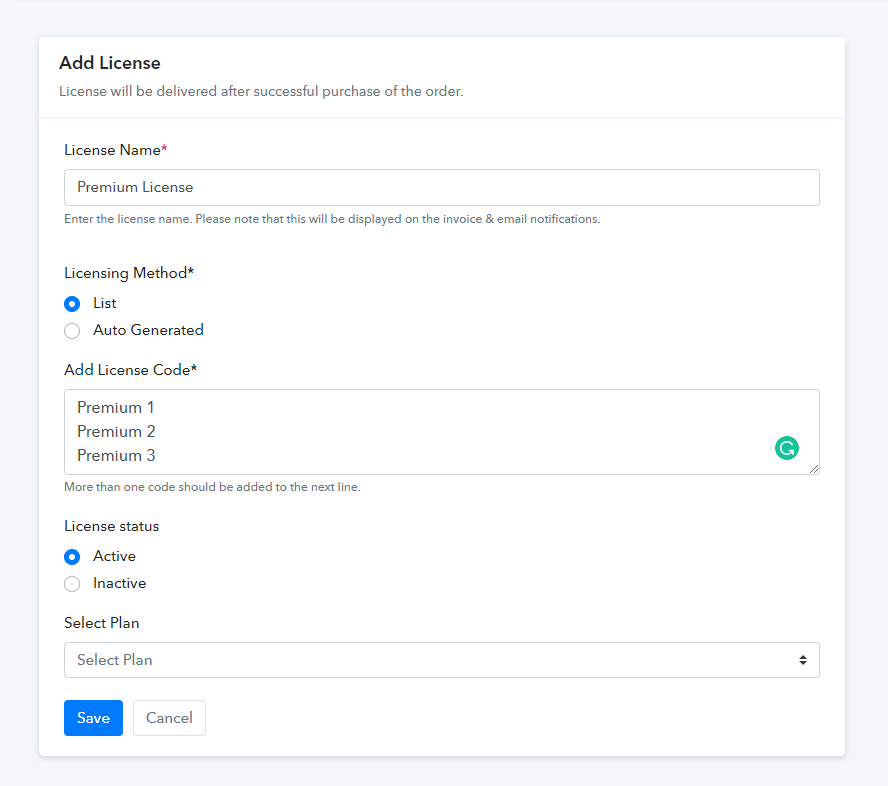
1. License Name
You can name the license as per your choice. Just remember one thing that this name will be displayed on the customer invoice and email notifications.
2. Licensing Method
There are basically two licensing methods to choose from.
i. List – You can choose this method when you want to manually add the name and number of license codes. Also, this method allows you to limit and customize the license codes.
Further, on choosing the Licensing method as “List” you will be required to add the license code in the box provided.
For example: If you want to manually offer licenses to just two of your special customers, you can do that by using the “List method”.
Let’s say the name of the two licenses codes is “Special Customer A” and “Special Customer B” so the format in which they must be added in the box will be
Special Customer A
Special Customer B
ii. Auto-Generated – This method is for automatically generating the license codes. On choosing the “Auto-Generated” method the system will generate codes randomly and share them with the customers through email or invoice whenever a purchase is made.
3. License Status
Users can change the status of the license according to their needs.
For example: If you want to offer the license to your customers for a limited period of time then whenever the license offering period ends you can change the status of the license from “Active” to “Inactive”.
You can set the status of the license as “Active” or “Inactive” by simply clicking on the respective option.
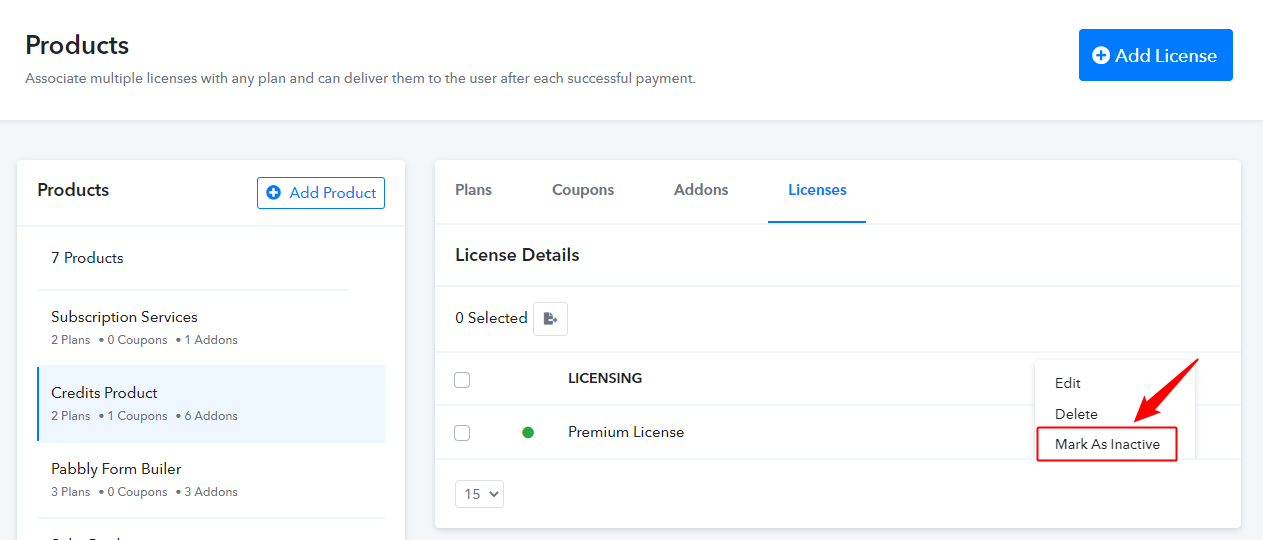
Besides, there is another option to change the status of a license from the license list.
Just access the license tab of a product and press the three vertically aligned dots next to a particular license and switch the status.
4. Select Plan
Any license that you create must be associated with a plan.
You can do this simply by choosing an existing plan from the dropdown that appears on clicking the “Select Plan” field.
Finally, click on the “Save” button and your license will be ready to share.
As soon as you assign the licenses to your users the front table would appear something like this
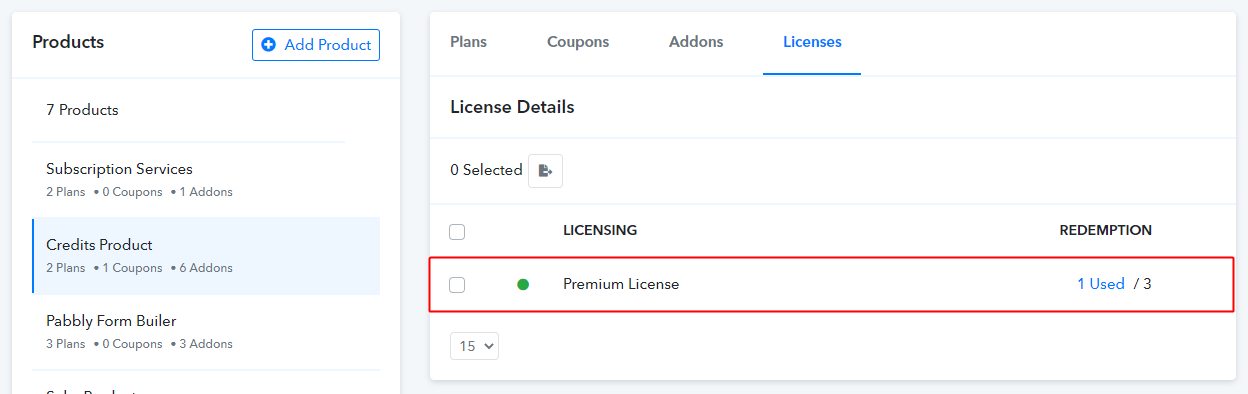
Following is the overview of the license redemption

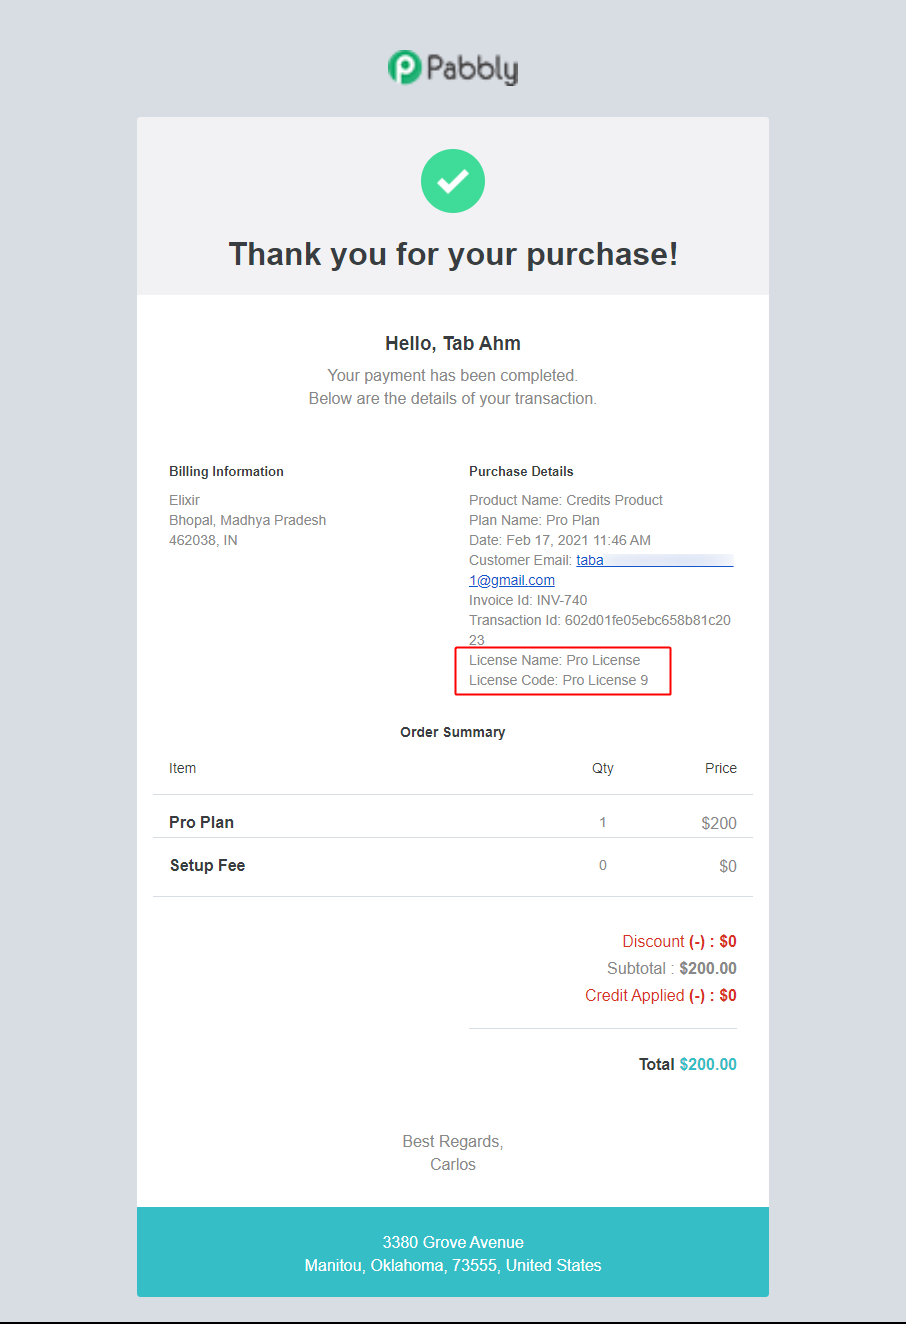
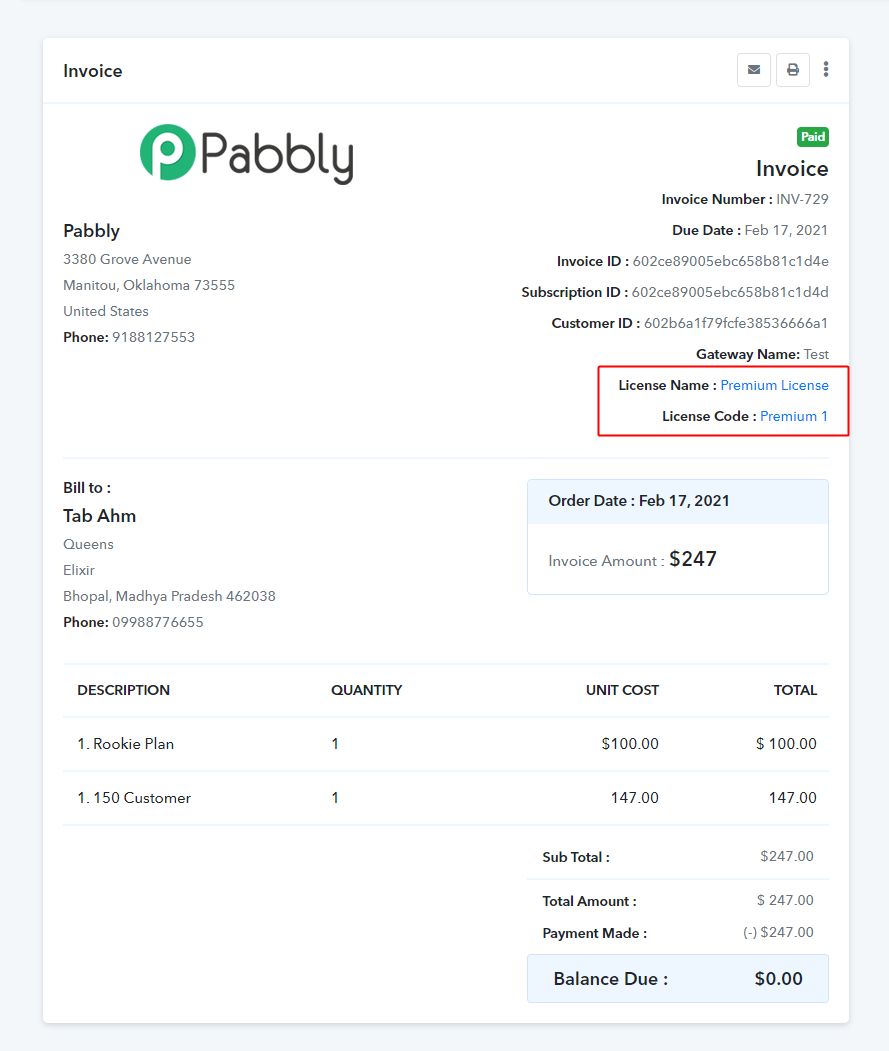
Once you setup the license its details will also be included in the Invoice and email notification received by the customers.
Invoice –
Email Notification –