How to Get Notifications When a New File is Uploaded to OneDrive Using Pabbly Connect

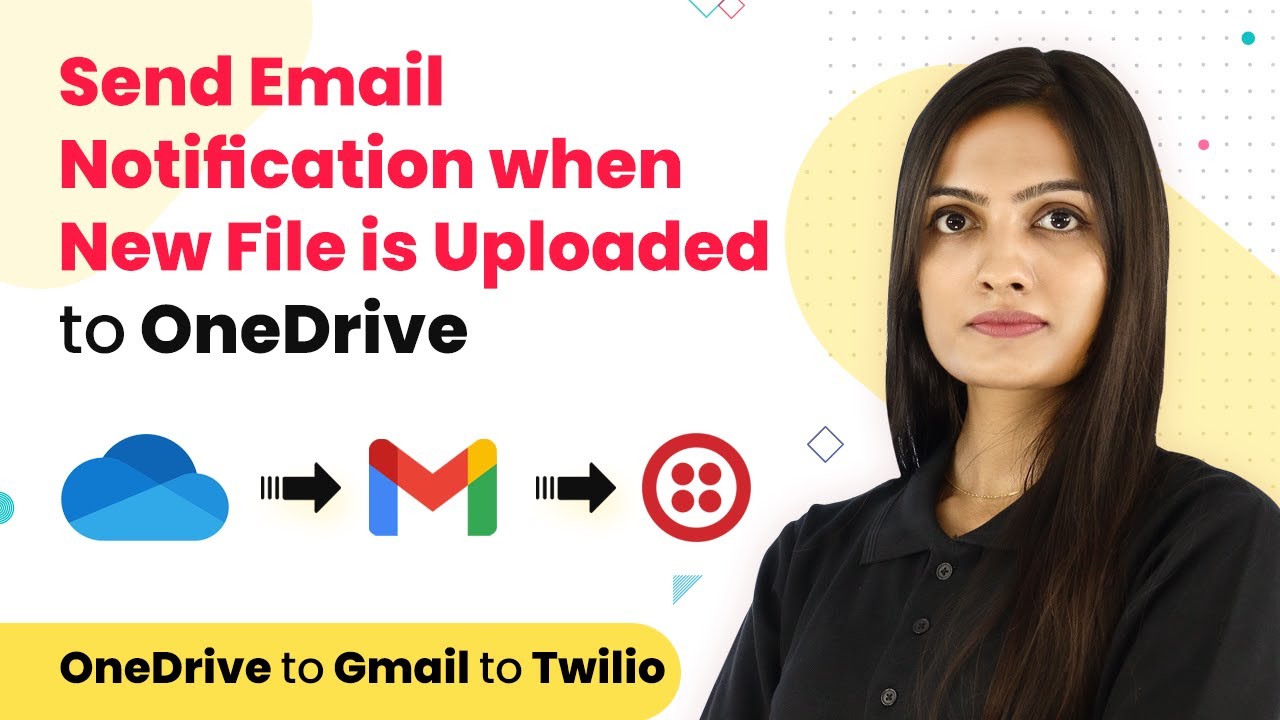
Learn how to set up notifications for new file uploads to OneDrive using Pabbly Connect, Gmail, and Twilio in this step-by-step tutorial. Build sophisticated automated workflows in less time than you think. This guide translates complex integrations into straightforward steps for immediate implementation.

Watch Step By Step Video Tutorial Below


1. Accessing Pabbly Connect for Integration

To begin the process of integrating notifications for new file uploads to OneDrive, first access Pabbly Connect. Open your browser and navigate to Pabbly.com. Once there, click on ‘Products’ and select ‘Connect’ to reach the integration platform.

Next, sign in to your Pabbly Connect account. If you do not have an account yet, you can create one in just a few minutes. After signing in, click on ‘Access Now’ to enter the Pabbly Connect dashboard and start creating your workflow.


2. Creating Your Workflow in Pabbly Connect

Within the Pabbly Connect dashboard, click on ‘Create Workflow’ to start setting up your automation. You will need to name your workflow; for this example, name it ‘OneDrive to Gmail and Twilio’. Click on ‘Create’ to proceed. using Pabbly Connect

  • Select ‘Microsoft OneDrive’ as your trigger application.
  • Choose the trigger event as ‘New File’.
  • Click on ‘Connect’ to start linking your OneDrive account.

Once connected, specify the folder path in OneDrive where the new files will be uploaded. This is crucial as it determines when the trigger will activate. After entering the folder path, click on ‘Save’ and then ‘Send Test Request’ to ensure everything is functioning correctly.


3. Setting Up Email Notifications with Gmail

After successfully connecting OneDrive to Pabbly Connect, the next step is to set up email notifications through Gmail. Choose Gmail as your action application and select the action event as ‘Send Email with Plain Text’.

To connect your Gmail account, click on ‘Connect’ and authorize Pabbly Connect to access your Gmail account. Once authorized, fill in the required fields such as recipient name, email, subject, and message body. You can map the file name and created date from the OneDrive trigger to personalize the email content.

  • Recipient Name: Enter the name of the person receiving the email.
  • Email Subject: Use a subject like ‘New File Uploaded’.
  • Email Body: Include a message about the new file upload.

Once you have filled out the email details, click on ‘Save’ and then ‘Send Test Request’ to confirm that the email notification is sent successfully.


4. Sending SMS Notifications with Twilio

The final step is to set up SMS notifications using Twilio. Click on the plus button to add another action window and select Twilio as the application. Choose the action event as ‘Send SMS Message’.

Connect your Twilio account to Pabbly Connect by entering your Account SID and Auth Token, which you can find in your Twilio dashboard. Once connected, fill in the SMS details such as the sender’s number (from Twilio) and the recipient’s number.

SMS Body: Write a message like ‘Hello, a new file has been uploaded!’. File Name: Map the file name from the OneDrive trigger. Recipient Number: Enter the phone number to receive the SMS.

After filling in the necessary fields, click on ‘Save’ and ‘Send Test Request’ to verify that the SMS notification is sent successfully.


5. Verifying Notifications in Gmail and Twilio

After setting up both email and SMS notifications, it’s essential to verify that everything is working correctly. Check your Gmail inbox to see if the email notification has arrived. You should see the email with the subject ‘New File Uploaded’ and the content you specified.

Next, log into your Twilio account and check the messaging section to confirm that the SMS has been sent. You should see the message with the details of the new file upload. This ensures that your integration using Pabbly Connect is functioning as intended.

To summarize, you have successfully integrated OneDrive with Gmail and Twilio through Pabbly Connect. This automation allows you to receive immediate notifications whenever a new file is uploaded, enhancing your workflow efficiency.


Conclusion

In this tutorial, we explored how to use Pabbly Connect to set up notifications for new file uploads to OneDrive. By integrating Gmail and Twilio, you can receive instant email and SMS alerts, improving your productivity.

Ensure you check out Pabbly Connect to create business automation workflows and reduce manual tasks. Pabbly Connect currently offer integration with 2,000+ applications.

Integrating Zoho CRM with Google Sheets Using Pabbly Connect

Learn how to integrate Zoho CRM with Google Sheets using Pabbly Connect to automate lead creation. Follow our step-by-step tutorial for seamless integration. This comprehensive guide reveals exactly how to connect your applications and automate repetitive tasks — accessible for professionals of all technical backgrounds.

Watch Step By Step Video Tutorial Below


1. Introduction to Pabbly Connect for Google Sheets and Zoho CRM Integration

Pabbly Connect is a powerful integration tool that allows you to automate workflows between various applications, including Google Sheets and Zoho CRM. In this tutorial, we will guide you through the process of creating leads in Zoho CRM directly from Google Sheets using Pabbly Connect.

By utilizing Pabbly Connect, you can streamline your lead management process without any coding knowledge. This integration enables you to automatically create leads in Zoho CRM whenever a new row is added to Google Sheets, ensuring that your data is always up-to-date.


2. Setting Up Pabbly Connect for Google Sheets Integration

To begin the integration, first, access Pabbly Connect by visiting the official website and signing in to your account. If you don’t have an account, you can create one for free in just a few minutes. Once logged in, navigate to the dashboard and click on the ‘Create Workflow’ button.

  • Click on ‘Create Workflow’.
  • Name your workflow, for example, ‘Google Sheets to Zoho CRM’.
  • Select Google Sheets as the trigger application.

After setting up the trigger, you will need to define the action that will occur in Zoho CRM. This setup process is crucial as it establishes how Pabbly Connect will facilitate the data transfer between Google Sheets and Zoho CRM.


3. Configuring Google Sheets to Work with Pabbly Connect

Now, let’s configure Google Sheets to work seamlessly with Pabbly Connect. Open your Google Sheets document where you want to capture leads. Ensure that your sheet has the necessary columns such as First Name, Last Name, Email, Company, Annual Revenue, and City.

Once your sheet is ready, you need to set up the Pabbly Connect Webhook:

  • Go to the Add-ons menu in Google Sheets.
  • Select ‘Pabbly Connect Webhook’.
  • Click on ‘Initial Setup’ and paste the Webhook URL from Pabbly Connect.

This step is essential as it links your Google Sheets to Pabbly Connect, allowing it to monitor for new entries and trigger the lead creation process in Zoho CRM.


4. Mapping Data from Google Sheets to Zoho CRM

After configuring Google Sheets, the next step is to map the data to Zoho CRM. In Pabbly Connect, select Zoho CRM as the action application and choose the ‘Create Lead’ action event. You will then need to connect your Zoho CRM account to Pabbly Connect.

To complete the connection, you will be prompted to enter your Zoho CRM domain. Once connected, you will see various fields that need to be filled:

Map the First Name field from Google Sheets to the corresponding field in Zoho CRM. Continue mapping Last Name, Email, Company, Annual Revenue, and City.

Once all fields are mapped correctly, click on ‘Save and Send Test Request’ to verify that the integration works. This will create a lead in Zoho CRM using the data from Google Sheets, demonstrating the power of Pabbly Connect in automating your lead generation process.


5. Finalizing the Integration and Testing

With the mapping complete, it’s time to finalize the integration. Go back to your Google Sheets and add a new row with lead information. This row should include all the mapped fields you set up earlier.

After adding the new lead information, return to Pabbly Connect and check if the lead has been created in Zoho CRM. Refresh the page in Zoho CRM to see the new entry. This confirms that Pabbly Connect has successfully integrated Google Sheets with Zoho CRM, automating your lead creation process.

This integration not only saves time but also ensures that your leads are captured accurately and efficiently, allowing you to focus on more important tasks while Pabbly Connect handles the data transfer seamlessly.


Conclusion

In this tutorial, we explored how to use Pabbly Connect to integrate Google Sheets with Zoho CRM, enabling automatic lead creation. This process enhances efficiency and accuracy in managing leads, making it easier for businesses to streamline their operations.

Ensure you check out Pabbly Connect to create business automation workflows and reduce manual tasks. Pabbly Connect currently offer integration with 2,000+ applications.

Automate WhatsApp Messages with Pabbly Connect: A Complete Guide

Learn how to automate WhatsApp messages using Pabbly Connect with Google Sheets for seamless communication. Step-by-step tutorial included. Implement the precise methodologies leading organizations use to automate repetitive tasks, illustrated with practical examples designed for immediate application.

Watch Step By Step Video Tutorial Below


1. Accessing Pabbly Connect for WhatsApp Integration

To automate sending WhatsApp messages, you first need to access Pabbly Connect. Start by visiting the Pabbly website and logging into your account. If you don’t have an account, you can create one easily within minutes.

Once logged in, navigate to the Pabbly Connect dashboard. This will allow you to create a new workflow that connects Google Sheets to WhatsApp. The integration requires no coding skills, making it user-friendly for everyone.


2. Setting Up the Workflow in Pabbly Connect

In this section, you will create a workflow in Pabbly Connect to send WhatsApp messages automatically. Click on the ‘Create Workflow’ button and name it, for example, ‘WhatsApp Message Automation’. This name will help you identify the workflow later.

  • Select the trigger app as ‘Scheduled’ to send messages at specific times.
  • Set the date and time for sending messages, ensuring you adjust for UTC if necessary.
  • Choose the action app as ‘Google Sheets’ to pull the data needed for the messages.

After setting the trigger and action, save your workflow. This setup will ensure that messages are sent at the desired time, pulling data directly from your Google Sheets.


3. Configuring Google Sheets for Data Retrieval

Next, you need to configure your Google Sheets in Pabbly Connect to retrieve the necessary data for WhatsApp messages. Ensure that your Google Sheet has the students’ names and WhatsApp numbers properly organized. For instance, names should be in column A and numbers in column B.

In the action event of your workflow, select ‘Get Rows’ from Google Sheets. Connect your Google account and choose the specific spreadsheet you created. Set the range to include all relevant rows, for example, A2 to B15, to cover all students.


4. Using Chat API to Send WhatsApp Messages

To send WhatsApp messages, you will integrate Chat API with Pabbly Connect. In the action event, select ‘Send Message’ from Chat API. You will need to input your API URL and token, which are essential for authentication.

  • Map the phone number field from your Google Sheets data to ensure the messages are sent to the correct recipients.
  • Compose the message body with a greeting and the link to the test form that students will access.
  • Test the setup to ensure that messages are sent correctly at the scheduled time.

After configuring these settings, save your workflow and test it to confirm that the WhatsApp messages are sent as expected. Ensure to check that the messages include the correct links and timings.


5. Finalizing and Testing the Integration

Finally, review your entire setup in Pabbly Connect to ensure everything is configured correctly. This includes checking the trigger, action, and the data mapping for Google Sheets and Chat API.

Once you are satisfied with the configuration, run a test to see if the messages are sent to the students’ WhatsApp numbers at the specified time. Make sure the links work and that students can access their test forms without issues.

After successful testing, your automation is complete. You can now rely on Pabbly Connect to manage your WhatsApp communications seamlessly, allowing you to focus on other important tasks.


Conclusion

In this tutorial, you learned how to automate WhatsApp messages using Pabbly Connect with Google Sheets. This integration saves time and ensures that your students receive timely notifications. By following these steps, you can streamline your communication effectively.

Ensure you check out Pabbly Connect to create business automation workflows and reduce manual tasks. Pabbly Connect currently offer integration with 2,000+ applications.

Integrate Facebook Leads to WhatsApp Using Pabbly Connect

Learn how to automatically send Facebook leads details to your team on WhatsApp using Pabbly Connect. Follow this step-by-step tutorial for seamless integration. Discover hidden automation capabilities within your existing tools. This guide shows you how to connect your essential applications and permanently eliminate redundant manual processes.

Watch Step By Step Video Tutorial Below


1. Access Pabbly Connect for Integration

To start the integration of Facebook leads with WhatsApp, access Pabbly Connect. This platform allows you to automate workflows without any coding skills required. Simply visit the Pabbly website and log in to your account.

Once logged in, navigate to the dashboard of Pabbly Connect. Here, you can create a new workflow that will connect Facebook and WhatsApp. Click on the ‘Create Workflow’ button to get started.


2. Create a Workflow in Pabbly Connect

In this step, you will create a workflow in Pabbly Connect to automate the lead transfer from Facebook to WhatsApp. Name your workflow something descriptive, like ‘Facebook to WhatsApp’ and click on ‘Create’.

  • Choose Facebook Lead Ads as the trigger application.
  • Select the trigger event as ‘New Lead’.
  • Connect your Facebook account to Pabbly Connect.

After connecting, you will need to select the specific Facebook page and lead form you are using. This allows Pabbly Connect to fetch the lead details directly from Facebook.


3. Fetch Lead Details from Facebook

Now that you have set up the trigger in Pabbly Connect, it’s time to fetch the lead details. Click on ‘Save and Send Test Request’ to retrieve the latest lead data from your specified form.

This step is crucial as it verifies that Pabbly Connect can successfully pull the lead information. Ensure that the lead details appear correctly, including the name, email, and other relevant information.

  • Check that the lead data matches the latest submission.
  • If successful, proceed to the next step.

After confirming the data, you can move forward to send this information to your WhatsApp group.


4. Send WhatsApp Message Using Pabbly Connect

In this section, you will set up the action in Pabbly Connect to send the lead details to your WhatsApp team. Select Chat API as the action application and choose ‘Send Message’ as the action event.

You’ll need to connect your Chat API account to Pabbly Connect by entering your API URL and token. Once connected, you can specify the group ID of your WhatsApp team to whom the message will be sent.

Input the group ID for your WhatsApp team. Compose the message using the lead details fetched from Facebook.

Finally, click on ‘Save and Send Test Request’ to ensure that the message is sent successfully to your WhatsApp group. This confirms that the integration between Facebook and WhatsApp through Pabbly Connect is working perfectly.


5. Conclusion on Facebook to WhatsApp Integration

In conclusion, using Pabbly Connect allows you to seamlessly automate the process of sending new Facebook lead details to your team on WhatsApp. This integration not only saves time but also ensures that your team is promptly informed about new leads.

Ensure you check out Pabbly Connect to create business automation workflows and reduce manual tasks. Pabbly Connect currently offer integration with 2,000+ applications.

Check out Pabbly Connect – Automate your business workflows effortlessly! Sign Up Free – Start your journey with ease! 10,000+ Video Tutorials – Learn step by step! Join Pabbly Facebook Group – Connect with 21,000+ like minded people!

By following the steps outlined in this tutorial, you can easily set up this workflow without any coding knowledge. Embrace the power of automation with Pabbly Connect to enhance your team’s efficiency and responsiveness.


How to Insert Records in Multiple Tables at the Same Time in MySQL Using Pabbly Connect

Learn how to insert records in multiple tables at the same time in MySQL using Pabbly Connect. This detailed tutorial covers all steps and integrations.

Watch Step By Step Video Tutorial Below


1. Accessing Pabbly Connect for MySQL Integration

To start inserting records in multiple tables at the same time using MySQL, first, you need to access Pabbly Connect. This platform allows seamless integration between various applications, including MySQL. Once you log into your Pabbly Connect account, you can set up your integrations effectively.

After logging in, click on the ‘Create Workflow’ button. This is where you will begin the process of connecting your applications. Ensure you have your MySQL database ready to accept records. This integration is crucial for automating data entry across multiple tables.


2. Setting Up the MySQL Integration with Pabbly Connect

Setting up the MySQL integration through Pabbly Connect involves a few straightforward steps. First, you need to select MySQL as your trigger application. This will allow Pabbly Connect to listen for new data entries.

  • Choose MySQL as the trigger app.
  • Set the event to ‘New Record’.
  • Connect your MySQL account by providing necessary credentials.

After setting the trigger, you will have to configure the action steps. This includes specifying which tables in your MySQL database will receive the new records. By doing this, you ensure that data flows smoothly across all necessary tables.


3. Inserting Records into Multiple Tables Simultaneously

Once you have set up the trigger, the next step is to insert records into multiple tables using Pabbly Connect. You will need to select the action app as MySQL again. This allows you to define how the records will be inserted into the different tables.

  • Choose ‘Insert Row’ as the action event.
  • Select the first table where you want to insert data.
  • Map the fields from your source to the MySQL table.
  • Repeat the process for additional tables.

This setup will allow you to insert records into multiple tables at the same time. The automation will ensure that data is consistent and reduces manual entry errors.


4. Testing Your Pabbly Connect Integration

After configuring the insertion process, it’s essential to test your Pabbly Connect workflow. This ensures that records are being inserted correctly into all specified tables without any issues. Click on the ‘Test’ button to initiate the process.

Monitor the results to verify that the data has been inserted into the desired tables. If everything is set up correctly, you should see the new records appear in each table as expected. This step is crucial to confirm that your integration works flawlessly before going live.


5. Finalizing Your MySQL Integration with Pabbly Connect

Once testing is complete, you can finalize your integration in Pabbly Connect. Make sure to save your workflow and enable it so that it runs automatically whenever new data is submitted. This automation will save you time and increase efficiency.

Additionally, regularly monitor the performance of your integration to ensure everything is functioning as intended. With your MySQL database now integrated through Pabbly Connect, you can handle data entries with ease and accuracy.


Conclusion

In this tutorial, we explored how to insert records in multiple tables at the same time in MySQL using Pabbly Connect. This integration streamlines data entry and enhances efficiency, making it a valuable tool for your database management needs.

Ensure you check out Pabbly Connect to create business automation workflows and reduce manual tasks. Pabbly Connect currently offer integration with 2,000+ applications.

How to Send Slack Notifications When a GitHub Repository Gains or Loses a Star Using Pabbly Connect

Learn how to send Slack notifications for GitHub repository stars using Pabbly Connect. Follow our detailed tutorial for seamless integration. Follow this definitive guide to creating powerful automated workflows with straightforward, efficiency-focused solutions that save valuable time.

Watch Step By Step Video Tutorial Below


1. Setting Up Pabbly Connect for GitHub and Slack Integration

To start sending Slack notifications for GitHub repository star changes, you need to set up Pabbly Connect. First, log in to your Pabbly Connect account. If you don’t have one, you can create a free account in just a few minutes.

Once logged in, navigate to the dashboard and click on the ‘Create Workflow’ button. This will allow you to set up a new integration workflow between GitHub and Slack using Pabbly Connect. You will be prompted to name your workflow; for this example, you can name it ‘GitHub Star Notifications’.


2. Configuring GitHub as the Trigger Application in Pabbly Connect

Next, you need to configure GitHub as the trigger application in Pabbly Connect. Select ‘GitHub’ from the list of applications. You will then choose the trigger event, which is ‘New Star’ or ‘Star Removed’. This means that your workflow will trigger whenever someone stars or unstars your GitHub repository.

  • Select GitHub as the application.
  • Choose the trigger event: New Star or Star Removed.
  • Connect your GitHub account by authorizing Pabbly Connect.

After connecting your GitHub account, you need to specify which repository you want to monitor for star changes. This is a crucial step as it determines where Pabbly Connect will pull the data from. Make sure to select the correct repository from the dropdown list.


3. Setting Up Slack as the Action Application in Pabbly Connect

Once you have configured GitHub, the next step is to set up Slack as the action application in Pabbly Connect. Choose ‘Slack’ from the application list and select the action event as ‘Send Channel Message’. This action will send a message to a specific Slack channel whenever there is a star change on your GitHub repository.

  • Select Slack as the application.
  • Choose the action event: Send Channel Message.
  • Connect your Slack account by authorizing Pabbly Connect.

After connecting Slack, you will need to specify the channel where you want the notifications to be sent. You can customize the message to include details about the star event, such as the repository name and the action performed (starred or unstarred). This is where Pabbly Connect ensures that your team is kept up-to-date with the latest changes.


4. Testing the Integration in Pabbly Connect

After setting up both GitHub and Slack in Pabbly Connect, it’s important to test the integration. Click on the ‘Test & Review’ button to ensure that everything is working correctly. This step will simulate a star event in your GitHub repository and check if a message is sent to your specified Slack channel.

If the test is successful, you will see a confirmation message in Slack. If not, review your settings in Pabbly Connect to ensure that all configurations are correct. Testing is a crucial step to confirm that your integration works seamlessly before going live.


5. Finalizing the Setup in Pabbly Connect

Once you have tested your integration successfully, you can finalize the setup in Pabbly Connect. Click on the ‘Save’ button to activate your workflow. Your GitHub and Slack integration is now complete, and you will receive notifications whenever your specified GitHub repository gains or loses a star.

To ensure everything runs smoothly, you can monitor your Pabbly Connect dashboard. Here, you can check the history of your integrations and see if there are any issues. This monitoring capability helps you maintain the efficiency of your automation.


Conclusion

In this tutorial, we demonstrated how to send Slack notifications when a GitHub repository gains or loses a star using Pabbly Connect. By following these steps, you can easily set up automation that keeps your team informed about important changes in your projects.

Ensure you check out Pabbly Connect to create business automation workflows and reduce manual tasks. Pabbly Connect currently offer integration with 2,000+ applications.

Integrate Razorpay with ConvertKit and Google Sheets Using Pabbly Connect

Learn how to integrate Razorpay with ConvertKit and Google Sheets using Pabbly Connect in this detailed step-by-step tutorial. This comprehensive guide reveals exactly how to connect your applications and automate repetitive tasks — accessible for professionals of all technical backgrounds.

Watch Step By Step Video Tutorial Below


Accessing Pabbly Connect for Integration

To begin integrating Razorpay with ConvertKit and Google Sheets, you first need to access Pabbly Connect. This platform allows seamless integration between various applications without the need for coding skills. Simply visit the Pabbly Connect website and sign in to your account or create a new one.

Once logged in, navigate to the dashboard where you can create a new workflow. Click on the ‘Create Workflow’ button, and a dialog box will appear asking you to name your workflow. For this integration, you can name it ‘Razorpay to Google Sheets and ConvertKit’. After naming, click on the ‘Create’ button to proceed.


Setting Up the Trigger Event in Pabbly Connect

In this section, we will set up the trigger event in Pabbly Connect to capture new Razorpay orders. Select Razorpay as the application and choose the trigger event as ‘Order Paid’. This will allow Pabbly Connect to listen for any new payments made through Razorpay.

After selecting the trigger, you will need to create a webhook in your Razorpay account. To do this, go to your Razorpay settings, navigate to the webhooks section, and paste the webhook URL provided by Pabbly Connect. Ensure that the active event is set to ‘Order Paid’ before saving the webhook.


Configuring Razorpay to Google Sheets Integration

Now that the trigger is set, we will configure the integration of Razorpay with Google Sheets using Pabbly Connect. After the payment is made, the data will be sent to Google Sheets. Start by adding a new action step and select Google Sheets as the application.

  • Choose the action event as ‘Add New Row’.
  • Connect your Google account to Pabbly Connect.
  • Select the appropriate Google Sheet where the payment data will be stored.

Map the fields such as name, email, phone, payment amount, and transaction date to ensure the data is accurately recorded. Once the mapping is complete, click on ‘Save and Send Test Request’ to verify the integration.


Integrating Razorpay with ConvertKit

After setting up Google Sheets, the next step is to integrate Razorpay data with ConvertKit using Pabbly Connect. Add another action step and select ConvertKit as the application. Choose the action event as ‘Tag a Subscriber’ to add the new customer to your mailing list.

To connect ConvertKit with Pabbly Connect, you will need your API key and API secret from ConvertKit’s account settings. Once connected, map the subscriber’s email and name fields. You can also set a tag for the subscriber based on the payment they made.


Finalizing the Integration Process

With both Google Sheets and ConvertKit integrations set up, you can now finalize the workflow in Pabbly Connect. Ensure that both action steps are correctly configured and test the entire process by making a dummy payment in Razorpay.

Check Google Sheets to confirm that the payment details are recorded accurately, and verify in ConvertKit that the new subscriber has been added successfully. This confirms that the integration between Razorpay, Google Sheets, and ConvertKit via Pabbly Connect is working seamlessly.


Conclusion

This tutorial has provided a detailed guide on how to integrate Razorpay with ConvertKit and Google Sheets using Pabbly Connect. By following these steps, you can automate your payments and manage your subscribers efficiently, enhancing your online course selling experience.

Ensure you check out Pabbly Connect to create business automation workflows and reduce manual tasks. Pabbly Connect currently offer integration with 2,000+ applications.

Automatically Send Message with Image on WhatsApp Using Pabbly Connect

Learn how to automatically send messages with images on WhatsApp using Pabbly Connect, MS Word, and other applications in this detailed tutorial. Eliminate manual repetitive tasks from your workflow. Discover proven automation methods with intuitive steps designed for efficiency-minded professionals.

Watch Step By Step Video Tutorial Below


1. Setting Up Pabbly Connect for WhatsApp Integration

To automatically send messages with images on WhatsApp, you first need to set up Pabbly Connect. Start by creating an account on Pabbly’s website. Once logged in, navigate to the dashboard where you will find options to create a new workflow.

In the dashboard, click on ‘Create Workflow’ and name it appropriately, like ‘WhatsApp Image Sender’. This is where you will define the integration between WhatsApp and other applications like MS Word.


2. Connecting MS Word to Pabbly Connect

Next, integrate MS Word with Pabbly Connect. This step is crucial as it allows you to pull data from your Word documents to send via WhatsApp. To do this, select MS Word as your trigger application in Pabbly Connect.

  • Choose the trigger event, such as ‘New Document’.
  • Authorize Pabbly Connect to access your MS Word account.
  • Select the specific document you want to use for sending messages.

After setting up the trigger, test the connection to ensure that Pabbly Connect can access your MS Word data. This will confirm that your integration is correctly configured before moving on to WhatsApp.


3. Sending Images via WhatsApp Using Pabbly Connect

After integrating MS Word, the next step is to set up WhatsApp as the action application in Pabbly Connect. This will enable you to send messages with images automatically. Choose WhatsApp as your action application.

For sending the image, you will need to specify the following:

  • Select the action event ‘Send Image’.
  • Input the WhatsApp number of the recipient.
  • Add the image URL from your MS Word document.

Once you’ve filled in these details, test the action to ensure that the image is sent successfully via WhatsApp. This step is critical to verify that everything is working as intended.


4. Finalizing Your Automation with Pabbly Connect

With both MS Word and WhatsApp set up in Pabbly Connect, you can finalize your automation. Make sure to review all the settings and ensure that the data flow is correct. You can also add filters or conditions if needed, for more refined control over when messages are sent.

After reviewing, turn on the workflow. This will allow the automation to run continuously, sending images from your MS Word documents to WhatsApp as specified. You can monitor the workflow from the dashboard to check for any errors or issues.


Conclusion

In conclusion, using Pabbly Connect allows you to automatically send messages with images on WhatsApp by integrating with MS Word. This automation not only saves time but also enhances communication efficiency across platforms.

Ensure you check out Pabbly Connect to create business automation workflows and reduce manual tasks. Pabbly Connect currently offer integration with 2,000+ applications.

Get A Push Notification When You Receive An Email From Your Boss Using Pabbly Connect

Learn how to get a push notification when you receive an email from your boss using Pabbly Connect, integrating Gmail and Twilio effortlessly. Build sophisticated automated workflows in less time than you think. This guide translates complex integrations into straightforward steps for immediate implementation.

Watch Step By Step Video Tutorial Below


1. Accessing Pabbly Connect for Email Notifications

To get a push notification when you receive an email from your boss, start by accessing Pabbly Connect. Open your browser and navigate to the Pabbly website. Click on the ‘Products’ tab, then select ‘Connect’ to reach the Pabbly Connect dashboard.

Once on the dashboard, sign in to your account. If you don’t have an account, you can create one quickly. After signing in, click on the ‘Create Workflow’ button to begin setting up your integration.


2. Creating a Workflow in Pabbly Connect

In this section, we will create a workflow in Pabbly Connect that will trigger a push notification when an email is received. Name your workflow appropriately, such as ‘Microsoft Office 365 to Twilio’ and click on the ‘Create’ button.

  • Select Microsoft Office 365 as the trigger application.
  • Choose the trigger event as ‘New Mail’.
  • Connect your Microsoft Office 365 account to Pabbly Connect.

Once connected, you will need to allow Pabbly Connect to access your email. Click ‘Yes’ when prompted. This will enable the integration to function correctly.


3. Testing the Integration with Pabbly Connect

After setting up the trigger, it’s time to test the integration using Pabbly Connect. Click on ‘Save and Send Test Request’ to fetch a sample email from your inbox. Ensure that you have received an email from your boss to test this functionality.

Check the response in Pabbly Connect to confirm that it has captured the email details correctly. If successful, you will see the email subject and sender information displayed on your dashboard.

  • Verify that the email details are accurate.
  • Ensure that the email is from your boss’s email address.

This confirmation is crucial for setting the right conditions for your SMS notification.


4. Filtering Emails in Pabbly Connect

To ensure you only receive notifications for emails from your boss, you need to set a filter in Pabbly Connect. This filter will check the sender’s email address before sending an SMS notification.

Choose the ‘Filter by Pabbly’ option and set the condition where the sender’s email address matches your boss’s email. This way, SMS notifications will only be triggered for relevant emails.

Set the condition for the filter to check the sender’s email address. Click ‘Save and Send Test Request’ to confirm the filter works.

With the filter in place, you can be assured that only emails from your boss will trigger the SMS notification.


5. Sending SMS Notifications via Twilio with Pabbly Connect

The final step is to set up SMS notifications using Twilio through Pabbly Connect. Select Twilio as the action application and choose the action event as ‘Send SMS Message’.

Connect your Twilio account by entering your Account SID and Authorization Token. These credentials can be found in your Twilio dashboard. After connecting, you can configure the SMS body and recipient number.

Set the SMS body to something like ‘Hello, you have a new mail from your boss’. Add the recipient’s phone number in the correct format.

Once everything is set, click ‘Save and Send Test Request’ to send a test SMS. You should receive a notification on your phone confirming the integration works successfully.


Conclusion

Using Pabbly Connect, you can easily set up a workflow to get a push notification when you receive an email from your boss. This integration with Gmail and Twilio ensures you never miss an important email again. With no coding required, anyone can set it up effortlessly.

Ensure you check out Pabbly Connect to create business automation workflows and reduce manual tasks. Pabbly Connect currently offer integration with 2,000+ applications.

Integrate OneDrive and Slack with Pabbly Connect: A Step-by-Step Guide

Learn how to integrate OneDrive with Slack using Pabbly Connect. This tutorial provides a detailed step-by-step guide to automate file sharing. Discover hidden automation capabilities within your existing tools. This guide shows you how to connect your essential applications and permanently eliminate redundant manual processes.

Watch Step By Step Video Tutorial Below


1. Introduction to Pabbly Connect for OneDrive and Slack Integration

Pabbly Connect is a powerful integration platform that allows users to automate workflows between different applications, including OneDrive and Slack. In this tutorial, we will learn how to share new OneDrive files to a Slack channel automatically using Pabbly Connect.

This integration enables seamless communication and file sharing, ensuring that all team members are updated whenever new files are uploaded to OneDrive. By using Pabbly Connect, you can set up this process easily without any coding knowledge.


2. Setting Up Pabbly Connect for OneDrive and Slack

To start, navigate to the Pabbly Connect website by typing ‘Pabbly.com’ in your browser. Once there, click on ‘Products’ and select ‘Connect’. If you already have an account, sign in; otherwise, create a free account which takes just a couple of minutes.

Once logged in, click on the ‘Create Workflow’ button. Name your workflow (e.g., ‘OneDrive to Slack’) and click on ‘Create’. This action will open two windows: the trigger window and the action window, which are essential for setting up the integration with Pabbly Connect.


3. Configuring the Trigger Event in Pabbly Connect

In the trigger window, select ‘Microsoft OneDrive’ as the trigger application. Set the trigger event to ‘New File’. This means that the workflow will initiate whenever a new file is uploaded to OneDrive.

Next, click on ‘Connect’ to establish a connection between Pabbly Connect and Microsoft OneDrive. You will need to authorize the connection, which is safe and straightforward. Once authorized, you will see fields for setting the folder path and event type. Enter the folder path in the format required (e.g., ‘documents/B/project reports’) and click on ‘Save and Send Test Request’.

  • Select ‘Microsoft OneDrive’ as the trigger application.
  • Set the trigger event to ‘New File’.
  • Authorize the connection to OneDrive.
  • Enter the correct folder path.

After completing these steps, Pabbly Connect will be ready to detect new files in the specified OneDrive folder.


4. Configuring the Action Event to Send Messages to Slack

Now that the trigger is set up, it’s time to configure the action event. In the action window, select ‘Slack’ as the action application. The action event should be set to ‘Send Channel Message with Image’. This will allow you to send messages to a specified Slack channel whenever a new file is detected in OneDrive.

Click on ‘Connect’ to authorize Pabbly Connect to access your Slack account. After successful authorization, you will see fields to fill out, including channel, message type, message text, and image URL. Select the channel where you want the messages to be sent and fill in the necessary details.

  • Select ‘Slack’ as the action application.
  • Set the action event to ‘Send Channel Message with Image’.
  • Authorize the connection to Slack.
  • Fill in the message and image details.

Once everything is configured, click on ‘Save and Send Test Request’ to test the integration. If successful, the new file will be shared in the selected Slack channel.


5. Final Steps and Conclusion

After setting up the workflow, it may take a few moments for the integration to work. Files uploaded to OneDrive will be automatically shared in the designated Slack channel, ensuring your team stays informed. This integration showcases how Pabbly Connect simplifies the process of connecting different applications.

By following the steps outlined in this tutorial, you can easily automate the sharing of files from OneDrive to Slack without any coding skills. Pabbly Connect not only connects these applications but also enhances productivity by streamlining communication.

Conclusion

This guide summarizes the key points and helps you understand the essential features and benefits of using this tool.

Ensure you check out Pabbly Connect to create business automation workflows and reduce manual tasks. Pabbly Connect currently offer integration with 2,000+ applications.


In this tutorial, we learned how to use Pabbly Connect to integrate OneDrive and Slack effectively. This setup allows for seamless file sharing, ensuring that your team is always updated with the latest documents. Automating this process saves time and reduces manual errors, making it a valuable tool for any organization.