How to Integrate IndiaMART Leads with Salesforce Using Pabbly Connect for Dance Academy

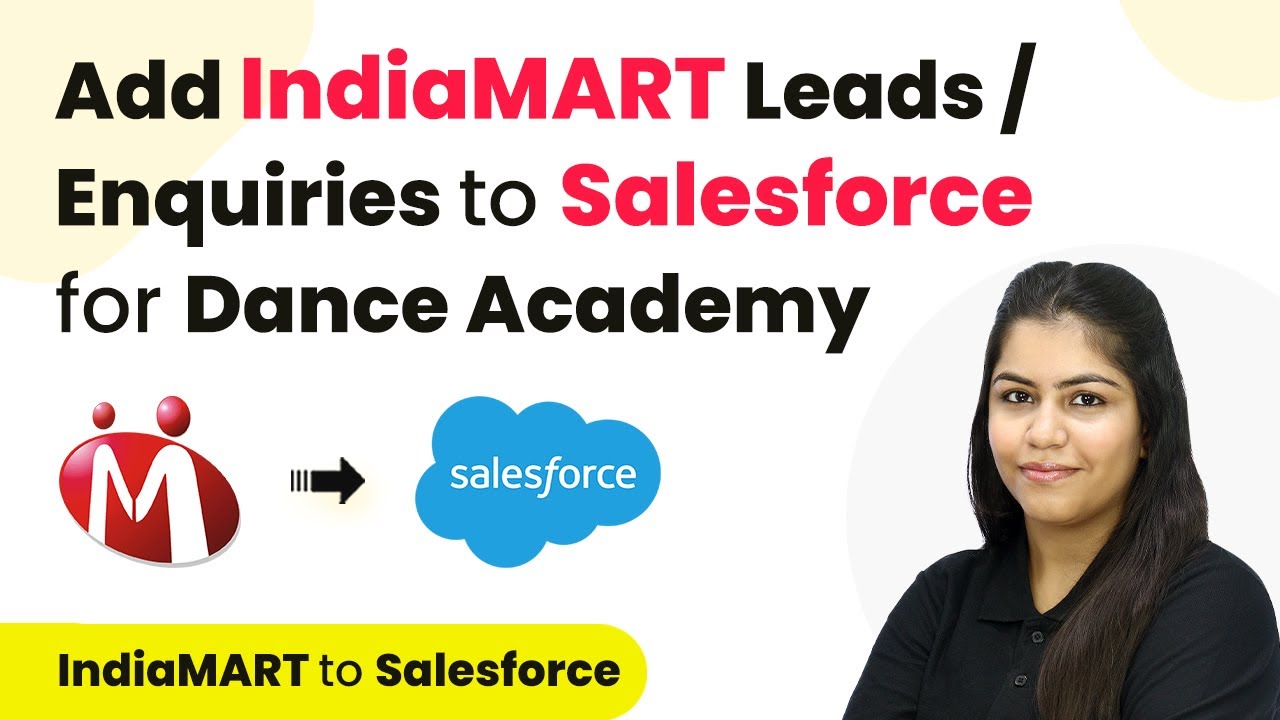
Learn how to seamlessly integrate IndiaMART leads with Salesforce for your Dance Academy using Pabbly Connect. Follow our step-by-step tutorial for automation. Follow this definitive guide to creating powerful automated workflows with straightforward, efficiency-focused solutions that save valuable time.

Watch Step By Step Video Tutorial Below


Accessing Pabbly Connect for Integration

To start integrating IndiaMART leads with Salesforce, first access Pabbly Connect. This platform allows you to automate workflows without any coding knowledge, making it perfect for managing leads efficiently.

Visit the Pabbly Connect website and sign in. If you’re a new user, click on the sign-up option to get started with a free trial. After logging in, you’ll see the dashboard where you can create new workflows.


Creating a Workflow in Pabbly Connect

Once you are in Pabbly Connect, click on the ‘Create Workflow’ button. You will need to name your workflow; for this purpose, you could use something like ‘Add IndiaMART Leads to Salesforce’. Select the folder where you want to save this workflow.

After naming your workflow, you will be directed to the workflow window. This is where you set up the trigger and action for your workflow. The trigger will be set to IndiaMART, and the action will be Salesforce. This step is crucial as it defines how the integration will operate.

  • Click on the ‘Create’ button to proceed.
  • Select IndiaMART as your trigger application.
  • Choose the event that triggers the workflow, such as ‘New Lead’.

After setting these, Pabbly Connect will provide you with a webhook URL that you will use to connect IndiaMART with this workflow.


Setting Up IndiaMART Lead Manager

Next, you need to set up the Lead Manager in IndiaMART to connect with Pabbly Connect. Log into your IndiaMART account and navigate to the Lead Manager section. Here, you will find options to manage your leads.

Click on the three dots to access the import/export leads option, and then select the ‘Push API’ option. Enter the webhook URL you copied from Pabbly Connect into the required field. This step establishes the connection between IndiaMART and your workflow.

  • Select ‘Other’ in the source dropdown.
  • Enter ‘Pabbly Connect’ as the CRM platform name.
  • Click ‘Save Details’ to finalize the setup.

After saving, you will need to generate an OTP to confirm the connection. This OTP will be sent to your registered email, which you must enter to validate the connection.


Configuring Salesforce Action in Pabbly Connect

With the IndiaMART setup complete, it’s time to configure the Salesforce action in Pabbly Connect. Select Salesforce as the action application and choose the action event to create a lead. This is where the magic happens, as it allows leads captured in IndiaMART to be automatically added to Salesforce.

To connect Salesforce with Pabbly Connect, click on ‘Add a New Connection’. You will be prompted to log into your Salesforce account and provide necessary permissions. Once authorized, you will be able to map the lead details received from IndiaMART to the fields in Salesforce.

Map the lead’s first name, last name, and other relevant details from the previous response. Ensure all required fields in Salesforce are filled correctly. Test the connection by sending a test request to verify that the lead is added successfully.

After testing, you should see the lead appear in your Salesforce account, confirming that the integration works as intended.


Conclusion

Integrating IndiaMART leads with Salesforce using Pabbly Connect streamlines your lead management process for your Dance Academy. This automation allows you to focus on your business while ensuring no lead is overlooked. By following the steps outlined, you can efficiently capture and manage inquiries, enhancing your response time and customer satisfaction.

Ensure you check out Pabbly Connect to create business automation workflows and reduce manual tasks. Pabbly Connect currently offer integration with 2,000+ applications.

How to Create Apollo.io Contact on Webflow Form Submission Using Pabbly Connect

Learn how to create Apollo.io contacts automatically through Webflow form submissions using Pabbly Connect. Streamline your lead management process effortlessly! This comprehensive guide reveals exactly how to connect your applications and automate repetitive tasks — accessible for professionals of all technical backgrounds.

Watch Step By Step Video Tutorial Below


Accessing Pabbly Connect for Automation

To create an Apollo.io contact on Webflow form submission, you need to access Pabbly Connect. Start by visiting the Pabbly Connect website and signing in or signing up for a free account if you are a new user. Once logged in, you will be directed to the dashboard where all Pabbly applications are available.

After accessing your account, click on the ‘Access Now’ button for Pabbly Connect. From the dashboard, initiate the automation process by clicking on the ‘Create Workflow’ button. This step is essential as it sets the foundation for connecting Webflow and Apollo.io.


Creating a Workflow in Pabbly Connect

In this step, you will name your workflow and select the folder for saving it. Enter a relevant name such as ‘Create Apollo.io Contact on Webflow Form Submission’ and choose the folder labeled ‘Automations’. After naming your workflow, click on the ‘Create’ button to proceed. using Pabbly Connect

The workflow window will now open, showing you the trigger and action settings. The trigger signifies the action that initiates the workflow, while the action is what happens in response. For this integration, you will need to select Webflow as your trigger application.

  • Select Webflow V2 as your trigger application.
  • Choose ‘New Form Submission’ as the trigger event.
  • Click on ‘Connect’ to set up the connection.

After setting the trigger, you will need to connect your Webflow account by either selecting an existing connection or adding a new one. If you are adding a new connection, you will need to generate an API token from your Webflow account.


Generating API Token in Webflow

To generate an API token in Webflow, navigate to your site settings. Click on the ‘Apps & Integrations’ section and look for the option to generate a new API token. Enter a name for the token, such as ‘New Contact’, and grant it the necessary permissions, typically read and write for all categories.

Once you click on ‘Generate Token’, copy the API token provided. This token is crucial for establishing a secure connection between Webflow and Pabbly Connect. Paste the API token back into the Pabbly Connect workflow and click ‘Save’. Now your Webflow account is successfully connected.

  • Ensure to publish your Webflow site after making changes.
  • Test the connection by submitting a form on your Webflow site.
  • Verify that Pabbly Connect captures the response from the form submission.

By following these steps, you ensure that your Webflow form submissions trigger the workflow in Pabbly Connect, capturing the necessary data for the next steps.


Creating a Contact in Apollo.io through Pabbly Connect

After successfully capturing the form submission data in Pabbly Connect, the next step is to create a contact in Apollo.io. Select Apollo.io as your action application. You will need to choose the action event as ‘Create Contact’ and click on ‘Connect’.

Similar to the previous steps, if you have an existing connection to Apollo.io, select it. Otherwise, you will need to create a new API key from your Apollo.io account. Navigate to the API Keys section in Apollo.io and create a new key, naming it ‘New Contact’ and selecting the appropriate permissions.

Copy the newly created API key and paste it into the Pabbly Connect workflow. Map the fields from the Webflow response to the corresponding fields in Apollo.io. Ensure all required fields such as first name, last name, email, and organization name are filled.

After mapping the fields, click on ‘Save and Test Request’ to confirm that the contact is created successfully in Apollo.io. This step finalizes the integration, ensuring that every new Webflow form submission results in a new contact being created in your Apollo.io account.


Conclusion

In this tutorial, we demonstrated how to automate the process of creating Apollo.io contacts using Pabbly Connect whenever a Webflow form submission occurs. This integration streamlines your lead management by eliminating manual entry, ensuring efficiency and accuracy in handling potential client information.

Ensure you check out Pabbly Connect to create business automation workflows and reduce manual tasks. Pabbly Connect currently offer integration with 2,000+ applications.

Using Pabbly Connect allows businesses to automate their workflows effectively, enhancing productivity and saving time. By following the steps outlined, you can easily set up this integration and optimize your lead management process.

How to Enroll TagMango User on Tally Forms Submission Using Pabbly Connect

Learn how to enroll TagMango users automatically through Tally Forms submission using Pabbly Connect. Step-by-step guide with detailed instructions. Explore efficient methods for automating routine tasks with clear, concise instructions suited for both newcomers and experienced professionals.

Watch Step By Step Video Tutorial Below


1. Accessing Pabbly Connect for Automation

To start using Pabbly Connect for automating the enrollment of TagMango users via Tally Forms, visit the Pabbly Connect homepage. You can access it by typing the URL Pabbly.com/connect in your browser.

Once on the homepage, you will see options to either sign in or sign up for free. If you are a new user, click on the green button labeled ‘Sign Up for Free’ to create an account. Existing users can simply log in to access their dashboards and workflows.


2. Creating a New Workflow in Pabbly Connect

After logging into Pabbly Connect, navigate to the dashboard and click on the ‘Create Workflow’ option. This action will prompt you to name your workflow. Enter ‘Enroll TagMango User on Tally Forms Submission’ and select the relevant folder for organization.

  • Name your workflow appropriately.
  • Select a folder to categorize your workflow.
  • Click on ‘Create’ to save your workflow.

Once created, you will see a blank workflow screen with two main sections: Trigger and Action. The Trigger section defines the event that starts the workflow, while the Action section specifies what happens next.


3. Setting Up Trigger and Action in Pabbly Connect

Your next step is to set the trigger for the workflow. Select Tally Forms as your trigger application. This means that every time a form is submitted in Tally Forms, it will initiate the workflow in Pabbly Connect.

Choose the trigger event as ‘New Response Received’. This ensures that every new submission will trigger the workflow. After selecting the trigger event, Pabbly Connect will provide you with a webhook URL that you need to copy.

  • Select Tally Forms as the trigger application.
  • Choose ‘New Response Received’ as the trigger event.
  • Copy the provided webhook URL for integration.

Now, go to your Tally Forms account and edit the specific registration form you want to connect. In the settings, find the integration section and paste the copied webhook URL. Save the changes to complete the connection between Tally Forms and Pabbly Connect.


4. Enrolling Users in TagMango via Pabbly Connect

With the connection established, the next step is to set up the action in Pabbly Connect. Choose TagMango as your action application. The action event will be ‘Enroll User’ which allows you to add users automatically based on the data received from Tally Forms.

To connect TagMango, you will need to enter your API key. You can obtain this key from your TagMango account under the automation settings. Once you have the API key, paste it into Pabbly Connect to establish the connection.

Select TagMango as the action application. Choose ‘Enroll User’ as the action event. Input your API key from TagMango to connect.

Map the fields from the Tally Forms submission to the corresponding fields in TagMango. This includes the user’s name, email, and any other relevant information. Once mapped, click on ‘Save and Send Test Request’ to verify that the user is enrolled successfully.


5. Testing the Integration of Tally Forms and TagMango

After setting up the action, it’s crucial to test the integration to ensure everything works smoothly. Go back to your Tally Forms and submit a test form with sample data. This action will trigger the workflow in Pabbly Connect and attempt to enroll the user in TagMango.

Once you submit the test form, return to Pabbly Connect to see if the response has been captured. You should see the details of the submitted form reflected in the response area. If successful, the user will be enrolled in TagMango with the corresponding details.

Submit a test form in Tally Forms. Check the response in Pabbly Connect for accuracy. Verify the user is added to TagMango.

Once confirmed, your integration is complete, and every new submission on Tally Forms will automatically enroll users in TagMango through Pabbly Connect.


Conclusion

In this tutorial, we explored how to enroll TagMango users automatically through Tally Forms submission using Pabbly Connect. By following the steps outlined, you can streamline the enrollment process for your digital courses efficiently.

Ensure you check out Pabbly Connect to create business automation workflows and reduce manual tasks. Pabbly Connect currently offer integration with 2,000+ applications.

How to Integrate IndiaMART Leads with Salesforce Using Pabbly Connect

Learn to automate adding IndiaMART leads to Salesforce for interior design using Pabbly Connect. This step-by-step guide simplifies your lead management process. Build sophisticated automated workflows in less time than you think. This guide translates complex integrations into straightforward steps for immediate implementation.

Watch Step By Step Video Tutorial Below


1. Accessing Pabbly Connect for Integration

To integrate IndiaMART leads with Salesforce, start by accessing Pabbly Connect. Navigate to the Pabbly Connect website and sign in to your account. If you are a new user, you can sign up for free and receive 100 tasks monthly.

Once logged in, you will see the dashboard. Click on the ‘Access Now’ button to enter the Pabbly Connect interface. This is where you will create your automation workflow to connect IndiaMART with Salesforce seamlessly.


2. Creating Your Workflow in Pabbly Connect

In Pabbly Connect, you need to create a new workflow for adding IndiaMART leads to Salesforce. Click on the ‘Create Workflow’ button in the top right corner. A dialog box will appear, prompting you to name your workflow.

  • Name your workflow: ‘Add IndiaMART Leads to Salesforce for Interior Designing Work’.
  • Select a folder to save your workflow.
  • Click on the ‘Create’ button to finalize your workflow setup.

Your workflow is now created. You will see two sections: Trigger and Action. The Trigger will capture new leads from IndiaMART, while the Action will send these details to Salesforce.


3. Setting Up the Trigger for IndiaMART Leads

In this step, you will set the Trigger application to IndiaMART in Pabbly Connect. Choose IndiaMART as your trigger application and select the ‘New Leads’ event. This setup allows your workflow to activate whenever a new lead is generated.

Pabbly Connect will provide you with a unique webhook URL. Copy this URL as it will be used to connect your IndiaMART account. Navigate to your IndiaMART account and go to the Lead Manager section.

  • Select ‘Import/Export Leads’ under the Lead Manager.
  • Click on the ‘Push API’ button.
  • Choose ‘Other’ as the source, and enter ‘Pabbly Connect’ for the platform name.
  • Paste the copied webhook URL and save the details.

After saving, a confirmation will indicate that the webhook URL is successfully added to your IndiaMART account. This completes the Trigger setup.


4. Generating a Test Lead to Verify Connection

Now it’s time to test the connection between IndiaMART and Pabbly Connect. Generate a test lead in your IndiaMART account. Select a dummy product and fill in the lead details, including the inquiry message, GST number, and other required fields.

After submitting the test lead, return to your Pabbly Connect workflow. You should see a message indicating that the webhook has received the test lead response. This confirms that the connection is working correctly.

Ensure the inquiry details are complete, including the request for consultation and furniture placement. Check for the response status to confirm successful lead capture.

With the test lead successfully captured, you are ready to set up the Action step to send this data to Salesforce.


5. Setting Up the Action to Create a Lead in Salesforce

In this final step, select Salesforce as the Action application in Pabbly Connect. Choose the ‘Create Lead’ action event. This action will create a new lead in your Salesforce account using the details captured from the IndiaMART lead.

Click on the ‘Connect’ button and authorize Pabbly Connect to access your Salesforce account. Once authorized, map the lead details from the previous step into the Salesforce fields. This includes the lead’s name, company, contact information, and inquiry details.

Map the first name and last name of the lead. Set the lead source as ‘IndiaMART Lead’. Fill in the status and rating fields appropriately.

After mapping all required fields, click on the ‘Save and Send Test Request’ button. Check your Salesforce account to confirm that the lead has been created successfully. This completes the integration process using Pabbly Connect.


Conclusion

This tutorial demonstrates how to automate the process of adding IndiaMART leads to Salesforce for your interior design business using Pabbly Connect. By following these steps, you can streamline your lead management and enhance your workflow efficiency.

Ensure you check out Pabbly Connect to create business automation workflows and reduce manual tasks. Pabbly Connect currently offer integration with 2,000+ applications.

Automate Zoho CRM Contacts from Tally Forms with Pabbly Connect

Learn how to automate the creation of Zoho CRM contacts from Tally Forms submissions using Pabbly Connect. This step-by-step tutorial covers the complete integration process.

Watch Step By Step Video Tutorial Below


1. Accessing Pabbly Connect for Integration

To automate the creation of Zoho CRM contacts from Tally Forms submissions, you first need to access Pabbly Connect. Start by visiting the Pabbly website and signing in to your account. If you are a new user, you can sign up for a free account and get started with 100 tasks free every month.

Once logged in, navigate to the dashboard where you’ll find various Pabbly applications. Click on the option for Pabbly Connect to begin setting up your automation. This platform will allow you to connect Tally Forms with Zoho CRM seamlessly.


2. Creating a Workflow in Pabbly Connect

After accessing Pabbly Connect, you need to create a new workflow. Click on the ‘Create Workflow’ button. You will be prompted to enter a name for your workflow, such as ‘Create Zoho CRM Contact on Tally Forms Submission’. Choose a folder to save it in, like ‘Automations’, and click on ‘Create’.

  • Enter the workflow name.
  • Select the folder for the workflow.
  • Click on ‘Create’ to open the workflow window.

This window is crucial as it contains the trigger and action settings for your workflow. The trigger will initiate the workflow when a new Tally Forms submission is received, and the action will create a new contact in Zoho CRM based on that submission.


3. Setting Up the Trigger for Tally Forms

In this step, you will set Tally as your trigger application in Pabbly Connect. Search for Tally and select it. For the trigger event, choose ‘New Response Received’. This event will trigger the workflow every time a new form submission occurs.

Next, you will be provided with a Webhook URL. Copy this URL as it will be used to connect your Tally Forms account with Pabbly Connect. Log into your Tally account, edit the form you want to connect, and navigate to the Integrations tab to paste the Webhook URL in the appropriate field.


4. Testing the Tally Forms Submission

After setting up the Webhook URL in Tally, you need to perform a test submission to ensure the connection works correctly. Open the form using the share link, fill in the required fields, and submit the form. For example, use a demo first name, last name, email, and other relevant details.

  • Fill in the demo first name.
  • Enter a demo last name.
  • Provide a demo email address.

Once submitted, return to Pabbly Connect to see if the response has been captured. This confirms that the trigger step is functioning correctly and ready for the next action.


5. Creating a Zoho CRM Contact

Now that the trigger is set up, it’s time to create a Zoho CRM contact. In Pabbly Connect, select Zoho CRM as your action application. Choose ‘Create Contact’ as the action event. If you haven’t connected your Zoho CRM account yet, click on ‘Add New Connection’ and enter your Zoho domain.

After successfully connecting to your Zoho CRM account, you will need to map the fields from the Tally Forms submission to the appropriate fields in Zoho CRM. For example, map the first name, last name, and email fields from the Tally response to their corresponding fields in Zoho CRM. Once mapped, click on ‘Send Test Request’ to create the contact.

After sending the test request, check your Zoho CRM account to confirm that the new contact has been created successfully. This automation ensures that every new Tally Forms submission results in a new contact in Zoho CRM without manual entry.


Conclusion

In this tutorial, we explored how to automate the creation of Zoho CRM contacts from Tally Forms submissions using Pabbly Connect. By following these steps, you can streamline your lead management process and ensure that your CRM is always up to date with the latest submissions.

Ensure you check out Pabbly Connect to create business automation workflows and reduce manual tasks. Pabbly Connect currently offer integration with 2,000+ applications.

How to Create LearnWorlds User on Typeform Submission Using Pabbly Connect

Learn how to create a LearnWorlds user on Typeform submission using Pabbly Connect. Step-by-step guide for seamless integration. Discover hidden automation capabilities within your existing tools. This guide shows you how to connect your essential applications and permanently eliminate redundant manual processes.

Watch Step By Step Video Tutorial Below


1. Accessing Pabbly Connect for Integration

To create a LearnWorlds user on Typeform submission, you first need to access Pabbly Connect. This platform allows you to automate workflows between applications without any coding skills.

Start by visiting the Pabbly Connect website. If you’re a new user, sign up for a free account, which gives you access to 100 tasks monthly. Existing users can simply log in to their account to begin.


2. Creating a Workflow in Pabbly Connect

Once logged into Pabbly Connect, you will need to create a new workflow. Click on the ‘Create Workflow’ button and name it appropriately, such as ‘LearnWorlds User Creation from Typeform Submission’.

  • Select Typeform as the trigger application.
  • Choose ‘New Entry’ as the trigger event.
  • Connect your Typeform account by authorizing Pabbly Connect.

After connecting, you will need to select the specific form you want to monitor for submissions. This is crucial for ensuring that the integration works correctly.


3. Setting Up LearnWorlds in Pabbly Connect

Now that you have set up Typeform as the trigger, it’s time to configure LearnWorlds as the action application in Pabbly Connect. Choose LearnWorlds from the list of applications.

  • Select ‘Create User’ as the action event.
  • Connect to your LearnWorlds account using the API credentials.
  • Map the fields from Typeform to the corresponding fields in LearnWorlds.

Make sure to enter all required fields correctly. This includes the user’s email, first name, and last name from the Typeform submission, ensuring seamless user creation in LearnWorlds.


4. Testing the Integration

After setting up the integration, it’s essential to test it to ensure everything functions as expected. In Pabbly Connect, you can send a test submission from your Typeform to see if a user is created in LearnWorlds.

Click on the ‘Send Test Request’ button in Pabbly Connect. If the integration is successful, you will receive a confirmation response indicating that the user has been created in LearnWorlds.


5. Finalizing Your Workflow

Once the test is successful, finalize your workflow in Pabbly Connect by clicking on the ‘Save’ button. This will activate the workflow, allowing it to run automatically whenever there is a new Typeform submission.

To ensure everything is working, you can monitor the workflow in your Pabbly dashboard. This allows you to check for any errors and ensure that users are being created in LearnWorlds as expected.


Conclusion

In this tutorial, we explored how to create a LearnWorlds user on Typeform submission using Pabbly Connect. By following these steps, you can automate user creation seamlessly, enhancing your online education platform’s efficiency.

Ensure you check out Pabbly Connect to create business automation workflows and reduce manual tasks. Pabbly Connect currently offer integration with 2,000+ applications.

How to Search & Update Data in Google Sheets using Pabbly Connect

Learn how to search and update data in Google Sheets using Pabbly Connect with this detailed tutorial. Streamline your automation processes now! Transform complex automation concepts into accessible, actionable steps that eliminate unnecessary manual work while maximizing existing application capabilities.

Watch Step By Step Video Tutorial Below


1. Setting Up Pabbly Connect for Google Sheets Integration

To search and update data in Google Sheets using Pabbly Connect, you first need to access the Pabbly Connect dashboard. Here, you can create a new workflow, which will enable the automation of data handling between your Google Sheets and the form submissions.

Start by clicking on the ‘Create Workflow’ button. Name your workflow something descriptive like ‘Google Sheets Search and Update Data’. You can select a folder within your Pabbly Connect account to organize your workflows. Once you click on ‘Create’, you will see a trigger window and an action window appear, which are essential for setting up your automation.


2. Trigger Setup with Pabbly Form Builder

In this step, you will set up the trigger using Pabbly Form Builder to receive new form submissions. Select Pabbly Connect as your application and choose ‘New Form Submission’ as the trigger event. This event will kick off the automation whenever a new form submission is made.

  • Select Pabbly Form Builder as the trigger application.
  • Choose the ‘New Form Submission’ event.
  • Copy the webhook URL provided by Pabbly Connect.
  • Add this URL to your form’s integration settings.

After saving the webhook in your form, Pabbly Connect will wait for a response. Once a form is submitted, the data will be captured in your Pabbly Connect workflow, allowing you to proceed to the next step of searching the data in Google Sheets.


3. Searching Data in Google Sheets

Now that you have set up the trigger, it’s time to search for the specific lead in Google Sheets using Pabbly Connect. In the action step, select Google Sheets as your application and choose the ‘Lookup Spreadsheet Row’ action event. This allows you to search for the lead ID received from the form submission.

Connect your Google Sheets account to Pabbly Connect by clicking on ‘Connect’ and following the prompts to authenticate your account. Once connected, select the spreadsheet that contains your lead data and specify the sheet you want to search in. Use the lead ID as your lookup value to find the corresponding row in the spreadsheet.


4. Updating Data in Google Sheets

After successfully locating the row, you will now update the lead status in Google Sheets using Pabbly Connect. In the next action step, again select Google Sheets and choose the ‘Update Row’ action event. This is where you will specify which row to update based on the row index retrieved from the previous step.

Map the row index from the previous response to the update row action, and specify the fields you wish to update. For example, you can leave the other fields blank and only update the status field with the new status received from the form submission. Finally, click on ‘Save and Send Test Request’ to execute the update.


5. Testing the Automation

To ensure everything is functioning correctly, conduct a test by submitting a new form entry through Pabbly Form Builder. After submitting, check your Google Sheets to verify that the lead status has been updated as intended. This confirms that your automation is working flawlessly with Pabbly Connect.

Remember, you can use this setup with any application of your choice as the trigger, not just Pabbly Form Builder. This flexibility allows you to automate updates in Google Sheets based on various inputs, enhancing your workflow efficiency.

Conclusion

This guide summarizes the key points and helps you understand the essential features and benefits of using this tool.

Ensure you check out Pabbly Connect to create business automation workflows and reduce manual tasks. Pabbly Connect currently offer integration with 2,000+ applications.


In conclusion, using Pabbly Connect allows you to effectively search and update data in Google Sheets through automation. By following these steps, you can streamline your data management processes and improve your team’s productivity.

How to Create Zendesk User on Typeform Submission with Pabbly Connect

Learn how to automate Zendesk user creation from Typeform submissions using Pabbly Connect. Step-by-step guide to streamline your workflow. Explore systematic approaches to creating efficient automation solutions that convert technical concepts into practical, implementable instructions.

Watch Step By Step Video Tutorial Below


1. Accessing Pabbly Connect for Integration

To create a Zendesk user on Typeform submission, start by accessing Pabbly Connect. This platform allows seamless integration between Typeform and Zendesk, automating the user creation process without any coding.

Begin by visiting the Pabbly website and logging into your account. If you’re a new user, you can sign up for free and enjoy 100 tasks every month. Once logged in, navigate to the Pabbly Connect application to set up your automation.


2. Creating a New Workflow in Pabbly Connect

In the Pabbly Connect dashboard, click on the ‘Create Workflow’ button to initiate your integration setup. You will be prompted to name your workflow. For this integration, name it ‘Create Zendesk User on Typeform Submission’ and select a suitable folder for storage. using Pabbly Connect

  • Click on ‘Create’ to proceed.
  • This will open the workflow window, where you set triggers and actions.

Now, select Typeform as your trigger application. This means that whenever a new entry is made in Typeform, it will trigger the workflow to create a user in Zendesk. Choose the trigger event as ‘New Entry’ and click on connect.


3. Connecting Typeform to Pabbly Connect

After selecting the Typeform trigger, you need to establish a connection. If you have previously connected Typeform, you can select the existing connection. Otherwise, click on ‘Add New Connection’ to link your Typeform account. using Pabbly Connect

  • Click on ‘Connect with Typeform’ and grant the necessary permissions.
  • Select the specific form you want to use for this automation.

Once connected, you will need to perform a test submission to capture the response. Open the Typeform link, fill in the necessary details, and submit the form. This allows Pabbly Connect to capture the data from the test submission.


4. Setting Up Zendesk User Creation

With the Typeform integration set up, it’s time to configure the action step in Pabbly Connect to create a user in Zendesk. Select Zendesk as your action application and choose the action event as ‘Create User’. using Pabbly Connect

Connect your Zendesk account by entering your username, API token, and subdomain. Ensure that the username is formatted correctly by adding ‘/token’ after your email address.

After successfully connecting, map the fields from the Typeform submission to the corresponding fields in Zendesk, such as name and email. This mapping allows dynamic updates whenever a new submission occurs.


5. Testing and Completing the Integration

Once the mapping is complete, send a test request to verify that the integration works correctly. Pabbly Connect will attempt to create a new user in Zendesk based on the submitted Typeform data.

After sending the test request, check your Zendesk account to confirm that the new user has been created successfully. Refresh the customer page in Zendesk to see the newly created user with the same details you submitted in Typeform.

Now your automation is complete! Every time a new submission is made in Typeform, Pabbly Connect will automatically create a user in Zendesk, streamlining your customer support process without manual input.


Conclusion

This tutorial demonstrated how to automate Zendesk user creation from Typeform submissions using Pabbly Connect. By following these steps, you can enhance your workflow and improve customer support efficiency.

Ensure you check out Pabbly Connect to create business automation workflows and reduce manual tasks. Pabbly Connect currently offer integration with 2,000+ applications.

Integrating IndiaMART Leads with Salesforce Using Pabbly Connect

Learn how to integrate IndiaMART leads with Salesforce for your fertilizer business using Pabbly Connect. Step-by-step guide for seamless automation. Eliminate manual repetitive tasks from your workflow. Discover proven automation methods with intuitive steps designed for efficiency-minded professionals.

Watch Step By Step Video Tutorial Below


1. Accessing Pabbly Connect for Integration

To integrate IndiaMART leads with Salesforce, the first step is accessing Pabbly Connect. You can reach Pabbly Connect by entering the URL Pabbly.com/connect in your browser. Once on the homepage, you have two options: sign in or sign up for free.

If you are a new user, click on the ‘Sign up for free’ button to create an account. After signing up, you will receive 100 free tasks every month, allowing you to explore the features of Pabbly Connect and test various automations.


2. Creating a Workflow in Pabbly Connect

Once logged into Pabbly Connect, navigate to the dashboard. Here, you can create a new workflow by clicking on the ‘Create Workflow’ option. A dialog box will prompt you to name your workflow. Name it ‘Add IndiaMART Leads to Salesforce for Fertilizer Business’ and select an appropriate folder for organization.

  • Click on ‘Create’ to finalize the workflow name.
  • This will open a new screen with options for triggers and actions.
  • Understand that triggers initiate the workflow, while actions are the responses to those triggers.

Now, select IndiaMART as the trigger application and choose ‘New Leads’ as the trigger event. This setup ensures that every new lead received through IndiaMART will trigger the workflow.


3. Setting Up IndiaMART Integration

To connect IndiaMART to Pabbly Connect, copy the generated webhook URL from Pabbly Connect. Log into your IndiaMART account and go to the Lead Manager section. Here, find the option for Push API integration.

Deactivate any existing API and paste the copied webhook URL into the relevant field. After saving these details, generate an OTP to activate the new webhook. This action establishes a successful connection between IndiaMART and Pabbly Connect.


4. Testing the Webhook Response

After setting up the webhook, it is crucial to test the integration. Create a dummy inquiry using a profile in incognito mode to simulate a new lead. Fill in the necessary details and submit the inquiry.

  • Ensure that the inquiry includes all relevant information like product type and quantity.
  • Once submitted, return to Pabbly Connect to check for the webhook response.
  • A successful response indicates that the integration is working correctly.

Verify that the lead details such as name, phone number, and inquiry are captured accurately in Pabbly Connect. This confirms that the connection is functional.


5. Integrating Salesforce with Pabbly Connect

Now that the IndiaMART integration is set up, the next step is to connect Salesforce. Select Salesforce as the action application in Pabbly Connect and choose ‘Create Record’ as the action event. Ensure you are logged into your Salesforce account for seamless integration.

Upon connecting, you’ll need to map the lead details received from IndiaMART to the corresponding fields in Salesforce. This includes last name, first name, company name, city, and other relevant details. Use the data received from the previous step to fill in these fields efficiently.

Map the first name and last name using the text formatter feature of Pabbly Connect. Ensure to include the inquiry details in the description field for better tracking. Click on ‘Save and Send Test Request’ to finalize the setup.

Once the test request is successful, refresh your Salesforce account to confirm that the new lead has been added with all the mapped details. This completes the integration process, allowing you to seamlessly add IndiaMART leads to Salesforce using Pabbly Connect.


Conclusion

In conclusion, integrating IndiaMART leads with Salesforce using Pabbly Connect simplifies lead management for your fertilizer business. By following these steps, you can automate the process effectively, ensuring no lead is missed.

Ensure you check out Pabbly Connect to create business automation workflows and reduce manual tasks. Pabbly Connect currently offer integration with 2,000+ applications.

How to Create or Update Keap Contact from LinkedIn Lead Gen Forms Leads Using Pabbly Connect

Learn how to automate the creation and updating of Keap contacts from LinkedIn Lead Gen Forms leads using Pabbly Connect. Step-by-step guide included! Eliminate manual repetitive tasks from your workflow. Discover proven automation methods with intuitive steps designed for efficiency-minded professionals.

Watch Step By Step Video Tutorial Below


1. Accessing Pabbly Connect for Integration

To start the integration process using Pabbly Connect, you first need to access the platform. Simply type ‘Pabbly.com/connect’ in your browser to reach the Pabbly Connect dashboard. If you are a new user, you can sign up for free, which includes 100 tasks monthly.

Once logged in, navigate to the dashboard where you can create workflows. Click on the ‘Create Workflow’ button, and enter a name for your workflow, such as ‘Create or Update Keap Contact from LinkedIn Lead Gen Forms Leads’. Select a folder to save your workflow for better organization.


2. Setting Up the Trigger in Pabbly Connect

In this step, you will set up the trigger that initiates the workflow. The trigger will be based on new leads from LinkedIn Lead Gen Forms. Select ‘LinkedIn Lead Gen Forms’ as your trigger application. This means that every time a new lead is captured, it will trigger the automation. using Pabbly Connect

  • Choose the specific LinkedIn Lead Gen Form you want to connect.
  • Set the polling frequency to every 10 minutes for timely updates.

After selecting the form, click on ‘Connect with LinkedIn’ to authorize Pabbly Connect to access your LinkedIn account. This allows Pabbly Connect to fetch new leads automatically from your chosen form.


3. Testing the Trigger to Ensure Functionality

Once the trigger is set, it’s crucial to test it to ensure that everything is working correctly. Submit a test lead through your LinkedIn Lead Gen Form. After submission, go back to Pabbly Connect and click on the ‘Save and Send Test Request’ button.

  • Check for the response received from LinkedIn to confirm the lead details.
  • Ensure that the first name, last name, email, and phone number are captured correctly.

If the test is successful, you will see the lead details reflected in the response section. This confirms that your trigger is functioning as intended, setting the stage for the next step of creating or updating contacts in Keap.


4. Setting Up the Action to Create or Update Keap Contact

Next, you will set up the action that will create or update the contact in Keap. Select ‘Keap’ as your action application. In the action event, choose ‘Create or Update Contact’ to ensure that every new lead from LinkedIn is processed correctly. using Pabbly Connect

Now, you will need to map the fields from the LinkedIn response to the Keap contact fields. For example, map the email address, first name, and last name from the LinkedIn lead to the corresponding fields in Keap. This mapping ensures that the data is accurately transferred and updated in Keap.


5. Finalizing the Integration and Testing

With the action set up, it’s time to finalize the integration. Click on the ‘Save and Send Test Request’ button to test the action. This will attempt to create or update a contact in Keap based on the data received from LinkedIn. using Pabbly Connect

Once the test is successful, you can check your Keap account to verify that the contact has been created or updated correctly. This step confirms that the entire workflow is functioning as expected, allowing you to automate the lead management process seamlessly.

Conclusion

This guide summarizes the key points and helps you understand the essential features and benefits of using this tool.

Ensure you check out Pabbly Connect to create business automation workflows and reduce manual tasks. Pabbly Connect currently offer integration with 2,000+ applications.


By using Pabbly Connect, you can efficiently manage your leads from LinkedIn and ensure that your Keap contacts are always up-to-date. This integration saves you time and ensures accurate data handling, enhancing your overall productivity.