Automate WhatsApp Reminders for Zoom Meetings Using Pabbly Connect

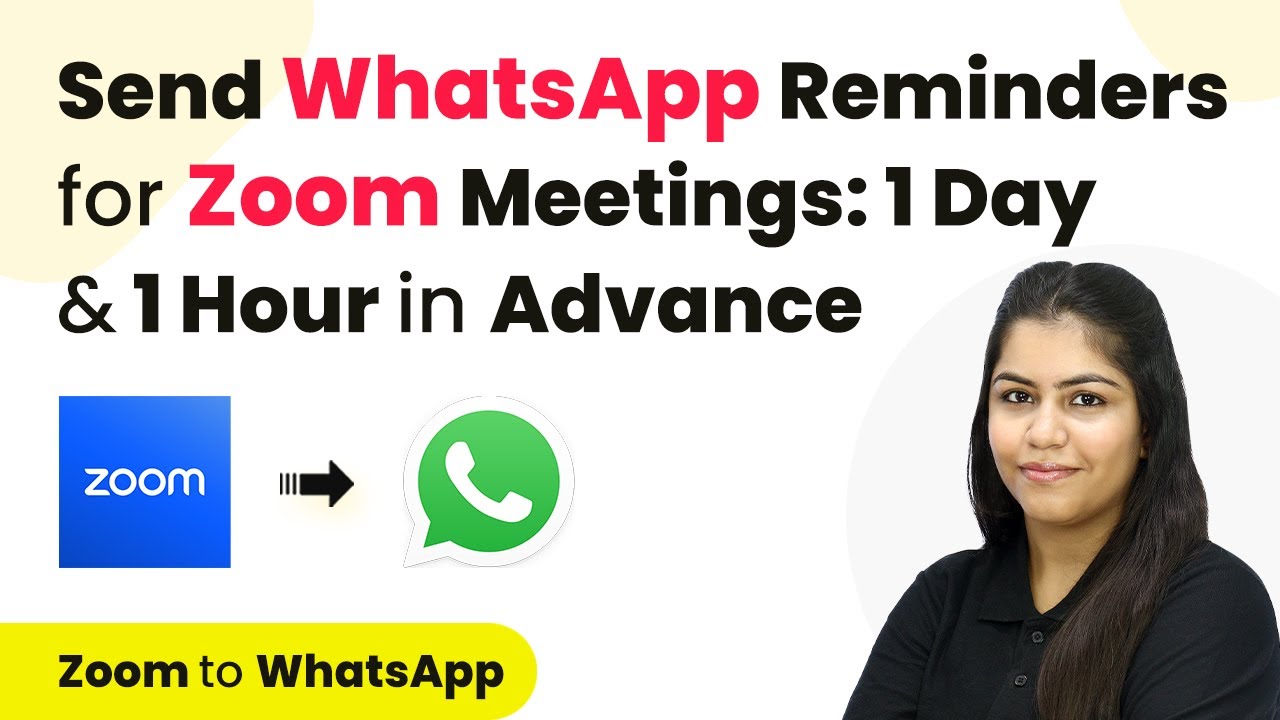
Learn how to automate WhatsApp reminders for Zoom meetings using Pabbly Connect step-by-step. Follow this detailed tutorial for seamless integration. Follow this definitive guide to creating powerful automated workflows with straightforward, efficiency-focused solutions that save valuable time.

Watch Step By Step Video Tutorial Below


1. Accessing Pabbly Connect for Integration

To start automating WhatsApp reminders for Zoom meetings, you first need to access Pabbly Connect. Open your web browser and type in ‘Pabbly Connect’ to reach the landing page. Here, you will see options to either sign in or sign up for free, where new users can get 100 tasks free each month.

As an existing user, click on the ‘Sign In’ button. Once logged in, you will see various Pabbly applications. Click on ‘Access Now’ for Pabbly Connect to enter your dashboard and begin creating your workflow.


2. Creating a Workflow in Pabbly Connect

After accessing Pabbly Connect, the next step is to create a workflow. Click on the ‘Create Workflow’ button in the top right corner. You will be prompted to name your workflow; name it ‘Send Automated WhatsApp Reminders for Zoom Meetings’.

  • Click on the ‘Create’ button to initiate the workflow.
  • This opens the workflow window, where you will define triggers and actions.

In this workflow, you will set Zoom as the trigger application. Select ‘Zoom’ and then choose the trigger event as ‘New Meeting Registration’. This will allow Pabbly Connect to listen for new registrations and trigger subsequent actions.


3. Setting Up Zoom Trigger in Pabbly Connect

To set up the Zoom trigger, you need to connect your Zoom account to Pabbly Connect. Click on ‘Connect’ and choose to add a new connection. You will be prompted to enter a token, which you can obtain by logging into your Zoom account.

Navigate to the left sidebar, click on ‘Admin’, followed by ‘Advanced’, and then ‘App Marketplace’. Here, create a new app by selecting ‘Develop’ and then ‘Build App’. Enter the app name as ‘Meeting Reminders’ and provide the redirect URL as specified in the Pabbly Connect instructions.


4. Sending WhatsApp Reminders via Pabbly Connect

Once the Zoom trigger is set up, the next step is to send WhatsApp reminders. For this, you will use the action application ‘AI Sensi’ to send automated WhatsApp messages. Select this application and choose the action event as ‘Send Template Message’. using Pabbly Connect

  • Map the recipient’s phone number and name from the Zoom registration response.
  • Ensure your message template includes personalized fields for a better user experience.

After configuring the message, click on ‘Save and Send Test Request’ to verify that the WhatsApp message is sent successfully. You should receive a confirmation message in your WhatsApp, indicating that the reminder has been sent.


5. Finalizing the Workflow in Pabbly Connect

To finalize your workflow, repeat the reminder sending process for one hour before the event. You will need to create another action step in Pabbly Connect using the same AI Sensi application.

Adjust the time settings to reflect one hour before the event and ensure all mappings are correct. After setting up, click on ‘Save and Send Test Request’ to confirm that both reminders (one day and one hour before) are functioning as intended.

With this setup, Pabbly Connect will automatically send WhatsApp reminders to your registrants, significantly reducing no-shows for your Zoom meetings.


Conclusion

Using Pabbly Connect, you can automate WhatsApp reminders for Zoom meetings effectively. This integration helps ensure your participants are reminded in advance, improving attendance rates and engagement.

Ensure you check out Pabbly Connect to create business automation workflows and reduce manual tasks. Pabbly Connect currently offer integration with 2,000+ applications.

Automate WhatsApp Messages for India Mart Leads Using Pabbly Connect

Learn how to automate WhatsApp messages to India Mart leads using Pabbly Connect for your home textile and furnishing business. Learn to create powerful connections between your critical applications without requiring specialized programming knowledge or extensive technical background.

Watch Step By Step Video Tutorial Below


1. Setting Up Pabbly Connect for WhatsApp Integration

To automate WhatsApp messages to India Mart leads, we will use Pabbly Connect. First, visit the Pabbly Connect homepage by typing ‘pabbly.com/connect’ in your browser. You will see options to sign in or sign up for free. If you are an existing user, click on ‘Sign In’; otherwise, click ‘Sign Up for Free’ to create a new account.

After signing in, you will be directed to the dashboard. Here, you can create a new workflow by clicking on ‘Create Workflow’. Name your workflow something like ‘Send WhatsApp Message to India Mart Leads’. This workflow will help you manage your automated messages effectively.


2. Configuring the Trigger for India Mart Leads

The next step involves setting up the trigger for your workflow. For this, select India Mart as your trigger application. The trigger event will be ‘New Leads’, which means the workflow will activate whenever a new lead is received from India Mart.

  • Select ‘India Mart’ as the trigger application.
  • Choose ‘New Leads’ as the trigger event.
  • Copy the webhook URL provided by Pabbly Connect.

Next, log into your India Mart account. Navigate to the Lead Manager section, and under the menu, select ‘Push API’. Here, you will create a new webhook by pasting the copied URL and activating it. This connection allows Pabbly Connect to receive lead data from India Mart.


3. Sending WhatsApp Messages Using AI Sensei

After configuring the trigger, the next step is to set up the action that sends WhatsApp messages. For this, select AI Sensei as the action application. The action event will be ‘Send Template Message’. This step will ensure that each lead receives a personalized message on WhatsApp.

To connect AI Sensei with Pabbly Connect, you will need to enter your API key. This key can be found in your AI Sensei account under the API Key section. Once you enter the API key, save the connection to proceed.

  • Select ‘AI Sensei’ as the action application.
  • Choose ‘Send Template Message’ as the action event.
  • Enter your API key from your AI Sensei account.

Now that the action is set, you can create a message template that will be sent to each lead. This template can include personalized information such as the lead’s name and inquiry details, ensuring a tailored communication experience.


4. Finalizing the Automation Process

To finalize your automation, you need to map the required fields in the WhatsApp message template. This includes the mobile number of the lead, their name, and any other relevant details from the inquiry received through India Mart. using Pabbly Connect

Ensure that the mobile number is dynamically mapped to automatically update with each new lead. This way, every time a lead submits an inquiry, the message will be sent to the correct number without manual entry.

After mapping the fields, test the workflow by submitting a dummy inquiry through your India Mart account. Check if the WhatsApp message is sent successfully to the lead’s number. You should see a confirmation message indicating that the message has been sent.


5. Conclusion

In conclusion, automating WhatsApp messages for India Mart leads using Pabbly Connect simplifies the communication process for your home textile and furnishing business. By following the steps outlined, you can ensure timely and personalized responses to inquiries, helping to convert leads into paying customers efficiently.

Thanks for following along with this tutorial! Remember to subscribe to the channel for more helpful content like this.

If you found this guide useful, please consider giving it a thumbs up and sharing it with others who might benefit from it.

Integrating Wix Forms and Slack Using Pabbly Connect: A Step-by-Step Guide

Learn how to integrate Wix Forms and Slack using Pabbly Connect to automate notifications for travel inquiries. Follow this detailed tutorial for seamless setup. Navigate the automation landscape confidently with clear, structured guidance suitable for professionals regardless of prior technical experience.

Watch Step By Step Video Tutorial Below


Accessing Pabbly Connect for Integration

To begin, you need to access Pabbly Connect. This platform allows seamless integration between various applications, such as Wix and Slack. Start by visiting the Pabbly Connect website and signing in using your credentials.

Once logged in, you will see options for creating a new workflow. Click on the ‘Create Workflow’ button to initiate the process of connecting Wix Forms with Slack. This setup will ensure that your team receives instant notifications for every new travel inquiry submitted through your Wix forms.


Creating a Workflow in Pabbly Connect

After accessing Pabbly Connect, you will be prompted to name your workflow. For this integration, name it something relevant, like ‘Notify Team on Slack for Wix Form Submission’. Choose a folder to save your workflow, then click on ‘Create’. This action opens the workflow window where you will set up triggers and actions.

In this window, you will select Wix Forms as your trigger application. The trigger event should be set to ‘New Form Submission’. This event indicates that whenever a new travel inquiry is submitted, it will trigger the workflow. After selecting the trigger event, a webhook URL will be generated. This URL is crucial as it will connect your Wix Forms account to Pabbly Connect.

  • Select Wix Forms as the trigger application.
  • Choose ‘New Form Submission’ as the trigger event.
  • Copy the generated webhook URL for later use.

With the webhook URL copied, you can now proceed to your Wix account to set up the automation that will send data to Pabbly Connect.


Setting Up Wix Forms for Webhook Integration

Now, navigate to your Wix account to set up the automation. In your Wix dashboard, go to the ‘Automations’ section. Click on ‘Add New Automation’ to create a new automation process. Choose to start from scratch, and select Wix Forms as your trigger again, specifying the form that will initiate this automation.

After selecting the specific form, you will need to set the action for this automation. Choose ‘Send via Webhook’ as the action type. Here, paste the webhook URL you copied from Pabbly Connect. This step ensures that whenever a form is submitted, the data is sent directly to your Pabbly Connect workflow.

  • Navigate to Wix Automations and click ‘Add New Automation’.
  • Select the form that triggers the automation.
  • Set the action to ‘Send via Webhook’ and paste the copied URL.

After saving the automation, you will need to perform a test submission to ensure that the data flows correctly from Wix Forms to Pabbly Connect.


Testing the Integration Between Wix Forms and Slack

To test the integration, submit a test inquiry through your Wix form. Fill out the form with dummy data, including the first name, email, phone number, city, and travel dates. Once submitted, this information should automatically be sent to Pabbly Connect via the webhook.

After submission, go back to your Pabbly Connect dashboard to verify that the response has been captured. You should see all the details from your test submission, confirming that the connection is working as intended. This successful capture indicates that your workflow is now ready to send notifications.

Submit a test inquiry through your Wix form. Check your Pabbly Connect dashboard for captured data. Ensure the workflow is ready to send notifications.

With the test submission successfully captured, you can now proceed to set up the action that will notify your team on Slack.


Notifying Your Team on Slack Using Pabbly Connect

For the final step, return to your Pabbly Connect workflow and set Slack as the action application. Choose the action event as ‘Send Channel Message’. This action allows you to notify your team whenever a new inquiry is received. Click on ‘Connect’ to link your Slack account with Pabbly Connect.

You will need to authorize Pabbly Connect to access your Slack account. After the connection is established, select the channel where you want to send notifications, such as ‘New Leads’. Lastly, customize the message to include details from the form submission, ensuring your team receives all necessary information about the new inquiry.

Select Slack as the action application. Choose ‘Send Channel Message’ as the action event. Authorize the connection and select your notification channel.

Once you have mapped the necessary fields and saved your workflow, you will be ready to automate notifications for travel inquiries received through your Wix forms.


Conclusion

In this tutorial, we explored how to integrate Wix Forms and Slack using Pabbly Connect. This setup allows for automatic notifications for new travel inquiries, enhancing communication and efficiency within your team. By following these steps, you can streamline your workflow and ensure timely responses to potential clients.

Ensure you check out Pabbly Connect to create business automation workflows and reduce manual tasks. Pabbly Connect currently offer integration with 2,000+ applications.

Automate WhatsApp Messages with Pabbly Connect and Cognito Forms

Learn how to automate WhatsApp messages for Cognito Form submissions using Pabbly Connect in this detailed tutorial. Build sophisticated automated workflows in less time than you think. This guide translates complex integrations into straightforward steps for immediate implementation.

Watch Step By Step Video Tutorial Below


Accessing Pabbly Connect for Integration

To start automating WhatsApp messages using Pabbly Connect, first visit the Pabbly Connect website. Once there, sign in to your account. If you are a new user, you can sign up for free and receive 100 tasks per month. After logging in, you will see the Pabbly apps window.

From the apps window, click on the Pabbly Connect option. This will take you to the dashboard where you can create your automation workflows. To initiate a new workflow, click on the Create Workflow button located in the top right corner of the dashboard.


Creating a Workflow in Pabbly Connect

After clicking on Create Workflow, a dialog box will appear prompting you to name your workflow. Enter a name such as ‘Send WhatsApp Message on Cognito Form Submissions’. Next, select a folder where you want to save this workflow.

Once you have named your workflow and chosen a folder, click the Create button. This will set up your automation workflow in Pabbly Connect. You will see two sections: the Trigger and Action sections. The Trigger section is where you define what will start the automation process.

  • Name your workflow appropriately.
  • Select the folder for your workflow.
  • Click on Create to finalize the workflow setup.

Now that your workflow is created, you need to set up the Trigger application. This will be Cognito Forms, as you want to capture form submissions.


Setting Up the Trigger in Pabbly Connect

In the Trigger section, select Cognito Forms as your trigger application. You will then choose the trigger event as New Entry. This event will capture new submissions from your Cognito form. Once selected, Pabbly Connect will generate a unique webhook URL for your workflow.

Copy this webhook URL and go to your Cognito Forms account. Open the form you created and navigate to the settings. In the settings, find the option to Post JSON Data on a Website and toggle it on. Paste the webhook URL into the submit entry endpoint field and save your changes.

  • Select Cognito Forms as the trigger application.
  • Choose New Entry as the trigger event.
  • Copy the webhook URL for integration.

After saving the webhook settings in Cognito Forms, return to Pabbly Connect and check if it is waiting for a webhook response. This indicates that the connection is established.


Setting Up the Action in Pabbly Connect

Next, you need to set up the Action step in your workflow. The action application will be WhatsApp by AI Sensi. This application will send the WhatsApp messages to your clients. In the Action step, select WhatsApp by AI Sensi and choose the action event as Send Template Message.

Click on the Connect button to establish a connection between Pabbly Connect and WhatsApp by AI Sensi. You will need to provide an API key from your WhatsApp account. Navigate to your WhatsApp by AI Sensi account, go to the manage section, and copy the API key. Paste this key into Pabbly Connect and save the connection.

Select WhatsApp by AI Sensi as the action application. Choose Send Template Message as the action event. Provide the API key to connect.

After saving the connection, you will need to create a campaign name for the WhatsApp message. This will help you manage and identify your message campaigns easily. Fill in the required fields using the data captured from the Cognito Forms submission.


Testing the Integration in Pabbly Connect

Once you have set up the action step, it’s time to test the integration. To do this, fill out the Cognito Form with test data. After submitting the form, check Pabbly Connect to see if it captures the response correctly. If the test submission is successful, you should receive a WhatsApp message at the number provided in the form.

Open your WhatsApp to verify that the message has been received. The message should include the dynamic fields you set up earlier, such as the customer’s name. This confirms that the automation is working as intended and that Pabbly Connect has successfully integrated Cognito Forms and WhatsApp by AI Sensi.

Submit the Cognito Form with test data. Check Pabbly Connect for captured responses. Verify the WhatsApp message received.

If everything works as expected, you can now automate WhatsApp messages for every new Cognito Form submission using Pabbly Connect. This saves time and ensures prompt communication with your clients.


Conclusion

In this tutorial, we explored how to automate WhatsApp messages for Cognito Form submissions using Pabbly Connect. By following the steps outlined, you can streamline your communication process and enhance customer engagement effectively.

Ensure you check out Pabbly Connect to create business automation workflows and reduce manual tasks. Pabbly Connect currently offer integration with 2,000+ applications.

How to Enroll Rigi User on WooCommerce Purchase with Pabbly Connect

Learn how to automate the enrollment of users in Rigi upon WooCommerce purchases using Pabbly Connect. Step-by-step tutorial with detailed instructions. Transform complex automation concepts into accessible, actionable steps that eliminate unnecessary manual work while maximizing existing application capabilities.

Watch Step By Step Video Tutorial Below


1. Accessing Pabbly Connect for WooCommerce Integration

To start the process of enrolling users in Rigi upon a WooCommerce purchase, you first need to access Pabbly Connect. This platform serves as the bridge between your WooCommerce store and Rigi, automating the enrollment process. You can reach Pabbly Connect by typing the URL Pabbly.com/connect in your browser.

Once on the Pabbly Connect homepage, you have two options: sign in if you’re an existing user or click on the ‘Sign Up for Free’ button to create a new account. New users will receive 100 free tasks every month, allowing them to explore this powerful automation tool.


2. Creating a Workflow in Pabbly Connect

After signing in, you will be directed to the dashboard of Pabbly Connect. To create a new workflow for enrolling Rigi users, click on the ‘Create Workflow’ option. You will be prompted to name your workflow; enter ‘Enroll Rigi User on WooCommerce Purchase’ and select a relevant folder, such as ‘Automations for LMS’.

  • Name your workflow appropriately.
  • Select the correct folder for organization.

Once you click on ‘Create’, you will see a blank workflow interface where you can set up your trigger and actions. The trigger will be the event that starts the workflow, while the actions are the responses to that trigger.


3. Setting Up the Trigger for WooCommerce Orders

In this step, you will set up the trigger in Pabbly Connect to listen for new orders in WooCommerce. Select WooCommerce as your trigger application and choose the event ‘New Order Created’. This event will notify Pabbly Connect whenever a new purchase is made.

After selecting the trigger event, you will receive a webhook URL. This URL needs to be added to your WooCommerce settings to establish communication. Log into your WordPress site, navigate to WooCommerce settings, and access the ‘Advanced’ tab where you can find the ‘Webhooks’ option.

  • Create a new webhook by clicking ‘Add Webhook’.
  • Set the status to active and select ‘Order Created’ as the topic.

Paste the webhook URL from Pabbly Connect into the delivery URL field and save the webhook. This setup will ensure that every time a new order is placed, the information is sent to Pabbly Connect.


4. Filtering Orders for Rigi Enrollment

After setting up the trigger, the next step in Pabbly Connect is to apply a filter to ensure only specific orders trigger the enrollment in Rigi. You want to ensure that only purchases for the PHP programming course will enroll users in Rigi.

Add a filter step in your workflow and configure it to check if the product purchased contains the specific course name. Set the filter type to ‘contains’ and input ‘PHP Programming Course’ as the value. This ensures that not every product purchase will create a user in Rigi, only the desired course.

Select the response from the previous step as the label. Test the condition to ensure it functions correctly.

Upon successful configuration, if the condition is true, you can then proceed to the next action step to create a user in Rigi.


5. Enrolling the User in Rigi

The final step in your workflow using Pabbly Connect is to enroll the user in Rigi. Select Rigi as your action application and choose the action event ‘Import User’. You will need to connect your Rigi account by entering the P API key from your Rigi dashboard.

After establishing the connection, map the user details from the WooCommerce order to the fields required by Rigi. This includes the user’s name, email, phone number, and the product hash key for the PHP programming course. Once all fields are mapped correctly, click on ‘Save and Send Test Request’.

Ensure all user details are dynamically mapped from the previous response. Confirm successful enrollment by checking the user management section in Rigi.

Once the test request is successful, your workflow is complete. Now, every time a customer purchases the PHP programming course, they will automatically be enrolled as a user in Rigi, streamlining your learning management process.


Conclusion

In this tutorial, we demonstrated how to use Pabbly Connect to automate the enrollment of users in Rigi upon WooCommerce purchases. By following these steps, you can efficiently manage your learning management system and ensure a seamless user experience.

Ensure you check out Pabbly Connect to create business automation workflows and reduce manual tasks. Pabbly Connect currently offer integration with 2,000+ applications.

Integrating Razorpay with Pabbly Connect for Email Marketing Automation

Learn how to automate your email marketing with Razorpay payments using Pabbly Connect. This step-by-step guide covers all necessary integrations and actions. Learn to create powerful connections between your critical applications without requiring specialized programming knowledge or extensive technical background.

Watch Step By Step Video Tutorial Below


1. Accessing Pabbly Connect for Automation

To start using Pabbly Connect, you first need to create an account. This integration allows you to connect Razorpay for payment processing with Pabbly Email Marketing for subscriber management.

To sign up, visit the Pabbly website and click on the free sign-up link. After creating an account, log into your dashboard to begin setting up your automation workflow.


2. Creating a Workflow in Pabbly Connect

Once logged into Pabbly Connect, click on the ‘Create Workflow’ button. Name your workflow something like ‘Razorpay to Pabbly Email Marketing’ to easily identify it later.

Next, select the folder where you want to save this workflow. After naming and selecting the folder, click on ‘Create’ to open the workflow setup screen.

  • Click on ‘Create Workflow’.
  • Name your workflow (e.g., Razorpay to Pabbly Email Marketing).
  • Select the folder to save the workflow.

After creating the workflow, you will see two windows: the trigger window and the action window. The trigger window will capture new payments from Razorpay, while the action window will handle adding subscribers to Pabbly Email Marketing.


3. Integrating Razorpay with Pabbly Connect

In the trigger window, select Razorpay as the application. Then, choose the trigger event as ‘Payment Captured’. This event will trigger the workflow whenever a payment is made.

After selecting the trigger event, Pabbly Connect will provide a webhook URL. Copy this URL and navigate to your Razorpay account to set up the webhook.

  • Select Razorpay in the trigger window.
  • Choose ‘Payment Captured’ as the trigger event.
  • Copy the webhook URL provided by Pabbly Connect.

In Razorpay, go to ‘Account and Settings’ > ‘Webhooks’. Click on ‘Add New Webhook’, paste the copied URL, and select ‘Payment Captured’ as the active event. Click on ‘Create Webhook’ to finalize the setup.


4. Adding Subscribers to Pabbly Email Marketing

After setting up the webhook, return to Pabbly Connect. You will see that the trigger is waiting for a webhook response. Make a test payment through your Razorpay payment page to generate a response.

Once the payment is processed, the details will appear in Pabbly Connect. Now, move to the action window and select Pabbly Email Marketing as the application. Choose ‘Add Subscriber’ as the action event.

Select Pabbly Email Marketing in the action window. Choose ‘Add Subscriber’ as the action event. Connect your Pabbly Email Marketing account by entering the API token.

After connecting, select the list where you want to add the subscriber. Map the email and name fields from the Razorpay trigger response to the Pabbly Email Marketing action step. Finally, save and send a test request to confirm that the subscriber has been added successfully.


5. Testing the Automation Workflow

To ensure everything is working, perform another test payment using a different customer name and email. After the payment is completed, check your Pabbly Email Marketing subscriber list to confirm that the new subscriber has been added.

If the automation is set up correctly, you should see the new subscriber in your Pabbly Email Marketing account almost instantly. This confirms that the integration between Razorpay and Pabbly Connect is functioning as intended.

Perform a test payment with a new customer. Check the subscriber list in Pabbly Email Marketing. Confirm the new subscriber is added automatically.

By following these steps, you can automate the process of adding subscribers to your email list whenever a payment is made through Razorpay, all thanks to Pabbly Connect.


Conclusion

This tutorial demonstrates how to seamlessly integrate Razorpay with Pabbly Connect for effective email marketing automation. By following the steps outlined, you can enhance your subscriber management process significantly.

Ensure you check out Pabbly Connect to create business automation workflows and reduce manual tasks. Pabbly Connect currently offer integration with 2,000+ applications.

How to Set Up Webhook Inside Chatwoot Using Pabbly Connect

Learn how to set up a webhook inside Chatwoot using Pabbly Connect to automate customer engagement tasks effectively. Discover hidden automation capabilities within your existing tools. This guide shows you how to connect your essential applications and permanently eliminate redundant manual processes.

Watch Step By Step Video Tutorial Below


1. Introduction to Pabbly Connect and Chatwoot

In this section, we will explore how to use Pabbly Connect to set up a webhook inside Chatwoot. Chatwoot is an open-source customer engagement platform that allows businesses to manage customer interactions across various channels. By utilizing Pabbly Connect, you can automate repetitive tasks and streamline your customer engagement processes.

Understanding the integration between Chatwoot and Pabbly Connect is crucial for effective automation. The webhook acts as a bridge, allowing data transfer between Chatwoot and other applications whenever a specific event occurs. This tutorial will guide you through the steps needed to establish this connection.


2. Setting Up Webhook in Chatwoot Using Pabbly Connect

To begin, you need to access your Chatwoot account and navigate to the settings. Here, you will find the integration options where you can set up a webhook. The process starts by selecting the trigger application as Chatwoot within Pabbly Connect.

  • Go to the settings in Chatwoot.
  • Select the Integrations option from the left menu.
  • Click on the Webhook option and then on Add New Webhook.

After clicking on Add New Webhook, you will need to paste the webhook URL provided by Pabbly Connect. Set the event to ‘Conversation Created’ to capture the necessary data when a new conversation starts. Once you click on Create Webhook, the setup will be complete.


3. Testing the Webhook Connection with Pabbly Connect

After setting up the webhook, the next step is to test the connection. This involves creating a test conversation in Chatwoot, which will trigger the webhook. Open your website where the Chatwoot chatbot is integrated and initiate a conversation to send a message.

As you send a message, ensure that you include details such as:

  • User’s first name
  • User’s last name
  • Email address
  • Phone number

Once the message is sent, return to Pabbly Connect to check if the response has been captured successfully. You should see the details of the conversation displayed, confirming that the integration is working.


4. Automating Tasks Using Pabbly Connect

With the webhook successfully set up and tested, you can now automate various tasks using Pabbly Connect. For instance, you can create records in Google Sheets for every conversation initiated. This helps in maintaining a systematic database of potential leads.

To automate the process, follow these steps:

Select Google Sheets as the action application in Pabbly Connect. Choose the action event to create a new row. Map the fields from Chatwoot to corresponding columns in Google Sheets.

This automation will ensure that every time a new conversation is created in Chatwoot, the details are automatically recorded in Google Sheets, allowing for better tracking and follow-up.


5. Conclusion on Setting Up Webhook Inside Chatwoot

In conclusion, setting up a webhook inside Chatwoot using Pabbly Connect is a straightforward process that significantly enhances customer engagement automation. By following the steps outlined in this tutorial, you can efficiently capture lead information and manage customer interactions seamlessly.

Ensure you check out Pabbly Connect to create business automation workflows and reduce manual tasks. Pabbly Connect currently offer integration with 2,000+ applications.

Utilizing Pabbly Connect not only automates data transfer between Chatwoot and Google Sheets but also opens up possibilities for further integrations with other applications. This ensures that your customer engagement strategy is both effective and efficient.


Integrating Trigger with Fitness: A Step-by-Step Guide

Learn how to integrate Trigger with Fitness Using Pabbly Connect for seamless automation. Follow our detailed tutorial for step-by-step instructions. Explore efficient methods for automating routine tasks with clear, concise instructions suited for both newcomers and experienced professionals. with Pabbly Connect.

Watch Step By Step Video Tutorial Below


1. Understanding Trigger and Fitness Integration

Integrating Trigger with Fitness is essential for automating workflows in a fitness studio. This integration allows for efficient management of webinar registrations and participant tracking.

To set up the integration, you will utilize applications like Trigger, Fitness, and Make. This ensures that every new registration is automatically processed, enhancing your studio’s operational efficiency.


2. Setting Up Contact Form 7 for Registrations

Setting up Contact Form 7 is the first step to manage registrations effectively. You will create a registration form for your fitness workshop that collects necessary participant information.

  • Create a new form in Contact Form 7.
  • Add fields for first name, last name, email, and phone number.
  • Ensure the form is connected to your WordPress site.

After creating the form, you will need to integrate it with Trigger using a webhook URL. This URL will facilitate communication between your form submissions and the automation process.


3. Connecting Trigger with Zoom for Automation

Connecting Trigger with Zoom is crucial for automating the addition of registrants to your Zoom meetings. This step involves configuring the workflow in Make.

To do this, you will first set up the trigger event in Make to listen for new submissions from Contact Form 7. This is how you will automate the registration process:

  • Select Contact Form 7 as your trigger application.
  • Choose ‘New Form Submission’ as the trigger event.
  • Copy the webhook URL provided by Make.

Once this is set up, you will go back to your WordPress site and paste the webhook URL into the Contact Form 7 settings, ensuring it is active for receiving submissions.


4. Finalizing the Integration with Test Submissions

Finalizing the integration involves testing the entire workflow to ensure that everything is functioning correctly. You will create a test submission through your Contact Form 7 registration form.

After submitting the test registration, you will check Make to confirm that the data has been received. This will include the participant’s details, such as:

First Name: Michael Last Name: Caris Email: [email protected]

Once you confirm that the data is received, you will proceed to add this registrant to your Zoom meeting, ensuring that they receive their meeting link automatically.


5. Conclusion: Seamless Integration with Trigger and Fitness

Integrating Trigger with Fitness streamlines the registration process for your fitness webinars and workshops. By automating the addition of participants to Zoom, you save time and enhance user experience.

Thanks for following along with this tutorial! Remember to subscribe to the channel for more helpful content like this.

If you found this guide useful, please consider giving it a thumbs up and sharing it with others who might benefit from it.

This setup allows you to focus on delivering high-quality fitness sessions while ensuring all registrations are handled efficiently. With Make, you can easily manage your workflows and improve your fitness studio’s operations.


In this tutorial, we explored how to integrate Trigger with Fitness Using Pabbly Connect, ensuring a smooth automation process for webinar registrations. With these steps, you can enhance your fitness studio’s operational efficiency and focus on what truly matters—your clients!

How to Enroll Rigi User on FlexiFunnels Purchase Using Pabbly Connect

Learn how to integrate FlexiFunnels with Rigi for automatic user enrollment using Pabbly Connect. Follow this step-by-step tutorial to streamline your course management. Revolutionize your productivity approach with just a few strategic clicks. Uncover professional methods for connecting applications and creating workflows that reclaim hours of your week.

Watch Step By Step Video Tutorial Below


1. Accessing Pabbly Connect for Integration

To automate the enrollment of Rigi users upon FlexiFunnels purchase, you first need to access Pabbly Connect. Open your browser and search for Pabbly Connect. If you don’t have an account, click on ‘Sign up for free’ to create one, which takes only two minutes.

Once you have an account, log in. On the dashboard, you will see various applications. Click on the ‘Access Now’ button under Pabbly Connect to start creating your workflow. This platform is essential as it will facilitate the connection between FlexiFunnels and Rigi.


2. Creating a Workflow in Pabbly Connect

After accessing Pabbly Connect, the next step is to create a new workflow. Click on the ‘Create Workflow’ button, and a new window will pop up. Here, name your workflow, for instance, ‘Enroll Rigi User on FlexiFunnels Purchase’ and click on ‘Create’. This workflow will be the foundation for automating your user enrollment process. using Pabbly Connect

  • Name your workflow according to its purpose.
  • Set up a trigger and action within the workflow.
  • Ensure FlexiFunnels is selected as the trigger application.

In this window, you will see two boxes labeled ‘Trigger’ and ‘Action’. The trigger is the event that initiates the workflow, while the action is what happens as a result. Setting this up correctly is crucial for the automation to work seamlessly.


3. Setting Up the Trigger in Pabbly Connect

To set up the trigger, select FlexiFunnels as your application and choose the ‘New Purchase’ event. This event will trigger the workflow every time a new purchase is made. You will then need to connect FlexiFunnels to Pabbly Connect using a webhook URL.

To do this, copy the provided webhook URL and navigate to your FlexiFunnels account. Go to the products section, select your course, and set the product rules. Under the webhook settings, paste the webhook URL you copied from Pabbly Connect. This step is vital as it establishes the connection between the two applications.


4. Testing the Integration with a Purchase

Now that the trigger is set up, it’s time to test the integration. Make a test purchase on your FlexiFunnels sales page. Fill in the required details, such as name, email, and payment information, and complete the order. This action will generate a response in Pabbly Connect, confirming that the purchase has been recorded.

Once the purchase is complete, return to Pabbly Connect. You should see the response containing all the details of the purchase, including customer information. This confirmation indicates that the trigger is functioning correctly and that the data is being sent from FlexiFunnels to Pabbly Connect.


5. Enrolling the User in Rigi

With the trigger successfully set up and tested, the next step is to enroll the user in Rigi. Select Rigi as your action application and choose the ‘Import User’ event. This action will take the customer details from the FlexiFunnels purchase and create a new user in Rigi.

To connect Rigi with Pabbly Connect, you will need an API token. Log into your Rigi account, navigate to the Integrations section, and enable the Pabbly integration to obtain your token. Copy this token and paste it back into Pabbly Connect to establish the connection.

Finally, map the customer details from the FlexiFunnels response to the required fields in Rigi, such as full name and email. Once all details are filled, click ‘Save’ to finalize the user enrollment process. This setup ensures that every new purchase leads to automatic user enrollment in Rigi without manual intervention.


Conclusion

In this tutorial, we explored how to automate the enrollment of Rigi users upon purchases made through FlexiFunnels using Pabbly Connect. By following the steps outlined, you can streamline your course management and enhance user experience. This integration saves time and reduces errors, allowing you to focus on delivering quality education.

Ensure you check out Pabbly Connect to create business automation workflows and reduce manual tasks. Pabbly Connect currently offer integration with 2,000+ applications.

Integrating Zoom with Gravity Forms Using Pabbly Connect

Learn how to seamlessly integrate Zoom with Gravity Forms using Pabbly Connect. This step-by-step guide walks you through the entire process with detailed instructions. Navigate the automation landscape confidently with clear, structured guidance suitable for professionals regardless of prior technical experience.

Watch Step By Step Video Tutorial Below


1. Setting Up Pabbly Connect for Zoom and Gravity Forms Integration

To integrate Zoom with Gravity Forms, we will use Pabbly Connect. First, access Pabbly Connect by visiting the official website and signing in to your account. If you are new, you can sign up for free and start with 100 tasks every month.

After logging in, navigate to the Pabbly Connect dashboard. Click on the ‘Create Workflow’ button to initiate the setup process. You will be prompted to name your workflow; for this integration, name it ‘How to Add Zoom Meeting Registrant on Gravity Forms Submission’. After naming, click ‘Create’ to proceed.


2. Setting Up Gravity Forms as the Trigger Application

In this step, we will configure Gravity Forms as the trigger application using Pabbly Connect. Select ‘Gravity Forms’ from the list of applications as your trigger. The trigger event will be set to ‘New Response’, which activates when a new form submission occurs.

  • Choose ‘Gravity Forms’ as the trigger application.
  • Select ‘New Response’ as the trigger event.
  • Copy the provided Webhook URL for later use.

After selecting the trigger, you will receive a Webhook URL. This URL is essential for connecting Gravity Forms to Pabbly Connect. Keep this URL handy as you will need it in the next steps.


3. Configuring the Webhook in Gravity Forms

Now, we need to set up the Webhook in Gravity Forms to enable communication between it and Pabbly Connect. Go to your WordPress dashboard and select the Gravity Forms plugin. Choose the form you want to integrate and click ‘Edit’.

  • Navigate to the form settings and select ‘Webhooks’.
  • Click on ‘Add New’ to create a new Webhook.
  • Paste the copied Webhook URL and configure the request method as POST.

After completing these settings, click ‘Save Settings’. This will connect Gravity Forms to Pabbly Connect and allow it to send data upon form submission.


4. Adding Zoom as the Action Application

With Gravity Forms now set up, it’s time to add Zoom as the action application using Pabbly Connect. In your workflow, select ‘Zoom’ as the action application. The action event will be set to ‘Add Meeting Registrant’.

Click on ‘Connect’ to link your Zoom account. If it’s your first time, you will need to authorize Pabbly Connect to access your Zoom account. Once connected, choose the meeting you want to add registrants to. Here, select the relevant meeting from the dropdown list.


5. Mapping Fields for Zoom Registration

The final step is to map the fields from the Gravity Forms submission to the Zoom registration fields in Pabbly Connect. This is crucial for ensuring that the correct data is sent to Zoom.

Map the following fields: email address, first name, last name, address, city, country, and phone number. By mapping these fields, you ensure that every new form submission leads to accurate Zoom registrations.

Map the email address from the Gravity Forms submission. Map the first name and last name accordingly. Ensure all required fields are filled for successful registration.

After mapping all necessary fields, click on ‘Save and Send Test Request’ to verify that the integration works. If successful, you will see the registrant added to your Zoom meeting.


Conclusion

In this tutorial, we covered how to add Zoom meeting registrants automatically through Gravity Forms submissions using Pabbly Connect. By following these steps, you can streamline your registration process and enhance user experience without manual efforts.

Ensure you check out Pabbly Connect to create business automation workflows and reduce manual tasks. Pabbly Connect currently offer integration with 2,000+ applications.