Integrating Instagram Lead Ads with Zoho CRM and WhatsApp Using Pabbly Connect

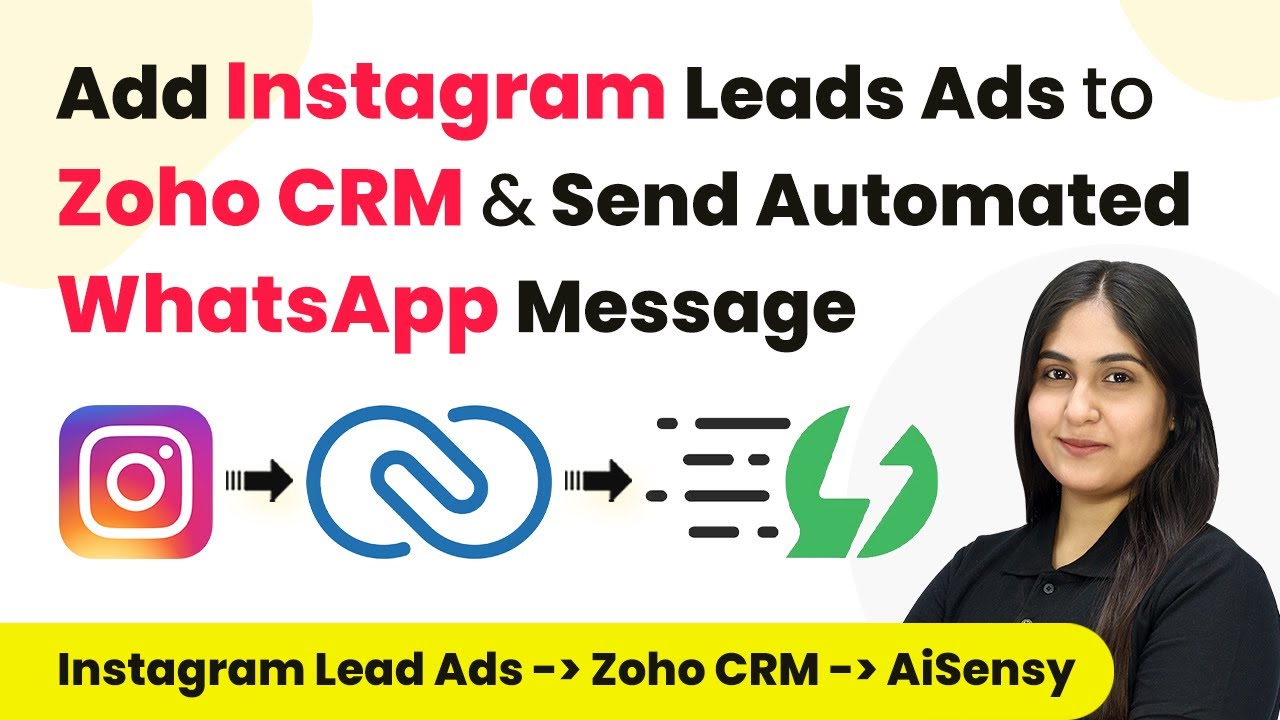
Learn how to automate your Instagram Lead Ads, Zoho CRM, and WhatsApp messaging using Pabbly Connect in this detailed tutorial. Develop expertise in application integration and learn how to design streamlined automation workflows using proven, simplified approaches.

Watch Step By Step Video Tutorial Below


1. Introduction to Pabbly Connect for Automation

Pabbly Connect is a powerful automation tool that allows you to integrate various applications seamlessly. In this tutorial, we will see how to use Pabbly Connect to automate the process of adding Instagram Lead Ads to Zoho CRM and sending automated WhatsApp messages. This integration helps streamline lead management for fitness studios and similar businesses.

To begin, access Pabbly Connect by visiting its homepage. If you are a new user, you can sign up for free and explore its features with 100 free tasks each month. Existing users can simply log in to access their dashboard and start creating workflows.


2. Creating a Workflow in Pabbly Connect

After logging into Pabbly Connect, the first step is to create a new workflow. Click on the ‘Create Workflow’ button located at the top right corner of the dashboard. Name your workflow something descriptive like ‘Add Instagram Lead Ads to Zoho CRM & Send Automated WhatsApp Message’ and select a folder for better organization.

  • Click on ‘Create’ to finalize your workflow.
  • Understand the two principles of automation: Trigger and Action.
  • Set your trigger application as Instagram Lead Ads.

By selecting Instagram Lead Ads as your trigger, you will be notified whenever a new lead is generated. This is essential for managing leads efficiently and ensuring they are captured in your CRM.


3. Setting Up Instagram Lead Ads Trigger

In the trigger step of your Pabbly Connect workflow, select Instagram Lead Ads as the application and choose the trigger event as ‘New Lead Instant’. This action ensures that every time a lead fills out the form on your Instagram ad, it will trigger the workflow.

Next, you need to connect your Instagram account to Pabbly Connect. Click on ‘Connect’ and follow the prompts to authorize the connection. Make sure your Instagram account is linked to your Facebook page, as this is crucial for capturing leads.

  • Select your Facebook account linked to your Instagram.
  • Choose the specific lead generation form you want to use.
  • Click on ‘Save and Send Test Request’ to test the connection.

Once you have successfully tested the connection, Pabbly Connect will be ready to capture leads from your Instagram ads automatically.


4. Integrating Zoho CRM with Pabbly Connect

Now that you have set up the trigger, the next step is to add the action to insert or update records in Zoho CRM. Select Zoho CRM as the action application in your Pabbly Connect workflow and choose the action event as ‘Insert or Update a Record’. This allows you to keep track of all your leads in one place.

Connect your Zoho CRM account by entering the domain name when prompted. Once connected, select the module as ‘Leads’ and proceed to map the fields from the Instagram lead to your Zoho CRM record. This includes mapping the first name, last name, email, and phone number.

Map the fields from the Instagram lead to the corresponding fields in Zoho CRM. Click on ‘Save and Send Test Request’ to confirm the data is being sent correctly. Check Zoho CRM to ensure the new lead record has been created.

With the lead now recorded in Zoho CRM, you can effectively manage your follow-ups and client interactions.


5. Sending Automated WhatsApp Messages

The final step in this automation process is sending an automated WhatsApp message to the new lead. In your Pabbly Connect workflow, add another action step and select ‘WhatsApp by AI Sensei’ as the application. Choose the action event as ‘Send Template Message’ to utilize your pre-defined message template for leads.

Connect your WhatsApp by AI Sensei account by entering the API key from your account settings. Once the connection is established, fill in the required fields, including the campaign name and the mobile number of the lead you just captured. Make sure to map the lead’s name to personalize the message.

Enter the campaign name that you have set up in AI Sensei. Map the mobile number and lead’s name to the message template. Click on ‘Save and Send Test Request’ to ensure the message is sent.

After completing this step, you will receive a WhatsApp message confirming the integration is successful, allowing you to engage with your leads promptly.


Conclusion

In this tutorial, we demonstrated how to integrate Instagram Lead Ads with Zoho CRM and automate WhatsApp messaging using Pabbly Connect. This integration streamlines lead management and enhances customer engagement, making it easier for businesses to convert leads into clients. By following these steps, you can automate your workflows and focus on growing your business effectively.

Ensure you check out Pabbly Connect to create business automation workflows and reduce manual tasks. Pabbly Connect currently offer integration with 2,000+ applications.

Automate WhatsApp Messages to Facebook Leads for Fitness Centre Using Pabbly Connect

Learn how to automate WhatsApp messages to Facebook leads for your fitness centre using Pabbly Connect. Follow this step-by-step guide for seamless integration. Develop expertise in application integration and learn how to design streamlined automation workflows using proven, simplified approaches.

Watch Step By Step Video Tutorial Below


1. Accessing Pabbly Connect for Automation

To send automated WhatsApp messages to Facebook leads for your fitness centre, access Pabbly Connect through your browser. Simply type in the URL to visit the Pabbly Connect website and log in to your account.

If you’re new to Pabbly Connect, you can sign up for a free account, which provides you with 100 free tasks monthly. Once logged in, navigate to the dashboard where you can create workflows that connect various applications like Facebook Lead Ads and AI Sensei.


2. Creating a Workflow in Pabbly Connect

After accessing Pabbly Connect, the next step is to create a new workflow. Click on the ‘Create Workflow’ button, and name your workflow something like ‘Automated WhatsApp Messages to Facebook Leads’. Choose a folder to save this workflow for better organization.

  • Click on the ‘Create’ button to initiate your workflow.
  • Select Facebook Lead Ads as your trigger application.
  • Set the trigger event to ‘New Lead Instant’.

Once these steps are completed, you will be prompted to connect your Facebook account to Pabbly Connect. If you already have a connection, simply save it. Otherwise, create a new connection by logging into your Facebook account.


3. Configuring Facebook Lead Ads in Pabbly Connect

With Pabbly Connect now connected to your Facebook account, you need to specify which Facebook page and lead form to use. Select the appropriate Facebook page from the dropdown menu, such as your fitness centre’s page.

  • Choose the lead form associated with your Facebook ads, for instance, ‘Sports Training Form’.
  • Save your settings and send a test request to ensure everything is functioning correctly.

Once you submit the test request, make sure to check the response in Pabbly Connect to confirm the connection is successful. This will allow you to capture lead details for further processing.


4. Setting Up AI Sensei for WhatsApp Messaging

After confirming that Facebook Lead Ads are properly connected, it’s time to set up AI Sensei in Pabbly Connect. Select AI Sensei as your action application and choose the action event ‘Send Template Message’.

Connect to AI Sensei using your API key. Enter campaign details, including the campaign name and template name.

When setting up the message template, ensure to include personalized variables such as the lead’s first name. This customization will enhance engagement with your leads.


5. Testing the Integration for Success

With both Facebook Lead Ads and AI Sensei configured, you can now test the entire integration process using Pabbly Connect. Submit a test lead through your Facebook form to verify that the WhatsApp message is sent correctly.

After submitting the test lead, check your WhatsApp to see if you have received the automated message. Ensure that the message reflects the lead’s details accurately, confirming that the integration is functioning as intended.

Through this process, you have successfully automated WhatsApp messaging for your fitness centre using Pabbly Connect to connect Facebook leads with AI Sensei.


Conclusion

In this tutorial, we explored how to use Pabbly Connect to automate WhatsApp messages to Facebook leads for your fitness centre. By following these steps, you can enhance your lead engagement and streamline your communication process effectively.

Ensure you check out Pabbly Connect to create business automation workflows and reduce manual tasks. Pabbly Connect currently offer integration with 2,000+ applications.

How to Set Up Webhook Inside Linear Using Pabbly Connect

Learn how to set up a webhook inside Linear using Pabbly Connect for seamless integration with Google Chat and The Happening. Follow our step-by-step guide.

Watch Step By Step Video Tutorial Below


1. Introduction to Pabbly Connect and Linear

In this section, we will explore how to set up a webhook inside Linear using Pabbly Connect. Linear is a platform designed for product teams to manage their products and track issues efficiently. By integrating Linear with Pabbly Connect, you can automate repetitive tasks and streamline your workflow.

Pabbly Connect acts as the central integration platform that allows you to connect Linear with various applications like Google Chat and The Happening. This integration helps in capturing responses automatically whenever a specific event occurs in Linear, enhancing productivity and team collaboration.


2. Setting Up the Webhook in Linear

To set up the webhook in Linear, we first need to access Pabbly Connect. Start by selecting Linear as your trigger application. This step is crucial as it defines when the automation will be triggered. In this case, we will choose the event type as ‘New Issue’ to capture any new issues created in Linear. using Pabbly Connect

  • Select Linear as the trigger application.
  • Choose the trigger event as ‘New Issue’.
  • Copy the webhook URL provided by Pabbly Connect.

Once you have copied the webhook URL, proceed to your Linear account. Navigate to the profile section, select ‘Workspace Settings’, and then go to the ‘API’ section. Here, you will create a new webhook by pasting the URL you copied from Pabbly Connect.


3. Configuring Linear Settings for Webhook

In this segment, we will configure the settings in Linear to finalize the webhook setup. After pasting the webhook URL into Linear, you must label your webhook appropriately. For example, you can name it ‘New Issues’. This label helps you identify the webhook’s purpose easily. using Pabbly Connect

  • Label your webhook as ‘New Issues’.
  • Select the data change event for capturing new issues.
  • Click on ‘Create Webhook’ to finalize your setup.

After creating the webhook, return to Pabbly Connect. You will notice that it is now waiting for a response from Linear. This indicates that your webhook is successfully set up and ready to capture data whenever a new issue is created.


4. Testing the Webhook Connection

Now that we have set up the webhook, it’s time to test the connection. To do this, create a new issue in Linear. This action should trigger the webhook and send the relevant data to Pabbly Connect. using Pabbly Connect

Enter the title and description of the issue, for example, ‘App Crashes on Login’. Make sure to fill in all necessary details, such as the issue type and priority. Once the issue is created, head back to Pabbly Connect to see if the response is captured.

If everything is set up correctly, you will see the details of the new issue displayed in Pabbly Connect, confirming that the webhook is functioning as intended. This step is crucial for ensuring that your automation works seamlessly.


5. Integrating with Google Chat Using Pabbly Connect

With the webhook successfully set up, we can now integrate Google Chat to send notifications whenever a new issue arises in Linear. In Pabbly Connect, select Google Chat as your action application. using Pabbly Connect

Configure the action step to send a message to your team in Google Chat. This message will contain the details of the new issue created in Linear. By setting up this action, you ensure that your team is promptly informed about any new issues, enhancing communication and response times.

Once you have configured the action step, test the entire workflow by creating another new issue in Linear. Check Google Chat to confirm that the message has been sent successfully. This integration significantly improves your team’s efficiency by automating notifications through Pabbly Connect.


Conclusion

In this tutorial, we demonstrated how to set up a webhook inside Linear using Pabbly Connect. By following the steps outlined, you can seamlessly integrate Google Chat and automate notifications for new issues. This integration not only saves time but also enhances team collaboration and efficiency.

Ensure you check out Pabbly Connect to create business automation workflows and reduce manual tasks. Pabbly Connect currently offer integration with 2,000+ applications.

How to Create WebinarKit Registrants as HubSpot Contacts Using Pabbly Connect

Learn how to automate the creation of HubSpot contacts from WebinarKit registrants using Pabbly Connect. Follow this detailed tutorial for step-by-step guidance. Discover how to seamlessly connect your essential tools through accessible instructions that make powerful automation available to professionals at every skill level.

Watch Step By Step Video Tutorial Below


1. Accessing Pabbly Connect for Integration

To create WebinarKit registrants as HubSpot contacts, you first need to access Pabbly Connect. Begin by opening your browser and searching for Pabbly Connect’s website. If you don’t have an account, click on the ‘Sign Up for Free’ button to create one.

Once signed in, you will see the dashboard where you can create a new workflow. Click on the ‘Create Workflow’ button and name your workflow, for instance, ‘Create WebinarKit Registrants as HubSpot Contacts’. This sets the stage for your integration process.


2. Setting Up the Trigger in Pabbly Connect

In this step, you will set up the trigger that initiates the workflow. The trigger application is WebinarKit, which will notify Pabbly Connect whenever a new registrant signs up. Search for WebinarKit in the trigger application section.

  • Select ‘New Webinar Registration’ as your trigger event.
  • Copy the webhook URL provided by Pabbly Connect.
  • Go to your WebinarKit account and paste the webhook URL in the registration settings.

After pasting the URL, save your changes. Now, every time a new registration occurs, WebinarKit will send the registrant’s details to Pabbly Connect.


3. Creating the HubSpot Contact Action

Now that your trigger is set, the next step is to define the action that Pabbly Connect will take upon receiving the registrant’s information. Search for HubSpot CRM as your action application.

Select ‘Create Contact’ as the action event. You will then need to connect your HubSpot account to Pabbly Connect. Choose your HubSpot account and authorize the connection.

  • Map the fields from the WebinarKit response to the corresponding HubSpot fields.
  • Include the first name, last name, email, and phone number of the registrant.

Once all fields are mapped correctly, save your settings. This ensures that every new registrant from WebinarKit will automatically be added as a contact in HubSpot CRM through Pabbly Connect.


4. Testing the Integration

After setting up both the trigger and action, it’s essential to test the integration to ensure everything functions correctly. Go back to your WebinarKit registration link and create a test registrant.

Once you submit the registration form, Pabbly Connect will receive the data. Check the response in the Pabbly Connect dashboard to confirm that the information has been captured correctly.

Verify that the registrant’s details appear as expected in the Pabbly Connect response. Check your HubSpot CRM to see if the new contact has been created successfully.

This testing phase is crucial to ensure that your automation is working as intended. If successful, you will see the new contact listed in HubSpot CRM.


5. Finalizing the Automation with Pabbly Connect

Once you have confirmed that your integration works flawlessly, you can finalize the automation process. This step involves ensuring that all settings are saved and that the workflow is active in Pabbly Connect.

Additionally, you can monitor the workflow for any errors or issues. Regular checks will help maintain the efficiency of the integration between WebinarKit and HubSpot CRM.

Ensure the workflow is turned on in Pabbly Connect. Consider setting up notifications for any failures in the workflow.

This final step ensures that your automated process runs smoothly, enhancing your lead management capabilities via Pabbly Connect.


Conclusion

In this tutorial, we demonstrated how to use Pabbly Connect to automate the creation of HubSpot contacts from WebinarKit registrants. By following these steps, you can streamline your lead management and enhance your marketing efforts efficiently.

Ensure you check out Pabbly Connect to create business automation workflows and reduce manual tasks. Pabbly Connect currently offer integration with 2,000+ applications.

Automate Google Forms Submission Alerts on Slack for Software Development Teams Using Pabbly Connect

Learn how to automate Google Forms submission alerts on Slack for software development teams using Pabbly Connect. Step-by-step tutorial included! Develop expertise in application integration and learn how to design streamlined automation workflows using proven, simplified approaches.

Watch Step By Step Video Tutorial Below


1. Accessing Pabbly Connect for Automation

To automate Google Forms submission alerts on Slack for software development teams, you first need to access Pabbly Connect. Begin by visiting the Pabbly Connect website and signing into your account. If you are a new user, you can sign up for free and enjoy 100 tasks every month.

Once logged in, you will see the Pabbly Connect dashboard. Click on the ‘Access Now’ button for Pabbly Connect. This will lead you to the workspace where you can create your automation workflow.


2. Creating a Workflow in Pabbly Connect

To create a new workflow in Pabbly Connect, click on the ‘Create Workflow’ button located at the top right corner. A dialog box will prompt you to name your workflow. Enter a suitable name such as ‘Automate Google Form Submission Alerts on Slack for Software Development Teams’.

  • Choose a folder where you want to save this workflow.
  • Select the ‘Google Forms Automations’ folder from the dropdown.

After naming your workflow and selecting the folder, click on the ‘Create’ button. This will set up the workflow and present you with two main sections: Trigger and Action. The Trigger indicates when the automation will start, while the Action specifies what happens as a result.


3. Setting Up the Trigger with Google Forms

In this step, you will set up the trigger for your workflow. Select ‘Google Forms’ as the trigger application. For the trigger event, choose ‘New Response Received’. This means that whenever a new form submission is made, Pabbly Connect will capture the response.

Once you select the trigger event, Pabbly Connect will provide you with a unique webhook URL. Copy this URL as you will need it to connect your Google Form to Pabbly Connect. Open your Google Form, navigate to the ‘Responses’ tab, and click on ‘Link to Sheets’ to create a new spreadsheet.


4. Linking Google Sheets to Pabbly Connect

After creating the new spreadsheet, go to the ‘Extensions’ menu in Google Sheets and select ‘Add-ons’. From there, click on ‘Get Add-ons’ and search for ‘Pabbly Connect Webhooks’. Install this add-on to facilitate the connection between Google Sheets and Pabbly Connect.

  • Refresh your Google Sheets page after installation.
  • Go back to the Extensions menu and select Pabbly Connect Webhooks.
  • Click on ‘Initial Setup’ and paste the webhook URL you copied earlier.

For the trigger column, specify column H, as this is where the final data will be added. Once done, click on the ‘Submit’ button. A confirmation message will indicate that the setup was successful.


5. Setting Up the Action to Send Alerts on Slack

Now that your trigger is set up, it’s time to configure the action. Select ‘Slack’ as the action application and choose the event ‘Send Channel Message’. This will send an alert to your designated Slack channel whenever a new form submission occurs. using Pabbly Connect

To connect to Slack, click on the ‘Connect’ button and select ‘Add New Connection’. Choose the token type as ‘Bot’ and click on ‘Save’. Authorize Pabbly Connect to access your Slack account by clicking on the ‘Allow’ button. After authorization, select the channel where you want to send alerts, such as ‘New Bug Report and Feature Request’.

Compose your alert message, including details like submission type, submitter name, email, priority, and issue description. Use data mapping to pull information from the previous step in your workflow. Finally, test the connection by sending a test message to ensure everything is functioning correctly.


Conclusion

This tutorial on automating Google Forms submission alerts on Slack for software development teams using Pabbly Connect demonstrates how easy it is to streamline communication and enhance efficiency. By following the steps outlined, you can ensure that your team receives timely alerts for new submissions, allowing them to respond promptly and effectively.

Ensure you check out Pabbly Connect to create business automation workflows and reduce manual tasks. Pabbly Connect currently offer integration with 2,000+ applications.

Automate Lead Management with Pabbly Connect in Minutes

Learn how to automate lead management using Pabbly Connect with Facebook Lead Ads, Google Sheets, Zoho CRM, and Slack. Step-by-step tutorial included. This comprehensive guide reveals exactly how to connect your applications and automate repetitive tasks — accessible for professionals of all technical backgrounds.

Watch Step By Step Video Tutorial Below


1. Accessing Pabbly Connect for Lead Management

To automate lead management, first access Pabbly Connect by typing the URL in your browser. Once on the homepage, you will see options to sign in or sign up for free.

If you are a new user, click on the ‘Sign up for free’ button to create an account. Existing users can log in directly. After signing in, you will be directed to the dashboard where you can create workflows to automate tasks.


2. Creating a Workflow in Pabbly Connect

After accessing Pabbly Connect, click on the ‘Create Workflow’ button to start automating lead management. A dialog box will prompt you to name your workflow. Name it ‘Automate Lead Management with Pabbly Connect’ and select a folder for organization.

  • Click on ‘Create’ to finalize your workflow.
  • You will see a blank workflow screen with two sections: Trigger and Action.
  • The Trigger is the event that starts the workflow, and Action is what happens as a result.

Choose Facebook Lead Ads as the trigger application to capture leads generated through your ads. This setup will allow Pabbly Connect to streamline your lead management process effectively.


3. Setting Up Trigger with Facebook Lead Ads

In this step, you will configure the trigger for your workflow using Pabbly Connect. Select ‘New Lead Instant’ as the trigger event. Click on ‘Connect’ to establish a connection between Facebook Lead Ads and Pabbly Connect.

Once connected, you will need to select your Facebook page and the lead form associated with your ads. This will enable Pabbly Connect to capture lead details as they come in.

  • Select your Facebook page (e.g., Prime Properties).
  • Choose the lead generation form you created for your ads.
  • Click on ‘Save and Send Test Request’ to verify the setup.

After testing, Pabbly Connect will confirm the successful connection, allowing you to capture lead details effectively.


4. Recording Leads in Google Sheets Using Pabbly Connect

Next, you will set up an action step to record the captured leads in Google Sheets using Pabbly Connect. Select Google Sheets as your action application and choose ‘Add New Row’ as the action event.

Connect your Google Sheets account by clicking on ‘Connect’ and selecting your account. Allow Pabbly Connect to access your Google Sheets for seamless integration. Specify the spreadsheet name (e.g., New Leads Detail) and select the appropriate sheet.

Map the lead details such as name, email, phone number, and type of property. Click ‘Save and Send Test Request’ to verify if the data is recorded correctly. Check your Google Sheets to confirm the new lead entry.

This step ensures that all leads are systematically recorded, making it easier to manage them later.


5. Adding Leads to Zoho CRM via Pabbly Connect

After recording leads in Google Sheets, the next step is to add them to Zoho CRM using Pabbly Connect. Select Zoho CRM as your action application and choose ‘Insert or Update Record’ as the action event.

Connect your Zoho CRM account by providing the domain name from your Zoho URL. Once authorized, map the lead details to the appropriate fields in Zoho CRM, including first name, last name, email, and phone number.

Select the module name as ‘Leads’ in Zoho CRM. Map additional fields such as city and state if available. Click ‘Save and Send Test Request’ to finalize the integration.

This integration allows Pabbly Connect to automatically add new leads to your Zoho CRM, enhancing your lead management process.


Conclusion: Notifying Your Team on Slack with Pabbly Connect

Lastly, set up a notification system for your team using Slack through Pabbly Connect. Select Slack as your action application and choose ‘Send Channel Message’ as the action event. Connect your Slack account and select the relevant channel.

Ensure you check out Pabbly Connect to create business automation workflows and reduce manual tasks. Pabbly Connect currently offer integration with 2,000+ applications.

Check out Pabbly Connect – Automate your business workflows effortlessly! Sign Up Free – Start your journey with ease! 10,000+ Video Tutorials – Learn step by step! Join Pabbly Facebook Group – Connect with 21,000+ like minded people!

Compose a message to inform your team about the new lead, mapping the lead details as needed. This ensures that your team is always updated on new leads, facilitating timely follow-ups.

By following these steps, you have successfully automated lead management using Pabbly Connect, integrating Facebook Lead Ads, Google Sheets, Zoho CRM, and Slack without any coding skills. This streamlined process enhances efficiency and improves your team’s response time to potential clients.

Automatically Add HubSpot Contacts to Flodesk Segments as Subscribers Using Pabbly Connect

Learn how to automatically add HubSpot contacts to Flodesk segments as subscribers using Pabbly Connect. Streamline your email marketing effortlessly! Explore systematic approaches to creating efficient automation solutions that convert technical concepts into practical, implementable instructions.

Watch Step By Step Video Tutorial Below


1. Accessing Pabbly Connect for HubSpot and Flodesk Integration

To start the process of automatically adding HubSpot contacts to Flodesk segments, you need to access Pabbly Connect. This integration platform is essential for connecting your HubSpot CRM with Flodesk seamlessly.

Begin by signing into your Pabbly Connect account. If you are a new user, you can sign up for free and receive 100 tasks monthly. Once logged in, you will see the dashboard where you can create a new workflow.


2. Creating a Workflow in Pabbly Connect

After accessing your Pabbly Connect dashboard, click on the ‘Create Workflow’ button located at the top right corner. A dialog box will appear prompting you to name your workflow.

  • Name your workflow: ‘Automatically Add HubSpot Contacts to Flodesk Segments as Subscribers’.
  • Select a folder to save your workflow.

Once you have named your workflow and selected a folder, click on ‘Create’. This creates a new workflow where you will set up the trigger and action steps for the integration.


3. Setting Up HubSpot CRM as the Trigger in Pabbly Connect

The next step involves setting HubSpot CRM as the trigger application in your Pabbly Connect workflow. Choose HubSpot CRM and select the trigger event as ‘New Contact Added’. This ensures that every time a new contact is added to your HubSpot account, it will trigger an action in Flodesk.

Click on the ‘Connect’ button to authorize Pabbly Connect to access your HubSpot account. Once connected, you will see options to select output properties like first name, last name, email, and country. Select the properties relevant for your subscriber.

  • First Name
  • Last Name
  • Email
  • Country

After selecting the desired properties, click on ‘Save and Send Test Request’. This will capture the last contact created in your HubSpot account, confirming that the trigger setup is successful.


4. Adding Subscribers to Flodesk Segments Using Pabbly Connect

Now that you have set up the trigger, it’s time to add the new contacts as subscribers in Flodesk. For this action, select Flodesk as the action application and choose ‘Create/Update Subscriber’ as the action event. This allows you to create a new subscriber in Flodesk based on the HubSpot contact details.

Click on the ‘Connect’ button to authorize Pabbly Connect to access your Flodesk account. You will need to map the fields from the HubSpot contact to Flodesk. For example, map the email, first name, and last name fields accordingly.

Map Email to the corresponding field. Map First Name and Last Name.

Once you have mapped all necessary fields, click on ‘Save and Send Test Request’. This will create a subscriber in your Flodesk account, confirming the action step has been executed successfully.


5. Segmenting Subscribers in Flodesk Using Pabbly Connect

After creating the subscriber, the next step is to add them to specific segments in Flodesk. This is crucial for targeted email marketing. In your Pabbly Connect workflow, add another action step and select Flodesk again, this time choosing ‘Add Existing Subscriber to Segment’ as the action event.

Map the subscriber’s email again and select the segment based on the country property from the HubSpot contact. For example, if the country is India, select the India segment; if it’s the USA, select the USA segment. This ensures that subscribers are categorized correctly based on their geographical location.

Select the correct segment for the subscriber. Confirm the mapping of the subscriber’s email.

Once everything is set up, click on ‘Save and Send Test Request’. This will confirm that the subscriber has been successfully added to the appropriate segment in Flodesk.


Conclusion

In summary, using Pabbly Connect allows you to automate the process of adding HubSpot contacts to Flodesk segments as subscribers efficiently. This integration not only saves time but also enhances your email marketing campaigns by ensuring subscribers are accurately segmented based on their geographical data.

Ensure you check out Pabbly Connect to create business automation workflows and reduce manual tasks. Pabbly Connect currently offer integration with 2,000+ applications.

How to Automatically Send Study Notes via Email on Thinkific Course Enrollment Using Pabbly Connect

Learn how to automatically send study notes via email on Thinkific course enrollment using Pabbly Connect. Step-by-step tutorial with detailed integration process. Develop expertise in application integration and learn how to design streamlined automation workflows using proven, simplified approaches.

Watch Step By Step Video Tutorial Below


1. Accessing Pabbly Connect for Automation

To automatically send study notes via email on Thinkific course enrollment, you first need to access Pabbly Connect. This platform allows you to create automated workflows without any coding skills.

Begin by opening your web browser and searching for Pabbly Connect. Once on the landing page, you can either sign in if you already have an account or click on the ‘Sign Up for Free’ button to create a new account. This process takes only a couple of minutes, and you will receive 100 free tasks each month.


2. Creating a Workflow in Pabbly Connect

After signing in to Pabbly Connect, you will be directed to the dashboard. Here, click on the ‘Create Workflow’ button to start a new automation process. This is where you’ll set up the connection between Thinkific and Gmail.

  • Click on ‘Create Workflow’ and name it something descriptive, like ‘Automatically Send Study Notes on Thinkific Enrollment’.
  • Next, you will see two sections labeled Trigger and Action. Select Thinkific as your trigger application.
  • Choose the event ‘Enrollment Created’ as your trigger event.

By setting up this workflow in Pabbly Connect, you ensure that every time a new enrollment occurs in Thinkific, the automation will be triggered, allowing you to send study notes automatically.


3. Connecting Thinkific to Pabbly Connect

To connect Thinkific with Pabbly Connect, you will need to create a webhook. This webhook acts as a bridge between Thinkific and Pabbly Connect. Copy the provided webhook URL from Pabbly Connect.

Log into your Thinkific account and navigate to the settings. Under the development section, find the webhooks option. Click on ‘New Webhook’, select ‘Enrollment’ as the model, and paste the webhook URL into the target URL field. After filling in all required details, click on ‘Save’ to establish the connection.


4. Setting Up Email Notifications in Pabbly Connect

Once the webhook is set up, you need to configure the email notifications. Return to Pabbly Connect and set up a filter to send emails only to students who enroll in specific courses, like the ‘PHP Course for Beginners’.

  • Select ‘Filter by Pabbly’ as your action application.
  • Set the filter type to ‘Equal To’ and input the course name.
  • Save the filter to proceed with the email setup.

By using this filter, Pabbly Connect ensures that only the relevant emails are sent to students who enroll in the specified course, improving the efficiency of your communication.


5. Sending Study Notes via Gmail Integration

The final step is to configure Gmail as your action application in Pabbly Connect. Select Gmail and choose the action event ‘Send Email V1’. This allows you to send personalized emails with study notes to your students.

Connect Gmail by allowing access to your account. Fill in the recipient’s email address, which will be dynamically mapped from the Thinkific enrollment details. Customize the email subject and content to include the student’s name and course information.


By following these steps, you will have successfully set up an automated system to send study notes via email upon Thinkific course enrollment. With Pabbly Connect, you streamline your communication process, ensuring students receive their materials promptly.

Conclusion

This guide summarizes the key points and helps you understand the essential features and benefits of using this tool.

Ensure you check out Pabbly Connect to create business automation workflows and reduce manual tasks. Pabbly Connect currently offer integration with 2,000+ applications.


In conclusion, using Pabbly Connect to automatically send study notes via email on Thinkific course enrollment enhances the learning experience for students while saving time for educators. This integration simplifies the process and ensures timely communication.

Automating Web Development Inquiries with Pabbly Connect and Salesforce

Learn how to automate web development inquiries using Pabbly Connect and Salesforce. Follow our step-by-step guide for seamless integration. Streamline your workflow, save valuable time, and eliminate repetitive tasks through powerful automation capabilities.

Watch Step By Step Video Tutorial Below


Setting Up Pabbly Connect for Automation

To automate web development inquiries, start by setting up Pabbly Connect. This tool allows you to integrate various applications without coding. First, visit the Pabbly website and sign in to your account.

Once logged in, navigate to the dashboard. Here you can find all your workflows. Click on the ‘Create Workflow’ button to initiate the automation process.


Creating a New Workflow in Pabbly Connect

In this section, we will create a new workflow in Pabbly Connect to handle new inquiries from your web development company. Click on the ‘+’ icon to create a new folder for organization.

Now, name your workflow, for example, ‘Custom Web Application Development Leads in Salesforce’. Select the folder where you want to save this workflow. After naming, click on ‘Create Now’ to proceed.

  • Click on the ‘Create Workflow’ button.
  • Name your workflow appropriately.
  • Select the desired folder to save the workflow.

After creating the workflow, you will see two boxes: one for the trigger and the other for the action. This setup allows you to define the event that starts the automation and the subsequent action taken.


Defining Trigger and Action in Pabbly Connect

Next, we will define the trigger in Pabbly Connect. For this workflow, select ‘IndiaMART’ as your trigger application. This means that when a new inquiry is received, it will trigger the workflow.

After selecting IndiaMART, you will need to configure the trigger event. Choose ‘New Lead’ as the event that starts the automation. This ensures that every time a new inquiry comes in, it will activate the workflow.

  • Select ‘IndiaMART’ as the trigger application.
  • Choose ‘New Lead’ as the trigger event.
  • Ensure the trigger is properly configured.

After setting up the trigger, you will need to connect IndiaMART to Pabbly Connect using the provided webhook URL. This URL acts as a bridge between the two applications, allowing data transfer.


Connecting Salesforce to Pabbly Connect

Now that we have set up the trigger, we need to connect Pabbly Connect with Salesforce. Click on ‘Action Application’ and select Salesforce. This will allow you to send the inquiries directly to your Salesforce account.

Next, choose the action event as ‘Create Lead’. This means that every time a new inquiry is triggered, it will automatically create a lead in Salesforce. You will need to authorize Pabbly Connect to access your Salesforce account by clicking on ‘Allow’.

Select Salesforce as the action application. Choose ‘Create Lead’ as the action event. Authorize Pabbly Connect to access your Salesforce account.

After authorization, map the fields from IndiaMART to Salesforce. This ensures that the data from the inquiry is accurately transferred to the correct fields in Salesforce.


Testing and Verifying the Integration

Finally, it is crucial to test the integration between Pabbly Connect and Salesforce. To do this, send a test inquiry from IndiaMART. This will help you verify that the data is correctly captured and sent to Salesforce.

Check your Salesforce account to see if the lead has been created successfully. If everything is set up correctly, you should see the new lead in your Salesforce dashboard, complete with all the details from the inquiry.

Send a test inquiry from IndiaMART. Verify that the lead appears in Salesforce. Ensure all data is accurately transferred.

Once verified, you can finalize the workflow in Pabbly Connect. This automation will now handle all future inquiries seamlessly, saving you time and effort.


Conclusion

In summary, automating web development inquiries with Pabbly Connect and Salesforce streamlines your workflow. By following the steps outlined, you can efficiently manage leads and enhance productivity.

Thanks for following along with this tutorial! Remember to subscribe to the channel for more helpful content like this.

If you found this guide useful, please consider giving it a thumbs up and sharing it with others who might benefit from it.

Automate WhatsApp Updates for Zenler Courses Using Pabbly Connect

Learn how to automate WhatsApp updates for your Zenler courses using Pabbly Connect. Follow our step-by-step guide to enhance student engagement. Master proven automation processes with practical implementation examples and strategic recommendations you can apply immediately in your workflow.

Watch Step By Step Video Tutorial Below


1. Accessing Pabbly Connect for Integration

To automate WhatsApp updates for your Zenler courses, you first need to access Pabbly Connect. This integration platform allows seamless connections between different applications. Start by visiting the Pabbly Connect homepage.

Once there, you will see options to sign in or sign up. If you are new, click on ‘Sign Up Free’ to create an account. Existing users should click ‘Sign In’ to access their dashboard. After logging in, you will be directed to the Pabbly Connect dashboard where you can create workflows.


2. Creating a Workflow in Pabbly Connect

In Pabbly Connect, creating a workflow is essential for automating your processes. Click on the ‘Create Workflow’ button located at the top right corner of the dashboard. A dialog box will appear, prompting you to name your workflow.

  • Name your workflow, for example, ‘Send Automated WhatsApp Updates for Zenler Courses.’
  • Select a folder for organization, such as ‘Automations.’
  • Click ‘Create’ to finalize your workflow setup.

After creating your workflow, you will see the trigger and action setup options. This is where you will define what initiates the automation process and what action follows.


3. Setting Up the Trigger in Pabbly Connect

To start the automation, you need to set up a trigger in Pabbly Connect. Here, you will select Zenler as your trigger application. This step is crucial as it determines when the automation will start.

Choose the trigger event as ‘Lesson Completed.’ This means that every time a student completes a lesson in Zenler, the workflow will be activated. You will receive a webhook URL that you will need to connect your Zenler account to Pabbly Connect.

  • Copy the webhook URL provided by Pabbly Connect.
  • Log into your Zenler account and navigate to the course automation settings.
  • Paste the webhook URL in the appropriate field to establish the connection.

Once the webhook is set up, your Zenler account is successfully connected to Pabbly Connect, allowing for automated responses.


4. Sending WhatsApp Messages Using Pabbly Connect

After setting up the trigger, the next step is to configure the action to send WhatsApp messages through Pabbly Connect. Select WhatsApp by AI Sensei as your action application. This integration enhances communication by automating WhatsApp messages.

Choose the action event as ‘Send Template Message.’ This will enable you to send a predefined message when a lesson is completed. You will need to connect your WhatsApp by AI Sensei account to Pabbly Connect using your API key.

Enter your API key from your WhatsApp by AI Sensei account. Specify the campaign name corresponding to your message template. Map the student’s phone number and name dynamically from the previous steps.

This setup ensures that each student receives a personalized WhatsApp message congratulating them on completing their lesson, thus enhancing their learning experience.


5. Testing and Finalizing the Integration

With everything set up in Pabbly Connect, it’s time to test the integration. You will need to complete a lesson in your Zenler course using a student account to trigger the workflow. This step verifies that the automation functions as intended.

After completing the lesson, check your WhatsApp to see if the automated message is received. The message should confirm the completion of the lesson and encourage the student to continue their learning journey. This feedback loop is essential for keeping students engaged.

Once confirmed, you can finalize the workflow in Pabbly Connect and start enjoying the benefits of automated communication with your students. This integration not only saves time but also enhances the overall learning experience.


Conclusion

In this tutorial, we explored how to use Pabbly Connect to automate WhatsApp updates for Zenler courses. By following the steps outlined, you can enhance student engagement and streamline communication effectively. Automating this process allows you to focus on delivering quality education while keeping students motivated.

Ensure you check out Pabbly Connect to create business automation workflows and reduce manual tasks. Pabbly Connect currently offer integration with 2,000+ applications.