How to Send Google Forms Submissions to Discord Using Pabbly Connect

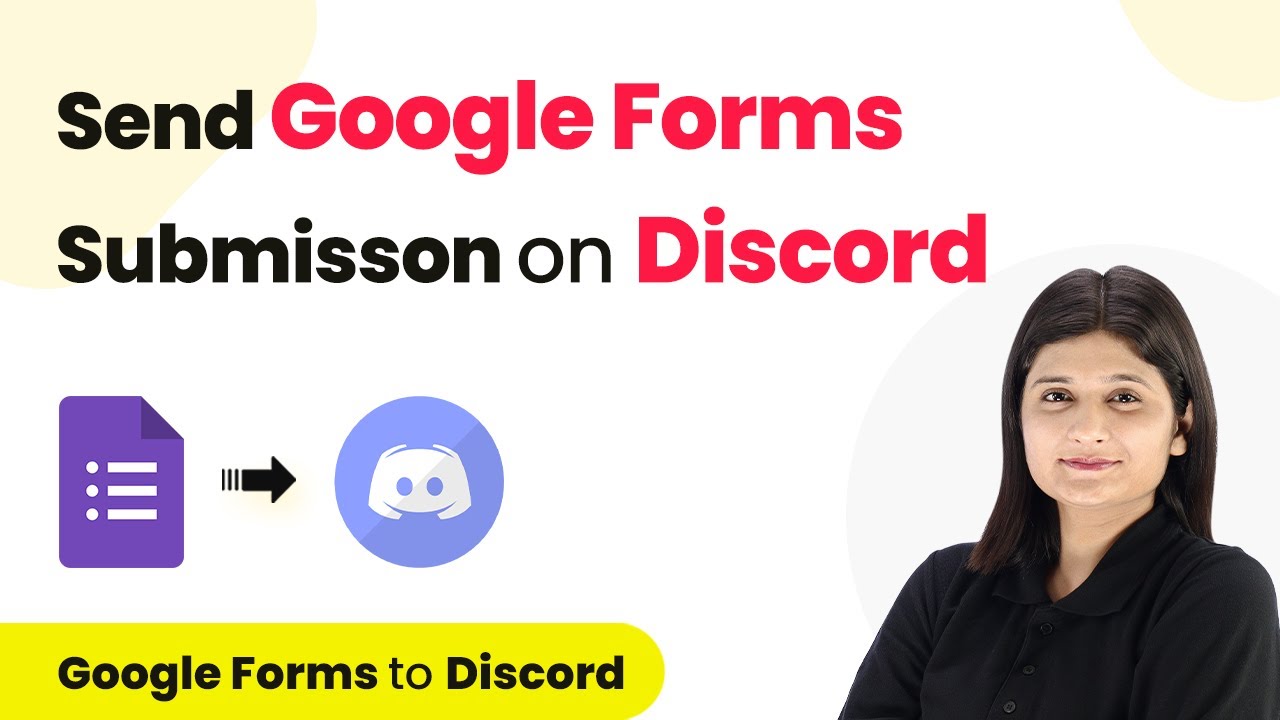
Learn how to automate sending Google Forms submissions to Discord using Pabbly Connect with this detailed step-by-step tutorial. Navigate the automation landscape confidently with clear, structured guidance suitable for professionals regardless of prior technical experience.

Watch Step By Step Video Tutorial Below


1. Accessing Pabbly Connect for Google Forms to Discord Integration

To send Google Forms submissions to Discord, you first need to access Pabbly Connect. Start by visiting the Pabbly website and signing into your account. If you are a new user, you can sign up for free and receive 100 tasks monthly.

Once logged in, navigate to the Pabbly Connect dashboard. Here, you can create a new workflow by clicking on the ‘Create Workflow’ button. Name your workflow as ‘How to Send Google Forms Submission on Discord’ and select a folder for organization.


2. Setting Up the Trigger for Google Forms

In this step, you will set Google Forms as the trigger application in Pabbly Connect. Choose ‘Google Forms’ and select the trigger event as ‘New Response Received’. This means every time a new form submission occurs, it will trigger the workflow.

  • Select Google Forms as the trigger application.
  • Choose ‘New Response Received’ as the trigger event.
  • Copy the provided webhook URL to connect Google Forms to Pabbly Connect.

After copying the webhook URL, go to your Google Forms, ensure the last field is marked as required, and navigate to the ‘Responses’ section. Click on ‘View in Sheets’ to create a Google Sheet linked to your form. This connection will ensure that all submissions are recorded in the sheet.


3. Connecting Google Sheets to Pabbly Connect

To link Google Sheets with Pabbly Connect, you need to install the Pabbly Connect add-on. In Google Sheets, go to ‘Extensions’, select ‘Add-ons’, and then ‘Get Add-ons’. Search for Pabbly Connect Webhooks and install it.

  • Go to ‘Extensions’ in Google Sheets.
  • Select ‘Pabbly Connect Webhooks’ and click on ‘Initial Setup’.
  • Paste the copied webhook URL and set the trigger column to the final data column.

After setting this up, click ‘Submit’ to save your configuration. Then, ensure to click ‘Send on Event’ in the Pabbly Connect Webhooks menu to activate the connection for future submissions.


4. Testing the Integration with Google Forms

Now that the connection is established, it’s time to test the integration. Return to your Google Forms and submit a test response. This will allow you to check if the data is being received correctly in Pabbly Connect.

Fill out the Google Form with dummy details. Submit the form and check Pabbly Connect for the response. Verify that the response is recorded in your Google Sheets.

If the test submission is successful, you will see the submitted details reflected in both Pabbly Connect and your Google Sheets, confirming the integration works correctly.


5. Setting Up Discord as the Action Application

In this final step, you will set up Discord as the action application in Pabbly Connect. Choose Discord and select the action event as ‘Send Channel Message’. Connect your Discord account and enter the required fields, including the webhook URL you created in Discord.

Open your Discord server settings and create a new webhook. Copy the webhook URL and paste it into Pabbly Connect. Map the fields from Google Forms to the message format in Discord.

After mapping the fields correctly, click ‘Save and Send Test Request’. Check your Discord channel to see if the message with the Google Form submission details appears successfully. This confirms that your integration is complete, and all future submissions will be sent automatically to your Discord channel.


Conclusion

In this tutorial, we demonstrated how to use Pabbly Connect to automate sending Google Forms submissions to a Discord channel. By following these steps, you can easily set up this integration and streamline your feedback collection process.

Ensure you check out Pabbly Connect to create business automation workflows and reduce manual tasks. Pabbly Connect currently offer integration with 2,000+ applications.

Automate Google Chat Notifications for LinkedIn Leads Using Pabbly Connect

Learn how to integrate Google Chat with LinkedIn leads using Pabbly Connect. This detailed tutorial provides step-by-step instructions for seamless automation. Master proven automation processes with practical implementation examples and strategic recommendations you can apply immediately in your workflow.

Watch Step By Step Video Tutorial Below


1. Accessing Pabbly Connect for Integration

To start automating Google Chat notifications for new LinkedIn leads, first access Pabbly Connect. Visit the Pabbly website and sign in or sign up for a free account to get started.

Once logged in, navigate to the Pabbly Connect dashboard. Here, you can create new workflows that connect various applications, including Google Chat and LinkedIn. This integration will allow you to automate notifications whenever a new lead is generated.


2. Creating a Workflow in Pabbly Connect

To create a workflow in Pabbly Connect, click on the ‘Create Workflow’ button. Name your workflow, such as ‘Notify Team on Google Chat for New LinkedIn Leads’, and select the appropriate folder for organization.

  • Click on ‘Create’ to proceed.
  • You will see two boxes: Trigger and Action.
  • Set LinkedIn Lead Generation Form as your trigger application.

In the trigger event, select ‘New Lead Gen Form Response’. This setup ensures that whenever a new lead is generated, it will trigger the automation to notify your team on Google Chat.


3. Connecting LinkedIn Lead Generation Form

Now, connect your LinkedIn Lead Generation Form to Pabbly Connect. Click on the ‘Connect’ button and choose your LinkedIn account from the dropdown menu. If you haven’t connected it before, click on ‘Add New Connection’ to authorize.

Once connected, select the specific lead form you want to monitor. Remember that LinkedIn Lead Gen Forms operate on a polling basis, meaning you will need to submit a test form to receive a response. After submitting your test form, click on ‘Save and Send Test Request’ to verify the connection.


4. Setting Up Google Chat Integration

Next, set up the action step in your workflow to send notifications to Google Chat. Choose Google Chat as your action application and select ‘Create a Message’ as the action event. Click on ‘Connect’ to enter your Google Chat webhook URL. using Pabbly Connect

  • In Google Chat, create a space and add a webhook.
  • Copy the webhook URL and paste it into Pabbly Connect.
  • Compose your message using dynamic fields from the LinkedIn lead response.

Once all fields are filled, click on ‘Save and Send Test Request’. This will send a test message to your Google Chat space, confirming that the integration works as intended.


5. Testing the Integration

After setting up the integration between LinkedIn and Google Chat using Pabbly Connect, it’s essential to test if everything is functioning correctly. Submit another test lead through your LinkedIn form to check if the notification is sent to Google Chat.

Wait for the polling interval (set to 10 minutes) to see if the new lead details appear in your Google Chat space. If successful, you will receive a message with the lead’s information, confirming that the automation is working perfectly.


Conclusion

This tutorial demonstrated how to automate Google Chat notifications for new LinkedIn leads using Pabbly Connect. By following these steps, you can streamline your lead management process and keep your team informed efficiently.

Ensure you check out Pabbly Connect to create business automation workflows and reduce manual tasks. Pabbly Connect currently offer integration with 2,000+ applications.

How to Notify Team on Microsoft Teams for New Facebook Leads Using Pabbly Connect

Learn how to integrate Facebook Leads with Microsoft Teams using Pabbly Connect. This step-by-step tutorial guides you through the process to automate notifications for new leads.

Watch Step By Step Video Tutorial Below


1. Introduction to Pabbly Connect and Its Purpose

Pabbly Connect is an automation software that helps integrate various applications seamlessly. In this tutorial, we will learn how to notify your team on Microsoft Teams whenever new Facebook leads come in. This integration ensures that your marketing team stays informed in real-time.

Using Pabbly Connect, we can set up a workflow to automate notifications for new leads from Facebook. This process helps streamline communication and enhances lead management, allowing your team to respond promptly to potential customers.


2. Setting Up Your Pabbly Connect Workflow

To get started with Pabbly Connect, first, log in to your account. If you are a new user, you can sign up for free and get 100 tasks every month. Once logged in, navigate to the dashboard. using Pabbly Connect

  • Click on the ‘Create Workflow’ button in the top right corner.
  • Name your workflow, for example, ‘Notify Team on Microsoft Teams for New Facebook Leads.’
  • Select a folder for your workflow, such as ‘Automation.’

Once you have named your workflow, click the ‘Create’ button. You will now see options to set up a trigger and an action. The trigger will be your Facebook lead ads, while the action will be sending a message to Microsoft Teams.


3. Configuring Facebook Leads Trigger in Pabbly Connect

In the workflow, select Facebook Lead Ads as your trigger application. This will allow Pabbly Connect to capture new leads from your Facebook ads. For the trigger event, choose ‘New Lead Instant’ to ensure immediate notifications. using Pabbly Connect

To connect your Facebook account, click on ‘Connect’ and select ‘Add New Connection.’ Follow the prompts to authorize Pabbly Connect to access your Facebook Lead Ads. Once connected, select your Facebook page and the lead form you want to use.

  • Choose your Facebook page, for example, ‘Digital Dynamics.’
  • Select the lead form, such as ‘Inquiry Form.’

After setting up the trigger, save your settings and proceed to test the connection by generating a test lead in your Facebook Lead Ads.


4. Notifying Team on Microsoft Teams Using Pabbly Connect

Now that your trigger is set, it’s time to configure the action in Microsoft Teams. Select Microsoft Teams as your action application and choose ‘Send a Message in a Channel’ as the action event. This will allow the workflow to send a notification to your specified channel whenever a new lead is captured. using Pabbly Connect

Next, click on ‘Connect’ to link your Microsoft Teams account with Pabbly Connect. If prompted, grant the necessary permissions for Pabbly Connect to send messages on your behalf. Select the team and channel where you want to receive notifications.

Choose your team, e.g., ‘Pabbly Connect.’ Select the channel, e.g., ‘New Facebook Leads.’

In the message field, enter the notification message. You can use dynamic fields to include lead details like first name, last name, email, and phone number. This ensures that every notification contains relevant information for your team to follow up on.


5. Testing and Finalizing the Integration

With your workflow set up, it’s essential to test the integration to ensure everything works as intended. Generate a test lead using the Facebook Lead Ads tool to see if the notification is sent to Microsoft Teams. After the test submission, check your Teams channel for the message.

If the notification appears as expected, your integration is successful! You can now rely on Pabbly Connect to automatically notify your team about new Facebook leads, enhancing your lead management process significantly.

To further validate, you can delete the previous test lead and create a new one to confirm that notifications are sent consistently. This ensures that your workflow remains effective and responsive to new leads.


Conclusion

In this tutorial, we explored how to use Pabbly Connect to automate notifications for new Facebook leads on Microsoft Teams. By following these steps, you can streamline your lead management process and enhance team collaboration. Automating notifications allows your team to act quickly on new leads, improving your chances of conversion.

Ensure you check out Pabbly Connect to create business automation workflows and reduce manual tasks. Pabbly Connect currently offer integration with 2,000+ applications.

How to Share Shopify Products on Facebook Page Using Pabbly Connect

Learn how to automate sharing Shopify products on your Facebook page using Pabbly Connect with this step-by-step tutorial. Follow this definitive guide to creating powerful automated workflows with straightforward, efficiency-focused solutions that save valuable time.

Watch Step By Step Video Tutorial Below


1. Accessing Pabbly Connect for Shopify and Facebook Integration

To share Shopify products on your Facebook page, you will first need to access Pabbly Connect. This powerful automation tool allows you to connect various applications seamlessly. Start by visiting the Pabbly Connect homepage at Pabbly.com/connect.

Once there, you will see options to sign in or sign up. If you are a new user, click on ‘Sign Up Free’ to get started. Existing users can simply click ‘Sign In’ to access their dashboard. After logging in, you will be ready to create a new workflow for your Shopify and Facebook integration.


2. Creating a Workflow in Pabbly Connect

After signing in to Pabbly Connect, the next step is to create a new workflow. Click on the ‘Create Workflow’ button located at the top right corner of the dashboard. In the dialog that appears, name your workflow, for example, ‘Share Shopify Product on Facebook Page,’ and select a folder for organization.

  • Click on ‘Create’ to start building your workflow.
  • You will see fields for setting up a trigger and action.

In the workflow window, begin by selecting a trigger application, which will be Shopify. Choose the trigger event as ‘New Product.’ This setup ensures that every time a new product is added to your Shopify store, Pabbly Connect will capture this event and initiate the subsequent actions.


3. Connecting Shopify with Pabbly Connect

To connect Shopify with Pabbly Connect, you will receive a webhook URL after setting up your trigger. Copy this URL and head to your Shopify account. Navigate to the ‘Settings’ section, then click on ‘Notifications’ and find the ‘Webhooks’ option.

  • Click on ‘Create Webhook’ and select the event as ‘Product Creation.’
  • Paste the webhook URL you copied from Pabbly Connect into the URL field.

Make sure to select ‘JSON’ as the format and use the latest API version. After filling out the required fields, click on ‘Save.’ This action establishes a connection between your Shopify account and Pabbly Connect, enabling it to receive notifications when new products are added.


4. Setting Up Facebook Page Integration in Pabbly Connect

Now that Shopify is connected to Pabbly Connect, the next step is to set up the action application, which will be your Facebook Page. In the action step, select Facebook Page and choose the action event as ‘Create a Page Photo Post.’

To connect your Facebook Page, click on ‘Connect’ and follow the prompts to authorize Pabbly Connect to access your Facebook account. Once connected, select the Facebook Page where you want the product posts to appear.

Map the data from the trigger step to the Facebook post fields. For example, use the photo URL and title from the Shopify product details. This mapping ensures that whenever a new product is created, the relevant details are automatically populated in the Facebook post.


5. Testing and Verifying the Integration

After setting up the integration, it’s crucial to test it. Go back to your Shopify account and create a new product. Once the product is saved, Pabbly Connect should receive the webhook response and trigger the action to create a new post on your Facebook Page.

Check your Facebook Page to verify that the new product post appears correctly. It should include the title and a description like ‘New Product Alert: [Product Title] – Go and grab yours now!’ This confirms that the integration is working as intended.

With this setup, you have successfully automated the sharing of your Shopify products on your Facebook page using Pabbly Connect. This integration not only saves time but also enhances your marketing efforts by keeping your followers updated with new product launches.


Conclusion

In conclusion, using Pabbly Connect to share Shopify products on your Facebook page automates your marketing process effectively. By following these steps, you can ensure that your followers are always informed about new products, boosting engagement and sales.

Ensure you check out Pabbly Connect to create business automation workflows and reduce manual tasks. Pabbly Connect currently offer integration with 2,000+ applications.

Automate Instagram Posts for New WooCommerce Products Using Pabbly Connect

Learn how to automate Instagram posts for new WooCommerce products using Pabbly Connect. Step-by-step tutorial for seamless integration. Explore systematic approaches to creating efficient automation solutions that convert technical concepts into practical, implementable instructions.

Watch Step By Step Video Tutorial Below


1. Accessing Pabbly Connect for Automation

To start automating Instagram posts for new WooCommerce products, you need to access Pabbly Connect. First, visit the Pabbly Connect website and log in to your account. If you are a new user, you can sign up for free and get 100 tasks each month.

Once logged in, you will see the dashboard. Here, you can create workflows that automate various processes. Click on the ‘Create Workflow’ button to begin setting up your automation.


2. Creating a Workflow in Pabbly Connect

In this step, you will create a workflow that connects WooCommerce and Instagram. Start by naming your workflow, such as ‘Post New WooCommerce Product on Instagram’. Choose a folder to save your workflow, like ‘Instagram Automations’. using Pabbly Connect

  • Name the workflow.
  • Select a folder for organization.
  • Click ‘Create’ to finalize your workflow.

After creating the workflow, you will see two sections: Trigger and Action. The Trigger section is where you define the event that starts the automation, while the Action section specifies what happens when the trigger occurs.


3. Setting Up the Trigger with WooCommerce

The next step involves setting up the Trigger. For this automation, select ‘WooCommerce’ as your trigger application. The specific event you want to capture is ‘New Product Created’. This means that every time a new product is added to WooCommerce, Pabbly Connect will capture that event. using Pabbly Connect

Once you select the trigger event, Pabbly Connect will provide a unique Webhook URL. Copy this URL to connect WooCommerce with Pabbly Connect. Log in to your WooCommerce account and navigate to Settings > Advanced > Webhooks to add a new Webhook.

  • Paste the Webhook URL from Pabbly Connect.
  • Name your Webhook, e.g., ‘New Product Created’.
  • Set the status to Active and select the topic as ‘Product Created’.

After saving the Webhook, return to Pabbly Connect and ensure that it captures the response correctly. You can do this by creating a test product in WooCommerce to verify the connection.


4. Setting Up the Action with Instagram

Now that you have set up the trigger, it’s time to define the action. Select ‘Instagram for Business’ as your action application and choose the event ‘Publish Photo’. This will allow you to post the product image to your Instagram account automatically. using Pabbly Connect

Click on the ‘Connect’ button to link your Instagram account. Ensure you are logged into your Instagram on a new tab for easier authorization. After successful authorization, select the Instagram account you want to use.

Map the photo URL from the previous WooCommerce step. Create a caption that includes the product name and sale price. Click ‘Save and Send Test Request’ to finalize the action setup.

Once the action is set up, you will see a positive response indicating that the photo has been published on your Instagram account.


5. Conclusion: Automate Your WooCommerce and Instagram Integration

In this tutorial, you learned how to automate posting new WooCommerce products on Instagram using Pabbly Connect. By creating a workflow that connects WooCommerce and Instagram, you can save time and enhance customer engagement.

Ensure you check out Pabbly Connect to create business automation workflows and reduce manual tasks. Pabbly Connect currently offer integration with 2,000+ applications.

This integration allows you to automatically post product images and details, driving traffic to your store and boosting sales. With Pabbly Connect, you can streamline your marketing efforts and focus on growing your business.


Integrating Elementor with Microsoft Teams Using Pabbly Connect

Learn how to automate notifications from Elementor to Microsoft Teams using Pabbly Connect. Follow this step-by-step tutorial for seamless integration. Discover how to seamlessly connect your essential tools through accessible instructions that make powerful automation available to professionals at every skill level.

Watch Step By Step Video Tutorial Below


1. Accessing Pabbly Connect for Automation

To start integrating Elementor with Microsoft Teams, first access Pabbly Connect. This platform allows you to automate workflows seamlessly. If you are a new user, sign up for a free account, which includes 100 free tasks every month.

Once you have signed in to your Pabbly Connect account, you will see the dashboard displaying various applications. Click on the option to access the Pabbly Connect dashboard, where you will begin creating your workflow.


2. Creating a Workflow in Pabbly Connect

To create a workflow, click on the ‘Create Workflow’ button located at the top right corner of the dashboard. In the dialog box that appears, provide a name for your workflow, such as ‘Notify Team on Microsoft Teams for New Elementor Form Submission’. using Pabbly Connect

  • Name your workflow appropriately for easy identification.
  • Select a folder to save the workflow for better organization.

After naming your workflow and selecting a folder, click on the ‘Create’ button. This action will set up your workflow, where you will define the trigger and action steps.


3. Setting Up the Trigger for Elementor

The next step involves setting up the trigger that initiates the workflow. For this, select ‘Elementor’ as the trigger application. Choose the trigger event as ‘New Form Submission’ to capture responses from your Elementor forms.

Upon selecting the trigger, Pabbly Connect will provide you with a unique webhook URL. Copy this URL, as it will be used to connect Elementor with Pabbly Connect for capturing form submissions.

  • Select Elementor as the trigger application.
  • Choose ‘New Form Submission’ as the trigger event.
  • Copy the provided webhook URL for the next steps.

After copying the webhook URL, proceed to connect Elementor to Pabbly Connect by pasting the URL into the designated field in your Elementor form settings under ‘Actions After Submit’.


4. Configuring Microsoft Teams as the Action Step

Now that the trigger is set, the next step is to configure the action to send notifications to Microsoft Teams. Select ‘Microsoft Teams’ as the action application and choose the action event as ‘Send Channel Message’.

Click on the connect button to establish a connection between Microsoft Teams and Pabbly Connect. You will be prompted to authenticate your Microsoft Teams account by granting necessary permissions.

Select Microsoft Teams as the action application. Choose ‘Send Channel Message’ as the action event. Authenticate your Microsoft Teams account to proceed.

Once connected, select the appropriate team and channel where you want to send notifications. Map the relevant data fields such as name, email, phone number, and inquiry details from the previous step to customize your message.


5. Testing the Integration for Successful Notifications

After configuring the action step, it’s crucial to test the integration. Perform a test form submission using the Elementor form on your website. Fill in the required fields and submit the form.

Check your Microsoft Teams channel to see if the notification appears as expected. If successful, you will receive a message containing the details of the inquiry, confirming that the integration via Pabbly Connect is working properly.

Submit a test form from your Elementor form. Verify if the notification appears in Microsoft Teams. Ensure that all relevant details are included in the message.

Once confirmed, your automation is complete, allowing your team to receive real-time notifications for new inquiries submitted through the Elementor form, facilitated by Pabbly Connect.


Conclusion

In this tutorial, we explored how to integrate Elementor with Microsoft Teams using Pabbly Connect. By automating notifications for new form submissions, you can enhance your team’s responsiveness and streamline communication.

Ensure you check out Pabbly Connect to create business automation workflows and reduce manual tasks. Pabbly Connect currently offer integration with 2,000+ applications.

How to Send Automated WhatsApp Messages on Elementor Form Submission Using Pabbly Connect

Learn how to integrate Elementor with WhatsApp using Pabbly Connect to send automated messages on form submission. Step-by-step guide included. Discover hidden automation capabilities within your existing tools. This guide shows you how to connect your essential applications and permanently eliminate redundant manual processes.

Watch Step By Step Video Tutorial Below


Accessing Pabbly Connect for Automation

To send automated WhatsApp messages on Elementor form submission, we first need to access Pabbly Connect. Begin by navigating to the Pabbly Connect website and signing in. If you are a new user, you can sign up for a free account, which offers limited monthly automation tasks.

Once logged in, select the option to create a new workflow. Name your workflow, for example, ‘Send Automated WhatsApp Message on Elementor Form Submission’, and choose the appropriate folder for organization. This setup is crucial as it establishes the foundation for your automation process.


Setting Up the Trigger with Elementor

Next, we will set up the trigger in Pabbly Connect. For this integration, select Elementor as your trigger application. The trigger event should be set to ‘New Form Submission’, which will activate the workflow whenever a user submits a form on your Elementor-built website.

Upon selecting the trigger event, Pabbly Connect will provide you with a webhook URL. Copy this URL, as it will be used in your Elementor form settings. This step is essential for linking the form submissions directly to your Pabbly Connect workflow.

  • Select Elementor as the trigger application.
  • Choose the trigger event ‘New Form Submission’.
  • Copy the provided webhook URL for later use.

After copying the webhook URL, you will need to integrate it into your Elementor form. This integration ensures that every form submission is captured by Pabbly Connect, allowing for automated responses.


Integrating the Elementor Form with Pabbly Connect

Now, navigate to your WordPress dashboard and open the Elementor form you wish to integrate. In the form settings, locate the ‘Actions After Submit’ section. Here, you will add a new action by selecting ‘Webhook’ from the available options.

Paste the webhook URL you copied earlier into the designated field for the webhook action. Once this is done, click on the update button to save your changes. This step is critical as it connects your Elementor form to the Pabbly Connect workflow, enabling the automation of WhatsApp messages upon form submission.

  • Open the Elementor form settings.
  • Add ‘Webhook’ to the Actions After Submit.
  • Paste the copied webhook URL and update the form.

With the webhook successfully integrated, your Elementor form is now capable of triggering workflows in Pabbly Connect, setting the stage for sending automated WhatsApp messages.


Sending WhatsApp Messages Using Pabbly Connect

After setting up the Elementor form, the next step involves configuring the action to send WhatsApp messages through Pabbly Connect. For this, select an action application, which in this case will be AI Sensei, and choose the action event ‘Send Template Message’. This allows you to send pre-defined messages to leads who submit your form.

When prompted, connect your AI Sensei account by entering the required API key. You can obtain this key from your AI Sensei account under the API management section. After connecting, you will need to specify the campaign name and the template you want to use for the WhatsApp message.

Select AI Sensei as the action application. Choose ‘Send Template Message’ as the action event. Connect using your API key from AI Sensei.

Once the connection is established, map the necessary fields such as the lead’s mobile number and name to personalize the message. This mapping ensures that each WhatsApp message is tailored to the specific lead who submitted the form, enhancing engagement and responsiveness.


Testing and Finalizing Your Workflow

Now that the WhatsApp message action is configured, it’s time to test your workflow in Pabbly Connect. Go back to your Elementor form and perform a test submission. Fill in the form fields with dummy data and submit it to trigger the workflow.

After submission, check your Pabbly Connect dashboard to see if the webhook response has been captured. You should see all the details from the form submission. If everything is set up correctly, an automated WhatsApp message will be sent to the lead’s number after the form submission.

Perform a test submission on your Elementor form. Check Pabbly Connect for the captured response. Confirm that the automated WhatsApp message has been sent.

Once you confirm the message has been sent successfully, your workflow is complete. From now on, every new form submission will automatically trigger a WhatsApp message, streamlining your communication with potential clients.


Conclusion

In conclusion, using Pabbly Connect to send automated WhatsApp messages on Elementor form submission enhances your client engagement. By following these steps, you can easily set up a seamless communication channel with potential leads, ensuring timely responses and better service.

Ensure you check out Pabbly Connect to create business automation workflows and reduce manual tasks. Pabbly Connect currently offer integration with 2,000+ applications.

How to Notify Your Team on Slack for New Instagram Lead Ads Leads Using Pabbly Connect

Learn how to set up Pabbly Connect to notify your team on Slack for new Instagram Lead Ads leads with this detailed step-by-step tutorial. Implement the precise methodologies leading organizations use to automate repetitive tasks, illustrated with practical examples designed for immediate application.

Watch Step By Step Video Tutorial Below


Accessing Pabbly Connect for Instagram Lead Ads Integration

To notify your team about new Instagram Lead Ads leads, first, access Pabbly Connect. This platform enables seamless integration between Instagram Lead Ads and Slack. Start by visiting the Pabbly Connect website and logging into your account.

If you are a new user, you can sign up for free and receive 100 tasks every month. Once logged in, navigate to the dashboard where you will find the option to create a new workflow.


Creating a Workflow in Pabbly Connect

In this section, you will create a workflow to automate notifications. Click on the ‘Create Workflow’ button. Name your workflow ‘Notify Team on Slack for New Instagram Lead Ads Leads’ and select the appropriate folder for organization. using Pabbly Connect

After naming your workflow, you will be directed to the workflow window. Here, you will set up a trigger and action. The trigger will be the event that starts the automation, while the action is what happens as a result of that trigger. In this case, the trigger will be from Instagram Lead Ads, and the action will be sending a message to Slack.


Setting Up the Trigger for Instagram Lead Ads

To begin, select Instagram Lead Ads as your trigger application in Pabbly Connect. For the trigger event, choose ‘New Lead Instant’. This event will initiate the workflow whenever a new lead is generated through your Instagram ads.

Next, you will need to connect your Instagram Lead Ads account. Click on ‘Connect’, and if you have not previously set up a connection, select ‘Add New Connection’. You will be prompted to choose your Facebook page linked to your Instagram account. Follow the prompts to complete the connection.

  • Select your Facebook page associated with Instagram.
  • Choose the lead form you want to use for this integration.
  • Click ‘Save and Send Test Request’ to capture the lead data.

After setting up the trigger, you will need to test the setup by generating a dummy lead using the Meta for Developers tool. This will help ensure that Pabbly Connect captures the lead data correctly.


Setting Up the Action to Notify Team on Slack

Now that you have set up the trigger, it’s time to define the action. For the action application, select Slack in Pabbly Connect. You will choose the action event as ‘Send Channel Message’. This setup will allow you to send notifications to your Slack channel whenever a new lead is captured.

Connect your Slack account by clicking on ‘Connect’. If you haven’t connected before, choose ‘Add New Connection’ and enter the required token type. Select the appropriate channel where you want to send notifications, such as ‘New Lead Alerts’.

  • Map the details from the lead, including name, training goals, and contact information.
  • Ensure the message format is clear and informative for your team.
  • Test the action to confirm that messages are sent correctly to Slack.

Once the action setup is complete, you should be able to see the notifications in your Slack channel whenever a new lead comes in from Instagram Lead Ads.


Testing the Integration Workflow

After setting up both the trigger and action, it’s essential to test the entire workflow to ensure everything functions smoothly. Go back to the Meta for Developers tool and generate another dummy lead. This step is crucial for verifying that Pabbly Connect captures the lead details and triggers the Slack notification correctly.

Once you submit the dummy lead, check your Slack channel to see if the notification appears. The message should contain all the mapped details from the lead form, allowing your team to respond promptly to potential clients.

By automating this process, you enhance communication within your team and ensure that no leads are missed. This integration not only saves time but also improves your client acquisition process significantly.


Conclusion

In summary, using Pabbly Connect to notify your team on Slack for new Instagram Lead Ads leads is a straightforward process. By setting up a workflow with Instagram Lead Ads as the trigger and Slack as the action, you can automate notifications effectively. This ensures your team is always informed about new leads, enhancing your response time and client engagement.

Ensure you check out Pabbly Connect to create business automation workflows and reduce manual tasks. Pabbly Connect currently offer integration with 2,000+ applications.

Integrate IndiaMART Leads with Google Sheets Using Pabbly Connect

Learn how to seamlessly integrate IndiaMART leads for the travel tourism and hotel business into Google Sheets using Pabbly Connect. Follow our detailed tutorial! Explore efficient methods for automating routine tasks with clear, concise instructions suited for both newcomers and experienced professionals.

Watch Step By Step Video Tutorial Below


1. Accessing Pabbly Connect for IndiaMART Integration

To integrate IndiaMART leads into Google Sheets, first, access Pabbly Connect. Open your browser and search for ‘Pabbly Connect’. You will be directed to the Pabbly Connect landing page.

Here, you can either sign up for a free account or log in if you already have one. Signing up is quick and gives you access to 100 free tasks every month, which is perfect for managing your leads effectively.


2. Creating a Workflow in Pabbly Connect

Once logged into Pabbly Connect, navigate to the dashboard and click on the ‘Create Workflow’ button. This will allow you to set up your automation process for adding leads from IndiaMART to Google Sheets.

  • Click on ‘Create Workflow’.
  • Name your workflow (e.g., ‘IndiaMART Leads to Google Sheets’).
  • Select the folder to save your workflow.

After setting up the workflow name and folder, you will see two main sections: Trigger and Action. The Trigger is where the workflow starts, and Action is what happens next.


3. Setting Up the Trigger for IndiaMART

In this section, you will set the trigger application as IndiaMART in Pabbly Connect. Search for IndiaMART and select it as your trigger application. Then, choose ‘New Leads’ as the trigger event.

Next, you will need to connect IndiaMART to Pabbly Connect using the webhook URL provided. Copy the webhook URL and head over to your IndiaMART account.

  • Go to Lead Manager in your IndiaMART account.
  • Select the hamburger icon and choose ‘Import/Export Leads’.
  • Use the ‘Push API’ option to connect to Pabbly Connect.

Fill in the necessary details, including the webhook listener URL, and save your settings. This will establish the connection between IndiaMART and Pabbly Connect.


4. Setting Up the Action Step to Google Sheets

After configuring the trigger, it’s time to set up the action step in Pabbly Connect. Search for Google Sheets and select it as your action application. Choose ‘Add New Row’ as the action event.

Connect your Google Sheets account to Pabbly Connect by clicking on ‘Add New Connection’, and then sign in with your Google account. Allow the necessary permissions to complete the connection.

Select the specific Google Sheets file where you want to save the leads. Map the fields from the inquiry details to the corresponding columns in Google Sheets. Ensure that all necessary details such as name, email, and inquiry message are mapped correctly.

Mapping ensures that every time a new lead comes in, the relevant data is automatically filled into the Google Sheets.


5. Testing the Integration

To ensure that the integration works correctly, generate a test inquiry in IndiaMART. This will send a sample lead to Pabbly Connect, allowing you to verify that the data flows into Google Sheets as intended.

After generating the test inquiry, return to Pabbly Connect and check for the response. If the data appears correctly, your integration is successful!

Now, every new inquiry you receive through IndiaMART will be automatically added to your Google Sheets, streamlining your lead management process.


Conclusion

In this tutorial, we explored how to integrate IndiaMART leads into Google Sheets using Pabbly Connect. This automation helps streamline your lead management for the travel tourism and hotel business, ensuring that all inquiries are recorded efficiently.

Ensure you check out Pabbly Connect to create business automation workflows and reduce manual tasks. Pabbly Connect currently offer integration with 2,000+ applications.

Integrating India M Leads with Salesforce Using P Connect Now

Learn how to automate the integration of India M leads into Salesforce using P Connect Now, enhancing your real estate business efficiency. This comprehensive guide reveals exactly how to connect your applications and automate repetitive tasks — accessible for professionals of all technical backgrounds. with Pabbly Connect.

Watch Step By Step Video Tutorial Below


1. Setting Up Trigger for New Leads in India M

The first step in this integration involves setting up the P Connect Now trigger for new leads from India M. This trigger will initiate the workflow whenever a new lead is generated through India M.

To begin, log into your P Connect Now account and navigate to the dashboard. Here, you will create a new workflow specifically for capturing leads from India M. Click on the ‘Create Workflow’ button and name your workflow appropriately, such as ‘India M Leads to Salesforce.’ Select the folder where you want to save this workflow, ensuring it’s easily accessible for future modifications.


2. Connecting India M with P Connect Now

Next, you will connect India M with P Connect Now to facilitate the flow of data. This connection is vital for transferring lead information directly to your CRM, Salesforce.

  • Search for the trigger application, which is India M.
  • Select the trigger event, which should be ‘New Leads.’
  • Copy the provided webhook URL from P Connect Now.

After copying the webhook URL, go to your India M account. Navigate to the Lead Manager section and click on the hamburger icon. From there, select ‘Import/Export Leads’ and then ‘Push API’ to create a new integration. Here, paste the webhook URL you copied earlier and save the details to establish the connection.


3. Generating OTP for Integration Confirmation

To finalize the integration between India M and P Connect Now, you will need to generate an OTP. This step is crucial for authenticating the connection.

In the Push API settings, click on the ‘Click to Generate OTP’ button. Once you receive the OTP, submit it to complete the integration setup. This process ensures that your India M leads can now be sent to P Connect Now seamlessly.

After successfully generating and submitting the OTP, you should see a confirmation that the integration has been established. This indicates that any new inquiries from India M will now be automatically sent to P Connect Now.


4. Mapping Lead Details to Salesforce

The next step involves mapping the lead details from P Connect Now to Salesforce. This mapping is essential to ensure that all relevant lead information is accurately transferred to your CRM.

In the workflow settings, select Salesforce as your action application. Choose the action event as ‘Create Lead.’ Connect Salesforce with P Connect Now by clicking on ‘Add New Connection’ and allowing access to your Salesforce account.

  • Map the sender’s name from India M to the lead’s first and last name fields in Salesforce.
  • Include the company name, email, and phone number in the respective fields.
  • Add the inquiry message as the lead description.

Once all fields are mapped correctly, save the workflow. This setup ensures that every new inquiry from India M creates a corresponding lead in Salesforce with complete details.


5. Testing the Integration and Confirming Lead Creation

After mapping the lead details, it’s crucial to test the integration to confirm that leads from India M are being created in Salesforce as expected. This step verifies the entire workflow.

To test, generate a test inquiry in India M. Use the test option available in the Lead Manager to send a dummy inquiry to P Connect Now. After sending the test data, check your Salesforce account to see if the lead has been created.

If successful, you should see a new lead in Salesforce with all the details from your test inquiry. This confirms that your integration between India M and Salesforce using P Connect Now is functioning correctly.

Conclusion

This guide summarizes the key points and helps you understand the essential features and benefits of using this tool.

Thanks for following along with this tutorial! Remember to subscribe to the channel for more helpful content like this.

If you found this guide useful, please consider giving it a thumbs up and sharing it with others who might benefit from it.


In conclusion, integrating India M leads into Salesforce using P Connect Now streamlines your real estate business operations significantly. By following these detailed steps, you can automate lead management and ensure timely follow-ups, enhancing your chances of closing deals effectively.